Checkpoints
Create BigQuery dataset
/ 33
Create Dataflow Pipeline
/ 33
Build model with BQML
/ 34
Configuring MongoDB Atlas with BigQuery Dataflow Templates
This lab was developed with our partner, MongoDB. Your personal information may be shared with MongoDB, the lab sponsor, if you have opted in to receive product updates, announcements, and offers in your Account Profile
GSP1105

Overview
In this lab you configure MongoDB Atlas, create a M0 Cluster, make the cluster accessible from the outside world, and create an admin user. You will use the Sample_mflix database and movies collection on MongoDB Atlas that consists of details on Movies like cast, release date etc. You then create a dataflow pipeline to load the data from MongoDB cluster to Google BigQuery. Thereafter, you query the data on BigQuery using Google Cloud console and create a ML model from the data.
Objectives
In this lab, you learn how to:
- Create a BigQuery dataset
- Create a Dataflow pipeline using Dataflow UI
- Create a ML model from the BigQuery dataset
Prerequisites
- MongoDB Atlas setup through MondgoDB Atlas registration.
- Load Sample data to MongoDB Atlas cluster. Refer to the Load sample data.
- Logged in account should have roles/dataflow.admin to run the pipeline.
- Check the lab Getting Started with MongoDB Atlas on Google Cloud to create a cluster.
Setup and requirements
Before you click the Start Lab button
Read these instructions. Labs are timed and you cannot pause them. The timer, which starts when you click Start Lab, shows how long Google Cloud resources will be made available to you.
This hands-on lab lets you do the lab activities yourself in a real cloud environment, not in a simulation or demo environment. It does so by giving you new, temporary credentials that you use to sign in and access Google Cloud for the duration of the lab.
To complete this lab, you need:
- Access to a standard internet browser (Chrome browser recommended).
- Time to complete the lab---remember, once you start, you cannot pause a lab.
How to start your lab and sign in to the Google Cloud console
-
Click the Start Lab button. If you need to pay for the lab, a pop-up opens for you to select your payment method. On the left is the Lab Details panel with the following:
- The Open Google Cloud console button
- Time remaining
- The temporary credentials that you must use for this lab
- Other information, if needed, to step through this lab
-
Click Open Google Cloud console (or right-click and select Open Link in Incognito Window if you are running the Chrome browser).
The lab spins up resources, and then opens another tab that shows the Sign in page.
Tip: Arrange the tabs in separate windows, side-by-side.
Note: If you see the Choose an account dialog, click Use Another Account. -
If necessary, copy the Username below and paste it into the Sign in dialog.
{{{user_0.username | "Username"}}} You can also find the Username in the Lab Details panel.
-
Click Next.
-
Copy the Password below and paste it into the Welcome dialog.
{{{user_0.password | "Password"}}} You can also find the Password in the Lab Details panel.
-
Click Next.
Important: You must use the credentials the lab provides you. Do not use your Google Cloud account credentials. Note: Using your own Google Cloud account for this lab may incur extra charges. -
Click through the subsequent pages:
- Accept the terms and conditions.
- Do not add recovery options or two-factor authentication (because this is a temporary account).
- Do not sign up for free trials.
After a few moments, the Google Cloud console opens in this tab.

Steps to create an account on MongoDB Cloud:
-
Visit the MongoDB Cloud Page: Atlas UI .
-
Click on Try for Free: This will redirect you to the sign-up page.
-
Enter Your Details: Enter your first name, last name, personal email, and create a password (ensure you're not using the lab credential email).
-
Agree to Terms: Check the box to agree to the terms and conditions.
-
Click on button Create your Atlas account to Submit the form to create your account.
-
Verify Your Email: Check your email inbox for a message with the subject Verify Your MongoDB Email Address and click on Verify Email to complete your registration.
-
After verifying your Email, You may be asked to answer a few questions select any of them.
Task 1. Create Atlas cluster
To get access to the sample_data you need to create a MongoDB Atlas cluster. For this lab you deploy a free cluster. Please note that this cluster can only be used for PoVs.
Create MongoDB Atlas free cluster
- On the Deploy your cloud database select Shared.
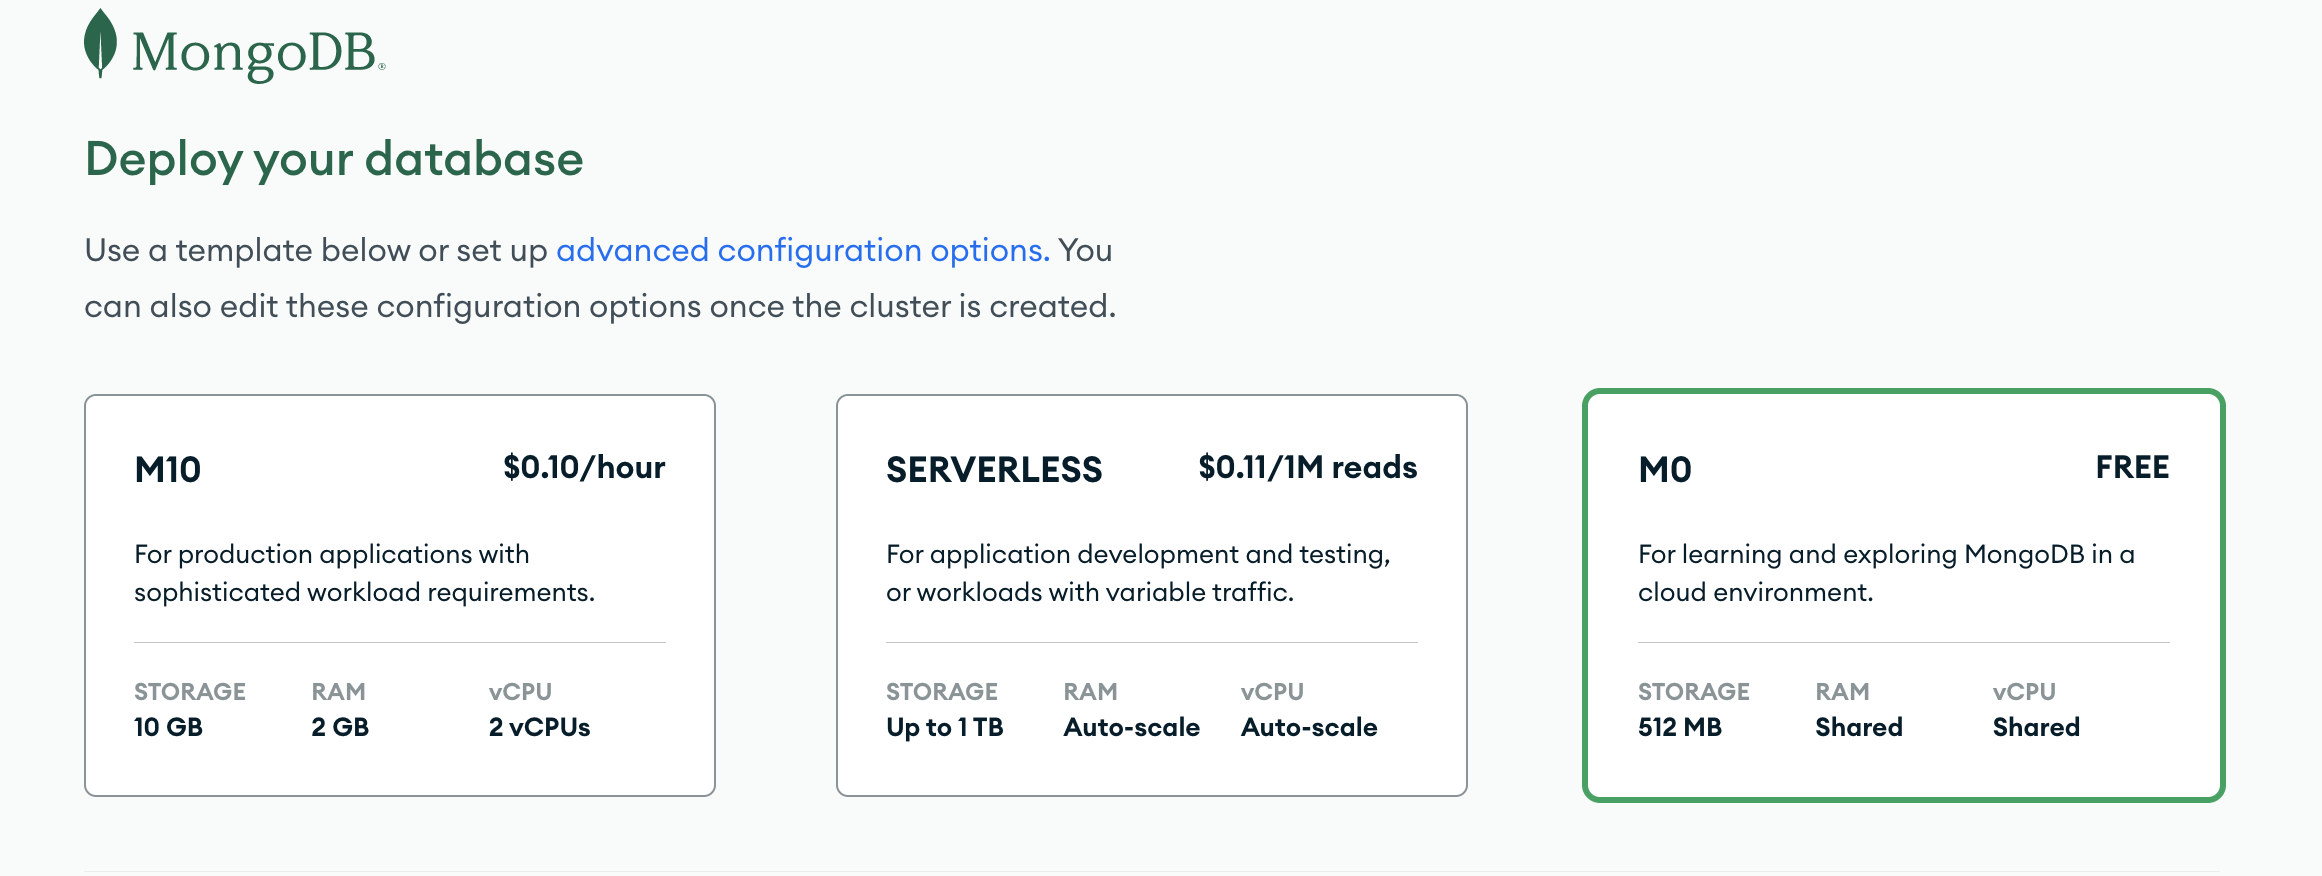
-
Select the Google Cloud in Provider, then select the nearest region to you.
-
Name the cluster as Sandbox and click Create Deployment.

- If you are presented with a "Connect to Sandbox" page, dismiss it by clicking Cancel.
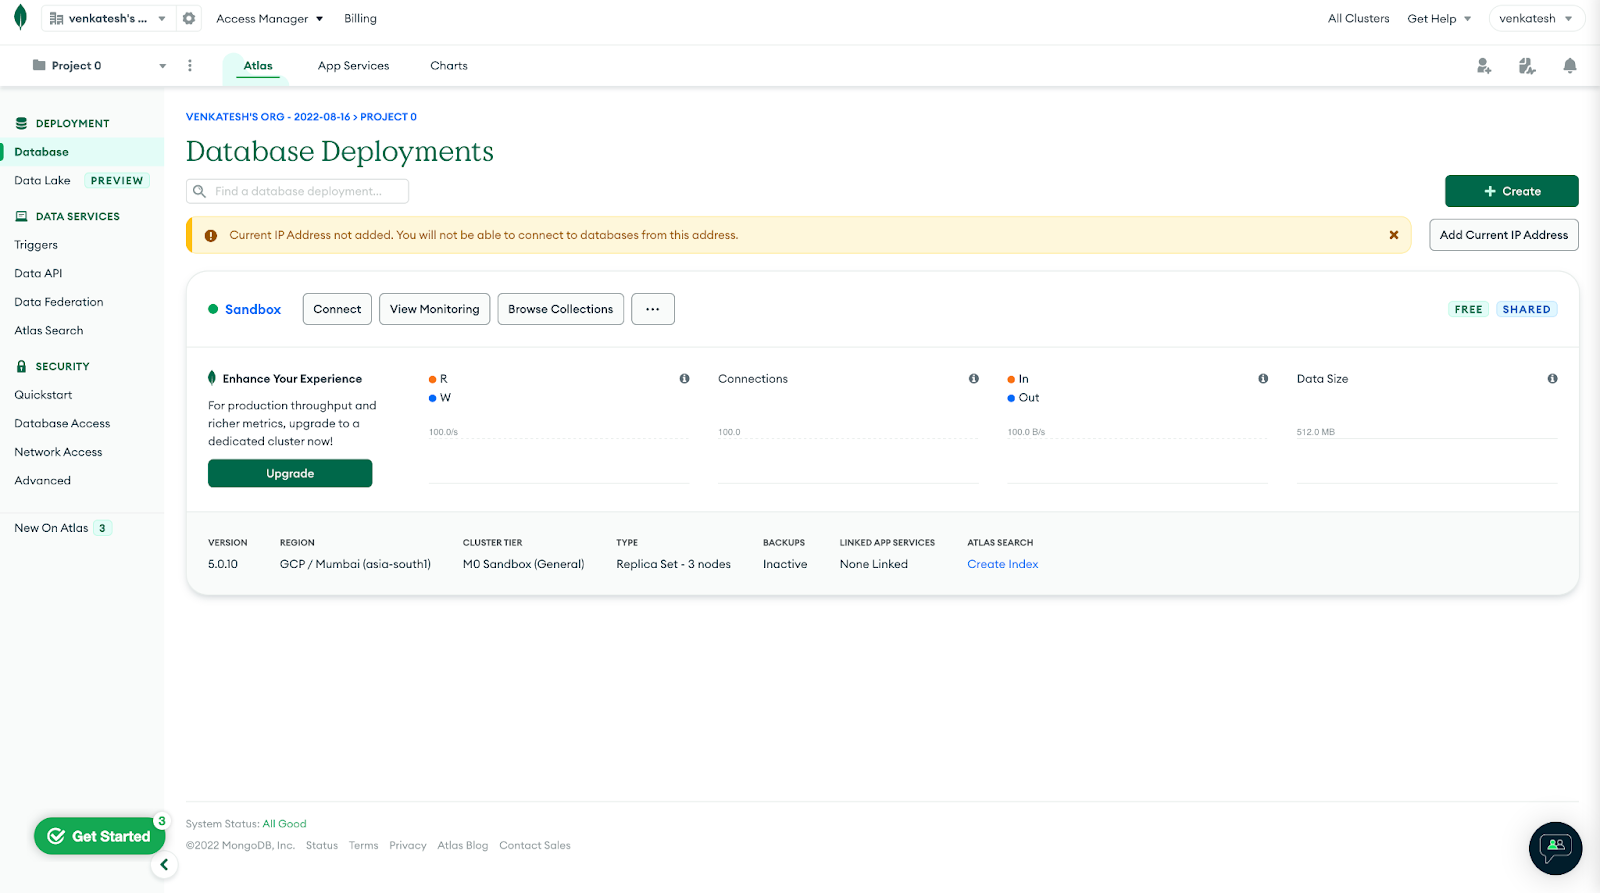
Load sample data
-
Navigate to your Clusters view. In the left navigation pane in Atlas, click Database under Deployment.
-
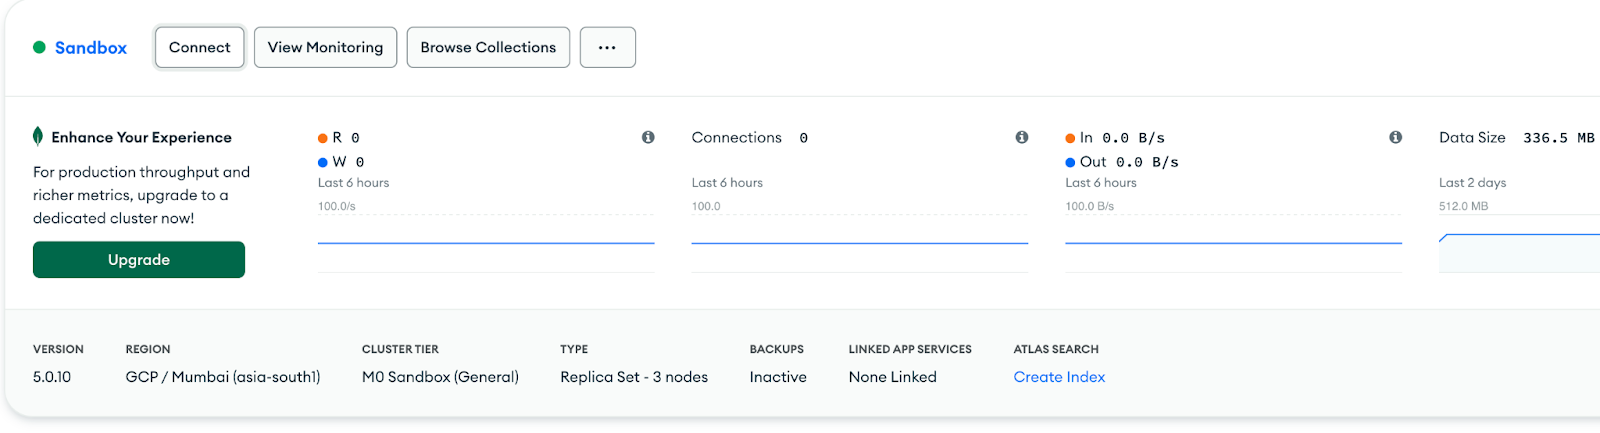
Your cluster should be automatically populated with sample data. Click the Connect button.
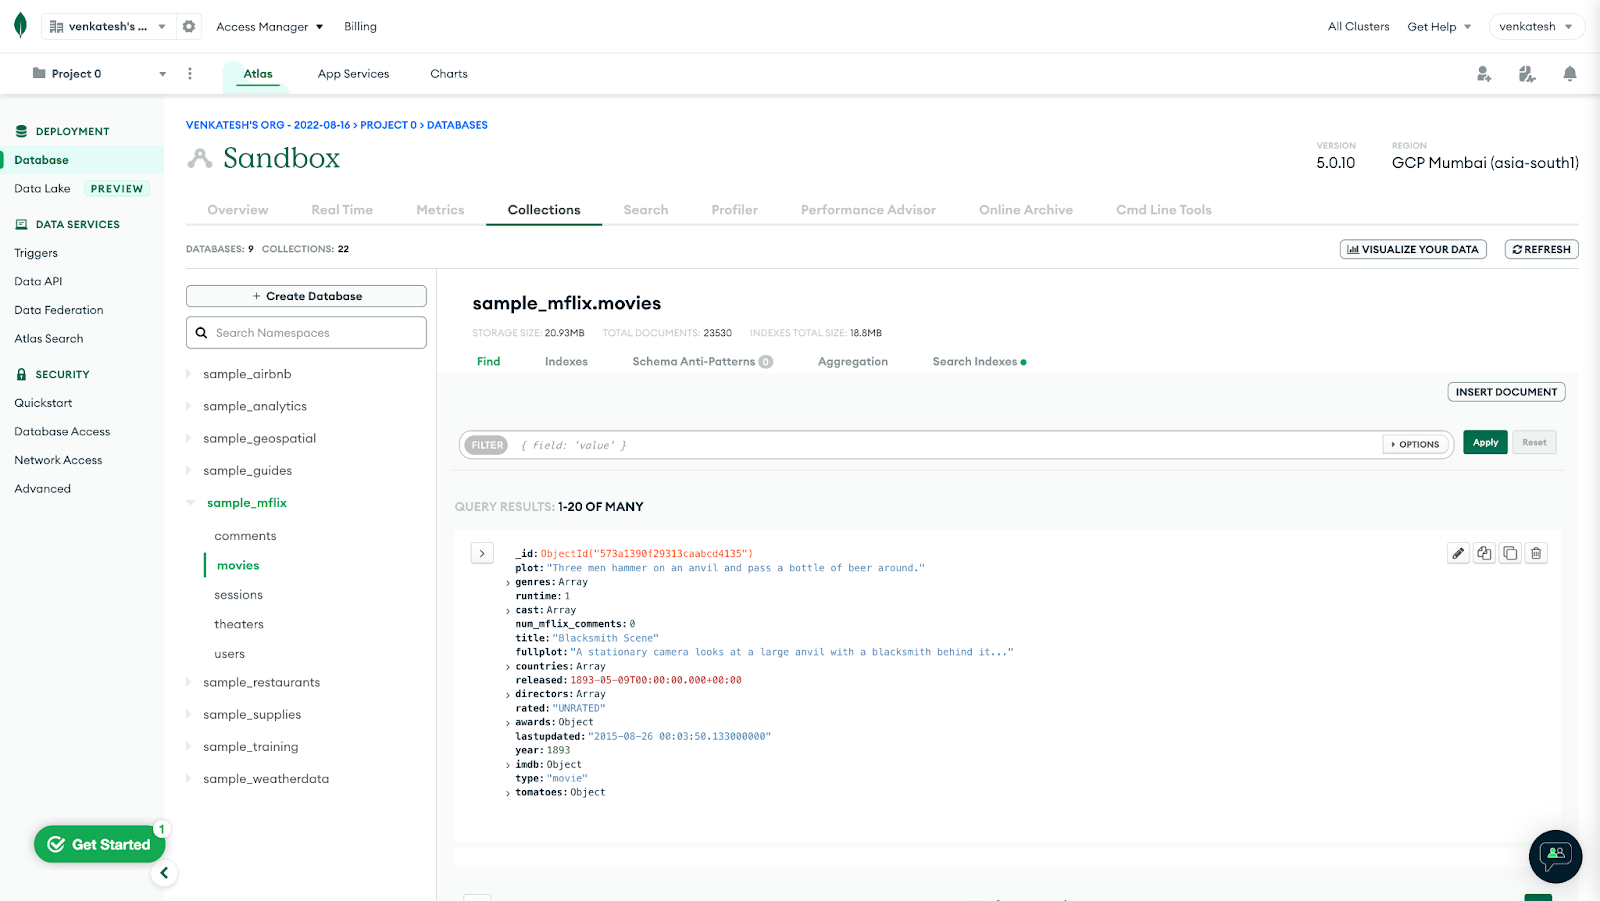
-
View your sample data by clicking your cluster's Browse Collections button. You will see the following databases in your cluster (databases that start with
sample_):
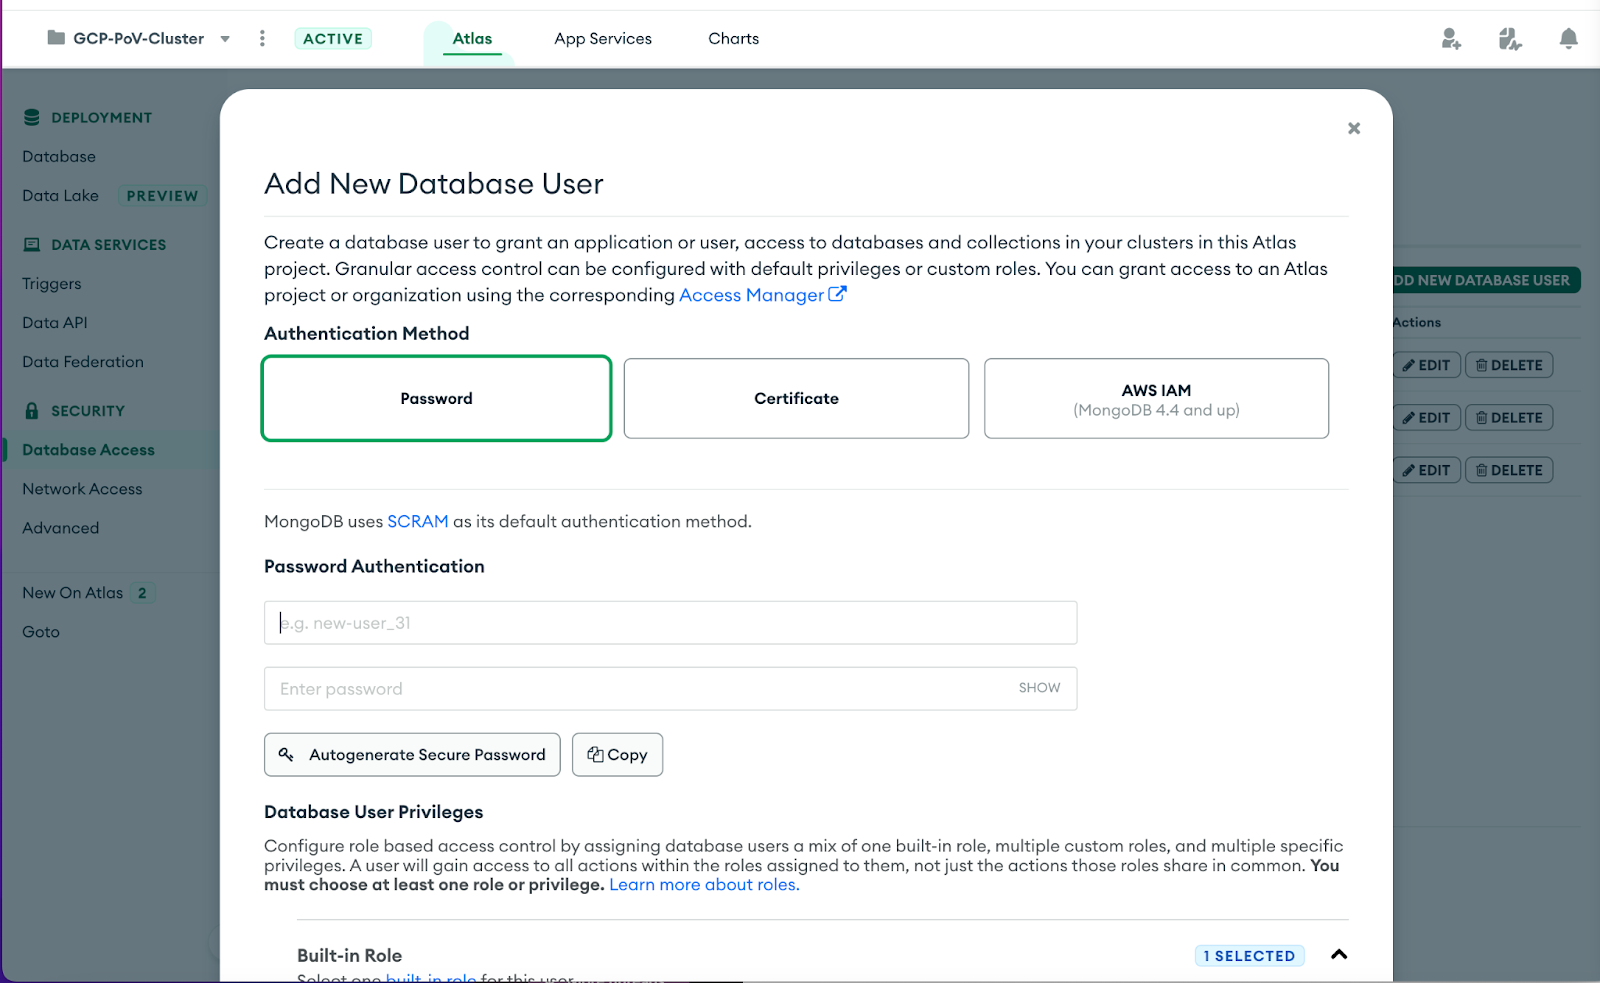
Create Database user
To have authenticated access on the MongoDB Sandbox cluster from Google Console, you need to create database users.
-
Click Database Access from the left pane on the Atlas dashboard, under Security.
-
Choose to Add New Database User using the green button. Leave the authentication method as Password and enter the username
appUserand passwordappUser123. -
Under Database User Privileges, click the Add Built-in Role, and add the role Read and write to any database. Finally, press the green Add User button on the bottom of the page to create the user.
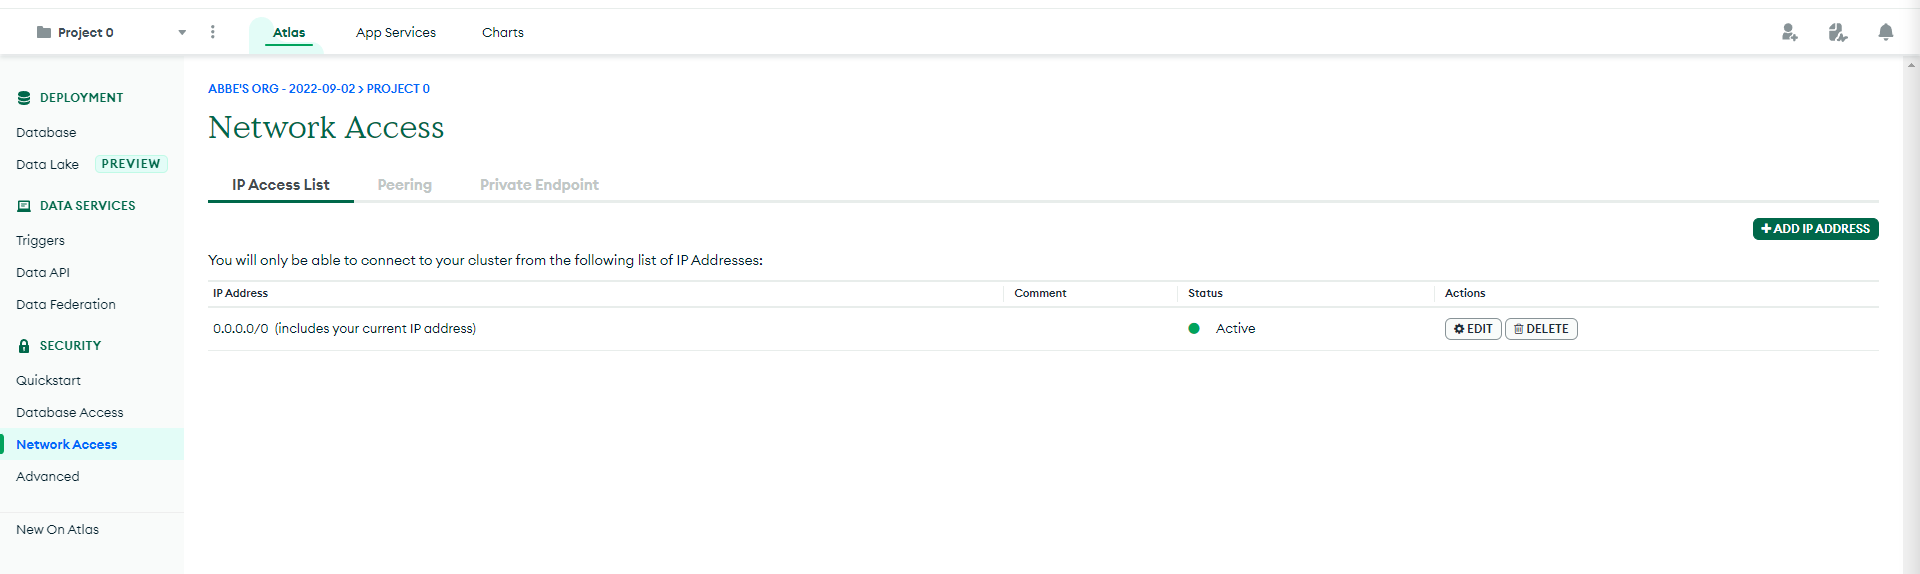
Grant network access
- Go to Network Access on the left panel. Click the + ADD IP ADDRESS button. Then click ALLOW ACCESS FROM ANYWHERE and click Confirm.
Task 2. Create BigQuery table
In this lab, you need a BigQuery dataset before you run the Dataflow pipeline. To create a BigQuery dataset, navigate to BigQuery from Google Cloud console, either by searching for BigQuery in the search bar on top or from the Navigation menu by navigating to BigQuery under the ANALYTICS task.
Create BigQuery dataset
-
Open BigQuery in the Google Cloud console.
-
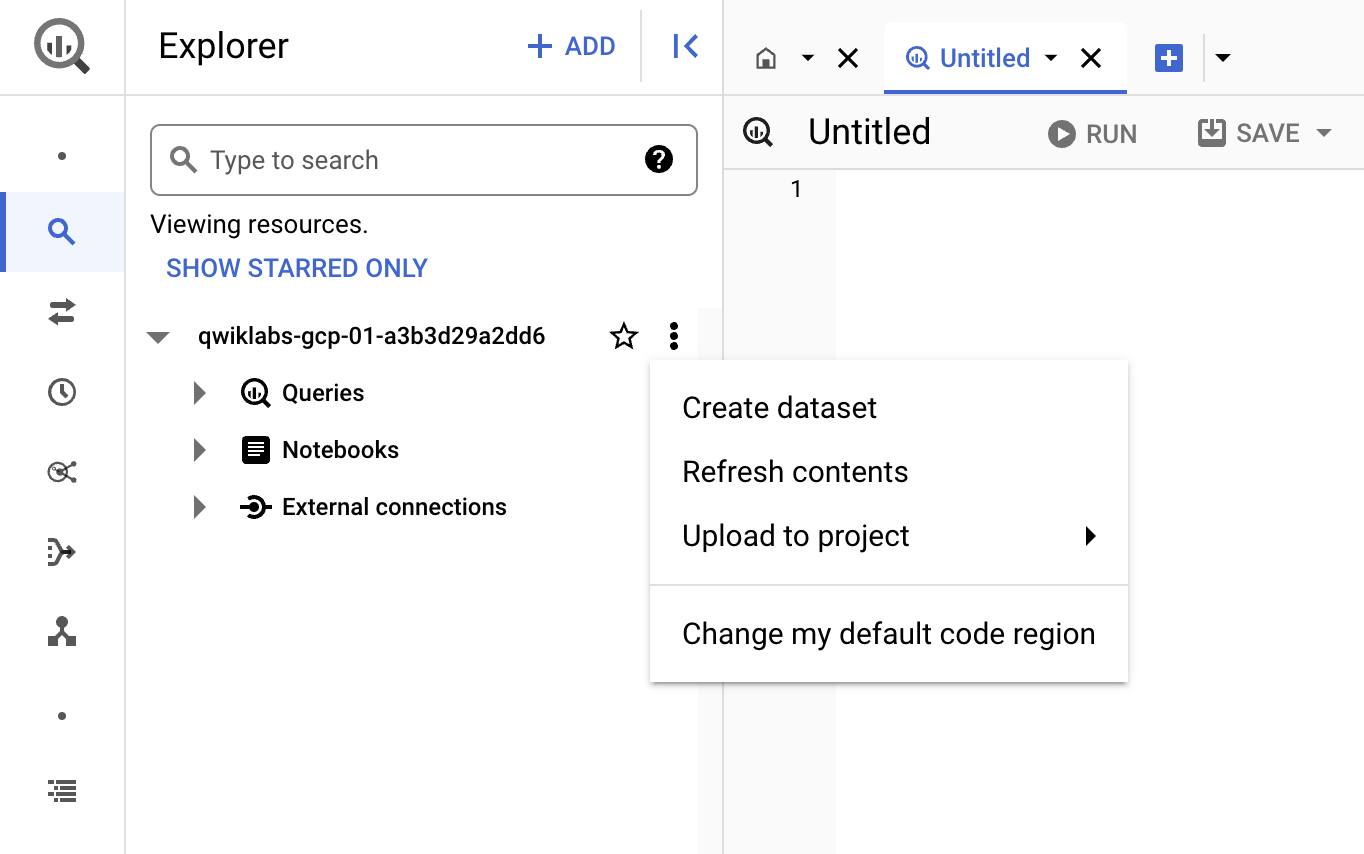
In the Explorer panel, select the project where you want to create the dataset.
-
Click on the three vertical dots next to your project ID under Explorer section, click View actions option and then click Create dataset.
-
On the Create dataset page:
-
For Dataset ID, enter
sample_mflix -
For Location type, select Region and under region select
for the dataset. After a dataset is created, the location can't be changed. -
For Default table expiration, leave the selection empty.
-
Click Create dataset.
-
Verify the dataset is listed under your project name on BigQuery explorer.
- Expand the dataset options and click Create table.
- Name the table movies and click Create table.
Task 3. Dataflow Pipeline creation
Now, create a Dataflow pipeline from the Dataflow UI.
Run Dataflow pipeline for MongoDB to BigQuery
-
To create a Dataflow pipeline with Dataflow, go to Dataflow Create job from the templates page.
-
In the Job name field, enter a unique job name: mongodb-to-bigquery-batch.
-
For Regional endpoint, select
.
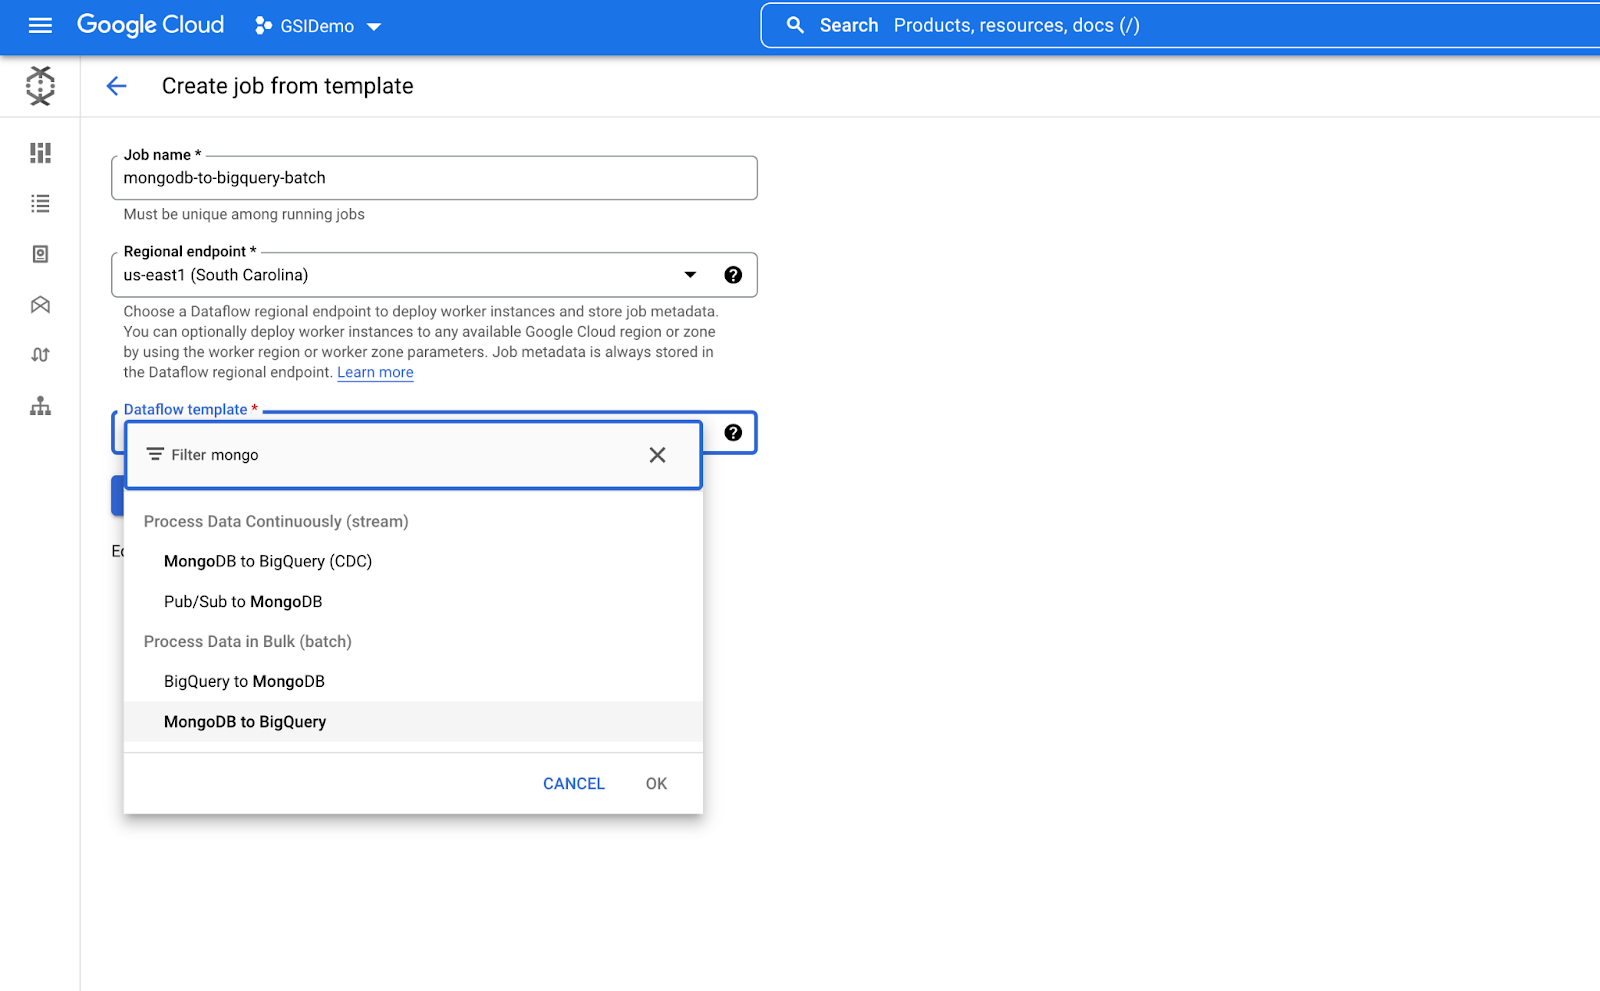
- From the Dataflow template drop-down menu, select the MongoDB to BigQuery template under Process Data in Bulk (batch).
- In Required parameter enter the following parameters:
-
MongoDB Connection URI
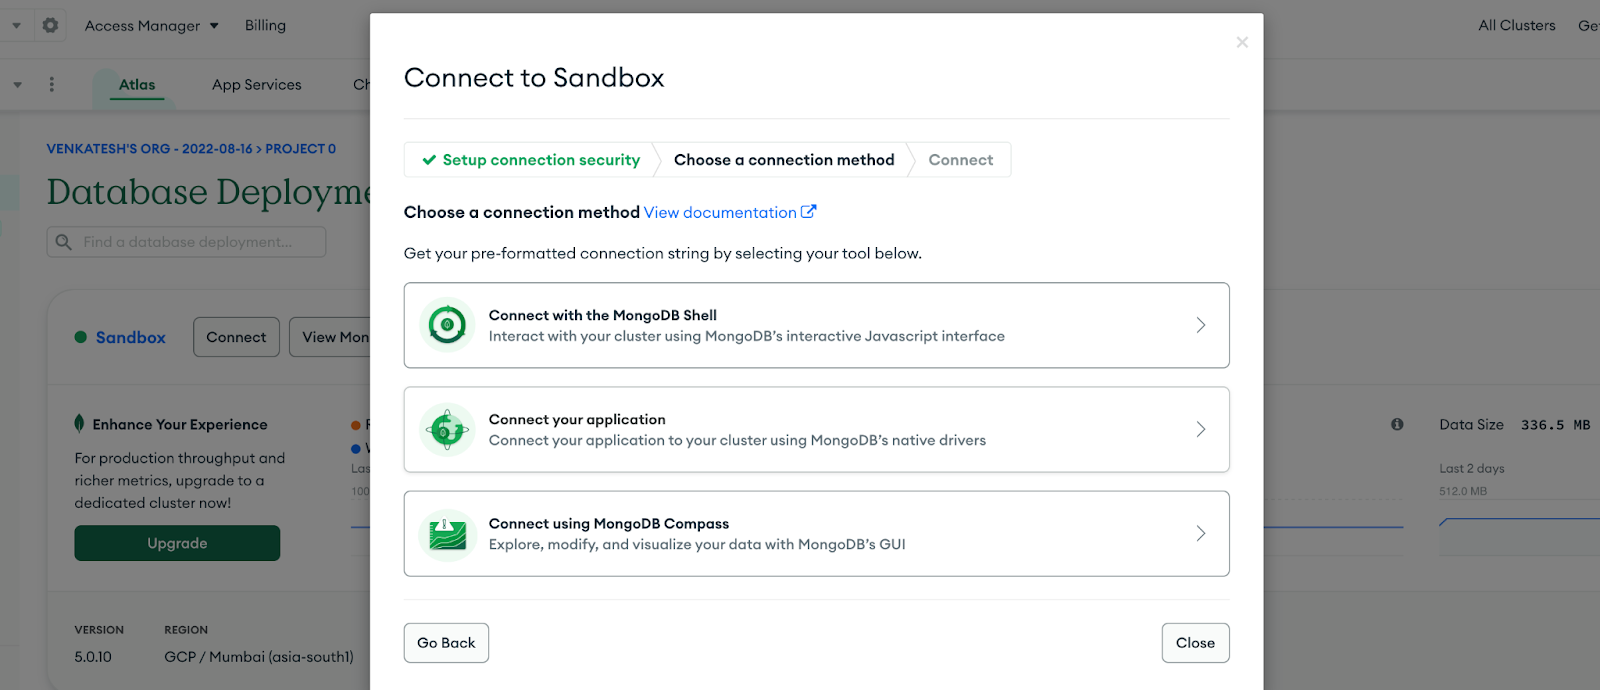
- Click the Connect button on your Atlas Sandbox cluster.
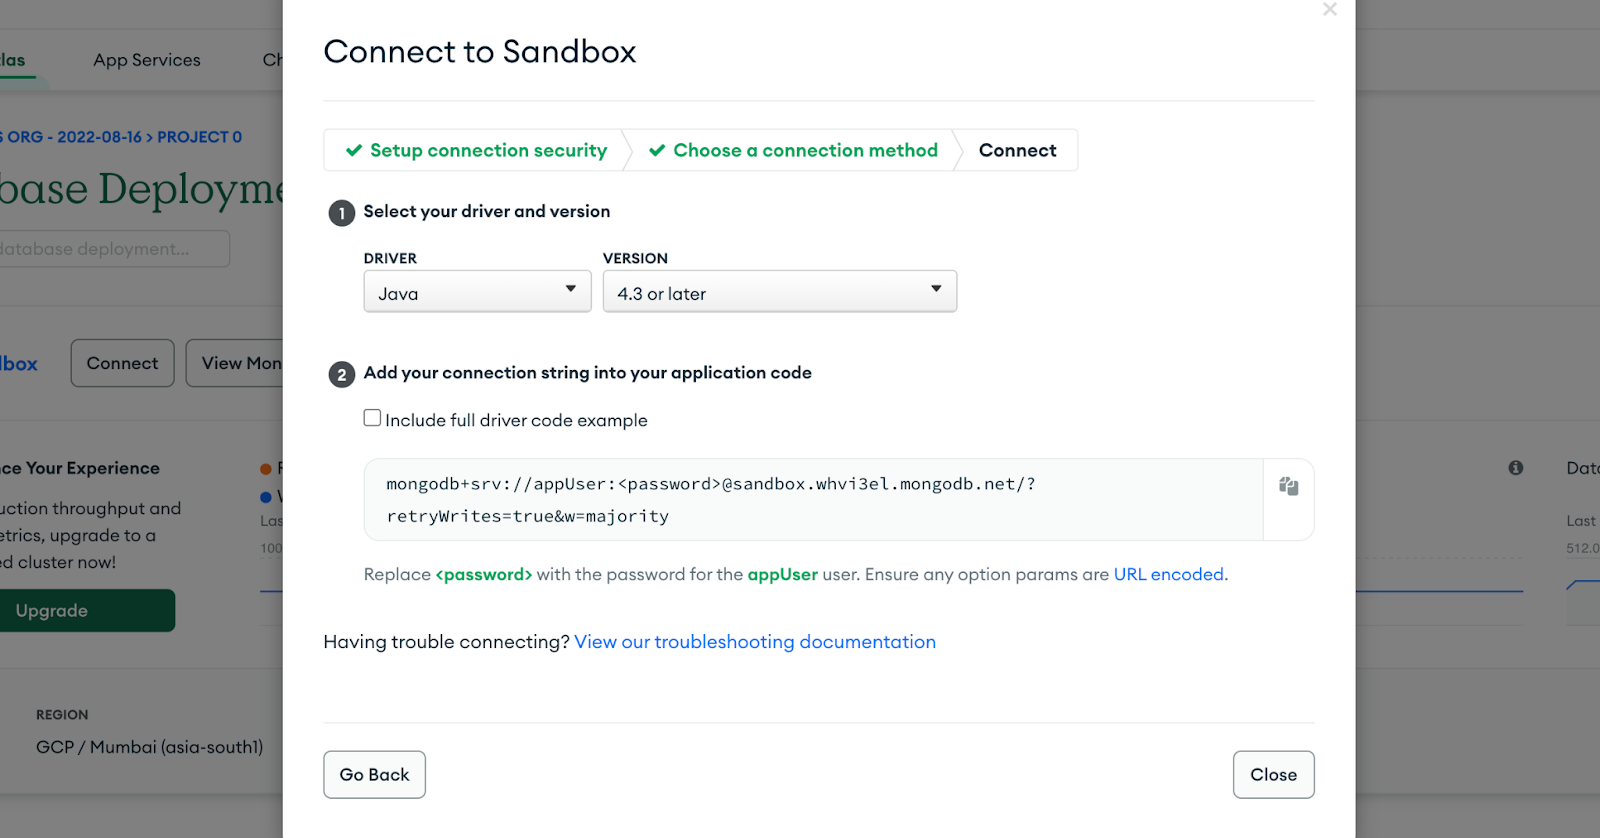
- Under Connect your application, click Drivers
Note: If you are getting slightly different UI then click on Connect > MongoDB Drivers. - Copy the connection string and click Close.
- Paste the URI in MongoDB Connection URI in your dataflow UI. Replace the <password> with
appUser123.
-
Mongo Database:
sample_mflixYou are using the
sample_mflixdatabase from the sample dataset for this lab. -
Mongo Collection:
movies -
Leave NONE for user Option.
-
BigQuery Output table:
- Click the BROWSE button, select movies. Your output table should look like -
.sample_mflix.movies
- Click the BROWSE button, select movies. Your output table should look like -
-
Expand Optional Parameters and de-select Use default machine type. Choose
e2-standard-2from the list of options. -
Click Run Job.
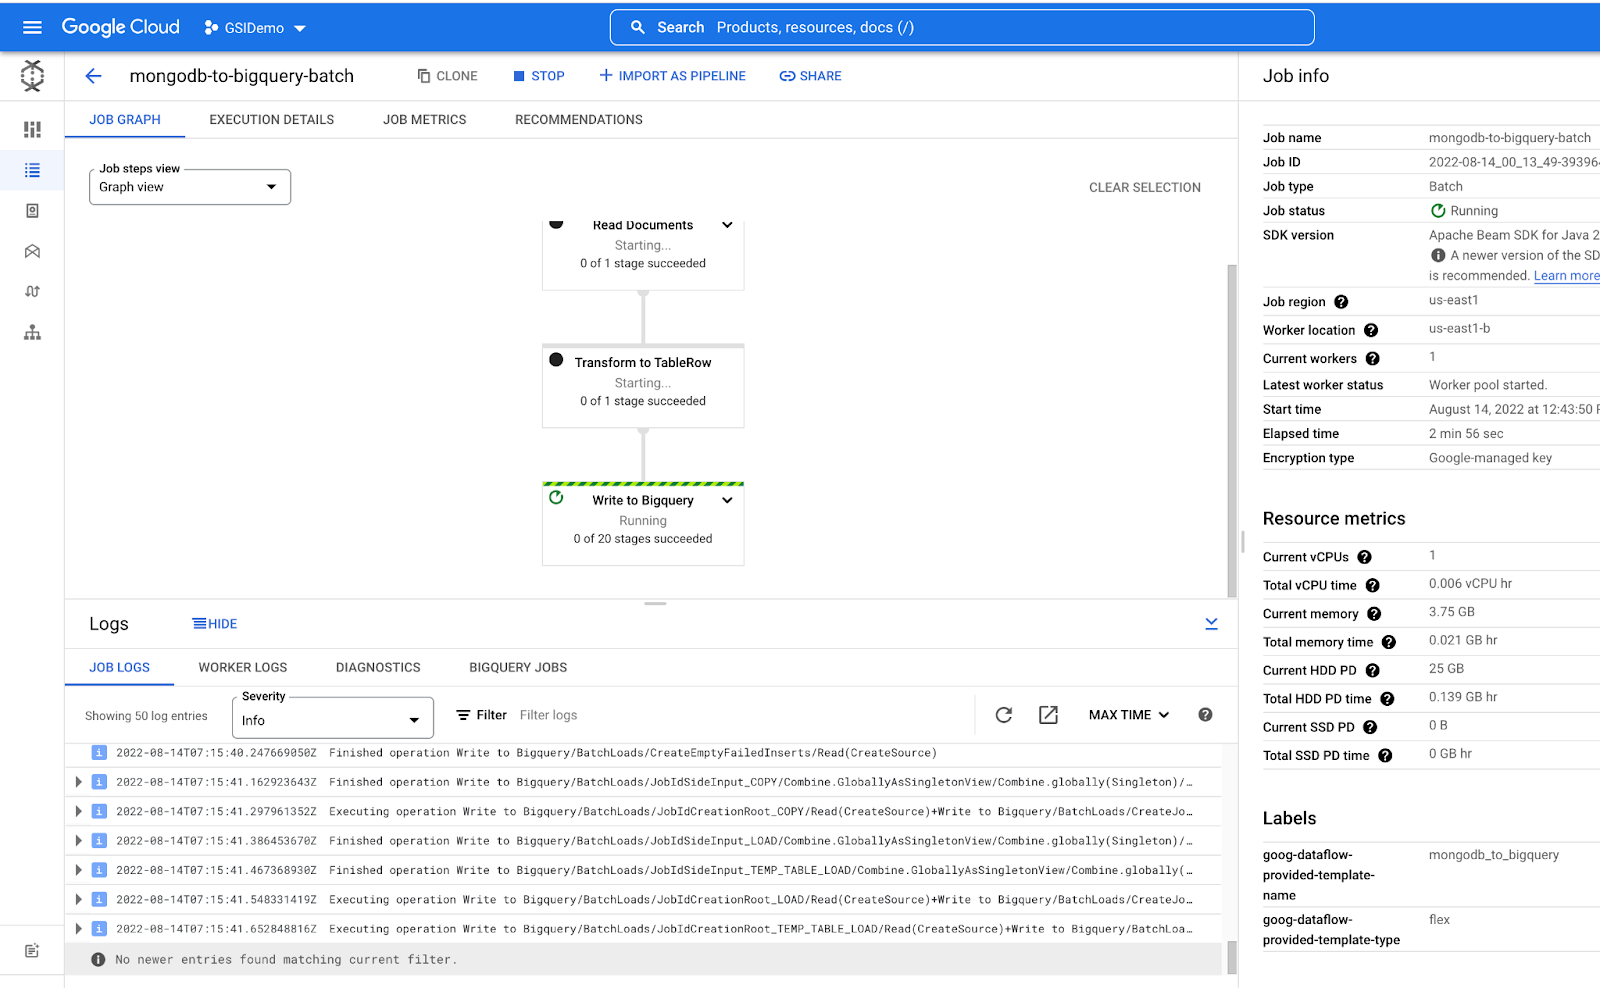
View the Dataflow Job running on dataflow on the Cloud Console.
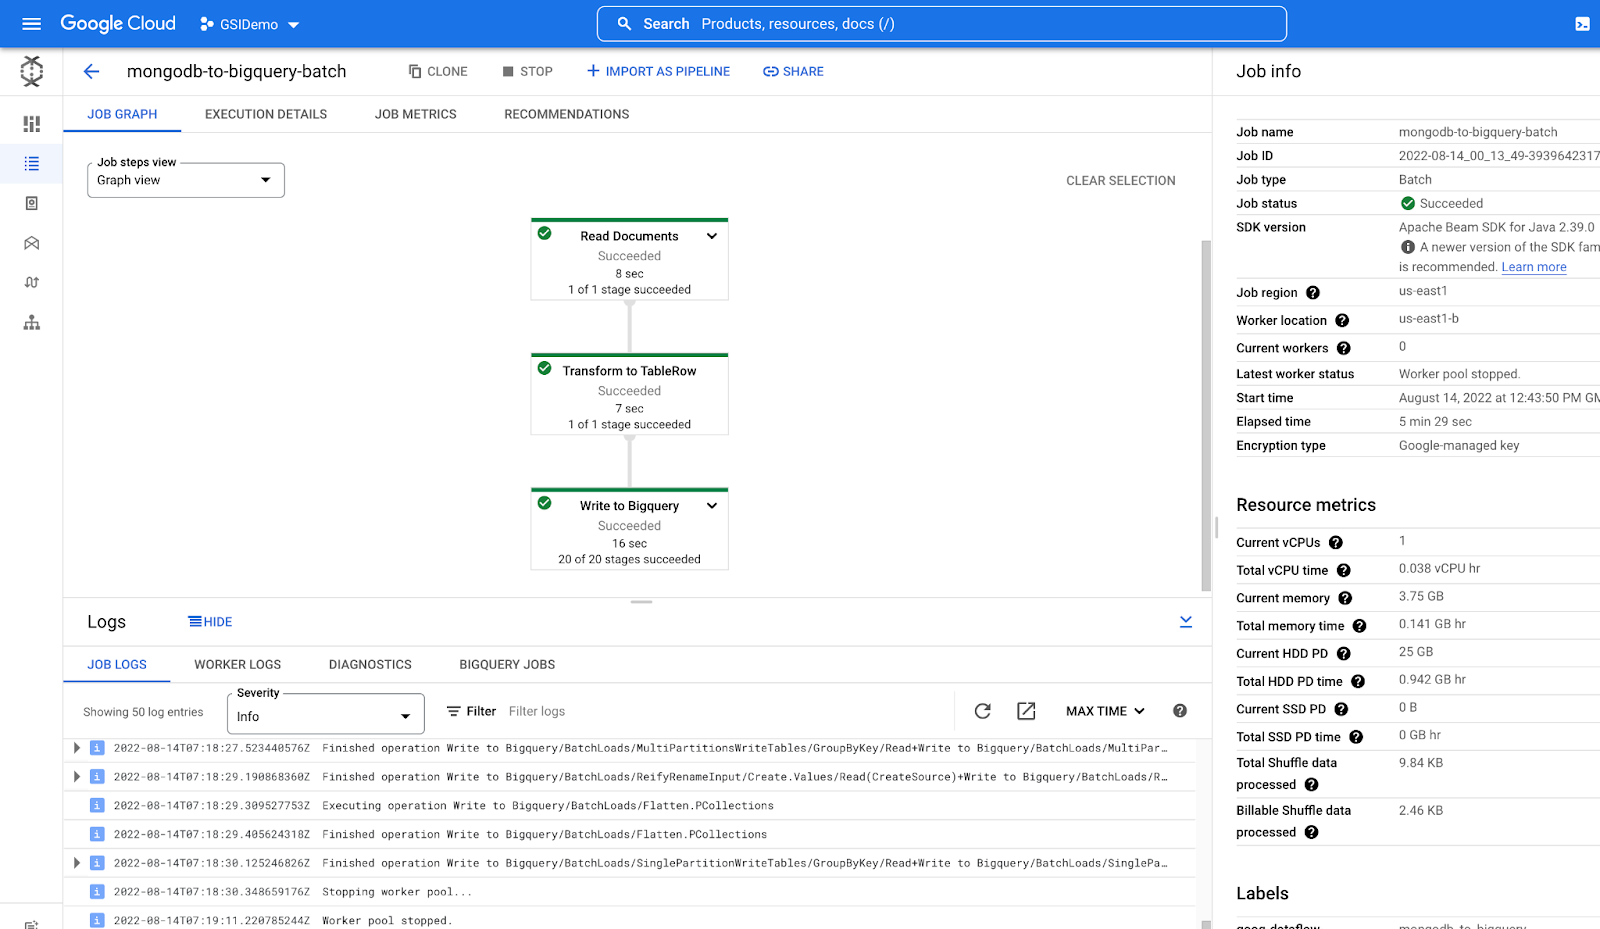
Once the Job run is completed all the job graphs will turn Green.
For more details on the values passed refer to the MongoDB Dataflow Templates.
5-10 minutes. Check your progress once your job has fully completed.Task 4. Build Model using BQML
-
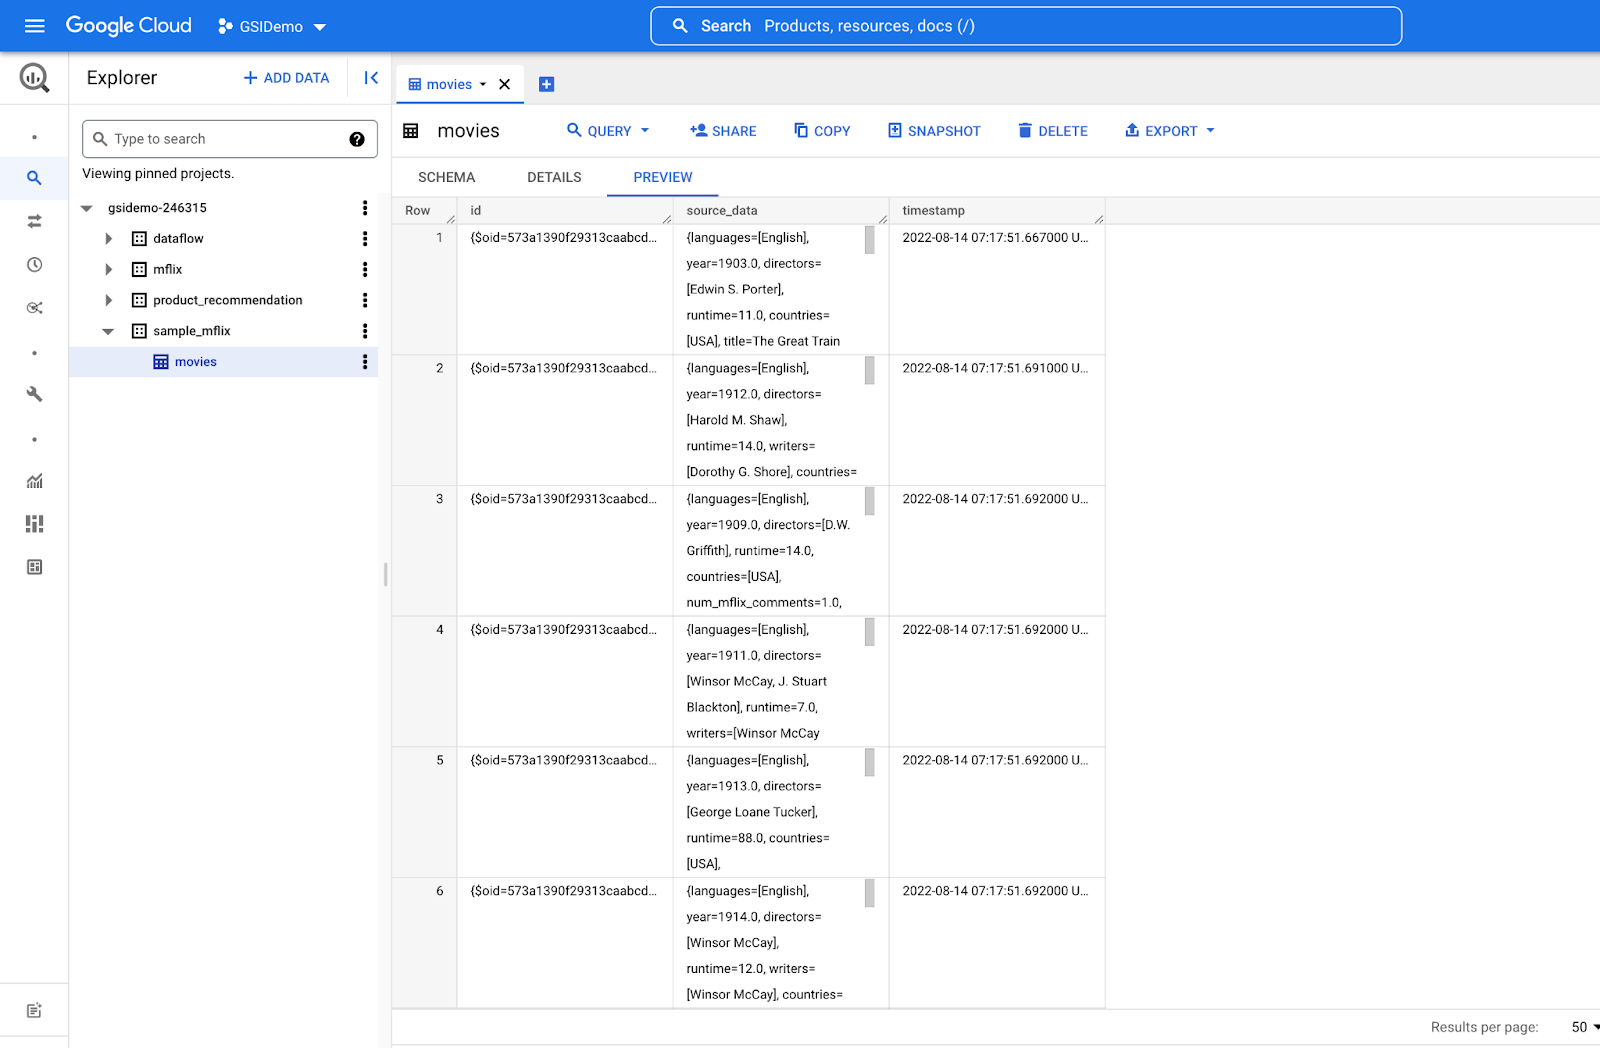
Once the pipeline runs successfully, open the BigQuery Explorer.
-
Expand the project, click on the dataset
sample_mflix, double click on the movies table. -
Run the below queries one at a time.
a. Query the first 1000 rows from the table:
b. Create a movies-unpacked table from parsed imported data:
c. Query and visualize the table movies-unpacked:
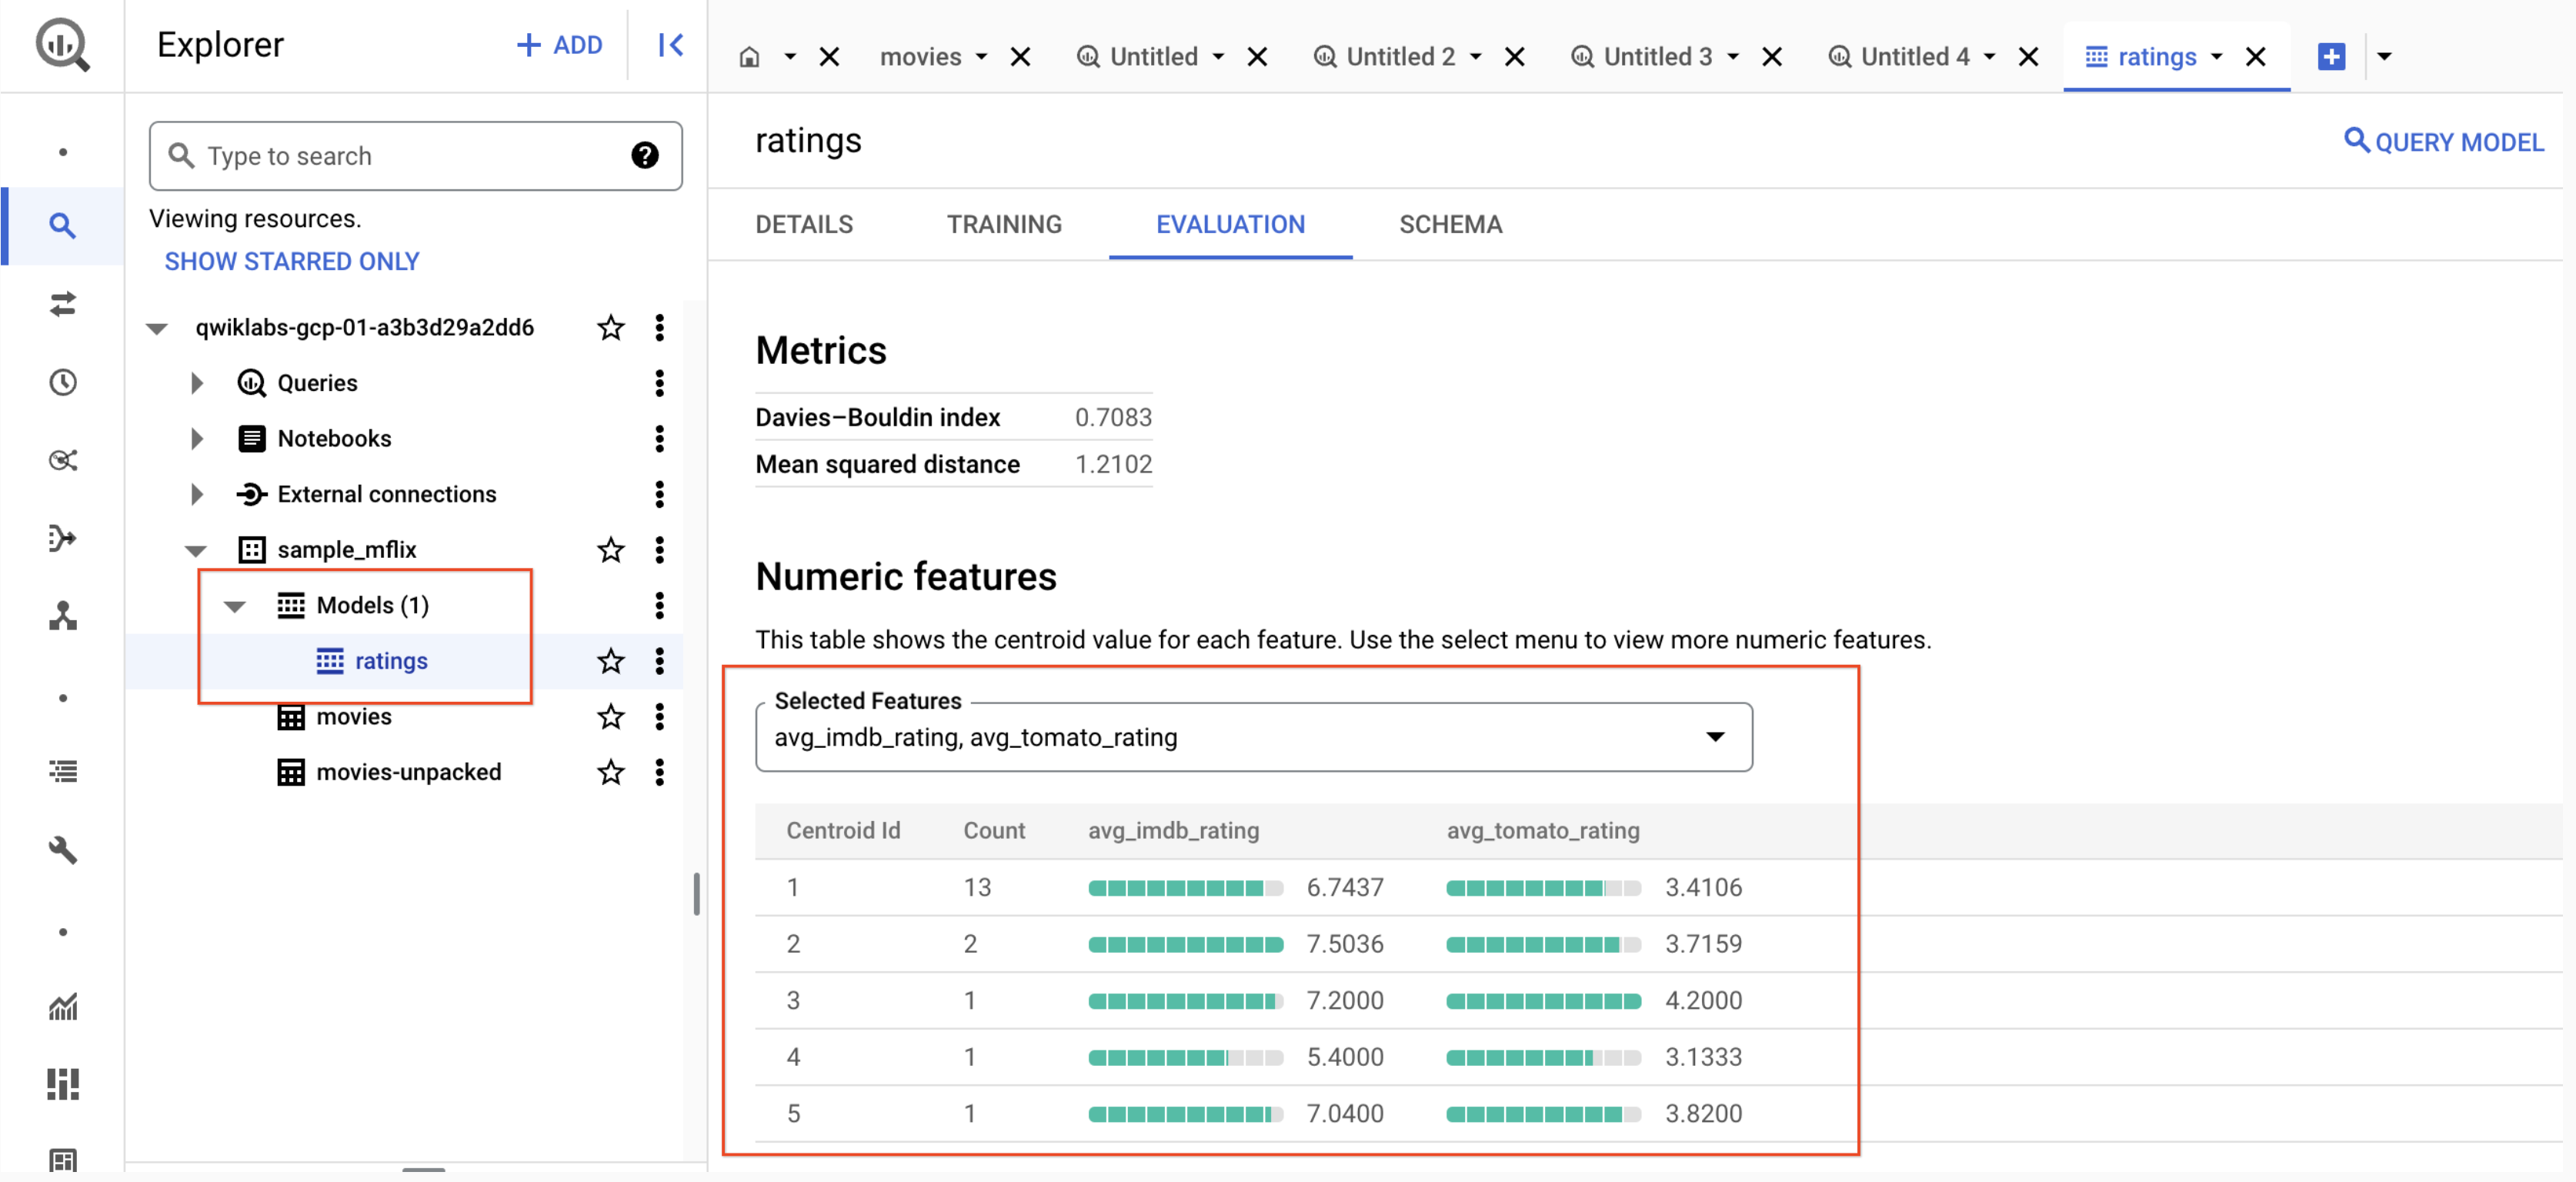
d. Create model samplemflix.rating using the KMEANS clustering algorithm:
-
Finally, navigate to the Model created under your Model section as shown below.
Congratulations!
In this lab, you have provisioned your first MongoDB Atlas cluster, loaded a sample dataset and you have setup a BigQuery dataset. Also you have used Dataflow UI to build a MongoDB to BigQuery pipeline and perform clustering on data using the k-means clustering algorithm.
You can deploy this model in VertexAI to manage your data models and scale your data model, which is out of scope for this lab.
Next steps/Learn more
-
To learn more about MongoDB, refer to MongoDB on the Google Cloud Marketplace.
-
To learn more about building modern data-driven applications, be sure to check out the MongoDB Atlas documentation.
-
Get free $500 credits for MongoDB on Google Cloud Marketplace - Applicable only for new customers
Google Cloud training and certification
...helps you make the most of Google Cloud technologies. Our classes include technical skills and best practices to help you get up to speed quickly and continue your learning journey. We offer fundamental to advanced level training, with on-demand, live, and virtual options to suit your busy schedule. Certifications help you validate and prove your skill and expertise in Google Cloud technologies.
Manual Last Updated July 18, 2024
Lab Last Tested July 18, 2024
Copyright 2024 Google LLC All rights reserved. Google and the Google logo are trademarks of Google LLC. All other company and product names may be trademarks of the respective companies with which they are associated.