Checkpoints
Natural Language API call
/ 50
Cloud Run app deplyoment
/ 50
Getting Started with MongoDB Atlas on Google Cloud
This lab was developed with our partner, MongoDB. Your personal information may be shared with MongoDB, the lab sponsor, if you have opted-in to receive product updates, announcements, and offers in your Account Profile.
GSP1093

Overview
MongoDB Atlas is a developer data platform, integrating a multi-cloud database with a diverse set of data services. Atlas simplifies database deployment and management while enabling modern data-driven application development.
In this introductory-level lab, you will get hands-on practice with MongoDB Atlas. You will create your first cloud database deployment, add data, build database indexes, set up database triggers, and connect to Google Cloud APIs. If you're new to Atlas, you came to the right place!
You will also deploy a fully-fledged MEAN stack application that queries the data from your Atlas database to Google Cloud Run. The application will allow you to leave comments for cake recipes. The comments' sentiments will be analyzed by the Google Cloud Natural Language API as you post them.
Objectives
In this lab, you will do the following:
- Provision your first MongoDB Atlas database deployment
- Create a database, collections with data, and indexes through the Atlas UI
- Integrate a Google Cloud API with MongoDB Atlas Triggers and Functions
- Deploy a MEAN stack application on Google Cloud Run
Prerequisites
Since this lab is an introduction to MongoDB Atlas, you will need an Atlas account. Create an account before you click Start Lab. You can do that in one of two ways:
- Through the Google Cloud Marketplace if you have a Google Cloud account.
- With the Atlas registration page.
Save this account information! The Atlas account is completely free and will be available for you after you complete this lab.
Setup and requirements
Before you click the Start Lab button
Read these instructions. Labs are timed and you cannot pause them. The timer, which starts when you click Start Lab, shows how long Google Cloud resources will be made available to you.
This hands-on lab lets you do the lab activities yourself in a real cloud environment, not in a simulation or demo environment. It does so by giving you new, temporary credentials that you use to sign in and access Google Cloud for the duration of the lab.
To complete this lab, you need:
- Access to a standard internet browser (Chrome browser recommended).
- Time to complete the lab---remember, once you start, you cannot pause a lab.
How to start your lab and sign in to the Google Cloud console
-
Click the Start Lab button. If you need to pay for the lab, a pop-up opens for you to select your payment method. On the left is the Lab Details panel with the following:
- The Open Google Cloud console button
- Time remaining
- The temporary credentials that you must use for this lab
- Other information, if needed, to step through this lab
-
Click Open Google Cloud console (or right-click and select Open Link in Incognito Window if you are running the Chrome browser).
The lab spins up resources, and then opens another tab that shows the Sign in page.
Tip: Arrange the tabs in separate windows, side-by-side.
Note: If you see the Choose an account dialog, click Use Another Account. -
If necessary, copy the Username below and paste it into the Sign in dialog.
{{{user_0.username | "Username"}}} You can also find the Username in the Lab Details panel.
-
Click Next.
-
Copy the Password below and paste it into the Welcome dialog.
{{{user_0.password | "Password"}}} You can also find the Password in the Lab Details panel.
-
Click Next.
Important: You must use the credentials the lab provides you. Do not use your Google Cloud account credentials. Note: Using your own Google Cloud account for this lab may incur extra charges. -
Click through the subsequent pages:
- Accept the terms and conditions.
- Do not add recovery options or two-factor authentication (because this is a temporary account).
- Do not sign up for free trials.
After a few moments, the Google Cloud console opens in this tab.

Task 1. Create an Atlas project and deploy a database
In this section, you will spin up your first MongoDB Atlas database deployment.
Provision a free database deployment
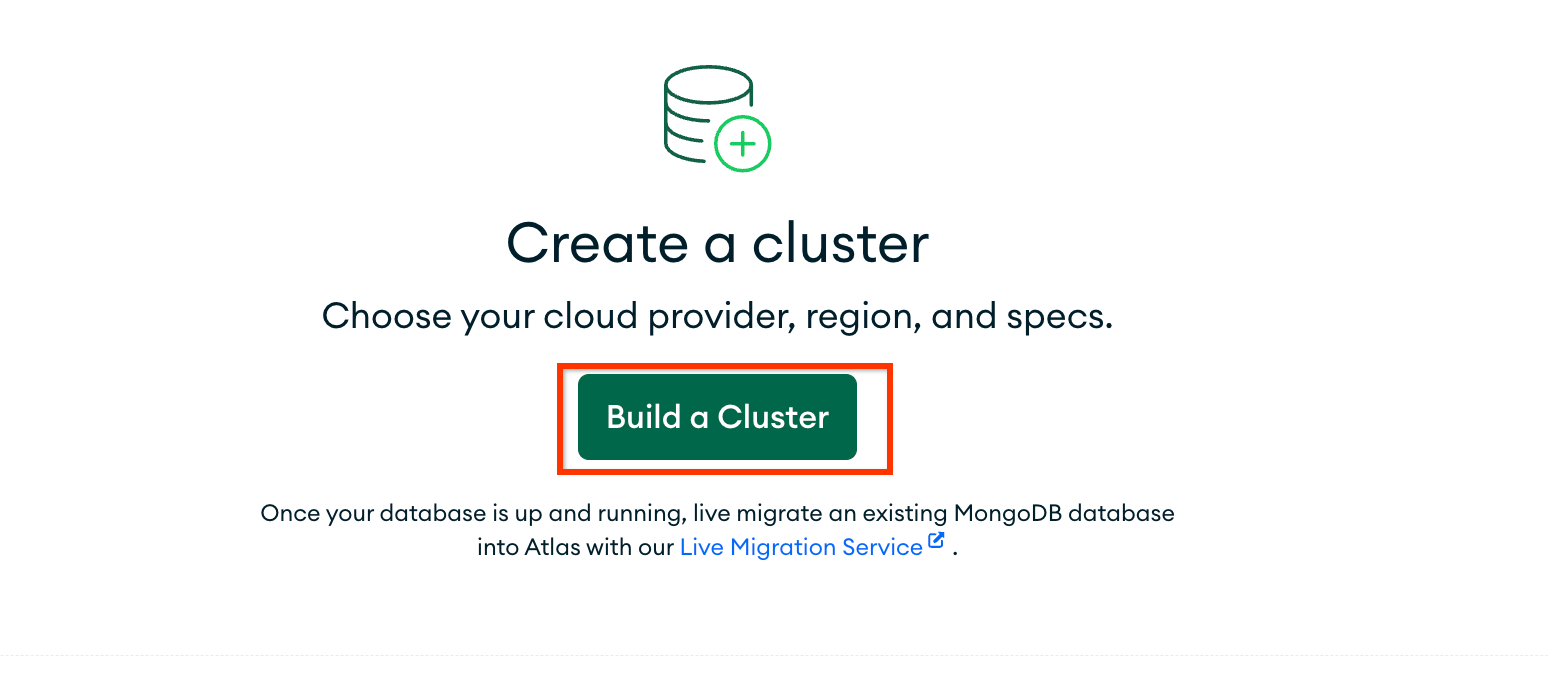
Deploy your first forever-free database in MongoDB Atlas! You'll do that using the Atlas UI,
Steps to create an account on MongoDB Cloud:
-
Visit the MongoDB Cloud Page: Atlas UI .
-
Click on Try for Free: This will redirect you to the sign-up page.
-
Enter Your Details: Enter your first name, last name, personal email, and create a password (ensure you're not using the lab credential email).
-
Agree to Terms: Check the box to agree to the terms and conditions.
-
Click on button Create your Atlas account to Submit the form to create your account.
-
Verify Your Email: Check your email inbox for a message with the subject Verify Your MongoDB Email Address and click on Verify Email to complete your registration.
-
After verifying your Email, You may be asked to answer a few questions select any of them.
-
Under Deploy your cluster page click on I'll do this later.
-
Click Database from the left side menu, under the DEPLOYMENT heading.
-
Click on the Create button right under Build a Cluster.
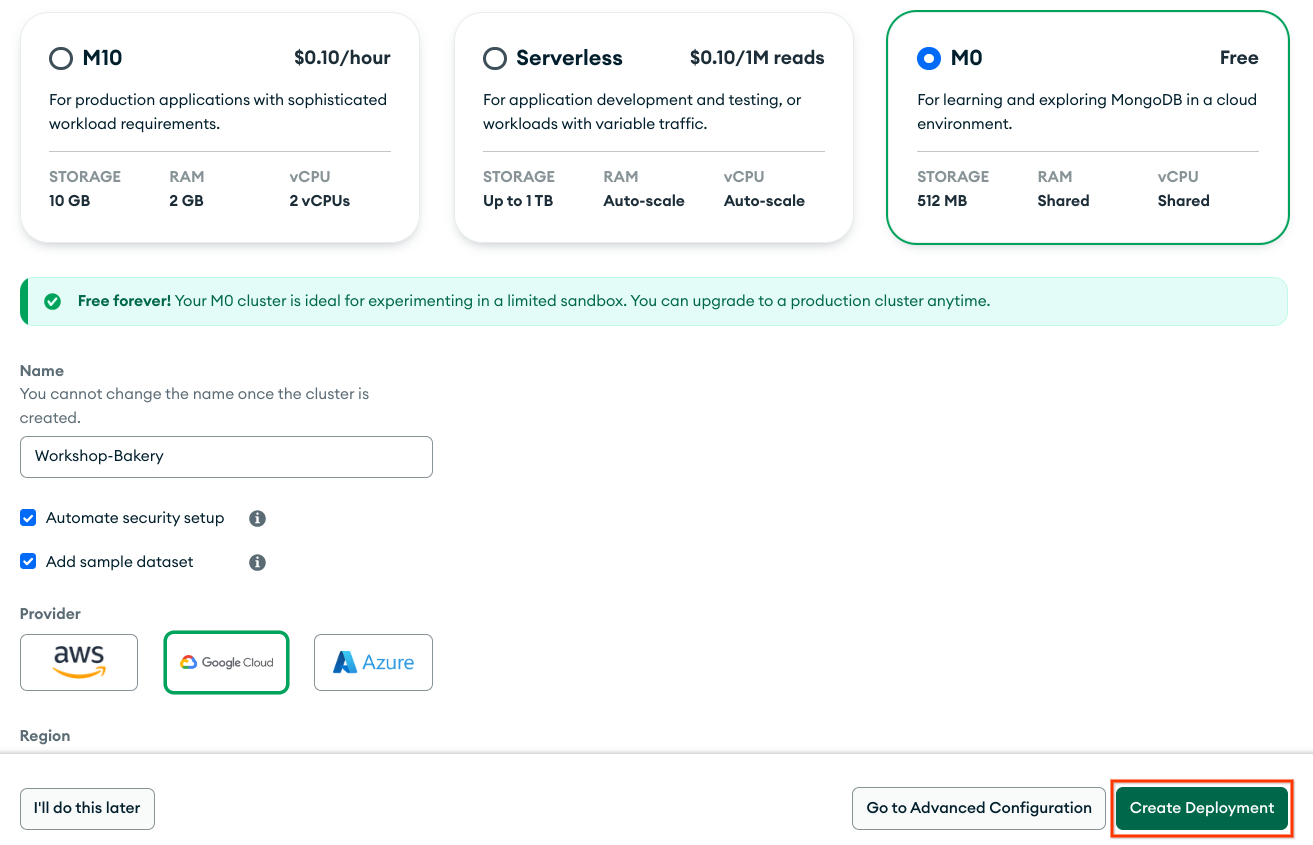
- You have the option to choose between a dedicated, serverless, and shared deployment. We recommend using the free shared M0 deployment for this lab.
- Select Google Cloud as your Cloud Provider. Select any region.
- Rename your cluster to Workshop-Bakery.
- Click Create Deployment to deploy your database.
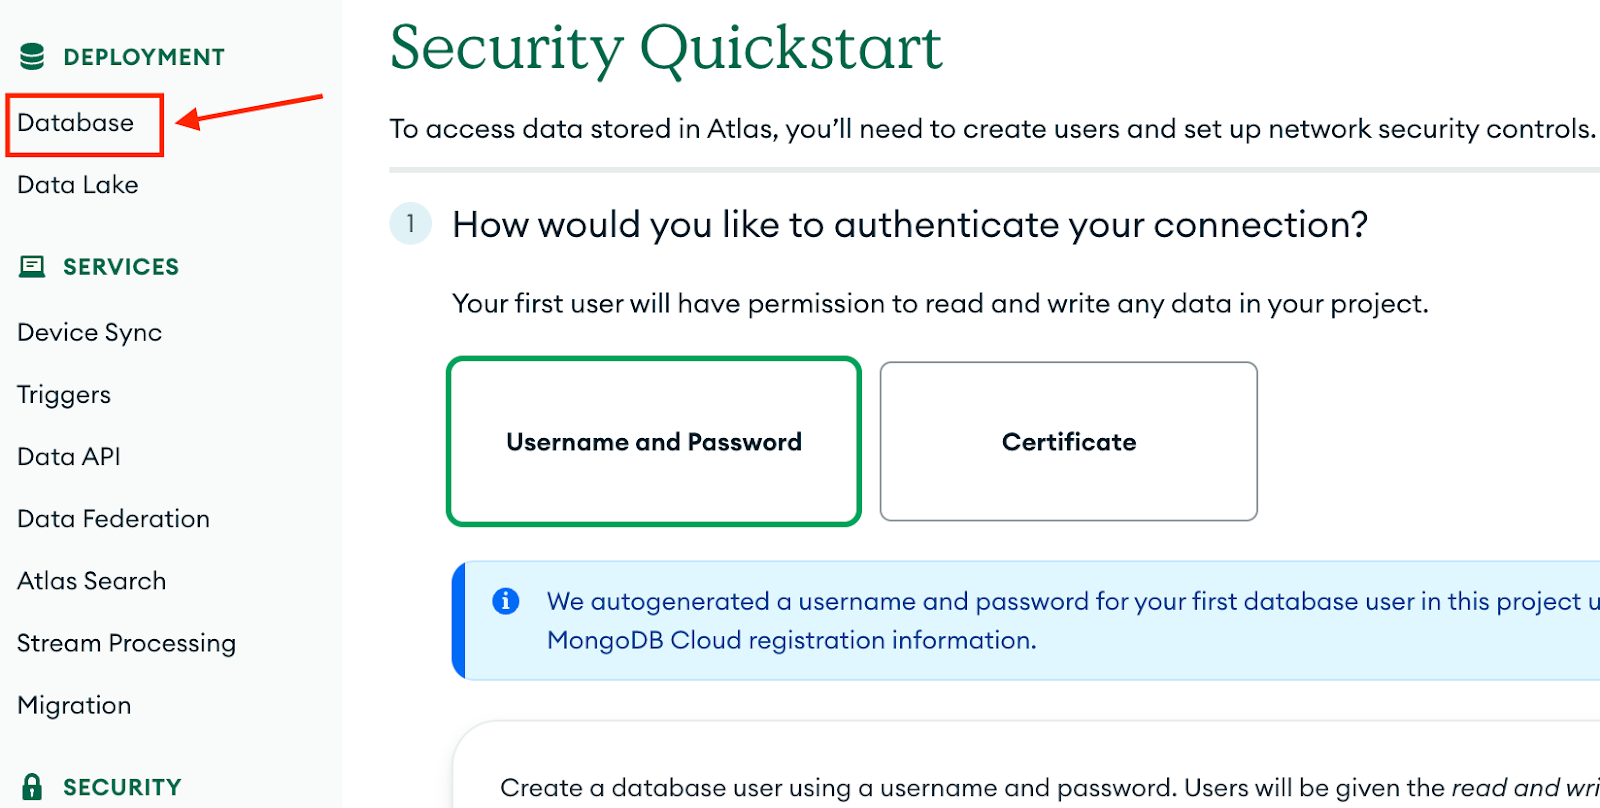
Security Quickstart
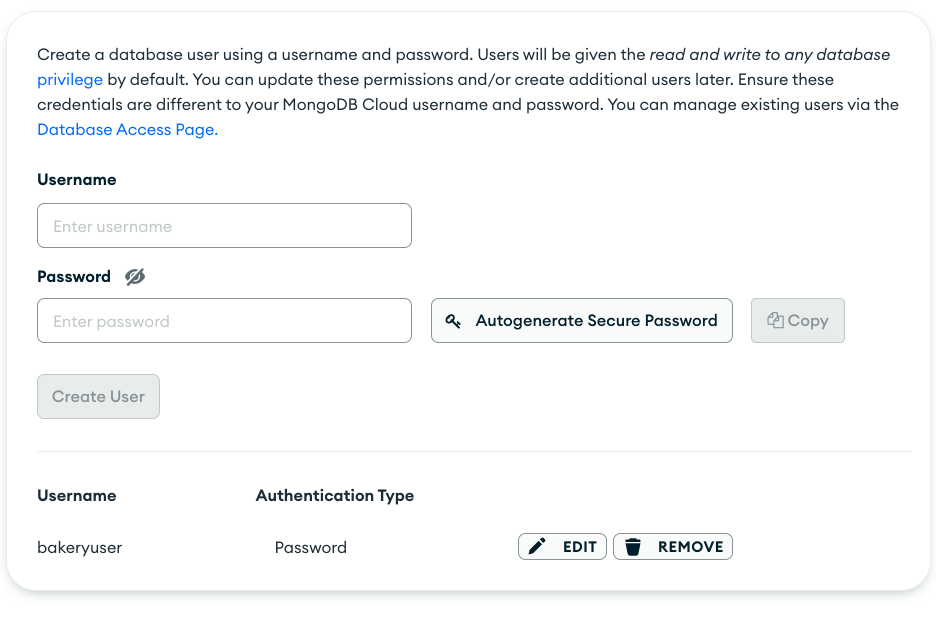
From the Navigation click Security > Quickstart. By default, every Atlas deployment is completely locked down. That's why you must create a database user and configure network access.
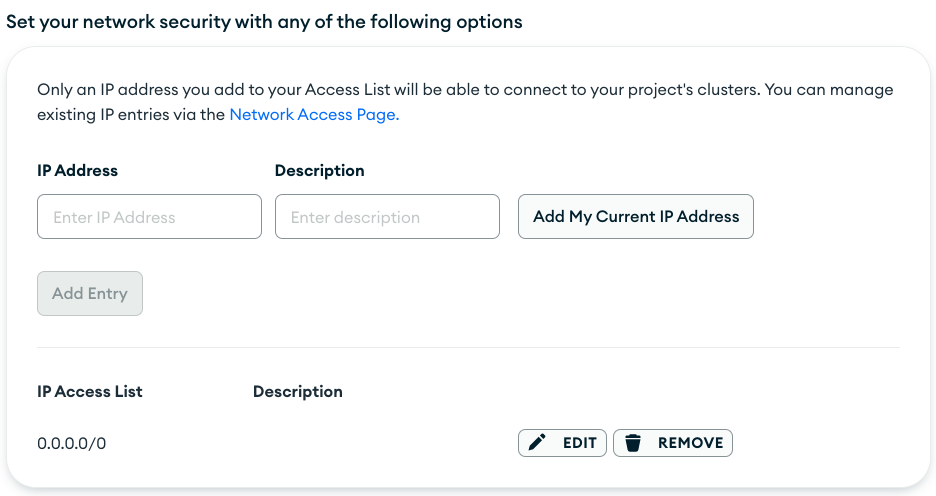
Next, you must configure network access between Atlas and your Google Cloud environment. The best way to do this is by setting up VPC peering or a private endpoint. These features are available only for the paid tier of Atlas deployments. To ensure that this lab remains free and you can still connect to your database deployment, you'll allow access from everywhere.
Add the following entry to the network access list: 0.0.0.0/0.
To navigate back to your deployments, select Database from the left-hand menu.
Create a database and collection, and insert the first documents
In this section, you will browse the new deployment, learn how to create a new database, add a collection to that database, and insert documents.
You will use the Atlas UI for this section. However, all this can also be done with the Atlas CLI and MongoDB Shell.
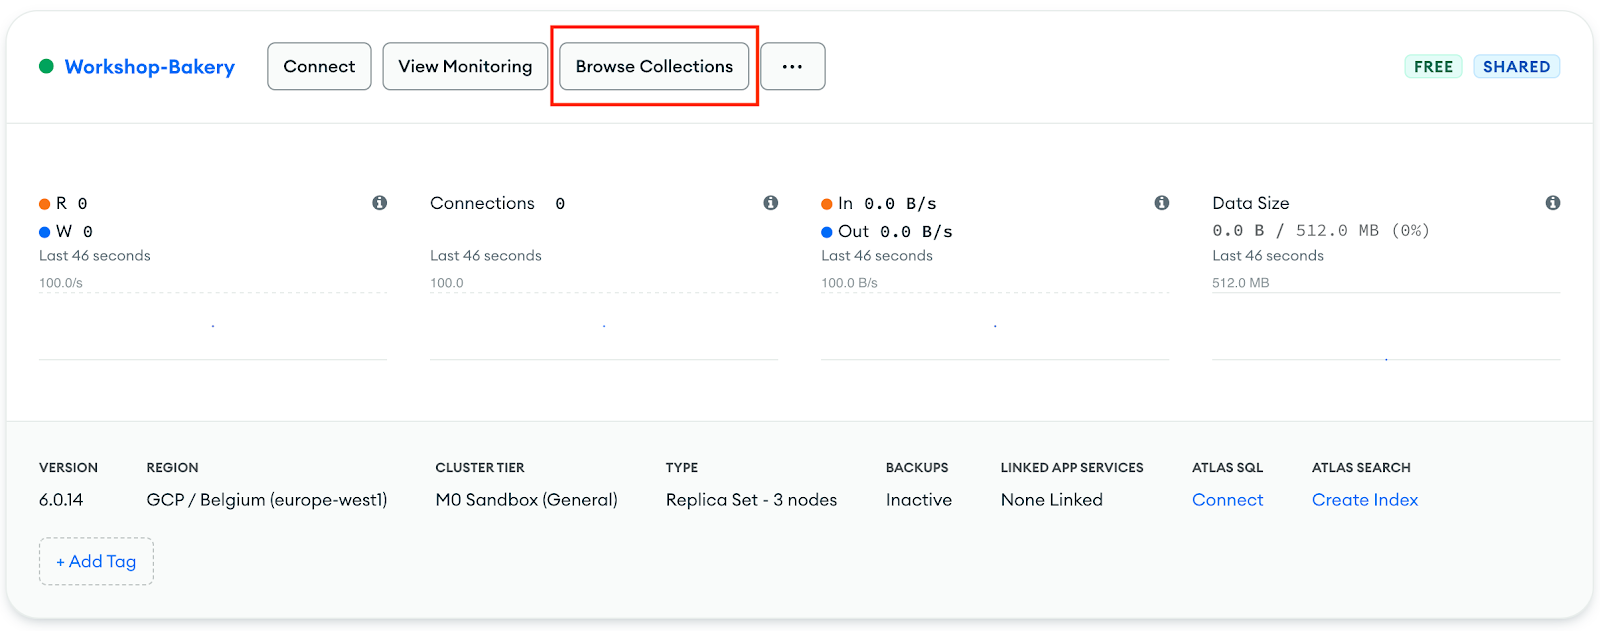
- Click the Browse Collections button to access the databases and collections in the deployment.
-
Currently, there are no databases or collections in your deployment. You will manually insert some data. Select Create Database.
-
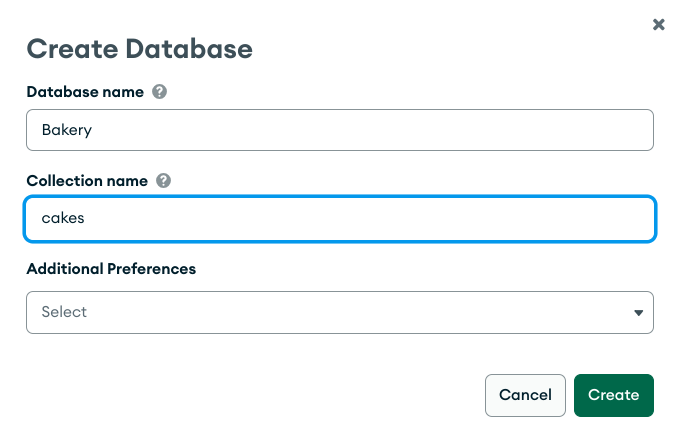
Name the database Bakery and the collection cakes, then click Create.
Now the cakes collection has been created inside the new Bakery database. Time to add some data. The Atlas UI makes this really easy.
- Click the Insert Document button in the top right corner.
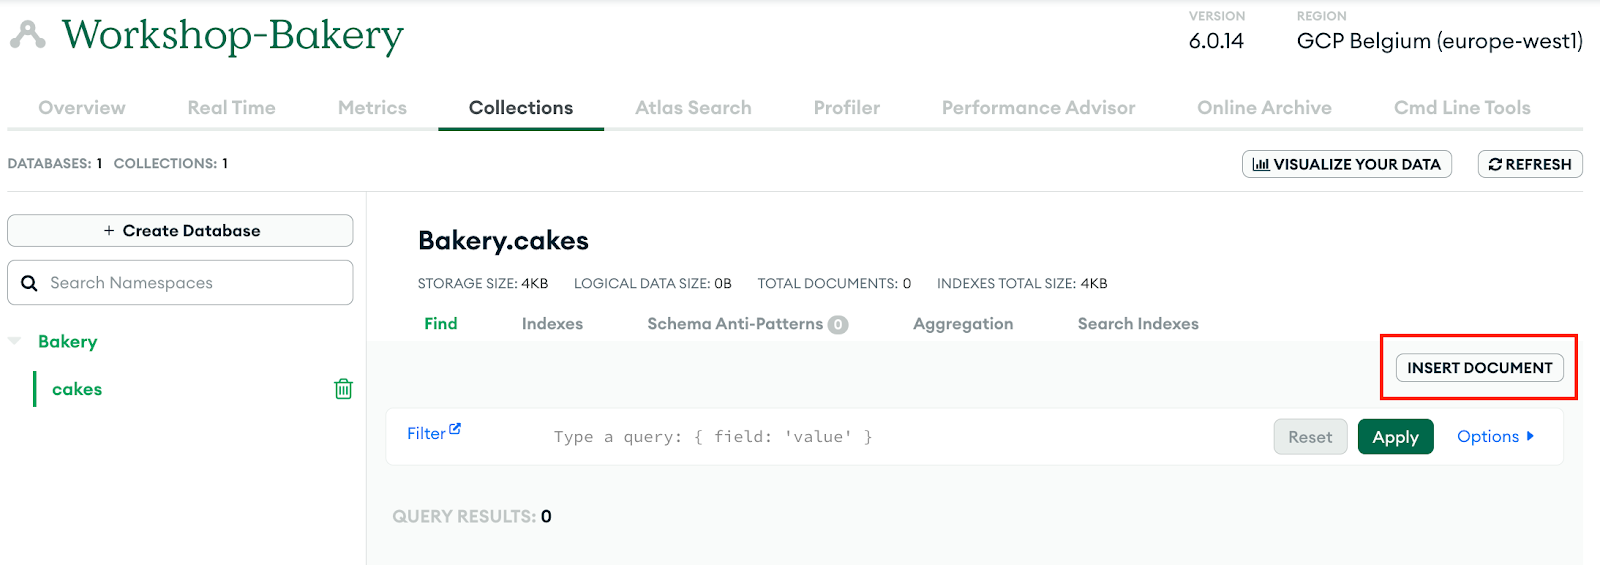
- When inserting data in the Atlas UI, you have two options of the view you want for adding data. We want to use the JSON view, so we can easily add some existing cake data. Click the {} button to switch views.
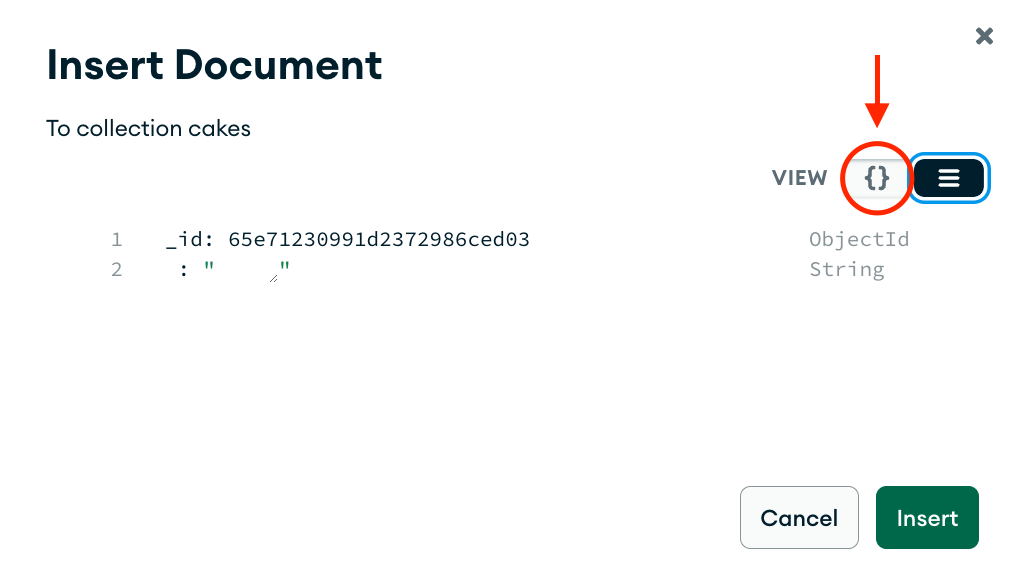
- Delete what is currently in the box, add the following cake document, and then press Insert:
- Repeat steps 4 and 5, this time adding the following cake document:
Note: MongoDB documents use BSON (Binary JSON), a binary serialization format, to store data. BSON extends the JSON specification with a few data types such as Date and BinData.
One of the BSON types is ObjectId — an easy-to-generate 12-byte value that consists of a timestamp, a machine and process identifiers, and a counter. In MongoDB, every document stored in a collection must have a unique _id field, which serves as a primary key. If a document is inserted without specifying an _id field, the MongoDB driver will automatically generate an ObjectId for the _id field.
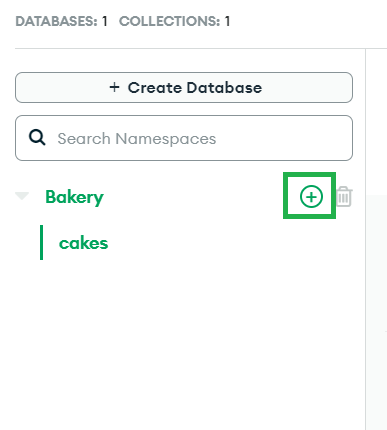
- Add a second collection to your Bakery database to store the comments that people can leave on each cake. Hover your mouse over Bakery in the left panel and there will be a + sign to add a new collection.
-
Click the plus (+) sign and add a new collection called comments.
-
Add a new comment by copy-pasting the document below.
Note: The cakeId field is of type ObjectId just like the _id field. _id is the unique identifier of this comment document.
On the other hand, cakeId is equal to the _id of a document from the cakes. In MongoDB, this is called a manual reference. Later, you will use this field to join data from the two collections.
You might also notice that the date field looks different than the rest of the fields. This field uses the BSON Date type which is a 64-bit integer that represents the number of milliseconds since the Unix epoch (Jan 1, 1970).
You now have your Atlas database set up with some cake data, and even a comment associated with one of the cakes!
Add indexes to your database
MongoDB automatically creates an index on the unique identifier field, _id, of every collection. This optimization allows optimized queries when fetching a document, such as a cake or a comment, by its ID.
Later on, you will deploy a web application that enables you to browse various cake recipes and read comments left by different users for each recipe. To fetch every comment associated with a specific recipe, the application will query the comments collection and filter the results based on the cakeId field.
The query looks something like this:
This query will retrieve only the comments linked to the specified cake. To optimize the query, let's add an index to the cakeId field in the comments collection.
While you have the comments collection open, click on Indexes.
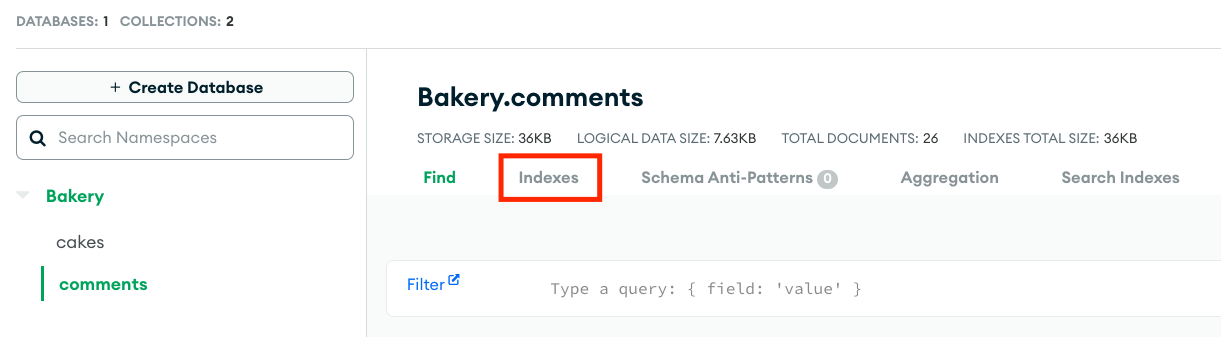
You should see the already existing index on the _id field, along with information about the type, size and usage of the index. Click Create Index and add the following in the Fields section.
Click Review and then Confirm to create the new index on the cakeId field.
Task 2: Analyze text sentiment with the Google Cloud Natural Language API
Next, you will set up an Atlas Trigger and a Function that will analyze the sentiment of new comments as they are inserted into the database. You will utilize the Google Cloud Natural Language API for the analysis.
Generate a Google Cloud API key
- First, open the Google Cloud console and log in with the temporary credentials that were generated for this lab.
- Let's ensure that the Natural Language API is enabled. In the Google Cloud console, under Marketplace search for Cloud Natural Language API and select it from the list.
- Verify that the API is already enabled and click on Manage.
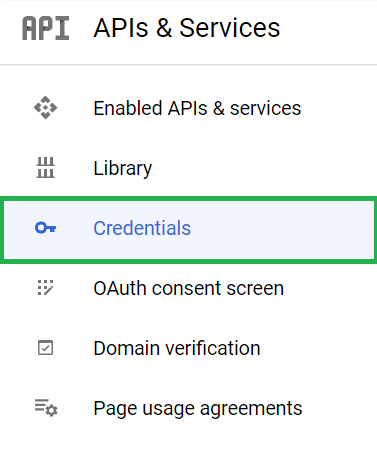
- This will take you to the Natural Language API page for your project. You will need to generate an API key to use it. Select Credentials from the left-hand menu.
- Click Create Credentials at the top of the browser window and select API Key from the dropdown box to generate a key.
- Copy the API key that has been generated for you.
Set up an Atlas Trigger
The next step is to configure the Atlas Trigger that tracks any new comments as they come in the database.
-
Go back to the Atlas UI and make sure you have your project open.
-
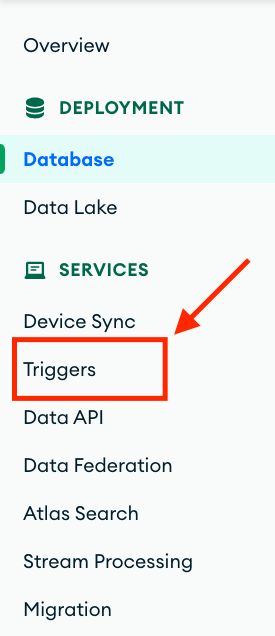
Select Triggers from the left-hand menu.
-
Click Get Started and wait for Atlas to set up the triggers page.
-
Click Add Trigger to start configuring a new trigger. Enter the name NewComment.
-
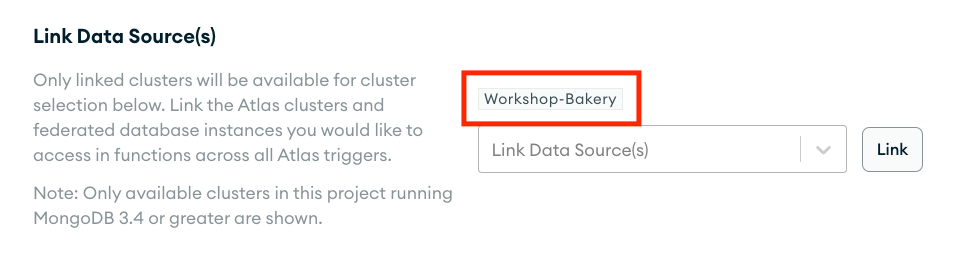
You should see the Workshop-Bakery deployment already linked under Link Data Source(s), above the dropdown. If not, click on the dropdown, select it, and click Link..
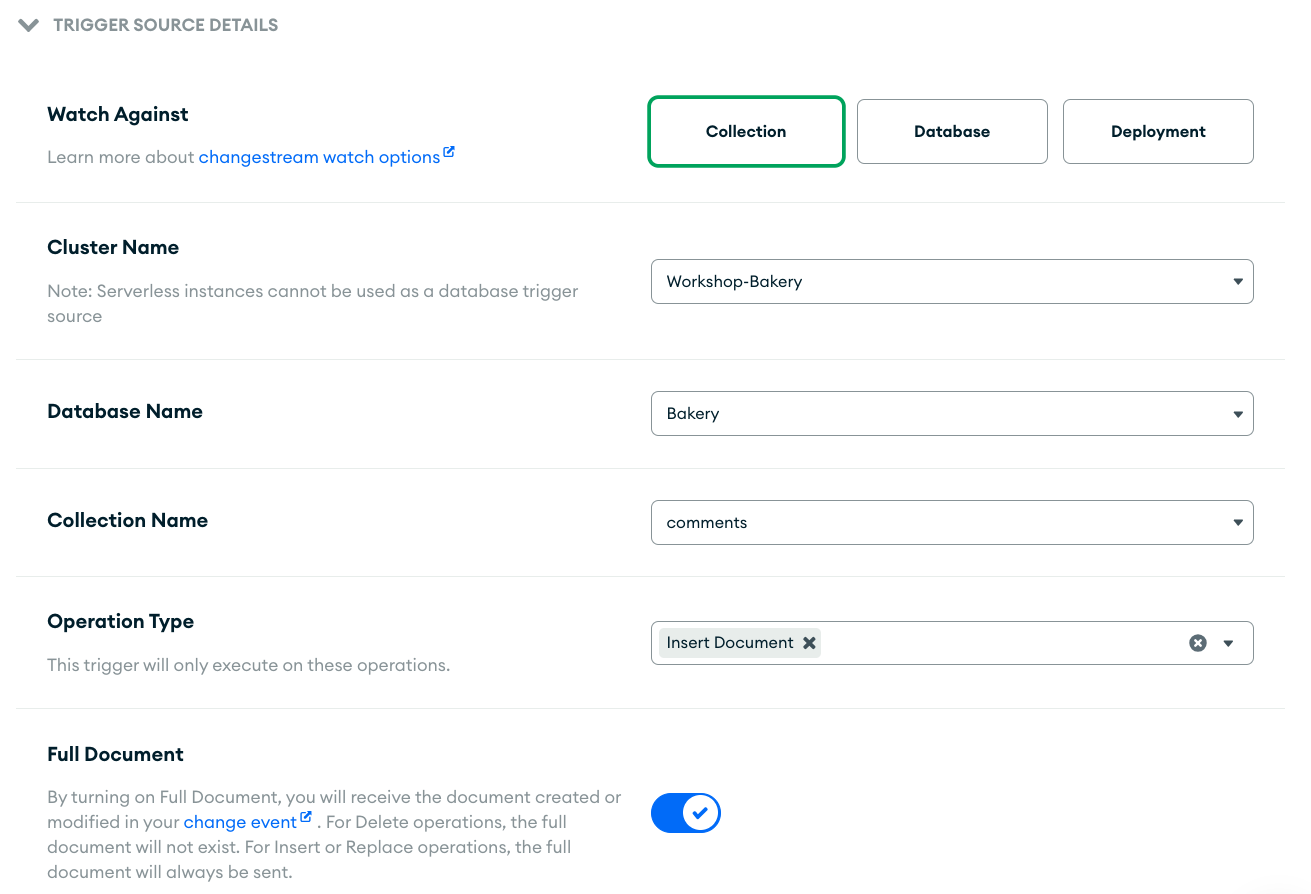
- Expand the Trigger Source Details and fill in the following details:
- Watch against: Collection
- Cluster name: Workshop Bakery
- Database name: Bakery
- Collection name: comments
- Operation type: Insert Document
- Full document: Enabled
Expand the Function section and replace the default implementation with the following code:
Finally, click Save.
Testing the Natural Language API integration
Finally, let's see what happens when you insert a new comment into your database.
-
Navigate back to Database Deployments by clicking on Database in the left-hand menu.
-
Click Browse Collections on the Workshop-Bakery deployment.
-
Open the comments collection from the list of collections on the left.
-
Click Insert document, open the JSON editor, and add the following document:
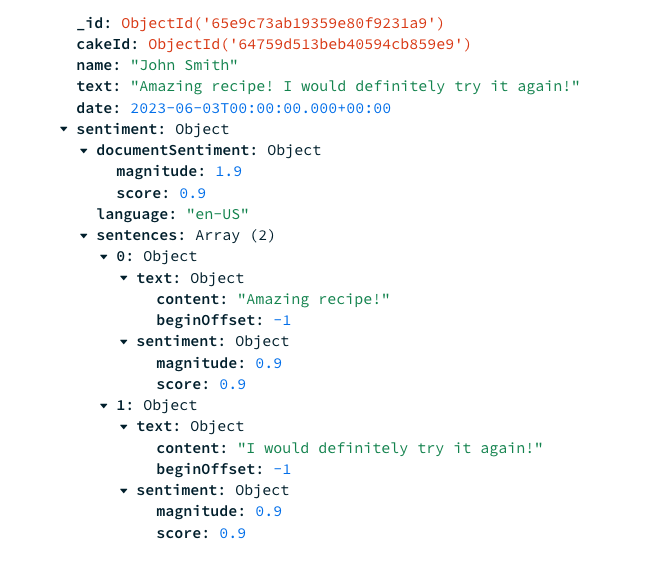
- The inserted document went through the Trigger that you set up and is now enriched with sentiment. Expand the sentiment field to see the analysis.
Task 3: Deploy a MEAN stack application to Google Cloud Run
Your final task is to deploy a web application that enables you to browse through the cake recipes, read them, and leave comments. The application has already been built for you, and your job is to configure it to connect to your Atlas database and deploy it to Google Cloud Run.
The app was built using the MEAN stack — MongoDB, Express, Angular, and Node. You will deploy two services to Cloud Run:
- A backend service built with Express and Node, connecting to your MongoDB Atlas database, and;
- A frontend service built with Angular, connecting to the backend service.
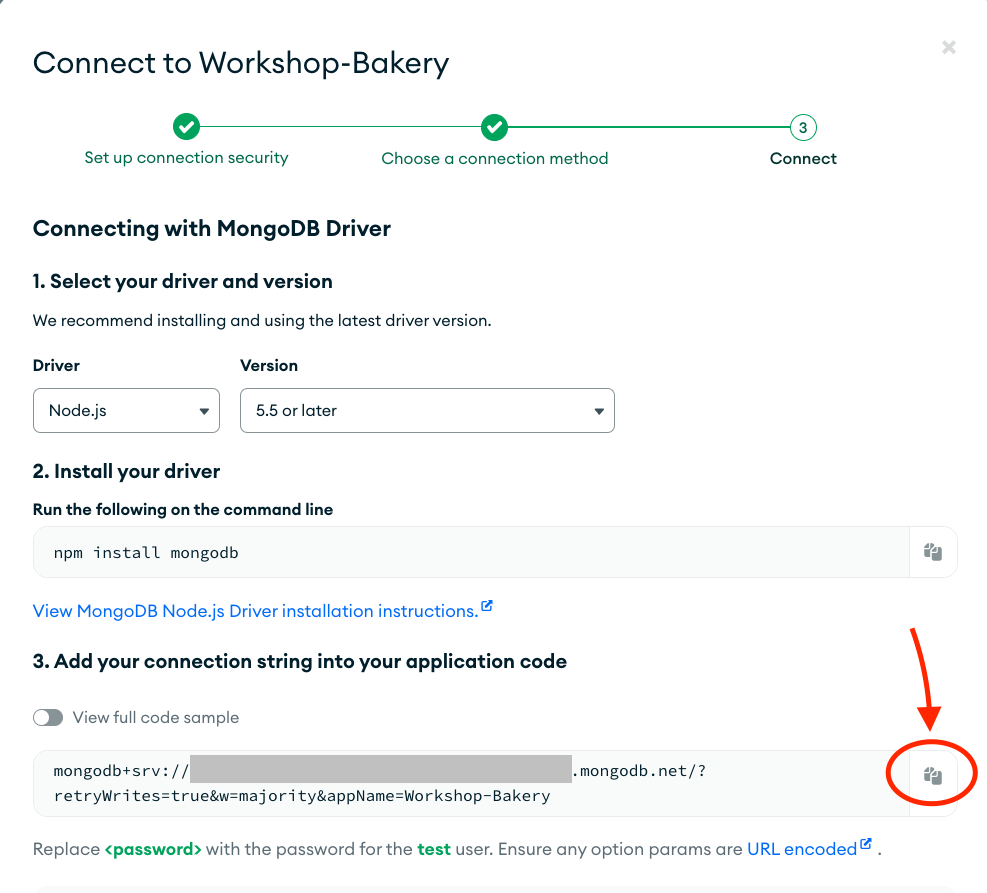
Copy the connection string of your deployment
Before deploying the services, let's copy the connection string for your Atlas deployment that will allow you to connect the backend service to your database.
- Head back to your Atlas project and open the Database Deployments page. Click Connect next to the Workshop-Bakery deployment.
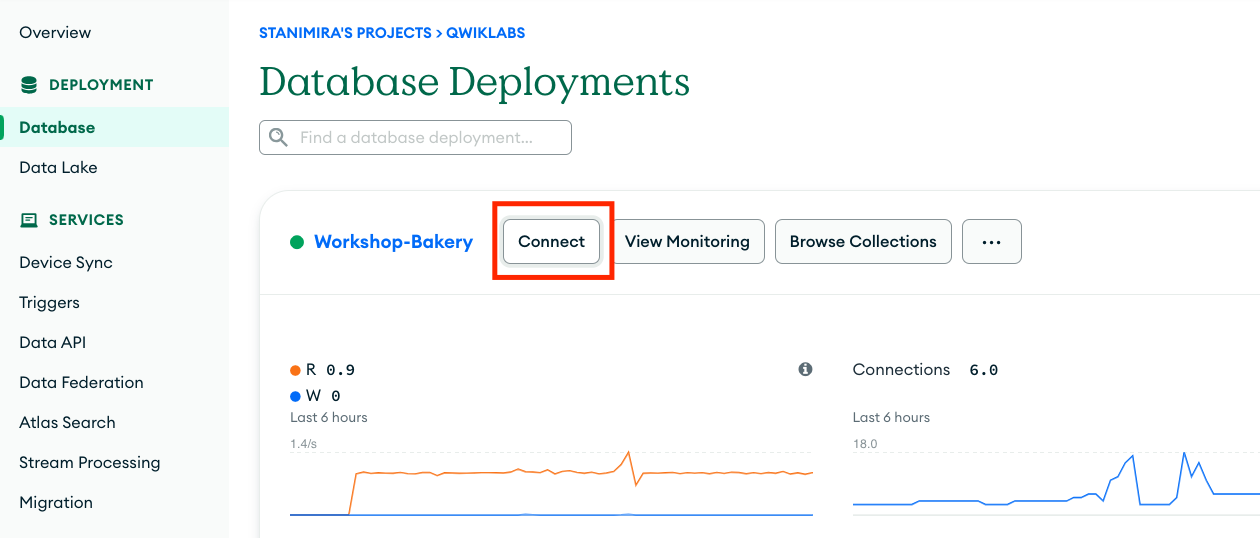
- Then, click on Drivers and copy the connection string.
Enable the Cloud Run and Cloud Build APIs
From Cloud Shell, enable the Cloud Run and Cloud Build APIs
If prompted, authorize Cloud Shell to make API calls.
Fetch the source code
To deploy your web application, you need its source code. Use git to fetch the public Github repository.
Run the following command in Cloud Shell:
Deploy the backend service
You'll deploy both services through the Cloud Code extension in Cloud Shell editor.
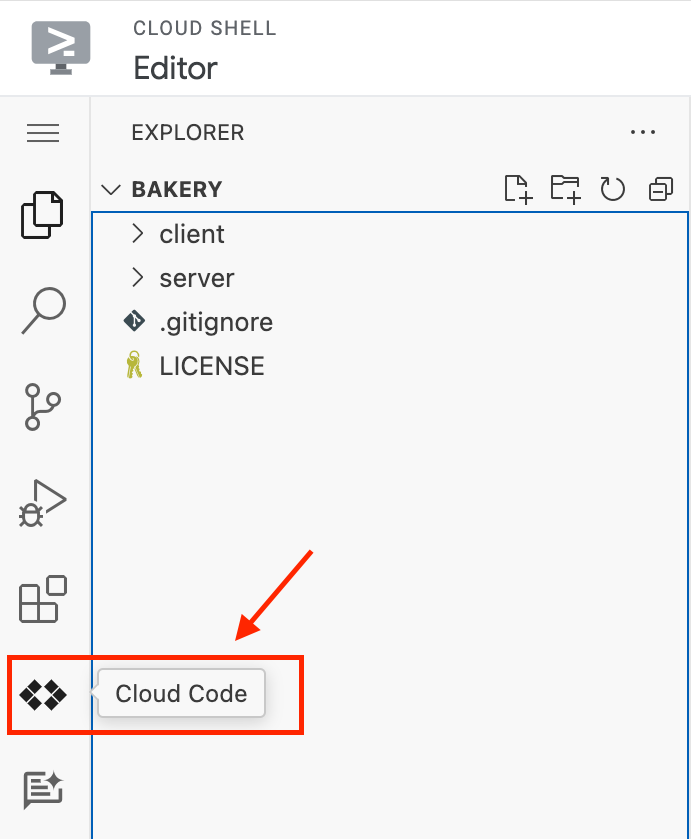
- In Cloud Shell, click Open Editor. If prompted, click Open in a new window. You should see your cloned project on the left. If you don't see it, expand the Explorer (the document icon on the side bar), click Open Folder and select the bakery folder from the dropdown.
- Select the Cloud Code extension from the left sidebar.
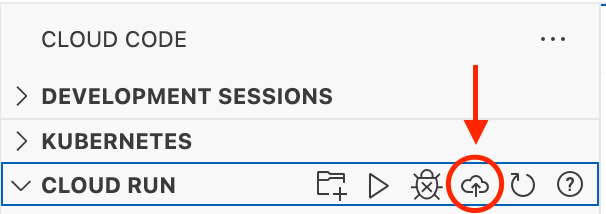
- Expand the Cloud Run section and click Select a Project the one corresponding to your lab project ID.
- Click the Deploy to Cloud Run icon.
-
Enter the following configuration to deploy the backend application:
-
Service Settings: Create a service
-
Service name: bakery-backend
-
Deployment platform: Cloud Run (fully managed)
-
Region:
-
Authentication: Allow unauthenticated invocations
-
Build environment: Local
-
Builder: Docker
-
Docker: server/Dockerfile — notice that there are two Docker files available. Make sure you select the one in the server directory!
-
Next, you need to specify the Atlas connection string for your deployment that you copied earlier. Under the Revision Settings section, click Show Advanced Settings. Open the Environment Variables tab and add the connection string of your Atlas deployment.
Notes:
-
Replace the placeholder with your connection string.
-
Replace the username and password placeholders with the credentials you created in the Security Quickstart step in Task 1 above.
-
Use a colon (:), as a delimiter between the name and the value of the variable.
-
Ensure that the connection string store in the variable 'ATLAS_URI:'.
-
Do NOT enclose the connection string with any quotes.
Click the Deploy button. Deploying the service can take a few minutes. Expand the process output by clicking on the Show Detailed Logs button.
When the deployment is complete, you will see the URL for your backend API. Copy it as you will need it to deploy the frontend service.
Deploy the frontend service
Next, you will deploy the Angular application. The client should be able to connect to the backend API using the URL of the service that you have just deployed.
- Open the bakery/client/src/environments/environment.prod.ts file and add the URL that copied as a value of apiURL.
-
Now you're ready to deploy the frontend service to Cloud Run. Open the Cloud Code extension again and click the Deploy to Cloud Run icon.
-
Enter the following configuration:
-
Service Settings: Create a service
-
Service name: bakery-frontend
-
Deployment platform: Cloud Run (fully managed)
-
Region:
-
Authentication: Allow unauthenticated invocations
-
Build environment: Local
-
Builder: Docker
-
Docker: client/Dockerfile — notice that there are two Docker files available. Make sure you select the one in the client directory!
-
Click the Deploy button and wait as your app is being deployed to the cloud.
-
When the deployment is complete, you will see the URL for your application. Click on it to see the bakery application displaying the list of the cakes from your Atlas database.
-
Open one of the two cake recipes and leave a comment. You will see that its sentiment, analyzed by the Natural Language API, is visible right next to the comment!

Congratulations!
You have provisioned your first MongoDB Atlas deployment, created a database and collections with data. You also learned how to access your data through a backend API and deploy services to Cloud Run.
Next Steps / Learn More
Be sure to check out MongoDB on the Google Cloud Marketplace!
Get free $500 credits for MongoDB on Google Cloud Marketplace - Applicable only for new customer.