

Before you begin
- Labs create a Google Cloud project and resources for a fixed time
- Labs have a time limit and no pause feature. If you end the lab, you'll have to restart from the beginning.
- On the top left of your screen, click Start lab to begin
Create a lake, zone, and asset in Dataplex
/ 25
Grant Dataplex Data Reader role on a Dataplex asset to another user
/ 25
Grant Dataplex Data Writer role on a Dataplex asset to another user
/ 25
Upload file to Cloud Storage bucket as a Dataplex Data Writer
/ 25
Dataplex is an intelligent data fabric that enables organizations to centrally discover, manage, monitor, and govern their data across data lakes, data warehouses, and data marts to power analytics at scale.
Dataplex provides a flexible security model that allows you to manage who can access and perform actions on Dataplex resources. Specifically, Dataplex security is implemented using different Dataplex IAM roles that allow users to administer Dataplex lakes, access data in the lake through the attached assets such as a Cloud Storage bucket or BigQuery dataset, or access metadata about the data connected to a lake.
In this lab, you learn how to implement security in Dataplex by logging in to a Google Cloud project as a Dataplex administrator, creating new Dataplex resources, and assigning and testing Dataplex IAM roles to other users. You conclude the lab by successfully uploading a new file to a Cloud Storage bucket as a user that has been granted the appropriate IAM role to modify that specific Dataplex asset.
After you start the lab, log in to the Google Cloud console as User 1 (
Read these instructions. Labs are timed and you cannot pause them. The timer, which starts when you click Start Lab, shows how long Google Cloud resources are made available to you.
This hands-on lab lets you do the lab activities in a real cloud environment, not in a simulation or demo environment. It does so by giving you new, temporary credentials you use to sign in and access Google Cloud for the duration of the lab.
To complete this lab, you need:
Click the Start Lab button. If you need to pay for the lab, a dialog opens for you to select your payment method. On the left is the Lab Details pane with the following:
Click Open Google Cloud console (or right-click and select Open Link in Incognito Window if you are running the Chrome browser).
The lab spins up resources, and then opens another tab that shows the Sign in page.
Tip: Arrange the tabs in separate windows, side-by-side.
If necessary, copy the Username below and paste it into the Sign in dialog.
You can also find the Username in the Lab Details pane.
Click Next.
Copy the Password below and paste it into the Welcome dialog.
You can also find the Password in the Lab Details pane.
Click Next.
Click through the subsequent pages:
After a few moments, the Google Cloud console opens in this tab.

In the Google Cloud Console, enter Cloud Dataplex API in the top search bar.
Click on the result for Cloud Dataplex API under Marketplace.
Click Enable if it isn't already enabled.
To apply and test user access to Dataplex resources, you first need to create some Dataplex resources.
In this task, you use the Google Cloud console to create a new Dataplex lake to store customer information, add a raw zone to the lake, and then attach a pre-created Cloud Storage bucket as a new asset in the zone.
To complete this task, be sure you are logged in as User 1 (
 ) > View All Products, navigate to Analytics > Dataplex Universal Catalog.
If prompted Welcome to the new Dataplex experience, click Close.
Under Manage lakes, click Manage.
Click Create lake.
Enter the required information to create a new lake:
| Property | Value |
|---|---|
| Display Name | Customer Info Lake |
| ID | Leave the default value. |
| Region |
Leave the other default values.
It can take up to 3 minutes for the lake to be created.
On the Manage tab, click on the name of your lake.
Click Add zone.
Enter the required information to create a new zone:
| Property | Value |
|---|---|
| Display Name | Customer Raw Zone |
| ID | Leave the default value. |
| Type | Raw zone |
| Data locations | Regional |
Leave the other default values.
For example, the option for Enable metadata discovery under Discovery settings is enabled by default and allows authorized users to discover the data in the zone.
It can take up to 2 minutes for the zone to be created.
On the Zones tab, click on the name of your zone.
On the Assets tab, click Add assets.
Click Add an asset.
Enter the required information to attach a new asset:
| Property | Value |
|---|---|
| Type | Storage bucket |
| Display Name | Customer Online Sessions |
| ID | Leave the default value. |
| Bucket name |
|
Leave the other default values.
While the Cloud Storage bucket does not contain any files, you can attach it to the zone now, and newly added files will automatically be integrated into the zone.
Click Done.
Click Continue.
For Discovery settings, select Inherit to inherit the Discovery settings from the zone level, and then click Continue.
Click Submit.
Click Check my progress to verify the objective.
Following the Google recommendation of least privilege, Dataplex allows Dataplex administrators to grant Dataplex IAM roles to users at the level of the project, lake, zone, and individual assets like a Cloud Storage bucket.
In this task, you use the Google Cloud console to assign the Dataplex Data Reader role to another user, so that they can have read access to the Cloud Storage bucket that is managed as a Dataplex resource.
To complete this task, remain logged in as User 1 (
In the Google Cloud Console, in the Navigation menu (
In the Dataplex resources menu, expand the arrow next to the project ID (
Expand the arrow next to the name of your lake.
Expand the arrow next to the name of your zone.
Click on the asset name (Customer Online Sessions).
Click Grant access.
For New principals, enter the email for User 2:
For Select a role, select Dataplex Data Reader under Cloud Dataplex.
Click Save.
Click Check my progress to verify the objective.
Log out of the project as User 1. In the next task, you log in to the project as User 2.
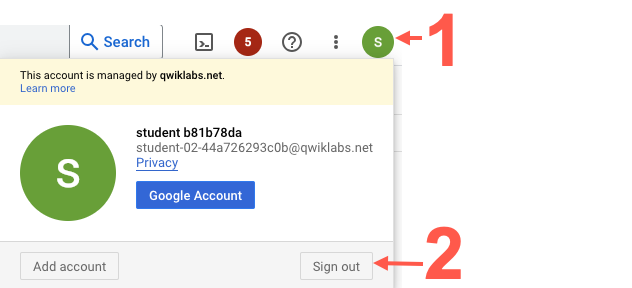
Click on the profile icon on the top right of the Google Cloud console.
Click Sign out.
If asked to confirm, click Leave.
Users who have been granted only the Dataplex Data Reader role on an asset have access to view the Dataplex asset but cannot modify it. For example, users with only the Dataplex Data Reader role on a Cloud Storage bucket cannot add new files to the bucket that is managed as a Dataplex asset.
In this task, you use the Google Cloud console to test access for User 2 to Dataplex resources by attempting to add a new file to the pre-created Cloud Storage bucket.
To complete this task, log in to the project as User 2 (
In the Google Cloud Console, in the Navigation menu (
Click on the bucket that has been precreated for you:
Click Upload files.
Select any file of your choice.
If you need a sample file, you can download the following test CSV file, and use it as the upload file.
Notice that you receive an error, and no files are uploaded to the bucket.
User 2 is denied access to upload a new file to the Cloud Storage bucket because the user has only been granted read access to the Dataplex asset.
Log out of the project as User 2. In the next task, you log in to the project as User 1.
Click on the profile icon on the top right of the Google Cloud console.
Click Sign out.
If asked to confirm, click Leave.
In this task, you use the Google Cloud console to assign the Dataplex Writer Role on the bucket to User 2, so that they can modify the bucket by adding new files.
To complete this task, log in to the project as User 1 (
In the Google Cloud Console, in the Navigation menu (
In the Dataplex resources menu, expand the arrow next to the project ID (
Expand the arrow next to the name of your lake.
Expand the arrow next to the name of your zone.
Click on the asset name (Customer Online Sessions).
Click on Edit principal (pencil icon) next to the email for User 2:
For Role, select Dataplex Data Writer under Cloud Dataplex.
Click Save.
Click Check my progress to verify the objective.
Log out of the project as User 1. In the next task, you log in to the project as User 2.
Click on the profile icon on the top right of the Google Cloud console.
Click Sign out.
If asked to confirm, click Leave.
Users who have been granted the Dataplex Writer Reader role on an asset have access to modify the asset, including the ability to add new files to a Cloud Storage bucket that is managed as a Dataplex asset.
In this task, you use the Google Cloud console to test access again for User 2 to Dataplex resources by successfully adding a new file to the pre-created Cloud Storage bucket.
To complete this task, log in to the project as User 2 (
In the Google Cloud Console, in the Navigation menu (
Click on the bucket that has been precreated for you:
Click Upload files.
Select any file of your choice.
If you need a sample file, you can download the following test CSV file, and use it as the upload file.
User 2 can successfully upload a new file to the Cloud Storage bucket as a Dataplex Data Writer.
Click Check my progress to verify the objective.
You implemented security in Dataplex by assigning and testing the appropriate Dataplex IAM role to another user, so that the user can successfully modify the files in a Cloud Storage bucket that is managed as a Dataplex asset.
...helps you make the most of Google Cloud technologies. Our classes include technical skills and best practices to help you get up to speed quickly and continue your learning journey. We offer fundamental to advanced level training, with on-demand, live, and virtual options to suit your busy schedule. Certifications help you validate and prove your skill and expertise in Google Cloud technologies.
Manual Last Updated August 21, 2025
Lab Last Tested August 21, 2025
Copyright 2025 Google LLC. All rights reserved. Google and the Google logo are trademarks of Google LLC. All other company and product names may be trademarks of the respective companies with which they are associated.


This content is not currently available
We will notify you via email when it becomes available

Great!
We will contact you via email if it becomes available

One lab at a time
Confirm to end all existing labs and start this one