GSP1128

Overview
In this lab, you will go through a reference implementation for MPC-compliant blockchain signing using Confidential Space. Let’s imagine Company A, which wants to transfer digital assets to Company B. Since they are leveraging an MPC-compliant model, instead of individual private keys, they use distributed key shares where key shareholders (Alice and Bob) collaborate to sign a transaction. This gives Company A the benefits of simplifying the user experience, and creating operational efficiencies, while retaining control over their private keys.
To describe the critical components that make this possible, you will walk through the technical setup, and outline the approval and signing process that triggers the transfer of digital assets from Company A to Company B. Please note that Bob and Alice work for Company A, and are required to approve the transaction.
This reference implementation covers signature operation, but does not cover all the aspect of MPC key management. For example, key generation will not be covered in this lab. Also, alternatives and complementary approaches exist – including using non-Google Cloud services for producing co-signatures, or having co-signers take turns to build the blockchain signature in their own environments (which is a more decentralized architecture).
In this lab, you will build the foundation for this interaction with a simple workload that signs an Ethereum transaction in Confidential Space based on co-signer key materials. First, you configure the necessary Cloud resources. Then, you run the workload in Confidential Space.
Objectives
In this lab, you will learn how to perform the following tasks:
- Learn about Confidential Space
- Create an Ethereum private test network
- Create a Confidential Space VM
- Interact with Ethereum from the Confidential Space VM
- Create and manage Workload Identity Pools
- Sign and submit an Ethereum transaction using Confidential Space
Setup and requirements
Before you click the Start Lab button
Read these instructions. Labs are timed and you cannot pause them. The timer, which starts when you click Start Lab, shows how long Google Cloud resources are made available to you.
This hands-on lab lets you do the lab activities in a real cloud environment, not in a simulation or demo environment. It does so by giving you new, temporary credentials you use to sign in and access Google Cloud for the duration of the lab.
To complete this lab, you need:
- Access to a standard internet browser (Chrome browser recommended).
Note: Use an Incognito (recommended) or private browser window to run this lab. This prevents conflicts between your personal account and the student account, which may cause extra charges incurred to your personal account.
- Time to complete the lab—remember, once you start, you cannot pause a lab.
Note: Use only the student account for this lab. If you use a different Google Cloud account, you may incur charges to that account.
How to start your lab and sign in to the Google Cloud console
-
Click the Start Lab button. If you need to pay for the lab, a dialog opens for you to select your payment method.
On the left is the Lab Details pane with the following:
- The Open Google Cloud console button
- Time remaining
- The temporary credentials that you must use for this lab
- Other information, if needed, to step through this lab
-
Click Open Google Cloud console (or right-click and select Open Link in Incognito Window if you are running the Chrome browser).
The lab spins up resources, and then opens another tab that shows the Sign in page.
Tip: Arrange the tabs in separate windows, side-by-side.
Note: If you see the Choose an account dialog, click Use Another Account.
-
If necessary, copy the Username below and paste it into the Sign in dialog.
{{{user_0.username | "Username"}}}
You can also find the Username in the Lab Details pane.
-
Click Next.
-
Copy the Password below and paste it into the Welcome dialog.
{{{user_0.password | "Password"}}}
You can also find the Password in the Lab Details pane.
-
Click Next.
Important: You must use the credentials the lab provides you. Do not use your Google Cloud account credentials.
Note: Using your own Google Cloud account for this lab may incur extra charges.
-
Click through the subsequent pages:
- Accept the terms and conditions.
- Do not add recovery options or two-factor authentication (because this is a temporary account).
- Do not sign up for free trials.
After a few moments, the Google Cloud console opens in this tab.
Note: To access Google Cloud products and services, click the Navigation menu or type the service or product name in the Search field.

Activate Cloud Shell
Cloud Shell is a virtual machine that is loaded with development tools. It offers a persistent 5GB home directory and runs on the Google Cloud. Cloud Shell provides command-line access to your Google Cloud resources.
-
Click Activate Cloud Shell  at the top of the Google Cloud console.
-
Click through the following windows:
- Continue through the Cloud Shell information window.
- Authorize Cloud Shell to use your credentials to make Google Cloud API calls.
When you are connected, you are already authenticated, and the project is set to your Project_ID, . The output contains a line that declares the Project_ID for this session:
Your Cloud Platform project in this session is set to {{{project_0.project_id | "PROJECT_ID"}}}
gcloud is the command-line tool for Google Cloud. It comes pre-installed on Cloud Shell and supports tab-completion.
- (Optional) You can list the active account name with this command:
gcloud auth list
- Click Authorize.
Output:
ACTIVE: *
ACCOUNT: {{{user_0.username | "ACCOUNT"}}}
To set the active account, run:
$ gcloud config set account `ACCOUNT`
- (Optional) You can list the project ID with this command:
gcloud config list project
Output:
[core]
project = {{{project_0.project_id | "PROJECT_ID"}}}
Note: For full documentation of gcloud, in Google Cloud, refer to the gcloud CLI overview guide.
Task 1. Key Generation and Encryption
- Open Cloud Shell and run the following command to set the project ID:
export MPC_PROJECT_ID=$(gcloud config get-value core/project)
You can check this was properly set by running:
echo $MPC_PROJECT_ID
You'll be using this variable throughout the remainder of the lab.
- Run the following command to enable the APIs that will be used in the lab:
gcloud services enable cloudkms.googleapis.com compute.googleapis.com confidentialcomputing.googleapis.com iamcredentials.googleapis.com artifactregistry.googleapis.com
Create the encryption keyring in KMS for the private key
In this section you will create the encryption key which will be used to encrypt the private key shares.
Note: For this lab, we are showing MPC-compliant signature operation, but we are over-simplifying the key generation step (and not doing distributed key share generation in multiple locations). We do not expect organizations to do this for real production applications.
- Create the key ring. After running the below command, you might need to enter
y to enable the API.
gcloud kms keyrings create mpc-keys --location=global
- Create the KMS key.
gcloud kms keys create mpc-key --location=global \
--keyring=mpc-keys --purpose=encryption --protection-level=hsm
- Grant your user account access to the key to encrypt the keys.
gcloud kms keys add-iam-policy-binding \
projects/$MPC_PROJECT_ID/locations/global/keyRings/mpc-keys/cryptoKeys/mpc-key \
--member="user:$(gcloud config get-value account)" \
--role='roles/cloudkms.cryptoKeyEncrypter'
Create the Ethereum private key
For this lab, you'll be using this private key: 0000000000000000000000000000000000000000000000000000000000000001. In a production scenario, you'd generate your own private key. If you'd like to use a different private key for the lab be sure to include it in the CLI flag below when running the Ganache VM. You are now going to split your private key into two shares and encrypt each.
Note: In a production scenario, keys should never be stored in plaintext files. Instead, the private key can be generated outside of Google Cloud (or skipped entirely and replaced with custom MPC key shard creation) and then encrypted so that no one sees or has access to the private key or the key shares. For the purposes of this lab we'll be using the gcloud CLI.
- Add your private key to a gcloud file for encryption:
echo -n "00000000000000000000000000000000" >> alice-key-share
- Then run the command to store Bob's private key share.
echo -n "00000000000000000000000000000001" >> bob-key-share
Encrypt the Ethereum private key shards using KMS
- Encrypt Alice's private key share.
gcloud kms encrypt \
--key mpc-key \
--keyring mpc-keys \
--location global \
--plaintext-file alice-key-share \
--ciphertext-file alice-encrypted-key-share
- Encrypt Bob's private key share.
gcloud kms encrypt \
--key mpc-key \
--keyring mpc-keys \
--location global \
--plaintext-file bob-key-share \
--ciphertext-file bob-encrypted-key-share
Create the bucket to store the encrypted keys
The mpc-encrypted-keys bucket will store the encrypted keys of Alice and Bob. In a production application, these keys could be held by Alice and Bob and then handed over when approval by each party is granted. They could also be separated out into different buckets on different projects.
- Create the
mpc-encrypted-keys bucket.
gcloud storage buckets create gs://$MPC_PROJECT_ID-mpc-encrypted-keys --location={{{ project_0.default_region | REGION }}}
- Upload Alice's and Bob's encrypted keys into the bucket. By doing this, we're approving the transaction and granting the Confidential Space VM access to the encrypted key.
gcloud storage cp alice-encrypted-key-share gs://$MPC_PROJECT_ID-mpc-encrypted-keys/
gcloud storage cp bob-encrypted-key-share gs://$MPC_PROJECT_ID-mpc-encrypted-keys/
Now that the keys have been created and encrypted, you can move on to the next step to create the MPC application.
Click Check my progress to verify the objective.
Key Generation and Encryption
Task 2. Service Account and Workload Identity Pool
Create the MPC Service Account
- Create the trusted-mpc-account service account.
gcloud iam service-accounts create trusted-mpc-account
- Allow the MPC service account access to decrypt the key shards.
gcloud kms keys add-iam-policy-binding mpc-key \
--keyring='mpc-keys' --location='global' \
--member="serviceAccount:trusted-mpc-account@$MPC_PROJECT_ID.iam.gserviceaccount.com" \
--role='roles/cloudkms.cryptoKeyDecrypter'
Create a Workload Identity Pool
We want to authorize workloads to access the encrypted keys based on
attributes of the following resources.
-
What: Code that is verified
-
Where: An environment that is secure
-
Who: An operator that is trusted
We use Workload identity federation to enforce an access policy based on these requirements.
Workload identity federation allows you to specify attribute conditions.
These conditions restrict which identities can authenticate with the workload identity pool (WIP).
You can add the Attestation Verifier Service to the WIP as a workload identity pool provider to present measurements and enforce the policy.
To create the WIP, complete the following steps.
CLI
- Create a WIP.
gcloud iam workload-identity-pools create trusted-workload-pool --location="global"
You will now create a new OIDC workload identity pool provider. The specified --attribute-condition authorizes access to the mpc-workloads container. It requires:
-
What: Latest
initial-workload-container uploaded to the mpc-workloads repository.
-
Where: Confidential Space trusted execution environment, version 0.1 or later.
-
Who: MPC
trusted-mpc service account.
Note: change int(assertion.swversion) >= 1 to int(assertion.swversion) ==0 if you choose confidential-space-debug image when creating the instance in the later step. See here for the full list of confidential vm attribute conditions.
- Create the new OIDC workload identity pool provider.
gcloud iam workload-identity-pools providers create-oidc attestation-verifier \
--location="global" \
--workload-identity-pool="trusted-workload-pool" \
--issuer-uri="https://confidentialcomputing.googleapis.com/" \
--allowed-audiences="https://sts.googleapis.com" \
--attribute-mapping="google.subject='assertion.sub'" \
--attribute-condition="assertion.swname == 'CONFIDENTIAL_SPACE' &&
'STABLE' in assertion.submods.confidential_space.support_attributes &&
assertion.submods.container.image_reference ==
'{{{ project_0.default_region | REGION }}}-docker.pkg.dev/$MPC_PROJECT_ID/mpc-workloads/initial-workload-container:latest'
&& 'run-confidential-vm@$MPC_PROJECT_ID.iam.gserviceaccount.com' in
assertion.google_service_accounts"
- Grant the
workloadIdentityUser role on the trusted-mpc-account service account to the trusted-workload-pool WIP. This allows the WIP to impersonate the service account.
gcloud iam service-accounts add-iam-policy-binding \
trusted-mpc-account@$MPC_PROJECT_ID.iam.gserviceaccount.com \
--role=roles/iam.workloadIdentityUser \
--member="principalSet://iam.googleapis.com/projects/$(gcloud projects describe $MPC_PROJECT_ID --format="value(projectNumber)")/locations/global/workloadIdentityPools/trusted-workload-pool/*"
Create run-confidential-vm service account
Create the run-confidential-vm service account.
CLI
- Create the run-confidential-vm service account.
gcloud iam service-accounts create run-confidential-vm
- Grant the Service Account User role on the run-confidential-vm service account to your user account. This allows your user account to impersonate the service account.
gcloud iam service-accounts add-iam-policy-binding \
run-confidential-vm@$MPC_PROJECT_ID.iam.gserviceaccount.com \
--member="user:$(gcloud config get-value account)" \
--role='roles/iam.serviceAccountUser'
- (Optional) Grant the service account the Log Writer permission. This allows the Confidential Space environment to write logs to Cloud Logging in addition to the Serial Console, so you can review logs after the VM is terminated (Requires
Security Admin permission).
gcloud projects add-iam-policy-binding $MPC_PROJECT_ID \
--member=serviceAccount:run-confidential-vm@$MPC_PROJECT_ID.iam.gserviceaccount.com \
--role=roles/logging.logWriter
Click Check my progress to verify the objective.
Service Account and Workload Identity Pool
Task 3. Create the Blockchain Node and Results Bucket
Ganache Ethereum Node
- Create the Ethereum Ganache instance and take note of the IP address. After running the below command, you might need to enter
y to enable the API.
gcloud compute instances create-with-container mpc-lab-ethereum-node \
--zone={{{ project_0.default_zone | ZONE }}} \
--tags=http-server \
--shielded-secure-boot \
--shielded-vtpm \
--shielded-integrity-monitoring \
--container-image=docker.io/trufflesuite/ganache:v7.7.3 \
--container-arg=--wallet.accounts=\"0x0000000000000000000000000000000000000000000000000000000000000001,0x21E19E0C9BAB2400000\" \
--container-arg=--port=80 \
--machine-type=e2-medium
Create a bucket for results
Create the $MPC_PROJECT_ID-mpc-results-storage bucket. Then grant the
run-confidential-vm service account permission to create files in the bucket,
so it can store the workload results there.
CLI
- Create the
mpc-results-storage bucket.
gcloud storage buckets create gs://$MPC_PROJECT_ID-mpc-results-storage --location={{{ project_0.default_region | REGION }}}
- Grant the Storage Object Creator role on the
/$MPC_PROJECT_ID-mpc-results-storage bucket to the run-confidential-vmservice account. This permits the service account to store query results to the bucket.
gsutil iam ch \
serviceAccount:run-confidential-vm@$MPC_PROJECT_ID.iam.gserviceaccount.com:objectCreator \
gs://$MPC_PROJECT_ID-mpc-results-storage
- Grant the Storage Object Viewer role on the
/$MPC_PROJECT_ID-mpc-encrypted-keys bucket to the trusted-mpc-account service account. This permits the service account to view the encrypted keys that were added by Alice and Bob.
gsutil iam ch \
serviceAccount:trusted-mpc-account@$MPC_PROJECT_ID.iam.gserviceaccount.com:objectViewer \
gs://$MPC_PROJECT_ID-mpc-encrypted-keys
Click Check my progress to verify the objective.
Create the Blockchain Node and Results Bucket
Task 4. Create the MPC Instance
Create the files in the editor
- In Cloud Shell, click the
 button to launch the Cloud Shell Editor.
You'll then find yourself in an IDE environment similar to Visual Studio Code, in which you can create projects, edit source code, run your programs, etc. If your screen is too cramped, you can expand or shrink the dividing line between the console and your edit/terminal window by dragging the horizontal bar between those two regions.
You can switch back and forth between the Editor and the Terminal by clicking the Open Editor and Open Terminal buttons, respectively. Try switching back and forth between these two environments now.
- Start by creating a folder in which to store your work for this lab, by selecting File > New Folder, enter
mpc-ethereum-demo, and click OK. All of the files you create in this lab, and all of the work you do in Cloud Shell, will take place in this folder.
package.json
-
Now create a package.json file. In the Cloud Editor window, click the File > New File menu to create a new file. When prompted for the new file's name, enter package.json and press the OK button. Make sure the new file ends up in the mpc-ethereum-demo project folder.
-
Place the following code into the package.json file. This will tell our image what packages should be used for the mpc application. In this case, we're using the @google-cloud/kms, @google-cloud/storage, ethers, and fast-crc32c libraries.
{
"name": "gcp-mpc-ethereum-demo",
"version": "1.0.0",
"description": "Demo for GCP multi-party-compute on Confidential Space",
"main": "index.js",
"scripts": {
"start": "node index.js"
},
"type": "module",
"dependencies": {
"@google-cloud/kms": "^3.2.0",
"@google-cloud/storage": "^6.9.2",
"ethers": "^5.7.2",
"fast-crc32c": "^2.0.0"
},
"author": "",
"license": "ISC"
}
index.js
- Next, create a
index.js file and paste the following code into the file. This is our entry file that specifies what commands should be run when the image starts up. We've also included a sample unsigned transaction. This transaction would normally be coming from an untrusted application that asks users for their signature. This index.js file also imports functions from mpc.js, which we'll be creating next.
import {signTransaction, submitTransaction, uploadFromMemory} from './mpc.js';
const signAndSubmitTransaction = async () => {
try {
// Create the unsigned transaction object
const unsignedTransaction = {
nonce: 0,
gasLimit: 21000,
gasPrice: '0x09184e72a000',
to: '0x0000000000000000000000000000000000000000',
value: '0x00',
data: '0x',
};
// Sign the transaction
const signedTransaction = await signTransaction(unsignedTransaction);
// Submit the transaction to Ganache
const transaction = await submitTransaction(signedTransaction);
// Write the transaction receipt
uploadFromMemory(transaction);
return transaction;
} catch (e) {
console.log(e);
uploadFromMemory(e);
}
};
await signAndSubmitTransaction();
mpc.js
- Create the
mpc.js file and paste the following code into the file. This is where the MPC signing will occur. We'll be importing functions from kms-decrypt.js and credential-config.js, which we'll be creating next.
import {ethers} from 'ethers';
import {decryptSymmetric} from './kms-decrypt.js';
import {Storage} from '@google-cloud/storage';
import {credentialConfig} from './credential-config.js';
const providers = ethers.providers;
const Wallet = ethers.Wallet;
// The ID of the GCS bucket holding the encrypted keys
const bucketName = process.env.KEY_BUCKET;
// Name of the encrypted key files.
const encryptedKeyFile1 = 'alice-encrypted-key-share';
const encryptedKeyFile2 = 'bob-encrypted-key-share';
// Create a new storage client with the credentials
const storageWithCreds = new Storage({
credentials: credentialConfig,
});
// Create a new storage client without the credentials
const storage = new Storage();
const downloadIntoMemory = async (keyFile) => {
// Downloads the file into a buffer in memory.
const contents = await storageWithCreds.bucket(bucketName).file(keyFile).download();
return contents;
};
const provider = new providers.JsonRpcProvider(`http://${process.env.NODE_URL}:80`);
export const signTransaction = async (unsignedTransaction) => {
/* Check if Alice and Bob have both approved the transaction
For this example, we're checking if their encrypted keys are available. */
const encryptedKey1 = await downloadIntoMemory(encryptedKeyFile1).catch(console.error);
const encryptedKey2 = await downloadIntoMemory(encryptedKeyFile2).catch(console.error);
// For each key share, make a call to KMS to decrypt the key
const privateKeyshare1 = await decryptSymmetric(encryptedKey1[0]);
const privateKeyshare2 = await decryptSymmetric(encryptedKey2[0]);
/* Perform the MPC calculations
In this example, we're combining the private key shares
Alternatively, you could import your mpc calculations here */
const wallet = new Wallet(privateKeyshare1 + privateKeyshare2);
// Sign the transaction
const signedTransaction = await wallet.signTransaction(unsignedTransaction);
return signedTransaction;
};
export const submitTransaction = async (signedTransaction) => {
// This can now be sent to Ganache
const hash = await provider.sendTransaction(signedTransaction);
return hash;
};
export const uploadFromMemory = async (contents) => {
// Upload the results to the bucket without service account impersonation
await storage.bucket(process.env.RESULTS_BUCKET)
.file('transaction_receipt_' + Date.now())
.save(JSON.stringify(contents));
};
kms-decrypt.js
- Create the
kms-decrypt.js file and paste the following code into the file. This is where the decryption of the encrypted key shares will occur. We'll be importing functions from credential-config.js, which we'll be creating next.
import {KeyManagementServiceClient} from '@google-cloud/kms';
import {credentialConfig} from './credential-config.js';
import crc32c from 'fast-crc32c';
const projectId = process.env.MPC_PROJECT_ID;
const locationId = 'global';
const keyRingId = 'mpc-keys';
const keyId = 'mpc-key';
// Instantiates a client
const client = new KeyManagementServiceClient({
credentials: credentialConfig,
});
// Build the key name
const keyName = client.cryptoKeyPath(projectId, locationId, keyRingId, keyId);
export const decryptSymmetric = async (ciphertext) => {
const ciphertextCrc32c = crc32c.calculate(ciphertext);
const [decryptResponse] = await client.decrypt({
name: keyName,
ciphertext,
ciphertextCrc32c: {
value: ciphertextCrc32c,
},
});
// Optional, but recommended: perform integrity verification on decryptResponse.
// For more details on ensuring E2E in-transit integrity to and from Cloud KMS visit:
// https://cloud.google.com/kms/docs/data-integrity-guidelines
if (
crc32c.calculate(decryptResponse.plaintext) !==
Number(decryptResponse.plaintextCrc32c.value)
) {
throw new Error('Decrypt: response corrupted in-transit');
}
const plaintext = decryptResponse.plaintext.toString();
return plaintext;
};
credential-config.js
- Create the
credential-config.js file and paste the following code into the file. This is where the workload identity pool paths are stored and the service account impersonation will occur. We'll be importing functions from credential-config.js.
export const credentialConfig = {
type: 'external_account',
audience: `//iam.googleapis.com/projects/${process.env.MPC_PROJECT_NUMBER}/locations/global/workloadIdentityPools/trusted-workload-pool/providers/attestation-verifier`,
subject_token_type: 'urn:ietf:params:oauth:token-type:jwt',
token_url: 'https://sts.googleapis.com/v1/token',
credential_source: {
file: '/run/container_launcher/attestation_verifier_claims_token',
},
service_account_impersonation_url: `https://iamcredentials.googleapis.com/v1/projects/-/serviceAccounts/trusted-mpc-account@${process.env.MPC_PROJECT_ID}.iam.gserviceaccount.com:generateAccessToken`,
};
Dockerfile
- Lastly, you'll create your Dockerfile. Create the
Dockerfile file and paste the following code into the file.
# pull official base image
FROM node:16.18.0
ENV NODE_ENV=production
WORKDIR /app
COPY ["package.json", "package-lock.json*", "./"]
RUN npm install --production
COPY . .
LABEL "tee.launch_policy.allow_cmd_override"="true"
LABEL "tee.launch_policy.allow_env_override"="NODE_URL,RESULTS_BUCKET,KEY_BUCKET,MPC_PROJECT_NUMBER,MPC_PROJECT_ID"
CMD [ "node", "index.js" ]
Note: LABEL tee.launch_policy.allow_cmd_override"="true" in the Dockerfile is a launch policy set by the image author. It allows the operator to override the CMD when executing the workflow later. By default, allow_cmd_override is set to false. LABEL "tee.launch_policy.allow_env_override"tells Confidential Space which variables are allowed in the image.
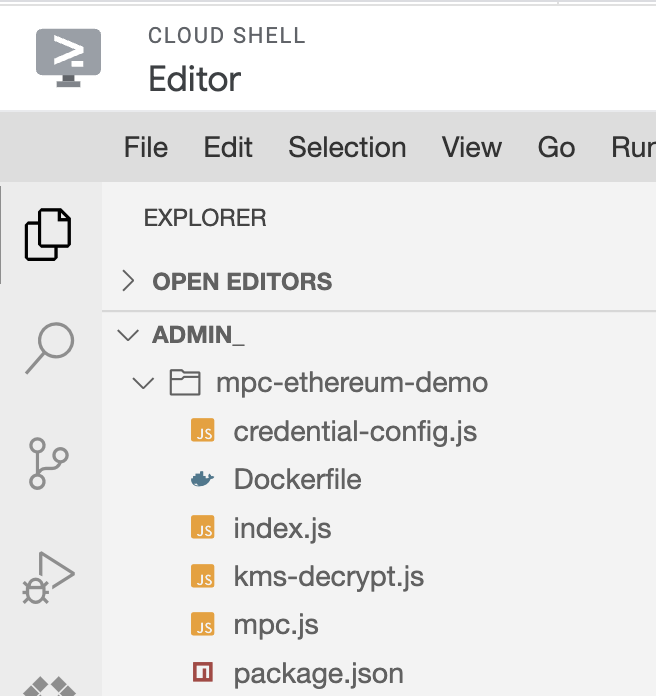
Once all the files are created, it should look like:
Create the repository
- Click Open Terminal to re-open the Cloud Shell terminal. Run the following command to create the Artifact Registry docker repository.
gcloud artifacts repositories create mpc-workloads \
--repository-format=docker --location={{{ project_0.default_region | REGION }}}
- Build and publish the Docker container.
gcloud auth configure-docker {{{ project_0.default_region | REGION }}}-docker.pkg.dev
docker build -t {{{ project_0.default_region | REGION }}}-docker.pkg.dev/$MPC_PROJECT_ID/mpc-workloads/initial-workload-container:latest mpc-ethereum-demo
docker push {{{ project_0.default_region | REGION }}}-docker.pkg.dev/$MPC_PROJECT_ID/mpc-workloads/initial-workload-container:latest
You might need to hit Y to confirm the config file.
Note: Confidential Space can use any remote repository where a Confidential VM can be granted access.
- Grant the service account that's going to run the workload the Artifact Registry Reader (
roles/artifactregistry.reader) role so it can read from the repository:
gcloud artifacts repositories add-iam-policy-binding mpc-workloads \
--location={{{ project_0.default_region | REGION }}} \
--member=serviceAccount:run-confidential-vm@$MPC_PROJECT_ID.iam.gserviceaccount.com \
--role=roles/artifactregistry.reader
- Grant the workloadUser role to the service account
gcloud projects add-iam-policy-binding $MPC_PROJECT_ID \
--member=serviceAccount:run-confidential-vm@$MPC_PROJECT_ID.iam.gserviceaccount.com \
--role=roles/confidentialcomputing.workloadUser
Click Check my progress to verify the objective.
Create the MPC Instance
Task 5. Create the MPC Operator Confidential Space Instance
In this section, you will create the Confidential VM instance.
The following variables have been added to the image:
-
NODE_URL: the URL of the Ethereum node that will process the signed transaction.
-
RESULTS_BUCKET: the bucket that stores the mpc transaction result.
-
KEY_BUCKET: the bucket that stores the mpc encrypted keys.
-
MPC_PROJECT_NUMBER: the project number, used for the credential config file.
-
MPC_PROJECT_ID: the project id, used for the credential config file.
- Run the following command to create the Confidential VM instance.
gcloud compute instances create mpc-cvm --confidential-compute \
--shielded-secure-boot \
--maintenance-policy=TERMINATE --scopes=cloud-platform --zone={{{ project_0.default_zone | ZONE }}} \
--image-project=confidential-space-images \
--image-family=confidential-space \
--service-account=run-confidential-vm@$MPC_PROJECT_ID.iam.gserviceaccount.com \
--metadata ^~^tee-image-reference={{{ project_0.default_region | REGION }}}-docker.pkg.dev/$MPC_PROJECT_ID/mpc-workloads/initial-workload-container:latest~tee-restart-policy=Never~tee-env-NODE_URL=$(gcloud compute instances describe mpc-lab-ethereum-node --format='get(networkInterfaces[0].networkIP)' --zone={{{ project_0.default_zone | ZONE }}})~tee-env-RESULTS_BUCKET=$MPC_PROJECT_ID-mpc-results-storage~tee-env-KEY_BUCKET=$MPC_PROJECT_ID-mpc-encrypted-keys~tee-env-MPC_PROJECT_ID=$MPC_PROJECT_ID~tee-env-MPC_PROJECT_NUMBER=$(gcloud projects describe $MPC_PROJECT_ID --format="value(projectNumber)")
Check the Cloud Storage Results
You can view the transaction receipt in Cloud Storage. It might take a few minutes for Confidential Space to boot and for results to appear. You'll know the container is done when the VM is in the stopped state.
- Go to the Cloud Storage Browser page.
- Click
$MPC_PROJECT_ID-mpc-results-storage.
- Click on the
transaction_receipt file.
- Click Download to download and view the transaction response.
Note: the results should appear in the bucket within a few minutes. If results aren't appearing, you can go to the mpc-cvm in compute engine and click on "Serial port 1 (console)" to view the logs.
Check the Ganache Blockchain Transaction
You can also view the transaction in the blockchain log.
- Go to the Compute Engine page.
- Click on the
mpc-lab-ethereum-node VM.
- Click
SSH to open the SSH-in-browser window.
- In the SSH window, enter
sudo docker ps to see the running Ganache container.
- Find the container ID for
trufflesuite/ganache:v7.7.3
- Enter
sudo docker logs CONTAINER_ID replacing CONTAINER_ID with the ID for trufflesuite/ganache:v7.7.3.
- View the logs for Ganache and confirm that there is a transaction listed in the logs.
Click Check my progress to verify the objective.
Create the MPC Operator Confidential Space Instance
Congratulations!
You created a confidential space VM and signed a blockchain transaction using multi-party computation! You can now use this same process to sign transactions for other blockchain applications.
Next steps/Learn more
Google Cloud training and certification
...helps you make the most of Google Cloud technologies. Our classes include technical skills and best practices to help you get up to speed quickly and continue your learning journey. We offer fundamental to advanced level training, with on-demand, live, and virtual options to suit your busy schedule. Certifications help you validate and prove your skill and expertise in Google Cloud technologies.
Manual Last Updated August 20, 2025
Lab Last Tested August 20, 2025
Copyright 2025 Google LLC. All rights reserved. Google and the Google logo are trademarks of Google LLC. All other company and product names may be trademarks of the respective companies with which they are associated.


