GSP1052

Overview
In today's competitive environment, organizations need to quickly and easily make decisions based on real-time data. Datastream for BigQuery features seamless replication from operational database sources such as AlloyDB, MySQL, PostgreSQL, and Oracle, directly into BigQuery, Google Cloud's serverless data warehouse. With a serverless, auto-scaling architecture, Datastream allows you to easily set up an ELT (Extract, Load, Transform) pipeline for low-latency data replication enabling real-time insights.
In this hands-on lab you'll deploy Cloud SQL for PostgreSQL database and import a sample data set using the gcloud command line. In the UI you will create and start a Datastream stream and replicate data into BigQuery.
Although you can easily copy and paste commands from the lab to the appropriate place, students should type the commands themselves to reinforce their understanding of the core concepts
What you'll do
- Prepare a Cloud SQL for PostgreSQL instance using the Google Cloud Console
- Import data into the Cloud SQL instance
- Create a Datastream connection profile for the PostgreSQL database
- Create a Datastream connection profile for the BigQuery destination
- Create a Datastream stream and start replication
- Validate that the existing data and changes are replicated correctly into BigQuery
Prerequisites
- Familiarity with standard Linux environments
- Familiarity with change data capture (CDC) concepts
Setup and requirements
Before you click the Start Lab button
Read these instructions. Labs are timed and you cannot pause them. The timer, which starts when you click Start Lab, shows how long Google Cloud resources are made available to you.
This hands-on lab lets you do the lab activities in a real cloud environment, not in a simulation or demo environment. It does so by giving you new, temporary credentials you use to sign in and access Google Cloud for the duration of the lab.
To complete this lab, you need:
- Access to a standard internet browser (Chrome browser recommended).
Note: Use an Incognito (recommended) or private browser window to run this lab. This prevents conflicts between your personal account and the student account, which may cause extra charges incurred to your personal account.
- Time to complete the lab—remember, once you start, you cannot pause a lab.
Note: Use only the student account for this lab. If you use a different Google Cloud account, you may incur charges to that account.
How to start your lab and sign in to the Google Cloud console
-
Click the Start Lab button. If you need to pay for the lab, a dialog opens for you to select your payment method.
On the left is the Lab Details pane with the following:
- The Open Google Cloud console button
- Time remaining
- The temporary credentials that you must use for this lab
- Other information, if needed, to step through this lab
-
Click Open Google Cloud console (or right-click and select Open Link in Incognito Window if you are running the Chrome browser).
The lab spins up resources, and then opens another tab that shows the Sign in page.
Tip: Arrange the tabs in separate windows, side-by-side.
Note: If you see the Choose an account dialog, click Use Another Account.
-
If necessary, copy the Username below and paste it into the Sign in dialog.
{{{user_0.username | "Username"}}}
You can also find the Username in the Lab Details pane.
-
Click Next.
-
Copy the Password below and paste it into the Welcome dialog.
{{{user_0.password | "Password"}}}
You can also find the Password in the Lab Details pane.
-
Click Next.
Important: You must use the credentials the lab provides you. Do not use your Google Cloud account credentials.
Note: Using your own Google Cloud account for this lab may incur extra charges.
-
Click through the subsequent pages:
- Accept the terms and conditions.
- Do not add recovery options or two-factor authentication (because this is a temporary account).
- Do not sign up for free trials.
After a few moments, the Google Cloud console opens in this tab.
Note: To access Google Cloud products and services, click the Navigation menu or type the service or product name in the Search field.

Activate Cloud Shell
Cloud Shell is a virtual machine that is loaded with development tools. It offers a persistent 5GB home directory and runs on the Google Cloud. Cloud Shell provides command-line access to your Google Cloud resources.
-
Click Activate Cloud Shell  at the top of the Google Cloud console.
-
Click through the following windows:
- Continue through the Cloud Shell information window.
- Authorize Cloud Shell to use your credentials to make Google Cloud API calls.
When you are connected, you are already authenticated, and the project is set to your Project_ID, . The output contains a line that declares the Project_ID for this session:
Your Cloud Platform project in this session is set to {{{project_0.project_id | "PROJECT_ID"}}}
gcloud is the command-line tool for Google Cloud. It comes pre-installed on Cloud Shell and supports tab-completion.
- (Optional) You can list the active account name with this command:
gcloud auth list
- Click Authorize.
Output:
ACTIVE: *
ACCOUNT: {{{user_0.username | "ACCOUNT"}}}
To set the active account, run:
$ gcloud config set account `ACCOUNT`
- (Optional) You can list the project ID with this command:
gcloud config list project
Output:
[core]
project = {{{project_0.project_id | "PROJECT_ID"}}}
Note: For full documentation of gcloud, in Google Cloud, refer to the gcloud CLI overview guide.
Task 1. Create a database for replication
In this section you will prepare a Cloud SQL for PostgreSQL database for Datastream replication.
Create the Cloud SQL database
- Run the following command to enable the Cloud SQL API:
gcloud services enable sqladmin.googleapis.com
- Run the following command to create a Cloud SQL for PostgreSQL database instance:
POSTGRES_INSTANCE=postgres-db
DATASTREAM_IPS={{{project_0.startup_script.ip_Address | IP_ADDRESS}}}
gcloud sql instances create ${POSTGRES_INSTANCE} \
--database-version=POSTGRES_14 \
--cpu=2 --memory=10GB \
--authorized-networks=${DATASTREAM_IPS} \
--region={{{project_0.default_region|REGION}}} \
--root-password pwd \
--database-flags=cloudsql.logical_decoding=on
Note: This command creates the database in . For other regions, be sure to replace the DATASTREAM_IPS with the right Datastream Public IPs for your region.
Note: Once the database instance is created, make a note of the instance's public IP - you'll need this later when creating Datastream's connection profile.
Click Check my progress to verify the objective.
Create a database for replication
Populate the database with sample data
Connect to the PostgreSQL database by running the following command in Cloud Shell.
gcloud sql connect postgres-db --user=postgres
When prompted for the password, enter pwd.
Once connected to the database, run the following SQL command to create a sample schema and table:
CREATE SCHEMA IF NOT EXISTS test;
CREATE TABLE IF NOT EXISTS test.example_table (
id SERIAL PRIMARY KEY,
text_col VARCHAR(50),
int_col INT,
date_col TIMESTAMP
);
ALTER TABLE test.example_table REPLICA IDENTITY DEFAULT;
INSERT INTO test.example_table (text_col, int_col, date_col) VALUES
('hello', 0, '2020-01-01 00:00:00'),
('goodbye', 1, NULL),
('name', -987, NOW()),
('other', 2786, '2021-01-01 00:00:00');
Configure the database for replication
- Run the following SQL command to create a publication and a replication slot:
CREATE PUBLICATION test_publication FOR ALL TABLES;
ALTER USER POSTGRES WITH REPLICATION;
SELECT PG_CREATE_LOGICAL_REPLICATION_SLOT('test_replication', 'pgoutput');
Task 2. Create the Datastream resources and start replication
Now that the database is ready, create the Datastream connection profiles and stream to begin replication.
-
From the Navigation menu, click on View All Products under Analytics select Datastream
-
Click Enable to enable the Datastream API.
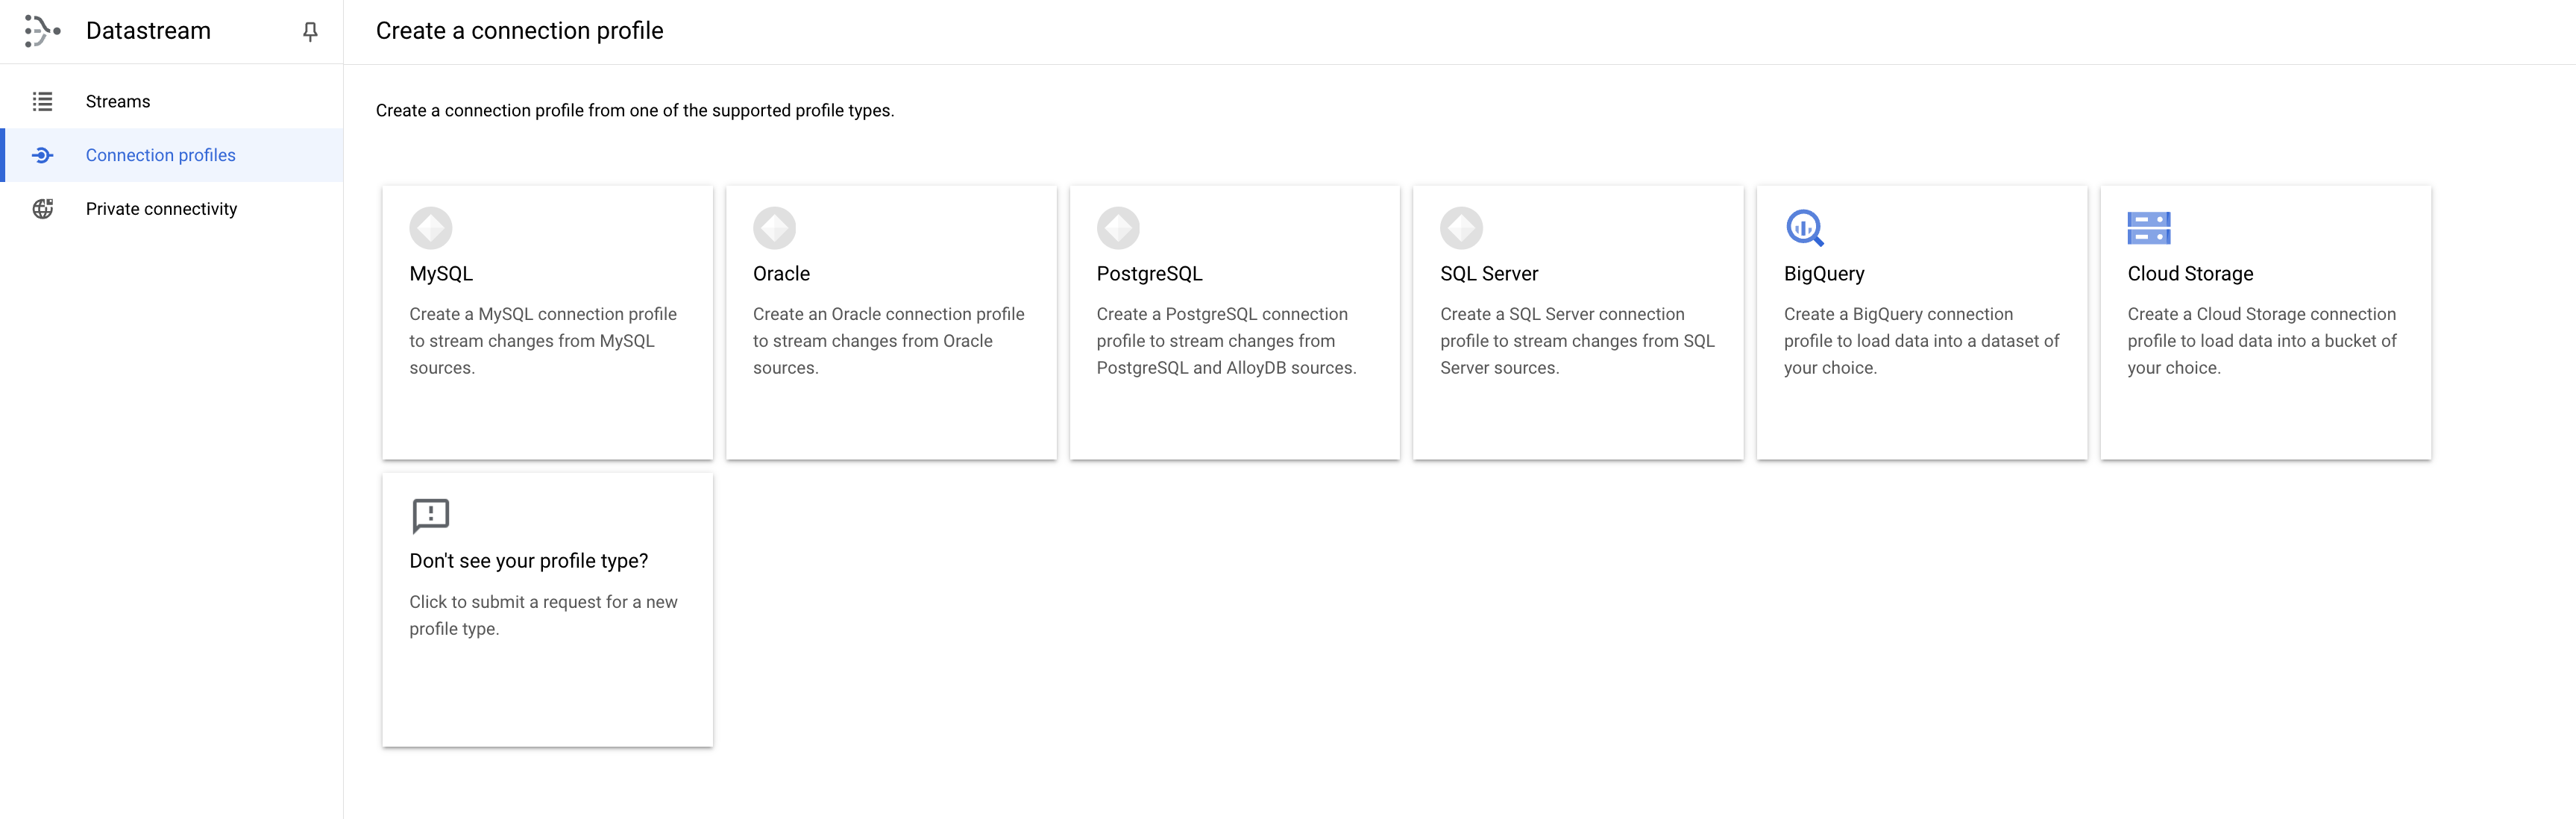
Create connection profiles
Create two connection profiles, one for the PostgreSQL source, and another for the BigQuery destination.
PostgreSQL connection profile
- In the Cloud console, navigate to the Connection Profiles tab and click Create Profile.

- Select the PostgreSQL connection profile type.
-
Use postgres-cp as the name and ID of the connection profile.
-
Enter the database connection details:
- Region:
- The IP and port of the Cloud SQL instance created earlier(Task 1)
- To find the IP address of your Cloud SQL instance:
- From the Navigation menu, click on SQL.
- On the SQL page, locate your PostgreSQL instance (typically named postgres-db).
- Copy the public IP address of the instance.
- Username:
postgres
- Password:
pwd
- Database:
postgres
-
Click Continue.
-
Select the IP allowlisting connectivity method, and click Continue.
-
Click RUN TEST to make sure that Datastream can reach the database.
-
Click Create.
BigQuery connection profile
- In the Cloud console, navigate to the Connection Profiles tab and click Create Profile.
- Select the BigQuery connection profile type.
-
Use bigquery-cp as the name and ID of the connection profile.
-
Region
-
Click Create.
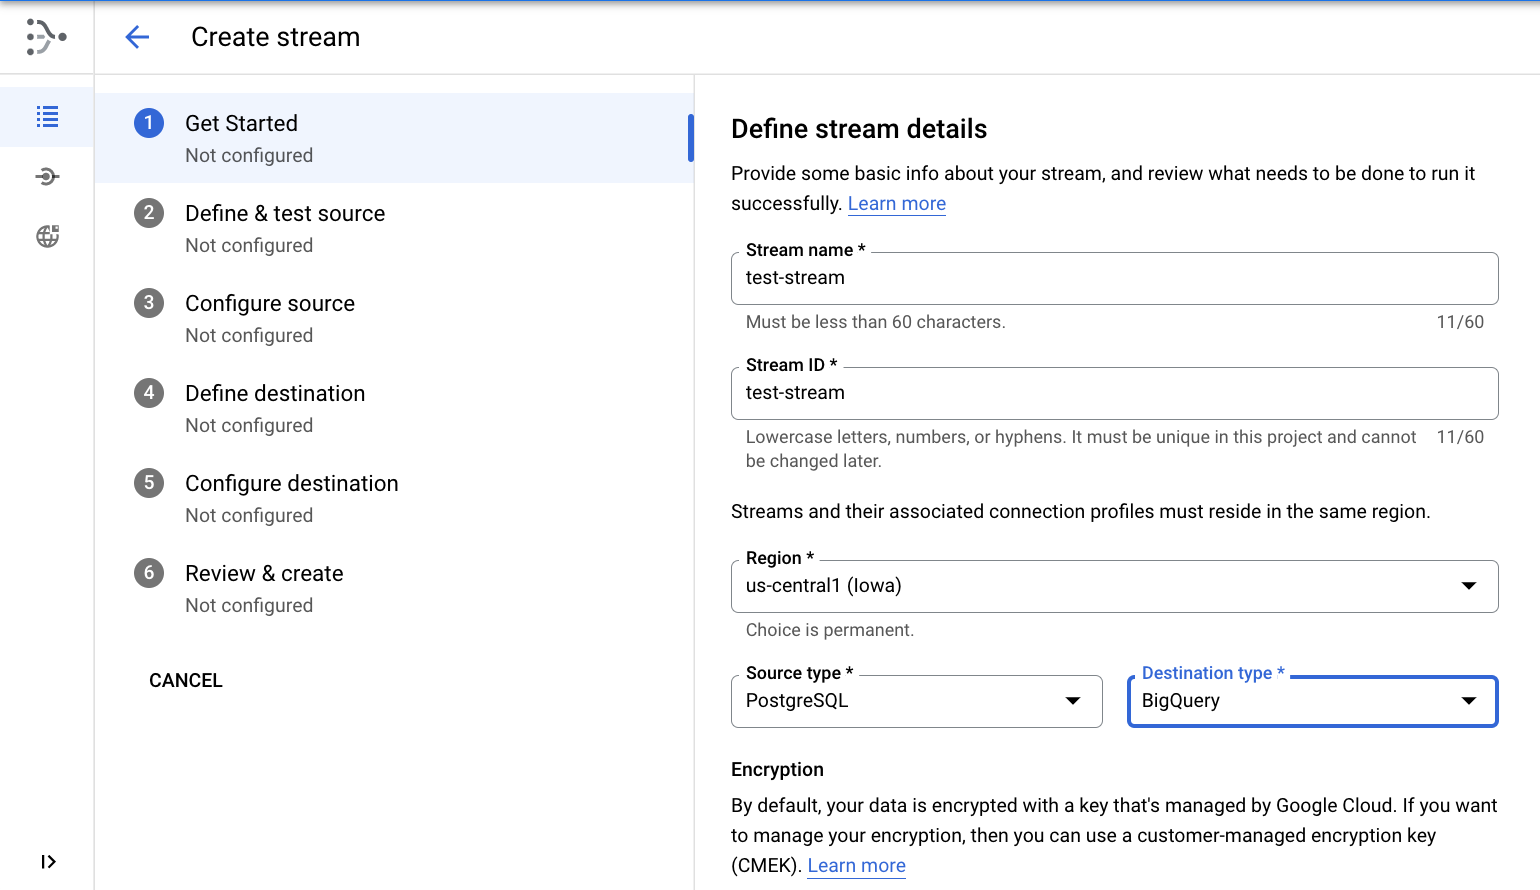
Create stream
Create the stream which connects the connection profiles created above and defines the configuration for the data to stream from source to destination.
- In the Cloud console, navigate to the Streams tab and click Create Stream.

Define the stream details
- Use
test-stream as the name and ID of the stream.
- Region
- Select PostgreSQL as the source type
- Select BigQuery as destination type
- Click CONTINUE.
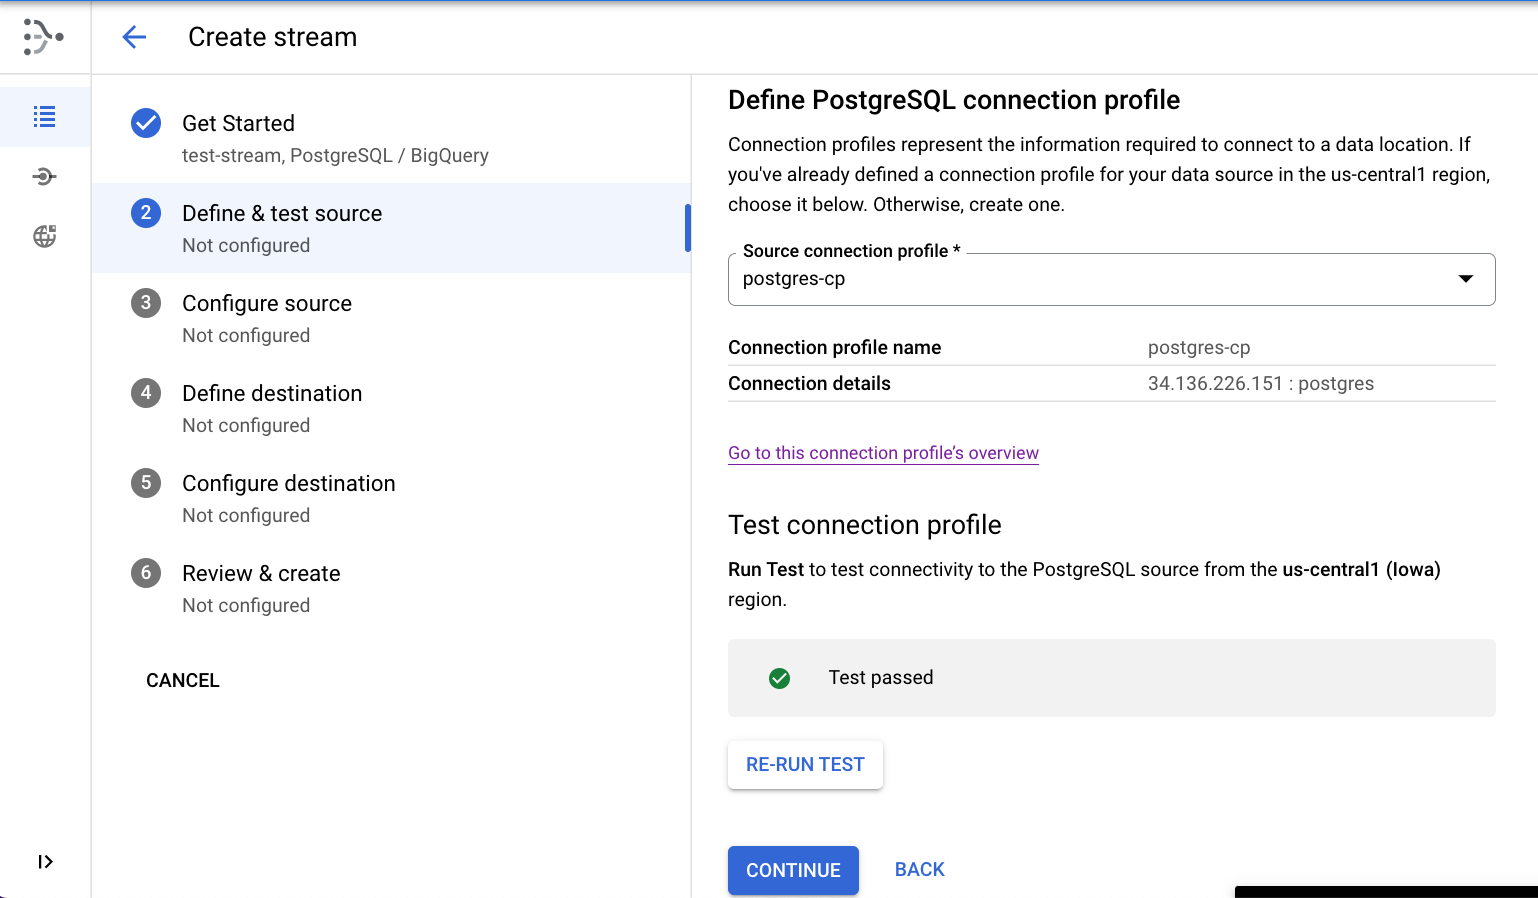
Define the source
- Select the postgres-cp connection profile created in the previous step.
- [Optional] Test connectivity by clicking RUN TEST
- Click CONTINUE.
Configure the source
- Specify the replication slot name as
test_replication.
- Specify the publication name as
test_publication.
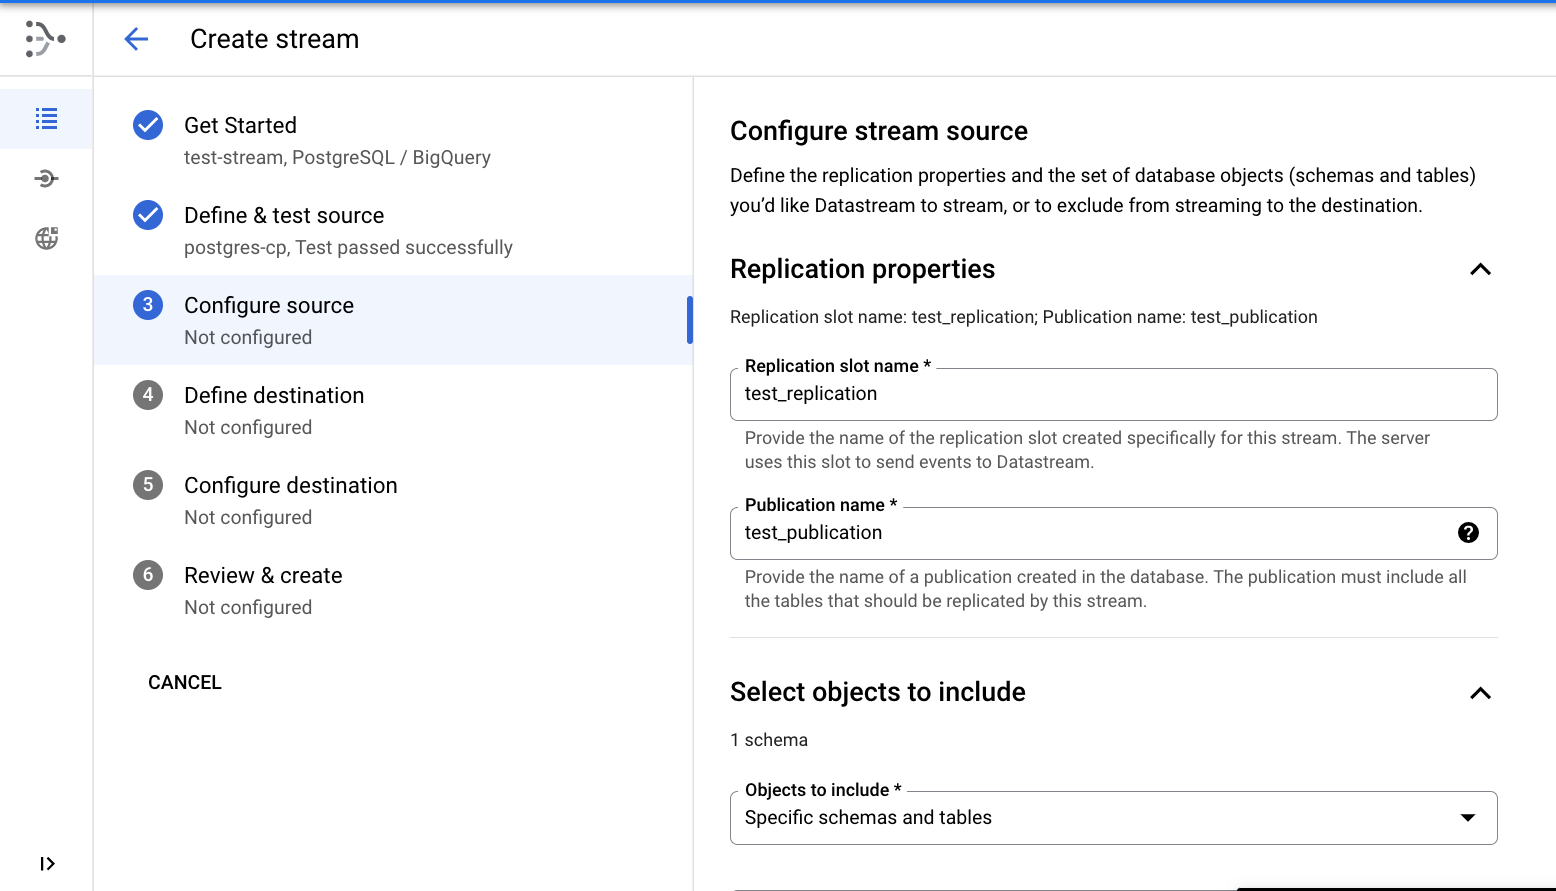
- Select the test schema for replication.

- Click Continue.
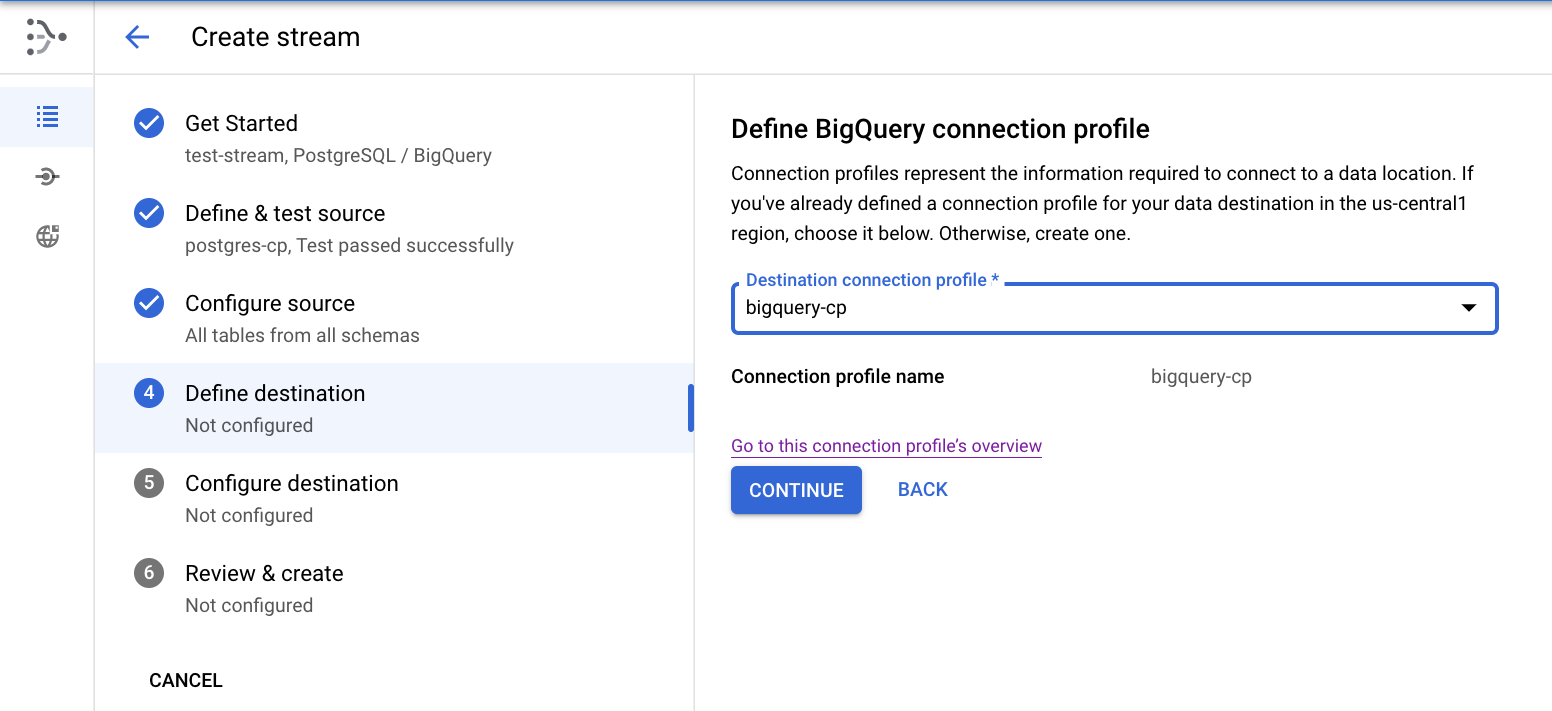
Define the destination
- Select the bigquery-cp connection profile created in the previous step, then click Continue.
Configure the destination
- Choose Region and select as the BigQuery dataset location.
- Set the staleness limit to 0 seconds.
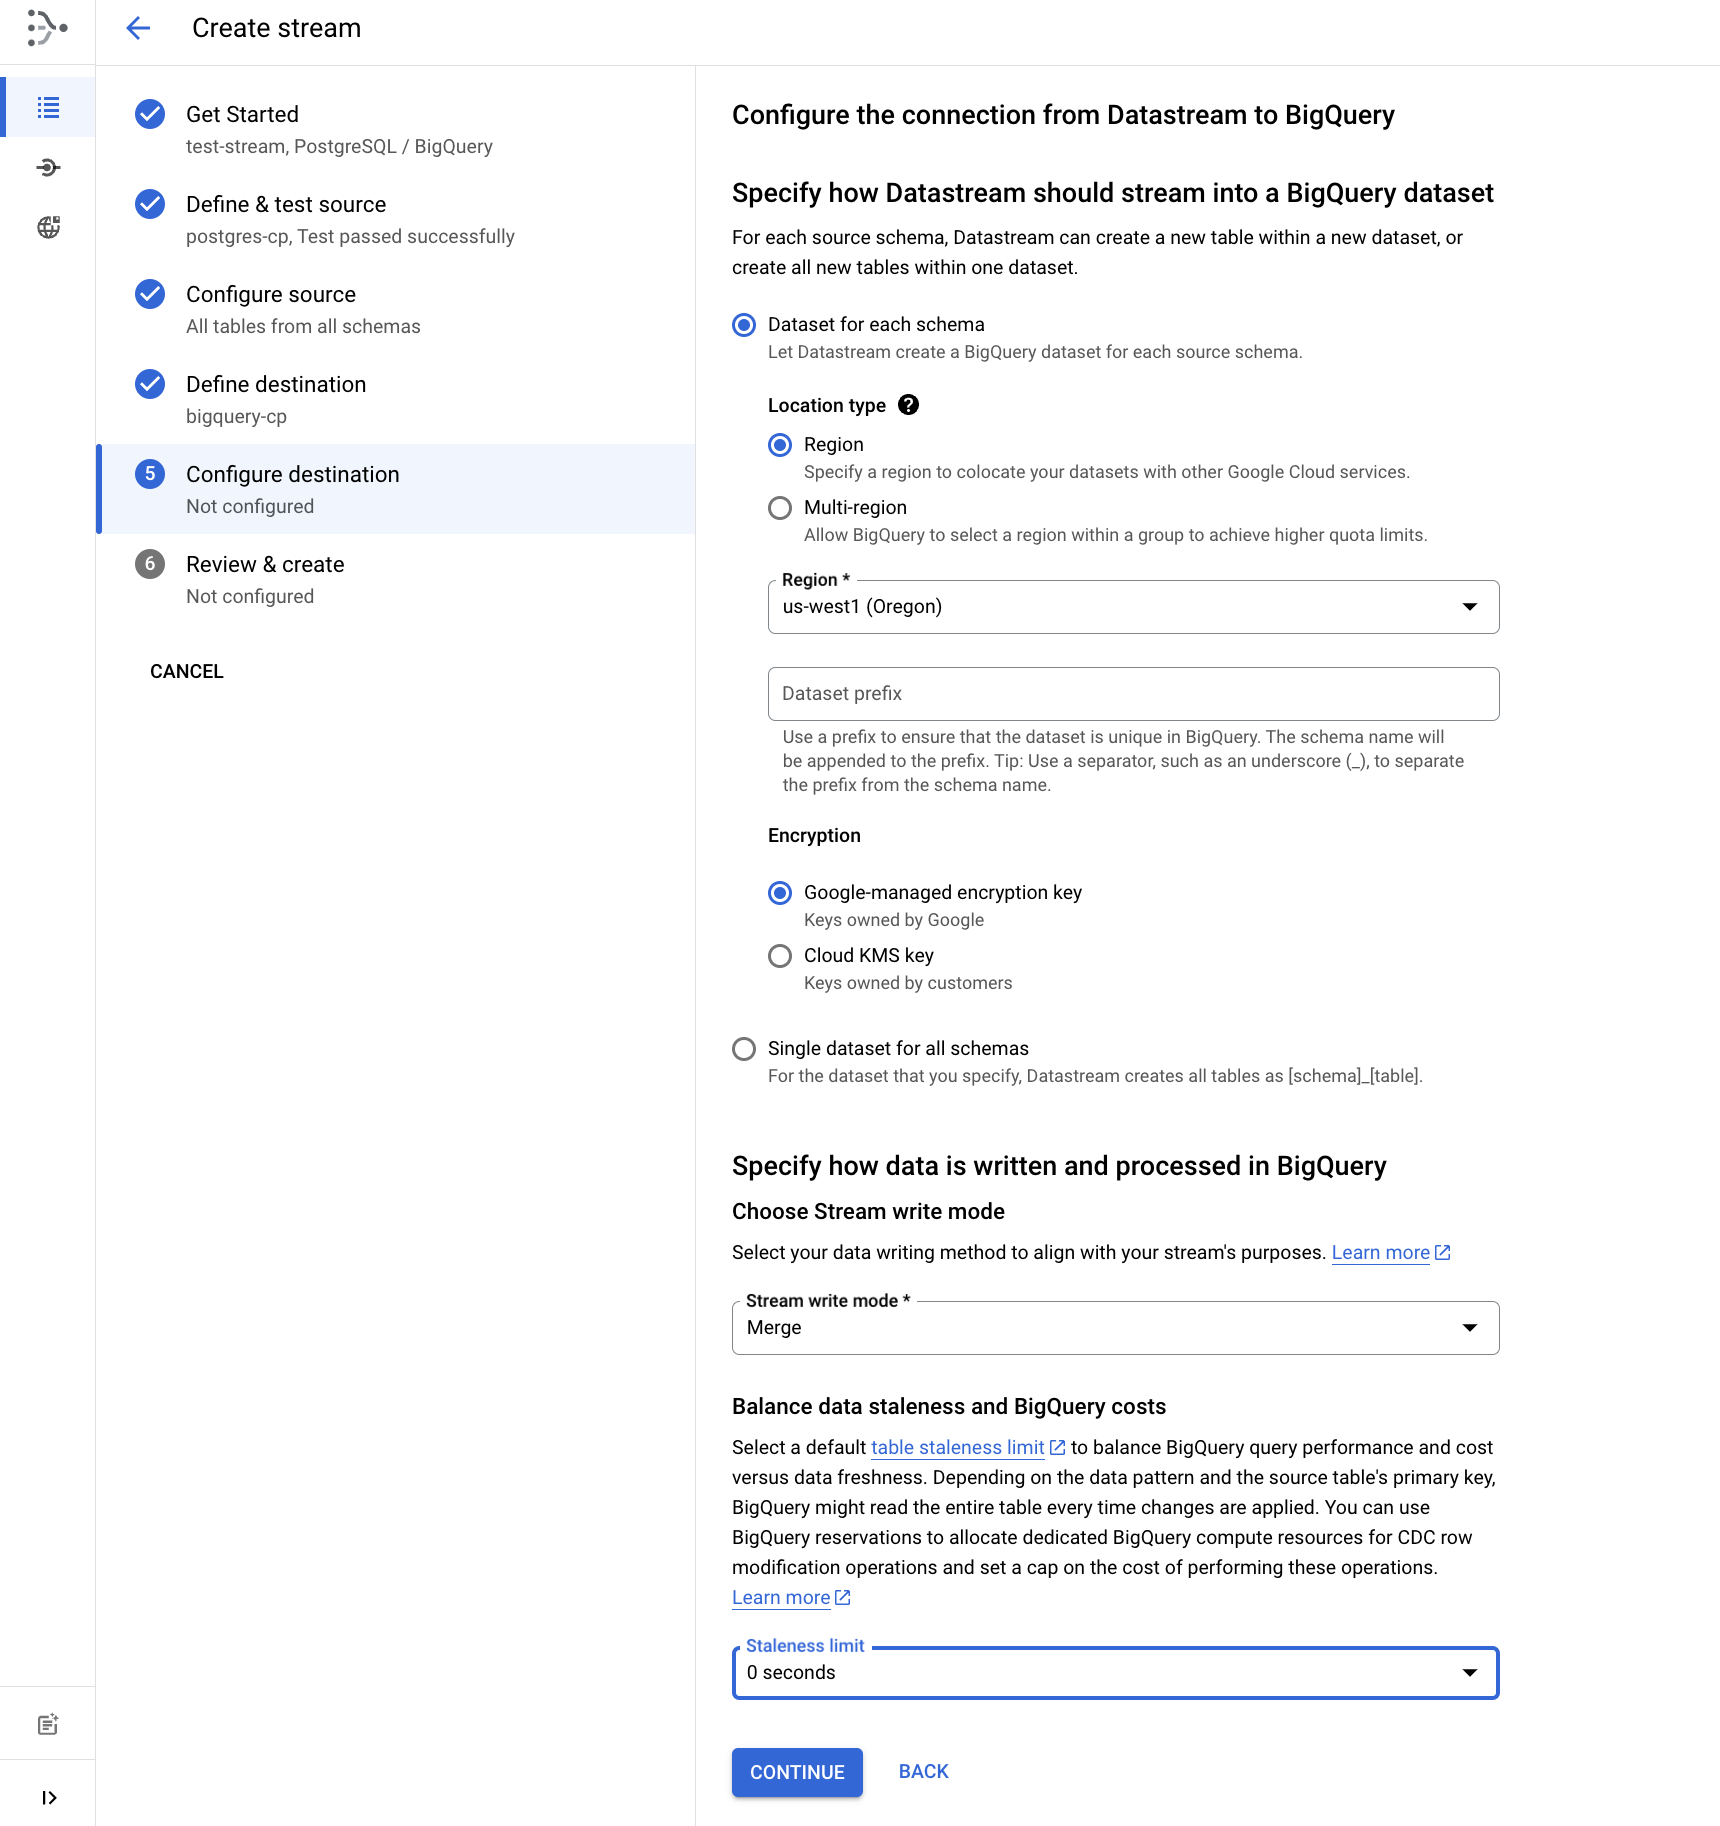
- Click Continue.
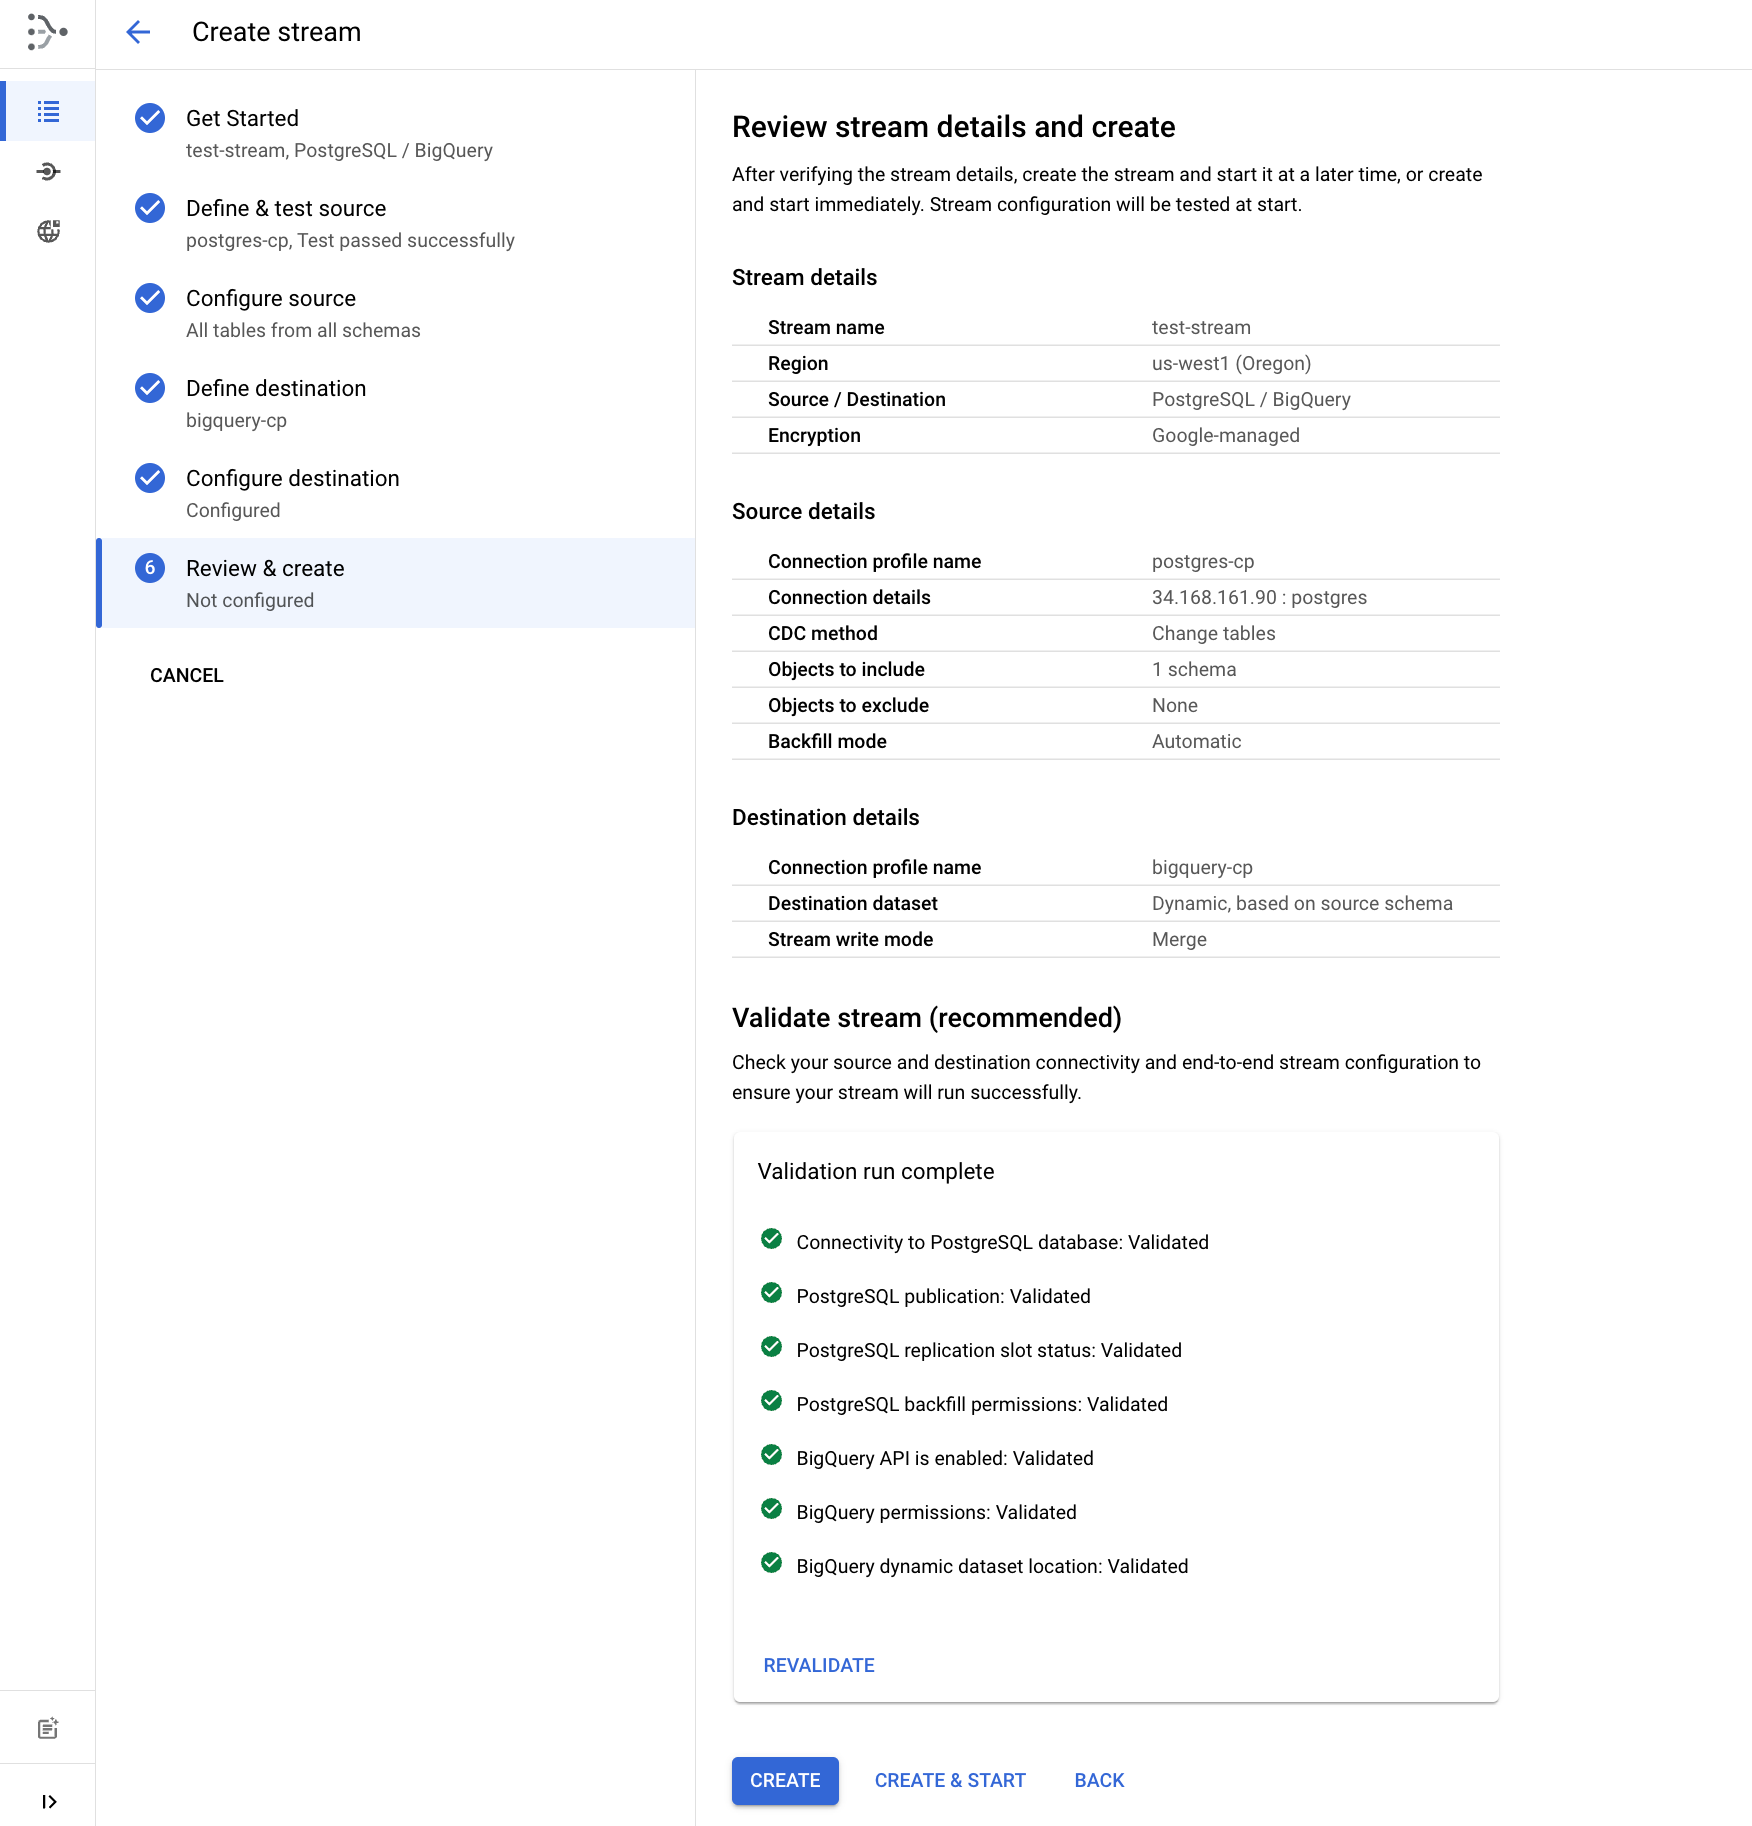
Review and create the stream
- Finally, validate the stream details by clicking Run Validation. Once validation completes successfully, click Create & Start then confirm Create & Start.
Wait approximately 1-2 minutes until the stream status is shown as running.
Click Check my progress to verify the objective.
Create the Datastream resources
Task 3. View the data in BigQuery
Now that the stream is running, see the data replicating into the BigQuery dataset.
- In the Google Cloud console, from the Navigation menu go to BigQuery.
For the pop-up click Done.
- In the BigQuery Studio explorer, expand the project node to see the list of datasets.
- Expand the test dataset node.
- Click on the example_table table.
- Click on the PREVIEW tab to see the data in BigQuery.
Note: The data might take few minutes to appear in Preview section.
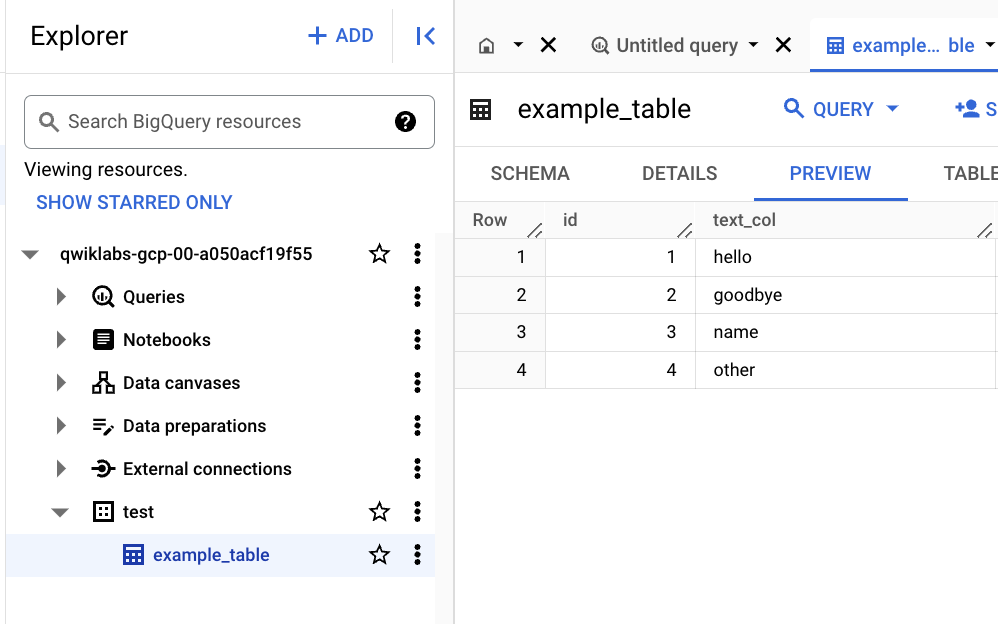
- If you see the message "There is no data to display" on the preview tab, you can verify the data using the following command.
SELECT * FROM test.example_table ORDER BY id;
Task 4. Check that changes in the source are replicated to BigQuery
- Run the following command in Cloud Shell to connect to the Cloud SQL database (the password is
pwd):
gcloud sql connect postgres-db --user=postgres
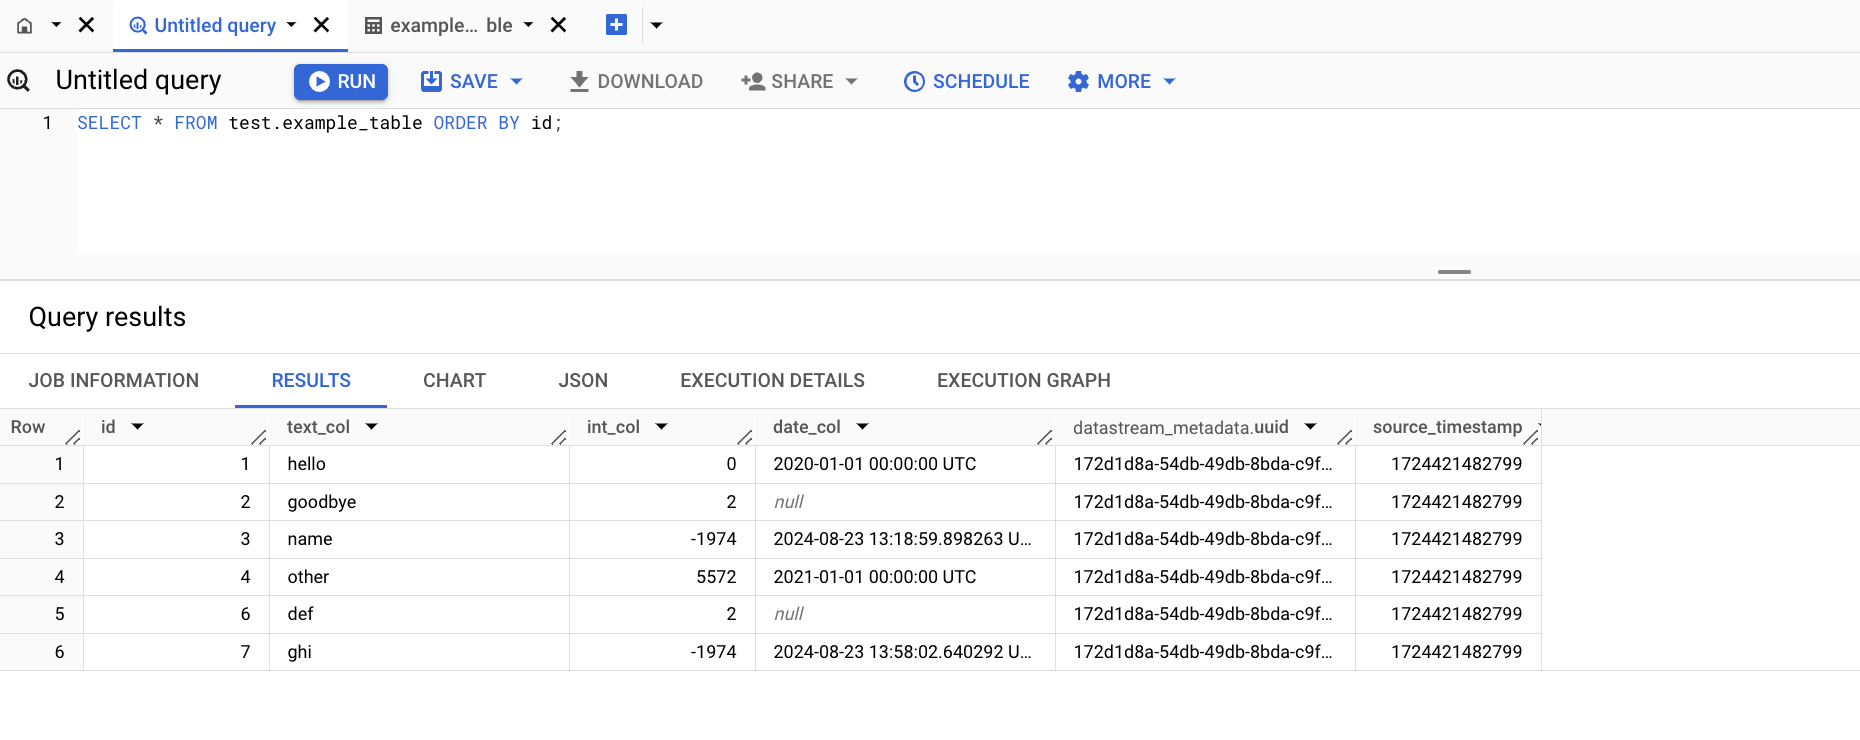
- Run the following SQL commands to make some changes to the data:
INSERT INTO test.example_table (text_col, int_col, date_col) VALUES
('abc', 0, '2022-10-01 00:00:00'),
('def', 1, NULL),
('ghi', -987, NOW());
UPDATE test.example_table SET int_col=int_col*2;
DELETE FROM test.example_table WHERE text_col = 'abc';
- Open the BigQuery SQL workspace and run the following query to see the changes in BigQuery:
SELECT * FROM test.example_table ORDER BY id;
Congratulations!
Datastream is an important tool in your data integration and analytics toolkit! You have learned the basics of replication from PostgreSQL to BigQuery with Datastream.
Manual Last Updated February 24, 2025
Lab Last Tested February 24, 2025
Copyright 2025 Google LLC. All rights reserved. Google and the Google logo are trademarks of Google LLC. All other company and product names may be trademarks of the respective companies with which they are associated.


