
Before you begin
- Labs create a Google Cloud project and resources for a fixed time
- Labs have a time limit and no pause feature. If you end the lab, you'll have to restart from the beginning.
- On the top left of your screen, click Start lab to begin
Launch a virtual machine
/ 20
Set up and run the vulnerable application
/ 20
Scan the application
/ 20
Remediate the vulnerabilities
/ 20
Re-scan the web application
/ 20
 IMPORTANT:
 Make sure to complete this hands-on lab on a desktop/laptop only.
 There are only 5 attempts permitted per lab.
 As a reminder – it is common to not get every question correct on your first try, and even to need to redo a task; this is part of the learning process.
 Once a lab is started, the timer cannot be paused. After 1 hour and 30 minutes, the lab will end and you’ll need to start again.
 For more information review the Lab technical tips reading.
Identifying vulnerabilities and implementing remediation techniques is crucial for helping ensure the security and stability of various systems and applications. Many applications and systems handle sensitive information, such as personally identifiable information, financial records, or intellectual property. Identifying vulnerabilities helps protect this sensitive data from unauthorized access and potential breaches. Addressing vulnerabilities early in the development process is generally more cost-effective than dealing with security breaches later. The cost of remediating a vulnerability is often much higher than the cost of preventing it in the first place.
As a security analyst, regularly scanning for vulnerabilities can help identify and address weaknesses before malicious attacks, thus mitigating potential threats proactively. It provides insight into an application’s attack surface, helping enable you to understand potential avenues of exploitation and prioritize critical areas for improvement.
In this lab, you'll not only learn how to set up and run a vulnerable application but scan it for vulnerabilities.
Cymbal Bank has developed a new banking application for its corporate clients that is set to be hosted and deployed on the new cloud infrastructure. The Chief Information Security Officer (CISO), Javier, wants to prioritize the security of this application before it is launched and customer-facing. Your team lead, Chloe, has tasked you with identifying and mitigating any application vulnerabilities for this new application. You'll use the Web Security Scanner in Google Cloud to scan the application for vulnerabilities pertaining to a top OWASP® web application vulnerability known as Cross-Site Scripting (XSS).
Here’s how you'll do this task: First, you’ll create a static IP address and launch a virtual machine. Then, you’ll deploy the vulnerable application. Next, you’ll set up and run the application. Then, you’ll access and scan the application. Finally, you’ll fix the vulnerabilities and re-scan the application.
Read these instructions. Labs are timed and you cannot pause them. The timer, which starts when you click Start Lab, shows how long Google Cloud resources will be made available to you.
This practical lab lets you do the activities yourself in a real cloud environment, not in a simulation or demo environment. It does so by giving you new, temporary credentials that you use to sign in and access Google Cloud for the duration of the lab.
To complete this lab, you need:
Click the Start Lab button. On the left is the Lab Details panel with the following:
Click Open Google Cloud console (or right-click and select Open Link in Incognito Window) if you are running the Chrome browser. The Sign in page opens in a new browser tab.
Tip: You can arrange the tabs in separate, side-by-side windows to easily switch between them.
If necessary, copy the Google Cloud username below and paste it into the Sign in dialog. Click Next.
You can also find the Google Cloud username in the Lab Details panel.
You can also find the Google Cloud password in the Lab Details panel.
After a few moments, the Console opens in this tab.

In this task, you’ll create a static IP address and launch the virtual machine to run the vulnerable application.
 ) icon. If prompted, click Continue.
This command creates a static IP address named xss-test-ip-address in the
If prompted, click Authorize.
This command returns the static IP address you generated.
This command creates a VM instance to run the vulnerable application.
Click Check my progress to verify that you have completed this task correctly.
In this task, you’ll download and extract the web application files for the vulnerable application, and then deploy the application in the SSH-in-browser.
First, you’ll create a firewall rule that will allow Web Security Scanner to access the vulnerable application.
This command creates a firewall rule that allows access to the web application from any source IP address. This allows the Web Security Scanner to access the vulnerable application and perform a scan.
Next, use an SSH connection to connect to the VM instance.
 ).
).This will open an SSH connection to your VM instance in a new browser window.
Now, extract the web application files.
This command downloads and extracts the vulnerable web application files.
Press Enter.
Finally, copy the following command into the SSH-in-browser page:
This command starts the application.
A message should indicate that the application is up and running.
Click Check my progress to verify that you have completed this task correctly.
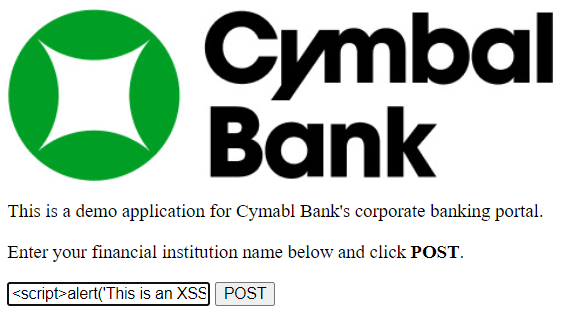
In this task, you’ll test your application for a vulnerability known as cross-site scripting (XSS). XSS vulnerabilities can be exploited by malicious scripts, such as HTML code, in content that is then served to web browsers.
<YOUR_EXTERNAL_IP> with the static IP address of the VM you saved in a notepad in Task 1:A Cymbal Bank corporate banking portal with a web form should appear.
This code injects an OWASP® vulnerability.
The injected code displayed a message back to the browser. This action by itself is not malicious, however attackers can introduce malicious code into an exploitable application to either steal data from it or implant malware onto the user's device.
The alert window opens with the following message: “This is an XSS Injection to demonstrate one of OWASP vulnerabilities”.
In this task, you’ll scan the application for vulnerabilities using the Web Security Scanner.
First, enable the Web Security Scanner API.
).Now, scan the application for vulnerabilities.
).If the Web Security Scanner API is enabled then the Cloud Web Security Scanner page displays the Scan configs details.
In the Cloud Web Security Scanner toolbar, click + New scan.
In the Name section, name the scan Cross-Site Scripting scan.
In the Starting URLs section, the Starting URLs 1 field should be pre-populated with your static IP address.
In the SSH-in-browser window, you should view logs being generated as Web Security Scanner tests all possible URLs for potential vulnerabilities.
The Results tab should indicate the cross-site vulnerabilities, demonstrating how Web Security Scanner can detect a XSS vulnerability.
The vulnerabilities can also be found in the Vulnerabilities tab under the Security Command Centre.
Click Check my progress to verify that you have completed this task correctly.
In this task, you'll remediate the application's XSS vulnerability and re-run the application with the new fix.
The recommendation for fixing the current vulnerabilities is to validate and escape untrusted user-supplied data, which also points to the corresponding OWASP® rules.
You will do this by editing the code of the vulnerable application to include lines of code that validate and escape the user-supplied data.
Now, edit the app.py file using the nano editor.
This command opens the nano code editor.
Press ENTER.
To fix the XSS vulnerability, you validate the output string variable. The output string is the processed output of the user-supplied web form input.
Ensure that the application does not accept user input as HTML code, instead, it will escape special characters supplied by user input. To do this, locate the two lines that set the output string:
This command re-runs the application.
Click Check my progress to verify that you have completed this task correctly.
In this task, you’ll re-scan the application to make sure there are no vulnerabilities.
The Results tab should now indicate that there are no vulnerabilities found.
Click Check my progress to verify that you have completed this task correctly. Be sure you wait until the scan completes to get credit for completing this task.
Great work!
Through this lab, you gained practical experience in scanning for application vulnerabilities. You learned the importance of a security analyst's ability to scan for application vulnerabilities, which is essential for helping identify and address potential weaknesses, managing risks, meeting compliance requirements, and ultimately, maintaining a robust security posture to protect an organization’s assets and reputation.
By closing security gaps and addressing weaknesses, you can help prevent potential exploitation, minimize the impact of security incidents, and maintain compliance with industry regulations.
In this lab, you completed one of the fundamental aspects of proactive cybersecurity strategies.
Before you end the lab, make sure you’re satisfied that you’ve completed all the tasks. When you're ready, click End Lab and then click Submit.
Ending the lab will remove your access to the lab environment, and you won’t be able to access the work you've completed in it again.
Copyright 2022 Google LLC All rights reserved. Google and the Google logo are trademarks of Google LLC. All other company and product names may be trademarks of the respective companies with which they are associated.


This content is not currently available
We will notify you via email when it becomes available

Great!
We will contact you via email if it becomes available

One lab at a time
Confirm to end all existing labs and start this one