Overview
In this lab, you will create a local backend and then create a Cloud Storage bucket to migrate the state to a remote backend
Objectives
In this lab, you will learn how to perform the following tasks:
- Create a local backend.
- Create a Cloud Storage backend.
- Refresh your Terraform state.
Task 1. Sign in to the Cloud console
For each lab, you get a new Google Cloud project and set of resources for a fixed time at no cost.
-
Click the Start Lab button. If you need to pay for the lab, a pop-up opens for you to select your payment method.
On the left is the Lab Details panel with the following:
- The Open Google Cloud console button
- Time remaining
- The temporary credentials that you must use for this lab
- Other information, if needed, to step through this lab
-
Click Open Google Cloud console (or right-click and select Open Link in Incognito Window if you are running the Chrome browser).
The lab spins up resources, and then opens another tab that shows the Sign in page.
Tip: Arrange the tabs in separate windows, side-by-side.
Note: If you see the Choose an account dialog, click Use Another Account.
-
If necessary, copy the Username below and paste it into the Sign in dialog.
{{{user_0.username | "Username"}}}
You can also find the Username in the Lab Details panel.
-
Click Next.
-
Copy the Password below and paste it into the Welcome dialog.
{{{user_0.password | "Password"}}}
You can also find the Password in the Lab Details panel.
-
Click Next.
Important: You must use the credentials the lab provides you. Do not use your Google Cloud account credentials.
Note: Using your own Google Cloud account for this lab may incur extra charges.
-
Click through the subsequent pages:
- Accept the terms and conditions.
- Do not add recovery options or two-factor authentication (because this is a temporary account).
- Do not sign up for free trials.
After a few moments, the Google Cloud console opens in this tab.
Note: To view a menu with a list of Google Cloud products and services, click the Navigation menu at the top-left, or type the service or product name in the Search field.

Task 2. Verify Terraform is installed
-
On the Google Cloud menu, click Activate Cloud Shell.
-
If prompted, click Continue.
-
Confirm that Terraform is installed by running the following command:
terraform --version
Task 3. Add a local backend
In this section, you will configure a local backend which will then be moved to a Cloud Storage bucket.
- In a new Cloud Shell window, create a
main.tf configuration file.
touch main.tf
- To retrieve your Project ID, run the following command:
gcloud config list --format 'value(core.project)'
- On the Cloud Shell toolbar, click Open Editor. To switch between Cloud Shell and the code editor, click Open Editor or Open Terminal as required.
- Copy the Cloud Storage bucket resource code into your
main.tf configuration file:
provider "google" {
project = "{{{project_0.project_id|Project ID}}}"
region = "{{{project_0.default_region|Region}}}"
}
resource "google_storage_bucket" "test-bucket-for-state" {
name = "{{{project_0.project_id|Project ID}}}"
location = "US" # Replace with EU for Europe region
uniform_bucket_level_access = true
}
- Add a local backend to your
main.tf file:
terraform {
backend "local" {
path = "terraform/state/terraform.tfstate"
}
}
This will reference a terraform.tfstate file in the terraform/state directory.
The final code in main.tf is as shown below.
provider "google" {
project = "{{{project_0.project_id|Project ID}}}"
region = "{{{project_0.default_region|Region}}}"
}
resource "google_storage_bucket" "test-bucket-for-state" {
name = "{{{project_0.project_id|Project ID}}}"
location = "US" # Replace with EU for Europe region
uniform_bucket_level_access = true
}
terraform {
backend "local" {
path = "terraform/state/terraform.tfstate"
}
}
Terraform must initialize any configured backend before use.
- On the Cloud Shell toolbar, click Open Terminal, then initialize Terraform using the following command:
terraform init
- Apply the changes. Type yes at the prompt to confirm.
terraform apply
The Cloud Shell Editor should now display the state file called terraform.tfstate in the terraform/state directory.
- Examine your state file:
terraform show
Your google_storage_bucket.test-bucket-for-state resource should be displayed.
Click Check my progress to verify local backend is created.
Add a local backend
Task 4. Add a Cloud Storage backend
- Navigate back to your
main.tf file in the editor. You will now replace the current local backend with a gcs backend.
- To change the existing local backend configuration, replace the code for local backend with the following configuration in the
main.tf file.
terraform {
backend "gcs" {
bucket = "{{{project_0.project_id|Project ID}}}"
prefix = "terraform/state"
}
}
The final code in main.tf is as shown below:
provider "google" {
project = "{{{project_0.project_id|Project ID}}}"
region = "{{{project_0.default_region|Region}}}"
}
resource "google_storage_bucket" "test-bucket-for-state" {
name = "{{{project_0.project_id|Project ID}}}"
location = "US" # Replace with EU for Europe region
uniform_bucket_level_access = true
}
terraform {
backend "gcs" {
bucket = "{{{project_0.project_id|Project ID}}}"
prefix = "terraform/state"
}
}
- Initialize your backend again. Type yes at the prompt to confirm.
terraform init -migrate-state
- In the Google Cloud console, in the Navigation menu, click Cloud Storage and then Buckets.
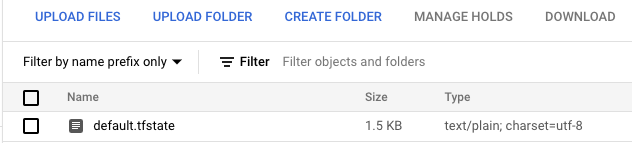
- Click on your bucket and navigate to the file
terraform/state/default.tfstate.
Your state file now exists in a Cloud Storage bucket!
Click Check my progress to verify remote backend is created.
Add a Cloud Storage backend
Task 5. Refresh the state
The terraform refresh command is used to reconcile the state Terraform knows about (via its state file) with the real-world infrastructure. This can be used to detect any drift from the last-known state and to update the state file.
This does not modify infrastructure, but does modify the state file. If the state is changed, this may cause changes to occur during the next plan or apply.
- Return to your storage bucket in the Cloud console. Select the check box next to the name, and click the Labels button on the top. The info panel with Labels tabs will open up.
- Click +ADD LABEL. Set the Key2 =
key and Value2 = value.
- Click Save.
- Return to Cloud Shell and use the following command to update the state file:
terraform refresh
Click Check my progress to verify terraform is refreshed.
Refresh the state
Task 6. Clean up the workspace
- First, revert your backend to
local so you can delete the storage bucket. Copy and replace the gcs configuration with the following:
terraform {
backend "local" {
path = "terraform/state/terraform.tfstate"
}
}
- Initialize the
local backend again. Type yes at the prompt to confirm.
terraform init -migrate-state
- In the
main.tf file, add the force_destroy = true argument to your google_storage_bucket resource. When you delete a bucket, this boolean option will delete all contained objects.
Note: If you try to delete a bucket that contains objects, Terraform will fail that run.
Your resource configuration should resemble the following:
resource "google_storage_bucket" "test-bucket-for-state" {
name = "{{{project_0.project_id|Project ID}}}"
location = "US" # Replace with EU for Europe region
uniform_bucket_level_access = true
force_destroy = true
}
- Apply the changes. Type yes at the prompt to confirm.
terraform apply
- You can now successfully destroy your infrastructure. Type yes at the prompt to confirm.
terraform destroy
Click Check my progress to verify the backend is deleted.
Clean up the workspace
Congratulations!
In this lab, you learned how to manage backends and state with Terraform. You created local and Cloud Storage backends to manage your state file, and also refreshed the state.
In this lab, you learned how to perform the following tasks:
- Create a local backend.
- Create a Cloud Storage backend.
- Refresh your Terraform state.
End your lab
When you have completed your lab, click End Lab. Google Cloud Skills Boost removes the resources you’ve used and cleans the account for you.
You will be given an opportunity to rate the lab experience. Select the applicable number of stars, type a comment, and then click Submit.
The number of stars indicates the following:
- 1 star = Very dissatisfied
- 2 stars = Dissatisfied
- 3 stars = Neutral
- 4 stars = Satisfied
- 5 stars = Very satisfied
You can close the dialog box if you don't want to provide feedback.
For feedback, suggestions, or corrections, please use the Support tab.
Copyright 2022 Google LLC All rights reserved. Google and the Google logo are trademarks of Google LLC. All other company and product names may be trademarks of the respective companies with which they are associated.


