SCBL070
Overview
Generative Knowledge Assist provides human agents with relevant summarized suggestions along with the referenced document while they are in a conversation with an end-user. The suggestions are based on the conversation history, the end-user's query, and the agent's knowledge base. Agents can examine the suggestions and decide whether to read or share them with the end-user.
Generative Knowledge Assist can help agents improve their efficiency and effectiveness by providing them with relevant information and documents. Generative Knowledge Assist can help agents quickly find the information they need to answer end-user questions, freeing up agents to focus on providing better customer service.
This tutorial provides a step-by-step approach to creating a Data Store, adding documents to the Data Store, creating a Generative Knowledge Assist infobot agent and attaching the Data Store to it, setting up an Agent Assist conversation profile, and linking it to the Generative Knowledge Assist Agent for Knowledge Assist using the Agent Assist console.
Objectives
In this lab, you will learn how to:
- Create a Data Store
- Create a Data Store Agent.
- Add documents to the Data Store.
- Create a conversation profile.
- Link a Data Store Agent to a conversation profile for Generative Knowledge Assist.
- Test Generative Knowledge Assist using the Agent Assist simulator.
Setup and Requirements
Before you click the Start Lab button
Read these instructions. Labs are timed and you cannot pause them. The timer, which starts when you click Start Lab, shows how long Google Cloud resources will be made available to you.
This Qwiklabs hands-on lab lets you do the lab activities yourself in a real cloud environment, not in a simulation or demo environment. It does so by giving you new, temporary credentials that you use to sign in and access Google Cloud for the duration of the lab.
What you need
To complete this lab, you need:
- Access to a standard internet browser (Chrome browser recommended).
- Time to complete the lab.
Note: If you already have your own personal Google Cloud account or project, do not use it for this lab.
Note: If you are using a Pixelbook, open an Incognito window to run this lab.
Activate Cloud Shell
Cloud Shell is a virtual machine that is loaded with development tools. It offers a persistent 5GB home directory and runs on the Google Cloud. Cloud Shell provides command-line access to your Google Cloud resources.
In the Cloud Console, in the top right toolbar, click the Activate Cloud Shell button.

Click Continue.

It takes a few moments to provision and connect to the environment. When you are connected, you are already authenticated, and the project is set to your PROJECT_ID. For example:

gcloud is the command-line tool for Google Cloud. It comes pre-installed on Cloud Shell and supports tab-completion.
You can list the active account name with this command:
gcloud auth list
(Output)
Credentialed accounts:
- <myaccount>@<mydomain>.com (active)
(Example output)
Credentialed accounts:
- google1623327_student@qwiklabs.net
You can list the project ID with this command:
gcloud config list project
(Output)
[core]
project = <project_ID>
(Example output)
[core]
project = qwiklabs-gcp-44776a13dea667a6
Task 1. Setting up Generative Knowledge Assist
Data stores are a collection of websites and documents, each of which reference your data. Data stores are used to find answers for end-user's questions.
A data store can consist of different sources such as:
- Your website domain
- A targeted web page
- Your organizational documents
- Frequently asked questions (Q&A pairs from a CSV document)
More on data stores is available in the documentation.
When an end-user asks the agent a question, the agent searches for an answer from the given source content and summarizes the findings into a coherent agent response. It also provides supporting links to the sources of the response for the end-user to learn more. The agent can provide up to five answer snippets for a given question.
To enable AI Applications, follow these steps:
-
In the Google Cloud console, navigate to the AI Applications console.
-
Click Continue and activate the API. Keep other values as default.
Task 2. Create a new conversational agent and Data Store Agent
AI Applications creates a special Conversational Agent, called a data store agent. With this feature, you provide a website link or documents (data stores), and Google parses your content and creates a conversational agent powered by large language models. This is accomplished by creating special state handlers called data store handlers. Using these data store handlers, your data store agent can have conversations about the content with your end-users.
You can specify your domain name and/or upload any number of documents, and Google will index them. This information is made available to your agent to access in real time. It combines the power and accuracy of Google Search algorithms running against your public or private data with the natural conversational capabilities of a conversational agent.
-
From the AI Applications console, click Apps, and click Create App.
-
Locate the Chat app under Conversational Agents and click Create.
-
Use Cymbal Stores as the company name.
-
Use google-agent as your agent name.
-
Click Continue.
-
Click Create Data Store.
-
Select Cloud Storage.
-
Check Unstructured documents (PDF, HTML, TXT and more).
-
Select Folder and add the following Cloud Storage bucket.
cloud-samples-data/dialogflow-cx/google-store
-
Click Continue.
-
Use google-store as the data store name.
-
Click Create.
-
Make sure that the newly created google-store is selected and click Create.
-
On the left menu, click on Data Stores.
-
In the list of data stores, select the newly created google-store.
-
Click on the Activity tab to see the progress of the data import.
Note: It can take more than 20 minutes for your documents to be available and ready for use by your agent.
Task 3. Test your Conversational agent
Testing is an important part of working with conversational agents to find bugs, identify limitations, and simulate a customer experience. You can start an interactive session with your chatbot to see how it responds to various questions that a customer might ask.
-
In the left navigation menu, click on Apps, then click on your agent google-agent.
-
In the Conversational Agents console within your agent, click Toggle Simulator icon to open the Simulator.

-
Leave other settings in the pane to default, type a greeting to your agent such as Hello and click the submit icon ( ).
).
-
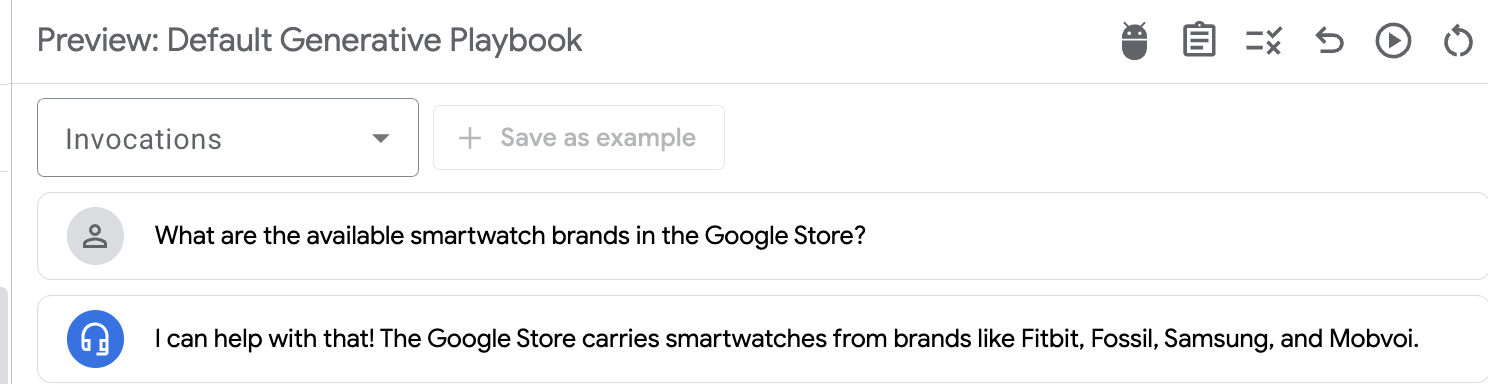
Ask the agent some questions about various products such as:
What are the available smartwatch brands in the Google Store?
Sample Output:
Task 4. Leverage Generative Knowledge Assist to help your agents
Now that you have created an agent that can answer questions about products for the Google Store, let's make it available to the customer service agents. To do so, you will configure an Agent Assist Profile to leverage the agent via Generative Knowledge Assist. Then you will explore the simulator to run a conversation flow.
- In the Conversational Agents Console, click on the Main Menu button at the top left of the page.
- Click on Agent Assist.
- Navigate to Conversation Profiles and click Create new.
- Name it
Google Store data store for suggestions.
- Check Generative Knowledge Assist and select
google-agent.
- Check Enable conversation augmented query.
- Click Create.
- A new entry is created. Click on Try it now.
- Enter the following customer message conversation.
What are the available smartwatch brands in the Google Store?
-
On the right pane, ask the Generative Knowledge assist for available smartwatch brands in the Google Store and press enter.
Sample Output:
[Generative Knowledge Assist] The Google Store sells smartwatches from Google Pixel Watch, Fitbit Sense 2, Fitbit Versa 4, Fitbit Inspire 3, Fitbit Charge 5, and Fitbit Luxe. These smartwatches help you manage your day, health, and fitness.
-
Click on the Paste into the input box button and click Send message.
Congratulations!
You have learned how to set up the Generative Knowledge Assist feature in Agent Assist from the Agent Assist console. You walked through the detailed steps of creating a Data Store, adding documents to the data store, creating the data store agent, creating a conversation profile and connecting the Generative Knowledge Assist agent to it. You also tested Generative Knowledge Assist performance using the Agent Assist simulator.
End your lab
When you have completed your lab, click End Lab. Qwiklabs removes the resources you’ve used and cleans the account for you.
You will be given an opportunity to rate the lab experience. Select the applicable number of stars, type a comment, and then click Submit.
The number of stars indicates the following:
- 1 star = Very dissatisfied
- 2 stars = Dissatisfied
- 3 stars = Neutral
- 4 stars = Satisfied
- 5 stars = Very satisfied
You can close the dialog box if you don't want to provide feedback.
For feedback, suggestions, or corrections, please use the Support tab.


