SCBL092
Agent Assist uses machine learning technology to provide suggestions to your human agents when they are in a conversation with a customer. Suggestions are based on your own uploaded data and therefore can be tailored to your specific business needs. Agent Assist also has multiple features that you can use to provide different types of suggestions and fine tune the suggested content that is provided to your agents. For example, you can configure suggestions using the Smart Reply feature. Each time an end-user asks a question, Agent Assist can provide suggested responses to the human agent.
This lab is a step-by-step approach to upload your data, train a model, and test your Smart Reply results during design-time using the Agent Assist console.
What you will learn
You will learn :
- How to create a conversation dataset using public transcript data.
- How to train a Smart Reply model using conversation datasets.
- How to create a conversation profile.
- How to test Smart Reply results using the Agent Assist simulator.
Reference Architecture
High Level Architecture
The following diagram shows a high-level architecture of customer onboarding process for agent assist.
Step 1: Prepare data
At this stage, you'll collect recent, relevant and high quality chat conservations (including speaker role and timestamp) which are stored in Google Cloud storage.
Step 2: Setup Dataset
A conversation dataset contains conversation transcript data, and is used to train a Smart Reply model. Smart Reply uses the conversation transcripts to recommend text responses to human agents conversing with an end-user.
Step 3: Train Model
At this stage, a Smart Reply model is being trained for the defined conversation dataset.
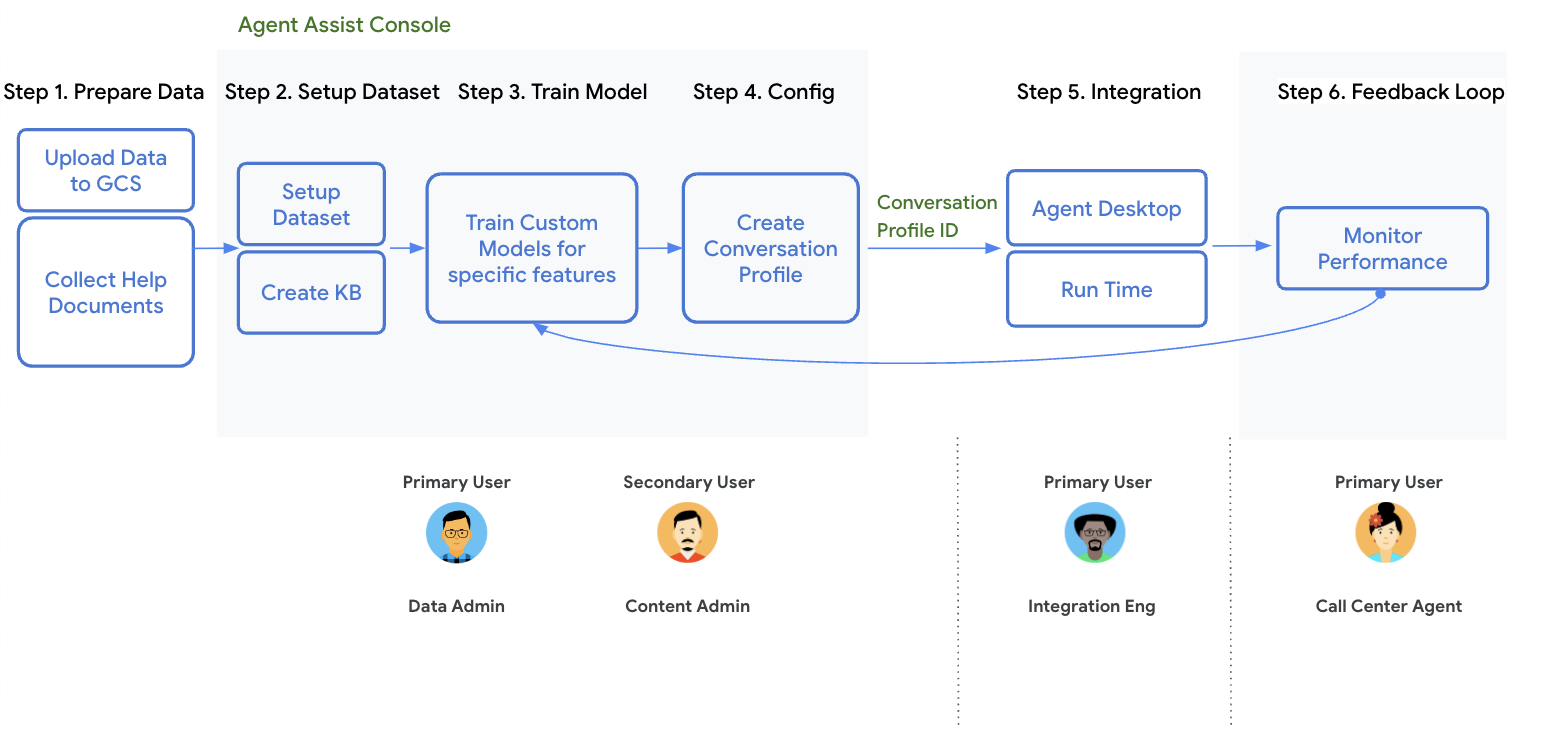
Step 4: Configuration
A conversation profile configures a set of parameters that control the suggestions made to an agent. These parameters control the suggestions that appear at runtime. Each profile can be configured either for a Conversational Agents or for a human agent for a conversation. If a human agent is in the conversation, you can also configure which category of suggestions are surfaced (for example, FAQ documents or Article Suggestions). You must create a conversation profile in order to create a conversation with an end-user.
Step 5: Integration
At this stage, the integration with client environments is being performed. Both chat integration and Phone integration (gRPC and Telephony) are possible.
Step 6: Feedback Loop
Feedback Loop (FBL) is a process that enables you to understand conversational traffic patterns through flows and pages that helps to quickly identify issues, such as pages with high escalations, no-match events or webhook errors. This step is critical to improve bot's performance.
Prerequisites and Cloud Environment Setup
Before you click the Start Lab button
Read these instructions. Labs are timed and you cannot pause them. The timer, which starts when you click Start Lab, shows how long Google Cloud resources will be made available to you.
This Qwiklabs hands-on lab lets you do the lab activities yourself in a real cloud environment, not in a simulation or demo environment. It does so by giving you new, temporary credentials that you use to sign in and access Google Cloud for the duration of the lab.
What you need
To complete this lab, you need:
- Access to a standard internet browser (Chrome browser recommended).
- Time to complete the lab.
Note: If you already have your own personal Google Cloud account or project, do not use it for this lab.
Note: If you are using a Pixelbook, open an Incognito window to run this lab.
Activate Cloud Shell
Cloud Shell is a virtual machine that is loaded with development tools. It offers a persistent 5GB home directory and runs on the Google Cloud. Cloud Shell provides command-line access to your Google Cloud resources.
In the Cloud Console, in the top right toolbar, click the Activate Cloud Shell button.

Click Continue.

It takes a few moments to provision and connect to the environment. When you are connected, you are already authenticated, and the project is set to your PROJECT_ID. For example:

gcloud is the command-line tool for Google Cloud. It comes pre-installed on Cloud Shell and supports tab-completion.
You can list the active account name with this command:
gcloud auth list
(Output)
Credentialed accounts:
- <myaccount>@<mydomain>.com (active)
(Example output)
Credentialed accounts:
- google1623327_student@qwiklabs.net
You can list the project ID with this command:
gcloud config list project
(Output)
[core]
project = <project_ID>
(Example output)
[core]
project = qwiklabs-gcp-44776a13dea667a6
Task 1. Enable APIs
- Open Cloud Shell and run the following commands to enable the Dialogflow, Cloud Storage and Data Labeling APIs
gcloud services enable dialogflow.googleapis.com
gcloud services enable storage.googleapis.com
gcloud services enable datalabeling.googleapis.com
You should see a success message similar to the following.
Operation "operations/acf.p2-433111697035-74541b6c-efc3-4c78-9141-3ac1368621e4" finished successfully.
Task 2. Creating a conversation dataset
In this step, you will create a conversation dataset which will be used for model training. A conversation dataset contains conversation transcript data, and is used to train either a Smart Reply or Summarization custom model. Smart Reply uses the conversation transcripts to recommend text responses to human agents conversing with an end-user.
You will be using a public dataset which is derived from an external source and is stored in a Google Cloud Storage bucket. The data contains task-oriented dialogues touching six domains: "Booking", "Restaurant", "Hotel", "Attraction", "Taxi", and "Train".
- Run the following command in Cloud Shell to see the publicly available transcript: (You can see few files for understanding the transcript)
gsutil ls gs://smart_messaging_integration_test_data | sed '1,5!d'
You should see the following output.
gs://smart_messaging_integration_test_data/test_MUL0001_3b6620b2134c902c.json
gs://smart_messaging_integration_test_data/test_MUL0001_3b6620b2134c93f2.json
gs://smart_messaging_integration_test_data/test_MUL0001_3b6620b2134c9a0f.json
gs://smart_messaging_integration_test_data/test_MUL0002_588f4cd535cfb350.json
gs://smart_messaging_integration_test_data/test_MUL0002_588f4cd535cfb3fa.json
-
Go to the Agent Assist Console and select the project.
-
Click Datasets in the left side panel of the Agent Assist console.
-
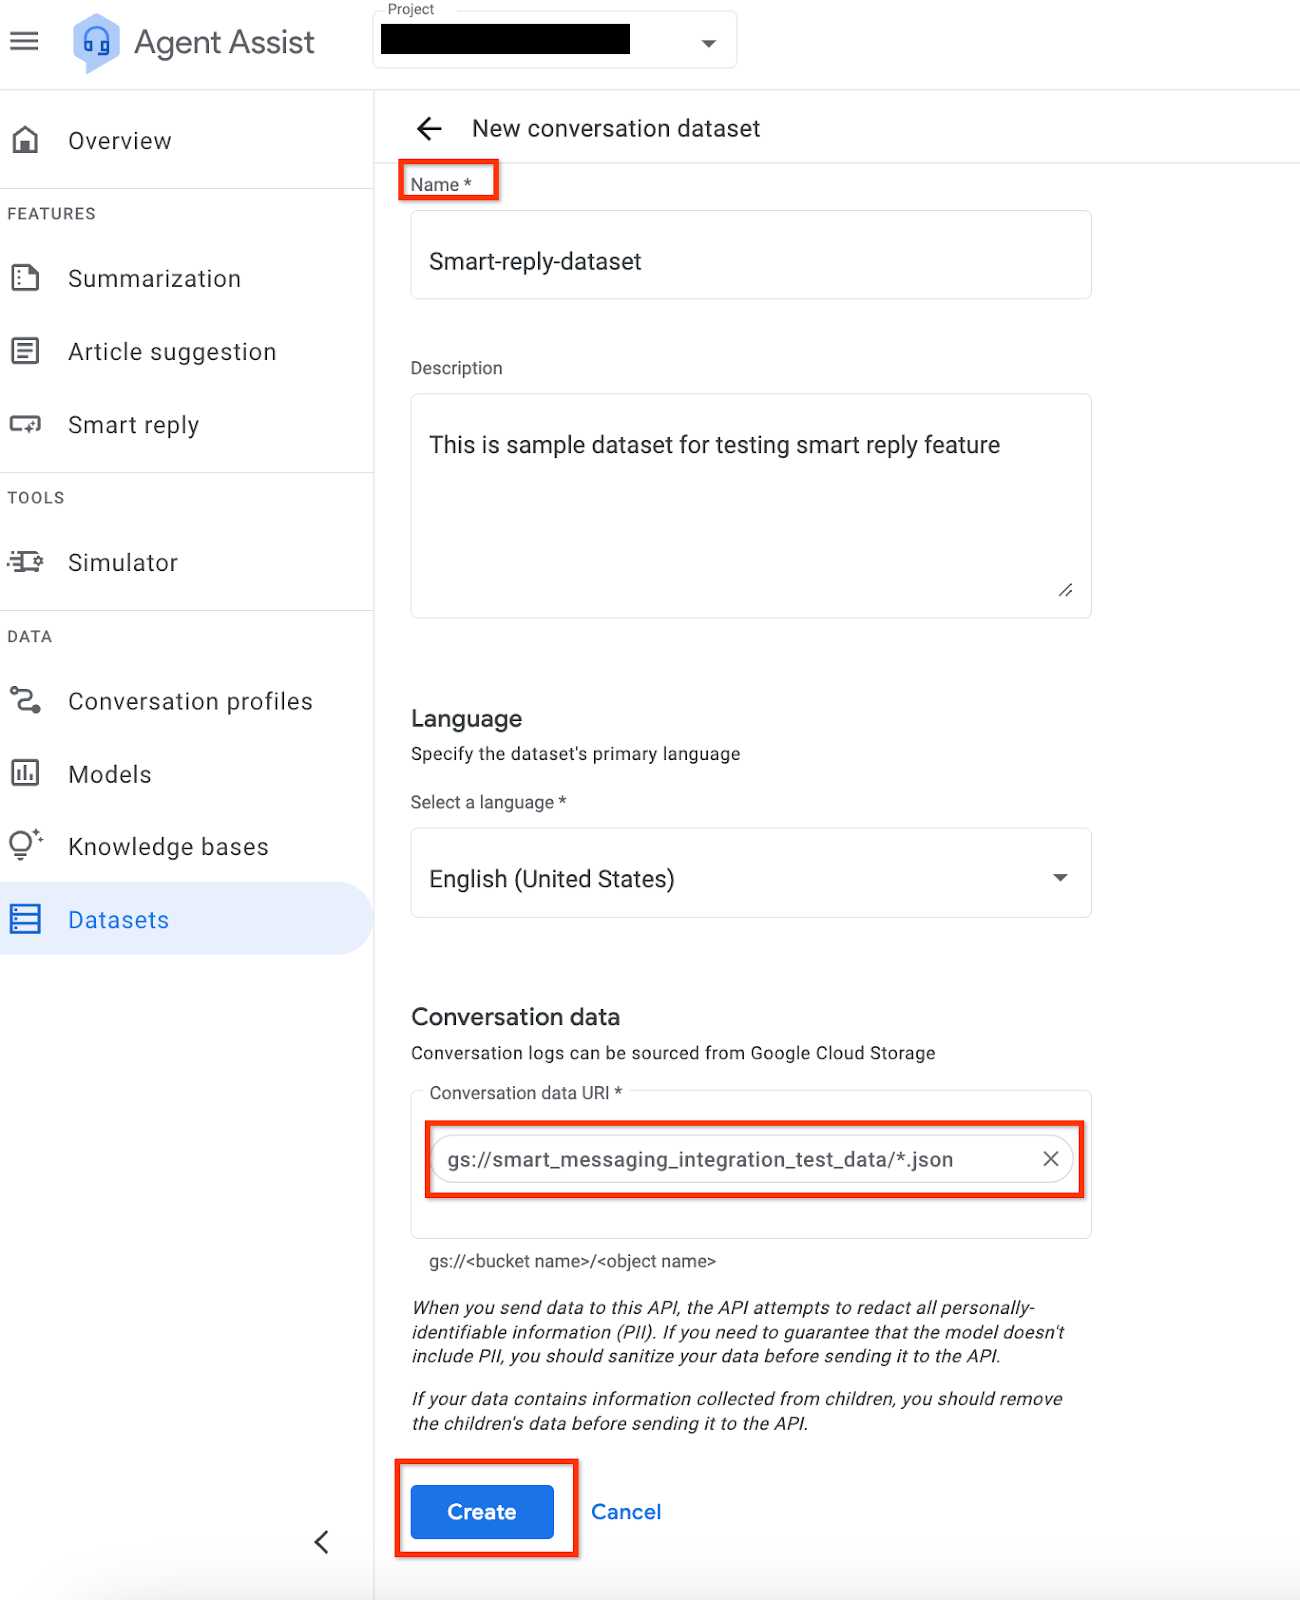
Click + Create button. You should the screen shown below.
-
Enter all required details:
-
Name:
smart-reply-dataset
-
Description: Dataset for training a Smart Reply model
-
Language: Select Language for your dataset [By default - English (United States)]
-
Conversation data:
gs://smart_messaging_integration_test_data/*.json
-
Click Create.
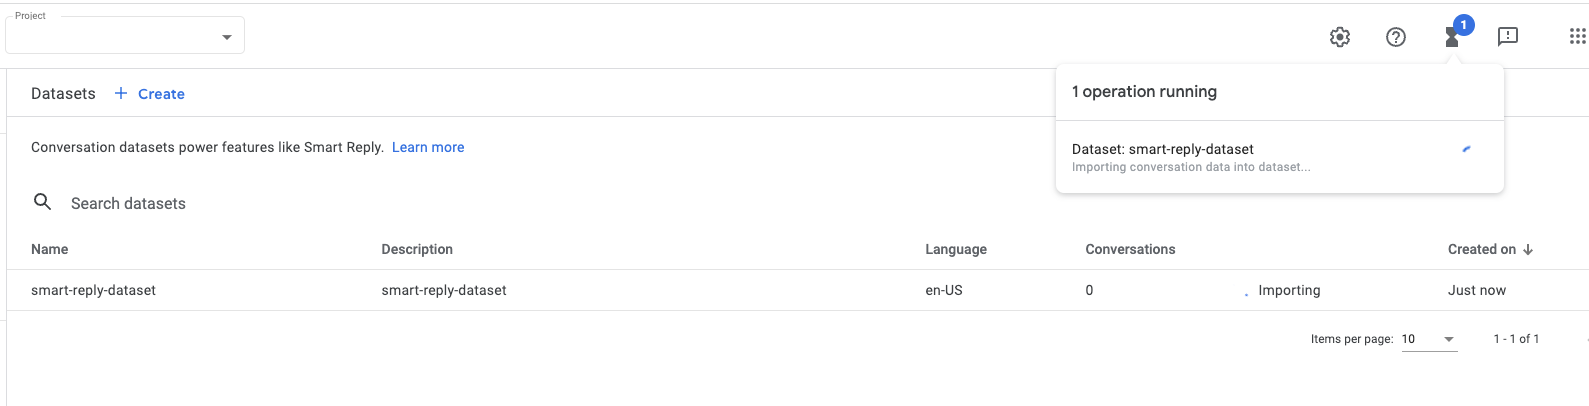
After clicking the Create button, the dataset creation will begin. You can monitor the progess by clicking the Status option:
Once the conversation dataset is created, you'll see the following screen. Note that it will take 10-15 minutes for the dataset to be created.
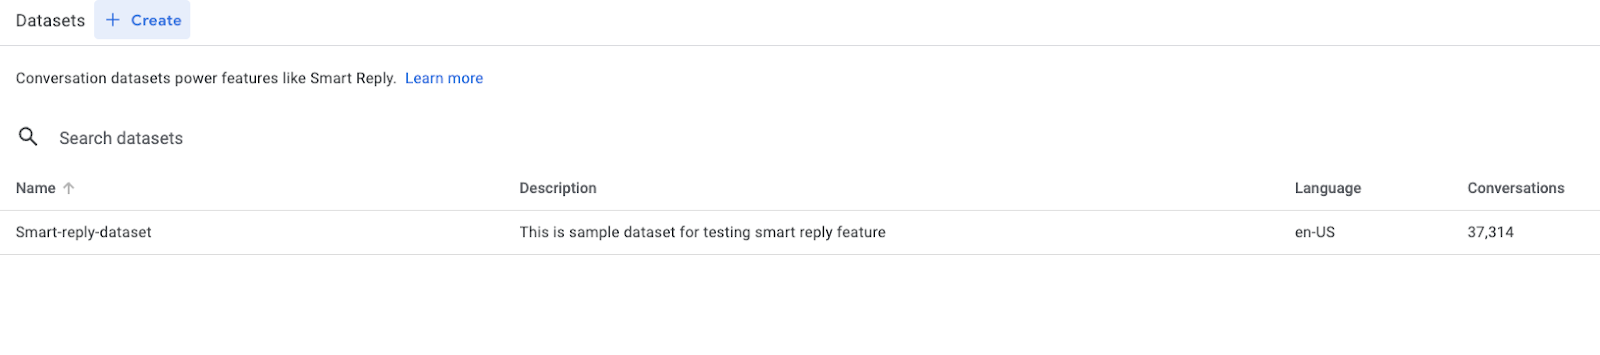
Now, you have successfully created the dataset having 37,314 conversations.
Task 3. Training a Smart Reply Model
In this step, you train a smart reply model for the purpose of deploying it using the Agent Assist Console.
-
If you are not still in the Agent Assist Console, return to the Agent Assist Console and select the project.
-
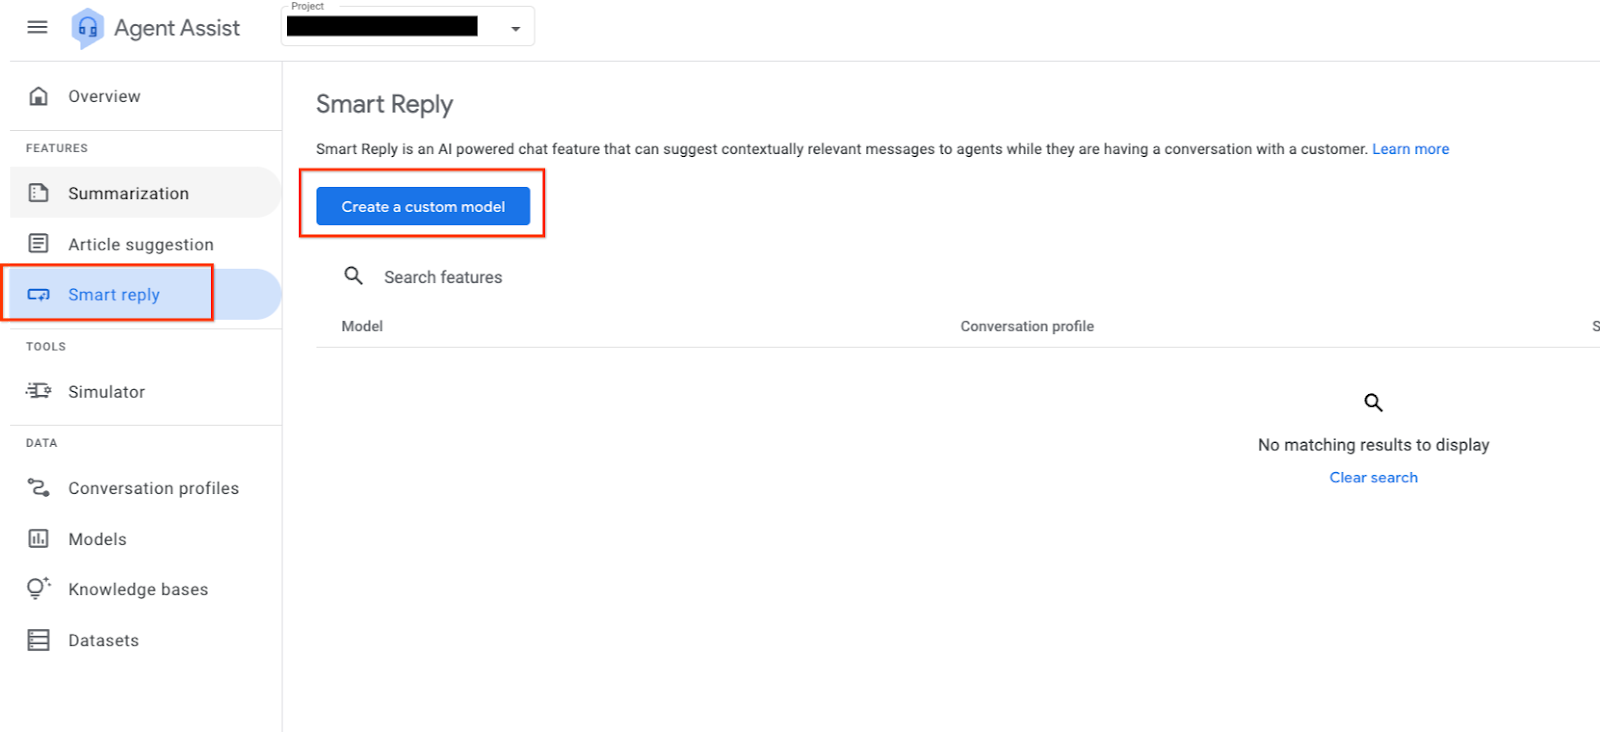
Click Smart reply on the left side of the panel.
-
Click Create a custom model button.
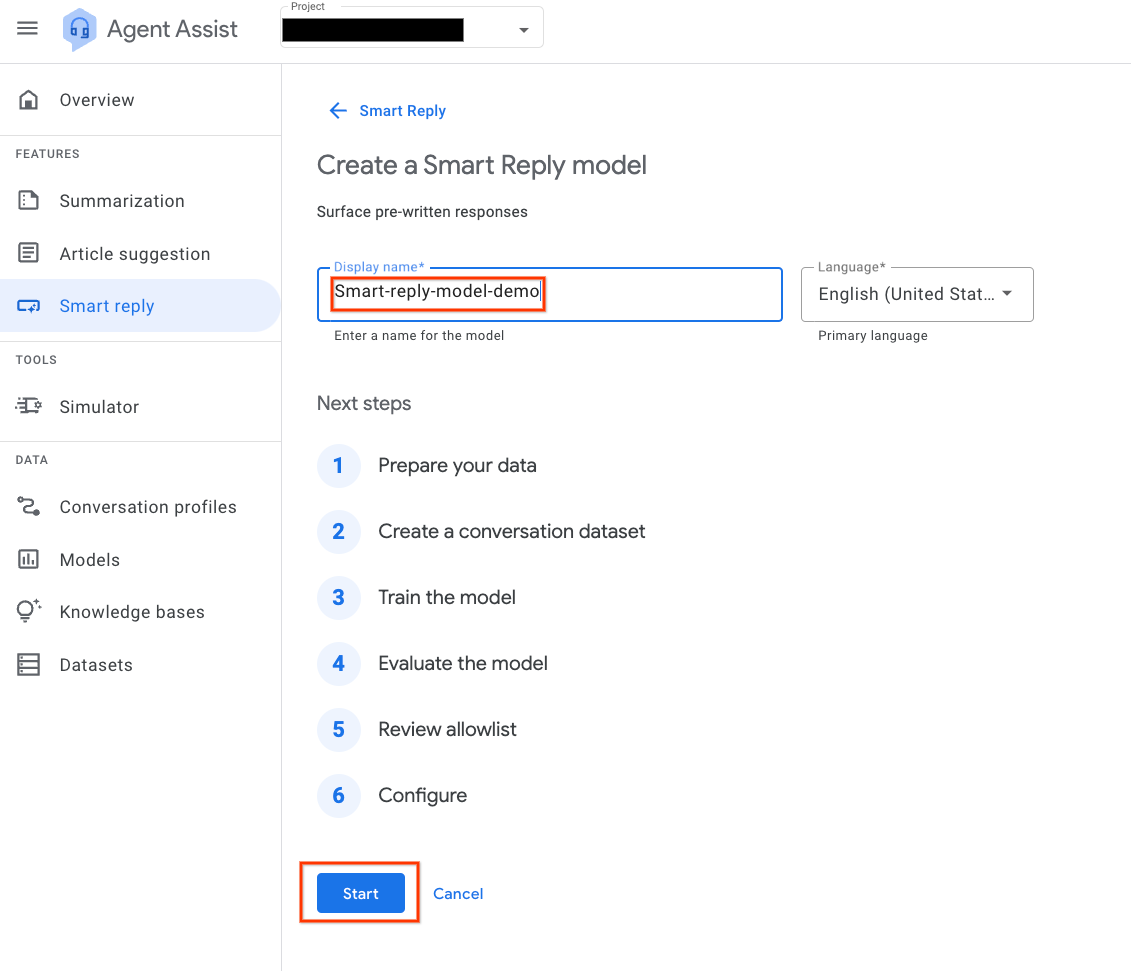
- Enter
smart-reply-model-demo for Display name and then click the Start button.
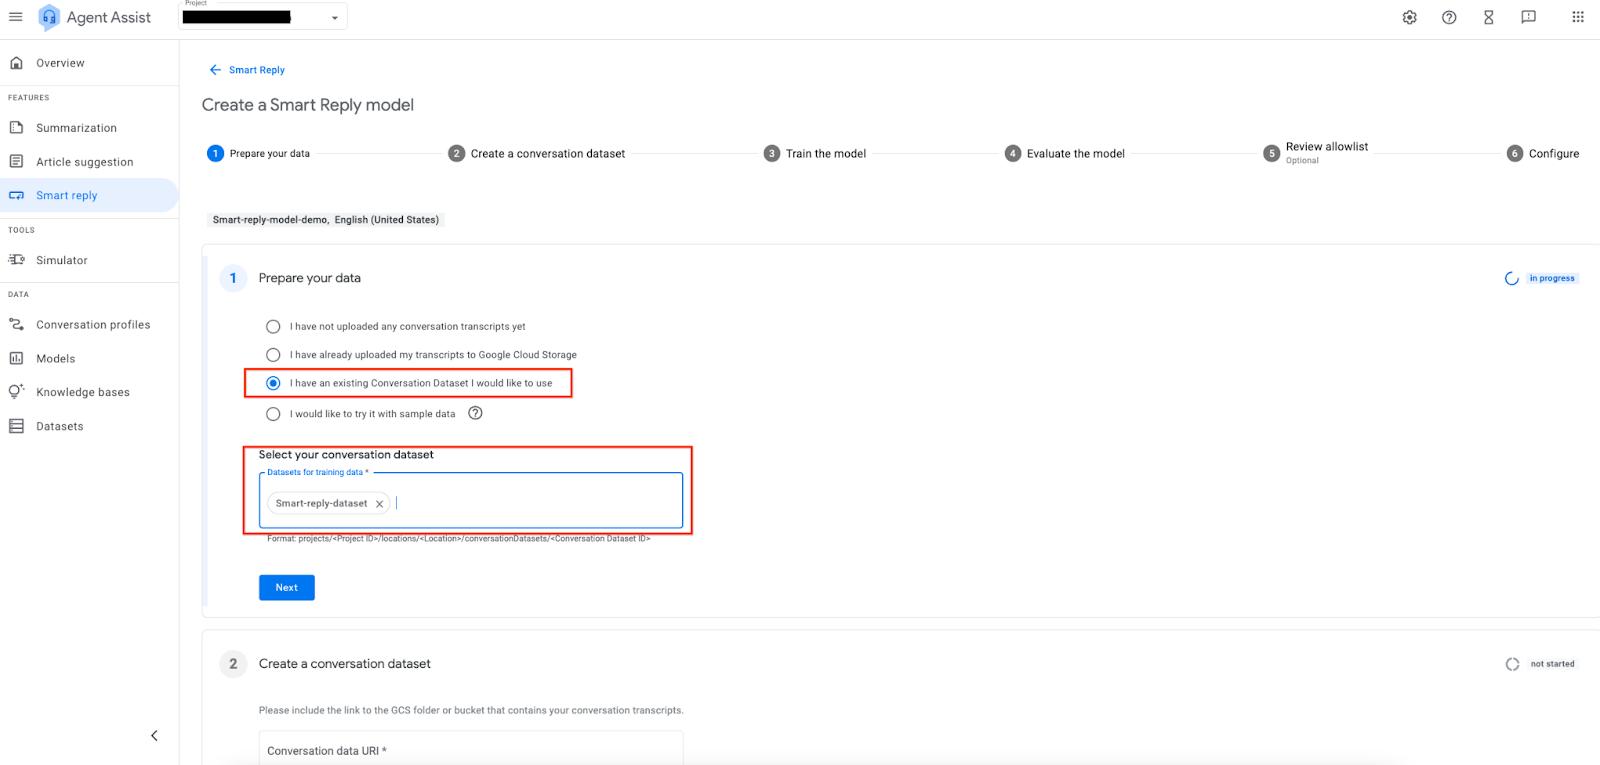
- Select the radio button I have an existing Conversation Dataset I would like to use and then select the
smart-reply-dataset conversation dataset you created previously. Click Next
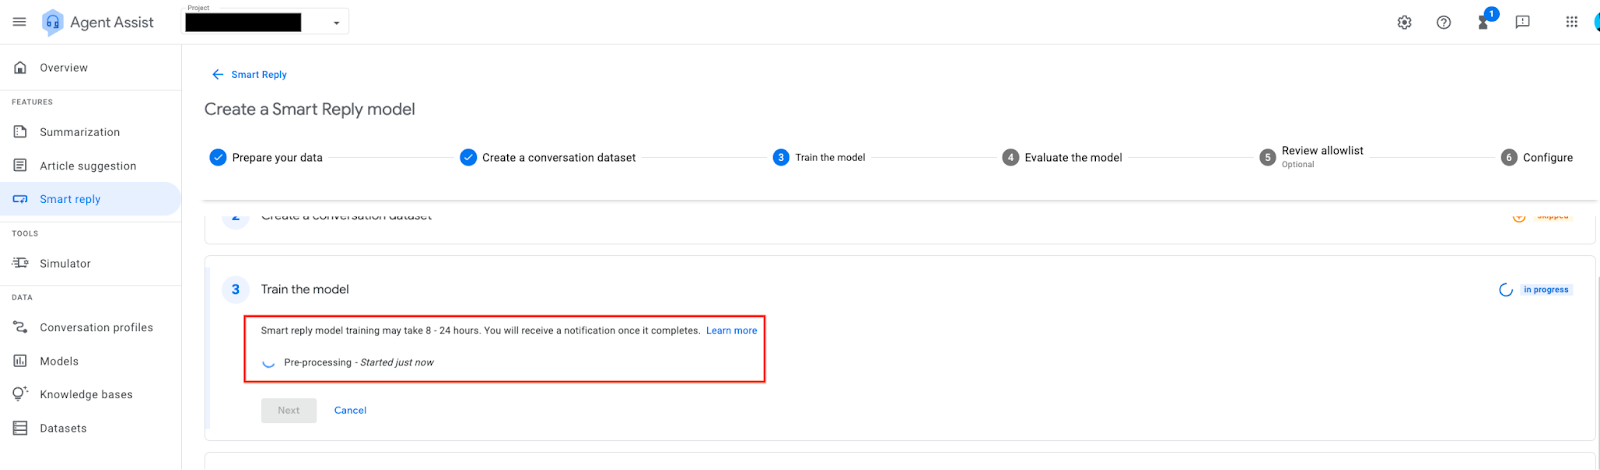
- Click Begin training as shown in the screenshot below.
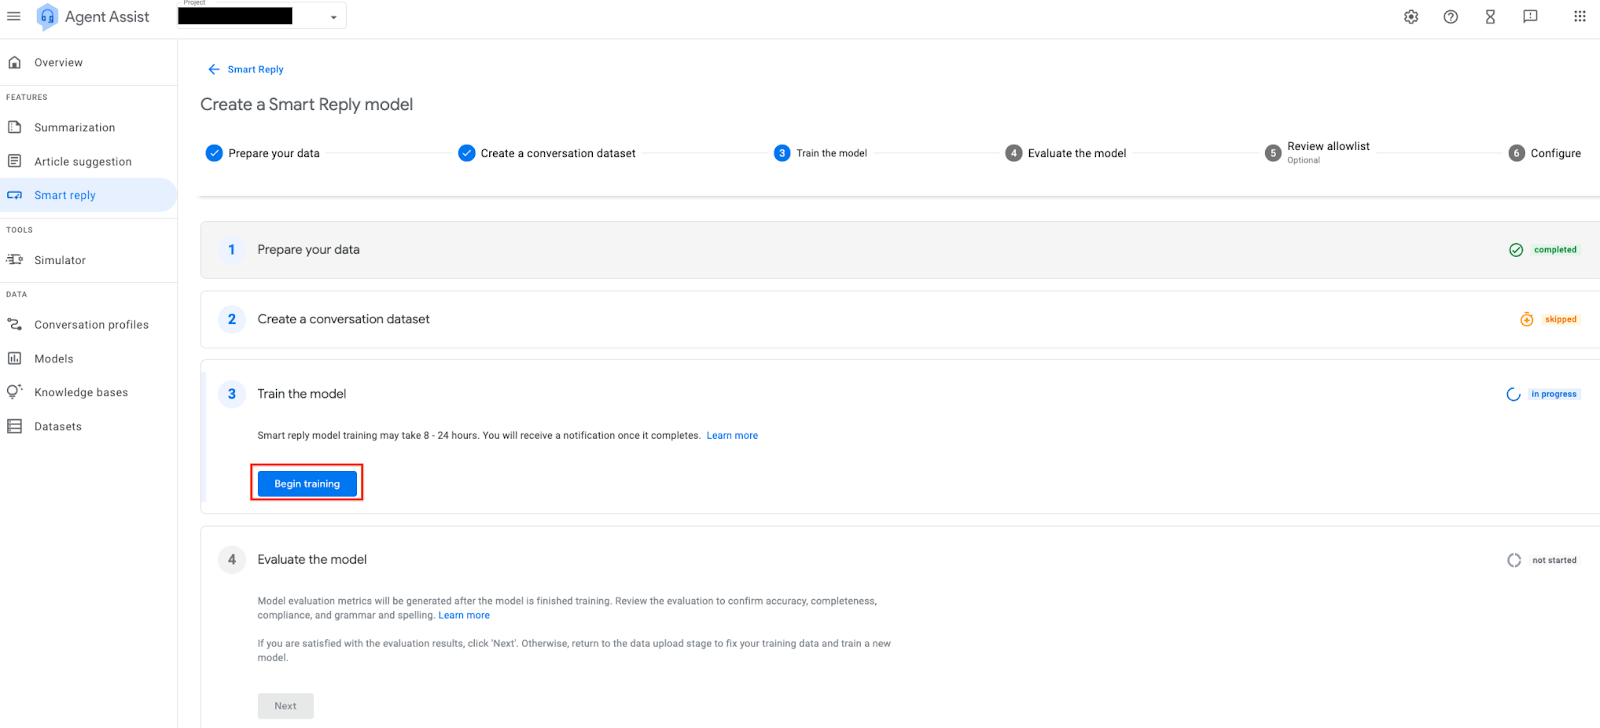 Model training will start and it can take anywhere between 8-24 hours to complete the training. The following steps are here to describe complete the model deployment process. You will not be able to perform these steps within the lab envrionment due to the training time for the Smart Reply model.
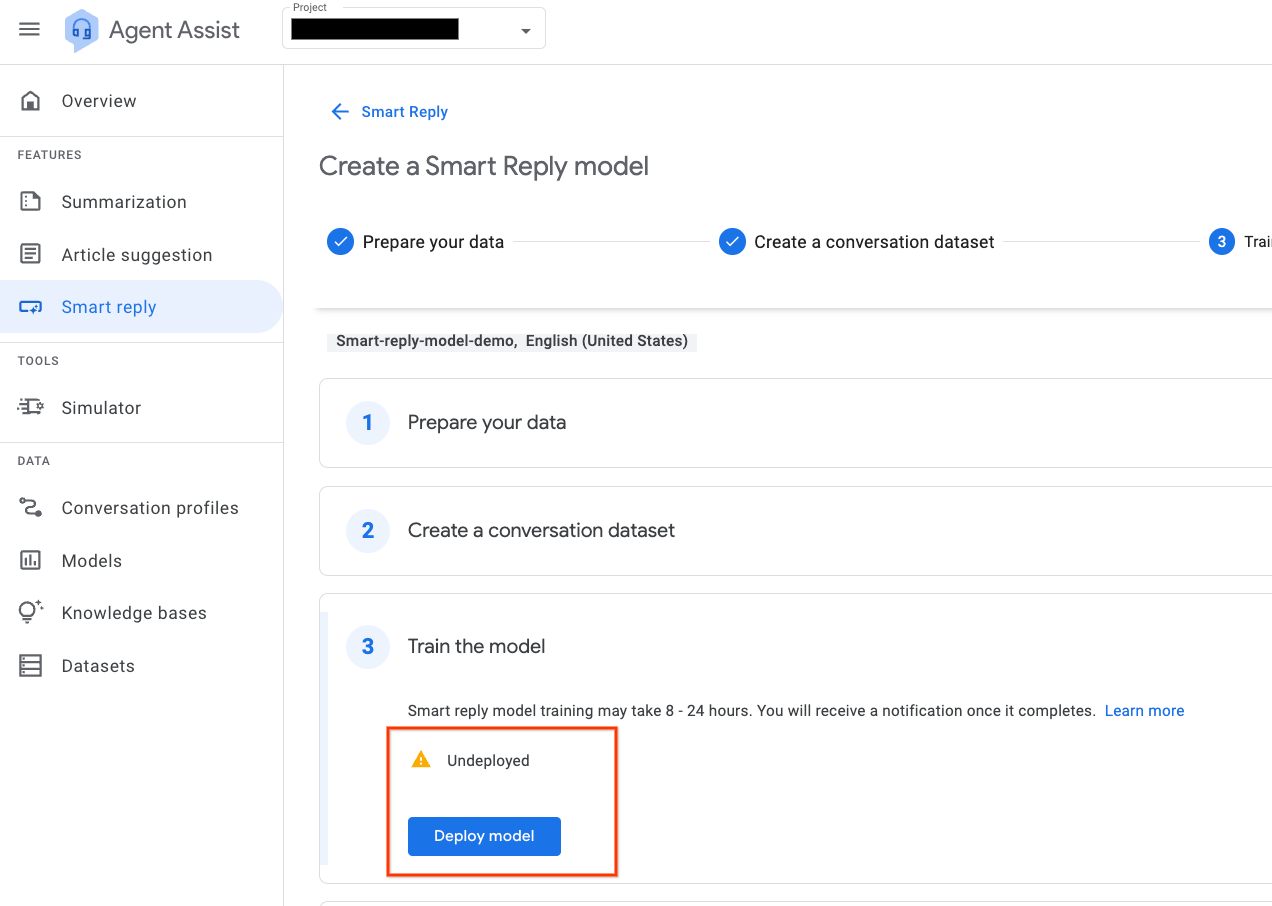
Once the model has completed training, click the Deploy Model button to proceed to the next step.
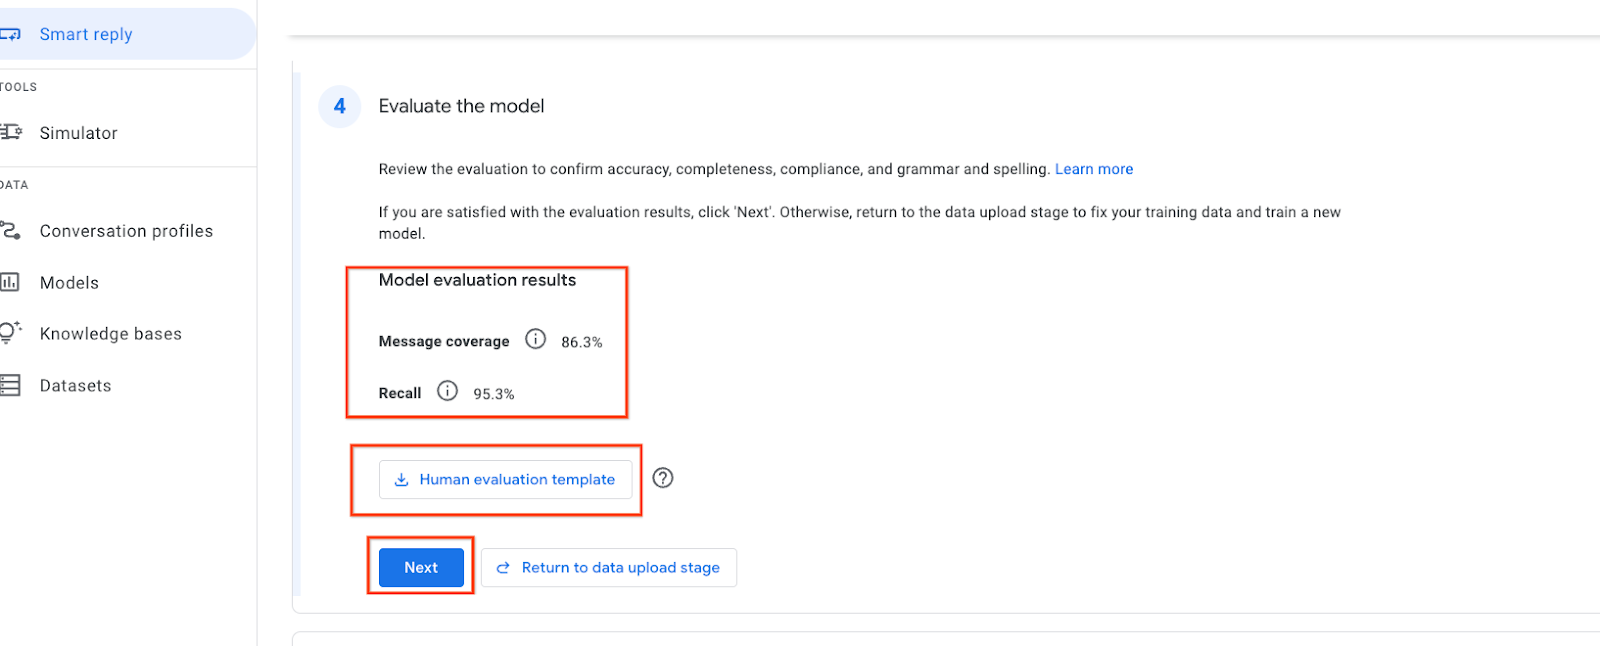
After model deployement, you should evaluate model performance. You can verify accuracy, completeness, compliance, and grammar and spelling. If you are satisfied with the evaluation results, click Next.
Otherwise, return to the data upload process to fix your training data and train a new model.
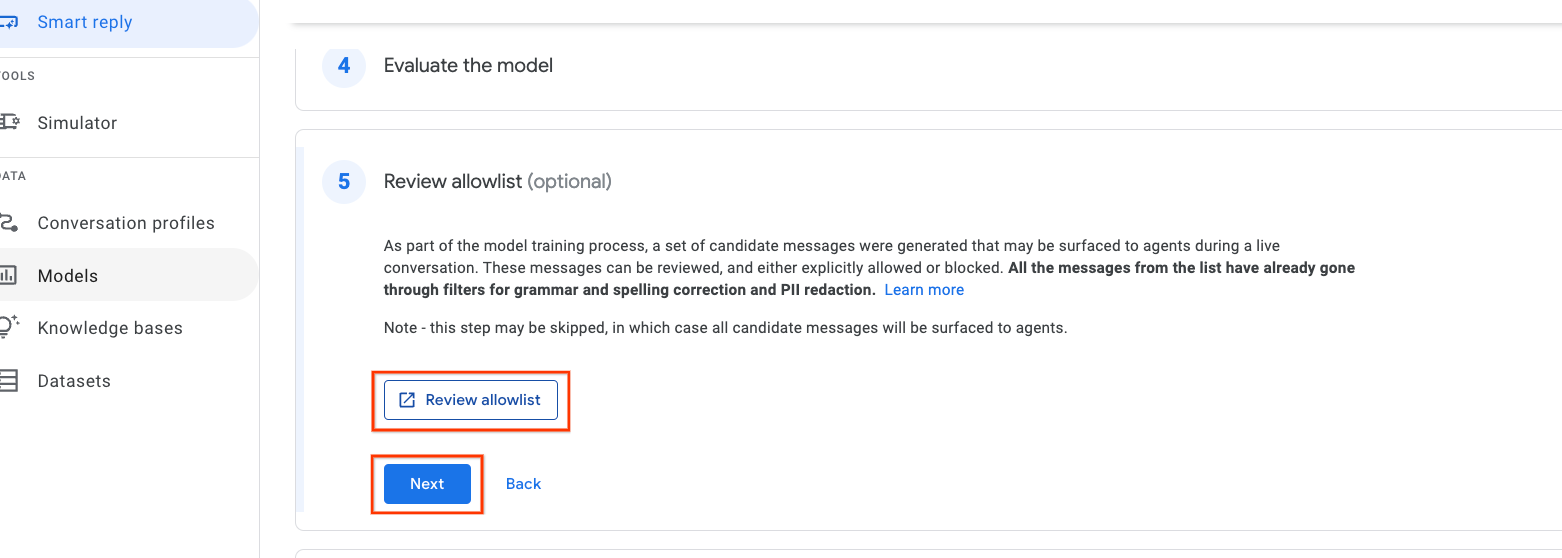
You also need verify the allowlist for the smart reply model. Click Review allowlist.
The allowlist is a list of potential suggestions that can be surfaced to agents during a conversation. The allowlist contains all possible suggestions generated using the selected conversation dataset.
To make messages easier to manage, Agent Assist automatically groups messages with similar meaning. You can see a message's similar messages by clicking on the Show (X) similar messages link to the right of the message.
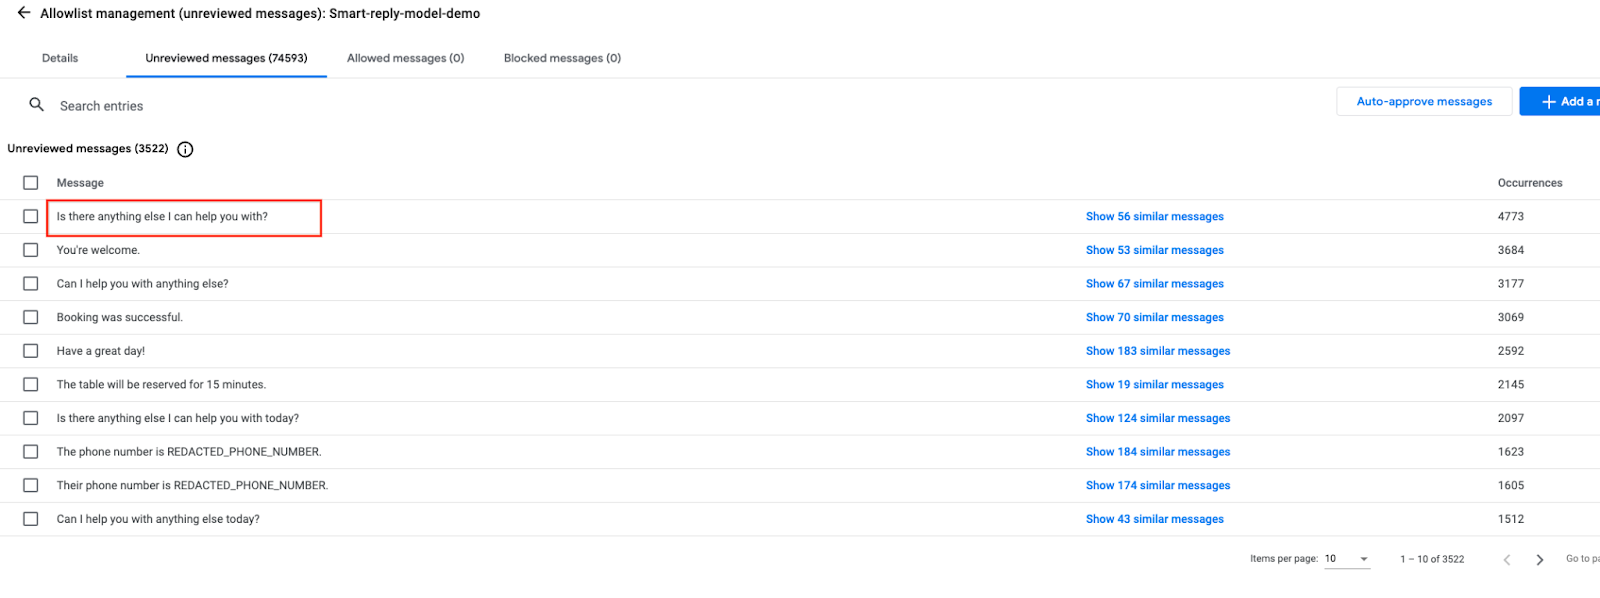
Click on any message and you'll see similar messages as shown below.
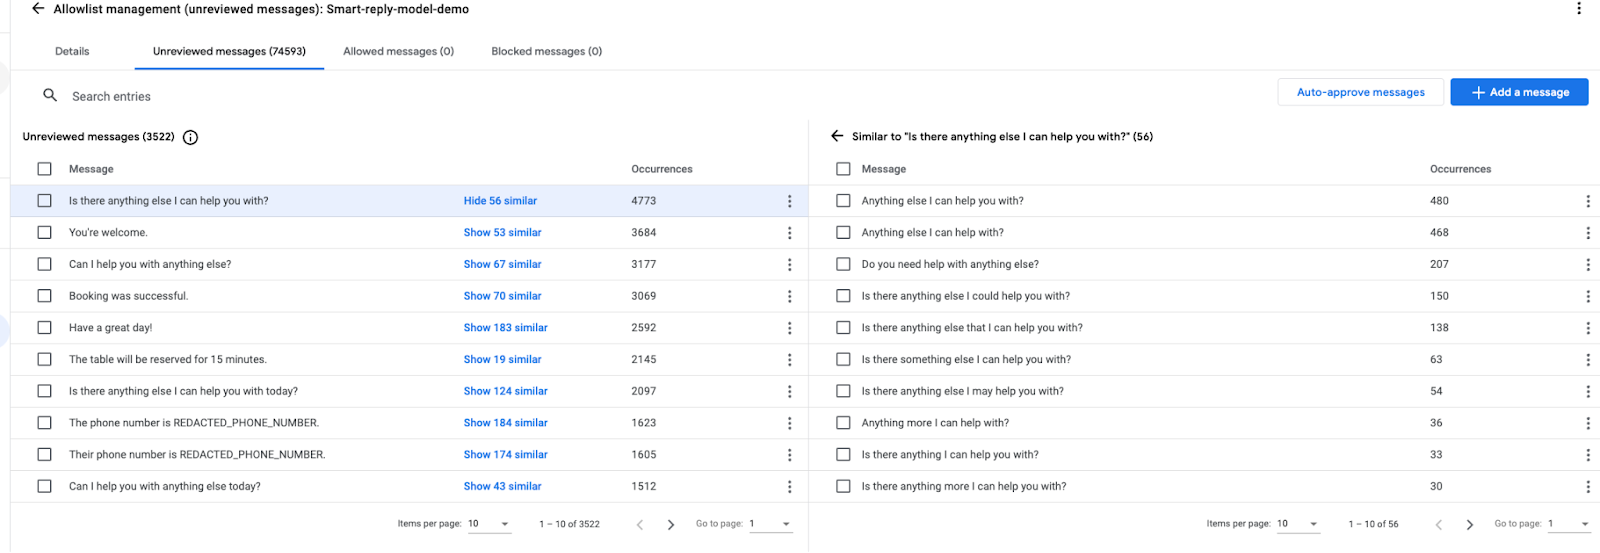
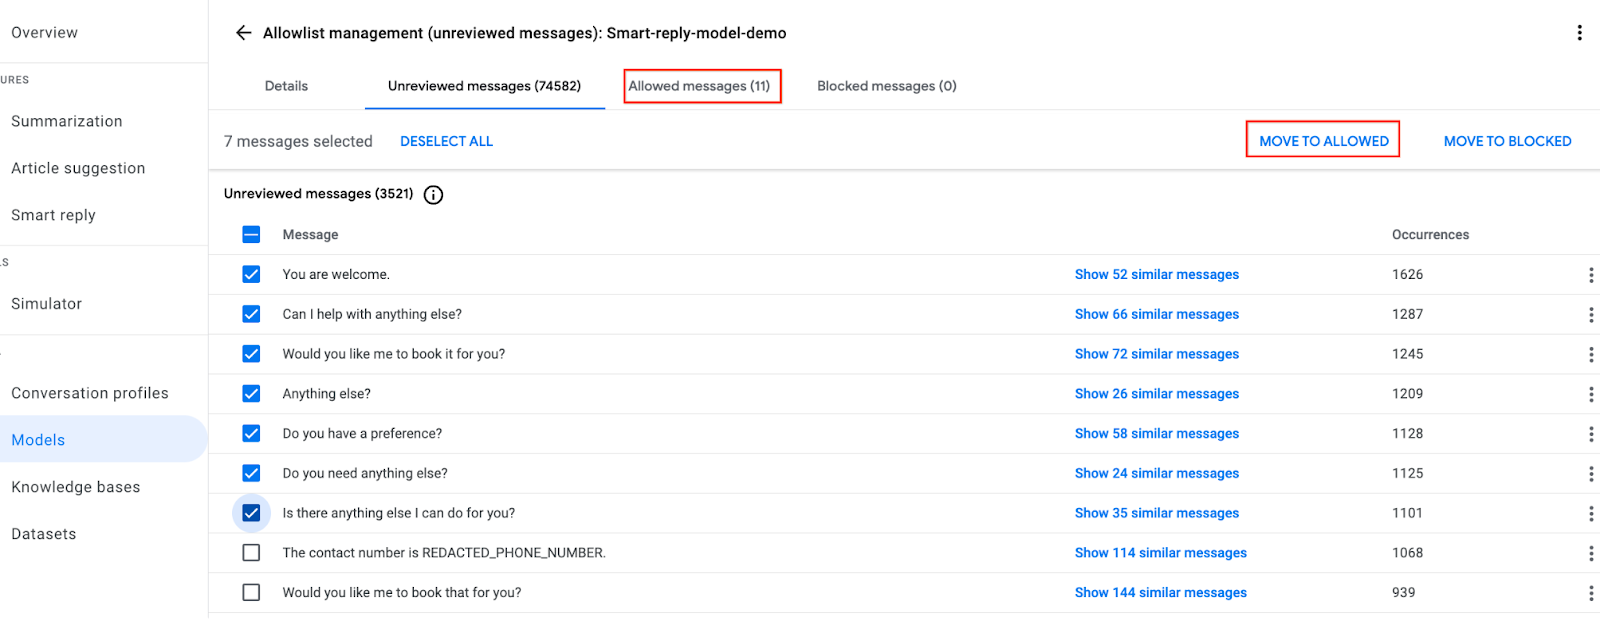
You can also edit the displayed messages by clicking on the message as shown below.

After careful observation and as per your business need, you can move the messages to either MOVE TO ALLOWED or MOVE TO BLOCKED
Note: Only allowed messages will be suggested during runtime chat and hence, Allowed messages should have sufficient entries to suggest.
Now, once you are done, click on the 3 dots icon on the right side of screen and select + Create profile button.
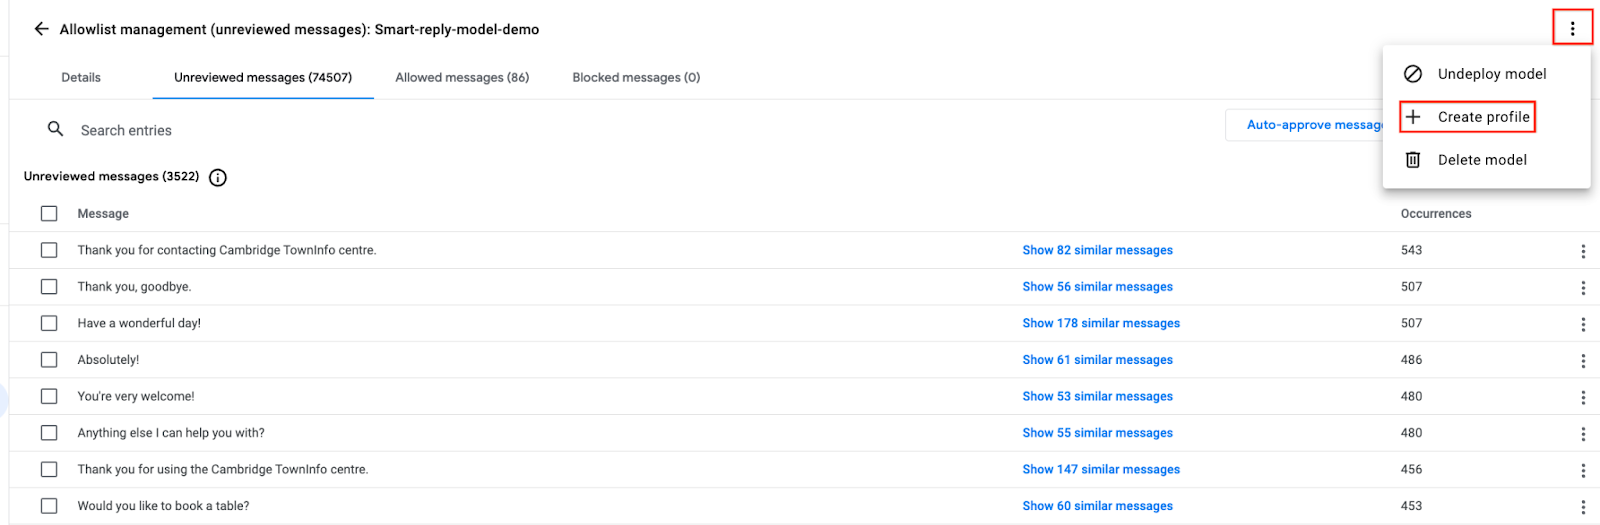
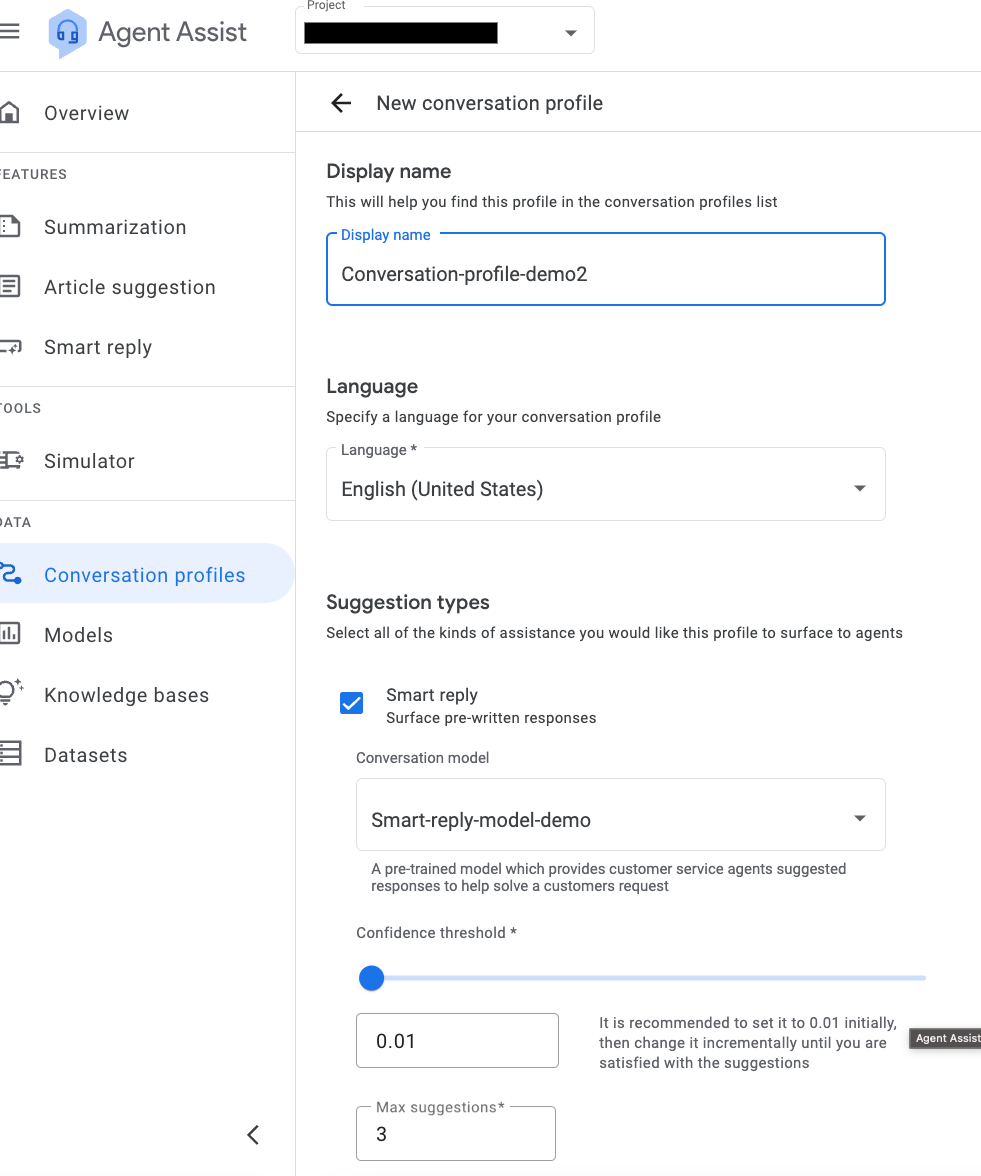
In this step, you'll create a conversation profile.
A conversation profile configures a set of parameters that control the suggestions made to an agent. These parameters control the suggestions that appear at runtime.
Enter the required information as shown in the below screenshot.
-
Display Name: Any name (for example, conversation-profile-demo)
-
Suggestion type: Tick the Smart reply option
-
Confidence threshold and Max suggestion: Keep by default for now.
(Later, you've to play with these parameters for achieving better results)
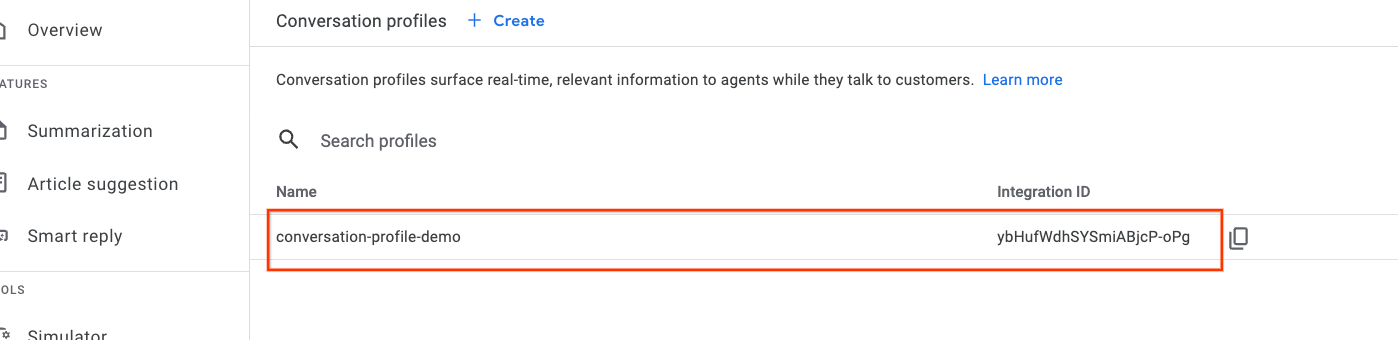
Now, finally go and select this conversation profile in the step 6 config.
Navigate to the Conversation Profile button on the left side of the screen. You'll see Integration ID that would get generated for the same shown in the screenshot below.
Finally, navigate to the Models button to view the trained smart reply model.
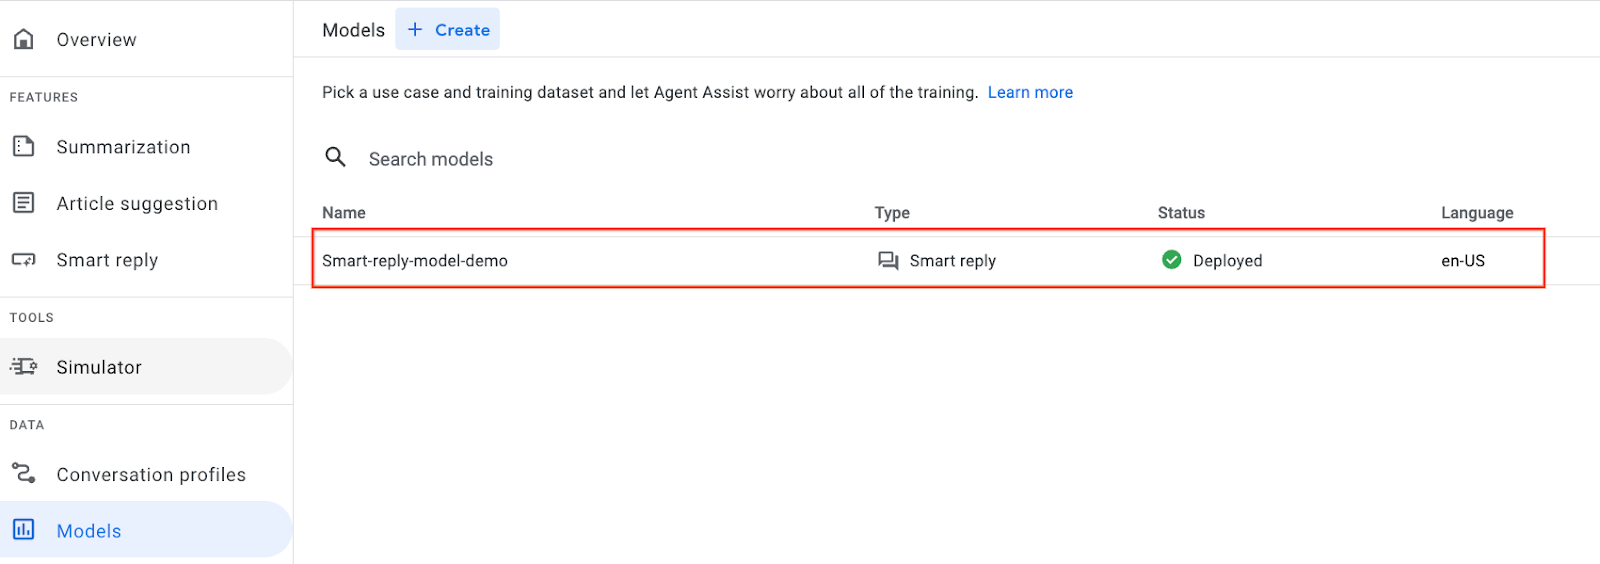
Congratulations! You have successfully created a Smart reply model.
Conclusion
Congratulations! You have successfully loaded a conversation dataset, and started training a model for Smart Reply using the Agent Assist console.
Further Documentation
Agent Assist Basics
https://cloud.google.com/agent-assist/docs/basics
Train a Smart Reply model & manage allowlists
https://cloud.google.com/agent-assist/docs/model-training
Conversational Agent Basics
https://cloud.google.com/dialogflow/cx/docs/basics
Best practices: Knowledge documents
https://cloud.google.com/agent-assist/docs/knowledge-documents
Agent Assist pricing
https://cloud.google.com/agent-assist/pricing
End your lab
When you have completed your lab, click End Lab. Qwiklabs removes the resources you’ve used and cleans the account for you.
You will be given an opportunity to rate the lab experience. Select the applicable number of stars, type a comment, and then click Submit.
The number of stars indicates the following:
- 1 star = Very dissatisfied
- 2 stars = Dissatisfied
- 3 stars = Neutral
- 4 stars = Satisfied
- 5 stars = Very satisfied
You can close the dialog box if you don't want to provide feedback.
For feedback, suggestions, or corrections, please use the Support tab.
Copyright 2023 Google LLC All rights reserved. Google and the Google logo are trademarks of Google LLC. All other company and product names may be trademarks of the respective companies with which they are associated.


