


Before you begin
- Labs create a Google Cloud project and resources for a fixed time
- Labs have a time limit and no pause feature. If you end the lab, you'll have to restart from the beginning.
- On the top left of your screen, click Start lab to begin
Create Entity
/ 100
In this lab, you learn how to store and query data in Datastore using the Google Cloud console.
Read these instructions. Labs are timed and you cannot pause them. The timer, which starts when you click Start Lab, shows how long Google Cloud resources are made available to you.
This hands-on lab lets you do the lab activities in a real cloud environment, not in a simulation or demo environment. It does so by giving you new, temporary credentials you use to sign in and access Google Cloud for the duration of the lab.
To complete this lab, you need:
Click the Start Lab button. If you need to pay for the lab, a dialog opens for you to select your payment method. On the left is the Lab Details pane with the following:
Click Open Google Cloud console (or right-click and select Open Link in Incognito Window if you are running the Chrome browser).
The lab spins up resources, and then opens another tab that shows the Sign in page.
Tip: Arrange the tabs in separate windows, side-by-side.
If necessary, copy the Username below and paste it into the Sign in dialog.
You can also find the Username in the Lab Details pane.
Click Next.
Copy the Password below and paste it into the Welcome dialog.
You can also find the Password in the Lab Details pane.
Click Next.
Click through the subsequent pages:
After a few moments, the Google Cloud console opens in this tab.

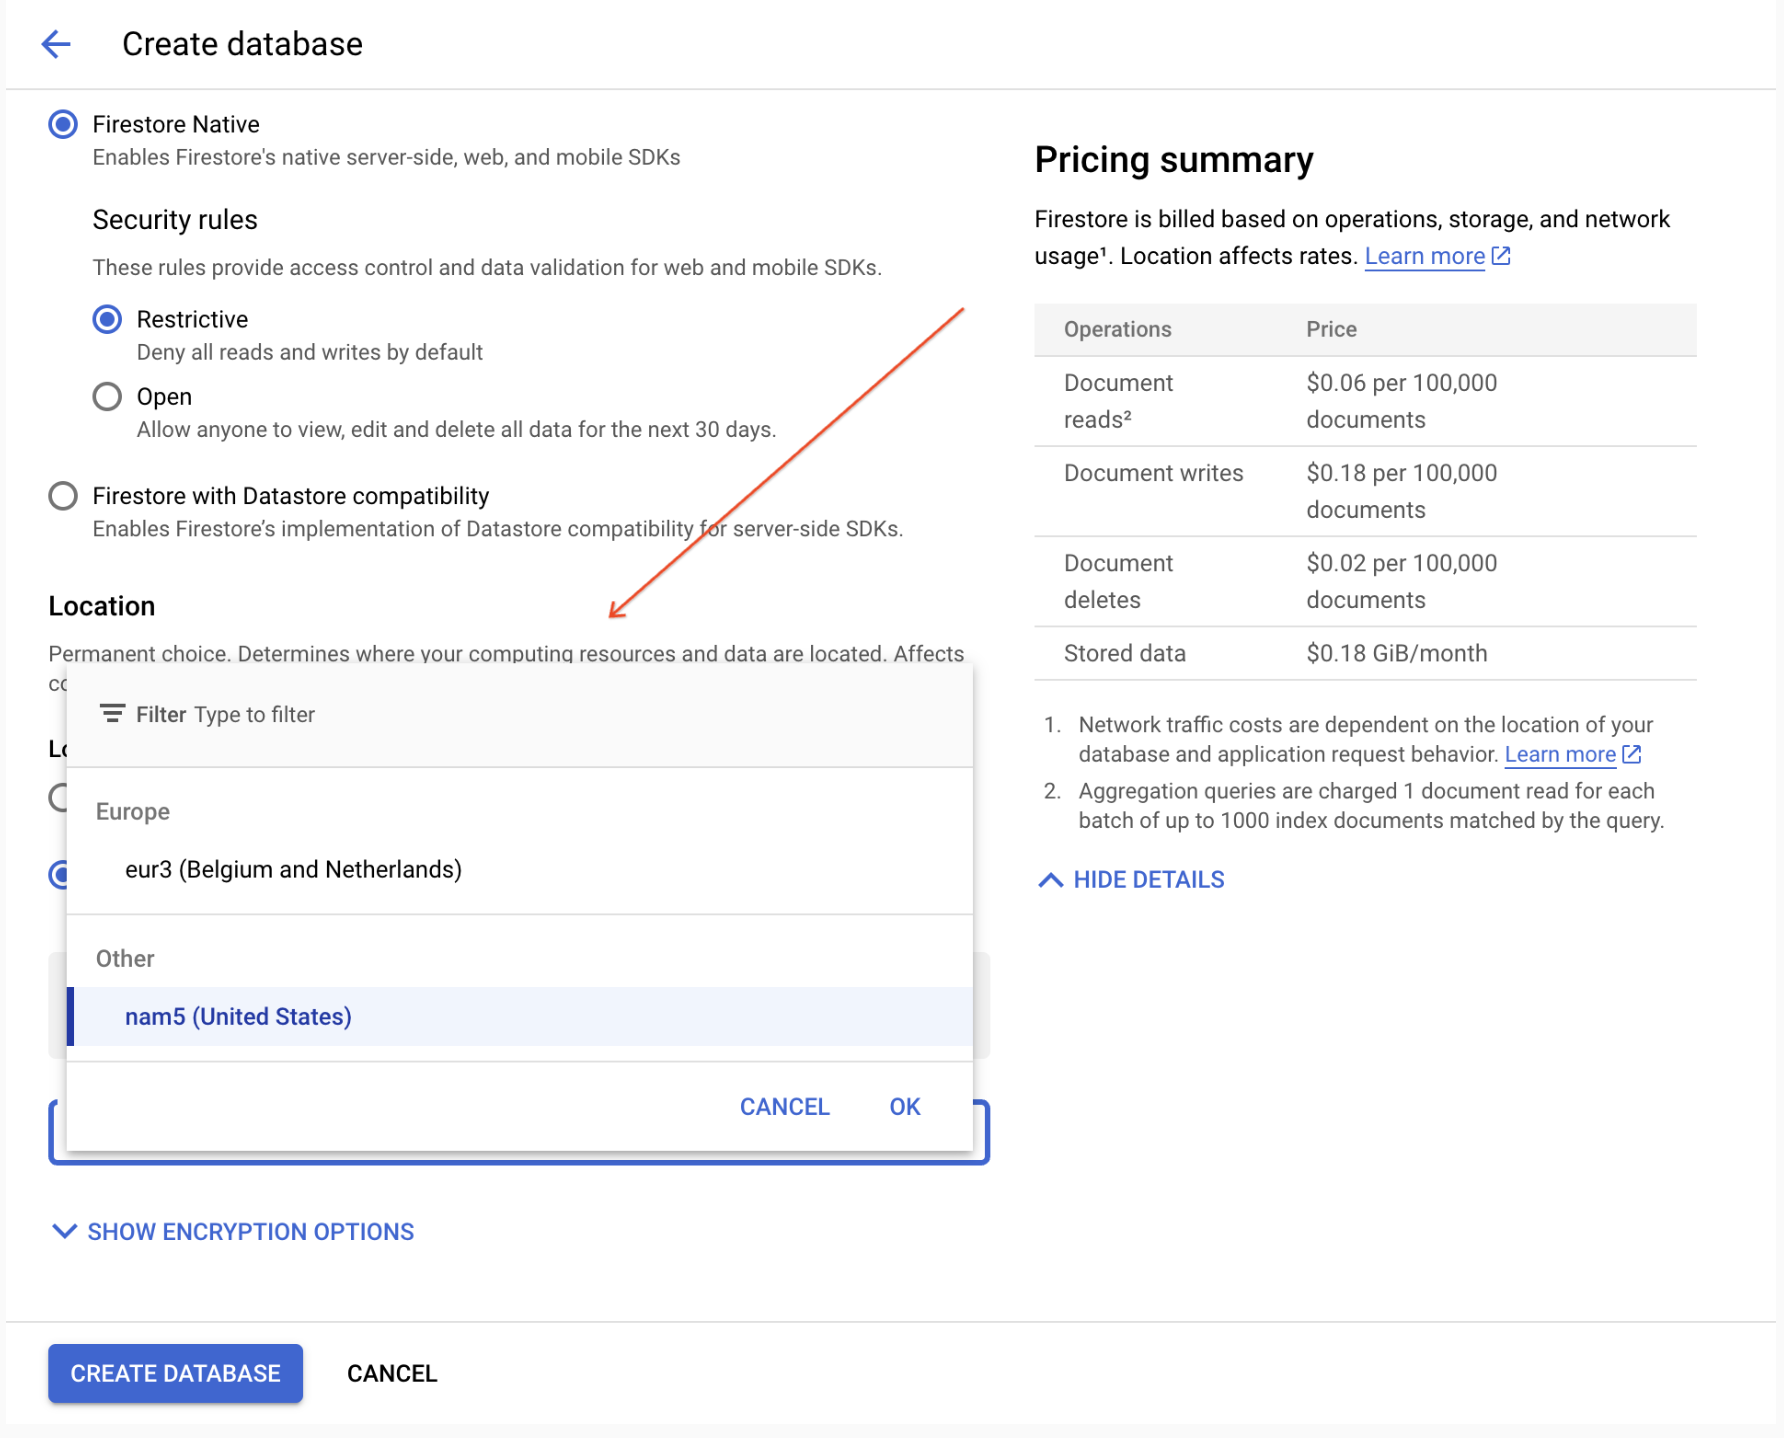
In left menu on the Console, Navigate to Databases section, go to Datastore > +CREATE A FIRESTORE DATABASE.
In the Configuration options, select Firestore with Datastore compatibility.
The location applies to both Cloud Datastore and App Engine for your Google Cloud project. You cannot change the location after it has been saved.
Click CREATE DATABASE.
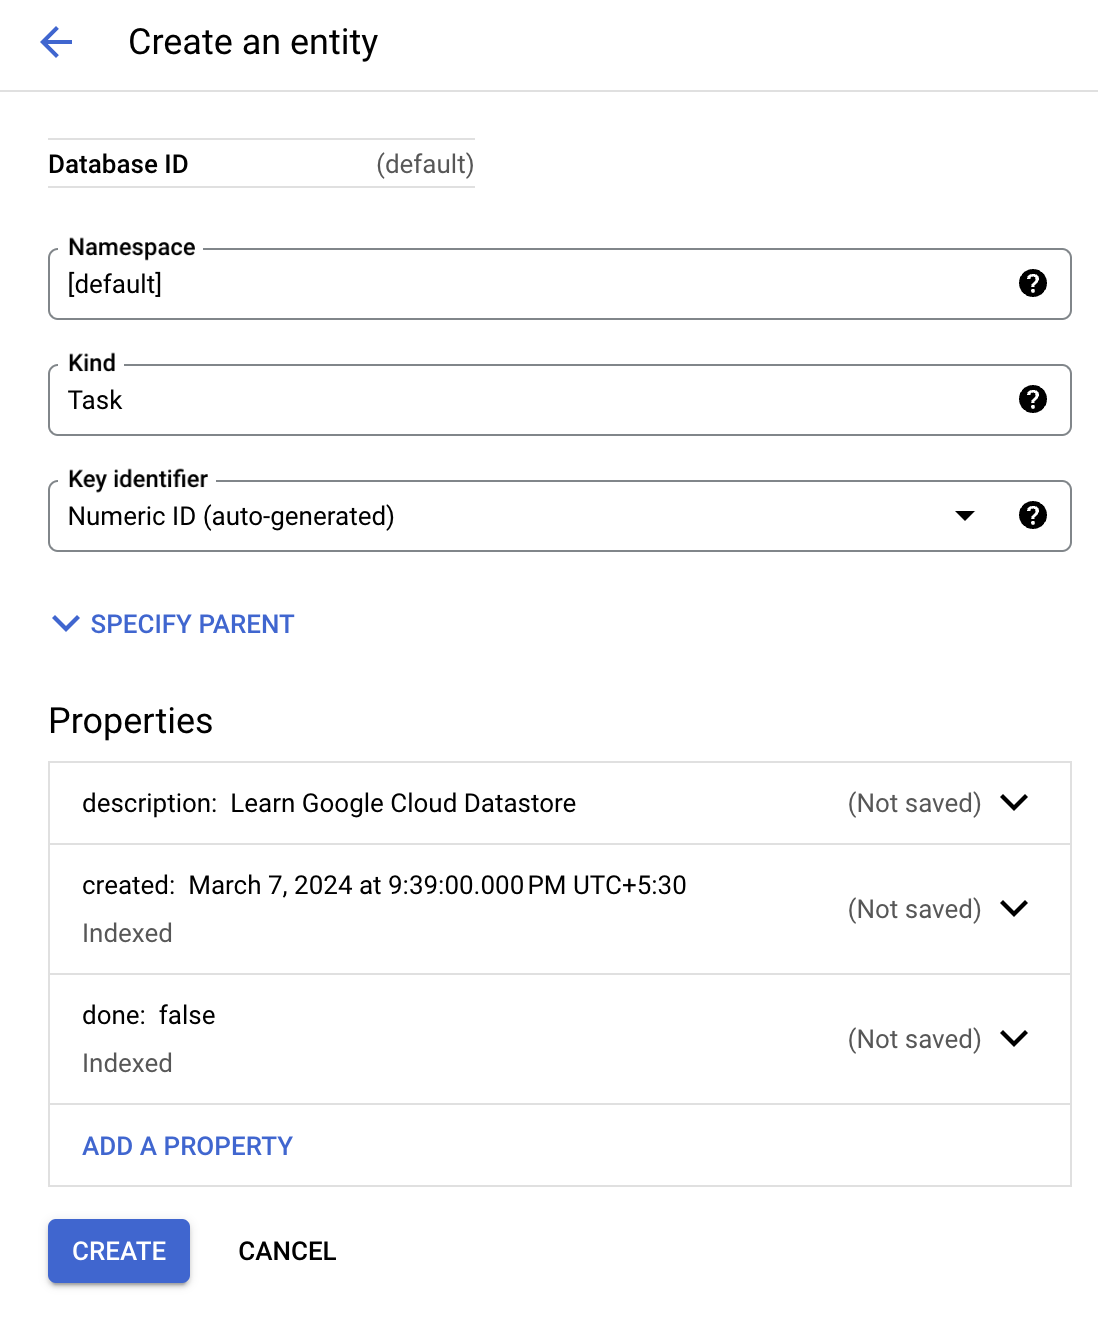
Click +Create Entity.
On the Create an entity page, use [default] for Namespace.
Type Task for Kind.
Under Properties use the Add property button to add these properties, and click Done after each one:
|
Name |
Type |
Value |
Indexed |
|
description |
String |
Learn Google Cloud Datastore |
✕ |
|
created |
Date and time |
(today's date) |
✓ |
|
done |
Boolean |
False |
✓ |
Your creation page should now look like this:
You just stored data in Cloud Datastore!
Click Check my progress to verify your performed task. If you have completed the task successfully you will granted with an assessment score.
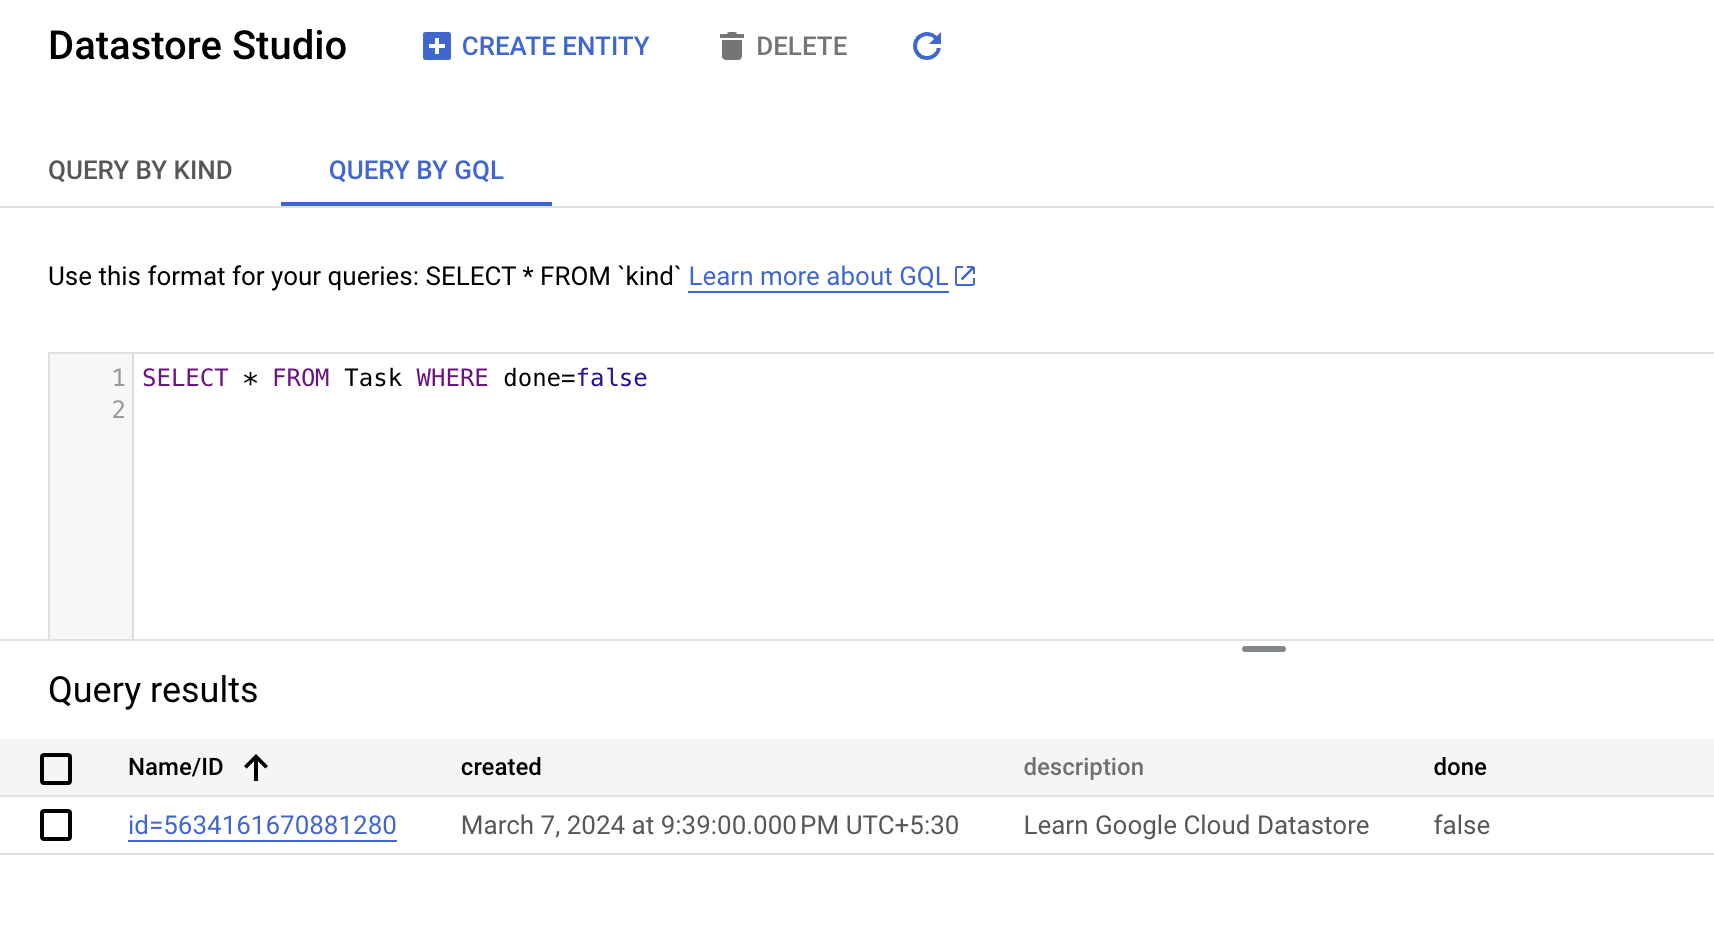
Cloud Datastore supports querying data by kind or by Google Query Language (GQL); the instructions below walk you through the steps of doing both.
Task as the kind.The query results show the Task entity that you created.
WHERE, done, == (Equal to), Boolean and false.Task entity that you created, since its done value is false. 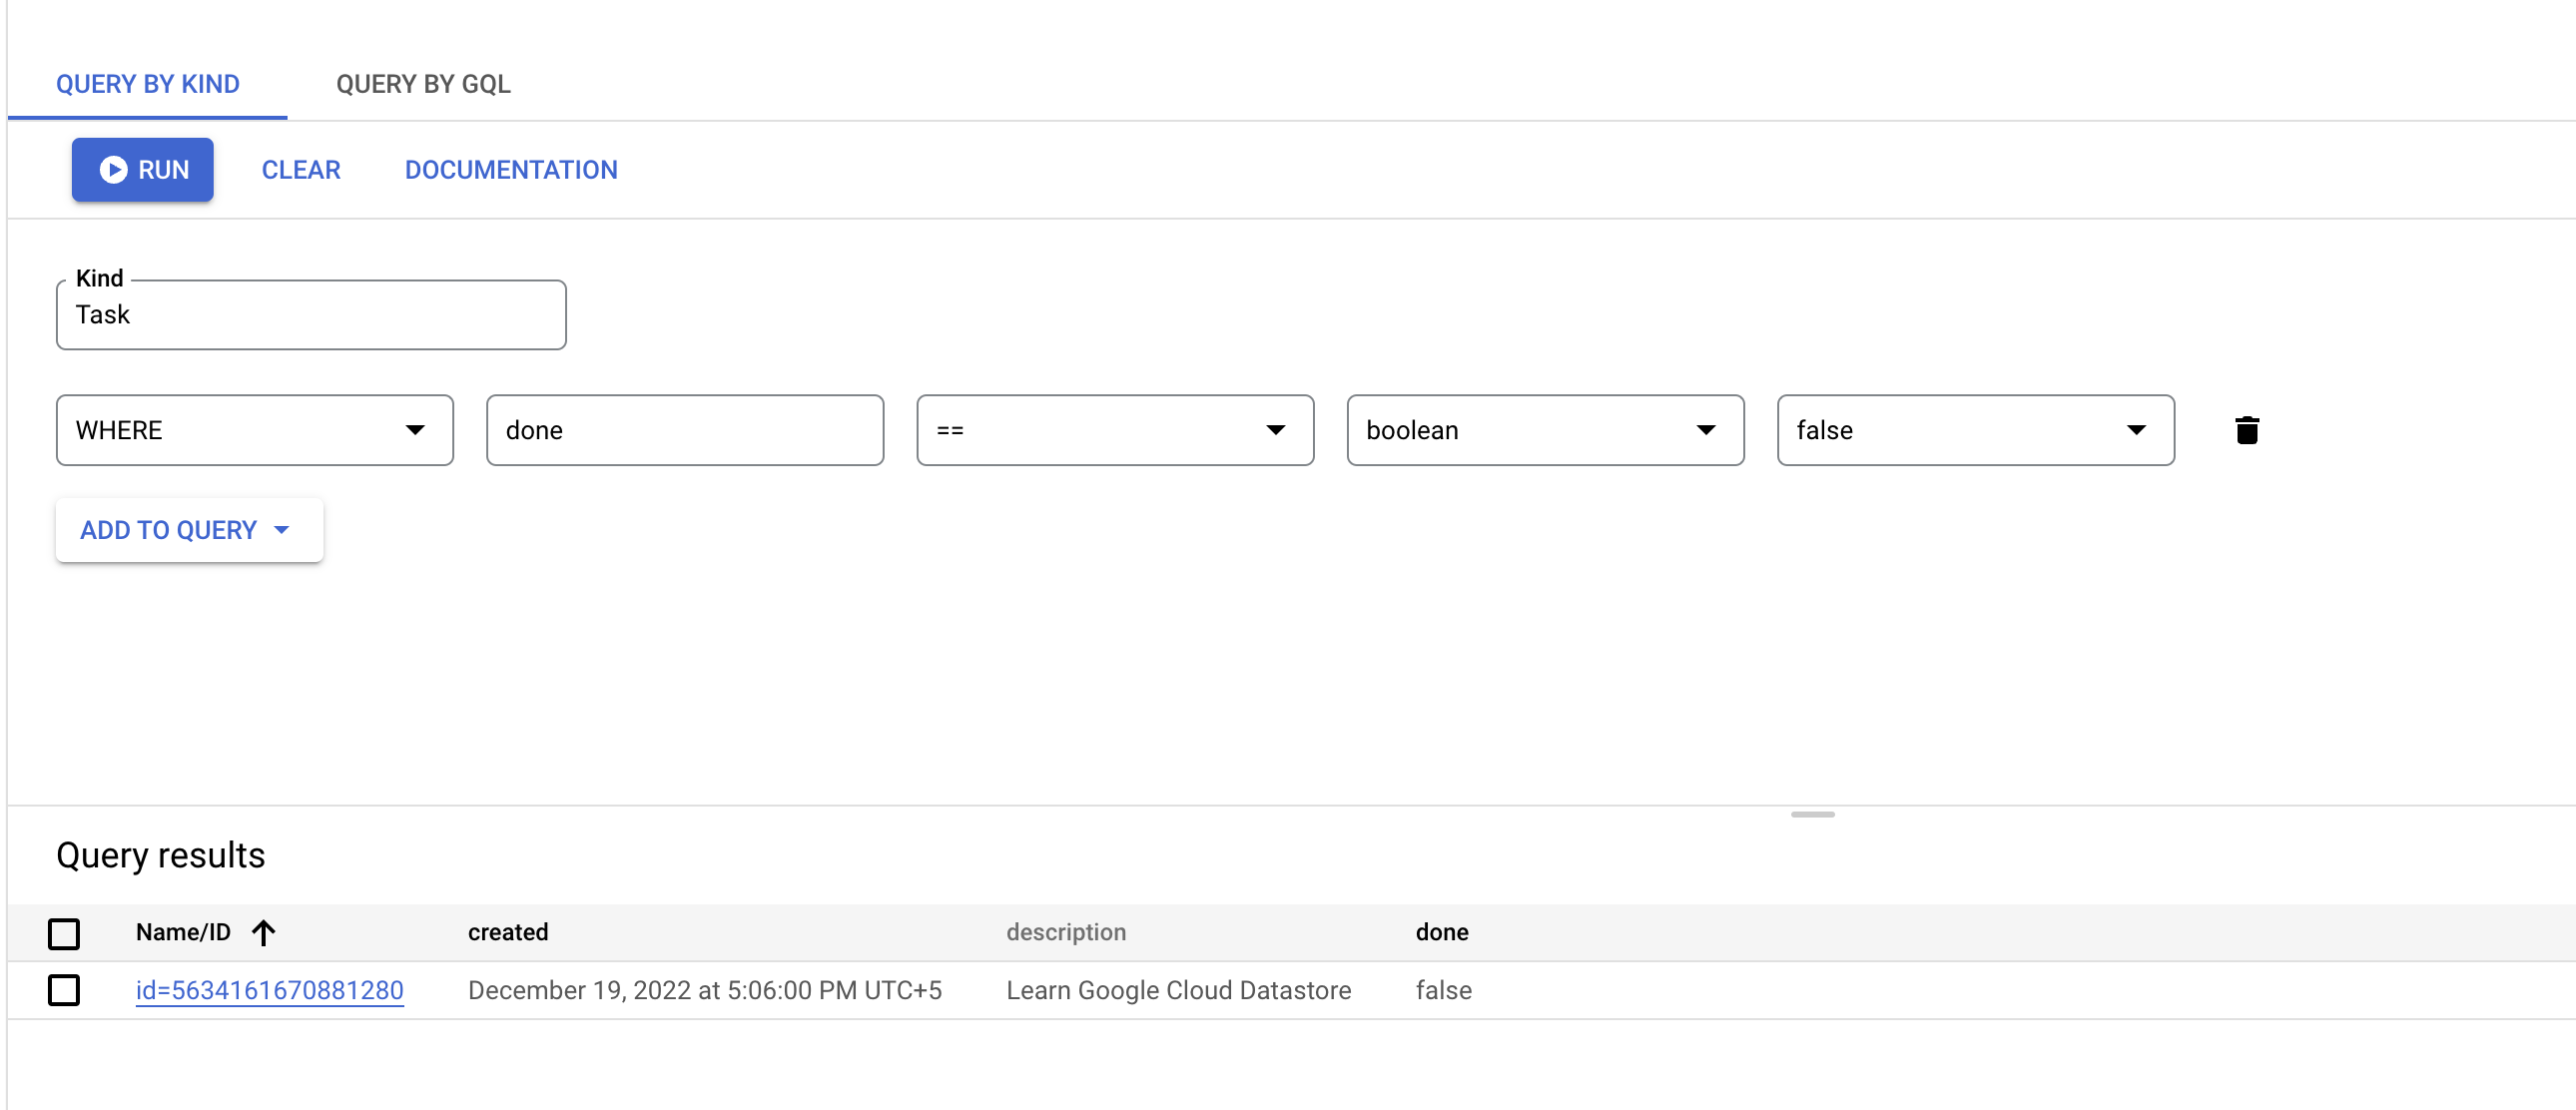
WHERE, done, == (Equal to), Boolean and true. The results do not include the Task entity that you created, because its done value is not true.Task is case sensitive.The query results show the Task entity that you created.
Run this query:
Task and done are case sensitive.The results show the Task entity that you created, since its done value is false.
The results do not include the Task entity that you created, because its done value is not true.
Below are multiple-choice questions to reinforce your understanding of this lab's concepts. Answer them to the best of your abilities.
You learned how to store and query data in Datastore using the Google Cloud console.
This lab is also part of a series of labs called Qwik Starts. These labs are designed to give you a little taste of the many features available with Google Cloud. Search for "Qwik Starts" in the lab catalog to find the next lab you'd like to take!
...helps you make the most of Google Cloud technologies. Our classes include technical skills and best practices to help you get up to speed quickly and continue your learning journey. We offer fundamental to advanced level training, with on-demand, live, and virtual options to suit your busy schedule. Certifications help you validate and prove your skill and expertise in Google Cloud technologies.
Manual Last Updated April 16, 2025
Lab Last Tested April 16, 2025
Copyright 2025 Google LLC. All rights reserved. Google and the Google logo are trademarks of Google LLC. All other company and product names may be trademarks of the respective companies with which they are associated.


This content is not currently available
We will notify you via email when it becomes available

Great!
We will contact you via email if it becomes available

One lab at a time
Confirm to end all existing labs and start this one