Checkpoints
Configure firewall rules to allow HTTP and SSH traffic to backends
/ 10
Configure instance templates and create managed instance groups
/ 20
Configure the HTTP Load Balancer
/ 10
Create and deploy reCAPTCHA session token and challenge-page site key
/ 20
Create Cloud Armor security policy rules for Bot Management
/ 20
Validate bot management with Cloud Armor
/ 20
Bot Management with Google Cloud Armor and reCAPTCHA
- GSP877
- Overview
- Setup and requirements
- Task 1. Configure firewall rules to allow HTTP and SSH traffic to backends
- Task 2. Configure instance templates and create managed instance groups
- Task 3. Configure the HTTP Load Balancer
- Task 4. Create and deploy reCAPTCHA session token and challenge-page site key
- Task 5. Create Cloud Armor security policy rules for Bot Management
- Task 6. Validate Bot Management with Cloud Armor
- Congratulations!
GSP877
Overview
Google Cloud HTTP(S) load balancing is deployed at the edge of Google's network in Google points of presence (POP) around the world. User traffic directed to an HTTP(S) load balancer enters the POP closest to the user and is then load balanced over Google's global network to the closest backend that has sufficient capacity available.
Cloud Armor is Google's distributed denial of service and web application firewall (WAF) detection system. Cloud Armor is tightly coupled with the Google Cloud HTTP Load Balancer and safeguards applications of Google Cloud customers from attacks from the internet.
reCAPTCHA Enterprise is a service that builds on the reCAPTCHA API and protects your site from spam and abuse using advanced risk analysis techniques to tell humans and bots apart. Cloud Armor Bot Management provides an end-to-end solution integrating reCAPTCHA Enterprise bot detection and scoring with enforcement by Cloud Armor at the edge of the network to protect downstream applications.
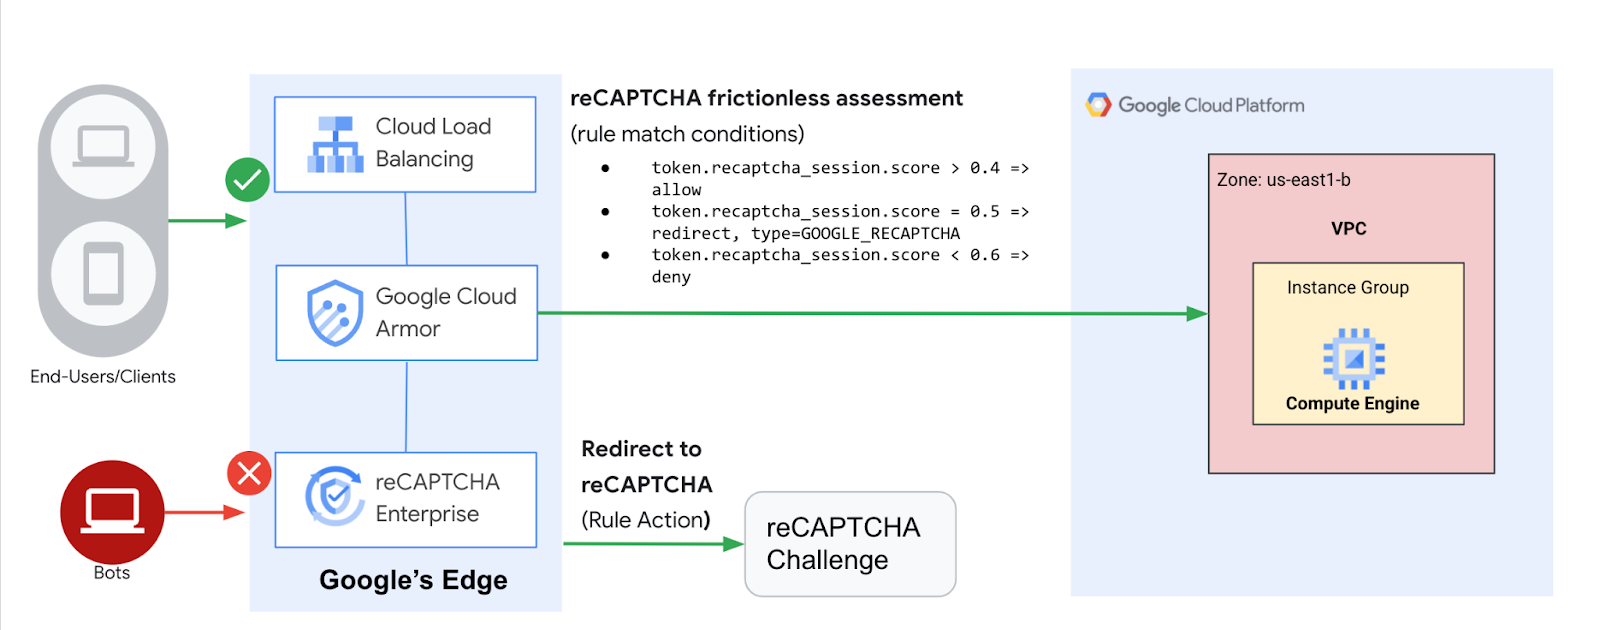
In this lab, you configure an HTTP Load Balancer with a backend, as shown in the diagram below. You set up a reCAPTCHA session token site key and embed it in your website. You also set up redirection to reCAPTCHA Enterprise manual challenge. You then configure a Cloud Armor bot management policy to see how bot detection protects your application from malicious bot traffic.
What you'll learn
In this lab, you learn how to:
- Set up a HTTP Load Balancer with appropriate health checks
- Create a reCAPTCHA WAF challenge-page site key and associated it with Cloud Armor security policy
- Create a reCAPTCHA session token site key and install it on your web pages
- Create a Cloud Armor bot management policy
- Validate that the bot management policy is handling traffic based on the rules configured
Setup and requirements
Before you click the Start Lab button
Read these instructions. Labs are timed and you cannot pause them. The timer, which starts when you click Start Lab, shows how long Google Cloud resources will be made available to you.
This hands-on lab lets you do the lab activities yourself in a real cloud environment, not in a simulation or demo environment. It does so by giving you new, temporary credentials that you use to sign in and access Google Cloud for the duration of the lab.
To complete this lab, you need:
- Access to a standard internet browser (Chrome browser recommended).
- Time to complete the lab---remember, once you start, you cannot pause a lab.
How to start your lab and sign in to the Google Cloud console
-
Click the Start Lab button. If you need to pay for the lab, a pop-up opens for you to select your payment method. On the left is the Lab Details panel with the following:
- The Open Google Cloud console button
- Time remaining
- The temporary credentials that you must use for this lab
- Other information, if needed, to step through this lab
-
Click Open Google Cloud console (or right-click and select Open Link in Incognito Window if you are running the Chrome browser).
The lab spins up resources, and then opens another tab that shows the Sign in page.
Tip: Arrange the tabs in separate windows, side-by-side.
Note: If you see the Choose an account dialog, click Use Another Account. -
If necessary, copy the Username below and paste it into the Sign in dialog.
{{{user_0.username | "Username"}}} You can also find the Username in the Lab Details panel.
-
Click Next.
-
Copy the Password below and paste it into the Welcome dialog.
{{{user_0.password | "Password"}}} You can also find the Password in the Lab Details panel.
-
Click Next.
Important: You must use the credentials the lab provides you. Do not use your Google Cloud account credentials. Note: Using your own Google Cloud account for this lab may incur extra charges. -
Click through the subsequent pages:
- Accept the terms and conditions.
- Do not add recovery options or two-factor authentication (because this is a temporary account).
- Do not sign up for free trials.
After a few moments, the Google Cloud console opens in this tab.

Before you begin
- In Cloud Shell, set up your project ID:
Enable APIs
- Enable all necessary services:
You're now set up to begin the first task.
Task 1. Configure firewall rules to allow HTTP and SSH traffic to backends
For this lab, you use the default VPC network created in your project when the lab spun up.
In this section, you configure firewall rules to allow HTTP traffic to the backends from the Google Cloud health checks and the Load Balancer. You then configure a firewall rule to allow SSH into the instances.
Create a firewall rule to allow HTTP traffic to the backends.
Health checks determine which instances of a load balancer can receive new connections. For HTTP load balancing, the health check probes to your load balanced instances come from addresses in the ranges 130.211.0.0/22 and 35.191.0.0/16. Your VPC firewall rules must allow these connections. Also, the load balancers talk to the backend on the same IP range.
To create a firewall rule to allow HTTP traffic to the backends:
- In the console, navigate to Navigation menu (
) > VPC network > Firewall.
- Notice the existing ICMP, internal, RDP, and SSH firewall rules. Each Google Cloud project starts with the default network and these firewall rules.
- Click Create Firewall Rule.
- Set the following values, leave all other values at their defaults:
| Property | Value (type value or select option as specified) |
|---|---|
| Name | default-allow-health-check |
| Network | default |
| Targets | Specified target tags |
| Target tags | allow-health-check |
| Source filter | IPv4 Ranges |
| Source IPv4 ranges | 130.211.0.0/22, 35.191.0.0/16 |
| Protocols and ports | Specified protocols and ports, and then check tcp. Type 80 for the port number |
- Click Create.
Alternatively, in the gCloud command line, use the following command:
- Similarly, create a firewall rule to allow SSH-ing into the instances:
Click Check my progress to verify the objective.
Task 2. Configure instance templates and create managed instance groups
A managed instance group uses an instance template to create a group of identical instances. Use these to create the backend of the HTTP Load Balancer.
Configure the instance templates
An instance template is a resource that you use to create VM instances and managed instance groups. Instance templates define the machine type, boot disk image, subnet, labels, and other instance properties.
To create an instance template:
- In the console, navigate to Navigation menu (
- For Name, type lb-backend-template.
- For Location, Select Global.
- For Series, select N1.
- Click Networking, Disks, Security, Management, Sole-Tenancy under Advanced options.
- Go to the Management section and insert the following script into the Startup script field:
- Click on the Networking tab and add the network tag: allow-health-check
- Set the following values and leave all other values at their defaults:
| Property | Value (type value or select option as specified) |
|---|---|
| Network (Under Network Interfaces) | default |
| Subnetwork (Under Network Interfaces) | default ( |
| Network tags | allow-health-check |
- Click Create.
Wait for the instance template to be created.
Create the managed instance group
To Create the managed instance group:
-
Still in Compute Engine page, click Instance groups in the left pane.
-
Click Create instance group.
-
Select New managed instance group (stateless).
-
Set the following values, leave all other values at their defaults:
| Property | Value (type value or select option as specified) |
|---|---|
| Name | lb-backend-example |
| Location | Single zone |
| Region | |
| Zone | |
| Instance template | lb-backend-template |
| Autoscaling | Set Autoscaling mode to Off: do not autoscale |
| Minimum number of instance | 1 |
- Click Create.
Add a named port to the instance group
- For your instance group, in Cloud Shell, define an HTTP service and map a port name to the relevant port:
The load balancing service forwards traffic to the named port.
Click Check my progress to verify the objective.
Task 3. Configure the HTTP Load Balancer
In this section, you configure the HTTP Load Balancer to send traffic to your backend lb-backend-example.
Start the configuration
-
In the console, click Navigation menu (
-
Select Application Load Balancer (HTTP/HTTPS) and Next.
-
Select Public facing (external) and Next.
-
Select Best for global workloads and Next.
-
Select Global external Application Load Balancer and Next.
-
Select Configure.
-
Set the Name to
http-lb.
Configure the frontend
- Click Frontend configuration.
- Specify the following, leaving all other values at their defaults:
| Property | Value (type value or select option as specified) |
|---|---|
| Protocol | HTTP |
| IP version | IPv4 |
| IP address | Ephemeral |
| Port | 80 |
- Click Done.
Configure the backend
Backend services direct incoming traffic to one or more attached backends. Each backend is composed of an instance group and additional serving capacity metadata.
- Click on Backend configuration.
- For Backend services & backend buckets, click Create a backend service.
- Set the following values, leave all other values at their defaults:
| Property | Value (select option as specified) |
|---|---|
| Name | http-backend |
| Protocol | HTTP |
| Named Port | http |
| Instance group | lb-backend-example |
| Port numbers | 80 |
-
Click Done.
-
For Cloud CDN, set the Cache mode to Use origin settings based on Cache-Control headers.
-
For Health Check, select Create a health check.
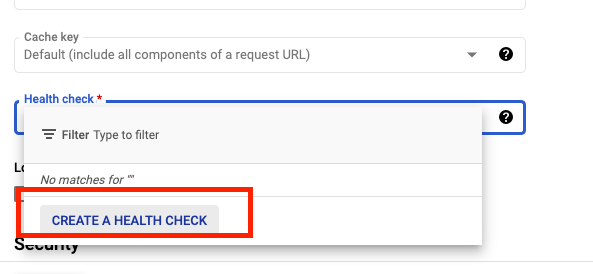
- Set the following values, leave all other values at their defaults:
| Property | Value (select option as specified) |
|---|---|
| Name | http-health-check |
| Protocol | TCP |
| Port | 80 |
- Click Save.
- Check the Enable Logging box.
- Set the Sample rate to
1. - Click Create to create the backend service and click ok.
Review and create the HTTP Load Balancer
Host and path rules determine how your traffic is directed. For example, you could direct video traffic to one backend and static traffic to another backend. However, you are not configuring the Host and path rules in this lab.
- Click on Review and finalize.

- Review the Backend services and Frontend.
- Click on Create.
Wait for the load balancer to be created.
- Click on the name of the load balancer (http-lb).
- Note the IPv4 address of the load balancer for the next task. In this lab, refer to it as
[LB_IP_v4].
Click Check my progress to verify the objective.
Test the HTTP Load Balancer
Now that you created the HTTP Load Balancer for your backends, verify that traffic is forwarded to the backend service.
- To test IPv4 access to the HTTP Load Balancer, open a new tab in your browser and navigate to http://[LB_IP_v4]. Be sure to replace
[LB_IP_v4]with the IPv4 address of the load balancer.
Task 4. Create and deploy reCAPTCHA session token and challenge-page site key
reCAPTCHA Enterprise for WAF and Google Cloud Armor integration offers the following features: reCAPTCHA challenge page, reCAPTCHA action-tokens, and reCAPTCHA session-tokens. In this task, you implement the reCATCHA session token site key and reCAPTCHA WAF challenge-page site.
Create reCAPTCHA session token and WAF challenge-page site key
Before you create the session token site key and challenge page site key, double-check that you've enabled the reCAPTCHA Enterprise API as indicated in the previous Enable API section.
The reCAPTCHA JavaScript sets a reCAPTCHA session-token as a cookie on the end-user's browser after the assessment. The end-user's browser attaches the cookie and refreshes the cookie as long as the reCAPTCHA JavaScript remains active.
- Create the reCAPTCHA session token site key and enable the WAF feature for the key:
The output of the above command gives you the session token site key you created. Record it to use later in this task.
You also set the WAF service to Cloud Armor to enable the Cloud Armor integration.
- Create the reCAPTCHA WAF challenge-page site key and enable the WAF feature for the key. You can use the reCAPTCHA challenge page feature to redirect incoming requests to reCAPTCHA Enterprise to determine whether each request is potentially fraudulent or legitimate. Later, you associate this key with the Cloud Armor security policy to enable the manual challenge. This lab refers to this key as
CHALLENGE-PAGE-KEYin the later steps.
- Navigate to Navigation menu (
Implement reCAPTCHA session token site key
- Navigate to Navigation menu (

- Go to the webserver root directory and change user to root:
- Update the landing
index.htmlpage and embed the reCAPTCHA session token site key. The session token site key (that you recorded earlier) is set in the head section of your landing page as below:
src="https://www.google.com/recaptcha/enterprise.js?render=<SESSION_TOKEN_SITE_KEY>&waf=session" async defer>
Remember to replace <SESSION_TOKEN_SITE_KEY> with the site token before you run the following command:
- Create three other sample pages to test out the bot management policies:
- good-score.html
- bad-score.html
- median-score.html
Validate that you are able to access all the webpages by opening them in your browser. Be sure to replace [LB_IP_v4] with the IPv4 address of the load balancer:
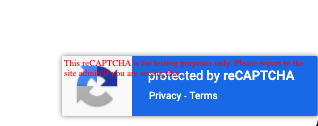
- Open
http://[LB_IP_v4]/index.html. You verify that the reCAPTCHA implementation is working when you see "protected by reCAPTCHA" at the bottom right corner of the page:
- Click into each of the links.
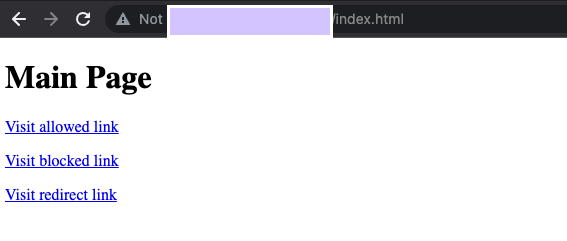
- Validate you are able to access all the pages.
Click Check my progress to verify the objective.
Task 5. Create Cloud Armor security policy rules for Bot Management
In this section, you use Cloud Armor bot management rules to allow, deny and redirect requests based on the reCAPTCHA score.
- In Cloud Shell, create security policy via gcloud:
- To use reCAPTCHA Enterprise manual challenge to distinguish between human and automated clients, associate the reCAPTCHA WAF challenge site key (CHALLENGE-PAGE-KEY) you previously created for a manual challenge with the security policy. In the following script, remember to replace "CHALLENGE-PAGE-KEY" with the key you previously created:
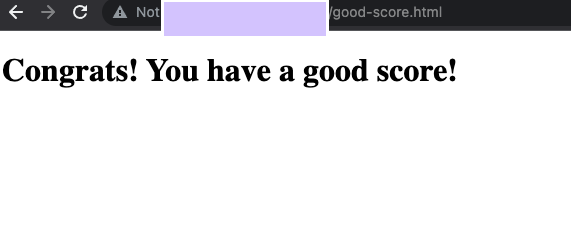
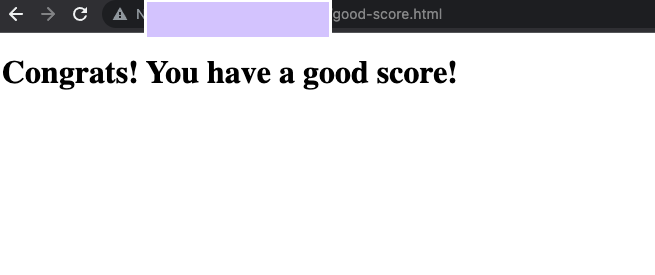
- Add a bot management rule to allow traffic if the url path matches good-score.html and has a score greater than 0.4:
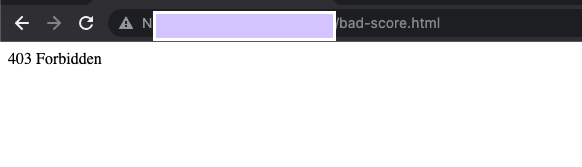
- Add a bot management rule to deny traffic if the url path matches bad-score.html and has a score less than 0.6:
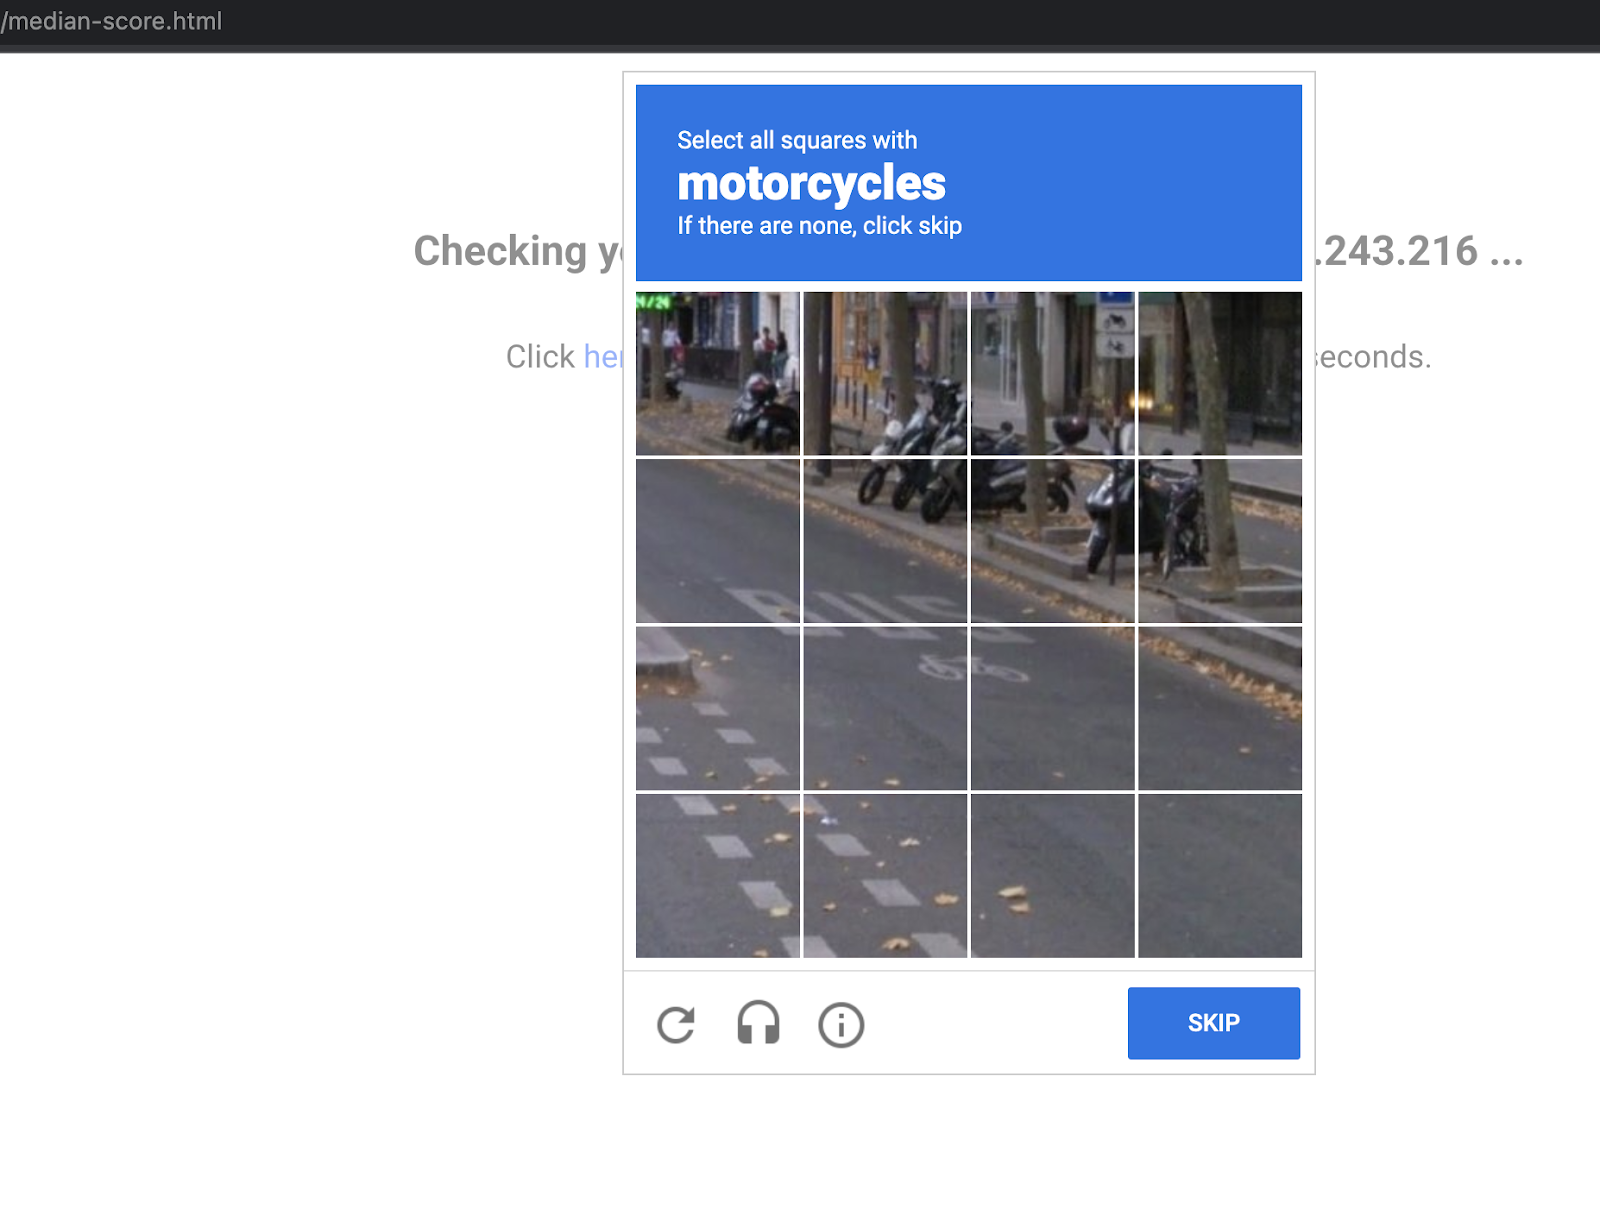
- Add a bot management rule to redirect traffic to Google reCAPTCHA if the url path matches median-score.html and has a score equal to 0.5:
- Attach the security policy to the backend service
http-backend:
-
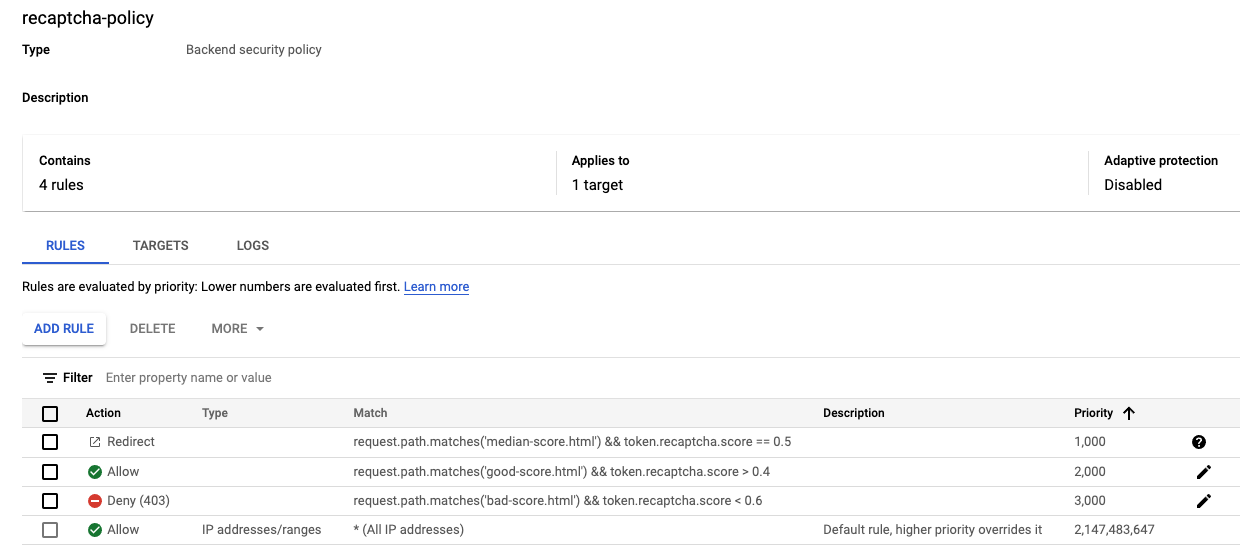
In the console, navigate to Navigation menu > Network Security > Cloud Armor policies.
-
Click
recaptcha-policy.
Your policy should resemble the following:
Click Check my progress to verify the objective.
Task 6. Validate Bot Management with Cloud Armor
- Open up a browser and enter the url
http://[LB_IP_v4]/index.html. Navigate to "Visit allowed link".
-
Open a new window in Incognito mode to ensure you have a new session.
-
Enter the url
http://[LB_IP_v4]/index.htmland navigate to "Visit blocked link". You should receive a HTTP 403 error:
-
Open a new window in Incognito mode to ensure you have a new session.
-
Enter the url
http://[LB_IP_v4]/index.htmland navigate to "Visit redirect link". You should see the redirection to Google reCAPTCHA and the manual challenge page as below:
Verify Cloud Armor logs
Explore the security policy logs to validate bot management worked as expected.
- In the console, navigate to Navigation menu > Network Security > Cloud Armor.
- Click recaptcha-policy.
- Click Logs.
- Click View policy logs.
- Below is the MQL(monitoring query language) query, copy and paste into the query editor:
- Now click Run Query.
- Look for a log entry in Query results where the request is for
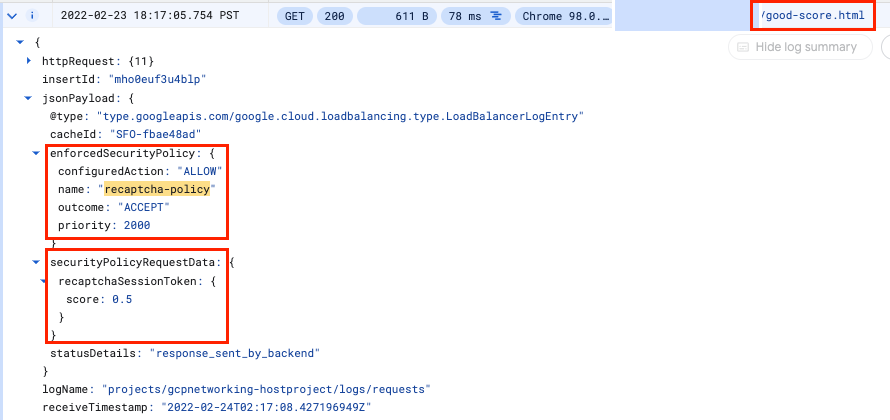
http://[LB_IP_v4]/good-score.html. Expand jsonPayload.Expand enforcedSecurityPolicy.
- Repeat the same for
http://[LB_IP_v4]/bad-score.htmlandhttp://[LB_IP_v4]/median-score.html.

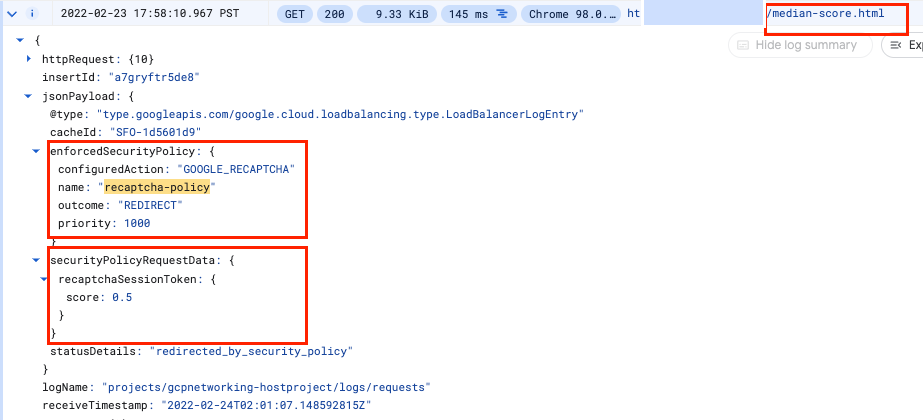
Notice that the configuredAction is set to ALLOW, DENY or GOOGLE_RECAPTCHA with the name recaptcha-policy.
Click Check my progress to verify the objective.
Congratulations!
You successfully implemented bot management with Cloud Armor. You configured an HTTP Load Balancer. Then, you created and implemented reCAPTCHA session token site key on a webpage. You also created a challenge-page site key. You set up Cloud Armor Bot management policy and validated how they handle requests based on the rules. You explored the security policy logs to identify why the traffic was allowed, blocked or redirected.
Manual Last Updated: July 04, 2024
Lab Last Tested: July 22, 2024
Copyright 2024 Google LLC All rights reserved. Google and the Google logo are trademarks of Google LLC. All other company and product names may be trademarks of the respective companies with which they are associated.