Checkpoints
Check BigQuery Datasets creation
/ 5
Check BigQuery table creation
/ 5
Check View creation
/ 5
Check Biglake table creation
/ 5
Replace the view
/ 5
Check GCS bucket creation
/ 5
Check Biglake table creation
/ 5
Cost Optimization and Data Tiering with BigLake and Cloud Storage
GSP267

Overview
BigQuery is Google's fully managed, NoOps, low cost analytics database. BigQuery uses SQL and can take advantage of the pay-as-you-go model. BigLake is a storage engine that provides a unified interface for analytics engines to query multiformat, multicloud, and multimodal data in a secure and governed manner.
In this lab, you will use a real world scenario to learn to how to potentially reduce your costs by archiving data, unused tables, and partitions from BigQuery into Google Cloud Storage.
Objectives
- Export data from BigQuery into Cloud Storage
- Create a BigLake table which reads from the data on Cloud Storage
- Delete the original table on BigQuery
Prerequisites
Completing Performance and Cost Optimization with BigQuery is suggested, but not required.
Setup and requirements
Before you click the Start Lab button
Read these instructions. Labs are timed and you cannot pause them. The timer, which starts when you click Start Lab, shows how long Google Cloud resources will be made available to you.
This hands-on lab lets you do the lab activities yourself in a real cloud environment, not in a simulation or demo environment. It does so by giving you new, temporary credentials that you use to sign in and access Google Cloud for the duration of the lab.
To complete this lab, you need:
- Access to a standard internet browser (Chrome browser recommended).
- Time to complete the lab---remember, once you start, you cannot pause a lab.
How to start your lab and sign in to the Google Cloud console
-
Click the Start Lab button. If you need to pay for the lab, a pop-up opens for you to select your payment method. On the left is the Lab details pane, which is populated with the temporary credentials that are needed for this lab.
-
Copy the Password and then click Open Google Cloud console. The lab spins up resources, then opens another tab that shows the Sign in page.
Tip: Open the tabs in separate windows, side by side. Note: If you see the Choose an account page, click Use another account. -
On the Sign in page, verify that the username from the Lab details pane is auto-filled. Click Next.
-
Paste the password in the Enter your password field. Click Next.
Important: Use the credentials from the Lab details pane. Using your personal Google Cloud account may incur charges to your account. -
Click through the subsequent pages:
-
Understand your account management.
-
Accept the terms and conditions.
-

After a few moments, the console opens.

Activate Cloud Shell
Cloud Shell is a virtual machine (VM) that is loaded with development tools. It offers a persistent 5GB home directory and runs on the Google Cloud. Cloud Shell provides command-line access to your Google Cloud resources.
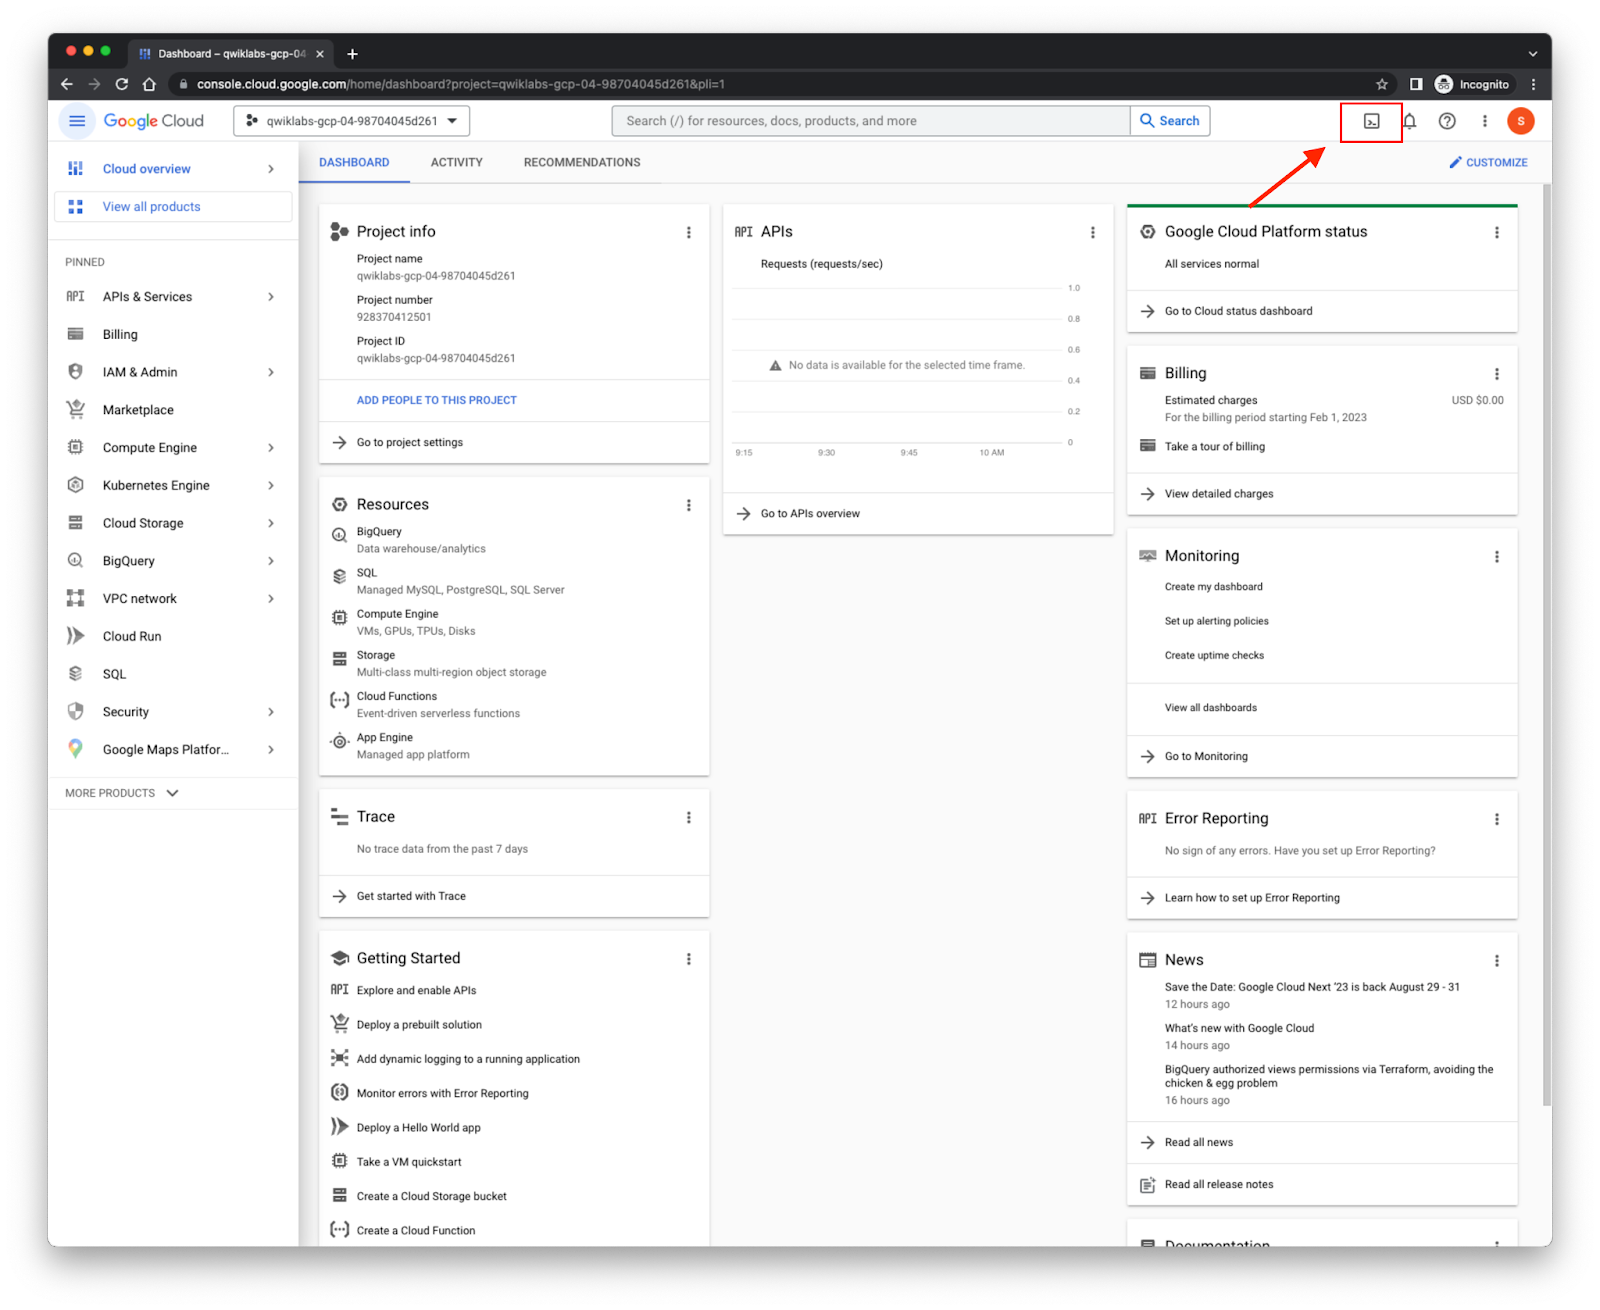
- In the Cloud Console, in the top-right toolbar, click the Activate Cloud Shell button.

- Click Continue.

It takes a few moments to provision and connect to the environment. When you are connected, you are already authenticated, and the project is set to your PROJECT_ID. For example:

gcloud is the command-line tool for Google Cloud. It comes pre-installed on Cloud Shell and supports tab-completion.
- You can list the active account name with this command:
Output:
Example output:
- You can list the project ID with this command:
Output:
Example output:
gcloud see the gcloud command-line tool overview.
Scenario
Cymbal Direct Management has recently noticed a sharp rise in the operating expenses of the company. Upon investigation, it has been inferred that the cost increase was from the Data Analytics Team. The management has instructed the Data Analytics Team to create a cost control plan to monitor spending and ensure that cost reduction measures are implemented effectively by the team.
Task 1: Archiving BigQuery table to BigLake
In this task you will archive a full table to BigLake in a way that is transparent to users.
Your task is to:
- Create a view in BigQuery.
- Export data from BigQuery into Cloud Storage.
- Build a BigLake connection to Cloud Storage
- Create a BigLake table which reads from the data on Cloud Storage.
- Update the view to point to the BigLake table and delete the original table on BigQuery storage.
The cymbal_bq_opt_3.top_products_20220801_bigquerystorage table resides on BigQuery storage.
The table is not used and should be archived. Because of this, to potentially reduce costs you decide to implement data tiering which is a technique of moving archive data, called cold data, out of BigQuery storage and onto Cloud Storage.
Before deciding on archiving to Cloud Storage, consider BigQuery long-term storage pricing. If you have a table that is not edited for 90 consecutive days, the price of storage for that table automatically drops by 50 percent. If you have a partitioned table, each partition is considered separately for eligibility for long-term pricing subject to the same rules as non-partitioned tables.
Create a Google Cloud Storage bucket to host data
Following this guide we can create a Google Cloud Storage bucket.
We chose between coldline & archive storage as it's cheaper than bigquery storage.
One approach is to use the command line, via cloud shell in the Cloud console.
- Click Activate Cloud Shell at the top of the Cloud console.
A Cloud Shell session opens inside a new frame at the bottom of the Cloud console and displays a command-line prompt. It can take a few seconds for the session to be initialized.
- Execute the following snippet to create an environment variable for your Project ID:
- Execute the following command to create a new bucket - notice storage class - to benefit from cost optimization it should be coldline or archive depending on access patterns:
Navigate to the BigQuery page in the Cloud console to continue the lab.
Check Google Cloud Storage bucket creation
Export data to bucket
This can be done in SQL using the `EXPORT DATA`` command documented in this guide.
- In the BigQuery, add the following query and click Run to export data to a bucket:
Create the BigLake table
- In Cloud Shell, execute the following snippet to create an environment variable for your Project ID:
- Execute the following snippet to create an environment variable for your Project Number:
- Execute the following command to enable the BigQuery Connection API:
- Execute the following command to create a connection:
You should see a success message like
Connection [...].mybiglakegcsconnector successfully created
mybiglakegcsconnector will be prefixed with actual Project number and the location you specified!
- Run the following command to view the service account of the connection:
- Execute the following command to grab and store the service account of this connection from the output:
- Execute the following command to grant the service account objectViewer role to the Cloud Storage bucket containing the CSV:
Navigate to the BigQuery page in the Cloud console to continue the lab.
Create a BigLake table
- In the BigQuery Editor, paste the following query to create an external table:
Check Biglake table creation
- Execute the following query to test that the view contains all the necessary data:
| Table location | number of records |
|---|---|
| BigQuery storage table | 35,681 |
| BigLake table | 35,681 |
This chart shows that all 35,681 rows of the table on BigQuery storage made it to our Google Cloud Storage-based BigLake table.
- As the table is migrated, you can execute the following command to delete the original table (that uses BigQuery storage):
Task 2. Move data from BigQuery storage to Google Cloud Storage
In this task you will offload part of the table to BigLake in a way that is transparent to users.
Your task is to:
- Create original table and create a view on top of it.
- Export and delete data from BigQuery into Cloud Storage.
- Create a BigLake table which reads from the data on Cloud Storage.
- Update the view to point to the BigLake table and BigQuery table.
Create the BigQuery table with a view on top of it
- In the BigQuery Editor, paste the following query and click Run to create a table:
Through analysis, oldest two partitions are marked to be archived. To potentially reduce costs you decide to implement data tiering which is a technique of moving archive data, called cold data, out of BigQuery storage and onto Cloud Storage.
Before deciding on archiving to Google Cloud Storage consider BigQuery long-term storage pricing. If you have a table that is not edited for 90 consecutive days, the price of storage for that table automatically drops by 50 percent. If you have a partitioned table, each partition is considered separately for eligibility for long-term pricing subject to the same rules as non-partitioned tables.
- Execute the following query to check the record count per day before starting the migration:
The result set is shown below. This will be revisited at the end of this migration to check your work.
| orderdate | record_count |
|---|---|
| 2022-08-01 | 114,036 |
| 2022-08-02 | 114,036 |
| 2022-08-03 | 114,036 |
| 2022-08-04 | 114,036 |
Your tasks are to:
- Identify the oldest 2 partitions by following this guide.
- Export the specified partitions from BigQuery storage onto GCS following this guide.
- Create a BigLake table using data on GCS as per this guide1 , guide2 and guide3.
- Update the view to combine the two tables so downstream readers have all partitions.
- Test that the view contains all original data so downstream consumers are not affected.
Identify the oldest partitions
- Execute the following query to identify the oldest two partitions:
Partition names take the form of YYYYMMDD.
The two oldest partitions are "20220801" and "20220802"
Each partition has 114,036 rows.
Export data
When exporting the data from BigQuery to Cloud Storage, aHive partition layout is required. The delineator order_dateis used as the key per partition.
- Export the data of the order whose
orderdateis"2022-08-01"by executing the following query.
- Execute the following query to export the data of the order whose
orderdateis"2022-08-01".
Make sure to replace ${GCP_PROJECT_ID} with your actual GCP Project ID!
Delete exported partition
To delete the exported partition, it is required to use the command line.
- In Cloud Shell, execute the following commands to delete the exported partition:
Make sure to enter "y" to confirm partition deletion.
Navigate to the BigQuery page in the Cloud console to continue the lab.
Create the BigLake table and update the view
- In the BigQuery editor, create a BigLake table by executing the following query:
Check Biglake table creation
- Execute the following query to create the view that combines two tables so downstream readers still have access to all partitions if there is need to unarchive data.
- Execute the following query to test that the view has access to all partitions across storage types.
| orderdate | record_count original view using only BigQuery storage | record_count new view using BigQuery storage & BigLake |
|---|---|---|
| 2022-08-01 | 114,036 | 114,036 |
| 2022-08-02 | 114,036 | 114,036 |
| 2022-08-03 | 114,036 | 114,036 |
| 2022-08-04 | 114,036 | 114,036 |
This chart shows that you have retained all rows in the original dataset while migrating the underlying storage.
Congratulations
By working through several scenarios you've learned how to reduce the bytes billed through archiving BigQuery data to Google Cloud Storage. You've also learned how to use views to prevent migration from causing any downtime to the user.
Next Steps / Learn More
- For more information on using Cloud Storage and BigLake, follow this guide.
Google Cloud Training & Certification
...helps you make the most of Google Cloud technologies. Our classes include technical skills and best practices to help you get up to speed quickly and continue your learning journey. We offer fundamental to advanced level training, with on-demand, live, and virtual options to suit your busy schedule. Certifications help you validate and prove your skill and expertise in Google Cloud technologies.
Manual Last Updated November 27, 2023
Lab Last Tested November 27, 2023
Copyright 2023 Google LLC All rights reserved. Google and the Google logo are trademarks of Google LLC. All other company and product names may be trademarks of the respective companies with which they are associated.