


시작하기 전에
- 실습에서는 정해진 기간 동안 Google Cloud 프로젝트와 리소스를 만듭니다.
- 실습에는 시간 제한이 있으며 일시중지 기능이 없습니다. 실습을 종료하면 처음부터 다시 시작해야 합니다.
- 화면 왼쪽 상단에서 실습 시작을 클릭하여 시작합니다.
Query a public dataset (dataset: samples, table: natality)
/ 15
Create a new dataset
/ 20
Create a bucket
/ 15
Copy file in your bucket
/ 15
Load data into your table
/ 20
Query a custom dataset
/ 15
Storing and querying massive datasets can be time consuming and expensive without the right hardware and infrastructure. Google BigQuery is an enterprise data warehouse that solves this problem by enabling super-fast SQL queries using the processing power of Google's infrastructure. Simply move your data into BigQuery and let us handle the hard work. You can control access to both the project and your data based on your business needs, such as giving others the ability to view or query your data.
You can access BigQuery in the Console, the classic Web UI or a command-line tool, or by making calls to the BigQuery REST API using a variety of client libraries such as Java, .NET, or Python. There are also a variety of third-party tools that you can use to interact with BigQuery, such as visualizing the data or loading the data.
This hands-on lab shows you how to use the Web UI to query public tables and load sample data into BigQuery.
For each lab, you get a new Google Cloud project and set of resources for a fixed time at no cost.
Sign in to Qwiklabs using an incognito window.
Note the lab's access time (for example, 1:15:00), and make sure you can finish within that time.
There is no pause feature. You can restart if needed, but you have to start at the beginning.
When ready, click Start lab.
Note your lab credentials (Username and Password). You will use them to sign in to the Google Cloud Console.
Click Open Google Console.
Click Use another account and copy/paste credentials for this lab into the prompts.
If you use other credentials, you'll receive errors or incur charges.
Accept the terms and skip the recovery resource page.
Google Cloud Shell is a virtual machine that is loaded with development tools. It offers a persistent 5GB home directory and runs on the Google Cloud.
Google Cloud Shell provides command-line access to your Google Cloud resources.
In Cloud console, on the top right toolbar, click the Open Cloud Shell button.
Click Continue.
It takes a few moments to provision and connect to the environment. When you are connected, you are already authenticated, and the project is set to your PROJECT_ID. For example:
gcloud is the command-line tool for Google Cloud. It comes pre-installed on Cloud Shell and supports tab-completion.
Output:
Example output:
Output:
Example output:
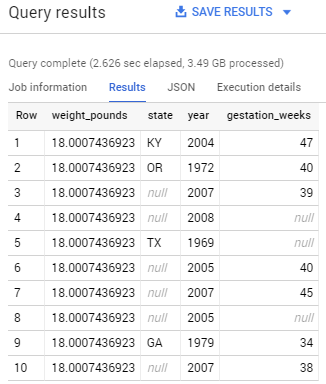
The BigQuery console provides an interface to query tables, including public datasets offered by BigQuery. The query you will run accesses a table from a public dataset that BigQuery provides. It uses standard query language to search the dataset, and limits the results returned to 10.
The Welcome to BigQuery in the Cloud Console message box opens. This message box provides a link to the quickstart guide and lists UI updates.
This data sample holds information about US natality (birth rates). Click the circular check icon to activate the query validator.
A green or red check displays above the query editor depending on whether the query is valid or invalid. If the query is valid, the validator also describes the amount of data to be processed after you run the query. This information is helpful for determining the cost to run a query.
Your query results should resemble the following:
Click Check my progress to verify your performed task. If you have successfully query against publlic dataset, you'll see an assessment score.
Now you'll create a custom table, load data into it, and run a query against it. You'll create a dataset to hold your table, add data to your project then make the data table you'll query against.
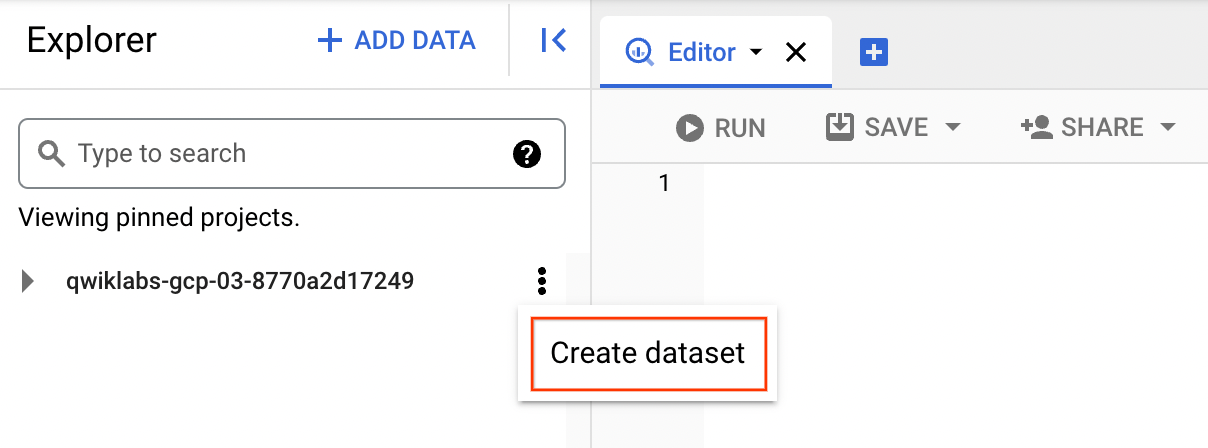
Datasets help you control access to tables and views in a project. This lab will only use one table, but you still need a dataset to hold the table.
In the left pane of the BigQuery console, click on the three dots next to your project ID.
Click Create dataset.
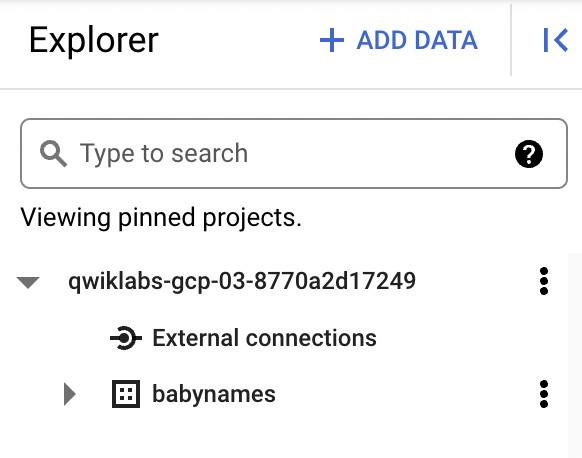
Enter babynames in the Dataset ID.
Leave all of the other default settings and click Create dataset. Now you have a dataset.
Click Check my progress to verify your performed task. If you have successfully created BigQuery dataset, you'll see an assessment score.
The custom data file you'll use contains approximately 7 MB of data about popular baby names, provided by the US Social Security Administration. You'll add the zip file to your project then create a storage bucket for the specific file that you'll need to query against.
Now that you have the files downloaded, you create a Cloud Storage bucket to hold specific data.
In the Cloud Console, select Navigation menu > Cloud Storage > Buckets, and then click Create.
Give your bucket a universally unique name, then click Create.
Click Check my progress to verify your performed task. If you have successfully created a storage bucket, you'll see an assessment score.
yob2014.txt into your bucket. Replace <your_bucket> with the name of the bucket you just created:Click Check my progress to verify your performed task. If you have successfully uploaded object in cloud storage bucket, you'll see an assessment score.
Now you can tell BigQuery where to find the data to query against.
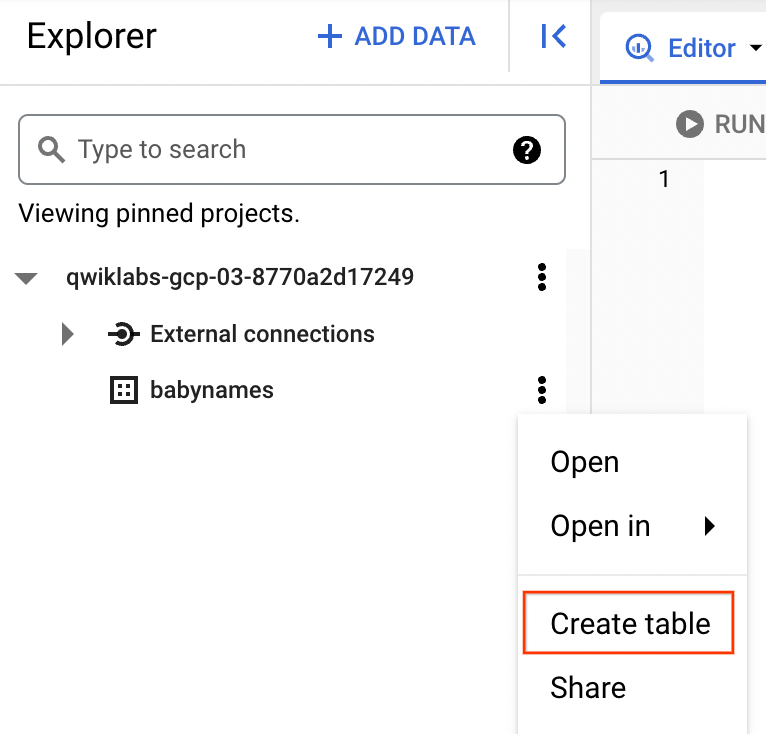
Next you'll load the data file from your storage bucket into a new table in BigQuery. You'll create the table inside the dataset you made earlier.
Return to the BigQuery console.
Under Source, for Create table from select Google Cloud Storage, enter the path to the data file your Google Cloud Storage bucket. Change the file format to CSV.
In the Destination Table section, set destination table name to names_2014
In the Schema section, click Edit as Text and add the following:
Your form should look like this:
Wait for BigQuery to create the table and load the data. While BigQuery loads the data, a (loading) string displays after your table name. You'll see the names_2014 table under the babynames dataset in the BigQuery console.
Click Check my progress to verify your performed task. If you have successfully load data in dataset table, you'll see an assessment score.
Below are multiple choice-questions to reinforce your understanding of this lab's concepts. Answer them to the best of your abilities.
Next you'll preview the first few rows of the data.
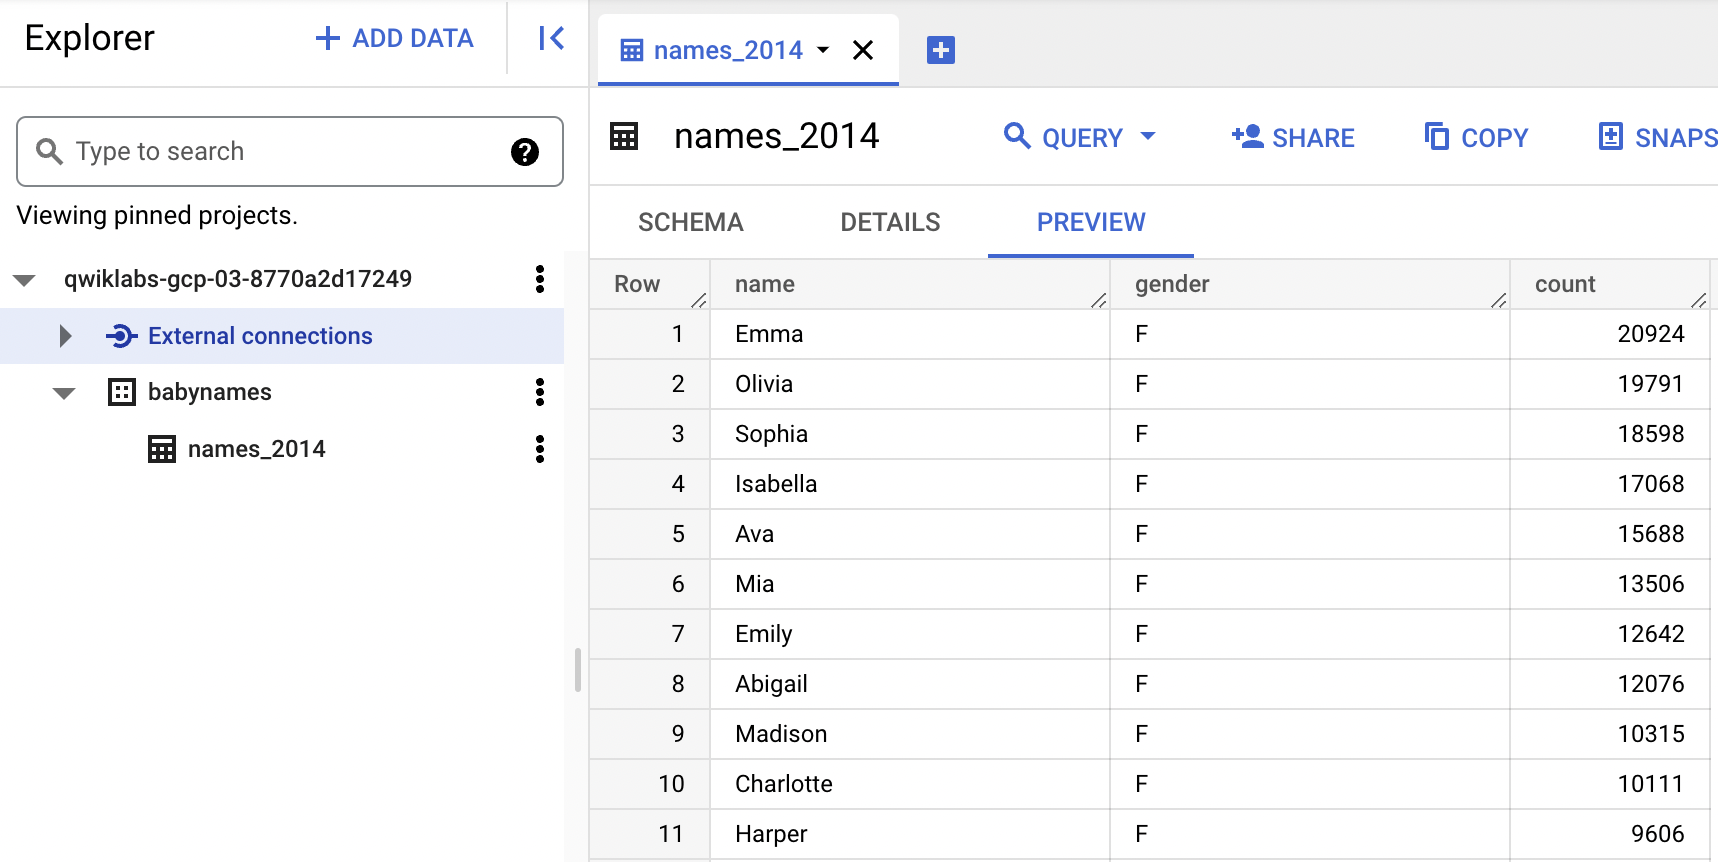
names_2014 table in the left-hand menu, then click Preview.Your table is ready to be queried against.
Running a query against custom data is identical to querying a public dataset that you did earlier, except that now you're querying your own table instead of a public table.
In BigQuery, click the + SQL query button in the top right corner to clear out your previous query.
Add the following query into the Query editor.
Click Check my progress to verify your performed task. If you have successfully query against custom dataset, you'll see an assessment score.
When you have completed your lab, click End Lab. Google Cloud Skills Boost removes the resources you’ve used and cleans the account for you.
You will be given an opportunity to rate the lab experience. Select the applicable number of stars, type a comment, and then click Submit.
The number of stars indicates the following:
You can close the dialog box if you don't want to provide feedback.
For feedback, suggestions, or corrections, please use the Support tab.
Copyright 2022 Google LLC All rights reserved. Google and the Google logo are trademarks of Google LLC. All other company and product names may be trademarks of the respective companies with which they are associated.


현재 이 콘텐츠를 이용할 수 없습니다
이용할 수 있게 되면 이메일로 알려드리겠습니다.

감사합니다
이용할 수 있게 되면 이메일로 알려드리겠습니다.

한 번에 실습 1개만 가능
모든 기존 실습을 종료하고 이 실습을 시작할지 확인하세요.