Backup for GKE is a service for backing up and restoring workloads in GKE clusters. It has two components:
A Google Cloud API serves as the control plane for the service.
A GKE add-on (the Backup for GKE agent) must be enabled in each cluster for which you wish to perform backup and restore operations.
Backups of your workloads may be useful for disaster recovery, CI/CD pipelines, cloning workloads, or upgrade scenarios. Protecting your workloads can help you achieve business-critical recovery point objectives.
What you'll learn
In this lab, you will learn how to:
Enable Backup for a GKE cluster
Deploy a stateful application with a database on GKE
Plan and backup GKE workloads
Restore a backup
Prerequisites
Working knowledge of the following technologies is beneficial but not required for this lab:
Read these instructions. Labs are timed and you cannot pause them. The timer, which starts when you click Start Lab, shows how long Google Cloud resources will be made available to you.
This hands-on lab lets you do the lab activities yourself in a real cloud environment, not in a simulation or demo environment. It does so by giving you new, temporary credentials that you use to sign in and access Google Cloud for the duration of the lab.
What you need
To complete this lab, you need:
Access to a standard internet browser (Chrome browser recommended).
Time to complete the lab.
Note: If you already have your own personal Google Cloud account or project, do not use it for this lab.
Note: If you are using a Chrome OS device, open an Incognito window to run this lab.
How to start your lab and sign in to the Google Cloud Console
Click the Start Lab button. If you need to pay for the lab, a pop-up opens for you to select your payment method.
On the left is a panel populated with the temporary credentials that you must use for this lab.
Copy the username, and then click Open Google Console.
The lab spins up resources, and then opens another tab that shows the Sign in page.
Tip: Open the tabs in separate windows, side-by-side.
In the Sign in page, paste the username that you copied from the left panel. Then copy and paste the password.
Important: You must use the credentials from the left panel. Do not use your Google Cloud Training credentials. If you have your own Google Cloud account, do not use it for this lab (avoids incurring charges).
Click through the subsequent pages:
Accept the terms and conditions.
Do not add recovery options or two-factor authentication (because this is a temporary account).
Do not sign up for free trials.
After a few moments, the Cloud Console opens in this tab.
Activate Cloud Shell
Cloud Shell is a virtual machine that is loaded with development tools. It offers a persistent 5GB home directory and runs on the Google Cloud. Cloud Shell provides command-line access to your Google Cloud resources.
In the Cloud Console, in the top right toolbar, click the Activate Cloud Shell button.
Click Continue.
It takes a few moments to provision and connect to the environment. When you are connected, you are already authenticated, and the project is set to your PROJECT_ID. For example:
gcloud is the command-line tool for Google Cloud. It comes pre-installed on Cloud Shell and supports tab-completion.
You can list the active account name with this command:
Enable Backup for GKE on an existing cluster. You can enable Backup when you create a new cluster, but for this lab you will enable it on an existing cluster:
Updating lab-cluster...done.
Updated [https://container.googleapis.com/v1beta1/projects/qwiklabs-gcp-##-############/zones/us-central1-a/clusters/lab-cluster].
To inspect the contents of your cluster, go to: https://console.cloud.google.com/kubernetes/workload_/gcloud/us-central1-a/lab-cluster?project=qwiklabs-gcp-##-############
Create request issued for: [my-backup-plan]
Waiting for operation [projects/qwiklabs-gcp-##-############/locations/us-central1/operations/operation-#############-#############-########-########] to complete...working...
Waiting for operation [projects/qwiklabs-gcp-##-############/locations/us-central1/operations/operation-#############-#############-########-########] to complete...done.
ㅤ
Created backup plan [my-backup-plan].
Verify the backup plans was created:
gcloud beta container backup-restore backup-plans list \
--project=$PROJECT_ID \
--location=$REGION
You will see the following verification:
NAME: my-backup-plan
LOCATION: us-central1
CLUSTER: lab-cluster
ACTIVE: Y
PAUSED: N
Fetching cluster endpoint and auth data.
kubeconfig entry generated for existing-cluster.
Ensure the reserved static IP address for the application is set:
echo "EXTERNAL_ADDRESS=${EXTERNAL_ADDRESS}"
The output should look like this:
EXTERNAL_ADDRESS=###.###.###.###
Task 4. Deploy the application
You are now ready to deploy a stateful application. You will deploy the WordPress application using MySQL as the database.
Run the following commands create persistent volumes for the application and database. The service will also be exposed through a Google Cloud external load balancer:
# Password for lab only. Change to a strong one in your environment.
YOUR_SECRET_PASSWORD=1234567890
kubectl create secret generic mysql-pass --from-literal=password=${YOUR_SECRET_PASSWORD?}
kubectl apply -f https://k8s.io/examples/application/wordpress/mysql-deployment.yaml
kubectl apply -f https://k8s.io/examples/application/wordpress/wordpress-deployment.yaml
Your results should look like the following:
secret/mysql-pass created
service/wordpress-mysql created
persistentvolumeclaim/mysql-pv-claim created
deployment.apps/wordpress-mysql created
service/wordpress created
persistentvolumeclaim/wp-pv-claim created
deployment.apps/wordpress created
while ! curl --fail --max-time 5 --output /dev/null --show-error --silent http://${EXTERNAL_ADDRESS}; do
sleep 5
done
echo -e "\nhttp://${EXTERNAL_ADDRESS} is accessible\n"
When the application is accessible, you should see the following output:
...
curl: (28) Connection timed out after 5001 milliseconds
curl: (28) Connection timed out after 5001 milliseconds
curl: (28) Connection timed out after 5001 milliseconds
curl: (28) Connection timed out after 5001 milliseconds
curl: (28) Connection timed out after 5001 milliseconds
curl: (28) Connection timed out after 5001 milliseconds
curl: (28) Connection timed out after 5001 milliseconds
curl: (28) Connection timed out after 5000 milliseconds
curl: (28) Connection timed out after 5000 milliseconds
curl: (28) Connection timed out after 5000 milliseconds
curl: (28) Connection timed out after 5000 milliseconds
ㅤ
http://###.###.###.### is accessible
ㅤ
Click Check my progress to verify the objective.
Deploy the application and patch the service
Task 5. Verify the deployed workload
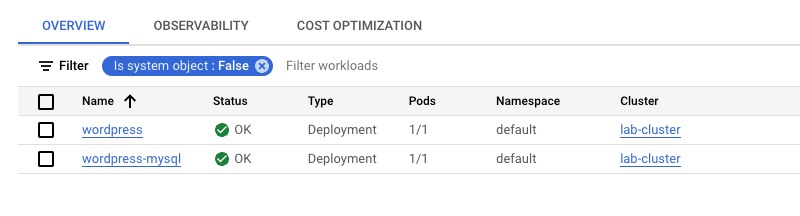
In the Cloud console, navigate to Kubernetes Engine > Workload. You should see the WordPress application and its database.
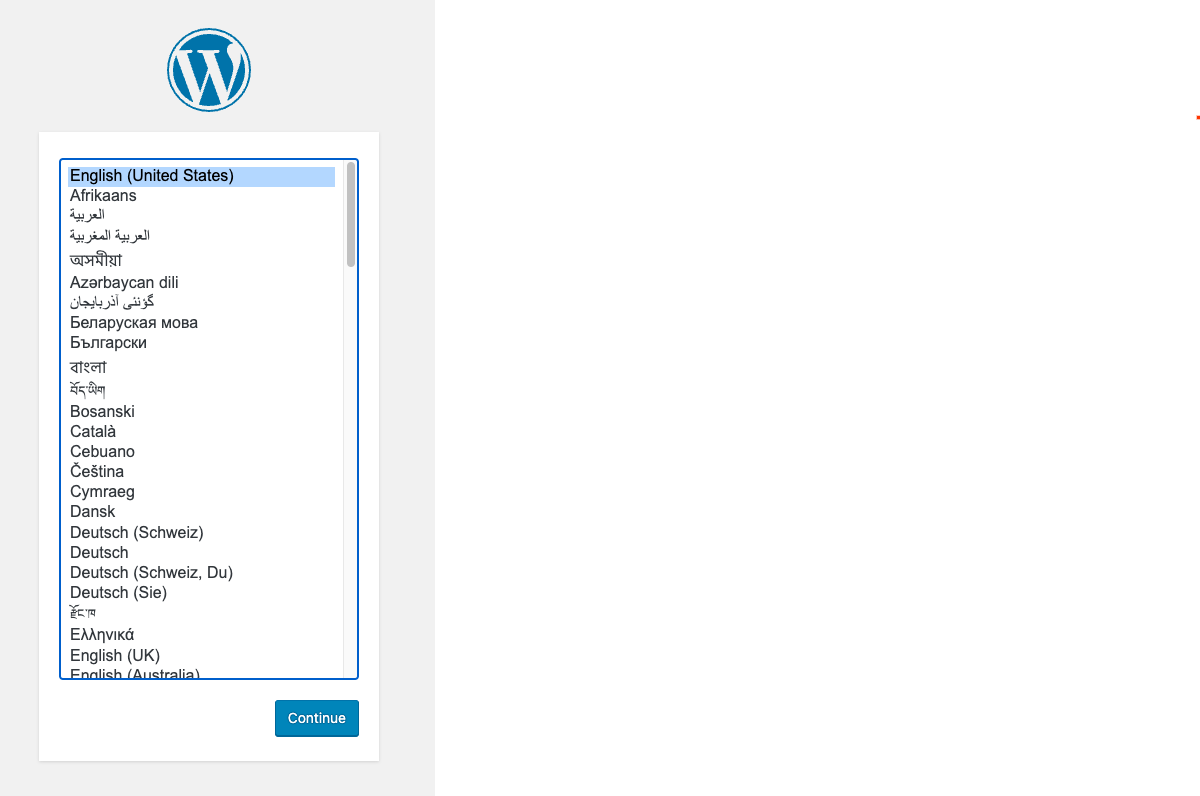
Open a browser window and paste in the URL from the previous step. You should see the following page:
Click the Continue button and type in the required info. For example:
Make a note of the password and click the Install WordPress button.
After you log in to the WordPress application, try to create some new posts and add a few comments to existing posts. After backup/restore, you want to verify your input still exists.
Create in progress for backup my-backup1 [projects/qwiklabs-gcp-##-############/locations/us-central1/operations/operation-#############-#############-########-########].
Creating backup my-backup1...done.
Waiting for backup to complete... Backup state: IN_PROGRESS.
Waiting for backup to complete... Backup state: IN_PROGRESS.
Waiting for backup to complete... Backup state: IN_PROGRESS.
Waiting for backup to complete... Backup state: IN_PROGRESS.
Waiting for backup to complete... Backup state: IN_PROGRESS.
Waiting for backup to complete... Backup state: IN_PROGRESS.
Waiting for backup to complete... Backup state: IN_PROGRESS.
Waiting for backup to complete... Backup state: IN_PROGRESS.
Waiting for backup to complete... Backup state: IN_PROGRESS.
Backup completed. Backup state: SUCCEEDED
Create request issued for: [my-restore-plan1]
Waiting for operation [projects/qwiklabs-gcp-##-############/locations/us-central1/operations/
operation-#############-#############-########-########] to complete...working.
Waiting for operation [projects/qwiklabs-gcp-##-############/locations/us-central1/operations/operation-#############-#############-########-########] to complete...done.
Created restore plan [my-restore-plan1].
View the restore plans:
gcloud beta container backup-restore restore-plans list \
--project=$PROJECT_ID \
--location=$REGION
Create in progress for restore my-restore1 [projects/qwiklabs-gcp-##-############/locations/us-central1/operations/operation-#############-#############-########-########].
Creating restore my-restore1...done.
Waiting for restore to complete... Restore state: CREATING.
Waiting for restore to complete... Restore state: CREATING.
Waiting for restore to complete... Restore state: IN_PROGRESS.
Restore completed. Restore state: SUCCEEDED
Verify the application is running:
kubectl get pods
Wait until the all pods have a STATUS of RUNNING
NAME READY STATUS RESTARTS AGE
wordpress-##########-##### 1/1 Running 0 ##s
wordpress-mysql-#########-##### 1/1 Running 0 ##s
Click on the URL and verify the application is functional.
Click Check my progress to verify the objective.
Restore a Backup
Congratulations!
Google Cloud Training & Certification
...helps you make the most of Google Cloud technologies. Our classes include technical skills and best practices to help you get up to speed quickly and continue your learning journey. We offer fundamental to advanced level training, with on-demand, live, and virtual options to suit your busy schedule. Certifications help you validate and prove your skill and expertise in Google Cloud technologies.
Manual Last Updated: December 15, 2022
Manual Last tested: January 30, 2023
Copyright 2023 Google LLC All rights reserved. Google and the Google logo are trademarks of Google LLC. All other company and product names may be trademarks of the respective companies with which they are associated.