

准备工作
- 实验会创建一个 Google Cloud 项目和一些资源,供您使用限定的一段时间
- 实验有时间限制,并且没有暂停功能。如果您中途结束实验,则必须重新开始。
- 在屏幕左上角,点击开始实验即可开始
Create the database accounts and insert DDL
/ 20
Create a change stream for Balance and AccountStatus
/ 20
Create an reconciliation dataset in BigQuery to receive change stream data
/ 20
Create a Dataflow change stream pipeline
/ 20
Create changes in Spanner and track them in BigQuery
/ 20
Account reconciliation is one of the many mandatory business processes for a plethora of businesses in numberless industry verticals. While every business has its procedures, it follows a pretty standard process of matching transactions across ledgers and bank statements to ensure financial accuracy of accounts. Reconciliation and audit tools help teams maximize their productivity and save time in what would otherwise be a very timely process of account reconciliation.
In this lab, you will create an account table in Google Cloud Spanner and set up a monitoring pipeline with Spanner's change streams feature and Google Dataflow. The changes will be reflected in BigQuery.
In this lab, you learn how to perform the following tasks:
Read these instructions. Labs are timed and you cannot pause them. The timer, which starts when you click Start Lab, shows how long Google Cloud resources are made available to you.
This hands-on lab lets you do the lab activities in a real cloud environment, not in a simulation or demo environment. It does so by giving you new, temporary credentials you use to sign in and access Google Cloud for the duration of the lab.
To complete this lab, you need:
Click the Start Lab button. If you need to pay for the lab, a dialog opens for you to select your payment method. On the left is the Lab Details pane with the following:
Click Open Google Cloud console (or right-click and select Open Link in Incognito Window if you are running the Chrome browser).
The lab spins up resources, and then opens another tab that shows the Sign in page.
Tip: Arrange the tabs in separate windows, side-by-side.
If necessary, copy the Username below and paste it into the Sign in dialog.
You can also find the Username in the Lab Details pane.
Click Next.
Copy the Password below and paste it into the Welcome dialog.
You can also find the Password in the Lab Details pane.
Click Next.
Click through the subsequent pages:
After a few moments, the Google Cloud console opens in this tab.

From the Cloud Console Navigation menu (
Click on the bitfoon-dev instance.
From the instance details page, click Create Database.
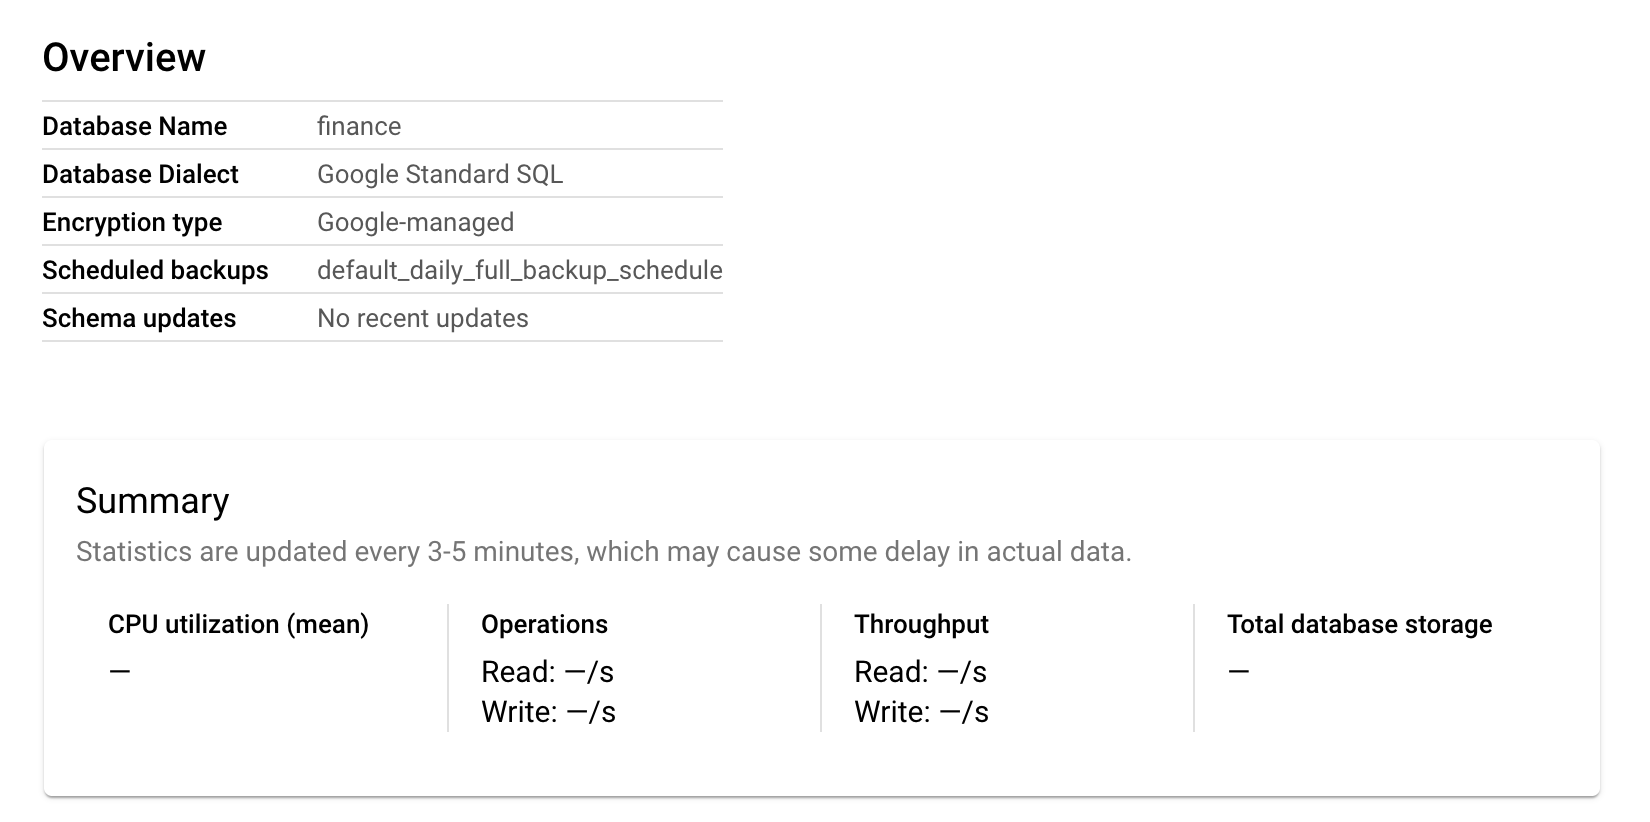
For the database name, enter finance.
For Select database dialect select Google Standard SQL..
In the Define your schema box, copy and paste following DDL:
Great! You have created an accounts database.
Click Check my progress to verify the objective.
From the finance database, click on Spanner Studio in the left menu.
Copy and paste following query into the box:
Your output should resemble:
ACCOUNTID12345ACCOUNTID24680ACCOUNTID135791Great! You have inserted multiple accounts in your database.
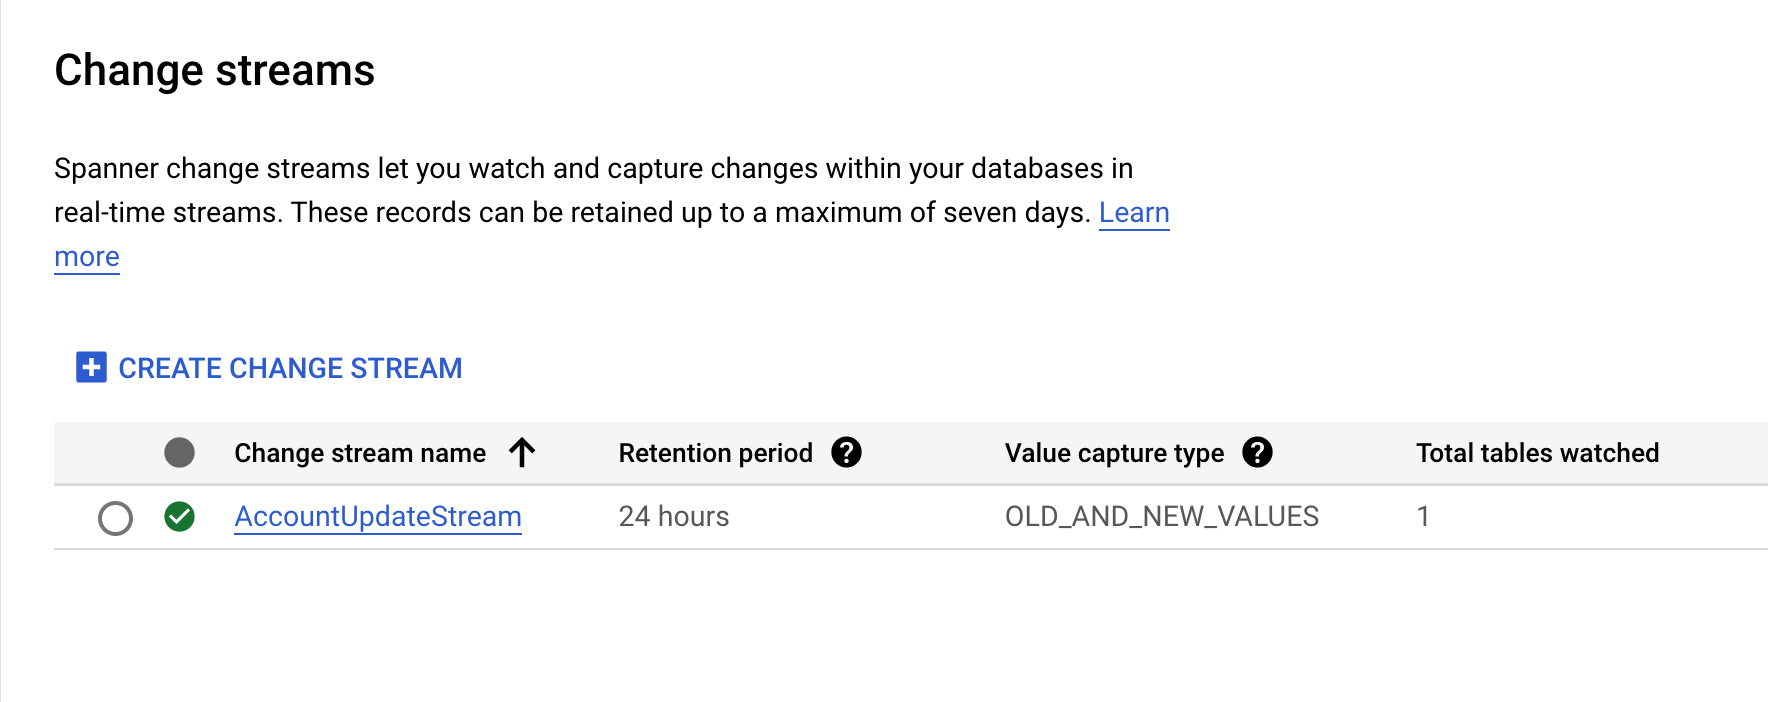
From the finance database, click on Change Streams in the left menu.
Click +CREATE CHANGE STREAM.
Copy and paste following schema into the Editor box:
Click Run.
Navigate back to the Change Streams page. Verify you change stream has been created:
The change stream is now created with a default retention period of 24h. You can check out other options here.
Click Check my progress to verify the objective.
On the Cloud Console Navigation menu (
click on the View actions icon (
Name the new dataset changestream.
Click Create Dataset.
Great! You have successfully created an reconciliation table.
Click Check my progress to verify the objective.
On the Cloud Console Navigation menu (
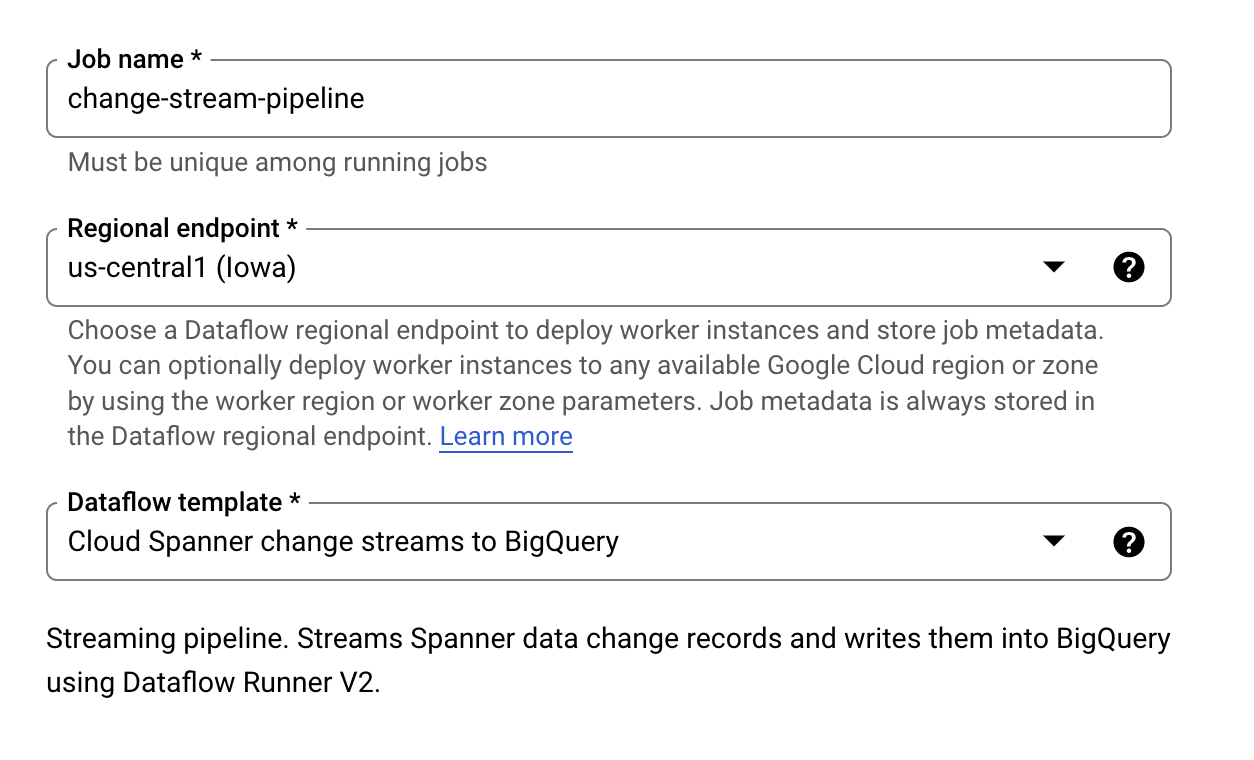
Click Create job from template.
For Job name type change-stream-pipeline.
For Regional Endpoint select
For Dataflow Template select Cloud Spanner change streams to BigQuery.
Fill out the required parameters with the following values:
bitfoon-dev
finance
AccountUpdateStream
changestream
bitfoon-dev
finance
Click Run Job.
On the Cloud Console Navigation menu (
Click on the bitfoon-dev instance.
Click on database finance.
Click on Spanner Studio in the left menu.
Run the following query to kick off the Dataflow job:
On the Cloud Console Navigation menu (
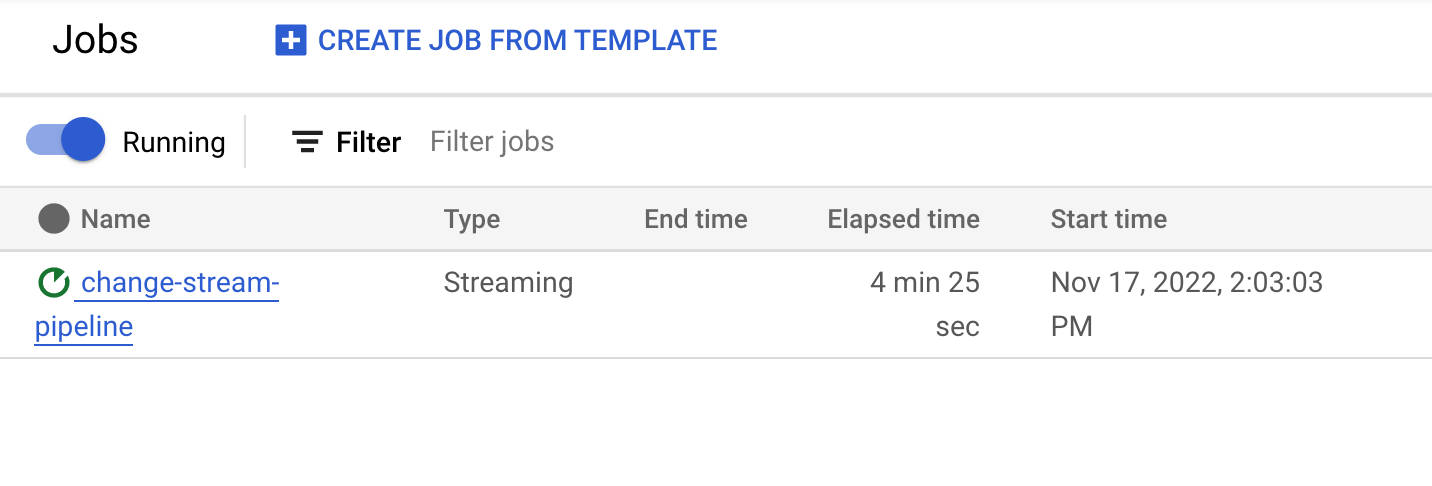
Verify the Dataflow job is running.
Click Check my progress to verify the objective.
From the Cloud Console Navigation menu (
Click on the bitfoon-dev instance.
Click on database finance.
Click on Spanner Studio in the left menu.
Copy and paste following update query into the box:
Click Run.
Repeat the query step three times with balance values to create multiple changes. Use the following balance values:
300500600On the Cloud Console Navigation menu (
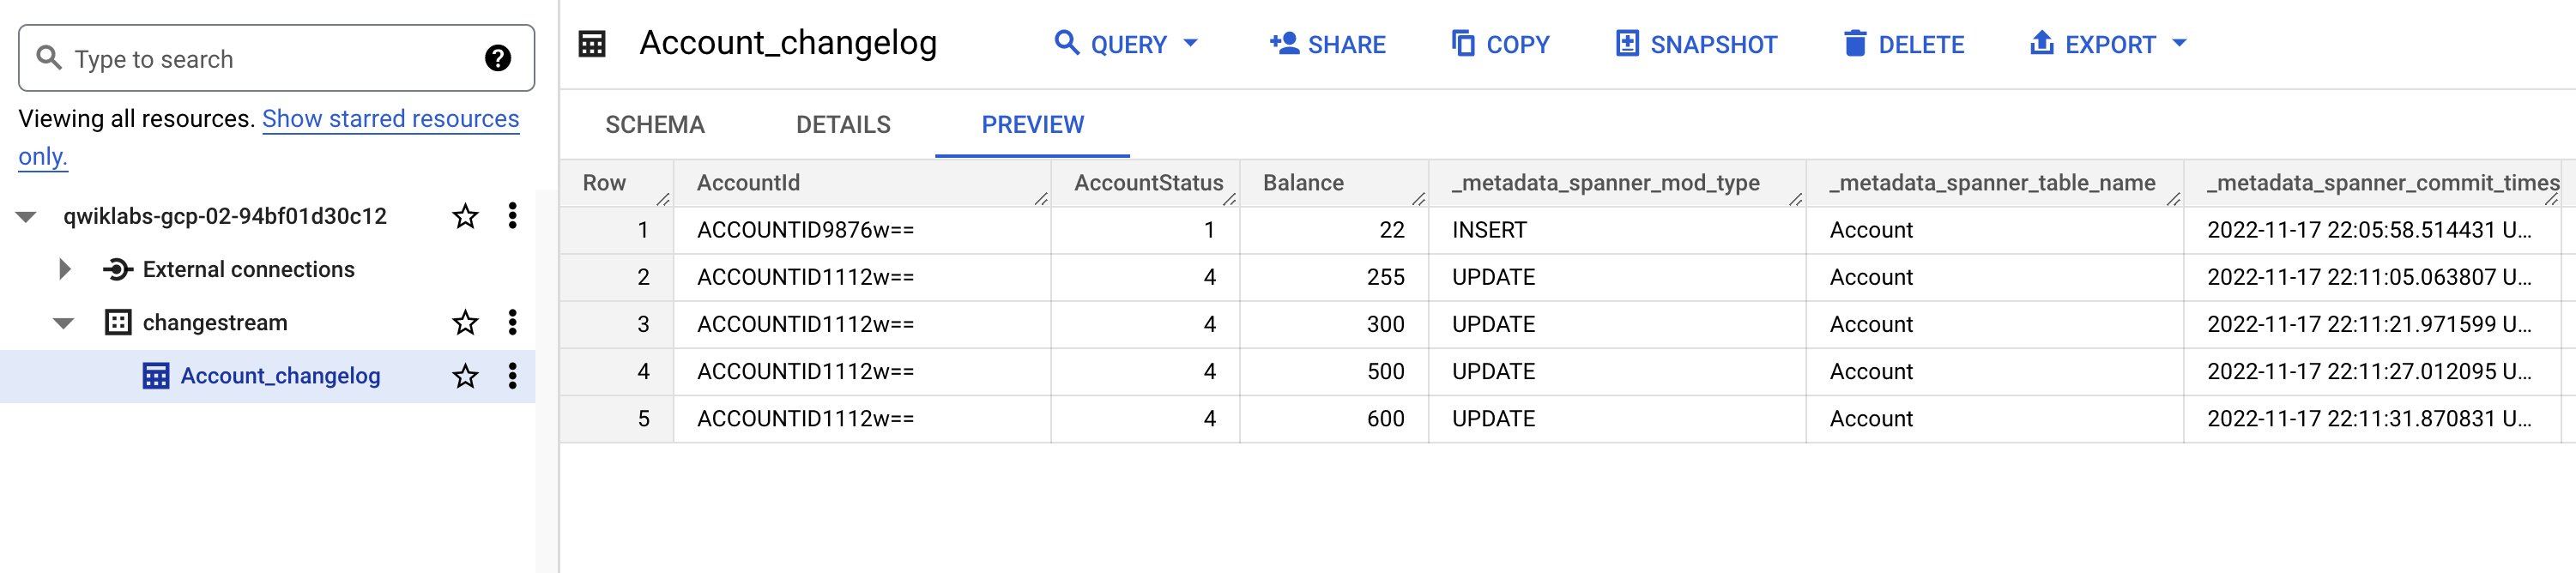
Navigate to the changestream dataset and select Account_changelog and observe the changes.
Click Check my progress to verify the objective.
In this lab you implemented a reconciliation and audit pipeline for an account and balances example on Google Cloud using Spanner, Dataflow, and BigQuery.
Check out the following resources to learn more about change streams and Spanner:
Manual Last Updated May 6, 2025
Lab Last Tested March 6, 2025
Copyright 2025 Google LLC. All rights reserved. Google and the Google logo are trademarks of Google LLC. All other company and product names may be trademarks of the respective companies with which they are associated.


此内容目前不可用
一旦可用,我们会通过电子邮件告知您

太好了!
一旦可用,我们会通过电子邮件告知您

一次一个实验
确认结束所有现有实验并开始此实验