Checkpoints
Enable services, create an artifact registry and the GKE cluster
/ 20
Create the Git repositories
/ 20
Create the container image with Cloud Build
/ 20
Create the Continuous Integration (CI) Pipeline
/ 20
Create the Test Environment and CD Pipeline
/ 20
Google Kubernetes Engine Pipeline using Cloud Build
- GSP1077
- Overview
- Objectives
- Setup and requirements
- Task 1. Initialize Your Lab
- Task 2. Create the Git repositories in Cloud Source Repositories
- Task 3. Create a container image with Cloud Build
- Task 4. Create the Continuous Integration (CI) pipeline
- Task 5. Create the Test Environment and CD pipeline
- Task 6. Review Cloud Build Pipeline
- Task 7. Test the complete pipeline
- Task 8. Test the rollback
- Congratulations!
GSP1077

Overview
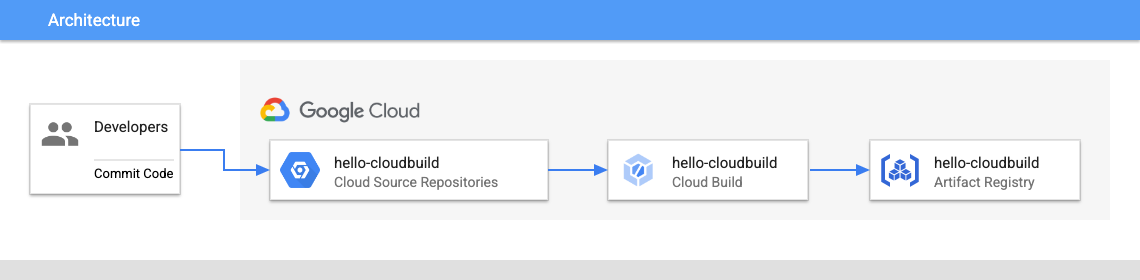
In this lab, you create a CI/CD pipeline that automatically builds a container image from committed code, stores the image in Artifact Registry, updates a Kubernetes manifest in a Git repository, and deploys the application to Google Kubernetes Engine using that manifest.
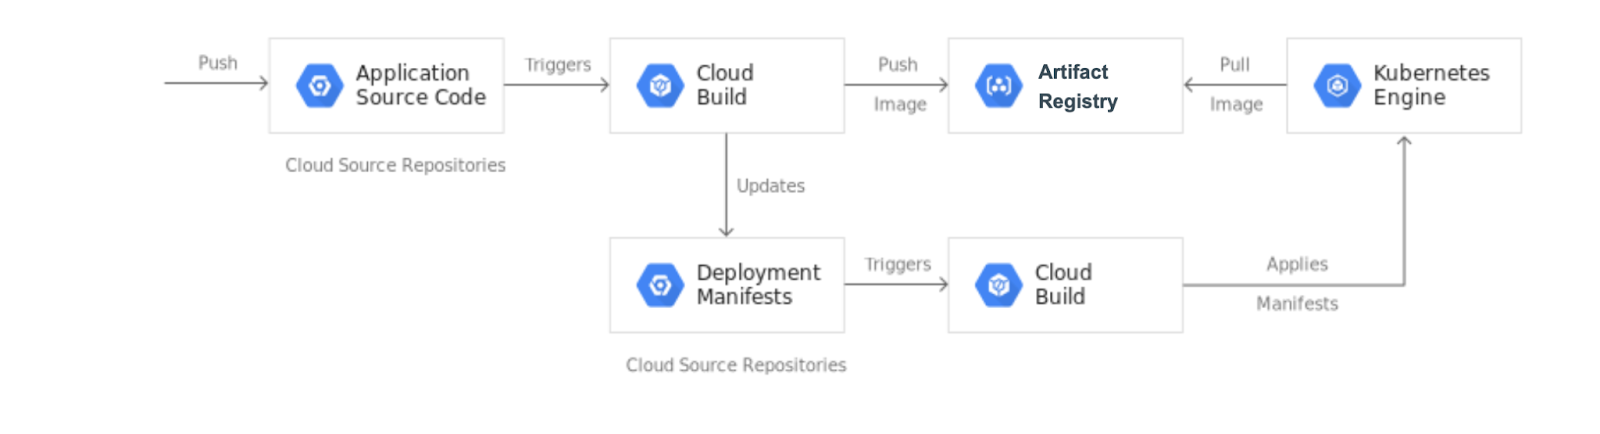
For this lab you will create 2 Git repositories:
- app repository: contains the source code of the application itself
- env repository: contains the manifests for the Kubernetes Deployment
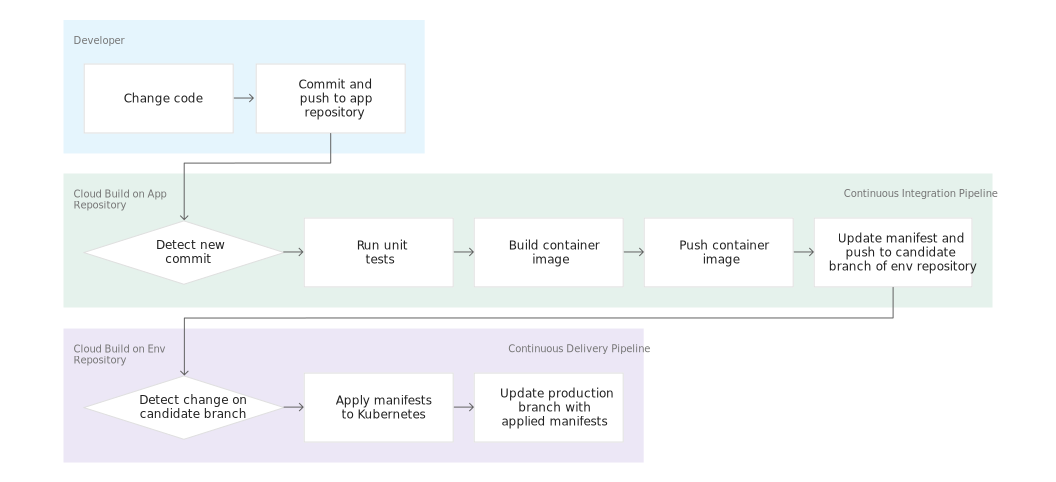
When you push a change to the app repository, the Cloud Build pipeline runs tests, builds a container image, and pushes it to Artifact Registry. After pushing the image, Cloud Build updates the Deployment manifest and pushes it to the env repository. This triggers another Cloud Build pipeline that applies the manifest to the GKE cluster and, if successful, stores the manifest in another branch of the env repository.
The app and env repositories are kept separate because they have different lifecycles and uses. The main users of the app repository are actual humans and this repository is dedicated to a specific application. The main users of the env repository are automated systems (such as Cloud Build), and this repository might be shared by several applications. The env repository can have several branches that each map to a specific environment (you only use production in this lab) and reference a specific container image, whereas the app repository does not.
When you finish this lab, you have a system where you can easily:
- Distinguish between failed and successful deployments by looking at the Cloud Build history.
- Access the manifest currently used by looking at the production branch of the env repository.
- Rollback to any previous version by re-executing the corresponding Cloud Build build.
Objectives
In this lab, you learn how to perform the following tasks:
- Create Kubernetes Engine clusters
- Create Cloud Source Repositories
- Trigger Cloud Build from Cloud Source Repositories
- Automate tests and publish a deployable container image via Cloud Build
- Manage resources deployed in a Kubernetes Engine cluster via Cloud Build
Setup and requirements
Before you click the Start Lab button
Read these instructions. Labs are timed and you cannot pause them. The timer, which starts when you click Start Lab, shows how long Google Cloud resources will be made available to you.
This hands-on lab lets you do the lab activities yourself in a real cloud environment, not in a simulation or demo environment. It does so by giving you new, temporary credentials that you use to sign in and access Google Cloud for the duration of the lab.
To complete this lab, you need:
- Access to a standard internet browser (Chrome browser recommended).
- Time to complete the lab---remember, once you start, you cannot pause a lab.
How to start your lab and sign in to the Google Cloud console
-
Click the Start Lab button. If you need to pay for the lab, a pop-up opens for you to select your payment method. On the left is the Lab Details panel with the following:
- The Open Google Cloud console button
- Time remaining
- The temporary credentials that you must use for this lab
- Other information, if needed, to step through this lab
-
Click Open Google Cloud console (or right-click and select Open Link in Incognito Window if you are running the Chrome browser).
The lab spins up resources, and then opens another tab that shows the Sign in page.
Tip: Arrange the tabs in separate windows, side-by-side.
Note: If you see the Choose an account dialog, click Use Another Account. -
If necessary, copy the Username below and paste it into the Sign in dialog.
{{{user_0.username | "Username"}}} You can also find the Username in the Lab Details panel.
-
Click Next.
-
Copy the Password below and paste it into the Welcome dialog.
{{{user_0.password | "Password"}}} You can also find the Password in the Lab Details panel.
-
Click Next.
Important: You must use the credentials the lab provides you. Do not use your Google Cloud account credentials. Note: Using your own Google Cloud account for this lab may incur extra charges. -
Click through the subsequent pages:
- Accept the terms and conditions.
- Do not add recovery options or two-factor authentication (because this is a temporary account).
- Do not sign up for free trials.
After a few moments, the Google Cloud console opens in this tab.

Activate Cloud Shell
Cloud Shell is a virtual machine that is loaded with development tools. It offers a persistent 5GB home directory and runs on the Google Cloud. Cloud Shell provides command-line access to your Google Cloud resources.
- Click Activate Cloud Shell
at the top of the Google Cloud console.
When you are connected, you are already authenticated, and the project is set to your Project_ID,
gcloud is the command-line tool for Google Cloud. It comes pre-installed on Cloud Shell and supports tab-completion.
- (Optional) You can list the active account name with this command:
- Click Authorize.
Output:
- (Optional) You can list the project ID with this command:
Output:
gcloud, in Google Cloud, refer to the gcloud CLI overview guide.
Task 1. Initialize Your Lab
- In Cloud Shell, set your project ID and project number. Save them as
PROJECT_IDandPROJECT_NUMBERvariables:
In the next task you will prepare your Google Cloud Project for use by enabling the required APIs, initializing the git configuration in Cloud Shell, and downloading the sample code used later in the lab.
- Run the following command to enable the APIs for GKE, Cloud Build, Cloud Source Repositories and Container Analysis:
- Create an Artifact Registry Docker repository named my-repository in the
region to store your container images:
- Create a GKE cluster to deploy the sample application of this lab:
- If you have never used Git in Cloud Shell, configure it with your name and email address. Git will use those to identify you as the author of the commits you will create in Cloud Shell (if you don't have a github account, you can just fill in this with your current information. No account is necessary for this lab):
Click Check my progress to verify the objective.
Task 2. Create the Git repositories in Cloud Source Repositories
In this task, you create the two Git repositories (hello-cloudbuild-app and hello-cloudbuild-env) and initialize hello-cloudbuild-app with some sample code.
- In Cloud Shell, run the following to create the two Git repositories:
- Download the sample code from Cloud Storage:
- Configure Cloud Source Repositories as a remote:
The code you just cloned contains a simple "Hello World" application.
Click Check my progress to verify the objective.
Task 3. Create a container image with Cloud Build
The code you cloned already contains the following Dockerfile.
With this Dockerfile, you can create a container image with Cloud Build and store it in Artifact Registry.
- In Cloud Shell, create a Cloud Build build based on the latest commit with the following command:
Cloud Build streams the logs generated by the creation of the container image to your terminal when you execute this command.
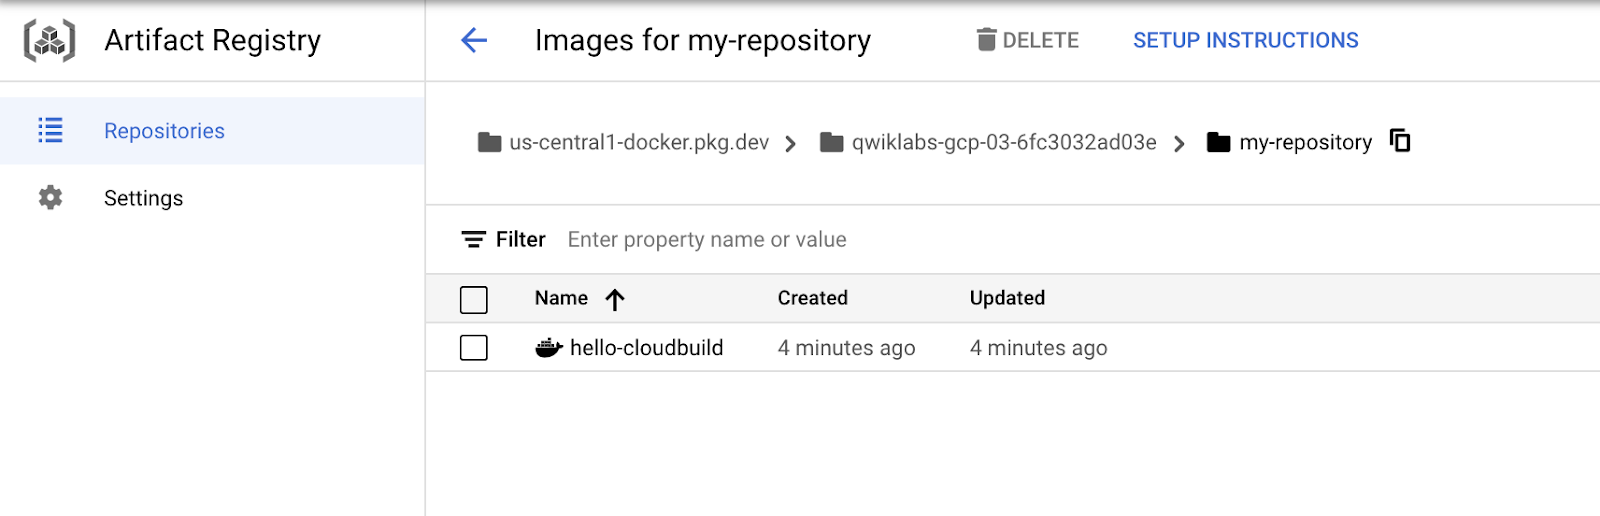
- After the build finishes, in the Cloud console go to Artifact Registry > Repositories to verify that your new container image is indeed available in Artifact Registry. Click my-repository.
Click Check my progress to verify the objective.
Task 4. Create the Continuous Integration (CI) pipeline
In this task, you will configure Cloud Build to automatically run a small unit test, build the container image, and then push it to Artifact Registry. Pushing a new commit to Cloud Source Repositories triggers this pipeline automatically. The cloudbuild.yaml file already included in the code is the pipeline's configuration.
- In the Cloud console, go to Cloud Build > Triggers.
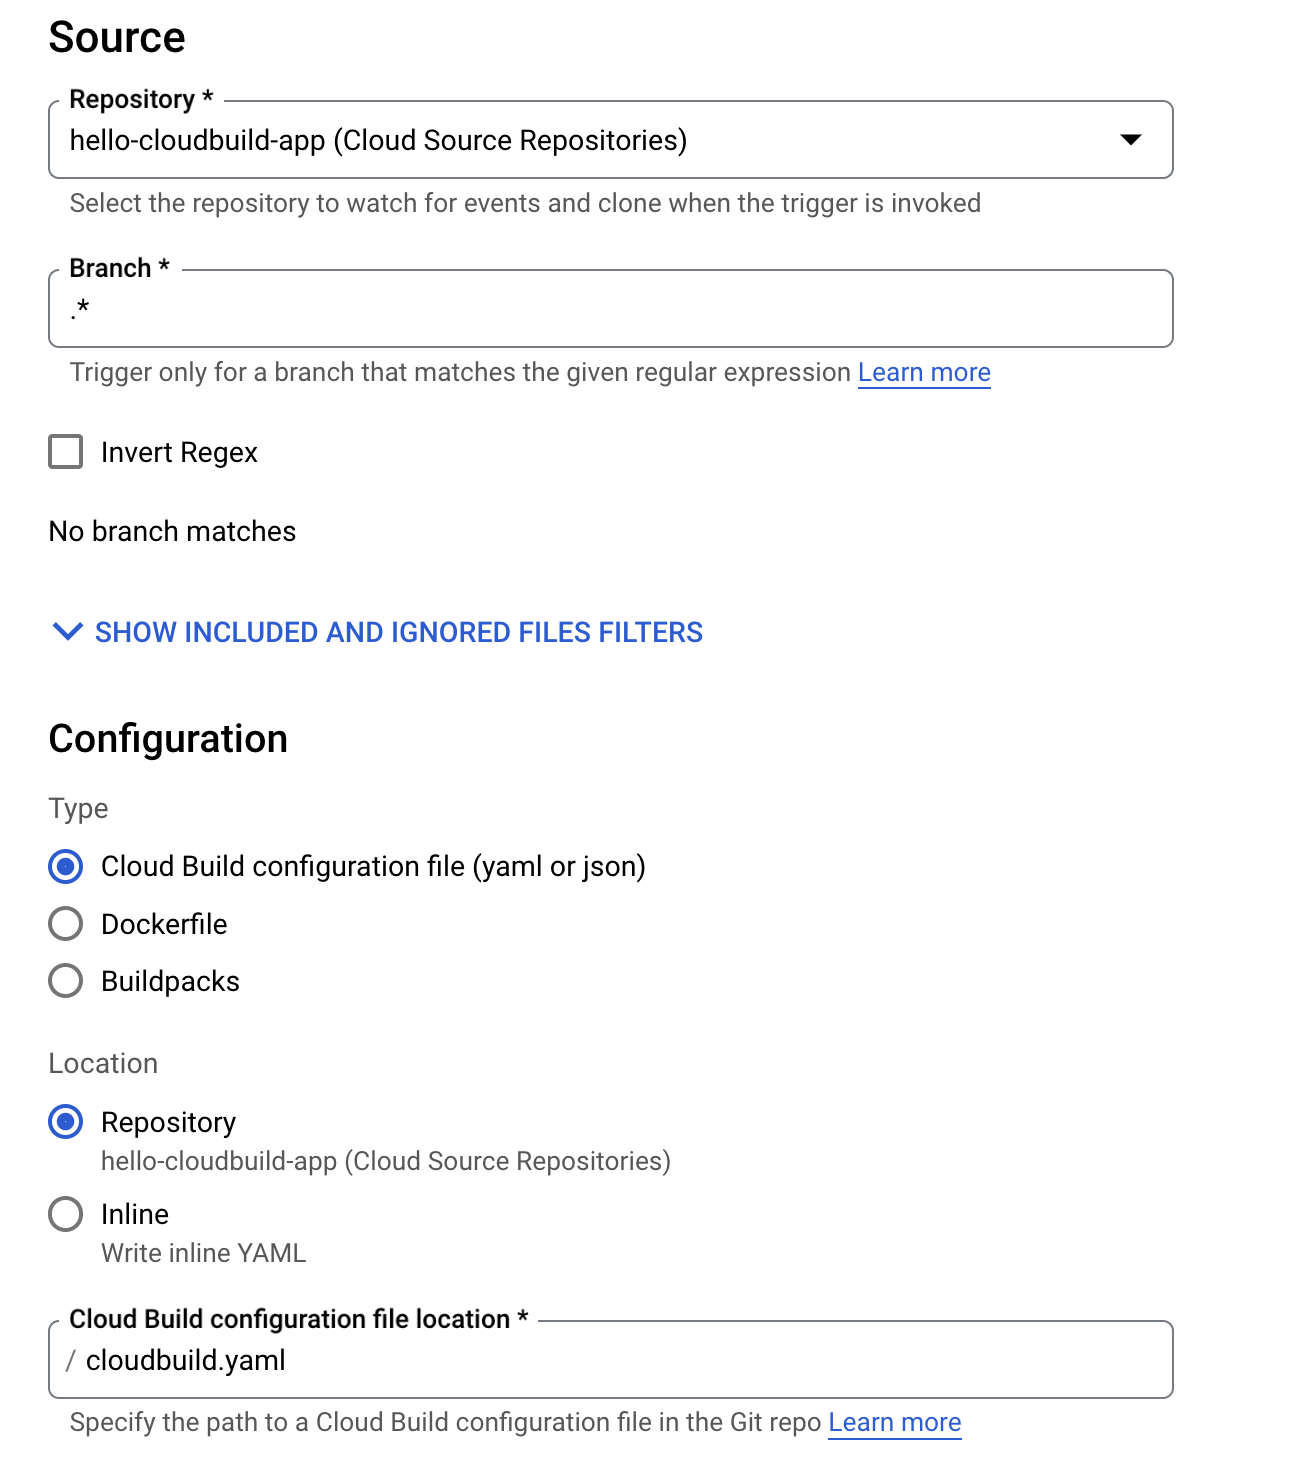
- Click Create Trigger
- In the Name field, type
hello-cloudbuild. - Under Event, select Push to a branch.
- Under Source, select hello-cloudbuild-app as your Repository and
.* (any branch)as your Branch. - Under Build configuration, select Cloud Build configuration file.
- In the Cloud Build configuration file location field, type
cloudbuild.yamlafter the /. - For the Service account, use the Compute Engine default service account.
- Click Create.
When the trigger is created, return to the Cloud Shell. You now need to push the application code to Cloud Source Repositories to trigger the CI pipeline in Cloud Build.
- To start this trigger, run the following command:
-
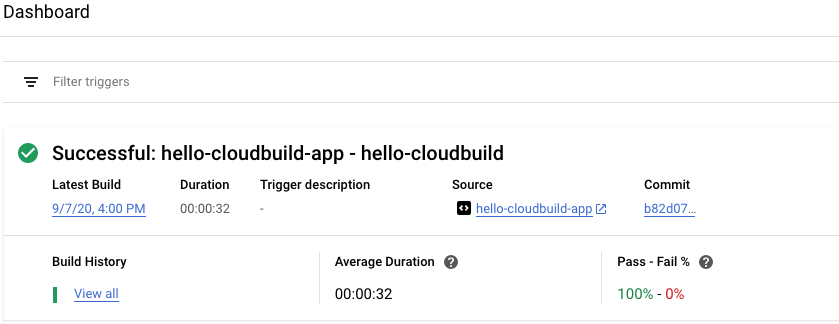
In the Cloud console, go to Cloud Build > Dashboard.
-
You should see a build running or having recently finished. You can click on the build to follow its execution and examine its logs.
Click Check my progress to verify the objective.
Task 5. Create the Test Environment and CD pipeline
Cloud Build is also used for the continuous delivery pipeline. The pipeline runs each time a commit is pushed to the candidate branch of the hello-cloudbuild-env repository. The pipeline applies the new version of the manifest to the Kubernetes cluster and, if successful, copies the manifest over to the production branch. This process has the following properties:
- The candidate branch is a history of the deployment attempts.
- The production branch is a history of the successful deployments.
- You have a view of successful and failed deployments in Cloud Build.
- You can rollback to any previous deployment by re-executing the corresponding build in Cloud Build. A rollback also updates the production branch to truthfully reflect the history of deployments.
Next you will modify the continuous integration pipeline to update the candidate branch of the hello-cloudbuild-env repository, triggering the continuous delivery pipeline.
Grant Cloud Build access to GKE
To deploy the application in your Kubernetes cluster, Cloud Build needs the Kubernetes Engine Developer Identity and Access Management role.
- In Cloud Shell execute the following command:
You need to initialize the hello-cloudbuild-env repository with two branches (production and candidate) and a Cloud Build configuration file describing the deployment process.
The first step is to clone the hello-cloudbuild-env repository and create the production branch. It is still empty.
- In Cloud Shell execute the following command:
- Next you need to copy the cloudbuild-delivery.yaml file available in the hello-cloudbuild-app repository and commit the change:
The cloudbuild-delivery.yaml file describes the deployment process to be run in Cloud Build. It has two steps:
- Cloud Build applies the manifest on the GKE cluster.
- If successful, Cloud Build copies the manifest on the production branch.
- Create a candidate branch and push both branches for them to be available in Cloud Source Repositories:
- Grant the Source Repository Writer IAM role to the Cloud Build service account for the hello-cloudbuild-env repository:
Create the trigger for the continuous delivery pipeline
- In the Cloud console, go to Cloud Build > Triggers.
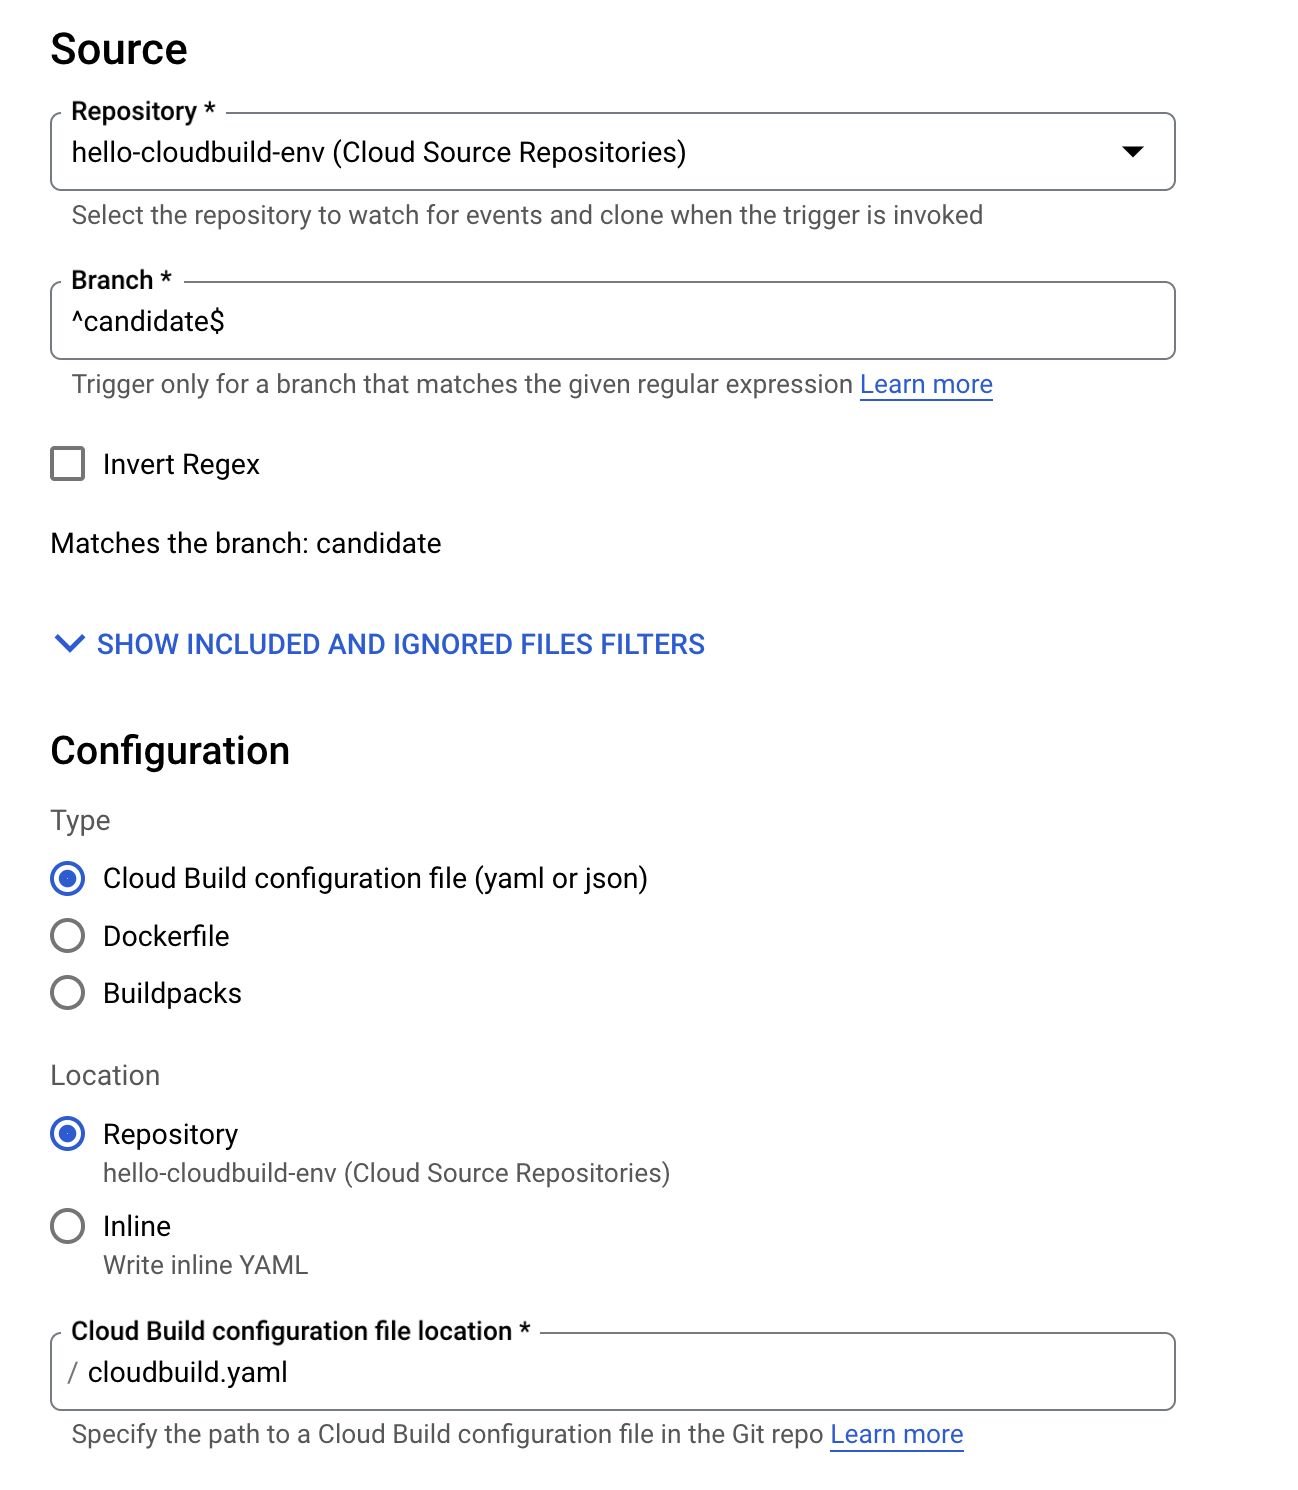
- Click Create Trigger.
- In the Name field, type
hello-cloudbuild-deploy. - Under Event, select Push to a branch.
- Under Source, select hello-cloudbuild-env as your Repository and
^candidate$as your Branch. - Under Build configuration, select Cloud Build configuration file.
- In the Cloud Build configuration file location field, type
cloudbuild.yamlafter the /. - For the Service account, use the Compute Engine default service account.
- Click Create.
Modify the continuous integration pipeline to trigger the continuous delivery pipeline.
Next, add some steps to the continuous integration pipeline that will generate a new version of the Kubernetes manifest and push it to the hello-cloudbuild-env repository to trigger the continuous delivery pipeline.
- Copy the extended version of the cloudbuild.yaml file for the app repository:
The cloudbuild-trigger-cd.yaml is an extended version of the cloudbuild.yaml file. It adds the steps below: they generate the new Kubernetes manifest and trigger the continuous delivery pipeline.
sed to render the manifest template. In reality, you will benefit from using a dedicated tool such as kustomize or skaffold. They allow for more control over the rendering of the manifest templates.
- Commit the modifications and push them to Cloud Source Repositories:
This triggers the continuous integration pipeline in Cloud Build.
Click Check my progress to verify the objective.
Task 6. Review Cloud Build Pipeline
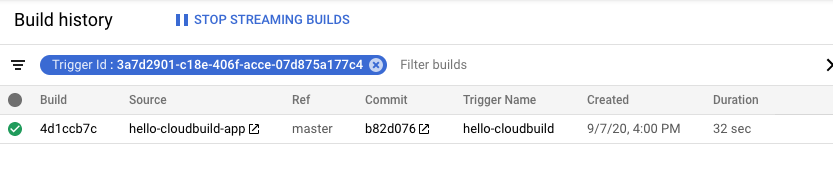
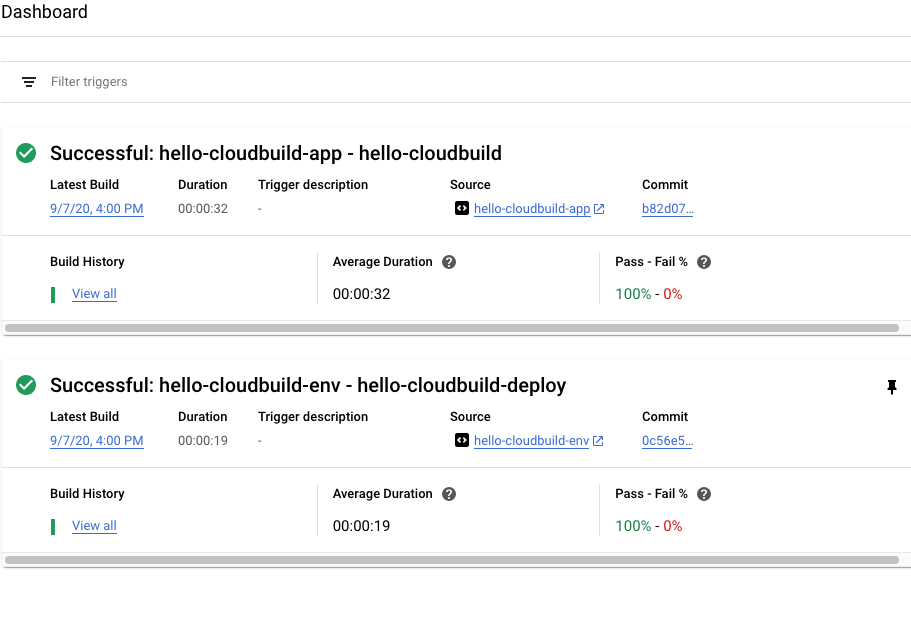
- In the Cloud console, go to Cloud Build > Dashboard.
- Click into the hello-cloudbuild-app trigger to follow its execution and examine its logs. The last step of this pipeline pushes the new manifest to the hello-cloudbuild-env repository, which triggers the continuous delivery pipeline.
- Return to the main Dashboard.
- You should see a build running or having recently finished for the hello-cloudbuild-env repository. You can click on the build to follow its execution and examine its logs.
Task 7. Test the complete pipeline
The complete CI/CD pipeline is now configured. Test it from end to end.
- In the Cloud console, go to Kubernetes Engine > Gateways,Services & Ingress.
There should be a single service called hello-cloudbuild in the list. It has been created by the continuous delivery build that just ran.
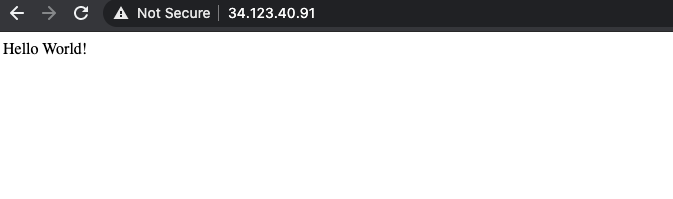
- Click on the endpoint for the hello-cloudbuild service. You should see "Hello World!". If there is no endpoint, or if you see a load balancer error, you may have to wait a few minutes for the load balancer to be completely initialized. Click Refresh to update the page if needed.
- In Cloud Shell, replace "Hello World" with "Hello Cloud Build", both in the application and in the unit test:
- Commit and push the change to Cloud Source Repositories:
- This triggers the full CI/CD pipeline.
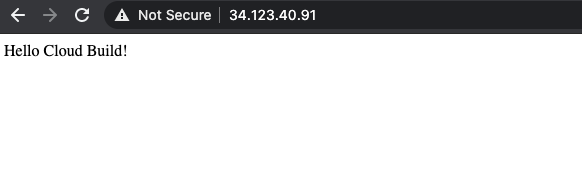
After a few minutes, reload the application in your browser. You should now see "Hello Cloud Build!".
Task 8. Test the rollback
In this task, you rollback to the version of the application that said "Hello World!".
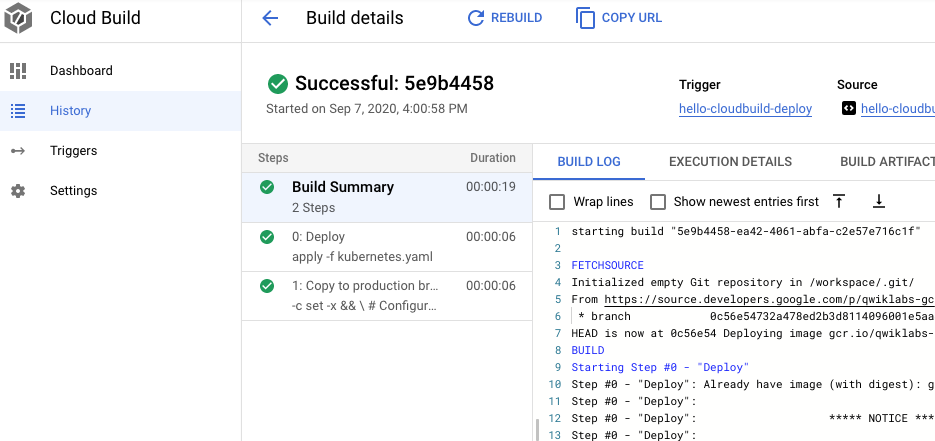
- In the Cloud console, go to Cloud Build > Dashboard.
- Click on View all link under Build History for the hello-cloudbuild-env repository.
- Click on the second most recent build available.
- Click Rebuild.
When the build is finished, reload the application in your browser. You should now see "Hello World!" again.
Congratulations!
Now you can use Cloud Build to create and rollback continuous integration pipelines with GKE on Google Cloud!
Google Cloud training and certification
...helps you make the most of Google Cloud technologies. Our classes include technical skills and best practices to help you get up to speed quickly and continue your learning journey. We offer fundamental to advanced level training, with on-demand, live, and virtual options to suit your busy schedule. Certifications help you validate and prove your skill and expertise in Google Cloud technologies.
Manual Last Updated: July 8, 2024
Lab Last Tested: July 8, 2024
Copyright 2024 Google LLC All rights reserved. Google and the Google logo are trademarks of Google LLC. All other company and product names may be trademarks of the respective companies with which they are associated.