Checkpoints
Create a cluster and instance
/ 30
Create and load a table
/ 40
Create a cluster and instance with CLI
/ 30
AlloyDB - Database Fundamentals
GSP1083

Overview
AlloyDB for PostgreSQL is a fully managed PostgreSQL-compatible database service for your most demanding enterprise database workloads. AlloyDB combines the best of Google with one of the most popular open-source database engines, PostgreSQL, for superior performance, scale, and availability.
In this lab, you perform several key fundamental tasks for creating and managing AlloyDB for PostgreSQL instances and databases.
What you'll do
In this lab, you learn how to perform the following tasks:
- Create a cluster and instance.
- Create tables and insert data in your database
- Use the Google Cloud CLI with AlloyDB.
- Delete an instance.
Setup and requirements
Before you click the Start Lab button
Read these instructions. Labs are timed and you cannot pause them. The timer, which starts when you click Start Lab, shows how long Google Cloud resources will be made available to you.
This hands-on lab lets you do the lab activities yourself in a real cloud environment, not in a simulation or demo environment. It does so by giving you new, temporary credentials that you use to sign in and access Google Cloud for the duration of the lab.
What you need
To complete this lab, you need:
- Access to a standard internet browser (Chrome browser recommended).
- Time to complete the lab.
Log in to Google Cloud Console
- Using the browser tab or window you are using for this lab session, copy the Username from the Connection Details panel and click the Open Google Console button.
- Paste in the Username, and then the Password as prompted.
- Click Next.
- Accept the terms and conditions.
Since this is a temporary account, which will last only as long as this lab:
- Do not add recovery options
- Do not sign up for free trials
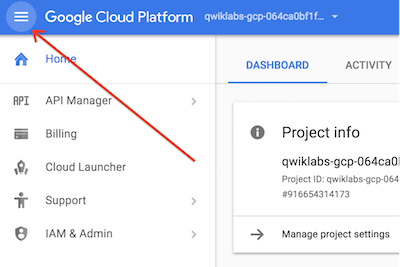
- Once the console opens, view the list of services by clicking the Navigation menu (
) at the top-left.
Activate Cloud Shell
Cloud Shell is a virtual machine that contains development tools. It offers a persistent 5-GB home directory and runs on Google Cloud. Cloud Shell provides command-line access to your Google Cloud resources. gcloud is the command-line tool for Google Cloud. It comes pre-installed on Cloud Shell and supports tab completion.
-
Click the Activate Cloud Shell button (
) at the top right of the console.
-
Click Continue.
It takes a few moments to provision and connect to the environment. When you are connected, you are also authenticated, and the project is set to your PROJECT_ID.
Sample commands
- List the active account name:
(Output)
(Example output)
- List the project ID:
(Output)
(Example output)
Task 1. Create a cluster and instance
-
First create an AlloyDB cluster. On the Cloud Console Navigation menu (
), under Databases click AlloyDB for PostgreSQL then Clusters.
-
Then click Create cluster at the top of the page.
-
Choose Highly Available from the list of options for the cluster type to start with step of the wizard.
-
Click Continue under the list of cluster options.
-
In the Configure your cluster section, fill in the following fields. Leave the others at their default value.
| Item | Value |
|---|---|
| Cluster ID | lab-cluster |
| Password | Change3Me |
| Network | peering-network |
-
The private services access connection option was configured for this project when you started the lab. This step is required to allow access to the AlloyDB cluster.
-
Click Continue to proceed.
-
Under Configure your primary instance, set the instance ID as lab-instance.
-
Select 2 vCPU, 16 GB as your machine type.
-
Scroll to the bottom of the page and click Create Cluster.
-
You're now on the Overview page for the new cluster you created. The bottom section contains details on your instance. Please make note of the Private IP address in the instances section. Copy the Private IP address to a text file so that you can paste the value in a later step.
-
Click Check my progress to verify the objective.
Task 2. Create tables and insert data in your database
-
A VM named, alloydb-client, containing the PostgreSQL client was provisioned for you at the start of the lab.
-
On the Navigation menu (
-
For the instance named alloydb-client, in the Connect column, click SSH to open a terminal window.
-
Set the following environment variable, replacing ALLOYDB_ADDRESS with the Private IP address of the AlloyDB instance.
- Run the following command to store the Private IP address of the AlloyDB instance on the AlloyDB client VM so that it will persist throughout the lab.
- Use the following command to launch the PostgreSQL (psql) client. You will be prompted to provide the postgres user's password (Change3Me) which you entered when you created the cluster.
- You will be presented with the psql terminal prompt as shown below.
- Input and run the following SQL command to create a new table named regions.
- Next add several rows of data to the regions table. Input and run the following SQL command.
- Run the following simple query to verify that you inserted the records.
-
Type \q to exit the psql client.
-
Another option to create tables and/or load data is by using a SQL file (.sql). A SQL file can contain DDL, DML or any supported SQL syntax. You will download and run a file containing DDL and DML, run that file, and then verify the load.
-
Run the following command to download a file containing DDL and DML for three tables: countries, departments, and jobs.
- Reconnect to the PostgreSQL (psql) client. You will be prompted to provide the postgres user's password (Change3Me).
- Run the following command to process the sql file.
- Run the following command to see the tables that are loaded into your database.
- Run a spot check query to examine the data in one of the tables you just created and loaded.
-
Type \q to exit the psql client.
-
Type exit to close the terminal window.
-
Click Check my progress to verify the objective.
Task 3. Use the Google Cloud CLI with AlloyDB
The Cloud Console is very useful, but in some use cases you want to manage AlloyDB databases using other methods. Google Cloud services can also be managed through the command line tool named gcloud. The easiest way to use the gcloud CLI is via the Cloud Shell but it can also be installed on a wide variety of operating systems.
Create a cluster and instance with CLI
-
Creating an AlloyDB cluster instance via gcloud is very simple.
-
In the Cloud Shell, create a new AlloyDB cluster using the command below.
- Once the cluster is created, run the following command to create the Primary instance.
- After the process completes, you can run the following command to list the AlloyDB clusters instances available in your project. The earlier instance you created, lab-cluster, and the one you just created, gcloud-lab-cluster, are returned in the listing.
- Click Check my progress to verify the objective.
Task 4. Deleting a cluster
- A very quick way to delete a cluster is by using the CLI. Run the following command. The force option deletes any subordinate instances as well. Another option to delete a cluster is to use the Cloud Console.
- To confirm that gcloud-lab-cluster was deleted run the following command:
If prompted Do you want to continue (Y/n)? press Y to continue.
Congratulations!
You now have a solid understanding of several key tasks when using an AlloyDB for PostgreSQL database.
Manual Last Updated April 26, 2024
Lab Last Tested August 2, 2023
Copyright 2022 Google LLC All rights reserved. Google and the Google logo are trademarks of Google LLC. All other company and product names may be trademarks of the respective companies with which they are associated.