
시작하기 전에
- 실습에서는 정해진 기간 동안 Google Cloud 프로젝트와 리소스를 만듭니다.
- 실습에는 시간 제한이 있으며 일시중지 기능이 없습니다. 실습을 종료하면 처음부터 다시 시작해야 합니다.
- 화면 왼쪽 상단에서 실습 시작을 클릭하여 시작합니다.
In this exercise, you build a simple HelloWorld Node.js application, containerize it, and deploy it into Google's managed Cloud Run and Cloud Run for Anthos offerings.
In this lab, you learn how to:
For each lab, you get a new Google Cloud project and set of resources for a fixed time at no cost.
Sign in to Qwiklabs using an incognito window.
Note the lab's access time (for example, 1:15:00), and make sure you can finish within that time.
There is no pause feature. You can restart if needed, but you have to start at the beginning.
When ready, click Start lab.
Note your lab credentials (Username and Password). You will use them to sign in to the Google Cloud Console.
Click Open Google Console.
Click Use another account and copy/paste credentials for this lab into the prompts.
If you use other credentials, you'll receive errors or incur charges.
Accept the terms and skip the recovery resource page.
In this task, you review and prepare the pre-created Anthos GKE cluster to execute Cloud Run for Anthos. First, you verify that the GKE cluster is registered in an Anthos Fleet. Second, you check that Cloud Service Mesh is installed in the cluster as a pre-requisite to installing Cloud Run for Anthos. Third, you enable and install Cloud Run for Anthos in the cluster.
On the Navigation menu (
Click Workloads, and verify that the cluster is running the Cloud Service Mesh components istio-ingressgateway and istiod-asm.
On the Navigation menu, click Anthos > Clusters and verify that the cluster is registered and appears in the list of Anthos managed clusters.
In the Cloud Platform Console, click Activate Cloud Shell

In Cloud Shell, set the Zone environment variable:
In Cloud Shell, initialize the environment variables:
If this step fails, wait 30 seconds and try again.
To move Cloud Shell to a new tab, click the Open in a new window icon.
Create a new helloworld folder for the app, and change into it:
The file will be opened for editing in the Cloud Shell editor in the top half of the screen.
In Node.js, the package.json file is used to define dependencies, key files, and general application information. This package.json file:
Express.js is a lightweight JavaScript based web server. This code:
When a request comes to root, the code:
A node_modules folder is created. All the dependencies, and the dependencies of the dependencies, are loaded into that folder.
The server is now waiting for a request to port 8080.
The code:
The npm installation generated some files you don't need copied into your container. Create a .dockerignore file to tell Docker which files to ignore:
Paste the following code into .dockerignore, and save the file:
Use Cloud Build to create the Docker image and push it to your project's Container Registry, under the name helloworld:
When the process completes, view the image in Container Registry in the helloworld folder.
To enable the Cloud Run service in your project, enter the following code in Cloud Shell:
In the Google Cloud console, navigate to Cloud Run.
Click Create Service to create a new service.
To populate the Container image URL field, click Select and choose the latest image from your helloworld repository.
Leave the Service name as helloworld.
Leave Region as us-central1 (Iowa).
Scroll down to Autoscaling, and set the Maximum number of instances to 4.
Under Authentication, select Allow unauthenticated invocations.
Click Container, Networking, Security, and investigate the different options to manage your container workload, set up environment variables, or connect your container to a Cloud SQL instance or via a VCP Connector to your private VPC.
Click Create and wait for the service to come up.
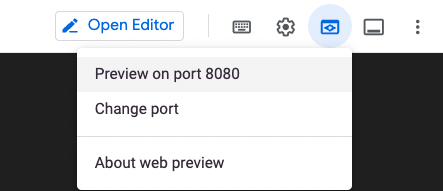
When an URL is displayed, click it to test the service.
To deploy a new revision, click Edit & Deploy New Version.
Under Environment variables, click Add Variable.
For Name1 type ENV, and for Value type your name.
Click Deploy.
When the new service revision finishes deploying and the new version starts receiving 100% of the traffic, re-test your application. What changed?
Congratulations! You have created and deployed a Node.js application to fully managed Cloud Run.
On the Navigation menu, click Kubernetes Engine > Workloads. Notice that several workloads have been created in the knative-serving namespace to run your Cloud Run for Anthos services.
On the Navigation menu, click Anthos > Clusters, and click on your cluster to verify that Cloud Run for Anthos is enabled.
On the Navigation menu, click Kubernetes Engine > Application. Click Go to list of services and click Create Service to create a new service.
Configure these settings for Service settings. Note that the gke might take a few minutes to be ready before you can schedule Cloud Run workloads.
| Property | Value |
|---|---|
| Available Anthos GKE clusters | gke selected |
| Namespace | default |
| Service name | helloworld-gke |
Click Next, and then paste your helloworld image URL(Example URL: gcr.io/qwiklabs-gcp-00-28785963622a/helloworld).
Click Next, and then select External. This invokes the service through the internet.
Click Create.
nip.io base domain. This allows you to test your
applications immediately.Congratulations! You deployed a Node.js application to a fully configurable, custom GKE cluster using Cloud Run for Anthos.
When you have completed your lab, click End Lab. Google Cloud Skills Boost removes the resources you’ve used and cleans the account for you.
You will be given an opportunity to rate the lab experience. Select the applicable number of stars, type a comment, and then click Submit.
The number of stars indicates the following:
You can close the dialog box if you don't want to provide feedback.
For feedback, suggestions, or corrections, please use the Support tab.
Copyright 2022 Google LLC All rights reserved. Google and the Google logo are trademarks of Google LLC. All other company and product names may be trademarks of the respective companies with which they are associated.


현재 이 콘텐츠를 이용할 수 없습니다
이용할 수 있게 되면 이메일로 알려드리겠습니다.

감사합니다
이용할 수 있게 되면 이메일로 알려드리겠습니다.

한 번에 실습 1개만 가능
모든 기존 실습을 종료하고 이 실습을 시작할지 확인하세요.