GSP460

Présentation
Dans cet atelier, vous allez créer une configuration Terraform avec un module pour automatiser le déploiement d'un réseau personnalisé avec des ressources. Plus précisément, vous allez déployer trois réseaux comportant des règles de pare-feu et des instances de VM.
Objectifs
- Créer une configuration pour un réseau en mode personnalisé
- Créer une configuration pour une règle de pare-feu
- Créer un module pour les instances de VM
- Créer une configuration pour un réseau en mode automatique
- Créer et déployer une configuration
- Vérifier le déploiement d'une configuration
Préparation
Avant de cliquer sur le bouton "Démarrer l'atelier"
Lisez ces instructions. Les ateliers sont minutés, et vous ne pouvez pas les mettre en pause. Le minuteur, qui démarre lorsque vous cliquez sur Démarrer l'atelier, indique combien de temps les ressources Google Cloud resteront accessibles.
Cet atelier pratique vous permet de suivre les activités dans un véritable environnement cloud, et non dans un environnement de simulation ou de démonstration. Des identifiants temporaires vous sont fournis pour vous permettre de vous connecter à Google Cloud le temps de l'atelier.
Pour réaliser cet atelier :
- Vous devez avoir accès à un navigateur Internet standard (nous vous recommandons d'utiliser Chrome).
Remarque : Ouvrez une fenêtre de navigateur en mode incognito (recommandé) ou de navigation privée pour effectuer cet atelier. Vous éviterez ainsi les conflits entre votre compte personnel et le compte temporaire de participant, qui pourraient entraîner des frais supplémentaires facturés sur votre compte personnel.
- Vous disposez d'un temps limité. N'oubliez pas qu'une fois l'atelier commencé, vous ne pouvez pas le mettre en pause.
Remarque : Utilisez uniquement le compte de participant pour cet atelier. Si vous utilisez un autre compte Google Cloud, des frais peuvent être facturés à ce compte.
Démarrer l'atelier et se connecter à la console Google Cloud
-
Cliquez sur le bouton Démarrer l'atelier. Si l'atelier est payant, une boîte de dialogue s'affiche pour vous permettre de sélectionner un mode de paiement.
Sur la gauche, vous trouverez le panneau "Détails concernant l'atelier", qui contient les éléments suivants :
- Le bouton "Ouvrir la console Google Cloud"
- Le temps restant
- Les identifiants temporaires que vous devez utiliser pour cet atelier
- Des informations complémentaires vous permettant d'effectuer l'atelier
-
Cliquez sur Ouvrir la console Google Cloud (ou effectuez un clic droit et sélectionnez Ouvrir le lien dans la fenêtre de navigation privée si vous utilisez le navigateur Chrome).
L'atelier lance les ressources, puis ouvre la page "Se connecter" dans un nouvel onglet.
Conseil : Réorganisez les onglets dans des fenêtres distinctes, placées côte à côte.
Remarque : Si la boîte de dialogue Sélectionner un compte s'affiche, cliquez sur Utiliser un autre compte.
-
Si nécessaire, copiez le nom d'utilisateur ci-dessous et collez-le dans la boîte de dialogue Se connecter.
{{{user_0.username | "Username"}}}
Vous trouverez également le nom d'utilisateur dans le panneau "Détails concernant l'atelier".
-
Cliquez sur Suivant.
-
Copiez le mot de passe ci-dessous et collez-le dans la boîte de dialogue Bienvenue.
{{{user_0.password | "Password"}}}
Vous trouverez également le mot de passe dans le panneau "Détails concernant l'atelier".
-
Cliquez sur Suivant.
Important : Vous devez utiliser les identifiants fournis pour l'atelier. Ne saisissez pas ceux de votre compte Google Cloud.
Remarque : Si vous utilisez votre propre compte Google Cloud pour cet atelier, des frais supplémentaires peuvent vous être facturés.
-
Accédez aux pages suivantes :
- Acceptez les conditions d'utilisation.
- N'ajoutez pas d'options de récupération ni d'authentification à deux facteurs (ce compte est temporaire).
- Ne vous inscrivez pas à des essais sans frais.
Après quelques instants, la console Cloud s'ouvre dans cet onglet.
Remarque : Pour accéder aux produits et services Google Cloud, cliquez sur le menu de navigation ou saisissez le nom du service ou du produit dans le champ Recherche.

Activer Cloud Shell
Cloud Shell est une machine virtuelle qui contient de nombreux outils pour les développeurs. Elle comprend un répertoire d'accueil persistant de 5 Go et s'exécute sur Google Cloud. Cloud Shell vous permet d'accéder via une ligne de commande à vos ressources Google Cloud.
-
Cliquez sur Activer Cloud Shell  en haut de la console Google Cloud.
-
Passez les fenêtres suivantes :
- Accédez à la fenêtre d'informations de Cloud Shell.
- Autorisez Cloud Shell à utiliser vos identifiants pour effectuer des appels d'API Google Cloud.
Une fois connecté, vous êtes en principe authentifié et le projet est défini sur votre ID_PROJET : . Le résultat contient une ligne qui déclare l'ID_PROJET pour cette session :
Your Cloud Platform project in this session is set to {{{project_0.project_id | "PROJECT_ID"}}}
gcloud est l'outil de ligne de commande pour Google Cloud. Il est préinstallé sur Cloud Shell et permet la complétion par tabulation.
- (Facultatif) Vous pouvez lister les noms des comptes actifs à l'aide de cette commande :
gcloud auth list
- Cliquez sur Autoriser.
Résultat :
ACTIVE: *
ACCOUNT: {{{user_0.username | "ACCOUNT"}}}
To set the active account, run:
$ gcloud config set account `ACCOUNT`
- (Facultatif) Vous pouvez lister les ID de projet à l'aide de cette commande :
gcloud config list project
Résultat :
[core]
project = {{{project_0.project_id | "PROJECT_ID"}}}
Remarque : Pour consulter la documentation complète sur gcloud, dans Google Cloud, accédez au guide de présentation de la gcloud CLI.
Tâche 1 : Configurer Terraform et Cloud Shell
Terraform vous permet de créer, de modifier et d'améliorer votre infrastructure de manière sûre et prévisible. Il s'agit d'un outil Open Source qui codifie les API dans des fichiers de configuration déclaratifs pouvant être partagés par les membres d'une équipe, traités comme du code, modifiés, révisés et gérés par version.
Initialiser Terraform
Terraform est doté d'une architecture basée sur des plug-ins compatible avec les nombreux fournisseurs de service et infrastructures disponibles. Chaque "fournisseur" est un binaire encapsulé distribué séparément de Terraform. Pour initialiser Terraform, définissez Google comme fournisseur.
- Créez un répertoire pour votre configuration Terraform en exécutant la commande suivante :
mkdir tfnet
-
Dans Cloud Shell, cliquez sur Ouvrir l'éditeur pour ouvrir l'éditeur Cloud Shell. Cliquez sur Ouvrir dans une nouvelle fenêtre si nécessaire.
-
Développez le dossier tfnet dans le volet gauche de l'éditeur de code.
-
Pour créer un fichier dans le dossier tfnet, cliquez sur Fichier > Nouveau fichier.
-
Nommez le nouveau fichier provider.tf, puis ouvrez-le.
-
Copiez le code suivant dans le fichier provider.tf :
provider "google" {}
-
Initialisez Terraform à l'aide des commandes suivantes :
cd tfnet
terraform init
Le résultat doit se présenter comme suit :
* provider.google: version = "~> 3.63"
Terraform has been successfully initialized!
Vous êtes maintenant prêt à utiliser Terraform dans Cloud Shell.
Tâche 2 : Créer le réseau managementnet et ses ressources
Créez le réseau en mode personnalisé managementnet avec sa règle de pare-feu et une instance de VM (managementnet-us-vm).
Configurer le réseau managementnet
Créez une configuration et définissez managementnet.
- Pour créer un fichier, cliquez sur Fichier > Nouveau fichier.
- Nommez le nouveau fichier managementnet.tf, puis ouvrez-le.
- Copiez le code base suivant dans managementnet.tf :
# Create the managementnet network
resource [RESOURCE_TYPE] "managementnet" {
name = [RESOURCE_NAME]
#RESOURCE properties go here
}
Ce modèle de base est un excellent point de départ pour toutes les ressources Google Cloud. Le champ name (nom) vous permet de nommer la ressource, et le champ type de spécifier la ressource Google Cloud que vous souhaitez créer. Vous pouvez aussi définir des propriétés, mais ce n'est pas nécessaire pour toutes les ressources.
- Dans le fichier managementnet.tf, remplacez
[RESOURCE_TYPE] par "google_compute_network".
Remarque : La ressource google_compute_network est un réseau VPC. Les ressources disponibles se trouvent dans la documentation du fournisseur Google Cloud. Pour en savoir plus sur cette ressource spécifique, consultez la documentation Terraform.
- Dans le fichier managementnet.tf, remplacez
[RESOURCE_NAME] par "managementnet".
- Ajoutez la propriété suivante à managementnet.tf :
auto_create_subnetworks = "false"
Contrairement à un réseau en mode automatique, un réseau en mode personnalisé ne crée pas automatiquement un sous-réseau dans chaque région. Vous devez donc définir auto_create_subnetworks sur false.
- Le fichier managementnet.tf doit ressembler à ceci :
# Create managementnet network
resource "google_compute_network" "managementnet" {
name = "managementnet"
auto_create_subnetworks = "false"
}
- Pour enregistrer managementnet.tf, cliquez sur Fichier > Enregistrer.
Ajouter un sous-réseau au réseau managementnet
Ajoutez managementsubnet-us au réseau VPC.
- Ajoutez la ressource suivante à managementnet.tf :
# Create managementsubnet-us subnetwork
resource "google_compute_subnetwork" "managementsubnet-us" {
name = "managementsubnet-us"
region = "{{{ project_0.default_region | Region 1 }}}"
network = google_compute_network.managementnet.self_link
ip_cidr_range = "10.130.0.0/20"
}
Remarque : La ressource google_compute_subnetwork est un sous-réseau. Vous devez spécifier le nom, la région, le réseau VPC et la plage d'adresses IP CIDR de managementsubnet-us. Pour en savoir plus sur cette ressource spécifique, consultez la documentation Terraform.
- Pour enregistrer managementnet.tf, cliquez sur Fichier > Enregistrer.
Configurer la règle de pare-feu
Définissez une règle de pare-feu autorisant le trafic HTTP, SSH, RDP, et ICMP sur managementnet.
- Ajoutez le code base suivant à managementnet.tf :
# Add a firewall rule to allow HTTP, SSH, RDP and ICMP traffic on managementnet
resource [RESOURCE_TYPE] "managementnet-allow-http-ssh-rdp-icmp" {
name = [RESOURCE_NAME]
source_ranges = [
"0.0.0.0/0"
]
#RESOURCE properties go here
}
- Dans le fichier managementnet.tf, remplacez
[RESOURCE_TYPE] par "google_compute_firewall" :
Remarque : La ressource google_compute_firewall est une règle de pare-feu. Pour en savoir plus sur cette ressource spécifique, consultez la documentation Terraform.
- Dans le fichier managementnet.tf, remplacez
[RESOURCE_NAME] par "managementnet-allow-http-ssh-rdp-icmp".
- Ajoutez la propriété suivante à managementnet.tf :
network = google_compute_network.managementnet.self_link
Remarque : Étant donné que cette règle de pare-feu dépend du réseau auquel elle est associée, vous devez utiliser la référence google_compute_network.managementnet.self_link pour demander à Terraform de résoudre ces ressources selon leur ordre de dépendance. Dans cette situation, le réseau est créé avant la règle de pare-feu.
- Ajoutez les propriétés suivantes à managementnet.tf :
allow {
protocol = "tcp"
ports = ["22", "80", "3389"]
}
allow {
protocol = "icmp"
}
La liste de règles allow spécifie les protocoles et les ports autorisés.
- Avec les ajouts effectués sur managementnet.tf, vous devez obtenir le résultat suivant :
# Create a firewall rule to allow HTTP, SSH, RDP and ICMP traffic on managementnet
resource "google_compute_firewall" "managementnet_allow_http_ssh_rdp_icmp" {
name = "managementnet-allow-http-ssh-rdp-icmp"
source_ranges = [
"0.0.0.0/0"
]
network = google_compute_network.managementnet.self_link
allow {
protocol = "tcp"
ports = ["22", "80", "3389"]
}
allow {
protocol = "icmp"
}
}
- Pour enregistrer managementnet.tf, cliquez sur Fichier > Enregistrer.
Configurer l'instance de VM
Vous devez créer un module d'instance de VM pour définir l'instance de VM. Un module est un fichier de configuration réutilisable stocké dans un dossier. Vous allez utiliser le module créé pour toutes les instances de VM de cet atelier.
- Pour créer un dossier dans tfnet, sélectionnez le dossier tfnet, puis cliquez sur Fichier > Nouveau dossier.
- Nommez ce nouveau dossier instance.
- Pour créer un fichier dans instance, sélectionnez le dossier instance et cliquez sur Fichier > Nouveau fichier.
- Nommez le nouveau fichier main.tf, puis ouvrez-le.
Votre structure de dossiers dans Cloud Shell doit ressembler à ceci :
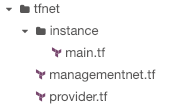
- Copiez le code base suivant dans main.tf :
resource [RESOURCE_TYPE] "vm_instance" {
name = [RESOURCE_NAME]
#RESOURCE properties go here
}
- Dans le fichier main.tf, remplacez
[RESOURCE_TYPE] par "google_compute_instance".
Remarque : La ressource google_compute_instance est une instance Compute Engine. Pour en savoir plus sur cette ressource spécifique, consultez la documentation Terraform.
- Dans main.tf, remplacez
[RESOURCE_NAME] par var.instance_name.
Ce module devant être utilisé avec toutes les instances de VM, le nom de l'instance doit être défini en tant que variable d'entrée. Cela vous permet de contrôler le nom de la variable depuis managementnet.tf. Pour en savoir plus sur les variables d'entrée, consultez la documentation Définir des variables d'entrée.
- Ajoutez les propriétés suivantes à main.tf :
zone = var.instance_zone
machine_type = var.instance_type
Ces propriétés définissent la zone et le type de machine de l'instance en tant que variables d'entrée.
- Ajoutez les propriétés suivantes à main.tf :
boot_disk {
initialize_params {
image = "debian-cloud/debian-11"
}
}
Cette propriété spécifie que le disque de démarrage doit utiliser l'image de l'OS Debian 11. Les quatre instances de VM vont utiliser la même image. Vous pouvez donc coder cette propriété en dur dans le module.
- Ajoutez les propriétés suivantes à main.tf :
network_interface {
subnetwork = var.instance_subnetwork
access_config {
# Allocate a one-to-one NAT IP to the instance
}
}
Pour définir l'interface réseau, cette propriété fournit un nom de sous-réseau qu'elle utilise comme variable d'entrée et configuration d'accès. Si vous ne donnez aucune valeur à la configuration d'accès, vous créerez une adresse IP externe éphémère. Pour en savoir plus, consultez la documentation Terraform.
- Définissez les quatre variables d'entrée en haut du fichier main.tf et vérifiez que vous obtenez le résultat suivant, y compris les accolades
{} :
variable "instance_name" {}
variable "instance_zone" {}
variable "instance_type" {
default = "e2-standard-2"
}
variable "instance_subnetwork" {}
resource "google_compute_instance" "vm_instance" {
name = var.instance_name
zone = var.instance_zone
machine_type = var.instance_type
boot_disk {
initialize_params {
image = "debian-cloud/debian-11"
}
}
network_interface {
subnetwork = var.instance_subnetwork
access_config {
# Allocate a one-to-one NAT IP to the instance
}
}
}
Comme vous attribuez une valeur par défaut à instance_type, la variable est facultative. Les champs instance_name, instance_zone et instance_subnetwork sont obligatoires. Vous les définirez dans managementnet.tf.
- Pour enregistrer main.tf, cliquez sur Fichier > Enregistrer.
- Ajoutez l'instance de VM suivante à managementnet.tf :
# Add the managementnet-us-vm instance
module "managementnet-us-vm" {
source = "./instance"
instance_name = "managementnet-us-vm"
instance_zone = "{{{project_0.default_zone | ZONE 1}}}"
instance_subnetwork = google_compute_subnetwork.managementsubnet-us.self_link
}
Cette ressource utilise le module du dossier instance et fournit le nom, la zone et le réseau en tant que variables d'entrée. Comme cette instance dépend d'un réseau VPC, vous devez utiliser la référence google_compute_subnetwork.managementsubnet-us.self_link pour demander à Terraform de résoudre ces ressources selon leur ordre de dépendance. Dans ce cas, le sous-réseau est créé avant l'instance.
Remarque : Les modules Terraform offrent l'avantage de pouvoir être réutilisés dans plusieurs configurations. Plutôt que d'écrire vous-même un module, vous pouvez profiter des modules existants disponibles dans le registre de modules Terraform.
- Pour enregistrer managementnet.tf, cliquez sur Fichier > Enregistrer.
Créer le réseau managementnet et ses ressources
Vous allez maintenant appliquer la configuration managementnet.
- Pour réécrire les fichiers de configuration Terraform dans un format et un style canoniques, exécutez la commande suivante :
terraform fmt
Remarque : Si vous recevez un message d'erreur, revenez aux étapes précédentes et vérifiez que votre configuration est conforme aux instructions données dans l'atelier. Si vous ne parvenez pas à résoudre le problème lié à votre configuration, consultez ces versions définitives de configurations :
managementnet.tf
main.tf
provider.tf
- Initialisez Terraform à l'aide de la commande suivante :
terraform init
Le résultat doit se présenter comme suit :
Initializing the backend...
...
* provider.google: version = "~> 3.63"
Terraform has been successfully initialized!
Remarque : Si vous recevez un message d'erreur, revenez aux étapes précédentes et vérifiez que votre structure de dossiers/fichiers est valide. Si vous ne parvenez pas à résoudre le problème lié à votre configuration, consultez les versions définitives de configuration évoquées précédemment. Une fois le problème résolu, exécutez à nouveau la commande précédente.
- Créez un plan d'exécution à l'aide de la commande suivante :
terraform plan
Le résultat doit se présenter comme suit :
...
Plan: 4 to add, 0 to change, 0 to destroy.
...
Terraform a déterminé que vous deviez ajouter les quatre ressources suivantes :
| Nom |
Description |
| managementnet |
Réseau VPC |
| managementsubnet-us |
Sous-réseau de managementnet dans
|
| managementnet_allow_http_ssh_rdp_icmp |
Règle de pare-feu autorisant le trafic HTTP, SSH, RDP et ICMP |
| managementnet-us-vm |
Instance de VM dans
|
- Pour appliquer les modifications souhaitées, exécutez la commande suivante :
terraform apply
- Pour confirmer les actions planifiées, saisissez :
yes
Le résultat doit se présenter comme suit :
...
Apply complete! Resources: 4 added, 0 changed, 0 destroyed.
Notez que la règle de pare-feu et le sous-réseau sont créés lors de la création du réseau VPC. Une fois le sous-réseau créé, l'instance de VM l'est également. En effet, la règle de pare-feu et le sous-réseau s'appuient sur le réseau, et l'instance de VM sur le sous-réseau, via les références self_link.
Remarque : Si vous recevez un message d'erreur pendant l'exécution, revenez aux étapes précédentes et vérifiez que votre structure de dossiers/fichiers est valide. Si vous ne parvenez pas à résoudre le problème lié à votre configuration, consultez les versions définitives de configuration évoquées précédemment. Une fois le problème résolu, exécutez à nouveau la commande précédente.
Vérifier le réseau managementnet et ses ressources
Dans la console Cloud, vérifiez que les ressources ont bien été créées.
- Dans la console Cloud, accédez au menu de navigation > Réseau VPC > Réseaux VPC.
- Affichez le réseau VPC managementnet, ainsi que son sous-réseau.
- Dans le volet de gauche, cliquez sur Pare-feu.
- Affichez la règle de pare-feu managementnet_allow_http_ssh_rdp_icmp du réseau VPC créé.
- Accédez au menu de navigation, puis sélectionnez Compute Engine > Instances de VM.
- Notez le nom de l'instance managementnet-us-vm.
- Revenez dans Cloud Shell.
Cliquez sur Vérifier ma progression pour valider l'objectif.
Créer le réseau managementnet et ses ressources
Tâche 3 : Créer le réseau privatenet et ses ressources
Créez le réseau en mode personnalisé privatenet avec sa règle de pare-feu et une instance de VM (privatenet-us-vm).
Configurer le réseau privatenet
Créez une configuration et définissez privatenet.
- Pour créer un fichier dans le dossier tfnet, cliquez sur Fichier > Nouveau fichier.
- Nommez le nouveau fichier privatenet.tf, puis ouvrez-le.
Votre structure de dossiers dans Cloud Shell doit ressembler à ceci :
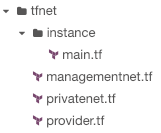
- Pour ajouter le réseau VPC, copiez le code suivant dans privatenet.tf :
# Create privatenet network
resource "google_compute_network" "privatenet" {
name = "privatenet"
auto_create_subnetworks = false
}
- Ajoutez la ressource de sous-réseau "privatesubnet-us" à privatenet.tf :
# Create privatesubnet-us subnetwork
resource "google_compute_subnetwork" "privatesubnet-us" {
name = "privatesubnet-us"
region = "{{{project_0.default_region| REGION 1}}}"
network = google_compute_network.privatenet.self_link
ip_cidr_range = "172.16.0.0/24"
}
- Ajoutez la ressource de sous-réseau "privatesubnet-second-subnet" à privatenet.tf :
# Create privatesubnet-second-subnet subnetwork
resource "google_compute_subnetwork" "privatesubnet-second-subnet" {
name = "privatesubnet-second-subnet"
region = "{{{project_0.default_region_2 | REGION 2}}}"
network = google_compute_network.privatenet.self_link
ip_cidr_range = "172.20.0.0/24"
}
- Pour enregistrer privatenet.tf, cliquez sur Fichier > Enregistrer.
Configurer la règle de pare-feu
Définissez une règle de pare-feu autorisant le trafic HTTP, SSH et RDP sur privatenet.
- Ajoutez la ressource de pare-feu à privatenet.tf :
# Create a firewall rule to allow HTTP, SSH, RDP and ICMP traffic on privatenet
resource "google_compute_firewall" "privatenet-allow-http-ssh-rdp-icmp" {
name = "privatenet-allow-http-ssh-rdp-icmp"
source_ranges = [
"0.0.0.0/0"
]
network = google_compute_network.privatenet.self_link
allow {
protocol = "tcp"
ports = ["22", "80", "3389"]
}
allow {
protocol = "icmp"
}
}
Remarque : Vous pouvez également créer un module pour la règle de pare-feu, car la seule différence avec la règle précédente est le réseau VPC auquel elle s'applique.
- Pour enregistrer privatenet.tf, cliquez sur Fichier > Enregistrer.
Configurer l'instance de VM
Configurez privatenet-us-vm à l'aide du module d'instance.
- Ajoutez la ressource d'instance de VM à privatenet.tf :
# Add the privatenet-us-vm instance
module "privatenet-us-vm" {
source = "./instance"
instance_name = "privatenet-us-vm"
instance_zone = "{{{project_0.default_zone | ZONE 1}}}"
instance_subnetwork = google_compute_subnetwork.privatesubnet-us.self_link
}
- Pour enregistrer privatenet.tf, cliquez sur Fichier > Enregistrer.
Créer le réseau privatenet et ses ressources
Vous allez maintenant appliquer la configuration privatenet.
- Pour réécrire les fichiers de configuration Terraform dans un format et un style canoniques, exécutez la commande suivante :
terraform fmt
Remarque : Si vous recevez un message d'erreur, revenez aux étapes précédentes et vérifiez que votre configuration est conforme aux instructions données dans l'atelier. Si vous ne parvenez pas à résoudre le problème lié à votre configuration, consultez ces versions définitives de configurations :
privatenet.tf
managementnet.tf
main.tf
provider.tf
- Initialisez Terraform à l'aide de la commande suivante :
terraform init
Le résultat doit se présenter comme suit :
Initializing the backend...
...
* provider.google: version = "~> 3.63"
Terraform has been successfully initialized!
Remarque : Si vous recevez un message d'erreur, revenez aux étapes précédentes et vérifiez que votre structure de dossiers/fichiers est valide. Si vous ne parvenez pas à résoudre le problème lié à votre configuration, consultez les versions définitives de configuration évoquées précédemment. Une fois le problème résolu, exécutez à nouveau la commande précédente.
- Créez un plan d'exécution à l'aide de la commande suivante :
terraform plan
Le résultat doit se présenter comme suit :
...
Plan: 5 to add, 0 to change, 0 to destroy.
...
Terraform a déterminé que vous deviez ajouter les cinq ressources suivantes :
| Nom |
Description |
| privatenet |
Réseau VPC |
| privatesubnet-us |
Sous-réseau de privatenet dans
|
| privatesubnet-second-subnet |
Sous-réseau de privatenet dans
|
| privatenet-allow-http-ssh-rdp-icmp |
Règle de pare-feu autorisant le trafic HTTP, SSH, RDP et ICMP |
| privatenet-us-vm |
Instance de VM dans
|
- Pour appliquer les modifications souhaitées, exécutez la commande suivante :
terraform apply
- Pour confirmer les actions planifiées, saisissez :
yes
Le résultat doit se présenter comme suit :
...
Apply complete! Resources: 5 added, 0 changed, 0 destroyed.
Remarque : Si vous recevez un message d'erreur pendant l'exécution, revenez aux étapes précédentes et vérifiez que votre structure de dossiers/fichiers est valide. Si vous ne parvenez pas à résoudre le problème lié à votre configuration, consultez les versions définitives de configuration évoquées précédemment. Une fois le problème résolu, exécutez à nouveau la commande précédente.
Vérifier le réseau privatenet et ses ressources
Dans la console Cloud, vérifiez que les ressources ont bien été créées.
- Dans la console Cloud, accédez au menu de navigation > Réseau VPC > Réseaux VPC.
- Affichez le réseau VPC privatenet, ainsi que ses sous-réseaux.
- Dans le volet de gauche, cliquez sur Réseau VPC > Pare-feu.
- Affichez la règle de pare-feu privatenet_allow_http_ssh_rdp_icmp du réseau VPC créé.
- Accédez au menu de navigation, puis sélectionnez Compute Engine > Instances de VM.
- Notez les adresses IP internes de privatenet-us-vm.
- Pour managementnet-us-vm, cliquez sur SSH afin de lancer un terminal et d'établir la connexion.
- Pour tester la connectivité à l'adresse IP interne de privatenet-us-vm, exécutez la commande suivante dans le terminal SSH en remplaçant l'adresse IP interne de privatenet-us-vm par la valeur que vous venez de noter :
ping -c 3 <Enter privatenet-us-vm's internal IP here>
Remarque : Comme les instances de VM se trouvent sur des réseaux VPC distincts, cela ne doit pas fonctionner.
- Revenez dans Cloud Shell.
Cliquez sur Vérifier ma progression pour valider l'objectif.
Créer le réseau privatenet et ses ressources
Tâche 4 : Créer le réseau mynetwork et ses ressources
Créez le réseau en mode automatique mynetwork avec sa règle de pare-feu et deux instances de VM (mynet_us_vm et mynet_second_vm).
Configurer mynetwork
Créez une configuration et définissez mynetwork.
- Pour créer un fichier dans le dossier tfnet, cliquez sur Fichier > Nouveau fichier.
- Nommez le nouveau fichier mynetwork.tf, puis ouvrez-le.
Votre structure de dossiers dans Cloud Shell doit ressembler à ceci :
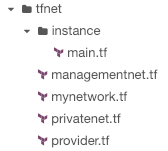
- Copiez le code suivant dans mynetwork.tf :
# Create the mynetwork network
resource "google_compute_network" "mynetwork" {
name = "mynetwork"
#RESOURCE properties go here
}
- Ajoutez la propriété suivante à mynetwork.tf :
auto_create_subnetworks = "true"
Par définition, un réseau en mode automatique crée un sous-réseau dans chaque région. Vous devez donc définir auto_create_subnetworks sur true.
- Votre fichier mynetwork.tf doit ressembler à ceci :
# Create the mynetwork network
resource "google_compute_network" "mynetwork" {
name = "mynetwork"
auto_create_subnetworks = "true"
}
- Pour enregistrer mynetwork.tf, cliquez sur Fichier > Enregistrer.
Configurer la règle de pare-feu
Définissez une règle de pare-feu autorisant le trafic HTTP, SSH et RDP sur mynetwork.
- Ajoutez la ressource de pare-feu à mynetwork.tf :
# Create a firewall rule to allow HTTP, SSH, RDP and ICMP traffic on mynetwork
resource "google_compute_firewall" "mynetwork-allow-http-ssh-rdp-icmp" {
name = "mynetwork-allow-http-ssh-rdp-icmp"
source_ranges = [
"0.0.0.0/0"
]
network = google_compute_network.mynetwork.self_link
allow {
protocol = "tcp"
ports = ["22", "80", "3389"]
}
allow {
protocol = "icmp"
}
}
- Pour enregistrer mynetwork.tf, cliquez sur Fichier > Enregistrer.
Configurer l'instance de VM
Configurez mynetwork-us-vm et mynetwork-second-vm à l'aide du module d'instance.
- Ajoutez les instances de VM suivantes à mynetwork.tf :
# Create the mynet-us-vm instance
module "mynet-us-vm" {
source = "./instance"
instance_name = "mynet-us-vm"
instance_zone = "{{{project_0.default_zone | ZONE 1}}}"
instance_subnetwork = google_compute_network.mynetwork.self_link
}
# Create the mynet-second-vm" instance
module "mynet-second-vm" {
source = "./instance"
instance_name = "mynet-second-vm"
instance_zone = "{{{project_0.default_zone_2 | ZONE 2}}}"
instance_subnetwork = google_compute_network.mynetwork.self_link
}
- Pour enregistrer mynetwork.tf, cliquez sur Fichier > Enregistrer.
Créer le réseau mynetwork et ses ressources
Vous allez maintenant appliquer la configuration mynetwork.
- Pour réécrire les fichiers de configuration Terraform dans un format et un style canoniques, exécutez la commande suivante :
terraform fmt
Remarque : Si vous recevez un message d'erreur, revenez aux étapes précédentes et vérifiez que votre configuration est conforme aux instructions données dans l'atelier. Si vous ne parvenez pas à résoudre le problème lié à votre configuration, consultez ces versions définitives de configurations :
privatenet.tf
managementnet.tf
mynetwork.tf
main.tf
provider.tf
- Initialisez Terraform à l'aide de la commande suivante :
terraform init
Le résultat doit se présenter comme suit :
Initializing the backend...
...
* provider.google: version = "~> 3.63"
Terraform has been successfully initialized!
Remarque : Si vous recevez un message d'erreur, revenez aux étapes précédentes et vérifiez que votre structure de dossiers/fichiers est valide. Si vous ne parvenez pas à résoudre le problème lié à votre configuration, consultez les versions définitives de configuration évoquées précédemment. Une fois le problème résolu, exécutez à nouveau la commande précédente.
- Créez un plan d'exécution à l'aide de la commande suivante :
terraform plan
Le résultat doit se présenter comme suit :
...
Plan: 4 to add, 0 to change, 0 to destroy.
...
Terraform a déterminé que vous deviez ajouter les quatre ressources suivantes :
| Nom |
Description |
| mynetwork |
Réseau VPC |
| mynetwork-allow-http-ssh-rdp-icmp |
Règle de pare-feu autorisant le trafic HTTP, SSH, RDP et ICMP |
| mynet-us-vm |
Instance de VM dans
|
| mynet-second-vm |
Instance de VM dans
|
- Pour appliquer les modifications souhaitées, exécutez la commande suivante :
terraform apply
- Pour confirmer les actions planifiées, saisissez :
yes
Le résultat doit se présenter comme suit :
...
Apply complete! Resources: 4 added, 0 changed, 0 destroyed.
Remarque : Si vous recevez un message d'erreur pendant l'exécution, revenez aux étapes précédentes et vérifiez que votre structure de dossiers/fichiers est valide. Si vous ne parvenez pas à résoudre le problème lié à votre configuration, consultez les versions définitives de configuration évoquées précédemment. Une fois le problème résolu, exécutez à nouveau la commande précédente.
Vérifier le réseau mynetwork et ses ressources
Dans la console Cloud, vérifiez que les ressources ont bien été créées.
- Dans la console Cloud, accédez au menu de navigation > Réseau VPC > Réseaux VPC.
- Affichez le réseau VPC mynetwork, ainsi que ses sous-réseaux.
- Dans le volet de gauche, cliquez sur Pare-feu.
- Affichez la règle de pare-feu mynetwork-allow-http-ssh-rdp-icmp du réseau VPC créé.
- Accédez au menu de navigation, puis sélectionnez Compute Engine > Instances de VM.
- Affichez les instances mynet-us-vm et mynet-second-vm.
- Notez les adresses IP internes de mynet-second-vm.
- Pour mynet-us-vm, cliquez sur SSH pour lancer un terminal et vous connecter.
- Pour tester la connectivité à l'adresse IP interne de mynet-second-vm, exécutez la commande suivante dans le terminal SSH (remplacez l'adresse IP interne de mynet-second-vm par la valeur que vous venez de noter) :
ping -c 3 <Enter mynet-second-vm's internal IP here>
Remarque : Comme les deux instances de VM appartiennent au même réseau et que le trafic ICMP est autorisé, tout doit fonctionner correctement.
Cliquez sur Vérifier ma progression pour valider l'objectif.
Créer le réseau mynetwork et ses ressources
Félicitations !
L'atelier d'auto-formation "Automatiser le déploiement de réseaux avec Terraform" est maintenant terminé.
Dans cet atelier, vous avez créé des configurations Terraform et des modules pour automatiser le déploiement d'un réseau personnalisé. Au fur et à mesure que votre configuration évolue, Terraform peut déterminer ce qui a changé et mettre au point des plans d'exécution incrémentiels, qui vous permettront de créer votre configuration globale étape par étape.
Grâce à ce module d'instance, vous avez pu réutiliser une configuration de ressource identique pour plusieurs ressources, et utiliser les propriétés en tant que variables d'entrée. Les configurations et les modules que vous avez créés pourront servir de point de départ à un futur déploiement.
Formations et certifications Google Cloud
Les formations et certifications Google Cloud vous aident à tirer pleinement parti des technologies Google Cloud. Nos cours portent sur les compétences techniques et les bonnes pratiques à suivre pour être rapidement opérationnel et poursuivre votre apprentissage. Nous proposons des formations pour tous les niveaux, à la demande, en salle et à distance, pour nous adapter aux emplois du temps de chacun. Les certifications vous permettent de valider et de démontrer vos compétences et votre expérience en matière de technologies Google Cloud.
Dernière mise à jour du manuel : 19 janvier 2024
Dernier test de l'atelier : 19 janvier 2024
Copyright 2025 Google LLC. Tous droits réservés. Google et le logo Google sont des marques de Google LLC. Tous les autres noms d'entreprises et de produits peuvent être des marques des entreprises auxquelles ils sont associés.


