In this lab, you will walk through the authoring of a Cloud Build CI/CD workflow that automatically builds and deploys a Kubeflow Pipeline (KFP). You will also integrate your workflow with GitHub by setting up a trigger that starts the workflow when a new tag is applied to the GitHub repo hosting the pipeline's code.
Objectives
Create a custom Cloud Build builder to pilote AI Platform Pipelines
Write a Cloud Build config file to build and push all the artifacts for a KFP
Setup a Cloud Build Github trigger to rebuild the KFP
Task 0: Setup
For each lab, you get a new Google Cloud project and set of resources for a fixed time at no cost.
Make sure you signed into Qwiklabs using an incognito window.
Note the lab's access time (for example, and make sure you can finish in that time block.
When ready, click .
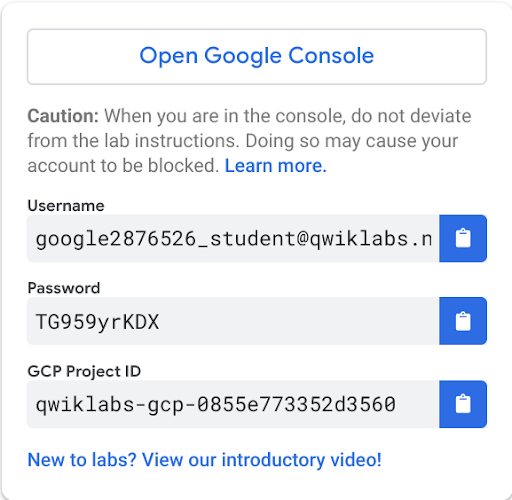
Note your lab credentials. You will use them to sign in to the Google Cloud Console.
Click Open Google Console.
Click Use another account and copy/paste credentials for this lab into the prompts.
Accept the terms and skip the recovery resource page.
Task 1: Create an instance of AI Platform Pipelines
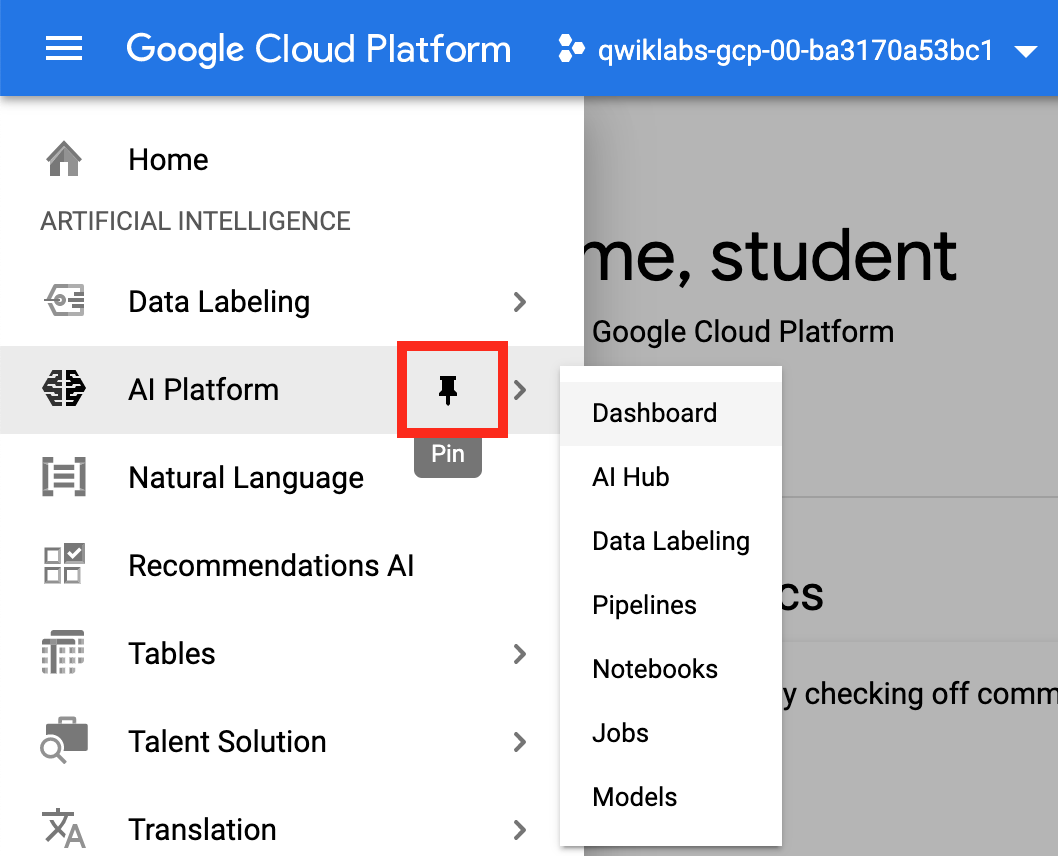
From the Navigation menu, scroll down to AI Platform and pin the section for easier access later in the lab.
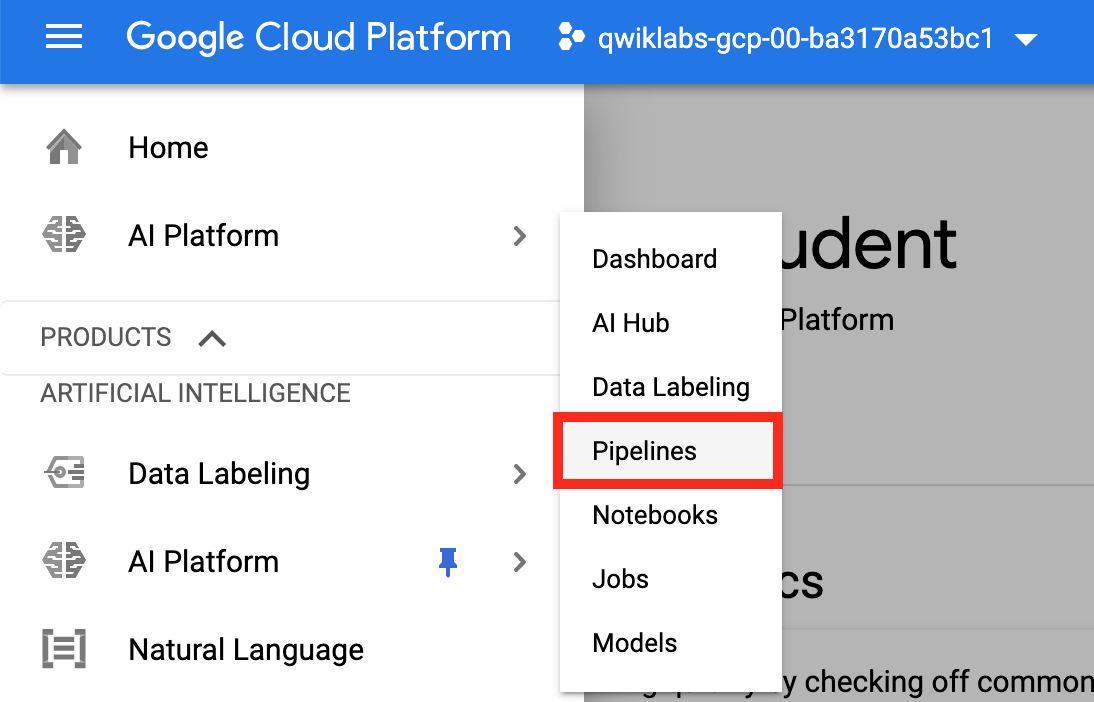
Click Pipelines.
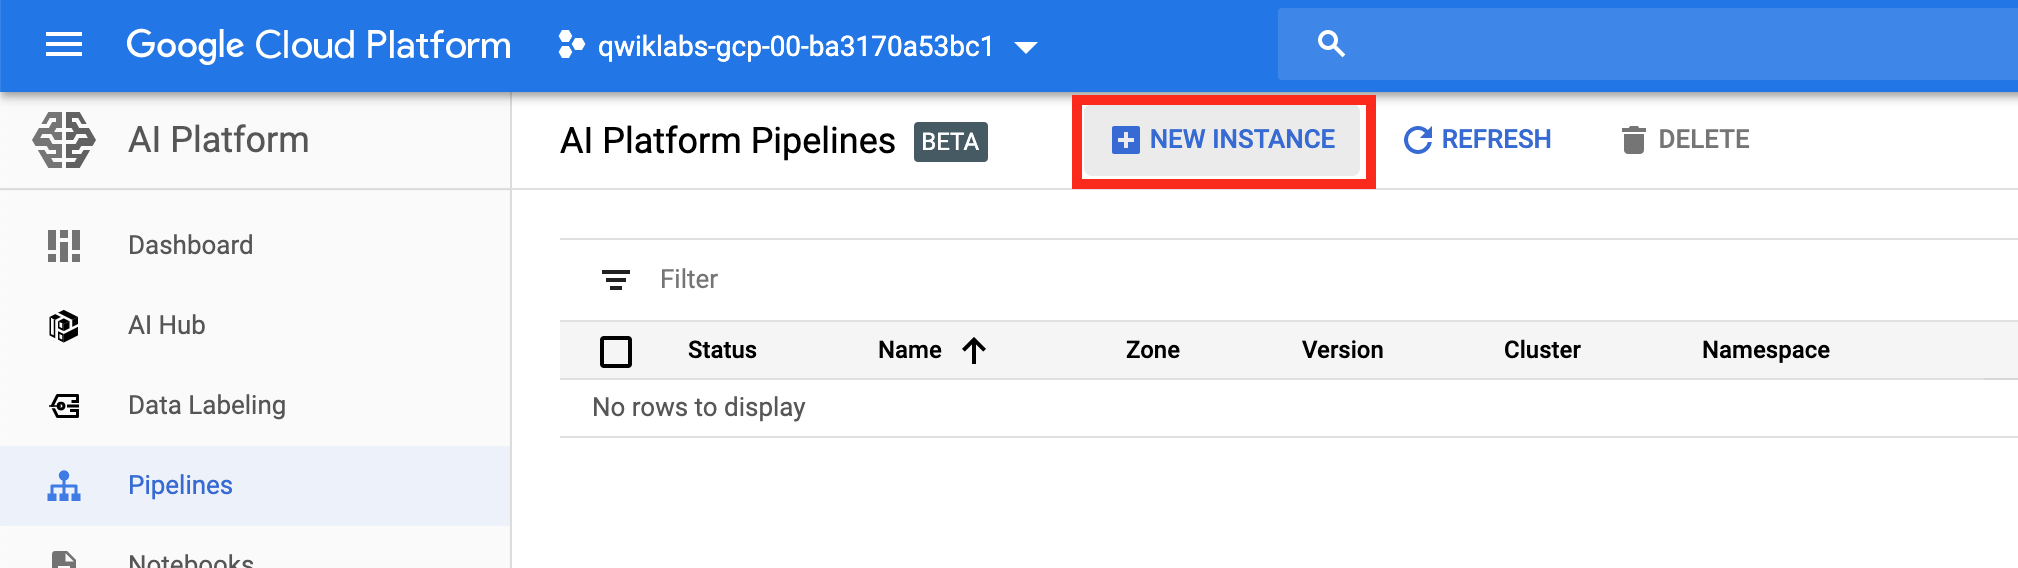
Then click New Instance.
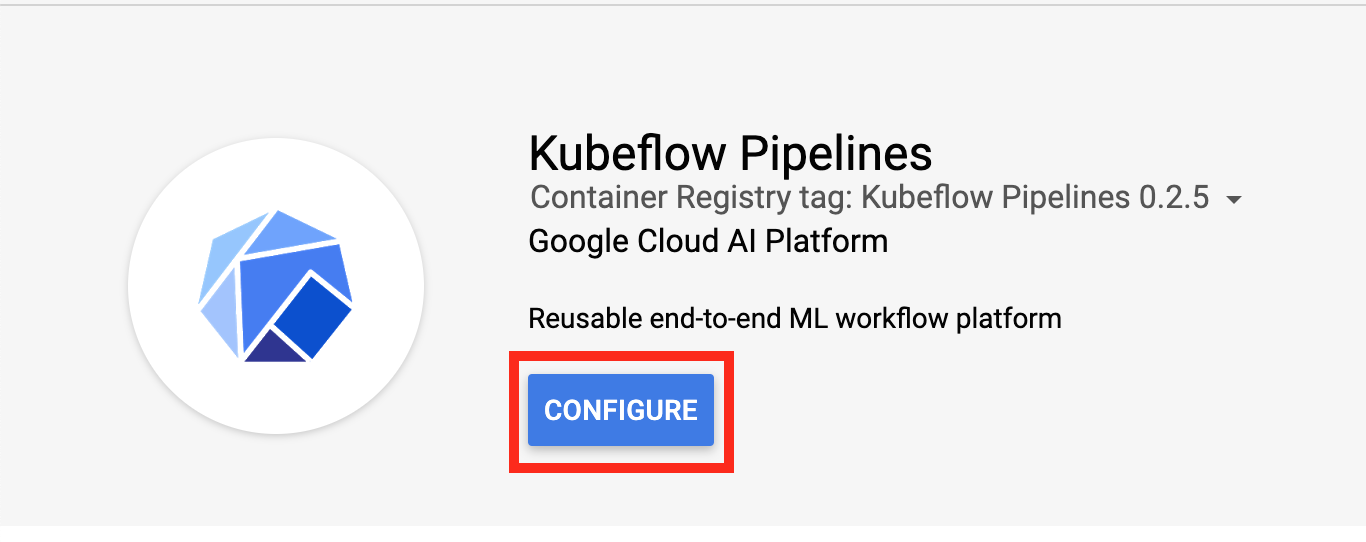
Click Configure.
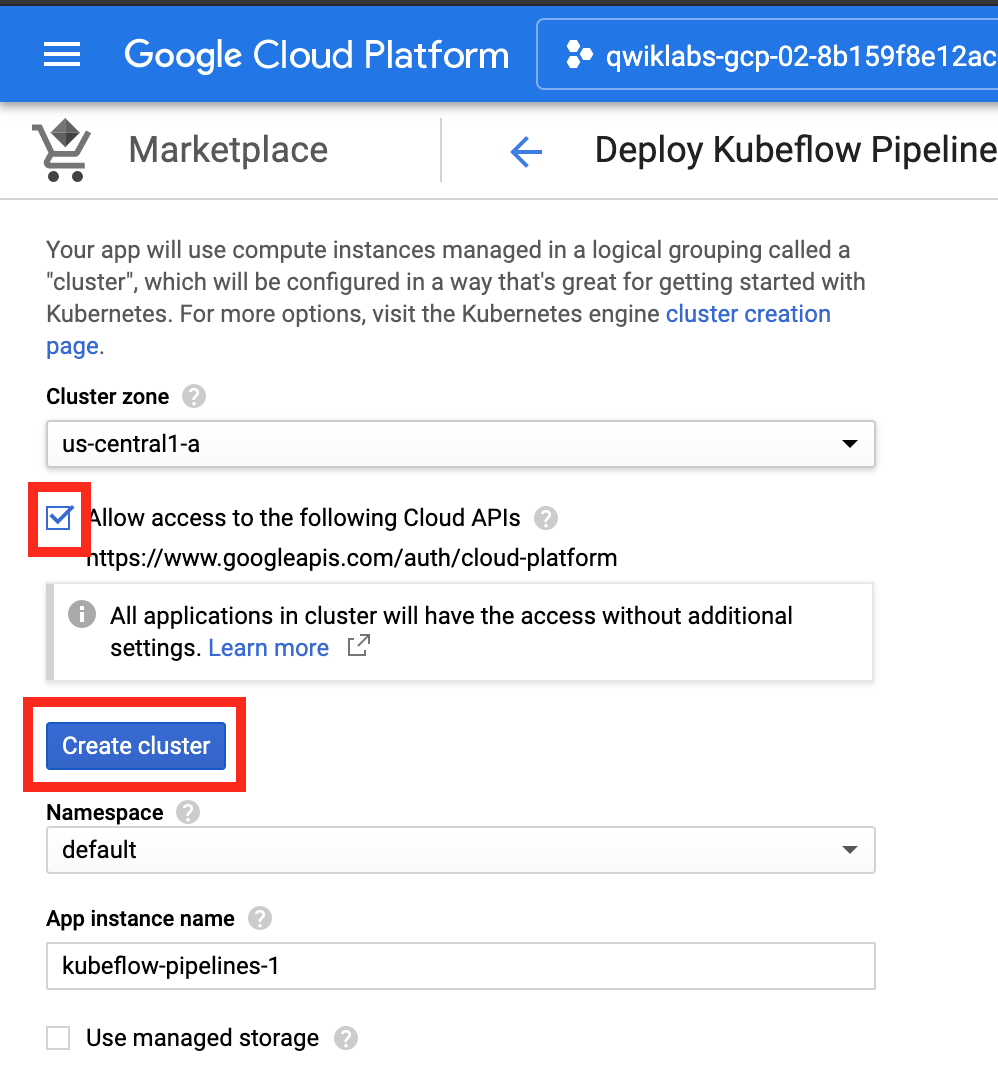
Check Allow access to the following Cloud APIs, leave the name as is, and then click Create Cluster.
This should take 5-10 minutes to complete. Wait for the cluster to finish before proceeding to the next step. In the first tab opened, you can view the Cluster Creation taking place in the GKE section of the Cloud Console, or see the individual VMs spinning up in the GCE section of the Cloud Console.
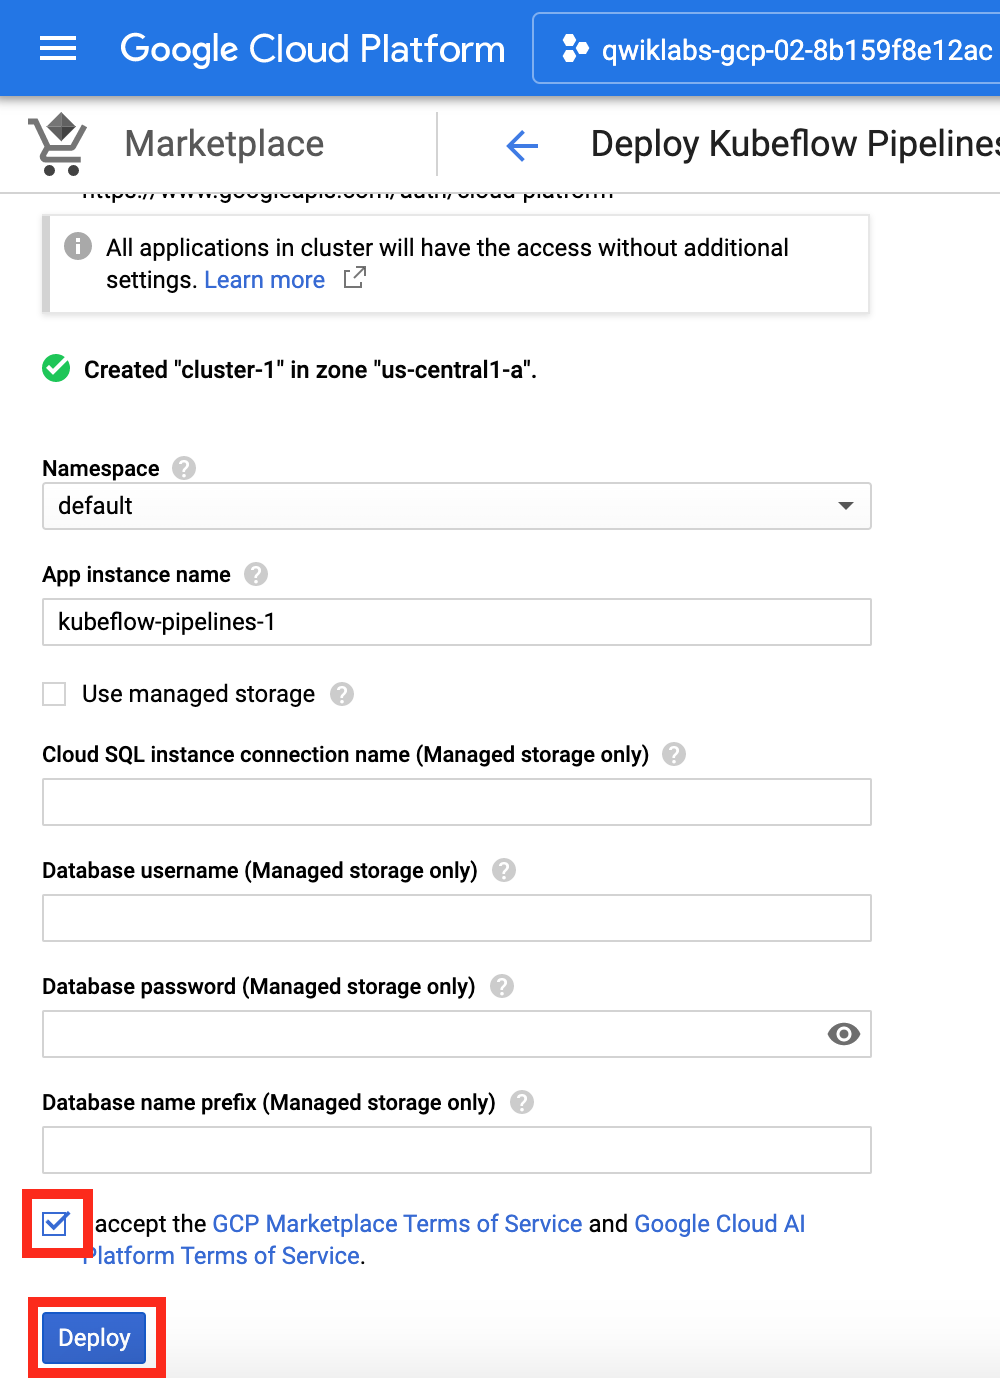
When the cluster creation is complete, check the Terms of Service box, leave other settings unchanged, and then click Deploy. You will see the individual services of KFP deployed to your GKE cluster. Proceed to the next step while installation occurs.
Click Check my progress to verify the objective.
Creating an instance of AI Platform Pipelines
Task 2: Access AI Platform Notebook
An instance of AI Platform Notebooks is used as a primary experimentation/development workbench. The instance is configured using a TensorFlow 2.3 Enterprise image.
In this lab, the AI Notebook instance is created for you at lab start time. Note: It will take approximately 5-10 minutes after starting the lab for the notebook instance to appear in AI Platform Notebooks. Wait for the instance to become available before proceeding.
Click Check my progress to verify the objective.
Wait for instance of AI Platform Notebooks
Task 3: Clone the mlops-on-gcp repo within your AI Platform Notebooks instance
To clone the mlops-on-gcp notebook in your JupyterLab instance:
Step 1
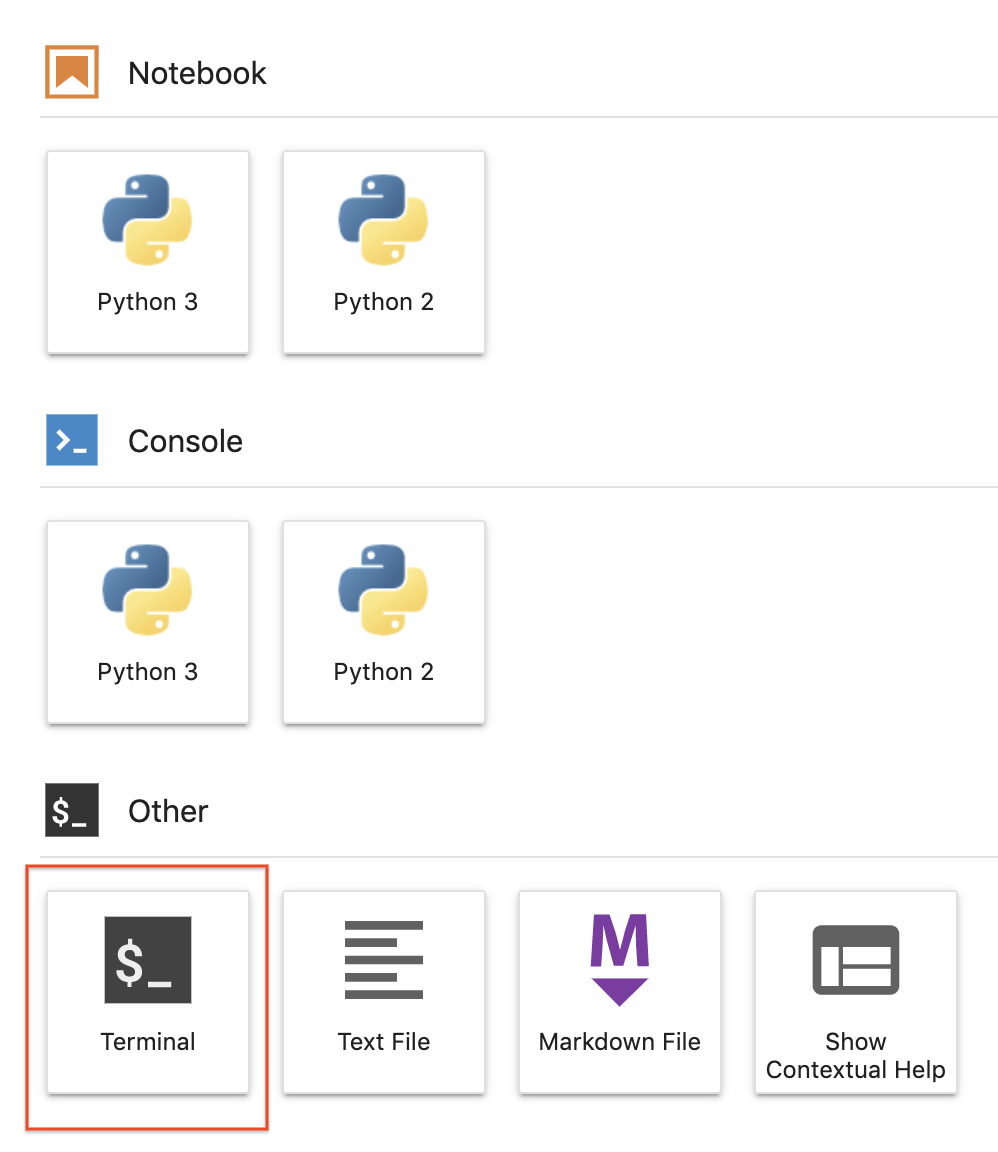
In JupyterLab, click the Terminal icon to open a new terminal.
Step 2
At the command-line prompt, type in the following command and press Enter.
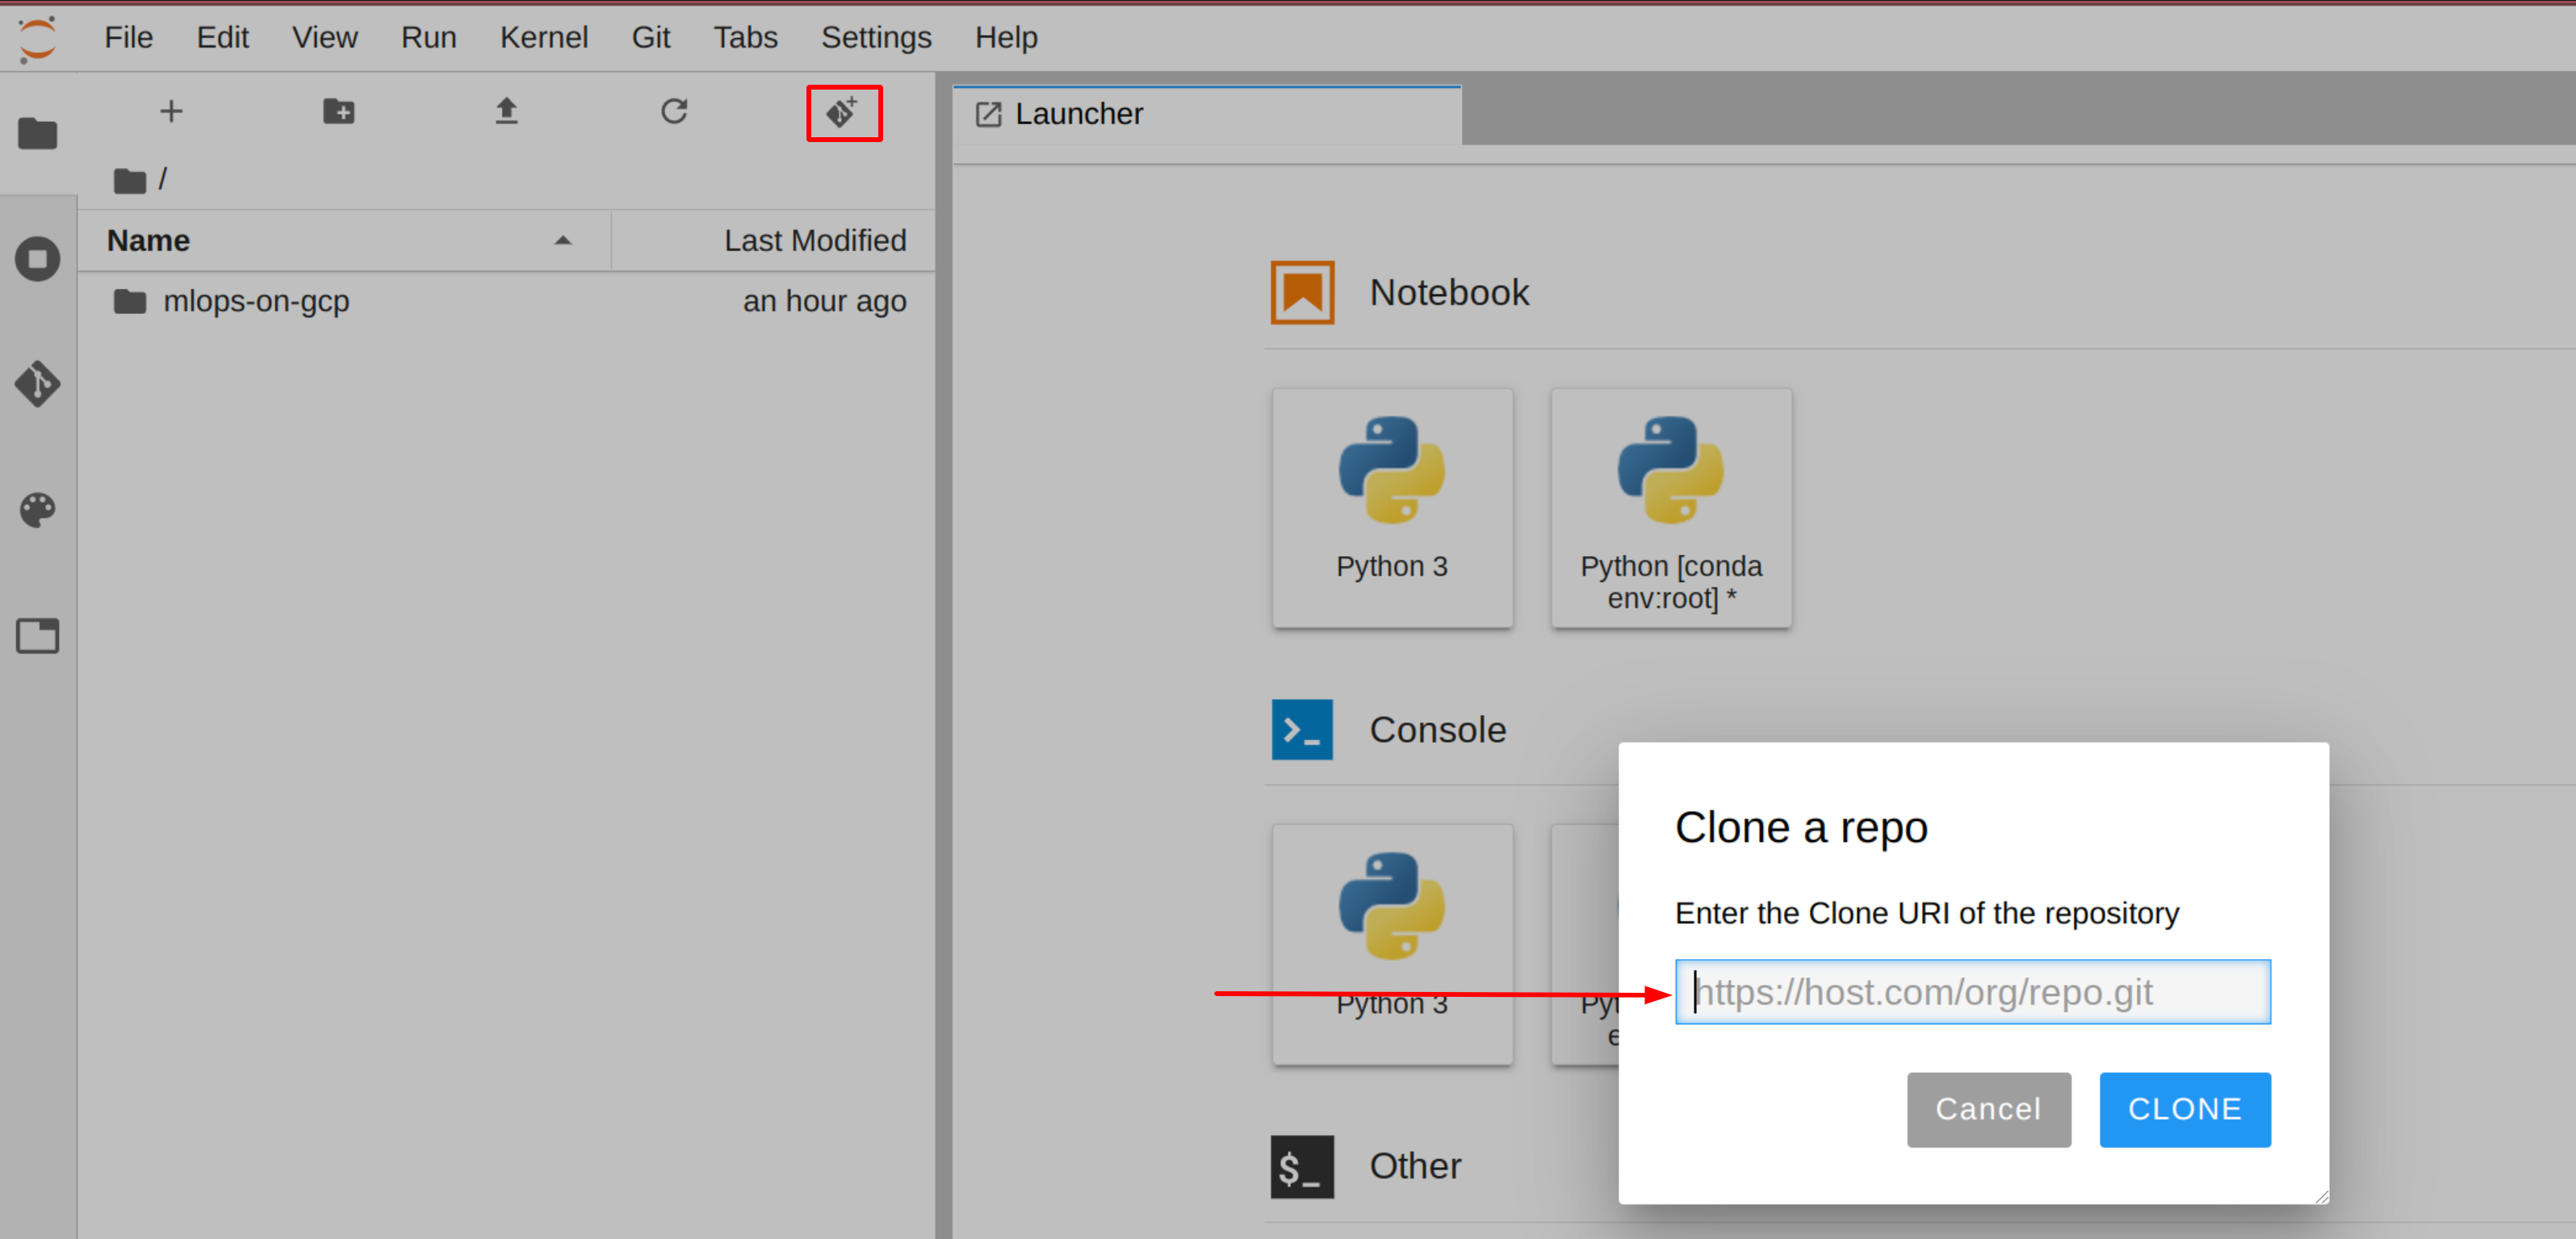
If the cloned repo does not appear in the JupyterLab UI you can use the top line menu and under Git --> Clone a repository, clone the repo (https://github.com/GoogleCloudPlatform/mlops-on-gcp) using the UI.
Step 3
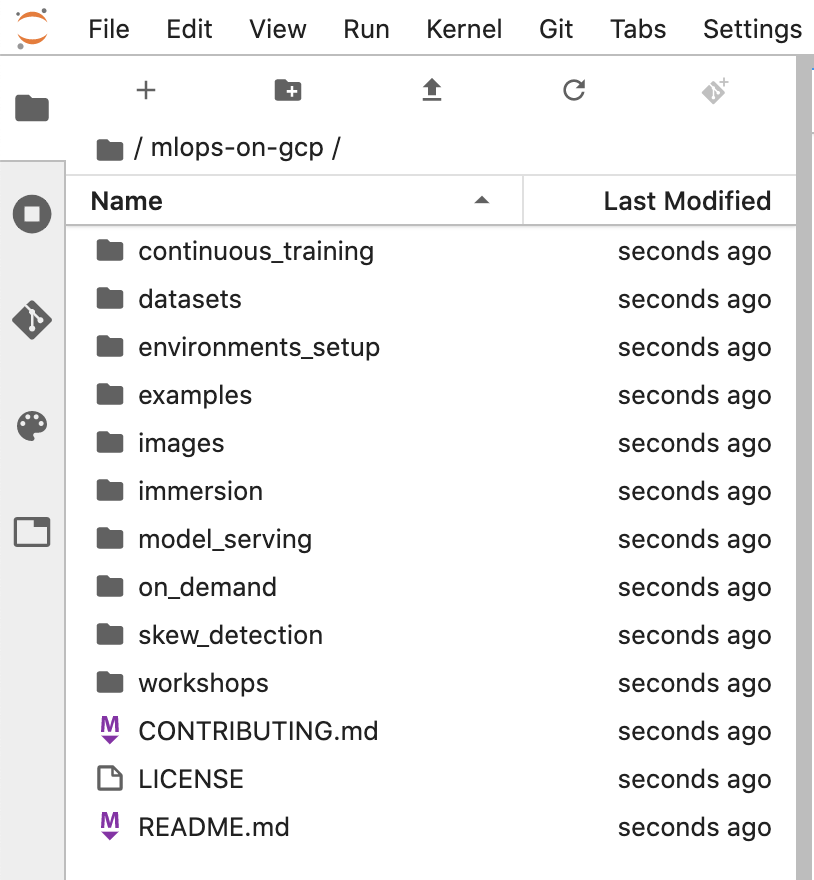
Confirm that you have cloned the repository by double clicking on the mlops-on-gcp directory and ensuring that you can see its contents. The files for all the Jupyter notebook-based labs throughout this course are available in this directory.
Navigate to the mlops-on-gcp notebook
Step 1
In the notebook interface, navigate to mlops-on-gcp > workshops > kfp-caip-sklearn > lab-03-kfp-cicd > exercises and open lab-03.ipynb.
Step 2
In the notebook interface, click on Edit > Clear All Outputs (click on Edit, then in the drop-down menu, select Clear All Outputs).
Carefully read through the notebook instructions and fill in lines marked with #TO DO where you need to complete the code as needed
Tip: To run the current cell you can click the cell and hit shift+enter. Other cell commands are found in the notebook UI under Run.
Hints may also be provided for the tasks to guide you along. Highlight the text to read the hints (they are in white text).
If you need more help, you may take a look at the complete solution by navigating to mlops-on-gcp > workshops > kfp-caip-sklearn > lab-03-kfp-cicd and opening lab-03.ipynb.
Congratulations!
In this lab, you've learned how to work with Cloud Build CI/CD workflow that automatically builds and deploys a KFP.
End your lab
When you have completed your lab, click End Lab. Qwiklabs removes the resources you’ve used and cleans the account for you.
You will be given an opportunity to rate the lab experience. Select the applicable number of stars, type a comment, and then click Submit.
The number of stars indicates the following:
1 star = Very dissatisfied
2 stars = Dissatisfied
3 stars = Neutral
4 stars = Satisfied
5 stars = Very satisfied
You can close the dialog box if you don't want to provide feedback.
For feedback, suggestions, or corrections, please use the Support tab.
Moduły tworzą projekt Google Cloud i zasoby na określony czas.
Moduły mają ograniczenie czasowe i nie mają funkcji wstrzymywania. Jeśli zakończysz moduł, musisz go zacząć od początku.
Aby rozpocząć, w lewym górnym rogu ekranu kliknij Rozpocznij moduł.
Użyj przeglądania prywatnego
Skopiuj podaną nazwę użytkownika i hasło do modułu.
Kliknij Otwórz konsolę w trybie prywatnym.
Zaloguj się w konsoli
Zaloguj się z użyciem danych logowania do modułu. Użycie innych danych logowania może spowodować błędy lub naliczanie opłat.
Zaakceptuj warunki i pomiń stronę zasobów przywracania.
Nie klikaj Zakończ moduł, chyba że właśnie został przez Ciebie zakończony lub chcesz go uruchomić ponownie, ponieważ spowoduje to usunięcie wyników i projektu.
Ta treść jest obecnie niedostępna
Kiedy dostępność się zmieni, wyślemy Ci e-maila z powiadomieniem
Świetnie
Kiedy dostępność się zmieni, skontaktujemy się z Tobą e-mailem
Jeden moduł, a potem drugi
Potwierdź, aby zakończyć wszystkie istniejące moduły i rozpocząć ten
Aby uruchomić moduł, użyj przeglądania prywatnego
Uruchom ten moduł w oknie incognito lub przeglądania prywatnego. Dzięki temu unikniesz konfliktu między swoim kontem osobistym a kontem do nauki, co mogłoby spowodować naliczanie dodatkowych opłat na koncie osobistym.
In this lab you will walk through authoring of a Cloud Build CI/CD workflow that automatically builds and deploys a KFP pipeline. You will also integrate your workflow with GitHub by setting up a trigger that starts the workflow when a new tag is applied to the GitHub repo hosting the pipeline's code.
Czas trwania:
Konfiguracja: 0 min
·
Dostęp na 120 min
·
Ukończono w 120 min
 and make sure you can finish in that time block.
 .
.