


Before you begin
- Labs create a Google Cloud project and resources for a fixed time
- Labs have a time limit and no pause feature. If you end the lab, you'll have to restart from the beginning.
- On the top left of your screen, click Start lab to begin
Create a bucket with the Cloud Storage JSON/REST API
/ 50
Upload a file using the Cloud Storage JSON/REST API
/ 50
APIs (Application Programming Interfaces) are software programs that give developers access to computing resources and data. Companies from many different fields offer publicly available APIs so that developers can integrate specialized tools, services, or libraries with their own applications and codebase.
This lab reviews the architecture and basic functioning of APIs. This also provides hands-on practice, where you configure and run Cloud Storage API methods in Google Cloud Shell. Taking this lab helps you understand the key principles of API communication, architecture, and authentication. You also gain practical experience with APIs, which you can apply to future labs or projects.
The ability to access data and computing resources greatly increases a developer's efficiency. It is much easier to use an API than to build every single program, method, or dataset from scratch. APIs are built on the principle of abstraction—you don't need to understand the inner workings or complexities of an API to use it in your own environment.
APIs are built with the developer in mind and often don't offer a graphical user interface (GUI). However, there are exceptions to this standard. Google has released a new tool called APIs Explorer, which allows you to explore various Google APIs interactively (be sure to check out the APIs Explorer: Qwik Start lab afterwards if you are interested in learning more.)
Google offers APIs that can be applied to many different fields and sectors. APIs are often used in web development, machine learning, data science, and system administration workflows. However, these are only a handful of use cases. By exploring AnyAPI, for example, you see that there are many APIs available.
When Qwiklabs provisions a new Google Cloud Project for a lab instance, it enables most APIs behind the scenes so you can work on the lab's tasks right away. If you create your own projects outside of Qwiklabs, you must enable certain APIs yourself.
As you gain proficiency as a Google Cloud user, you use more APIs in your workflow. Experienced users integrate and use Cloud APIs in their local environments almost exclusively, rarely using the Cloud Console to run tools and services. Dozens of Hands-on Labs are available that give you practice with various Google APIs in different languages. Here are two for example:
In this lab, you explore the API library to see what Google APIs are available.
In this lab, you learn about:
This is an introductory level lab. This assumes little to no prior knowledge of APIs or experience using Google APIs. Familiarity with shell environments and command line interface tools is recommended, but not required. Familiarity with the Cloud Console and Cloud Storage is recommended, so please at a minimum take the following labs before attempting this one:
Once you're ready, scroll down and follow the steps below to set up your lab environment.
Read these instructions. Labs are timed and you cannot pause them. The timer, which starts when you click Start Lab, shows how long Google Cloud resources are made available to you.
This hands-on lab lets you do the lab activities in a real cloud environment, not in a simulation or demo environment. It does so by giving you new, temporary credentials you use to sign in and access Google Cloud for the duration of the lab.
To complete this lab, you need:
Click the Start Lab button. If you need to pay for the lab, a dialog opens for you to select your payment method. On the left is the Lab Details pane with the following:
Click Open Google Cloud console (or right-click and select Open Link in Incognito Window if you are running the Chrome browser).
The lab spins up resources, and then opens another tab that shows the Sign in page.
Tip: Arrange the tabs in separate windows, side-by-side.
If necessary, copy the Username below and paste it into the Sign in dialog.
You can also find the Username in the Lab Details pane.
Click Next.
Copy the Password below and paste it into the Welcome dialog.
You can also find the Password in the Lab Details pane.
Click Next.
Click through the subsequent pages:
After a few moments, the Google Cloud console opens in this tab.

Cloud Shell is a virtual machine that is loaded with development tools. It offers a persistent 5GB home directory and runs on the Google Cloud. Cloud Shell provides command-line access to your Google Cloud resources.
Click Activate Cloud Shell 
Click through the following windows:
When you are connected, you are already authenticated, and the project is set to your Project_ID,
gcloud is the command-line tool for Google Cloud. It comes pre-installed on Cloud Shell and supports tab-completion.
Output:
Output:
gcloud, in Google Cloud, refer to the gcloud CLI overview guide.
Run the following command to set the region for your project:
APIs (Application Programming Interfaces) are a set of methods that allow programs to communicate with each other. To communicate effectively, programs must adhere to a clear protocol that governs the transfer and interpretation of data. The internet is the standard communication channel that APIs use to transmit requests and responses between programs. Web-based APIs use the client-server model as the underlying architecture for exchanging information. The client is a computing device that makes a request for some computing resource or data, and the server has data and/or computing resources stored on it, which interprets and fulfills the client's request.
Since APIs use the web as a communication channel, many of them adhere to the HTTP protocol, which specifies rules and methods for data exchange between clients and servers over the internet. APIs that utilize the HTTP protocol use HTTP request methods (also known as "HTTP verbs") for transmitting client requests to servers. The most commonly used HTTP request methods are GET, POST, PUT, and DELETE. GET is used by a client to fetch data from a server, PUT replaces existing data or creates data if it does not exist, POST is used primarily to create new resources, and DELETE removes data or resources specified by the client on a server.
APIs use HTTP methods to interact with data or computing services hosted on a server. These methods are useless if there isn't a way to access specific resources with consistency. APIs utilize communication channels called endpoints so that clients can access the resources they need without complication or irregularity. Endpoints are access points to data or computing resources hosted on a server and they take the form of an HTTP URI. Endpoints are added to an API's base URL to create a path to a specific resource or container of resources. Additionally, query strings can be added to endpoints to pass in variables that may be needed to complete an API's request.
APIs that utilize the HTTP protocol, request methods, and endpoints are referred to as RESTful APIs. RESTful APIs live on the server, acting as an implementer for client requests. This model defines a framework of endpoints (nouns) that HTTP methods (verbs) act on, and APIs use this framework to fulfill requests. To summarize, RESTful APIs utilize the client-server model, adhere to the HTTP protocol, utilize HTTP request methods, and utilize endpoints to access specific resources.
Answer the following multiple choice questions to reinforce your understanding of the concepts covered so far.
In this section, you explore the API library and enable an API. The API library is a centralized location for all Google APIs. You can use the API library to enable, disable, and manage APIs across your projects.
The API library offers quick access, documentation, and configuration options for 200+ Google APIs. Even though it's housed in the Console, it's important to note that the library offers access to all Google APIs — not only Google Cloud centric ones. This highlights an important theme: APIs are fundamental to all Google services, and Cloud APIs don't all fall under the Google Cloud category.
Time for some hands-on practice enabling an API in the API library. Assume that you are a mobile developer for a fitness site and you want to use the Google Fitness API to build your application.
Fitness API and press ENTER into the In the Search for APIs and Service search bar,.The Fitness API page opens and the API Status is Enabled.
The API library provides links to tutorials and documentation, terms of service, and interactive methods offered in the APIs Explorer. To see metric and usage information, use the APIs & Services dashboard. In this page, you view and request quotas, control access to resources and data, and view metrics.
To see one of these features in action, select the QUOTAS & SYSTEM LIMITS tab.
This shows you how many queries this API allows per day and per minute.
You've now provisioned a non-Cloud API. In the next sections, you learn about the architecture and basic functioning of APIs. You then practice using the Cloud Storage API.
Answer the following multiple choice questions to reinforce your understanding of the concepts covered so far.
To apply what you've learned, you make Cloud Storage REST/JSON API calls in Cloud Shell to create buckets and upload content.
In a new tab, open Google Cloud Storage JSON API to ensure that the Cloud Storage API is enabled. Notice the API is enabled.
In Cloud Shell, run the following command to create and edit a file called values.json:
nano text editor copy and paste the following. Since the bucket must have a unique bucket name, the Project ID is used in the bucket name:nano text editor by pressing CTRL+X, Y, and then ENTER.You just created a JSON file that contains an object that has three key-value pairs: name, location, and storageClass. These are the same values that are required when you make a bucket with the gsutil command line tool or in the console.
Before a bucket can be created with the Cloud Storage REST/JSON API, you need to get the proper authentication and authorization policies in place.
Authentication and authorization are two terms that are often used interchangeably, but they are not the same thing.
Authentication identifies who you are, and authorization determines what you can do.
There are three types of authentication/authorization services that Google APIs use. These are "API Keys", "Service accounts", and "OAuth". An API uses one of these authentication services depending on the resources it requests and from where the API is called from.
API keys are secret tokens that usually come in the form of an encrypted string. API keys are quick to generate and use. Oftentimes, APIs that use public data or methods and want to get developers up and running use API keys to quickly authenticate users.
In Google Cloud terms, API keys identify the calling project making the call to an API. By identifying the calling project, API keys enable usage information to be associated with that project, and they can reject calls from projects that haven't been granted access or enabled by the API.
OAuth tokens are similar to API keys in their format, but they are more secure and can be linked to user accounts or identities. These tokens are used primarily when APIs give a developer the means to access user data.
While API keys give developers access to all of an API's functionality, OAuth client IDs are all based on scope; different privileges are granted to different identities.
A service account is a special type of Google account that belongs to your application or a virtual machine (VM) instead of to an individual end user. Your application assumes the identity of the service account to call Google APIs, so that the users aren't directly involved.
You can use a service account by providing its private key to your application, or by using the built-in service accounts available when running on Cloud Functions, Google App Engine, Compute Engine, or Google Kubernetes Engine.
For a lab specifically dealing with service accounts and roles, refer to: Service Accounts and Roles: Fundamentals.
Since Cloud Storage is a platform that hosts and provides access to user data, you need to generate an OAuth token before you use its services.
Open the OAuth 2.0 playground in a new tab. This is a service that allows you to generate OAuth tokens with ease.
Scroll down and select Cloud Storage API V1.
Then select the https://www.googleapis.com/auth/devstorage.full_control scope.
Click on the blue box that says Authorize APIs. This opens the Google Sign-in page.
Select your username and then click Allow when prompted for permissions.
OAuth 2.0 Playground opens, notice that Step 2 has an authorization code generated.
Click on Exchange authorization code for tokens. If you get moved to Step 3, click on the Step 2 panel.
Copy the access token to use in the next step.
ls and hit enter. You should see the values.json file that you created before and a README-cloudshell.txt file:Output:
<YOUR_TOKEN> with the access token you generated:values.json file and replace the bucket name. This request is the culmination of everything you've learned about so far. You used the curl CLI tool to make an HTTP POST method request. You passed in the values.json file into the request body. You passed the OAuth token and a JSON specification as request headers. This request was routed to the Cloud Storage endpoint, which contains a query string parameter set to your Project ID.
Click Check my progress to verify your performed task. The assessment score updates if you've successfully created a bucket with the Cloud Storage JSON/REST API.
You can use the Cloud Storage JSON/REST API to upload files to buckets.
In your Cloud Shell session, click on the three-dotted menu icon in the top-right corner. Click Upload > Choose File. Select and upload demo-image.png file. This adds the image to your directory.
Run the following command to get the path to the image file:
You should receive a similar output:
<DEMO_IMAGE_PATH> with your output from the previous command:You should receive a similar output:
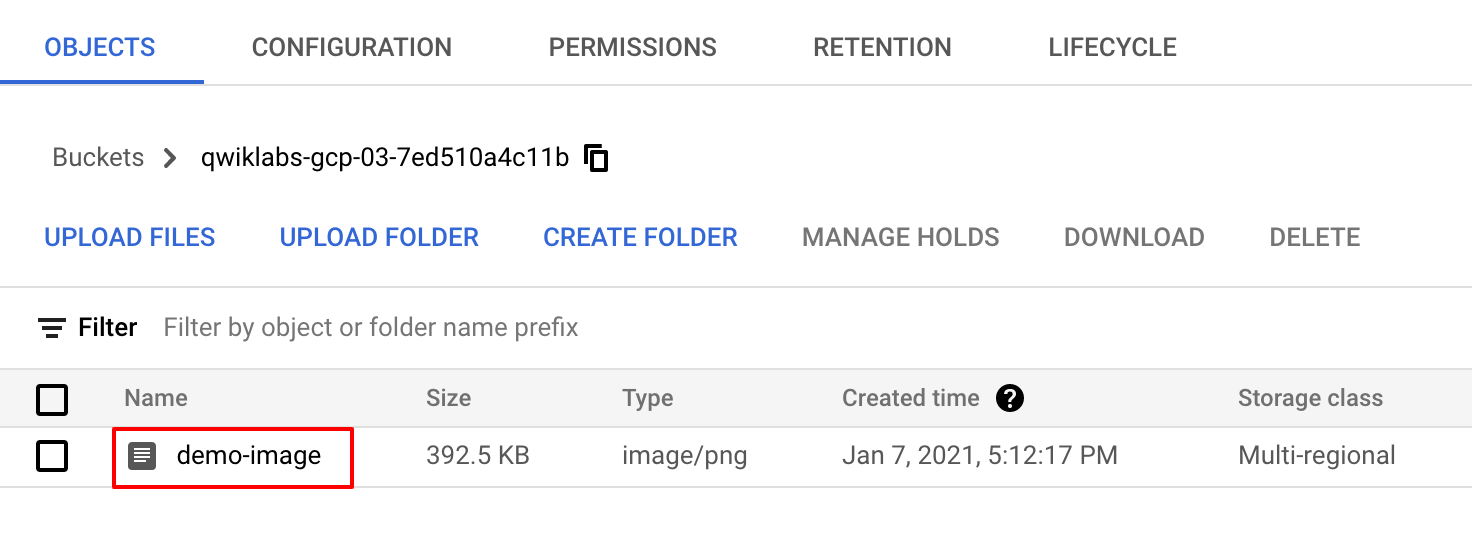
To see the image that was added to your bucket, open the navigation menu and select Cloud Storage > Buckets.
Click on the name of your bucket to see that demo-image has been added:
Click Check my progress to verify your performed task. The assessment score updates ff you have successfully uploaded a file using the Cloud Storage JSON/REST API
In this lab you developed a solid understanding of APIs and received hands-on practice with the Cloud Storage JSON/REST API. You learned about Cloud APIs, API architecture, the HTTP protocol and methods, endpoints, RESTful APIs, JSON, and API authentication practices. You are now ready to take more API labs in Qwiklabs.
Be sure to check out the following labs for more practice with APIs:
...helps you make the most of Google Cloud technologies. Our classes include technical skills and best practices to help you get up to speed quickly and continue your learning journey. We offer fundamental to advanced level training, with on-demand, live, and virtual options to suit your busy schedule. Certifications help you validate and prove your skill and expertise in Google Cloud technologies.
Manual Last Updated February 26, 2024
Lab Last Tested February 26, 2024
Copyright 2025 Google LLC. All rights reserved. Google and the Google logo are trademarks of Google LLC. All other company and product names may be trademarks of the respective companies with which they are associated.


This content is not currently available
We will notify you via email when it becomes available

Great!
We will contact you via email if it becomes available

One lab at a time
Confirm to end all existing labs and start this one