In this lab, you will create and connect to a Cloud SQL for SQL Server instance and perform basic SQL operations using the Google Cloud Console and a client.
Objectives
In this lab, you will learn how to perform the following tasks:
Create a Cloud SQL instance and configure it.
Connect to the Cloud SQL instance from a Windows server.
Create a database on the Cloud SQL instance.
Setup and requirements
Sign in to the Cloud Console
For each lab, you get a new Google Cloud project and set of resources for a fixed time at no cost.
Sign in to Qwiklabs using an incognito window.
Note the lab's access time (for example, 1:15:00), and make sure you can finish within that time.
There is no pause feature. You can restart if needed, but you have to start at the beginning.
When ready, click Start lab.
Note your lab credentials (Username and Password). You will use them to sign in to the Google Cloud Console.
Click Open Google Console.
Click Use another account and copy/paste credentials for this lab into the prompts.
If you use other credentials, you'll receive errors or incur charges.
Accept the terms and skip the recovery resource page.
Task 1. Create a Cloud SQL instance
In the Cloud Console, on the Navigation menu (), click SQL.
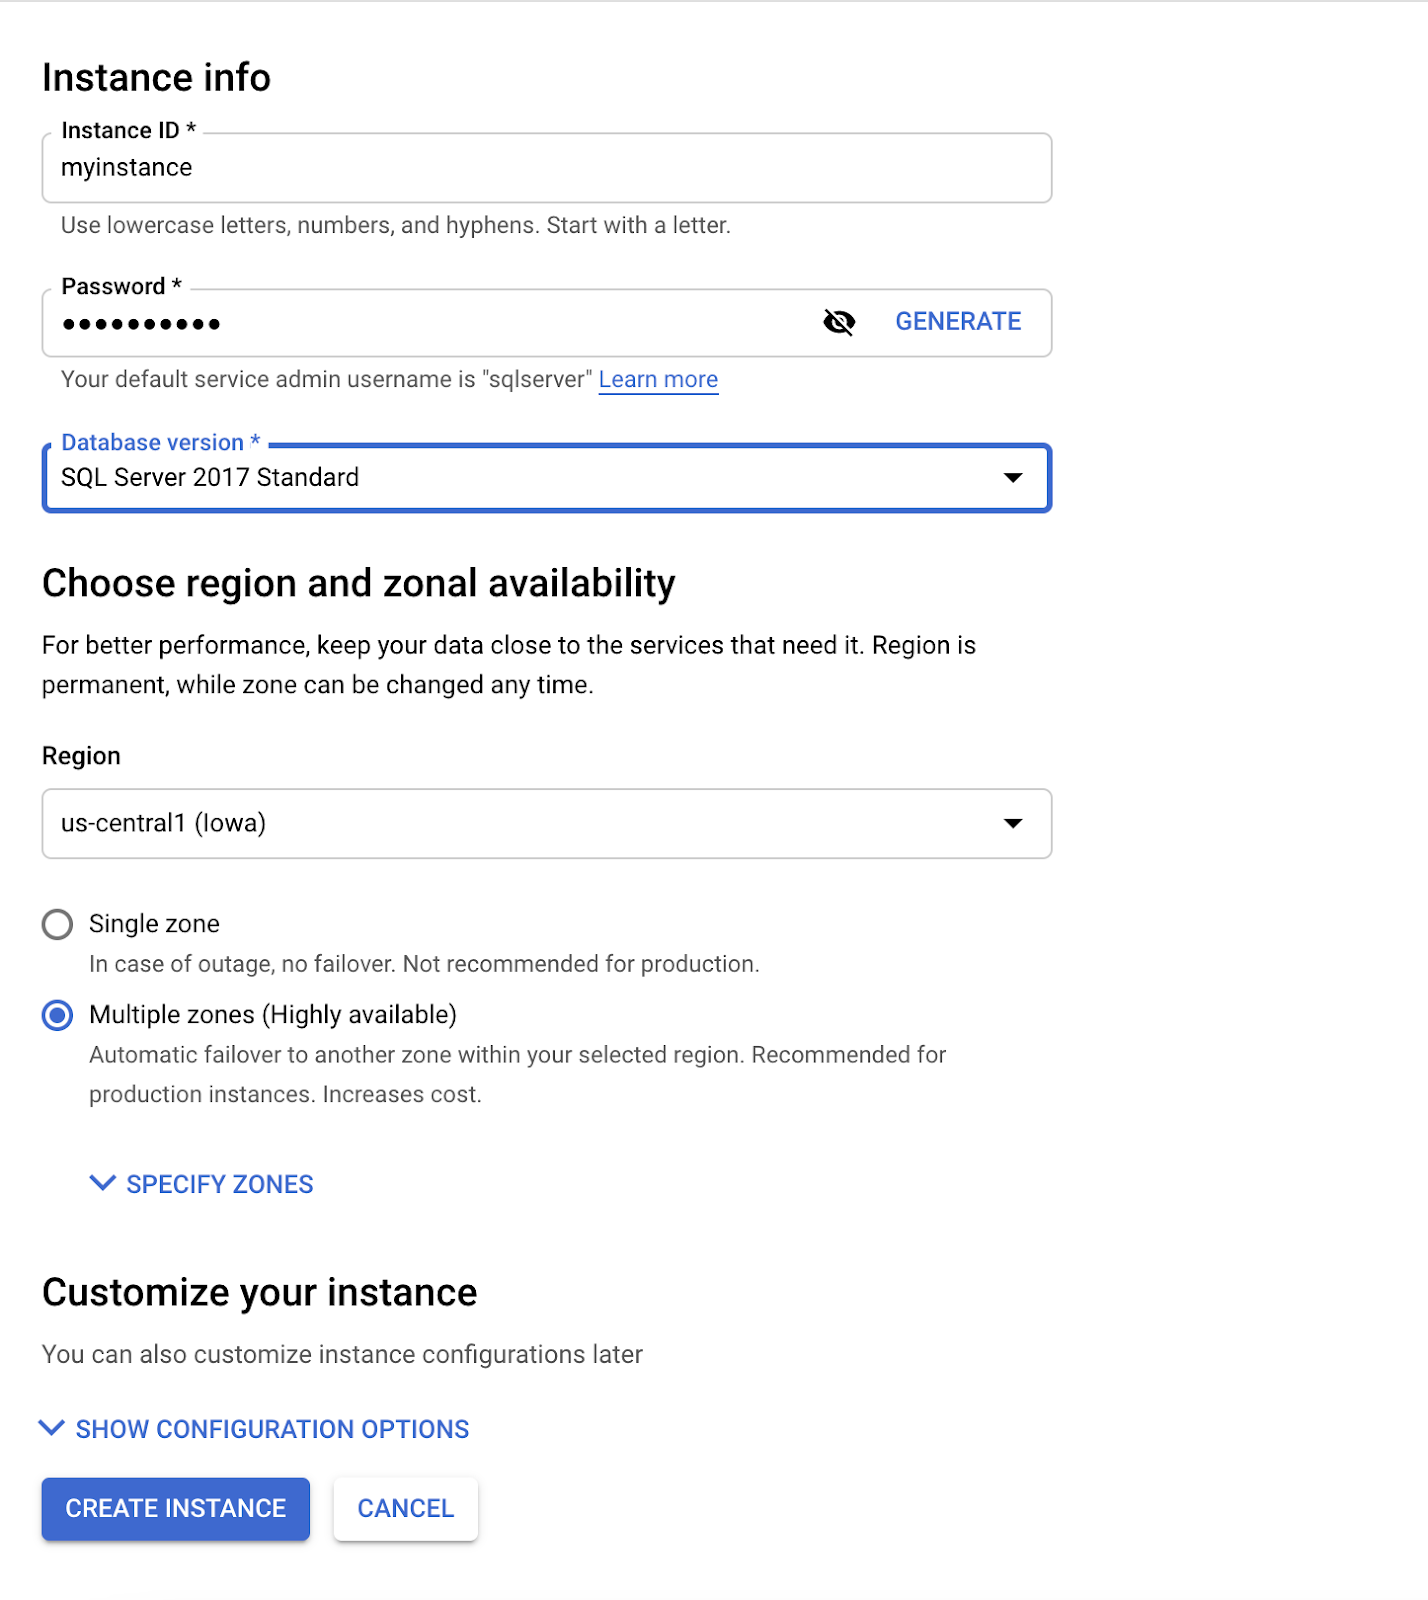
Click Create instance.
For Choose your database engine, select Choose SQL Server.
Enter myinstance for Instance ID.
Enter Password01 for the Password of the default sqlserver user.
Use the default values for the other fields.
Click Create Instance.
Note: Wait for the instance to finish deploying. It will take about 10 minutes to fully provision.Note: In your Qwiklabs project, the Compute API and the Cloud SQL Admin API are enabled for you by default. Working in another project, you may need to ensure those APIs are enabled before creating a Cloud SQL instance.Note: In this example, the instance is created using default settings, including a public IP address.
Wait for your instance to finish provisioning before moving on to the next step. This will take about 5 minutes.
Click Check my progress to verify the objective.
Create an instance
Task 2. Connect to a Windows VM instance with RDP
For this lab, you are provided with a Windows Server Virtual Machine that has SQL Server Management Studio preinstalled. You will use this VM to walkthrough connecting to your instance.
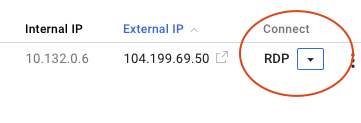
On the Navigation menu (), click Compute Engine > VM instances.
In the VM instances list, click RDP in the row for your VM instance ssms_vm.
Note: If you are not on Windows but are using Chrome, you can RDP directly from the browser using the Chrome RDP for Google Cloud extension. Click on RDP to connect.
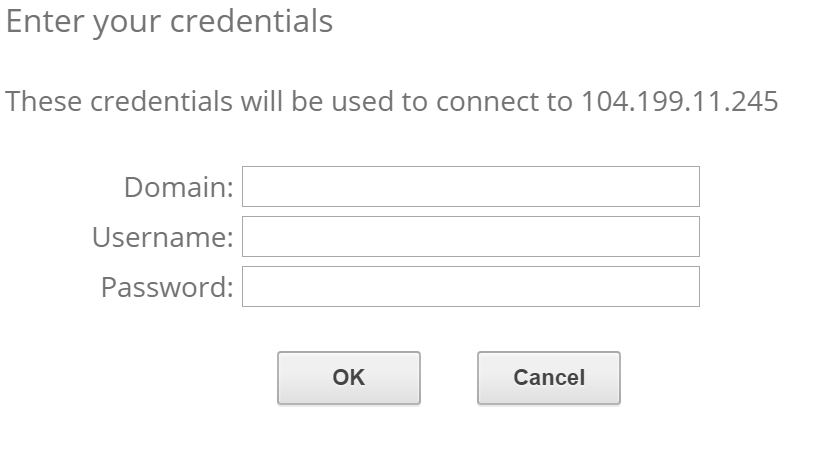
Log in with these credentials:
Username: student
Password: Password01
You can safely click Continue if presented with any messages or warnings.
Task 3. Connect to your Cloud SQL instance with Cloud SQL Auth Proxy
Once logged into your remote desktop window, SQL Server Management Studio will begin loading on startup. While it loads, you can connect your Windows Virtual Machine to your Cloud SQL instance with Cloud SQL Auth Proxy.
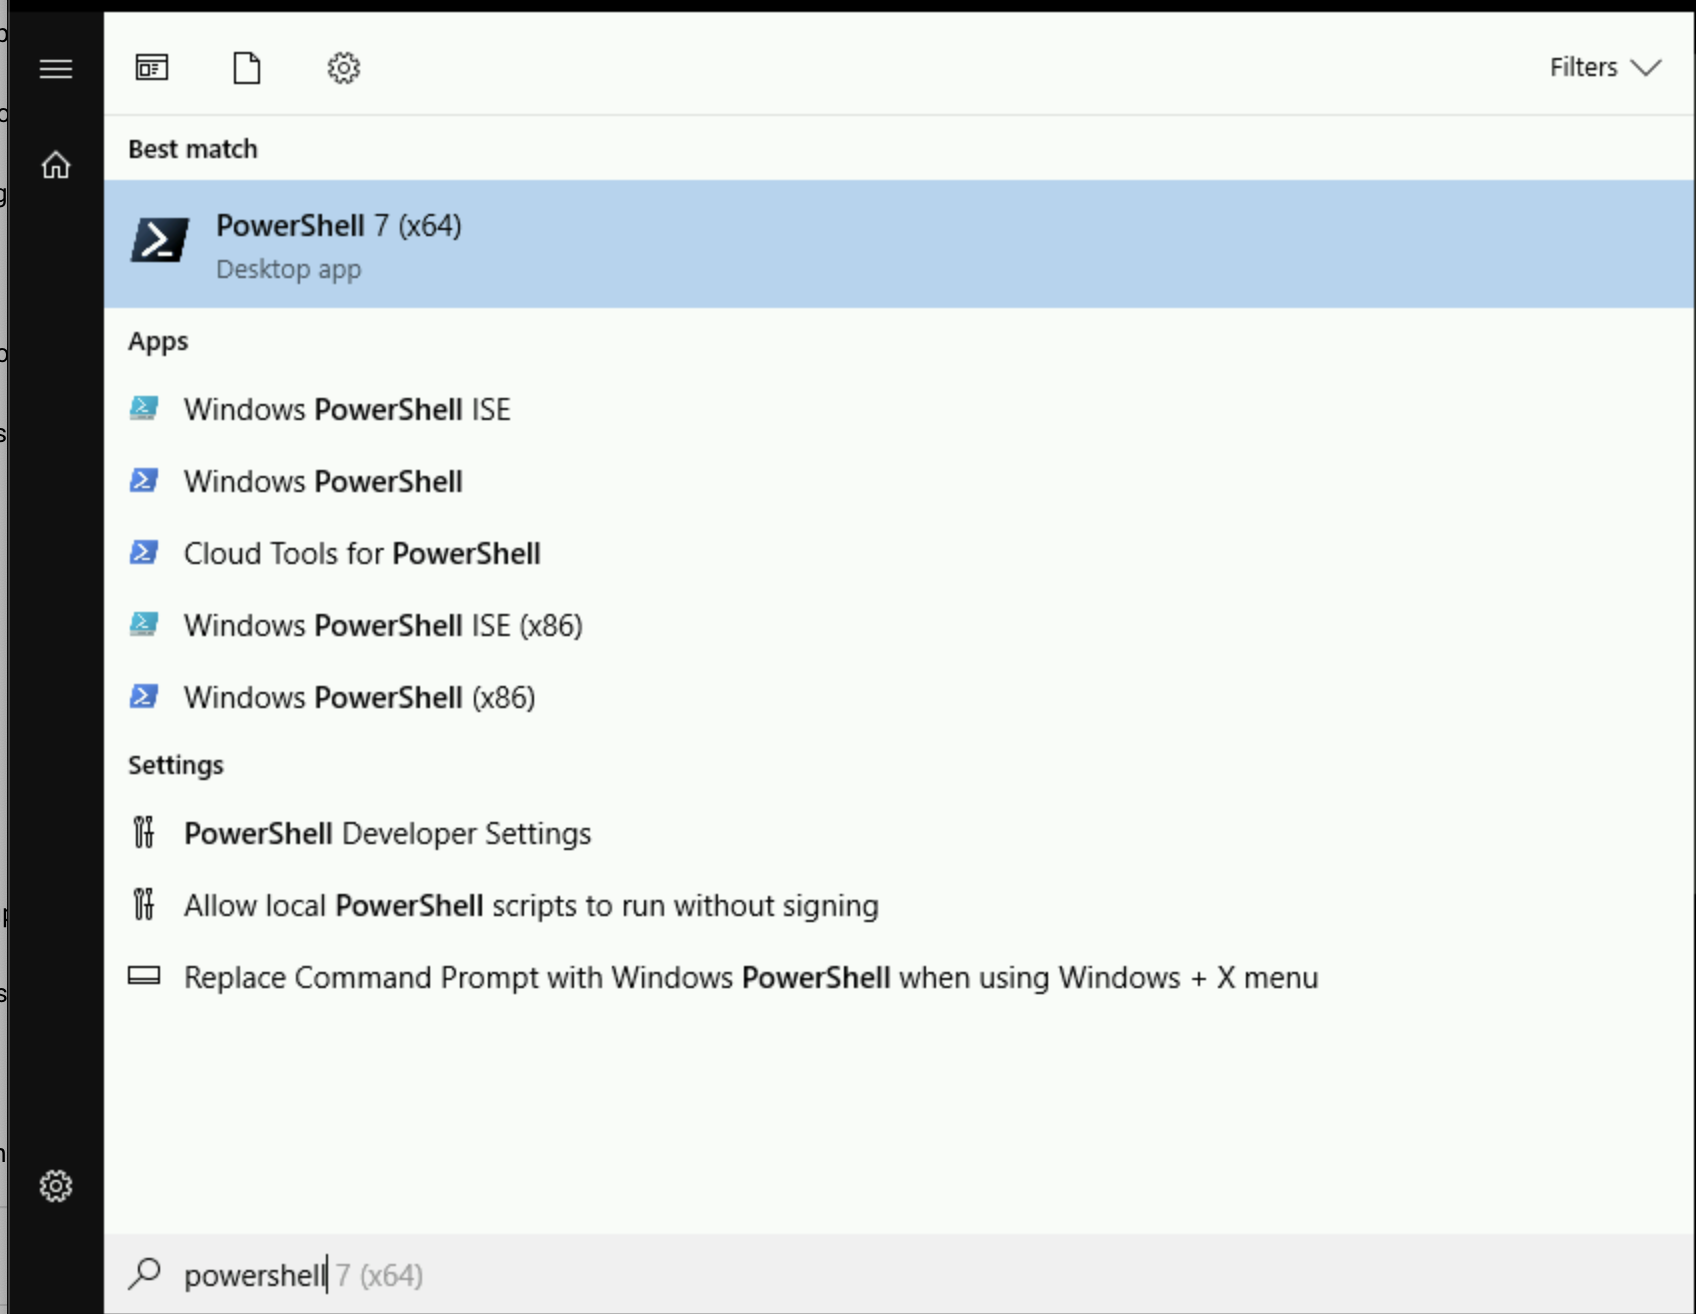
Click the Windows button. Type powershell.
Double-click PowerShell 7 (x64) from the results to open a PowerShell window.
In your PowerShell window, paste this command in to download the Cloud SQL Auth Proxy executable:
Listening on 127.0.0.1:1433 for myproject:myregion:myinstance.
Ready for new connections
Note: You can find your instance's connection name in the Cloud SQL Instances page where you created your instance at the beginning of the lab.
Task 4. Connect using the SSMS object explorer
Switch to the SQL Server Management Studio window in your Windows Virtual Machine.
If it hasn't already, wait for the SSMS window to fully load.
In SSMS, you should be presented with a Connect to server pop up. If not, select Connect Object Explorer from the File menu.
Enter the following values in the Connection dialog:
For Server Type, enter Database Engine.
For Server Name, enter 127.0.0.1.
For Authentication, enter SQL Server Authentication.
For Login, enter sqlserver.
For Password, enter the password used when the instance was created, Password01.
Note: You can find your cloud sql instance's public IP in the overview tab on the Cloud SQL instances page.
Click the Connect button.
Click Check my progress to verify the objective.
Connect using the SSMS Object Explorer
Task 5. Create a database and upload data
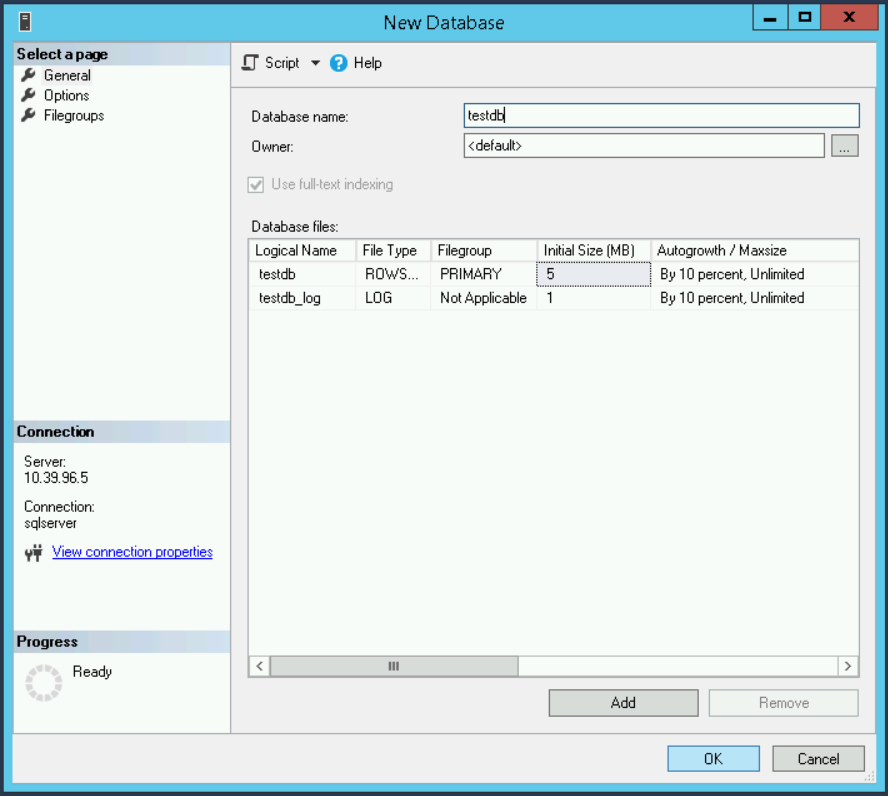
In the SSMS Object Explorer window, right-click the Databases node under your instance, and select New Database.
Enter testdb for the Database name and click the OK button.
Click Check my progress to verify the objective.
Create a database
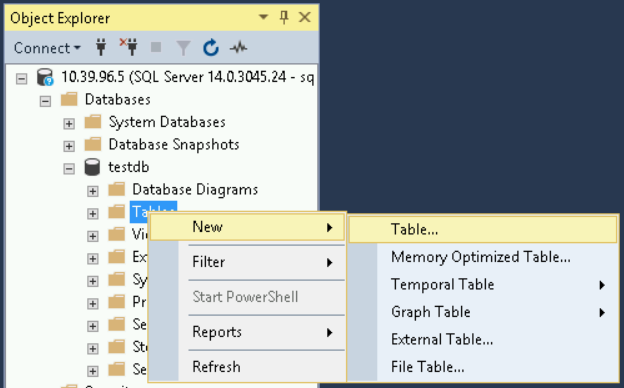
Under the newly created testdb database, right-click the Tables node, and select New > Table.
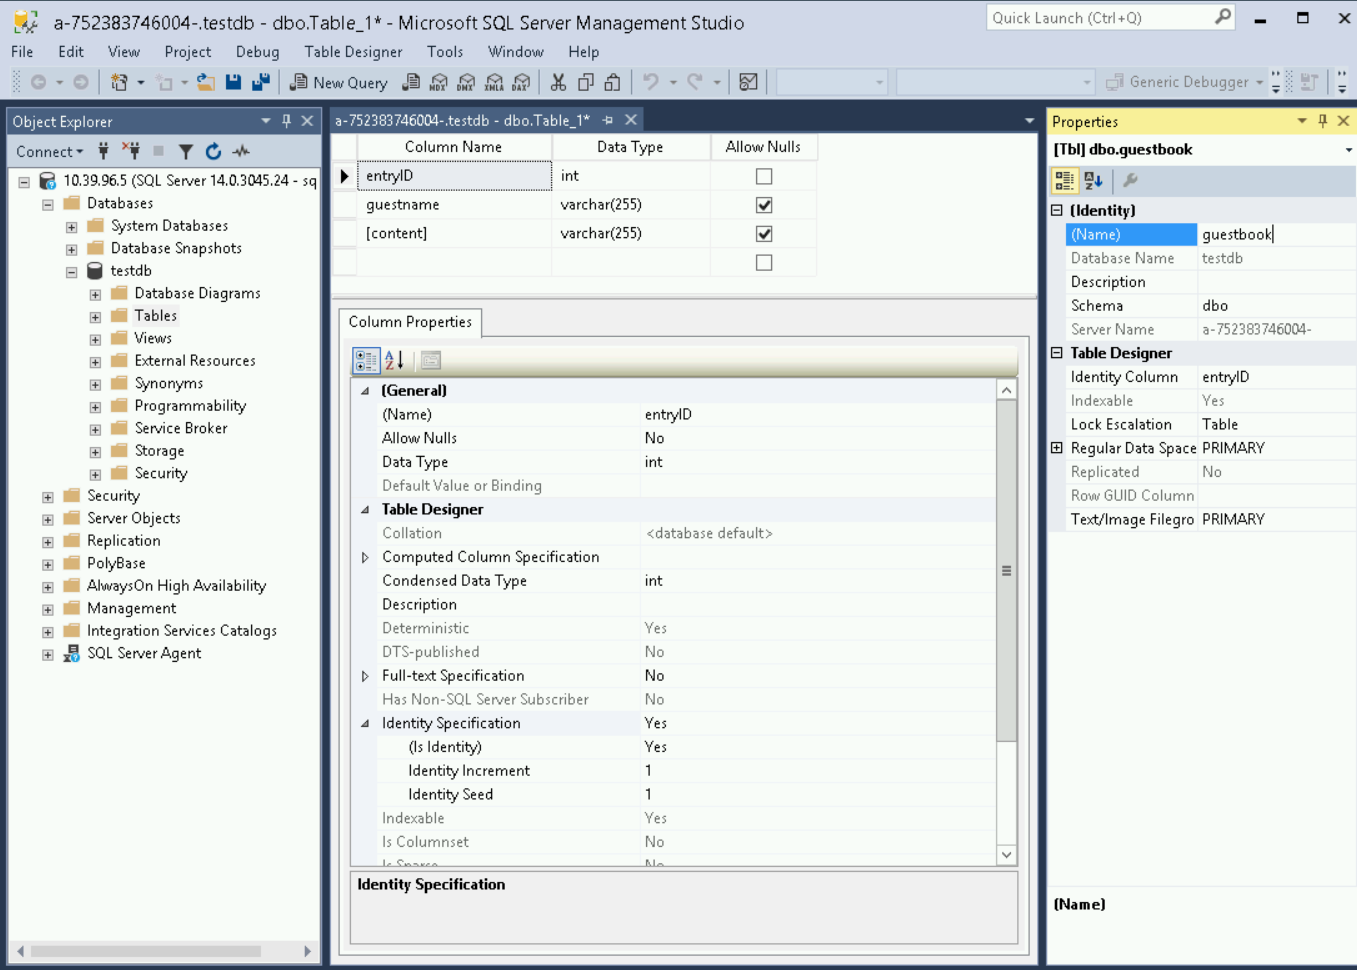
Enter the following values in the Create table dialog:
In the Properties window, for Identity > Name, enter guestbook.
For the first Column Name, enter entryID, set its Data Type to int, and clear the Allow Nulls checkbox.
In the Column Properties window, expand the Identity Specification item and set (Is Identity) to Yes.
For the second Column Name, enter guestname and set its Data Type to varchar(MAX).
For the third Column Name, enter content and set its Data Type to varchar(MAX).
Note: If you do not see a properties window like the picture below, click the wrench icon in SSMS.
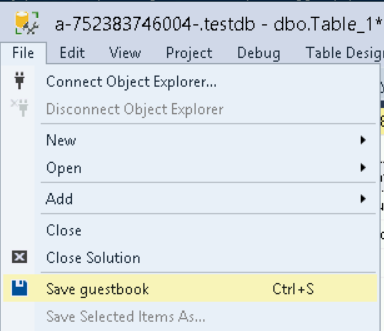
Click the File menu and select Save guestbook.
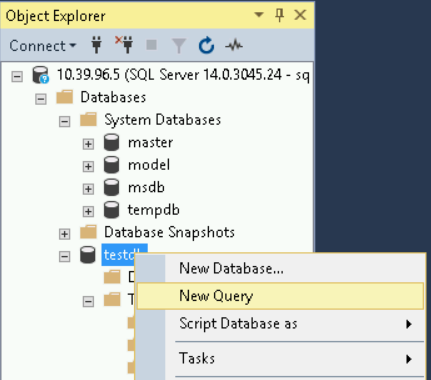
Right-click the testdb table under Databases and select New Query.
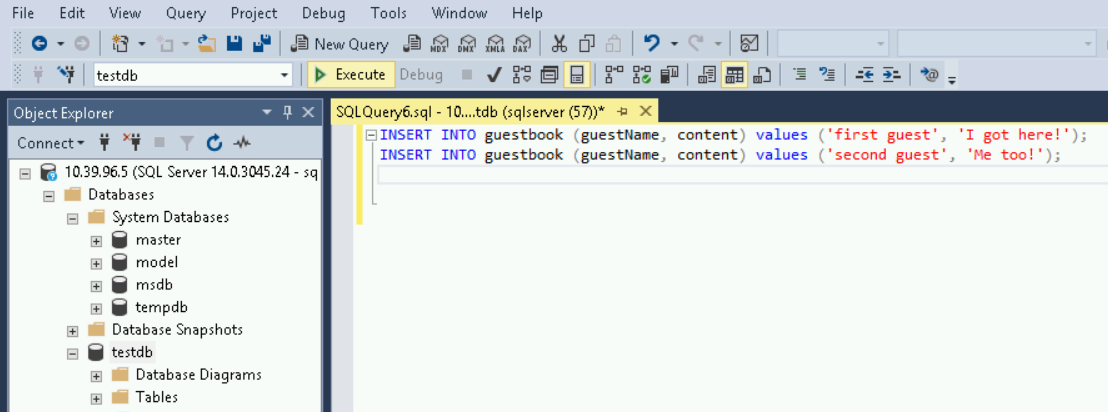
Enter the following two INSERT statements into the SQL query text window and click the Execute button:
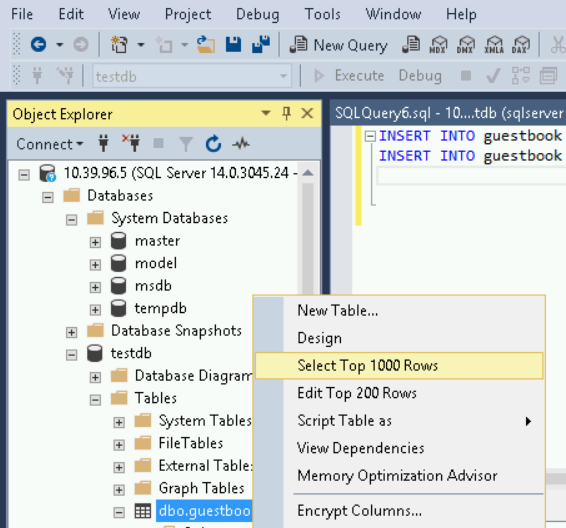
Expand the Tables item under the Databases > testdb item in the Object Explorer window. Right-click the dbo.guestbook table and choose Select Top 1000 Rows.
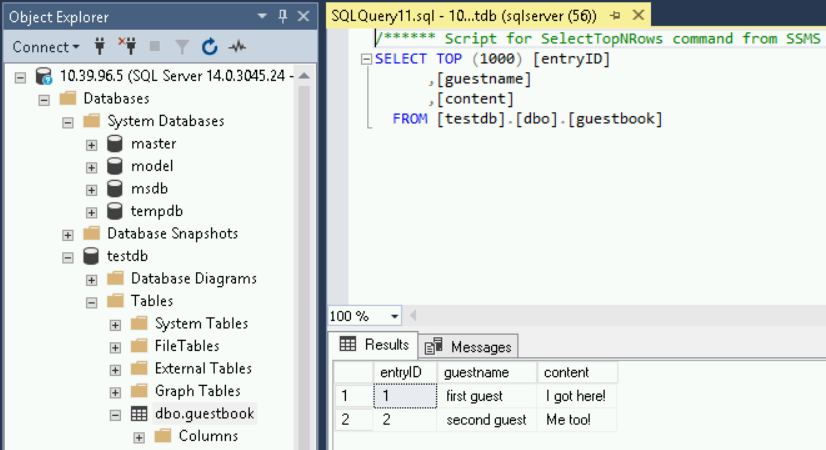
The two records you inserted are displayed as Results, along with the SQL SELECT statement used to query the records.
Congratulations!
You created a SQL Server instance on Google Cloud and connected to it using SQL Server Management Studio!
In this lab, you learned how to perform the following tasks:
Create a Cloud SQL instance and configure it.
Connect to the Cloud SQL instance from a Windows server.
Create a database on the Cloud SQL instance.
Copyright 2022 Google LLC All rights reserved. Google and the Google logo are trademarks of Google LLC. All other company and product names may be trademarks of the respective companies with which they are associated.
Moduły tworzą projekt Google Cloud i zasoby na określony czas.
Moduły mają ograniczenie czasowe i nie mają funkcji wstrzymywania. Jeśli zakończysz moduł, musisz go zacząć od początku.
Aby rozpocząć, w lewym górnym rogu ekranu kliknij Rozpocznij moduł.
Użyj przeglądania prywatnego
Skopiuj podaną nazwę użytkownika i hasło do modułu.
Kliknij Otwórz konsolę w trybie prywatnym.
Zaloguj się w konsoli
Zaloguj się z użyciem danych logowania do modułu. Użycie innych danych logowania może spowodować błędy lub naliczanie opłat.
Zaakceptuj warunki i pomiń stronę zasobów przywracania.
Nie klikaj Zakończ moduł, chyba że właśnie został przez Ciebie zakończony lub chcesz go uruchomić ponownie, ponieważ spowoduje to usunięcie wyników i projektu.
Ta treść jest obecnie niedostępna
Kiedy dostępność się zmieni, wyślemy Ci e-maila z powiadomieniem
Świetnie
Kiedy dostępność się zmieni, skontaktujemy się z Tobą e-mailem
Jeden moduł, a potem drugi
Potwierdź, aby zakończyć wszystkie istniejące moduły i rozpocząć ten
Aby uruchomić moduł, użyj przeglądania prywatnego
Uruchom ten moduł w oknie incognito lub przeglądania prywatnego. Dzięki temu unikniesz konfliktu między swoim kontem osobistym a kontem do nauki, co mogłoby spowodować naliczanie dodatkowych opłat na koncie osobistym.
This lab shows you how to create and connect to a SQL Server instance and perform basic SQL operations using the Google Cloud Console and a client.
Czas trwania:
Konfiguracja: 1 min
·
Dostęp na 60 min
·
Ukończono w 60 min
 ), click SQL.