

시작하기 전에
- 실습에서는 정해진 기간 동안 Google Cloud 프로젝트와 리소스를 만듭니다.
- 실습에는 시간 제한이 있으며 일시중지 기능이 없습니다. 실습을 종료하면 처음부터 다시 시작해야 합니다.
- 화면 왼쪽 상단에서 실습 시작을 클릭하여 시작합니다.
Create Cloud SQL instance
/ 5
Make connection from the SSMS Object Explorer
/ 5
Create database in Cloud SQL instance
/ 5
In this lab, you will create and connect to a Cloud SQL for SQL Server instance and perform basic SQL operations using the Google Cloud Console and a client.
In this lab, you will learn how to perform the following tasks:
For each lab, you get a new Google Cloud project and set of resources for a fixed time at no cost.
Sign in to Qwiklabs using an incognito window.
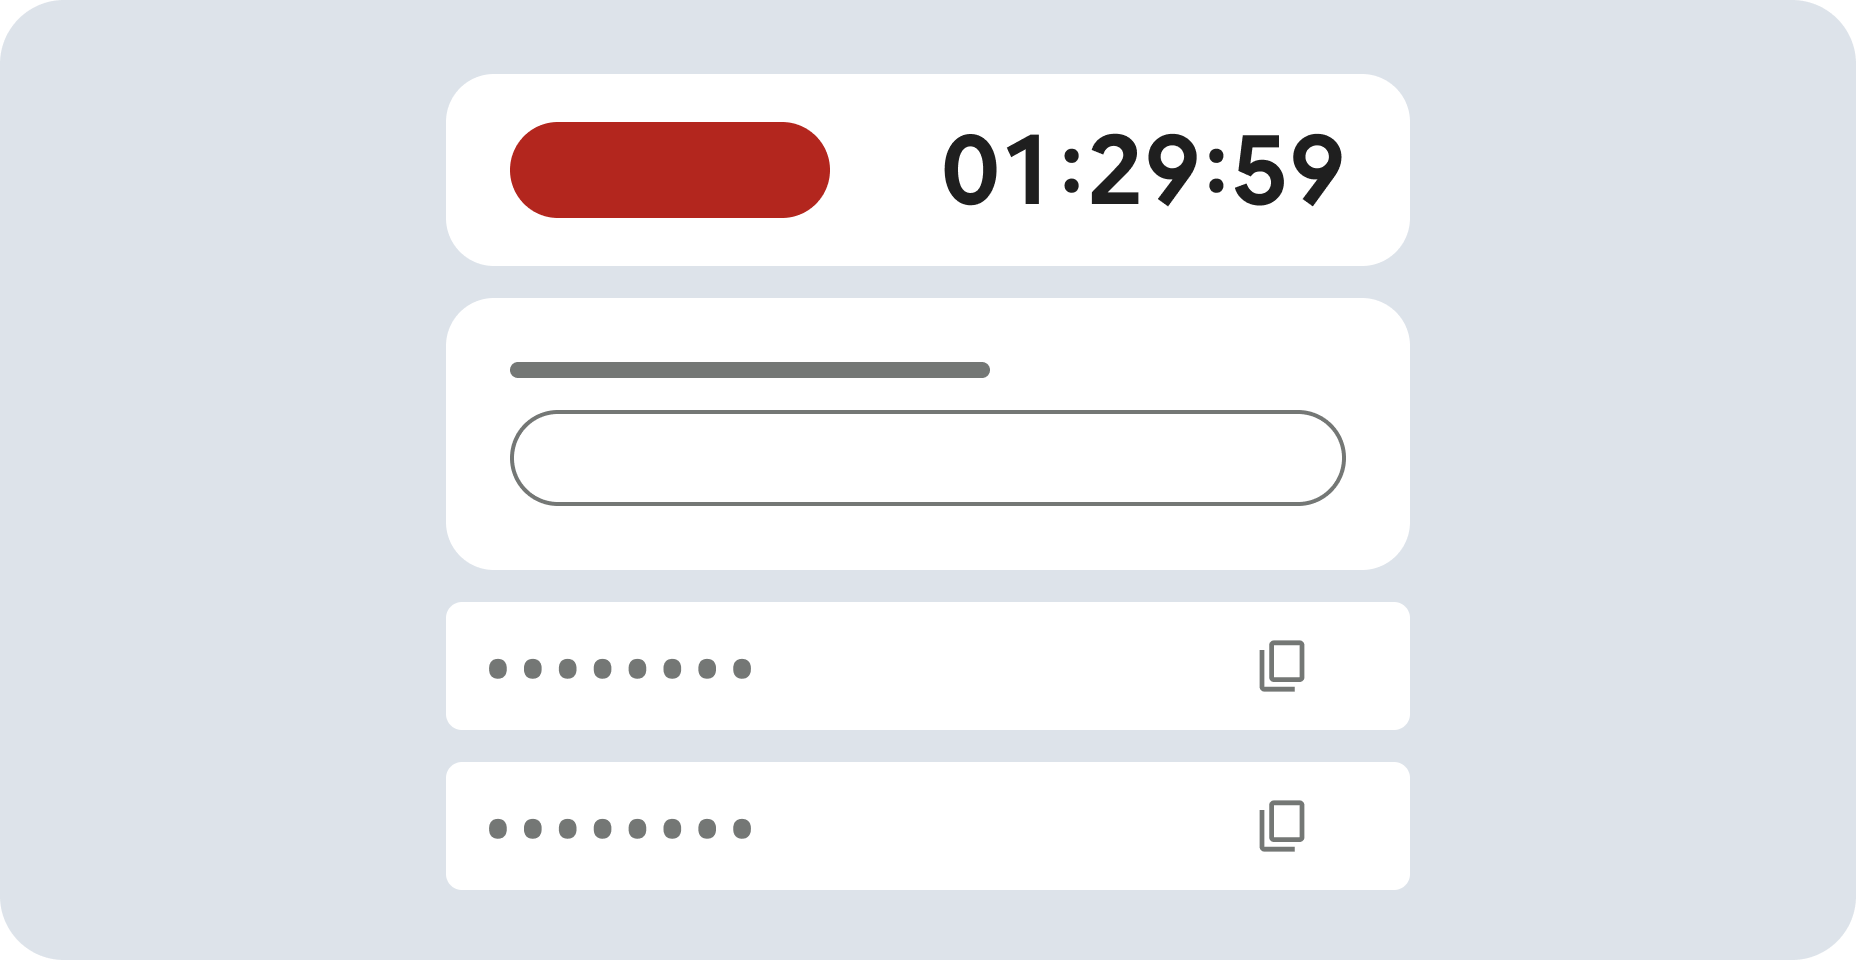
Note the lab's access time (for example, 1:15:00), and make sure you can finish within that time.
There is no pause feature. You can restart if needed, but you have to start at the beginning.
When ready, click Start lab.
Note your lab credentials (Username and Password). You will use them to sign in to the Google Cloud Console.
Click Open Google Console.
Click Use another account and copy/paste credentials for this lab into the prompts.
If you use other credentials, you'll receive errors or incur charges.
Accept the terms and skip the recovery resource page.
In the Cloud Console, on the Navigation menu (
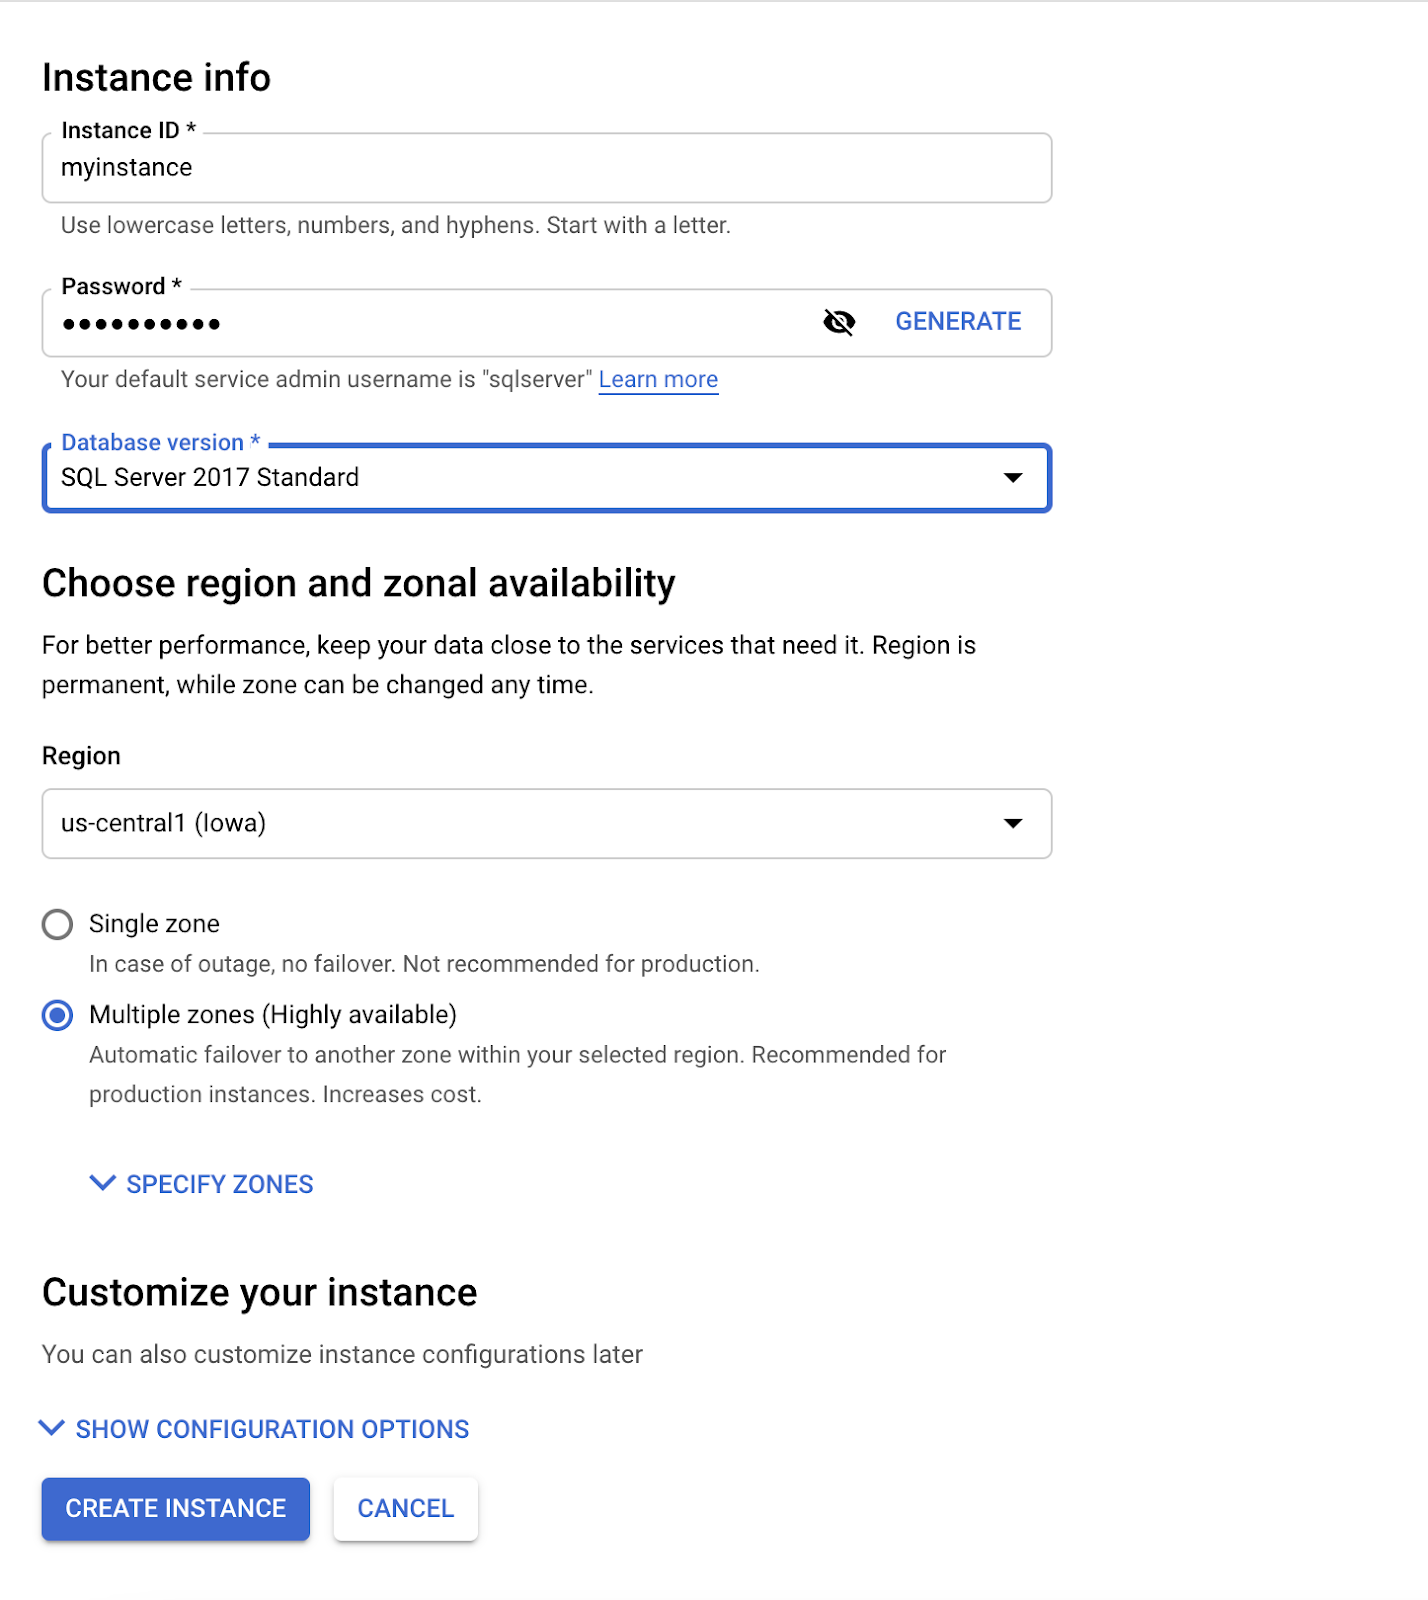
Click Create instance.
For Choose your database engine, select Choose SQL Server.
Enter myinstance for Instance ID.
Enter Password01 for the Password of the default sqlserver user.
Use the default values for the other fields.
Click Create Instance.
Wait for your instance to finish provisioning before moving on to the next step. This will take about 5 minutes.
Click Check my progress to verify the objective.
For this lab, you are provided with a Windows Server Virtual Machine that has SQL Server Management Studio preinstalled. You will use this VM to walkthrough connecting to your instance.
On the Navigation menu (
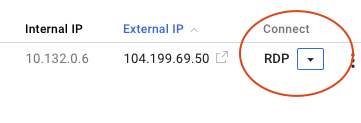
In the VM instances list, click RDP in the row for your VM instance ssms_vm.
student
Password01
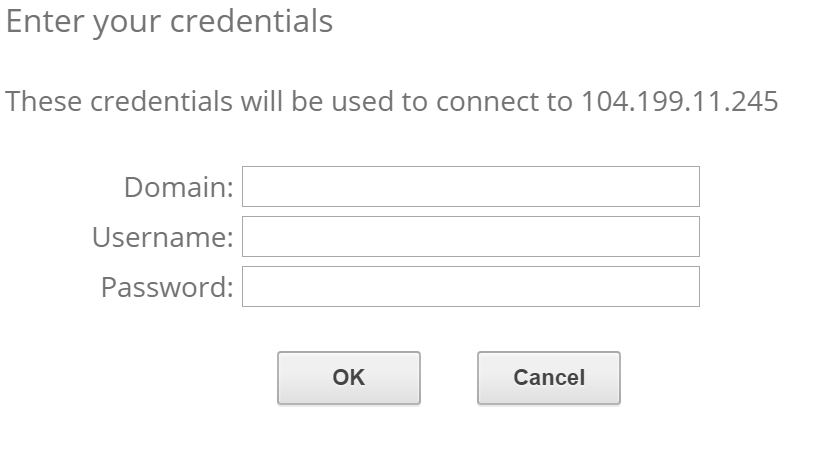
Once logged into your remote desktop window, SQL Server Management Studio will begin loading on startup. While it loads, you can connect your Windows Virtual Machine to your Cloud SQL instance with Cloud SQL Auth Proxy.
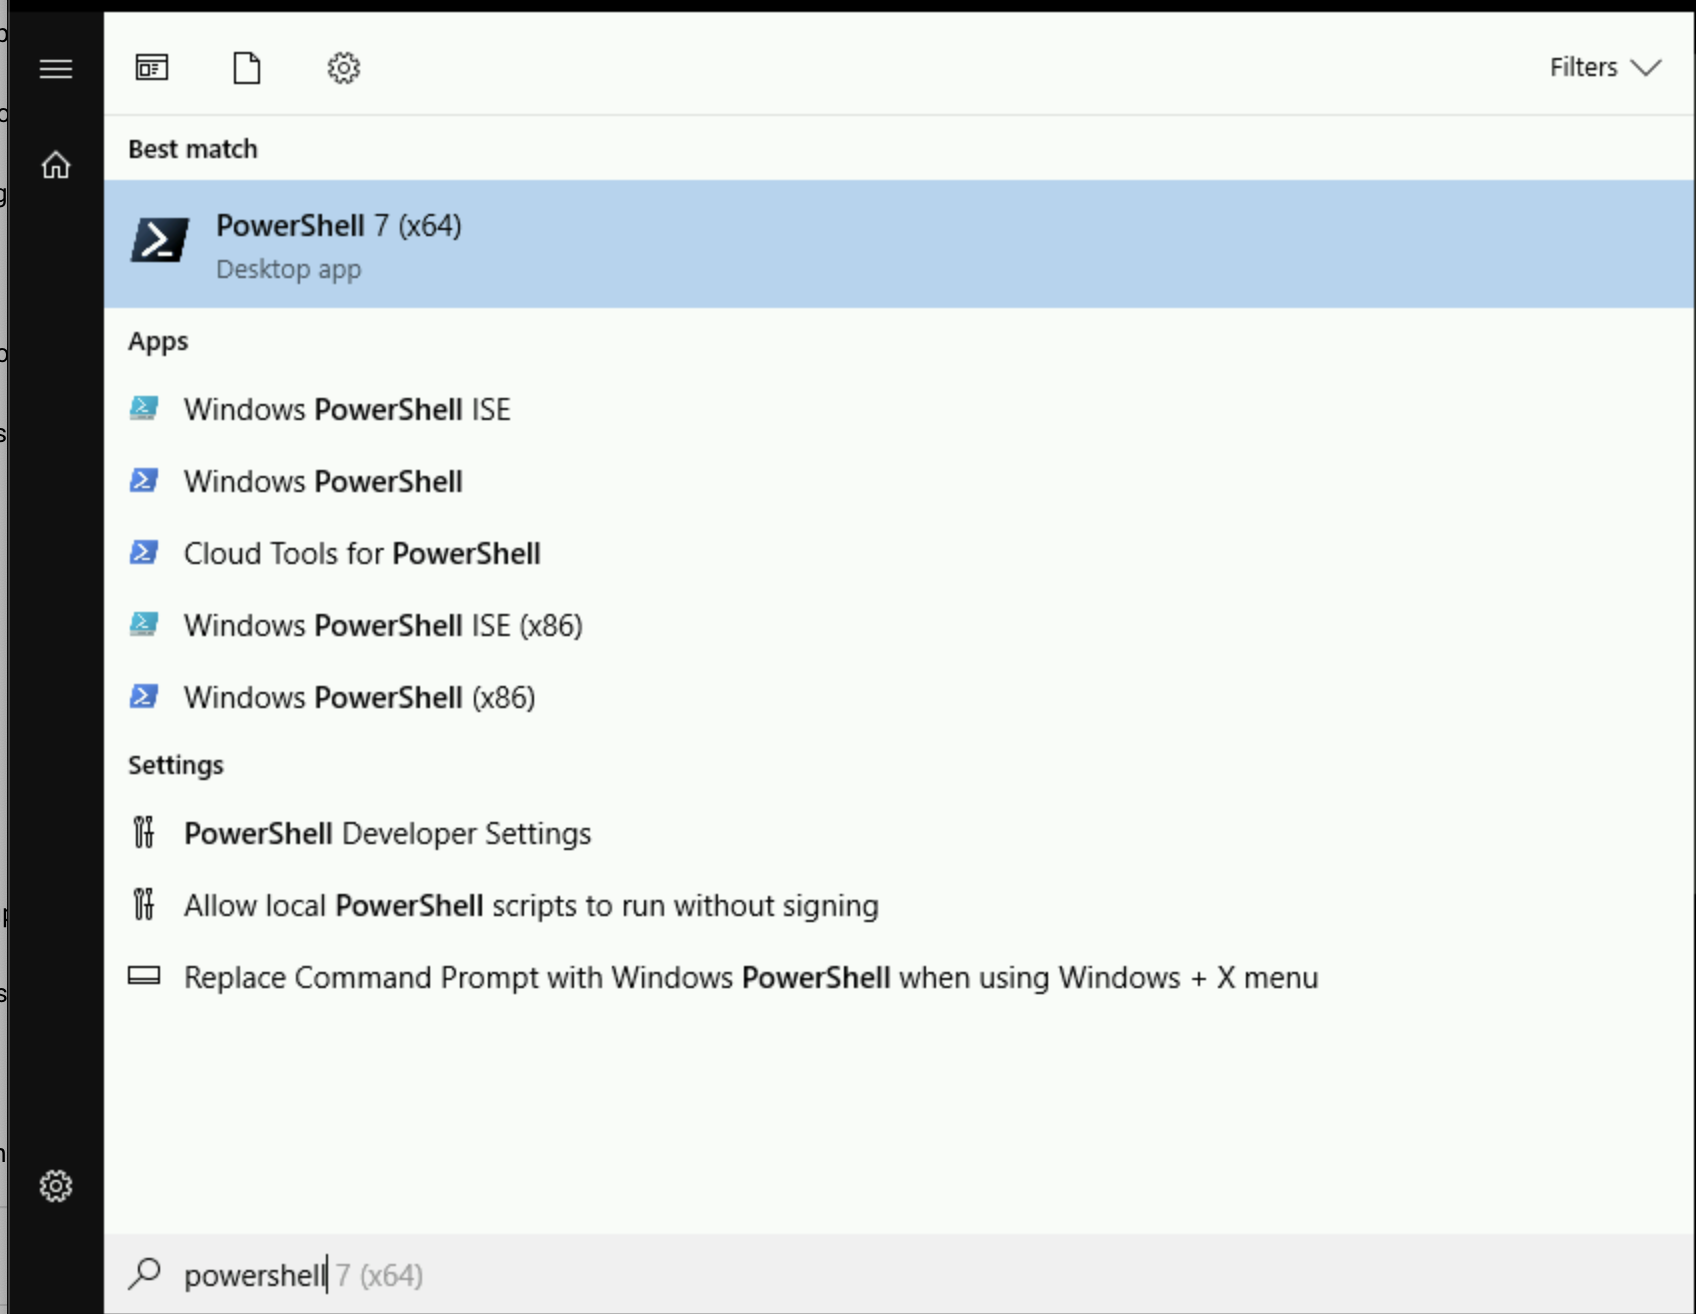
Click the Windows button. Type powershell.
Double-click PowerShell 7 (x64) from the results to open a PowerShell window.
A message similar to the following should appear:
If it hasn't already, wait for the SSMS window to fully load.

Database Engine.127.0.0.1.SQL Server Authentication.sqlserver.Password01.Click Check my progress to verify the objective.

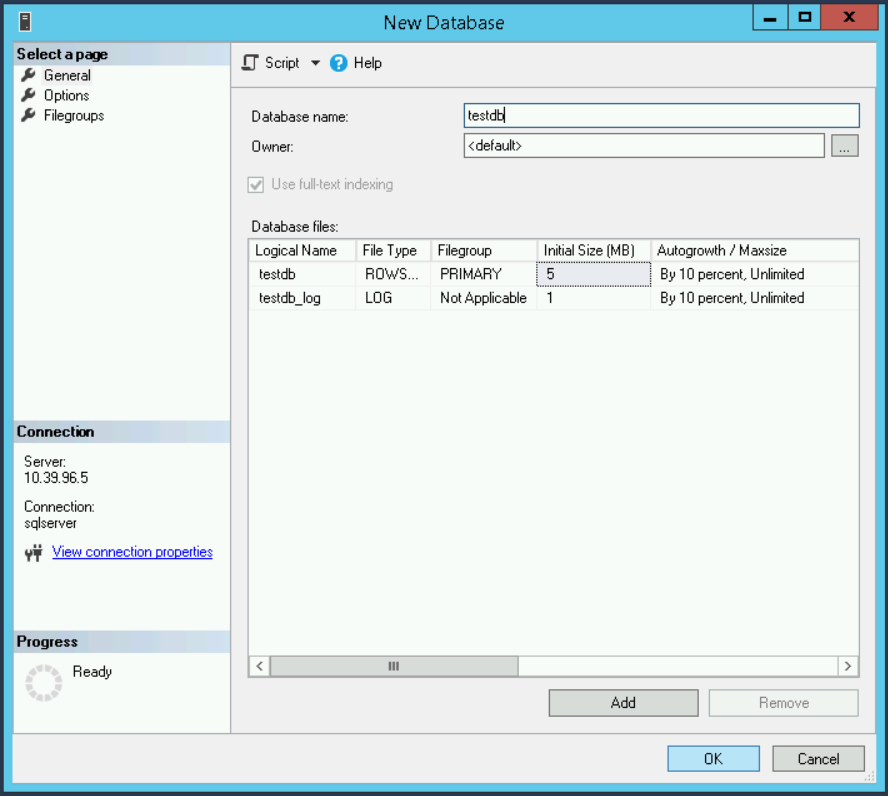
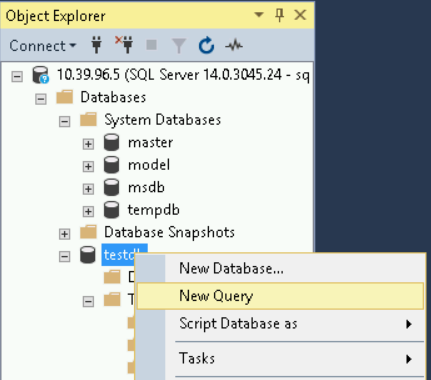
testdb for the Database name and click the OK button.
Click Check my progress to verify the objective.
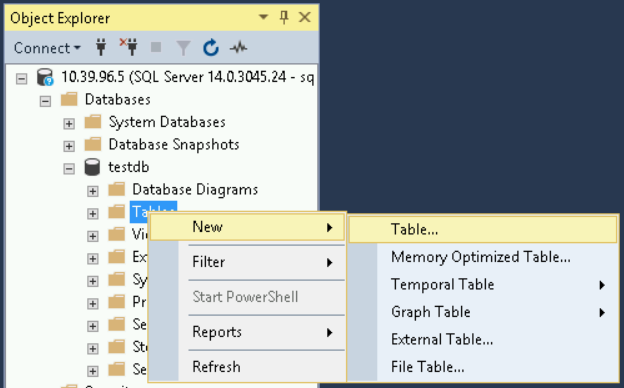
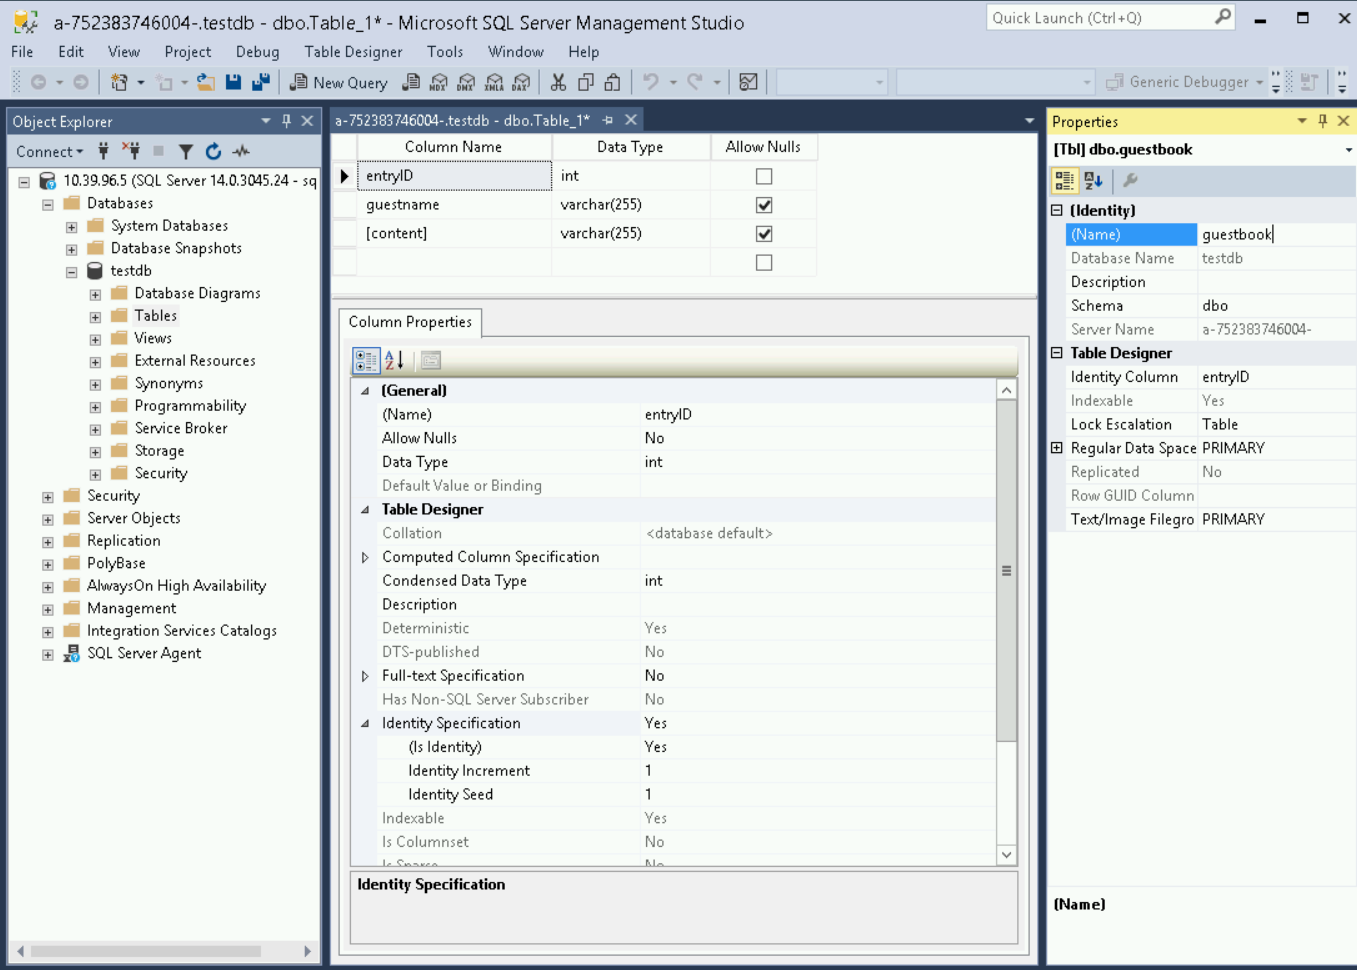
guestbook.entryID, set its Data Type to int, and clear the Allow Nulls checkbox.guestname and set its Data Type to varchar(MAX).content and set its Data Type to varchar(MAX).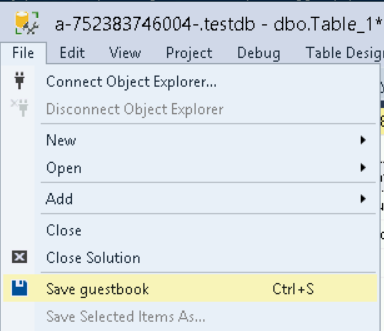
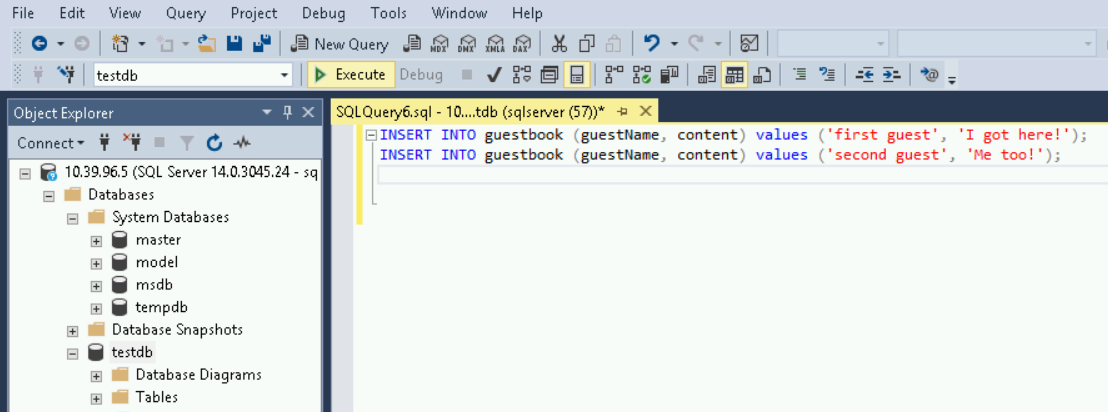
As an example:
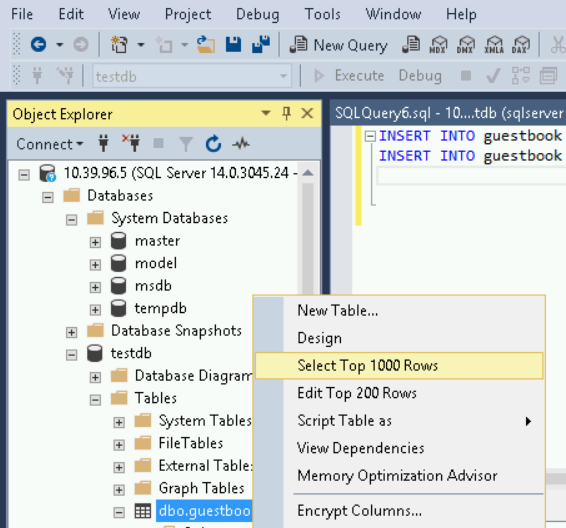
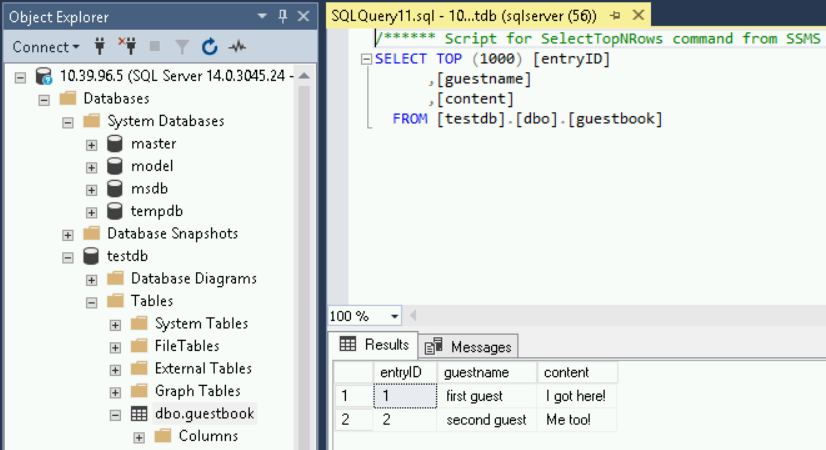
The two records you inserted are displayed as Results, along with the SQL SELECT statement used to query the records.
You created a SQL Server instance on Google Cloud and connected to it using SQL Server Management Studio!
In this lab, you learned how to perform the following tasks:
Copyright 2022 Google LLC All rights reserved. Google and the Google logo are trademarks of Google LLC. All other company and product names may be trademarks of the respective companies with which they are associated.


현재 이 콘텐츠를 이용할 수 없습니다
이용할 수 있게 되면 이메일로 알려드리겠습니다.

감사합니다
이용할 수 있게 되면 이메일로 알려드리겠습니다.

한 번에 실습 1개만 가능
모든 기존 실습을 종료하고 이 실습을 시작할지 확인하세요.