

Before you begin
- Labs create a Google Cloud project and resources for a fixed time
- Labs have a time limit and no pause feature. If you end the lab, you'll have to restart from the beginning.
- On the top left of your screen, click Start lab to begin
BQ Dataset Created
/ 20
BQ Table JSON
/ 20
BQ Table CSV
/ 20
BQ Player Query
/ 20
BQ Events Query
/ 20
Information access uses multiple formats, and BigQuery makes working with multiple data sources simple. In this lab you will get started with sports data science by importing external sports data sources into BigQuery tables. This will give you the basis for building more sophisticated analytics in subsequent labs.
The data used in this lab originates from the following sources:
In this lab, you will learn how to:
Read these instructions. Labs are timed and you cannot pause them. The timer, which starts when you click Start Lab, shows how long Google Cloud resources are made available to you.
This hands-on lab lets you do the lab activities in a real cloud environment, not in a simulation or demo environment. It does so by giving you new, temporary credentials you use to sign in and access Google Cloud for the duration of the lab.
To complete this lab, you need:
Click the Start Lab button. If you need to pay for the lab, a dialog opens for you to select your payment method. On the left is the Lab Details pane with the following:
Click Open Google Cloud console (or right-click and select Open Link in Incognito Window if you are running the Chrome browser).
The lab spins up resources, and then opens another tab that shows the Sign in page.
Tip: Arrange the tabs in separate windows, side-by-side.
If necessary, copy the Username below and paste it into the Sign in dialog.
You can also find the Username in the Lab Details pane.
Click Next.
Copy the Password below and paste it into the Welcome dialog.
You can also find the Password in the Lab Details pane.
Click Next.
Click through the subsequent pages:
After a few moments, the Google Cloud console opens in this tab.

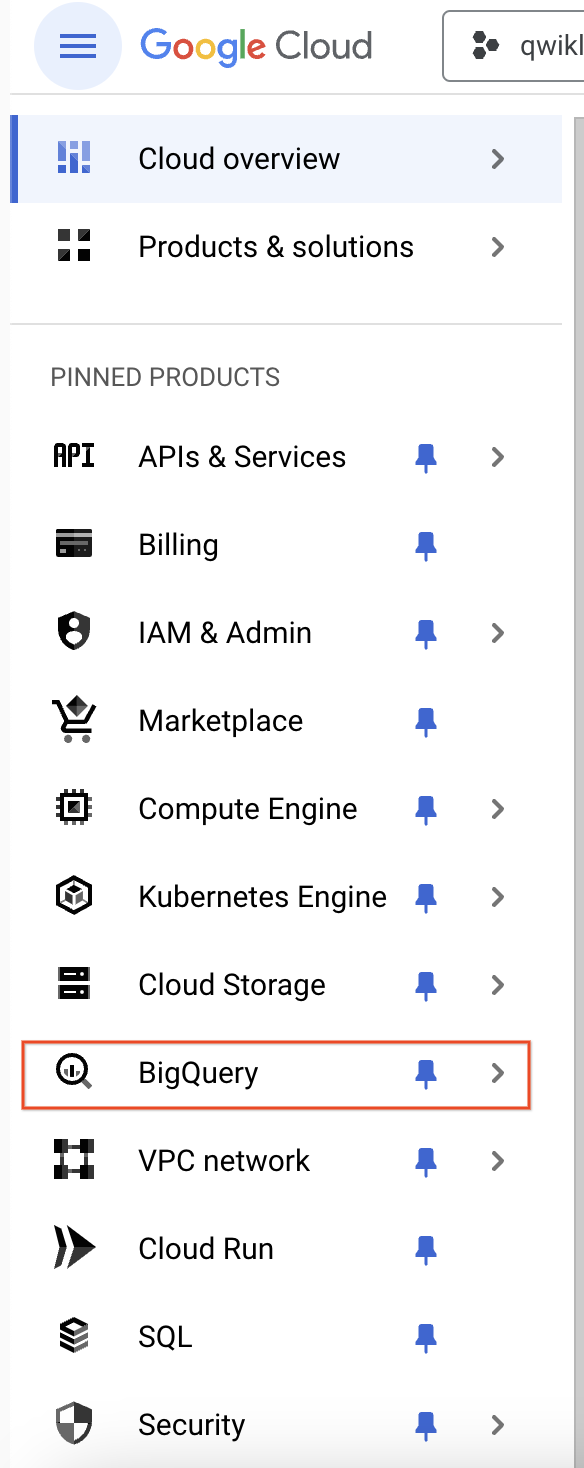
The BigQuery console provides an interface to query tables, including public datasets offered by BigQuery.
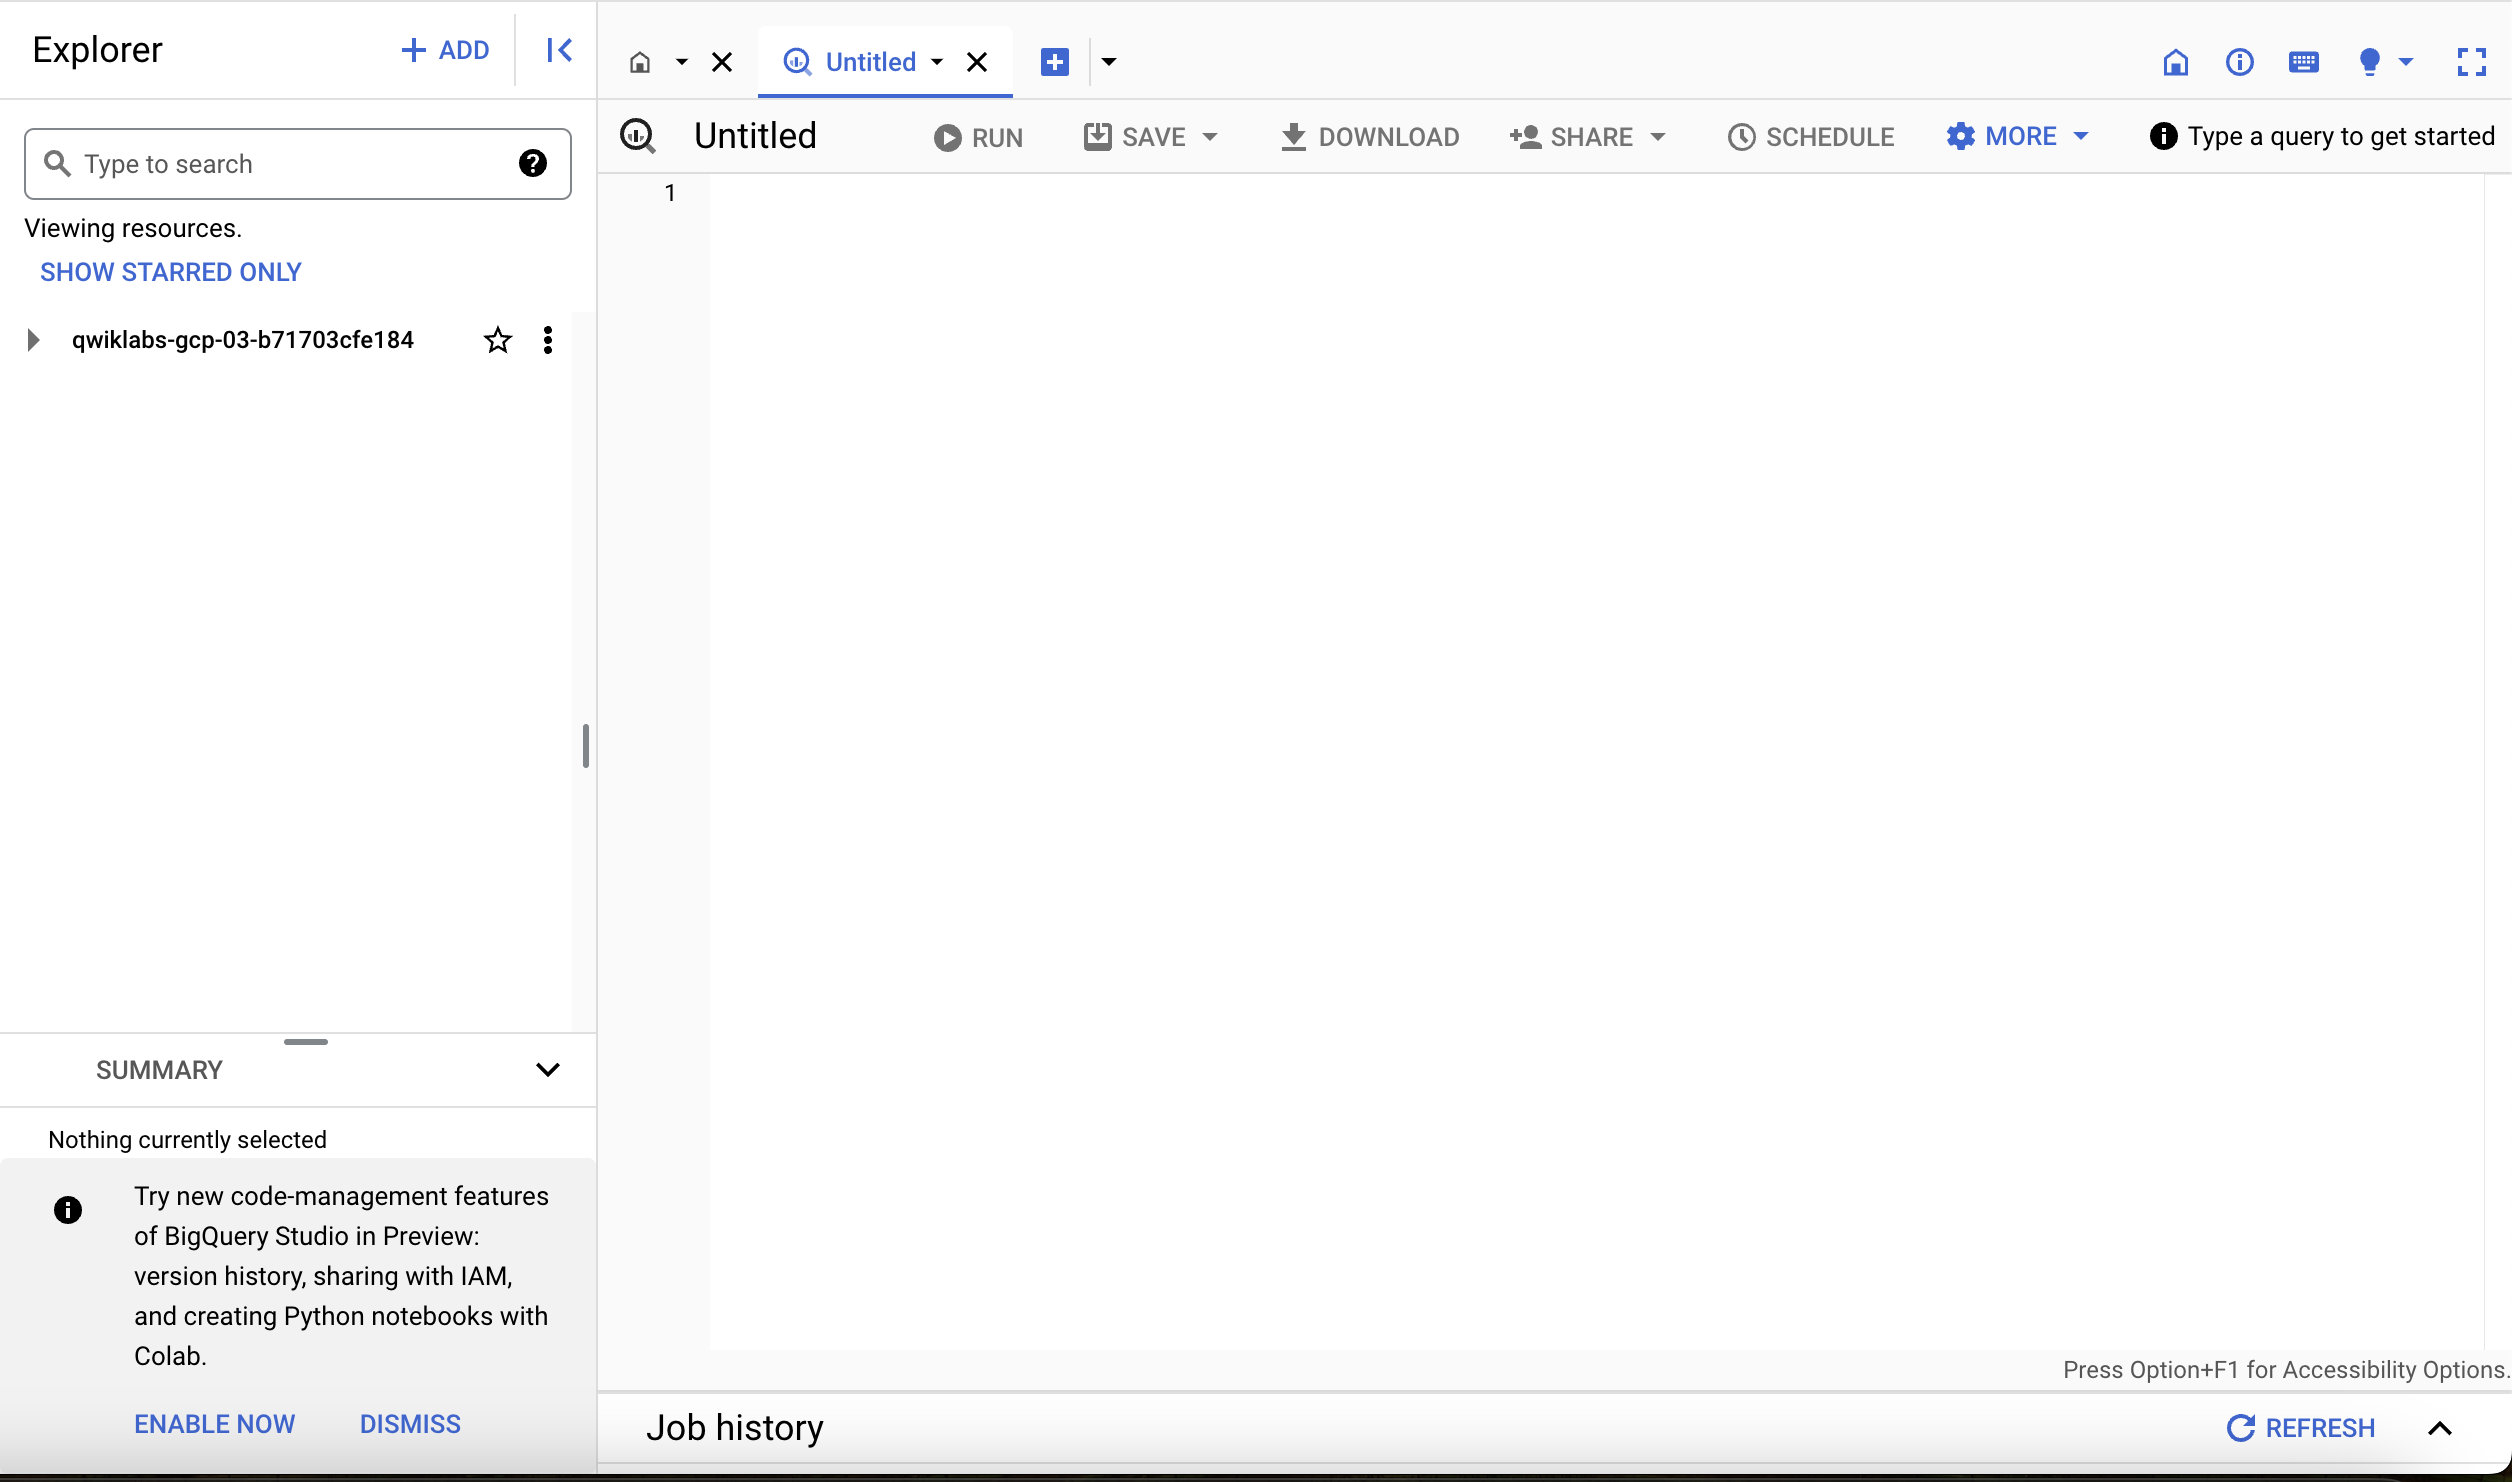
In this section the BigQuery interface was used to access the console. The console provides a convenient way to add information to a dataset. BigQuery uses tables to represent data in a structured way.
In the next section learn more about BigQuery and how to create custom tables.
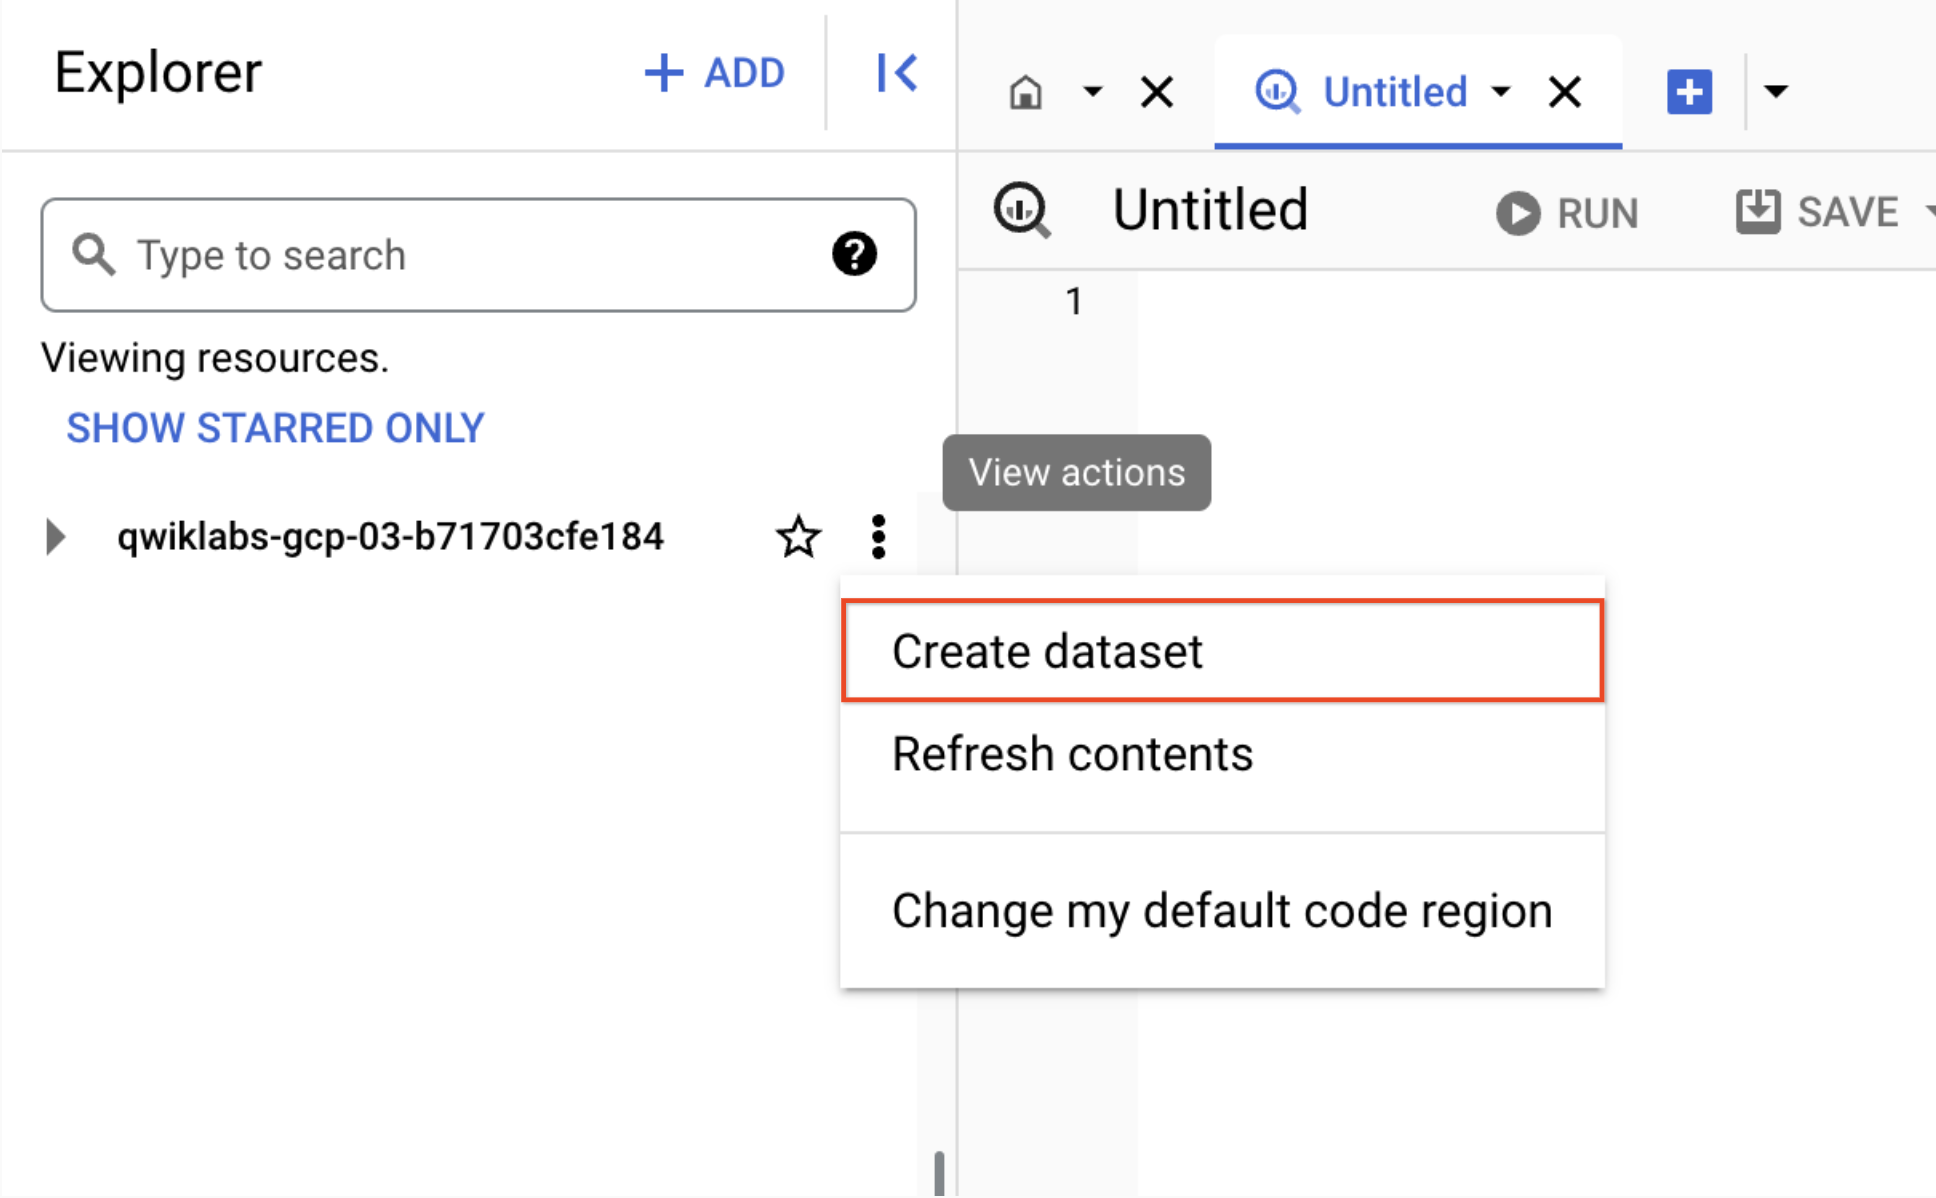
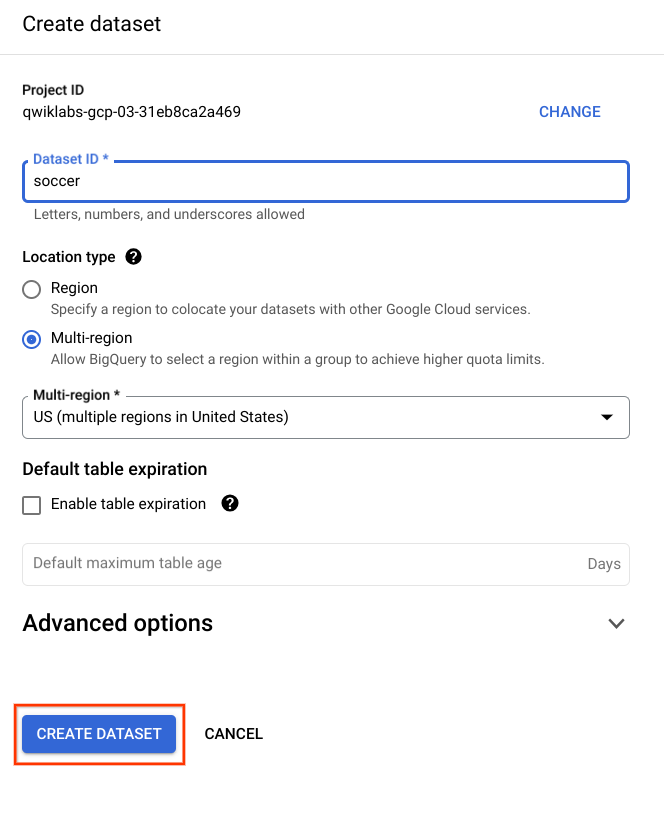
In this section, you will create a dataset. The dataset is used to add data to the project. Datasets utilize tables and views to help control access to data within a project.
| Field | Value |
|---|---|
| Dataset ID | soccer |
| Data location | us (multiple regions in United States) |
| Default table expiration | Default |
Click Check my progress to verify the objective
In this section a new dataset was created using BigQuery. During this process, BigQuery needs to know where to store the information to be created. It also provides the option to include customer managed encryption, if required.
In the next section learn how to populate the created dataset with JavaScript Object Notation (JSON) a common data format.
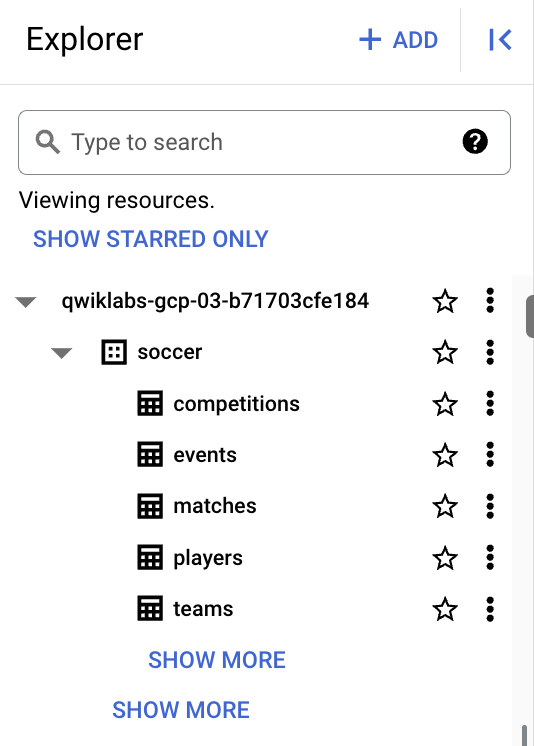
Now you will load the tables created previously with soccer data into the dataset.
BigQuery provides support for a number of import formats. In this lab use JSON with the dataset created in the previous section.
Create a table by clicking on the View actions icon next to your soccer dataset in the Explorer section.
Select Create table.
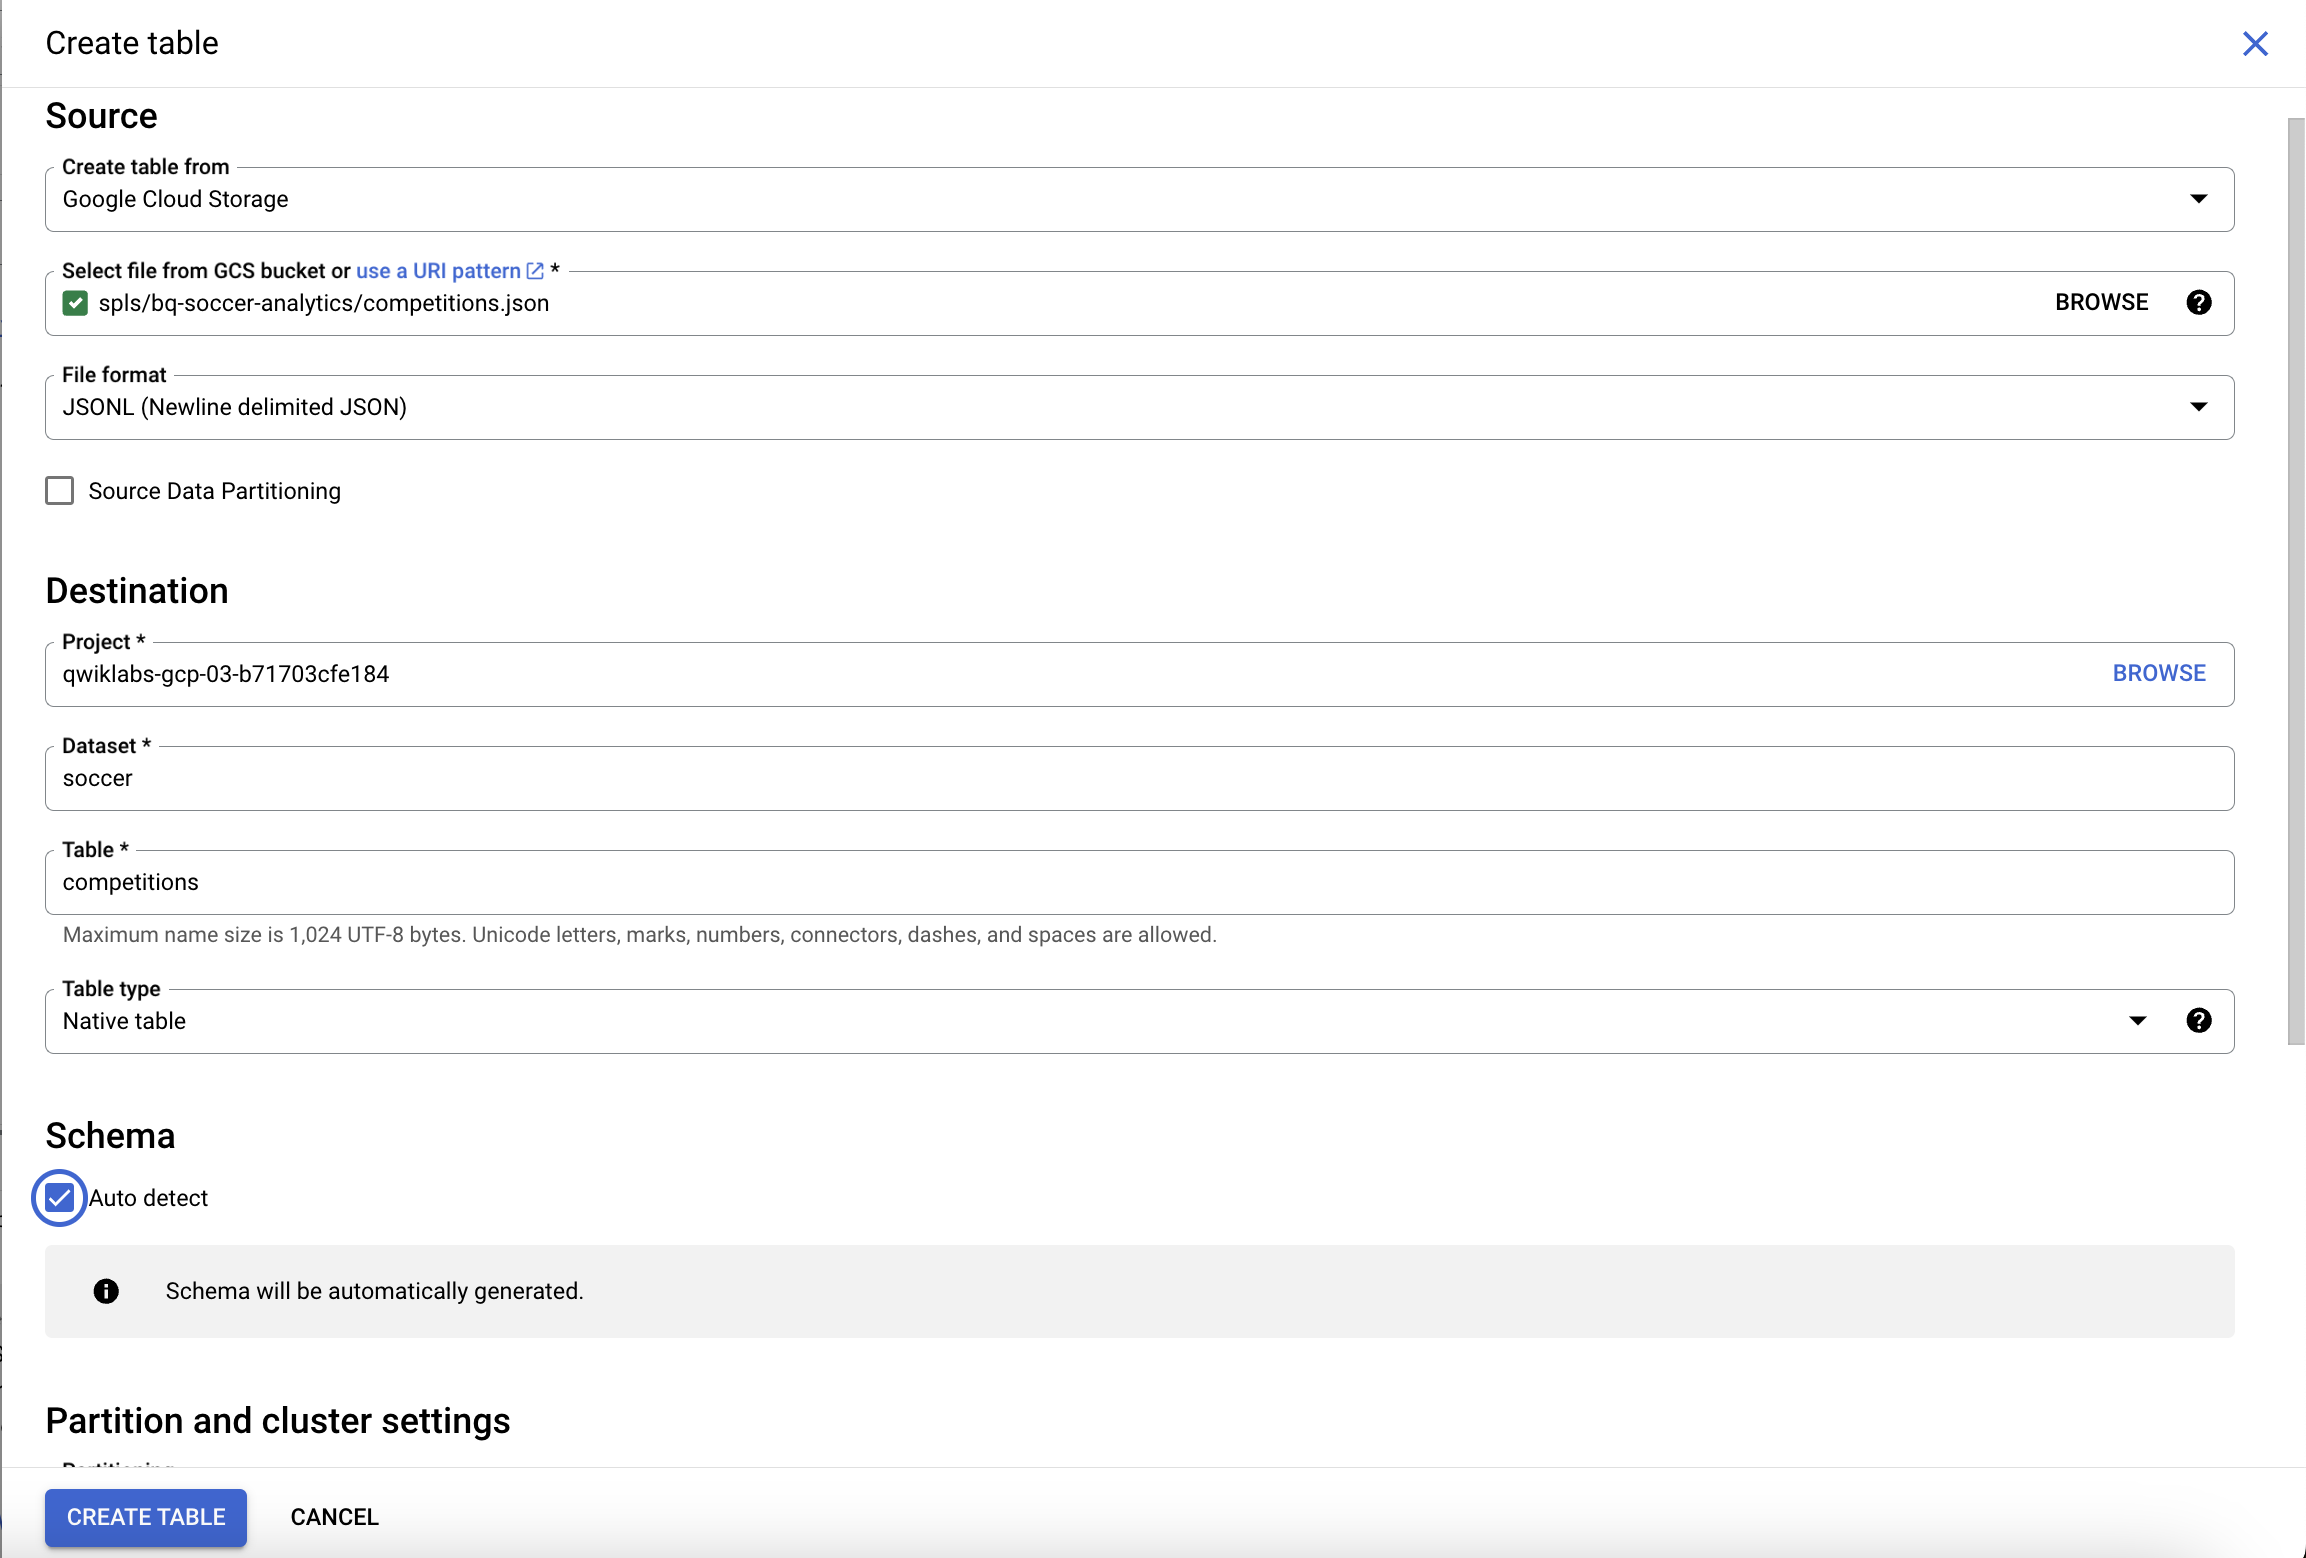
In the following section use the default values for all settings unless otherwise indicated. The data is stored in a public Google Cloud Storage (GCS) bucket.
| Field | Value |
|---|---|
| Create table from | Google Cloud Storage |
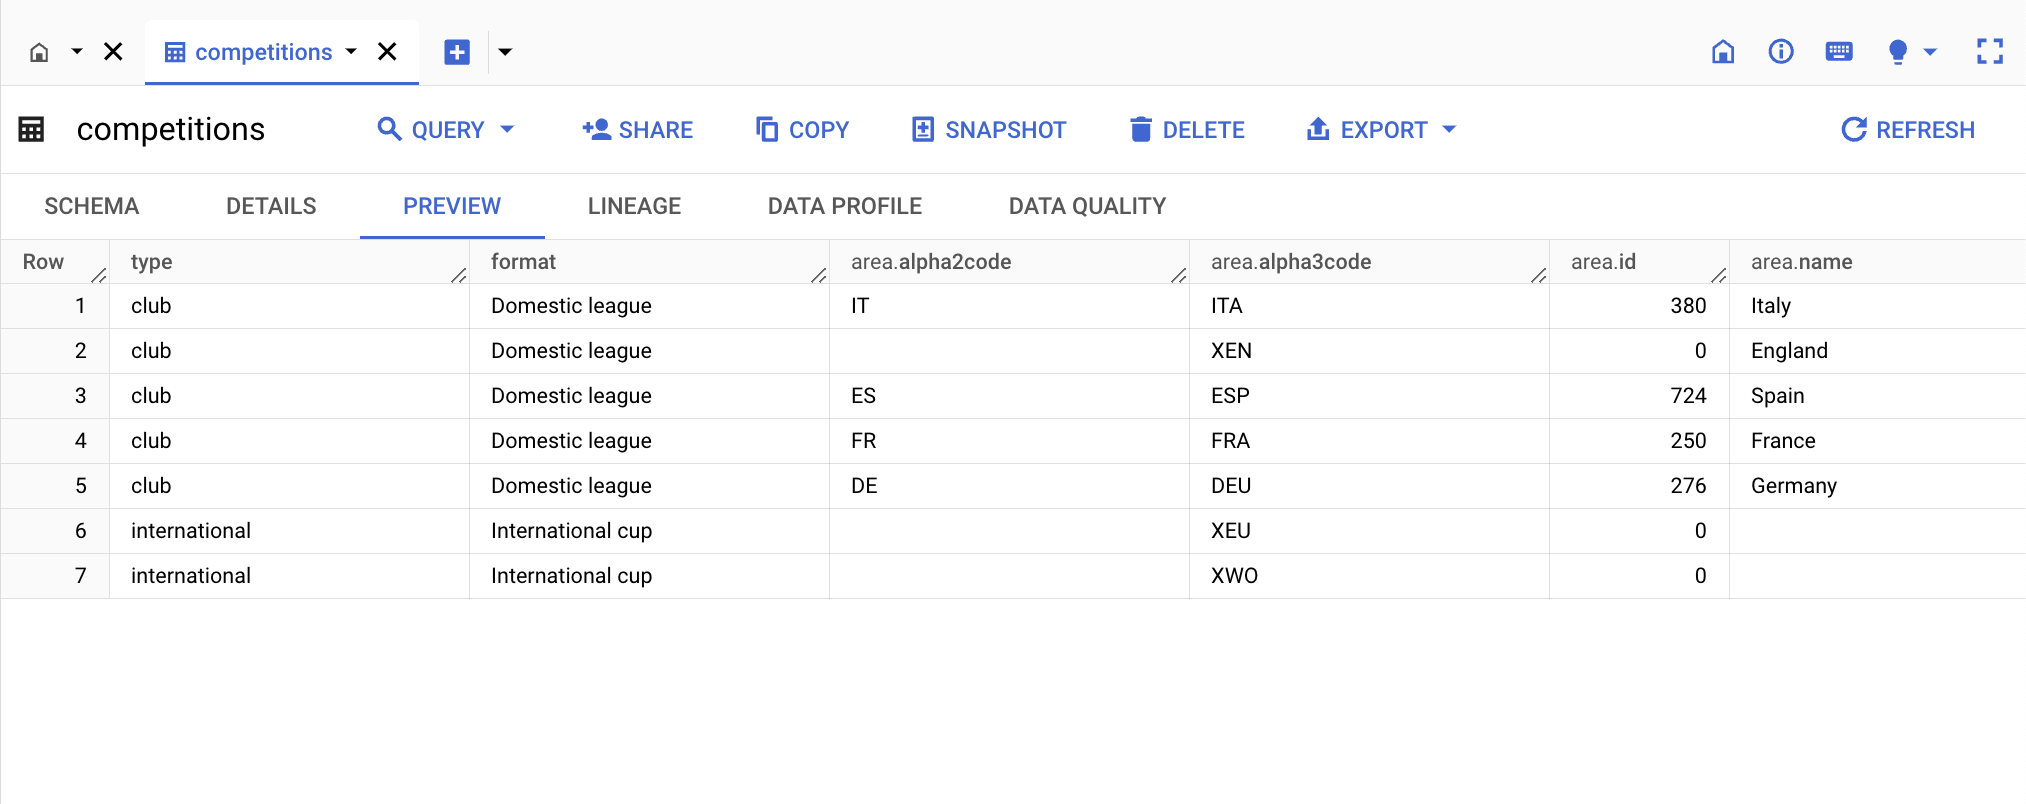
| Select file from GCS bucket | spls/bq-soccer-analytics/competitions.json |
| File format | JSONL (Newline delimited JSON) |
| Table name | competitions |
| Schema | Check the box marked Schema Auto detect
|
gs:// to be applied.
| GCS bucket file | Table name |
|---|---|
| spls/bq-soccer-analytics/matches.json | matches |
| spls/bq-soccer-analytics/teams.json | teams |
| spls/bq-soccer-analytics/players.json | players |
| spls/bq-soccer-analytics/events.json | events |
Click Check my progress to verify the objective
In this section new tables were created using BigQuery. During this process, BigQuery used Cloud Storage as the source for the JSON files. Cloud Storage provides a good intermediate storage option for object files.
In the next section learn how to populate the created dataset with a comma-separated values (CSV) file, that is another common data format.
In this section, load another table of soccer data into the dataset. The load process will this time be sourced from a comma-separated values (CSV) file stored in Cloud Storage.
soccer dataset in the Explorer section, and select Create table.Use the default values for all settings unless otherwise indicated.
| Field | Value |
|---|---|
| Create table from | Google Cloud Storage |
| Select file from GCS bucket | spls/bq-soccer-analytics/tags2name.csv |
| File format | CSV |
| Table name | tags2name |
| Schema | Check the box marked Auto detect |
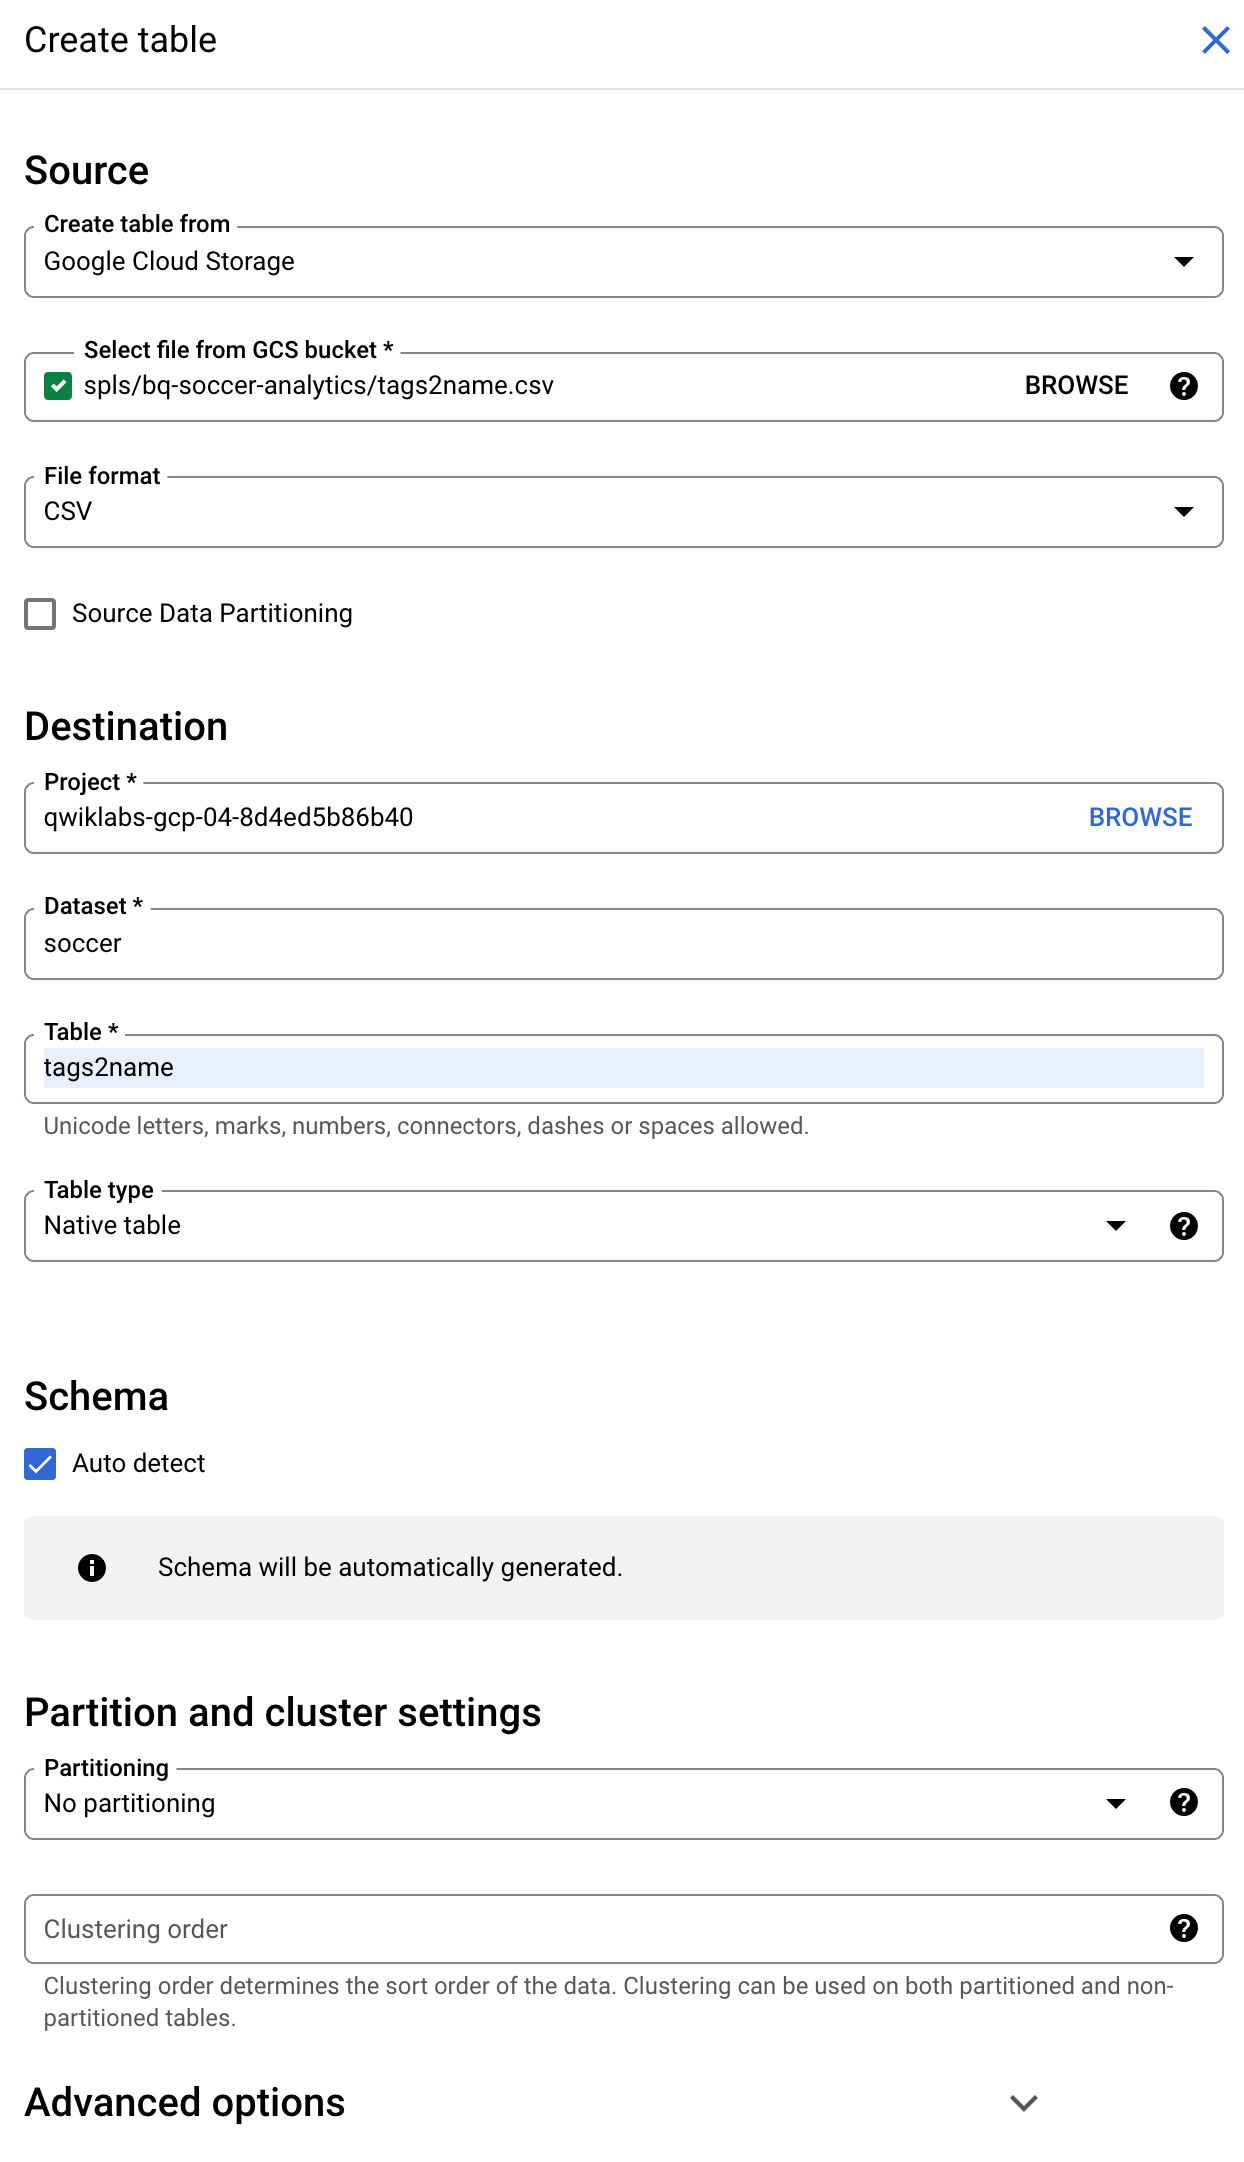
A pop up message will appear saying "tags2name" created.
Click Check my progress to verify the objective
In this section a new table was created using BigQuery. During this process, BigQuery used Cloud Storage as the source for the CSV file. Cloud Storage provides a good intermediate storage option for object files.
BigQuery provides a convenient way to store data previously held in a variety of formats. To learn more about data ingestion techniques for BigQuery read Choosing a data ingestion method.
In the next couple of sections learn how to query the datasets created in BigQuery.
Now that you've loaded data into your tables, you can run queries against it. Next, create a query that retrieves the top 10 tallest defenders (for whom height is available) in the players table.
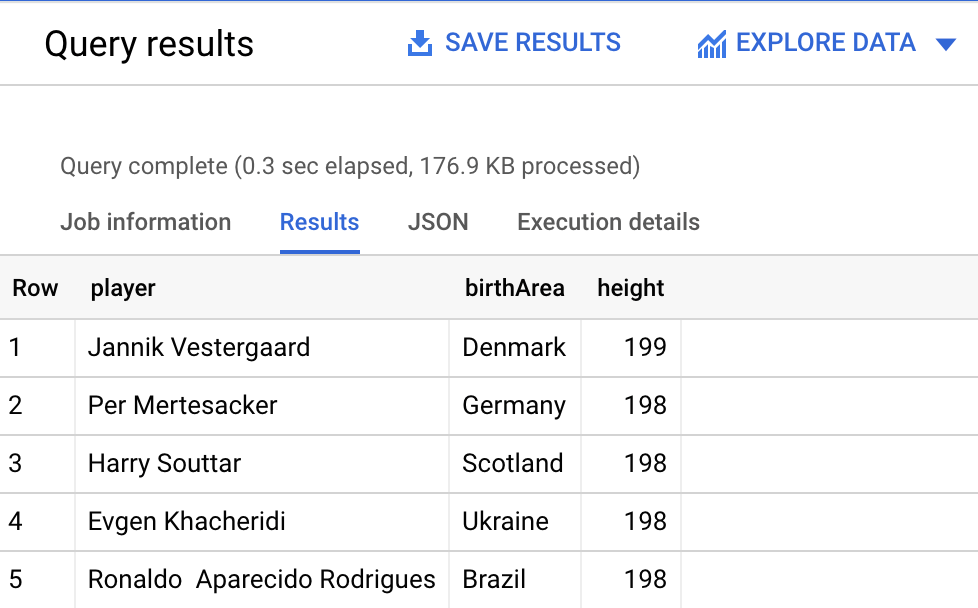
Click Check my progress to verify the objective
Understanding how to perform queries in BigQuery is essential. Running queries in BigQuery provides a simple interface to extract powerful data insights.
Create a query to retrieve counts of all event types that are found in the events table.
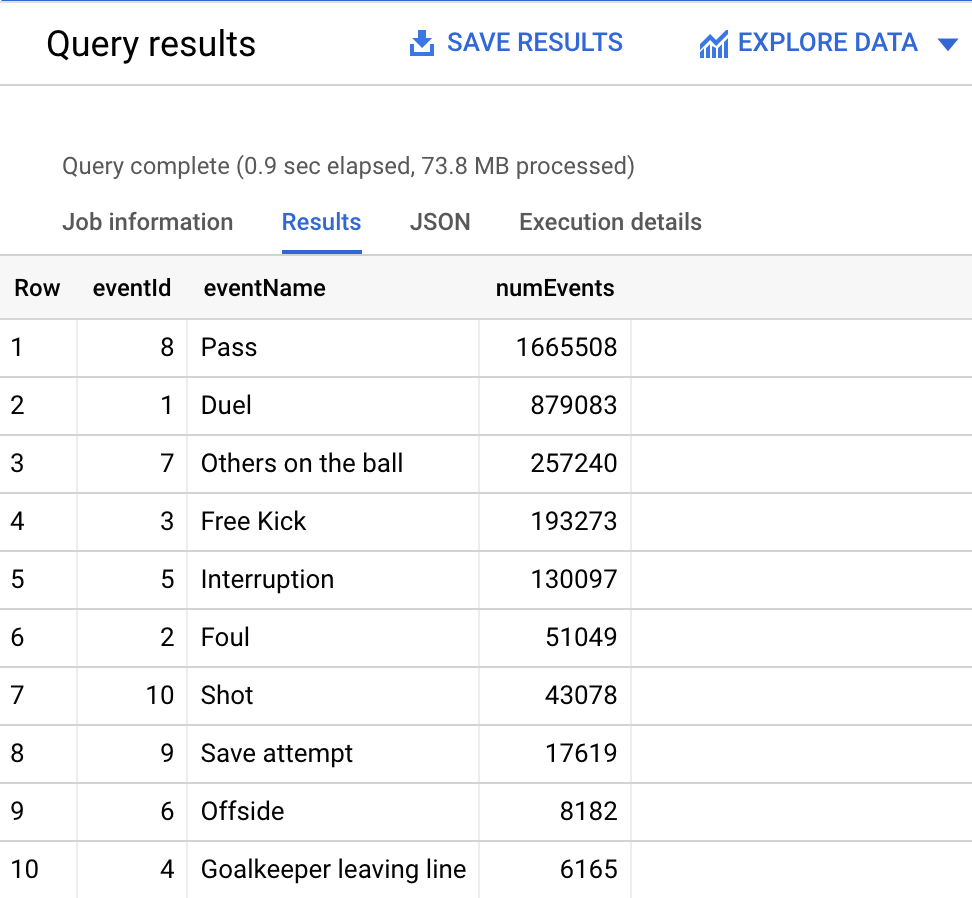
Click Check my progress to verify the objective
Being able to capitalize on stored data to establish trends and patterns presents an opportunity to deliver real benefit to end users. In the next section test your understanding of what you have learned in this introduction to BigQuery.
Test your understanding of BigQuery by completing the short quiz on the topics covered in this lab.
You have successfully uploaded files stored in Cloud Storage into tables in BigQuery and learned how to compose queries to extract data from the tables.
...helps you make the most of Google Cloud technologies. Our classes include technical skills and best practices to help you get up to speed quickly and continue your learning journey. We offer fundamental to advanced level training, with on-demand, live, and virtual options to suit your busy schedule. Certifications help you validate and prove your skill and expertise in Google Cloud technologies.
Manual Last Updated January 25, 2024
Lab Last Tested January 25, 2024
Copyright 2025 Google LLC All rights reserved. Google and the Google logo are trademarks of Google LLC. All other company and product names may be trademarks of the respective companies with which they are associated.


This content is not currently available
We will notify you via email when it becomes available

Great!
We will contact you via email if it becomes available

One lab at a time
Confirm to end all existing labs and start this one