Checkpoints
Extend a view to add columns from another view
/ 50
Extend an Explore to add joins from another Explore
/ 50
Modularizing LookML Code with Extends
GSP936

Overview
Looker is a modern data platform in Google Cloud that you can use to analyze and visualize your data interactively. You can use Looker to do in-depth data analysis, integrate insights across different data sources, build actionable data-driven workflows, and create custom data applications.
In this lab, you learn how to modularize your LookML code with extends by extending views and Explores.
Prerequisites
Familiarity with LookML is necessary. It is recommend that you complete the Understanding LookML in Looker skill badge quest before you begin this lab.
What are LookML Extends?
Extends allow you to modularize code by creating copies of LookML objects that can then be integrated into other LookML objects and modified independently from the original LookML object. In Looker, you can extend views, Explores, and LookML-defined dashboards. By modularizing your code, extends allow you to treat pieces of code as modules or units that you can then build upon to expand your model.
Why use extends?
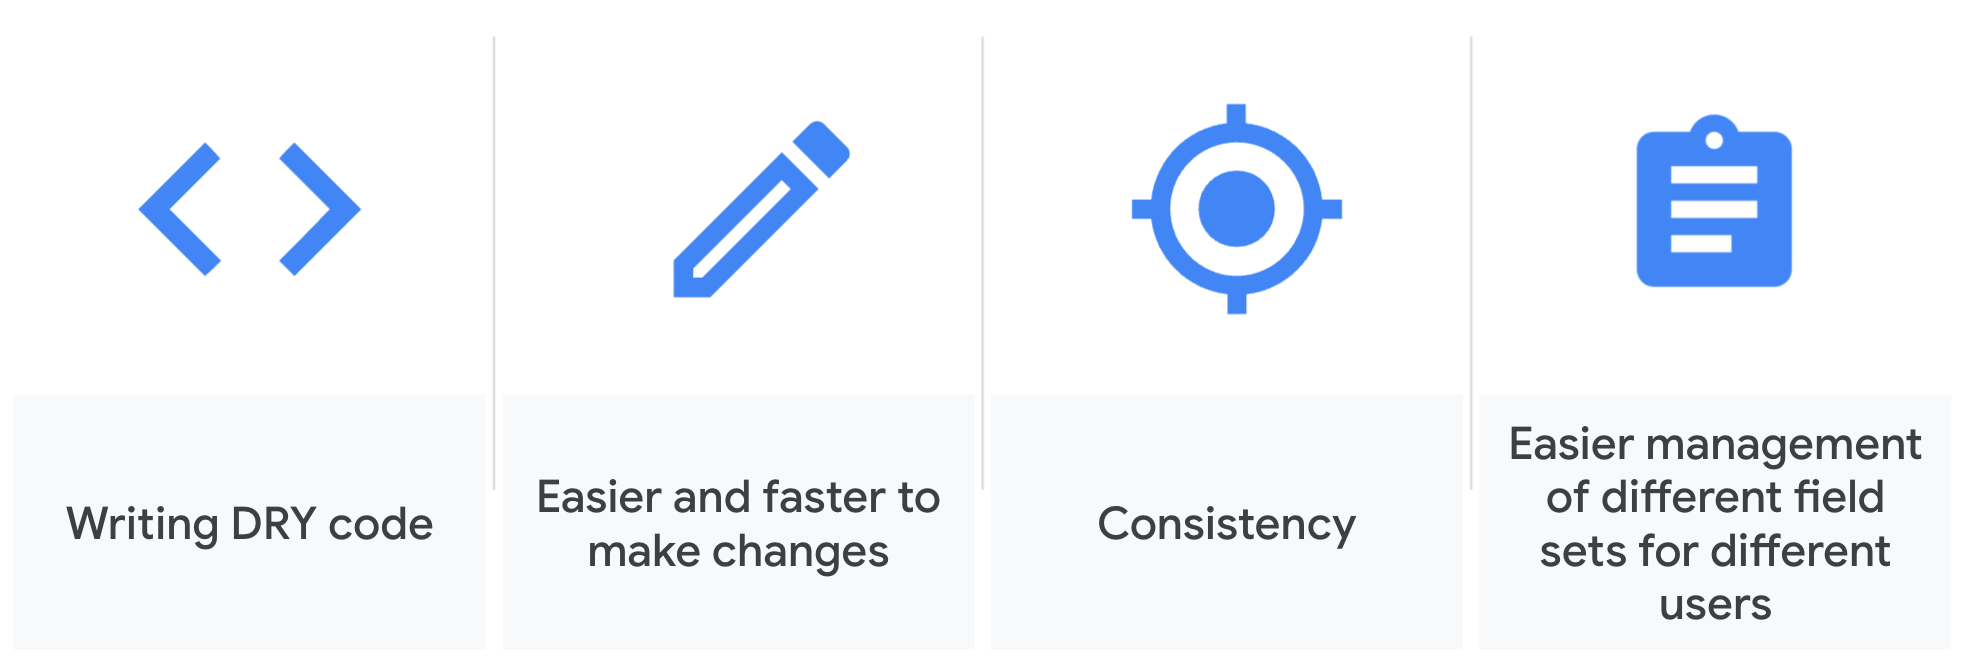
Extends help you write D.R.Y. (Don’t Repeat Yourself) code. By copying preexisting objects and sections of code, you can more easily add or modify logic. This is critical for scaling your model as your organization and use cases expand. It also maximizes consistency in your model, because you aren’t manually rewriting code all the time. And it makes it easier to manage field access for different groups of users, which is also important for scalability.
LookML view extends
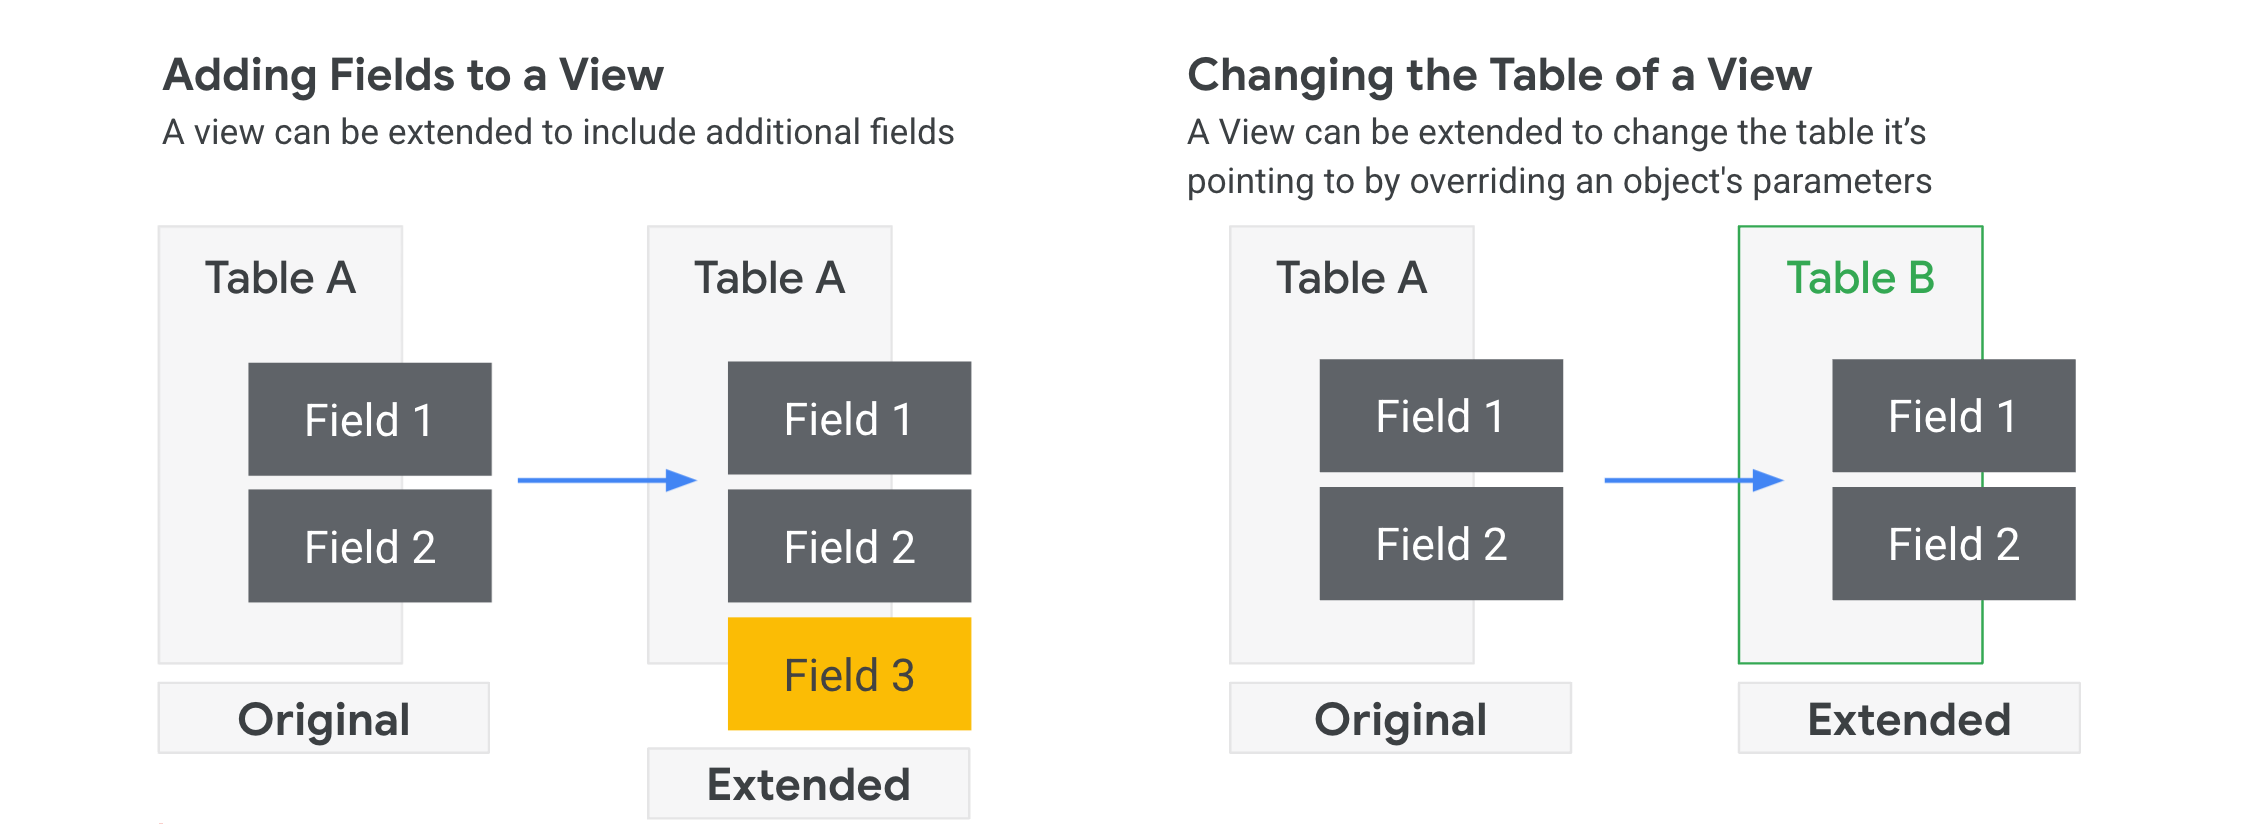
As mentioned earlier, one object you can extend is a LookML view. This is commonly done to add more fields and/or update logic to the existing fields. Another use case is to change the database table specified in the sql_table_name parameter.
LookML Explore extends
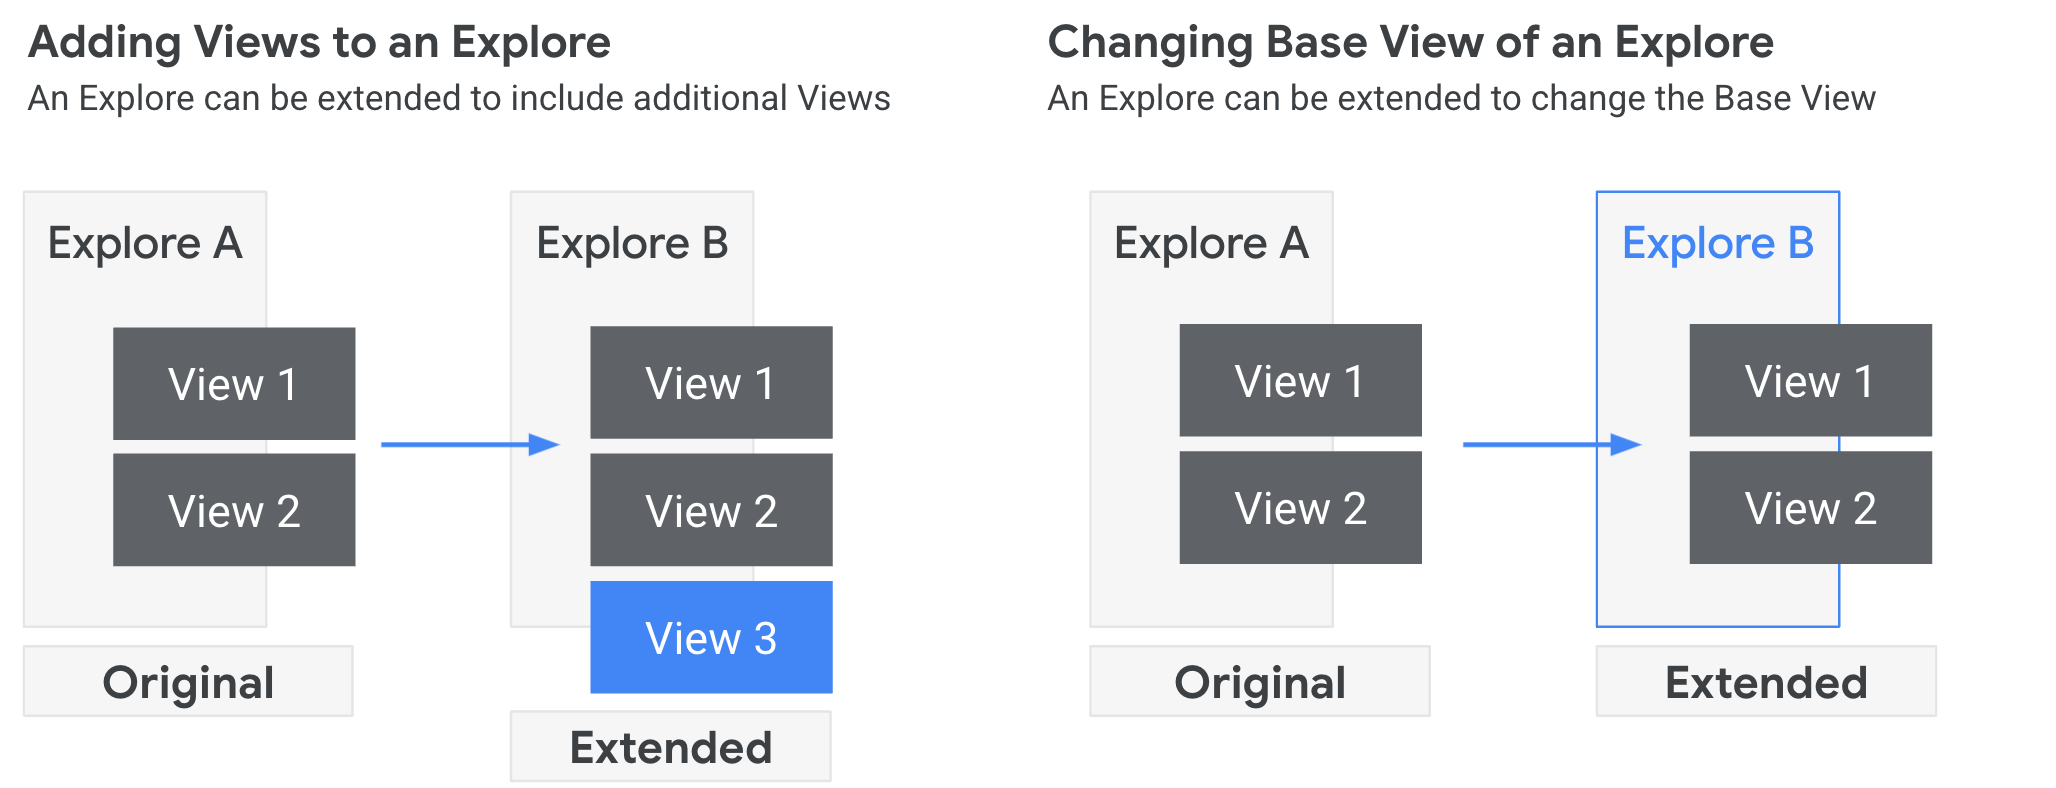
Another object you can extend is Explores. You may have multiple tables that must always be joined together, especially in a more normalized database architecture. To avoid rewriting the same joins repeatedly, you can make a “base” Explore that already joins them together and then extend it to create additional Explores that need to join in more views. Or you may need the same set of joined views, but with the new Explore starting from a different base view.
The four steps involved in Extend execution
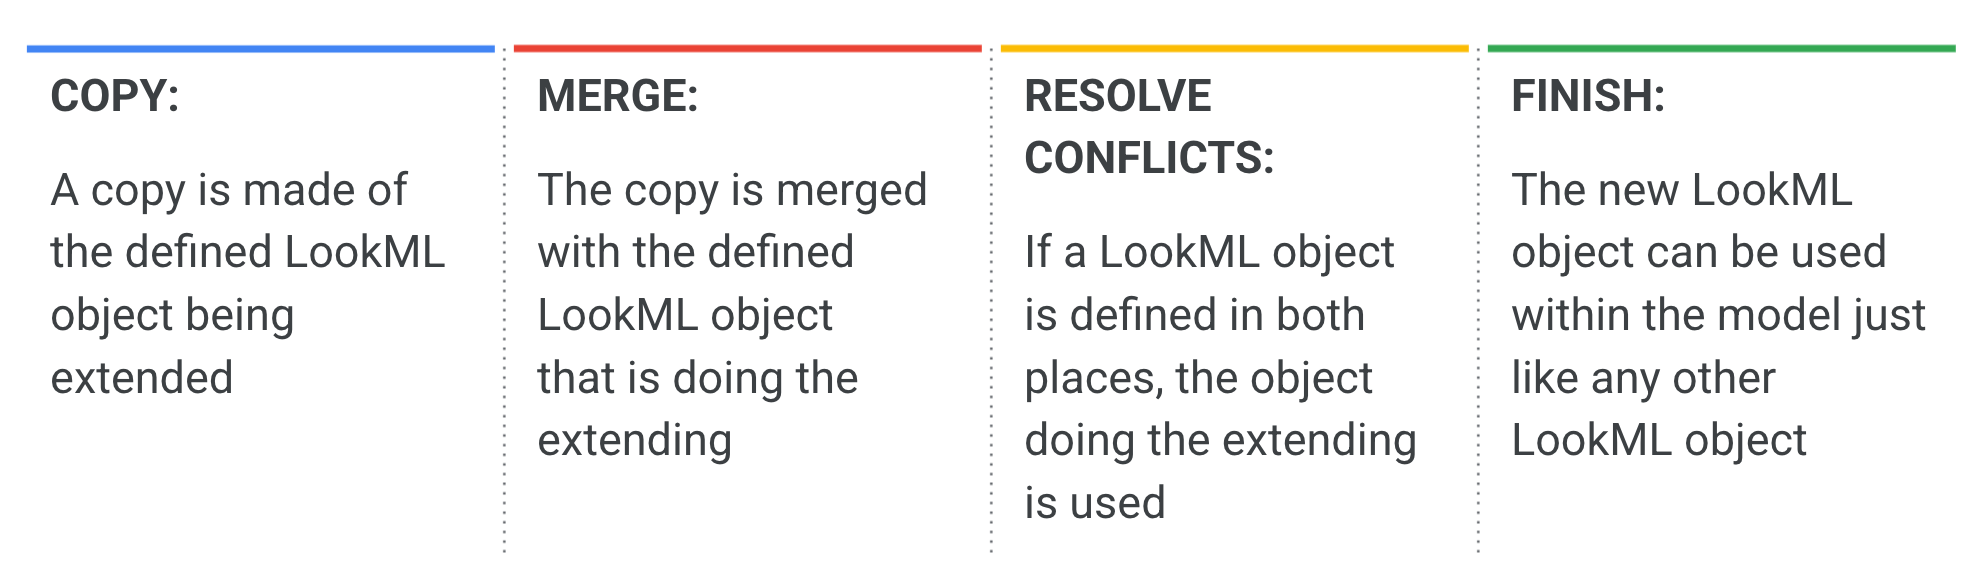
"Behind the scenes" with an Explore:
- Looker makes a copy of the LookML object being extended.
- The copy, or extending object, is merged with the new or modified definitions.
- If any conflicts are detected (which happens if you modified definitions), the extending object controls.
- The extending object can be used in your LookML model just like any other object.
Objectives
In this lab, you learn how to:
- Describe how extends allow you to modularize and easily reuse LookML code.
- Extend a view by integrating columns defined in another view.
- Extend an Explore by integrating joins defined in another Explore.
Setup
Before you click the Start Lab button
Read these instructions. Labs are timed and you cannot pause them. The timer, which starts when you click Start Lab, shows how long Google Cloud resources will be made available to you.
This hands-on lab lets you do the lab activities yourself in a real cloud environment, not in a simulation or demo environment. It does so by giving you new, temporary credentials that you use to sign in and access Google Cloud for the duration of the lab.
To complete this lab, you need:
- Access to a standard internet browser (Chrome browser recommended).
- Time to complete the lab---remember, once you start, you cannot pause a lab.
How to start your lab and sign in to Looker
-
When ready, click
.
A new panel will appear with the temporary credentials that you must use for this lab.
If you need to pay for the lab, a pop-up will open for you to select your payment method.
-
Note your lab credentials in the left pane. You will use them to sign in to the Looker instance for this lab.
Note: If you use other credentials, you will get errors or incur charges. -
Click Open Looker.
-
Enter the provided Username and Password in the Email and Password fields.
Important: You must use the credentials from the Connection Details panel on this page. Do not use your Google Cloud Skills Boost credentials. If you have your own Looker account, do not use it for this lab. -
Click Log In.
After a successful login, you will see the Looker instance for this lab.
Task 1. Extend a view to add columns from another view
Instead of copying/pasting the same code across multiple views, you can create one centralized view that contains definitions for commonly used dimensions and measures. Then, using extends, you can integrate those dimensions and measures into multiple views. You can simply use specific parameters for extends to identify the view that you want Looker to copy from.
From a business perspective, this is very practical because you can have one centralized code base that is reused by multiple teams that can extend the core code and customize it for their own needs. The benefit of abstracting the location dimensions is that you can update them once, and the update is then propagated to any of the views that are extended from that location view.
In this task, you create a new view that contains location dimensions (e.g., city, country) that can be reused by extending other views such as the users and events views.
Create a new view
-
Click the toggle button to enter Development mode.
-
On the Develop tab, select the qwiklabs-ecommerce LookML project.
-
Click (+) next to File Browser, and select Create View.
-
Name the view
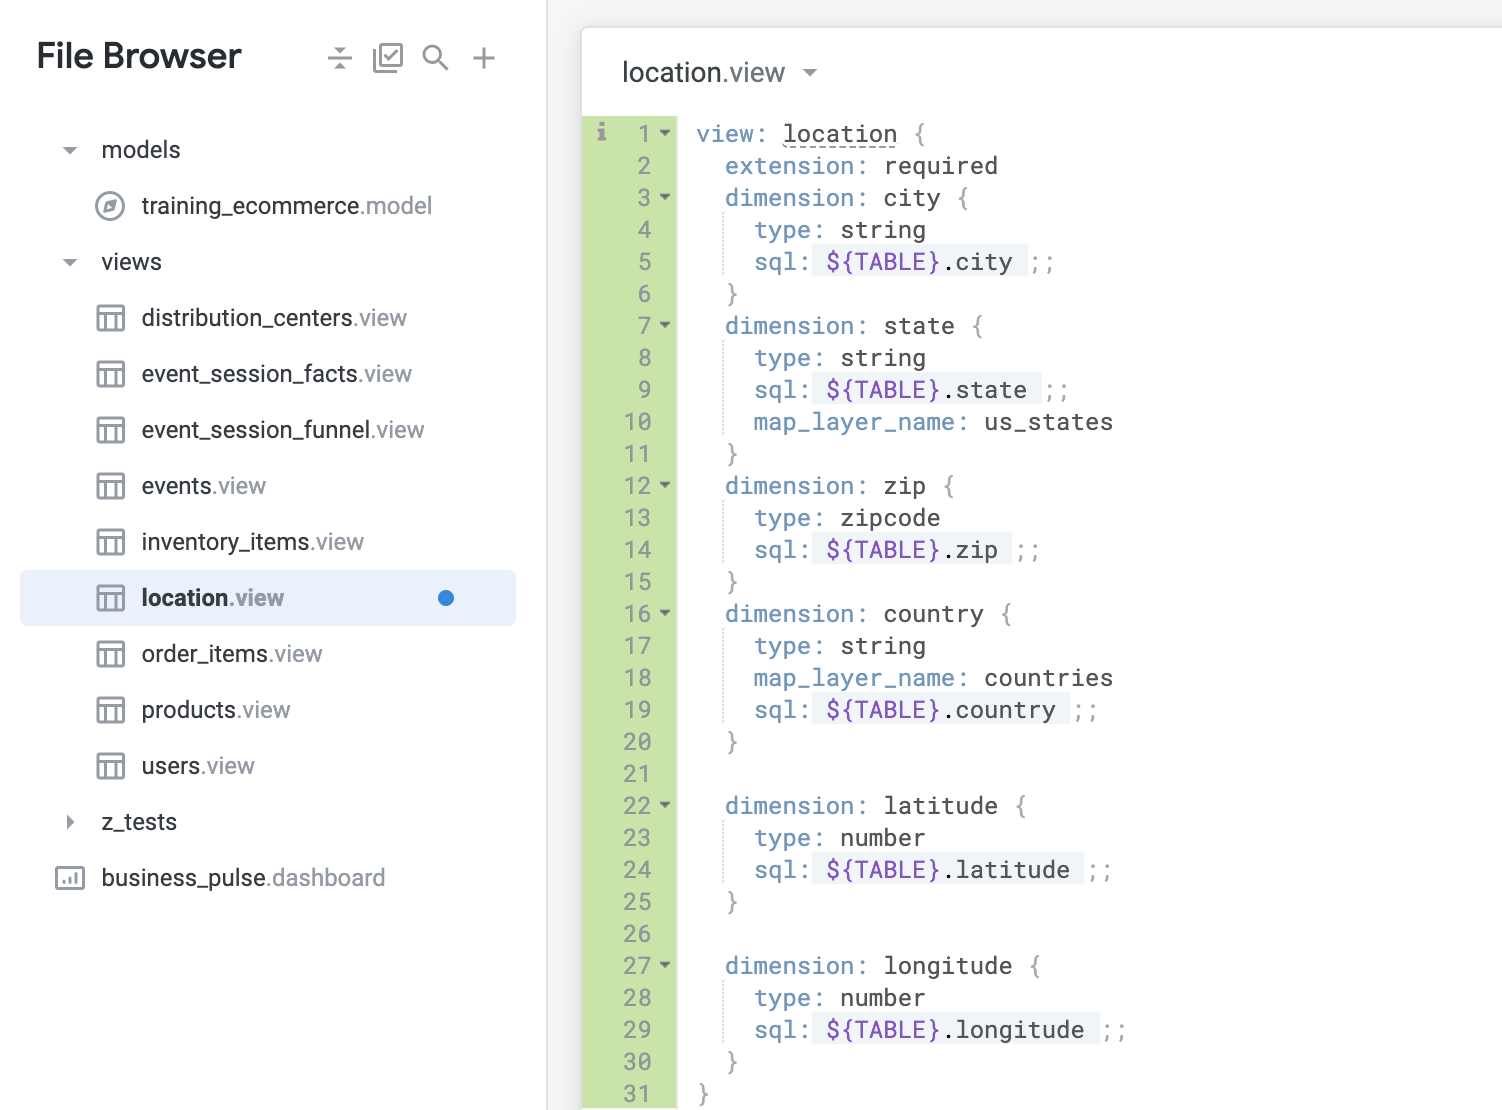
location, drag it under the views folder, and add the following code to it:
This view file contains the definitions for dimensions that you want to reuse in other views: city, country, latitude, longitude, state, and zip.
Notice line 2 (extension: required), which means that this view cannot be joined to other views, and thus will not be visible to users.
To use this view, you must integrate it into another view using the extends parameter, which you do in the next section.
Also notice that, unlike with other views, you do not need to include the parameter sql_table_name in the view definition to identify which table to use for the data. Instead, this view will use the table specified in the view that will be extended in the next section.
- Click Save Changes, and then click Validate LookML.
No LookML errors were found, and your file should resemble the following:
Add extends
-
Open the users.view file.
-
On a new line at the top of the file (line 1), add the following code, which indicates that the users view is being extended using the location view:
- On line 3 above
sql_table_name, add the following code:
sql_table_name parameter identifies which table to use as the data source for both the existing objects in the file and the objects that are added from geography via the extend.
-
Remove the existing dimension definitions for:
city,country,latitude,longitude,state, andzip(this is the existing order in the file). Instead of being explicitly defined in the users.view file, these dimensions are integrated via the extend from location.view. -
Click Save Changes, and then click Validate LookML.
-
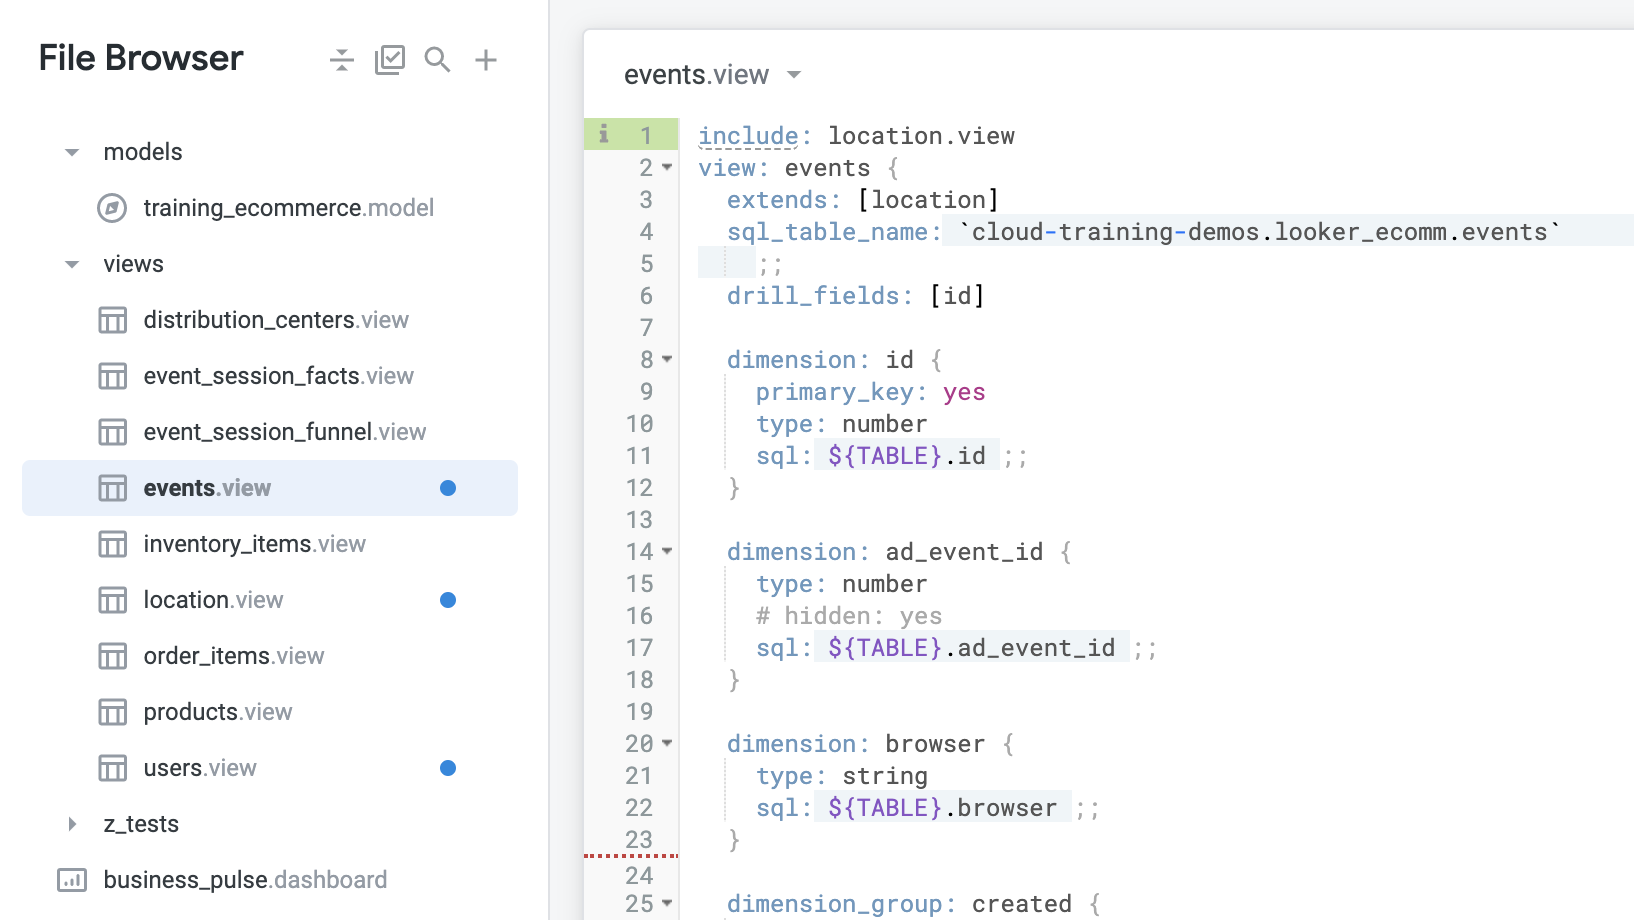
Open the event.view file.
-
On a new line at the top of the file (line 1), add the following code:
- On line 3 above
sql_table_name, add the following code:
-
As you did with the users view, remove the existing dimension definitions for:
city,country,latitude,longitude,state, andzip. -
Click Save Changes, and then click Validate LookML.
Your file should now resemble the following:
Test the extended view for Users and Events in the Order Items Explore
-
Navigate to the Explore page for Order Items.
-
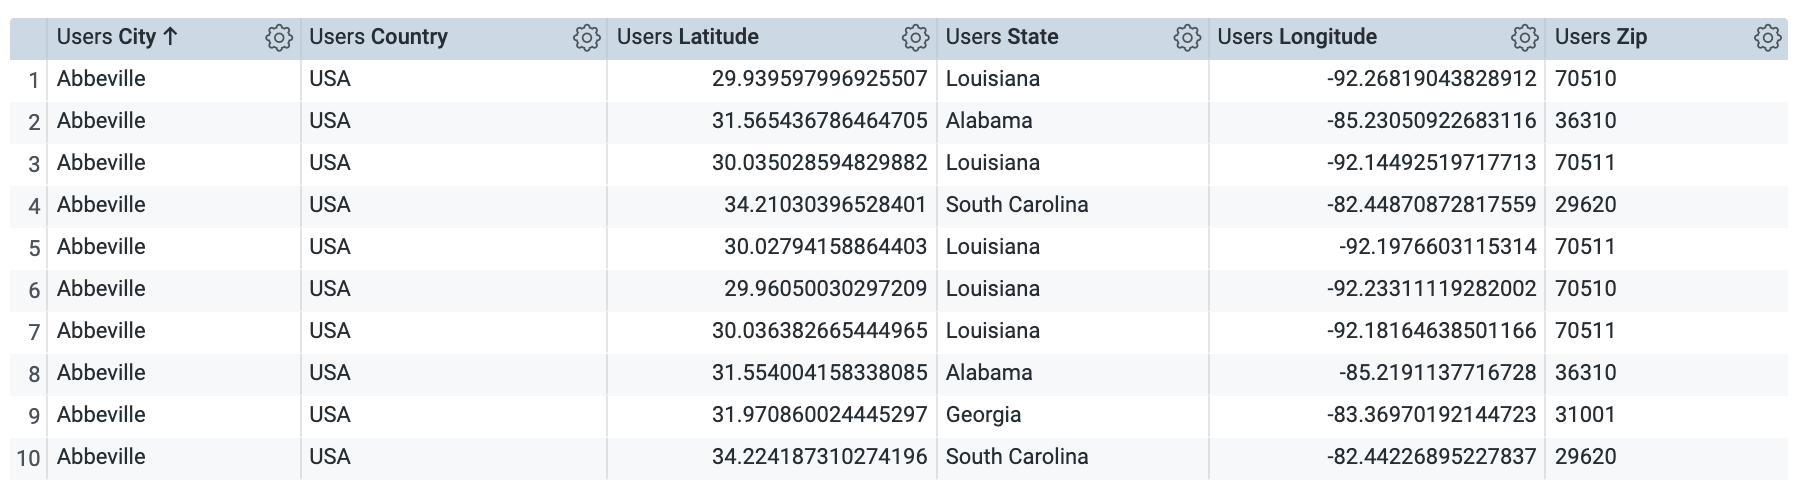
From the Users view, select the City, Country, Latitude, Longitude, State, and Zip dimensions.
-
Click Run.
Even though you removed the definitions for these dimensions (city, country, latitude, longitude, state and zip) from the users.view file, you can see and use them because they were added to the users.view file using an extend from the location.view file!
-
Navigate to the Events Explore.
-
From the Events view, select the City, Country, Latitude, Longitude, State, and Zip dimensions.
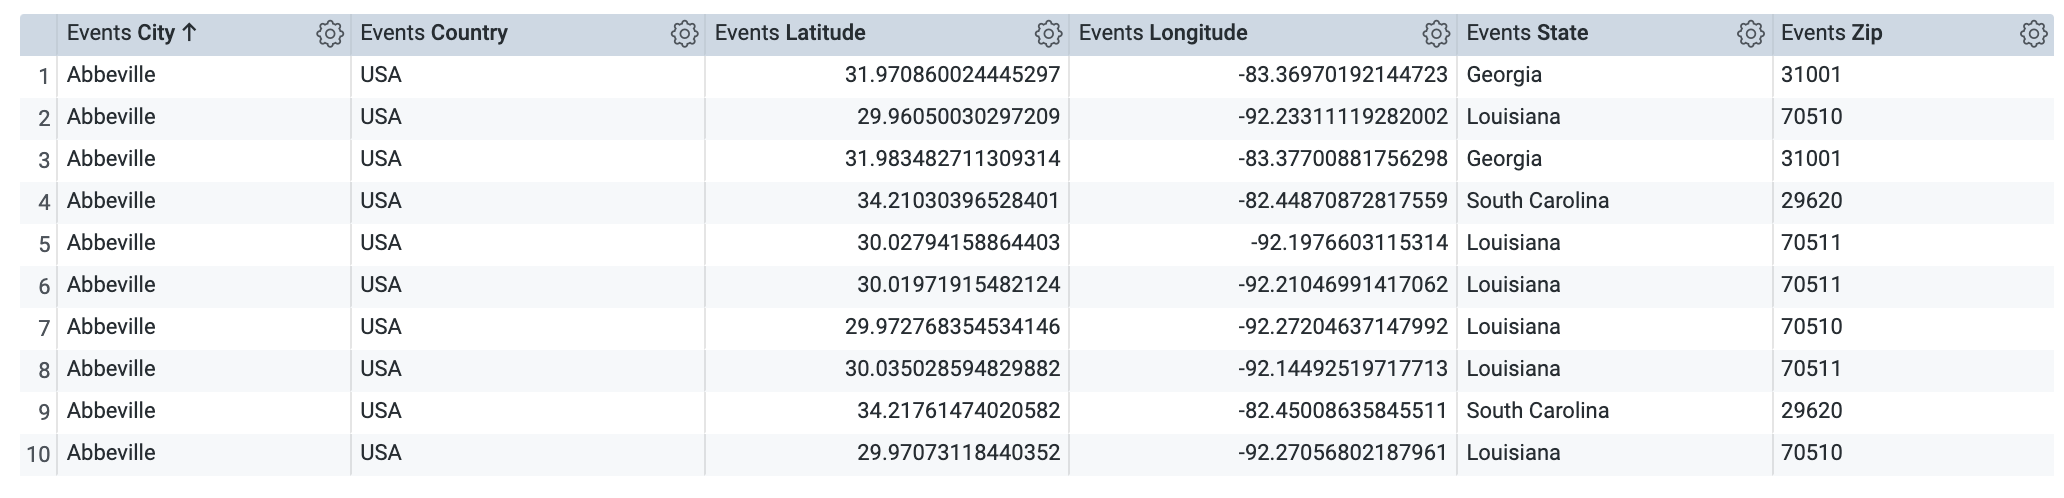
Again, even though you removed the definitions for these dimensions from the events.view file, you can see and use them because they were added to the events.view file using an extend.
- Navigate back to the events.view file in the Looker IDE.
Commit changes and deploy to production
-
Click Validate LookML and then click Commit Changes & Push.
-
Add a commit message and click Commit.
-
Lastly, click Deploy to Production.
Click Check my progress to verify the objective.
Task 2. Extend an Explore to add joins from another Explore
Instead of copying/pasting the same joins across multiple Explores in a model file, you can create one base Explore that contains the most commonly used joins across your Explores. Then you can use extends to reuse that base Explore to define and customize other Explores defined in the model file.
A common business use case for this is creating one core Explore that can be used to create other Explores for specific user groups/teams within your organization.
In this section, you create one base Explore that contains joins for all views that are needed by multiple business teams, and then use extends to reuse and customize that base Explore for multiple teams.
-
Navigate to the training_ecommerce.model file.
-
After the
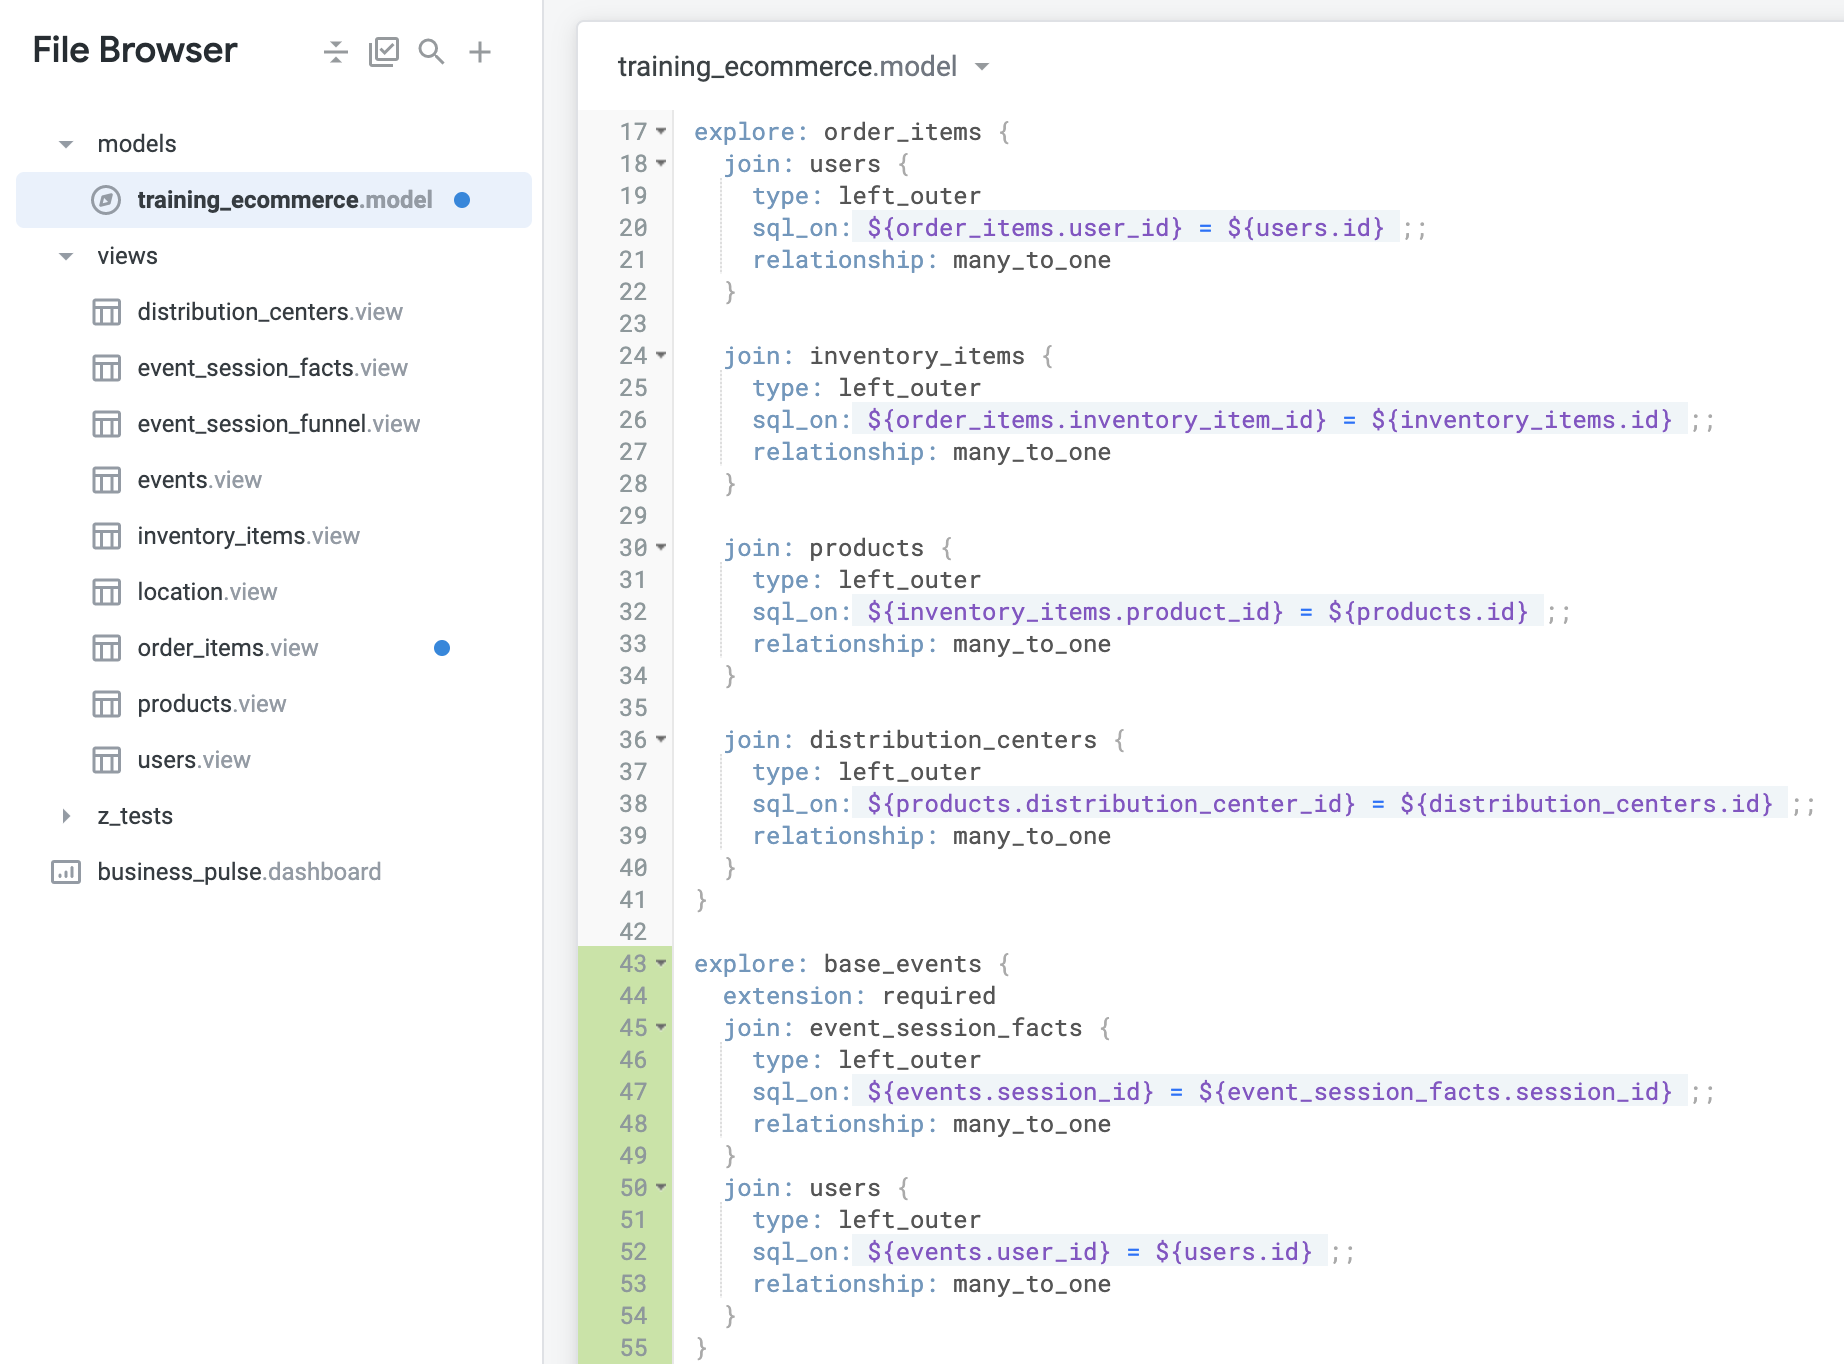
order_itemsExplore definition (around line 43), create a new base Explore calledbase_events, using the following code:
Notice again the line for extension: required, which means that this Explore is not visible to users. Your file should resemble the following:
Next, you'll modify the existing definition for the events Explore to extend it with the views from base_events.
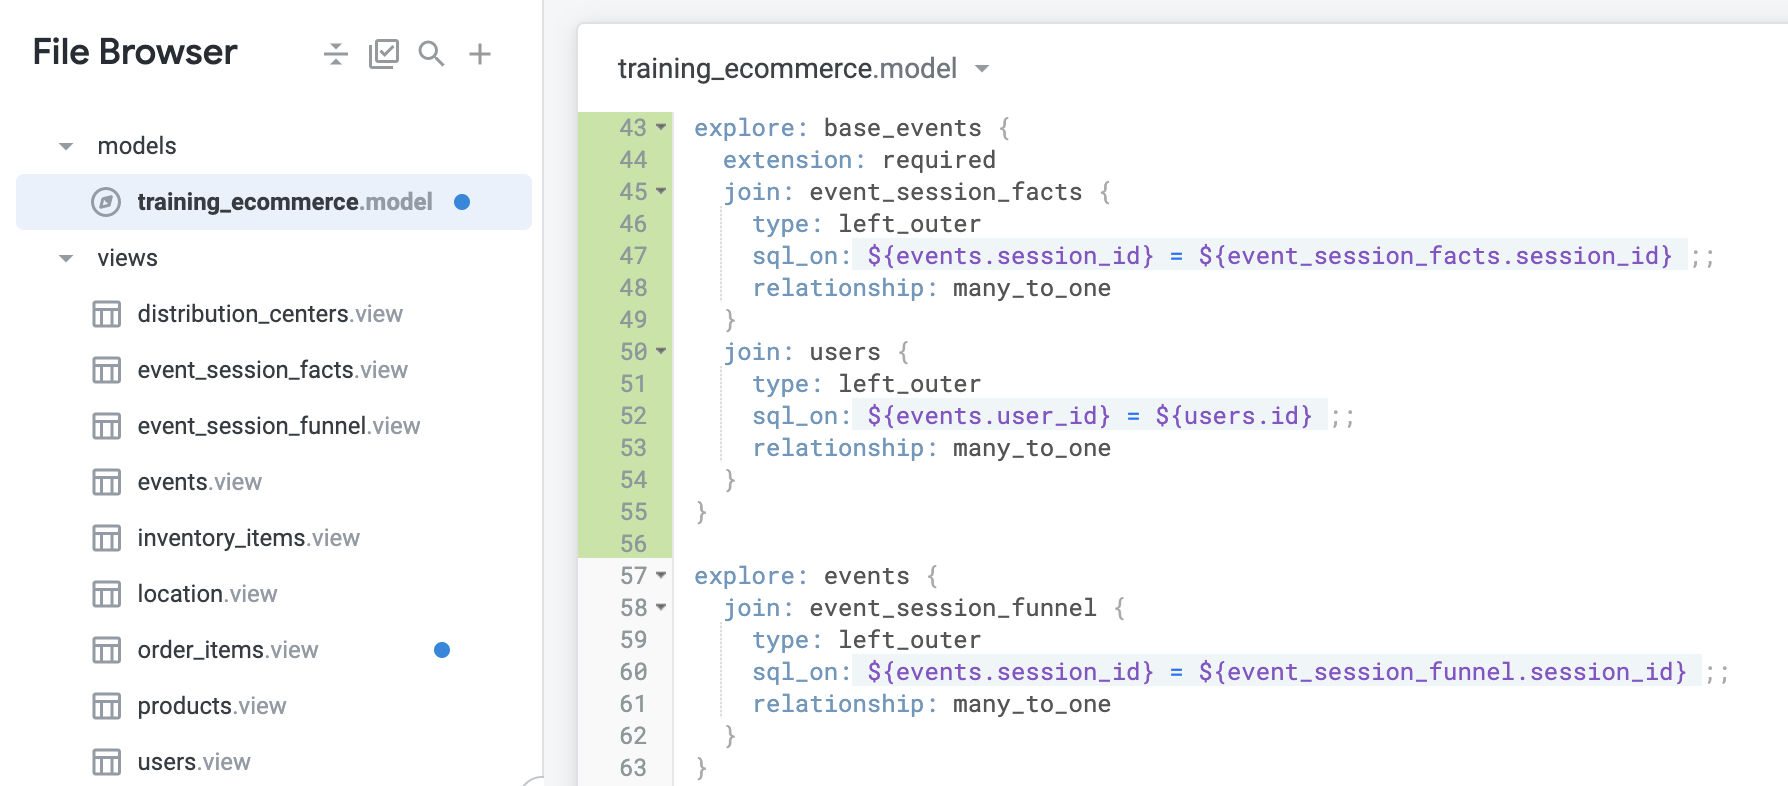
- From the events Explore, remove the existing joins for
event_session_factsandusers.
These joined views are integrated from the base_events Explore via code added in the next step. Notice that the join definition for event_session_funnel remains to customize this Explore for a particular set of users. Your file should resemble the following:
- Under the first line of the events Explore definition, add the following code:
Your final definition for the events Explore should resemble the following:
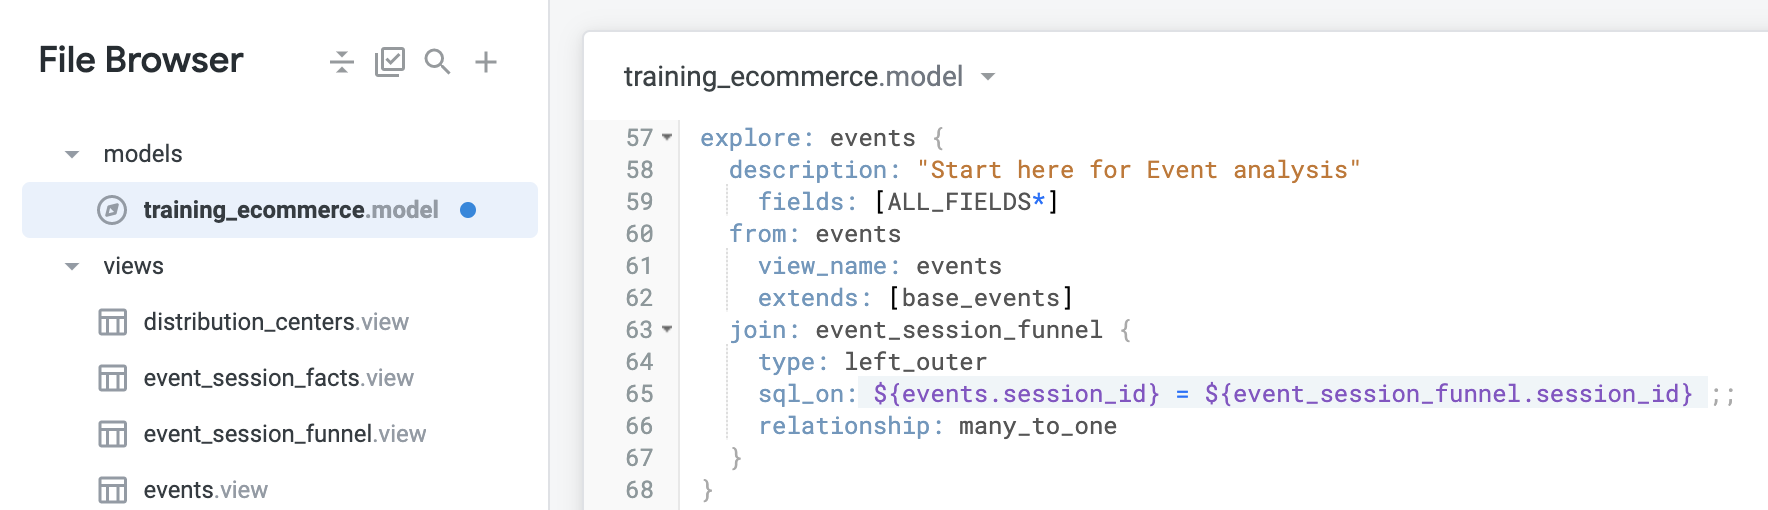
from and view_name are both pointing to the events view, so why include both? The from makes sure that you are using the original view called events (not an alias name for the view and not an extended one), and the view_name is the view file name, which could be an alias, etc.
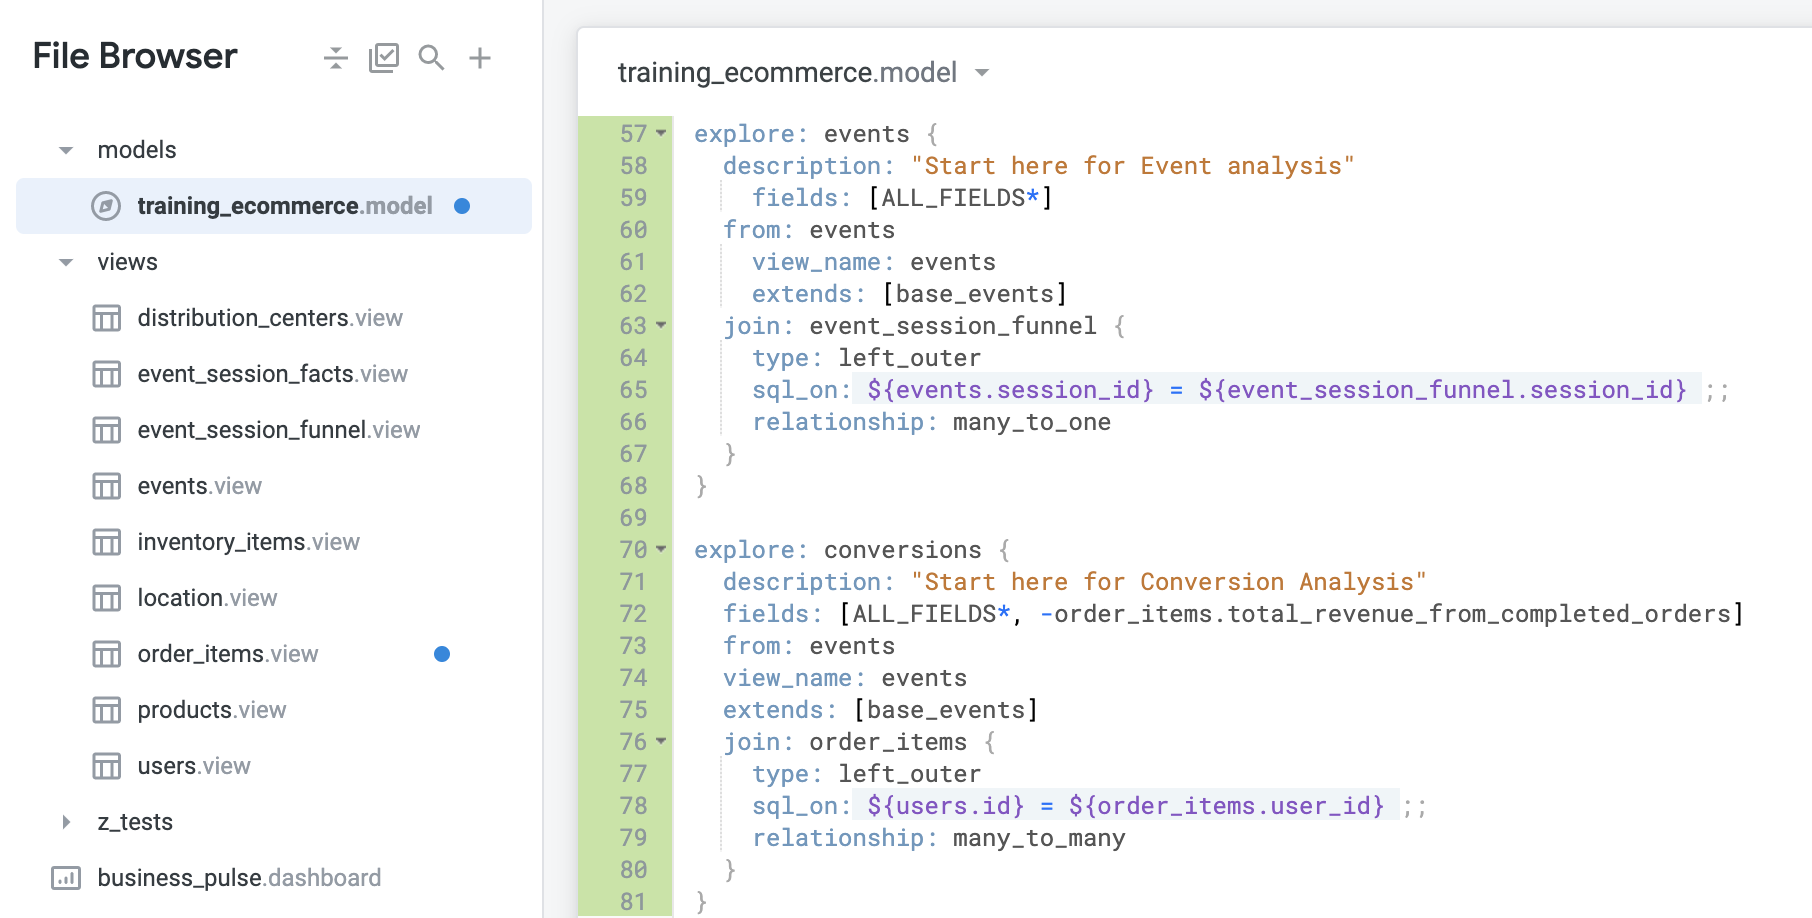
- Below the modified events Explore definition, to add a new Explore called conversions, use the following code:
Lines 2-6 here provide a description for the Explore info button, identify which fields from which view file to include (all fields except the total_revenue_from_completed_orders measure in the order items view), and specify which Explore is being used to extend this Explore (i.e., the same base_events Explore that was used to extend the events Explore).
- Click Save Changes, and then click Validate LookML.
No LookML errors were found, and your file should resemble the following:
Now it's time to test your new Explores. Go to each Explore (Events and Conversions), and notice which views are included. Because the Explores share a core set of views but are customized with additional views, each one serves a different user audience.
- Navigate to the Events Explore, which contains the views joined in the base Explore (Events, Event Session Facts, Users) plus the Event Session Funnel view.

-
To review the description, hold the pointer over Information (
) next to Events.
-
Navigate to the Conversions Explore, which contains the views joined in the base Explore (Events, Event Session Facts, Users) plus the Order Items view.
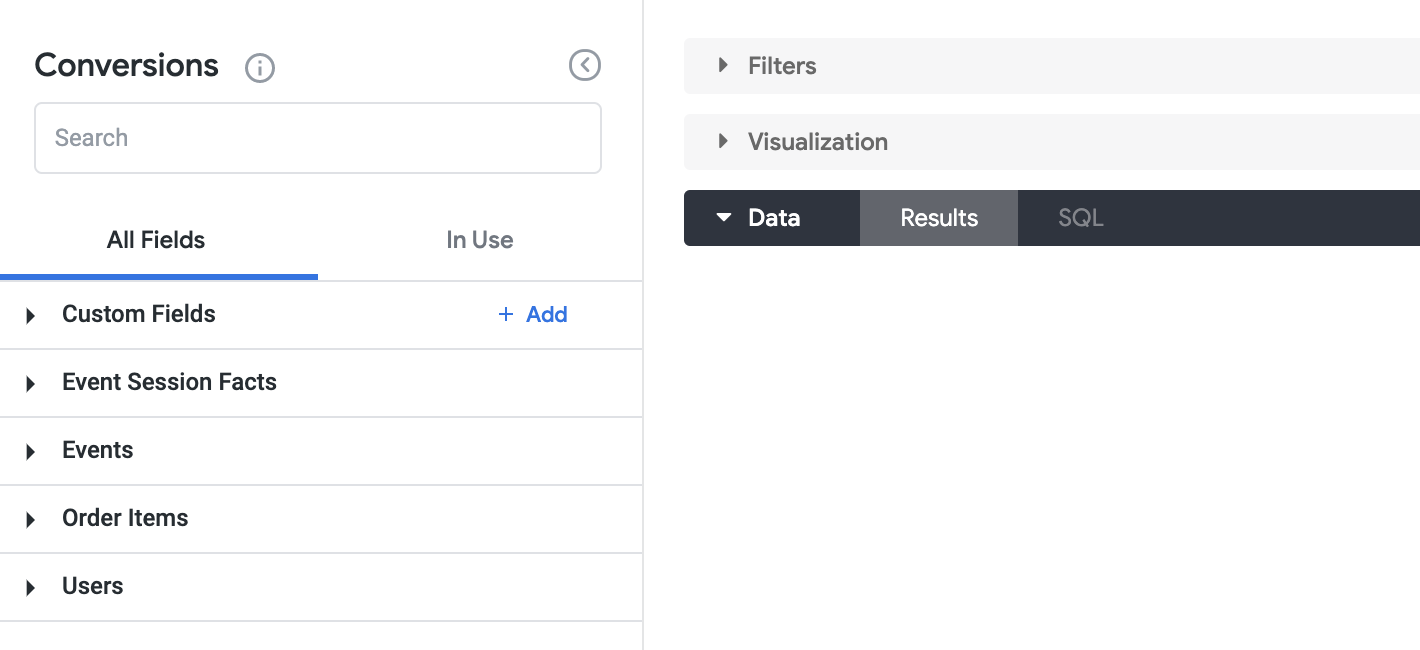
-
To review the description, hold the pointer over Information (
-
Review the measures in the Order Items view;
total_revenue_from_completed_ordersis not listed. -
Return to the training_ecommerce.model file in the Looker IDE.
Commit changes and deploy to production
-
Click Validate LookML and then click Commit Changes & Push.
-
Add a commit message and click Commit.
-
Lastly, click Deploy to Production.
Click Check my progress to verify the objective.
Congratulations!
In this lab, you created a new view containing location dimensions by extending the users and events view, created a base Explore that contained joins for multiple views, and used extends to reuse and customize the base Explore for multiple teams and users.
Finish your quest
This self-paced lab is part of the Advanced LookML Concepts in Looker and the Manage Data Models in Looker skill badge quest. A quest is a series of related labs that form a learning path. Completing a quest earns you a badge to recognize your achievement. You can make your badge (or badges) public and link to them in your online resume or social media account. Enroll in a quest and get immediate completion credit if you've taken this lab. See the Google Cloud Skills Boost catalog to see all available quests.
Next steps / learn more
Google Cloud training and certification
...helps you make the most of Google Cloud technologies. Our classes include technical skills and best practices to help you get up to speed quickly and continue your learning journey. We offer fundamental to advanced level training, with on-demand, live, and virtual options to suit your busy schedule. Certifications help you validate and prove your skill and expertise in Google Cloud technologies.
Manual Last Updated September 06, 2023
Lab Last Tested September 06, 2023
Copyright 2024 Google LLC All rights reserved. Google and the Google logo are trademarks of Google LLC. All other company and product names may be trademarks of the respective companies with which they are associated.