Checkpoints
Clone the Repository
/ 20
Add cluster to the KubeConfig
/ 20
Deploy the App
/ 20
Test the App
/ 20
Delete App from cluster
/ 20
GKE Autopilot: Qwik Start
GSP957

Overview
Autopilot is a new managed mode of operation for Google Kubernetes Engine (GKE) in which Google creates, sizes, and automatically scales on your behalf the physical infrastructure needed to run your application workloads.
In this lab, you get hands-on practice containerizing an application and deploying it to an Autopilot cluster using Kubernetes configuration and commands.
Simplifying GKE with Autopilot
On GKE your compute infrastructure consists of individual compute instances, called nodes. The set of nodes dedicated to your application is called a cluster. Powering GKE is Kubernetes, an open source cluster management system that is heavily influenced by over fifteen years of Google's experience running production workloads in containers. Kubernetes draws on the same design principles for running popular Google services at global scale to provide:
- Automatic management
- Monitoring and liveness probes for application containers
- Automatic scaling
- Rolling updates
With Autopilot, you reap the benefits of Google's ability to optimize and configure a cluster using best practices for high availability and security, monitor the health of the cluster, and recalculate the cluster capacity needed to run your workloads at any given moment.
Autopilot liberates you, the developer, to focus on application development, and not operational maintenance. Because you're running on GKE, you're still using Kubernetes to run the mission-critical mix of stateless and stateful services your application requires.
Setup and requirements
Before you click the Start Lab button
Read these instructions. Labs are timed and you cannot pause them. The timer, which starts when you click Start Lab, shows how long Google Cloud resources will be made available to you.
This hands-on lab lets you do the lab activities yourself in a real cloud environment, not in a simulation or demo environment. It does so by giving you new, temporary credentials that you use to sign in and access Google Cloud for the duration of the lab.
To complete this lab, you need:
- Access to a standard internet browser (Chrome browser recommended).
- Time to complete the lab---remember, once you start, you cannot pause a lab.
Task 1. Access Cloud Code
A Cloud Code integrated development environment (IDE) has already been set up to easily deploy workloads to a GKE cluster. This lab is using Cloud Code to reduce context switching - you can view information about your cluster resources without running any CLI commands.
-
Copy the
IDEURL from the Lab details panel. -
Paste it into a new browser window:
Task 2. Clone repo
Retrieve the source code under version control to begin the lab.
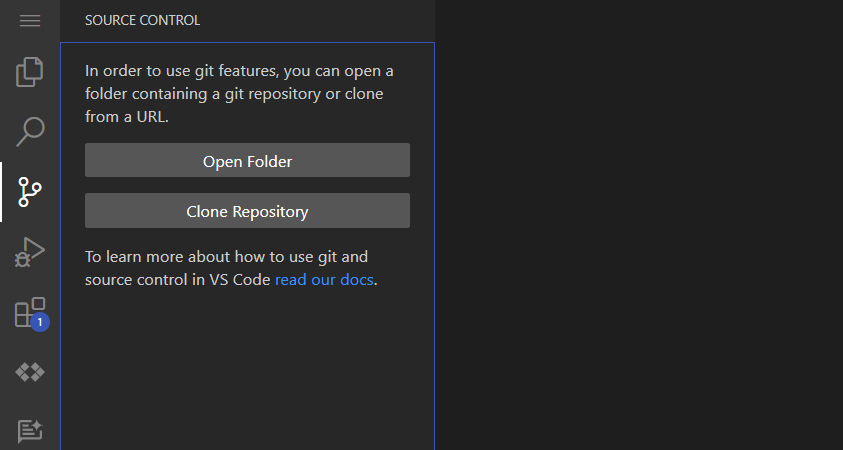
- In your Cloud Code environment, select the Source Control button from the sidebar.
-
Click the Clone Repository button.
-
Paste the following GitHub repository into the prompted search bar:
-
Click Clone from URL in the dropdown list under the search bar.
-
Click OK to confirm the location.
- When prompted to open the folder of the repo, click Open.
Click Check my progress to verify the objective.
Task 3. Add your cluster to the KubeConfig
A GKE Autopilot cluster has been preprovisioned within the lab. In this section, you will update the Cloud Code's KubeConfig to point to the cluster. Once the update is complete, you can then commence the deployment of the demo application.
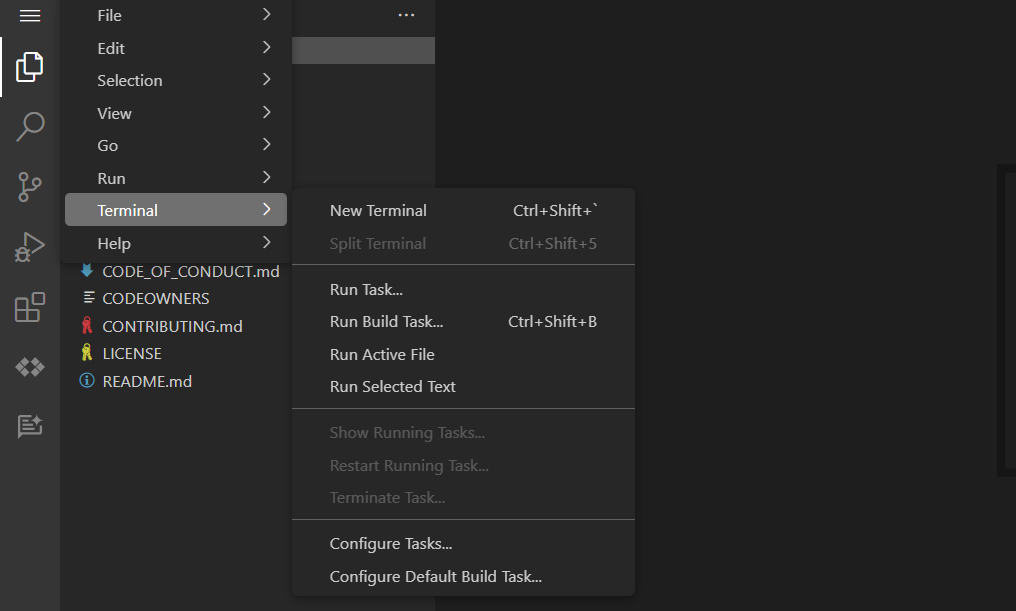
- Open a new terminal by going to the Navigation Menu and selecting Terminal > New Terminal.
Existing versions of kubectl and custom Kubernetes clients contain provider-specific code to manage authentication between the client and Google Kubernetes Engine. Starting with v1.26, this code will no longer be included as part of the OSS kubectl. GKE users will need to download and use a separate authentication plugin to generate GKE-specific tokens. This new binary, gke-gcloud-auth-plugin, uses the Kubernetes Client-go Credential Plugin mechanism to extend kubectl’s authentication to support GKE. For more information, you can check out the following documentation.
As part of the setup of the lab, the plugin has already been installed on this instance for you. To have kubectl use the new binary plugin for authentication instead of using the default provider-specific code, use the following steps.
- Set
export USE_GKE_GCLOUD_AUTH_PLUGIN=Truein~/.bashrc:
- Run the following command:
- Run the following command to force the config for this cluster to be updated to the Client-go Credential Plugin configuration.
On success, you should see this message pop up:
Click Check my progress to verify the objective.
Task 4. Build and deploy the app
Before you can deploy an application, you need a container for that application.
In this environment, you will utilize a skaffold manifest which builds the web and vote containers to google container registry and then deploys your application's Kubernetes manifests which use these container images.
-
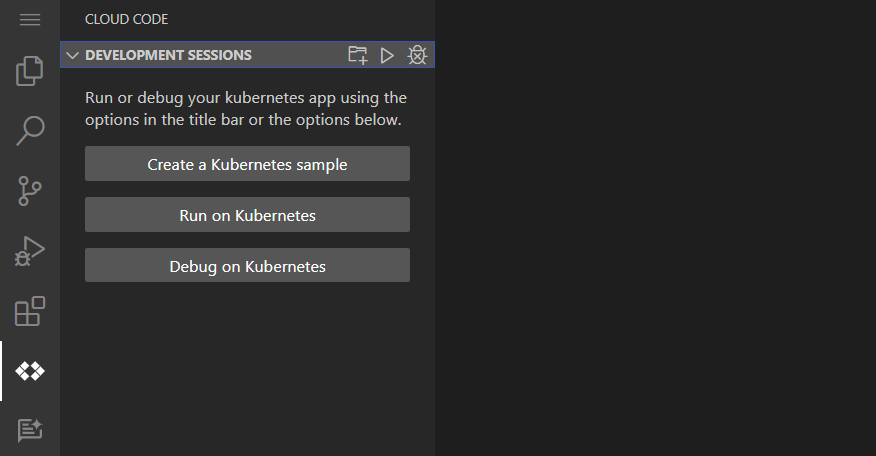
Select the Cloud Code button from the left side panel.
-
Click the Development Sessions tab from the list of options.
-
Click the Run on Kubernetes button. You may need to scroll down to see this button.
-
From the dropdown that appears, select v2/skaffold.yaml.
-
Click Yes to use the current context.
-
Type
qwiklabsand select your default image registry which should be your Project ID.

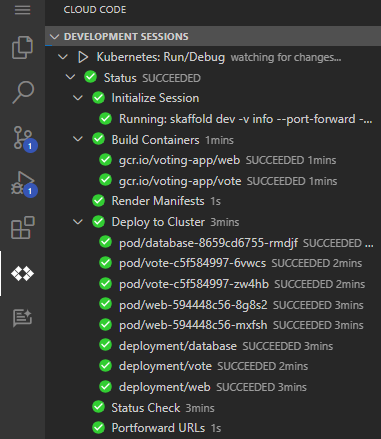
- Watch the progress in the Development Sessions of your Cloud Code - Kubernetes:
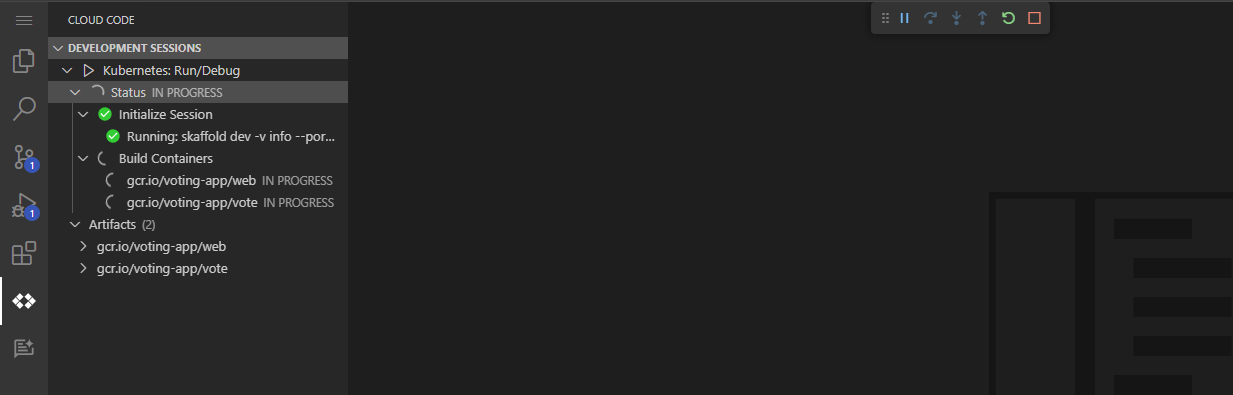
- Wait for the build and deployment process to complete.
-
While waiting, click on Status to see the logs of the deployment.
-
You can also click on each individual resource to see isolated logs and output for a particular pod, deployment, or service.
-
Once you see the green check mark for Status SUCCEEDED, you can move on:
skaffold run --default-repo=gcr.io/$PROJECT_ID/voting-app --tail command.
Be sure to set your Project ID environment variable by running
export PROJECT_ID=$(gcloud config get-value project) before executing the command.
The Stream Application Logs will continue to stream logs from activity in the voting app. This allows for an alternative, more immediate means of monitoring the application within the IDE.
Click Check my progress to verify the objective.
Task 5. Test the app
Finally, test that the application is working as specified.
-
Select the Cloud Code button from the side panel.
-
In the Development Sessions tab, scroll down until you locate Deployed Resources.
-
Click on Deployed Resources to unfold it:
-
Click on Services.
-
Click on default/web-external.
-
Click on External IPs:
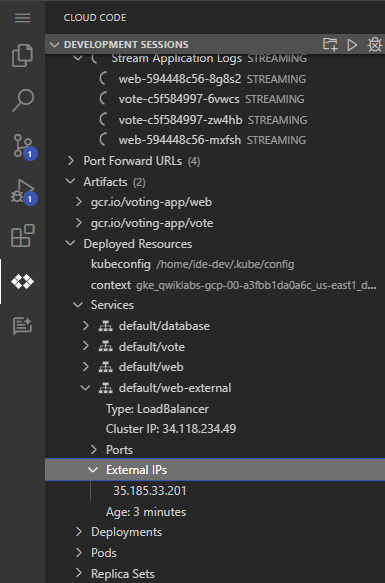
-
Open a new tab in your browser, enter the value of External IPs and press Enter.
-
You should see the frontend for the voting app:

-
Vote for either TABS or SPACES.
-
Add /results to the end of the voting app URL to view the voting results so far:

Click Check my progress to verify the objective.
Great job! You now have your voting application deployed to a cluster. GKE Autopilot has taken care of the management of the Kubernetes infrastructure.
Task 6. Clean up
- Terminate your application by pressing the red square Stop button in your IDE window:
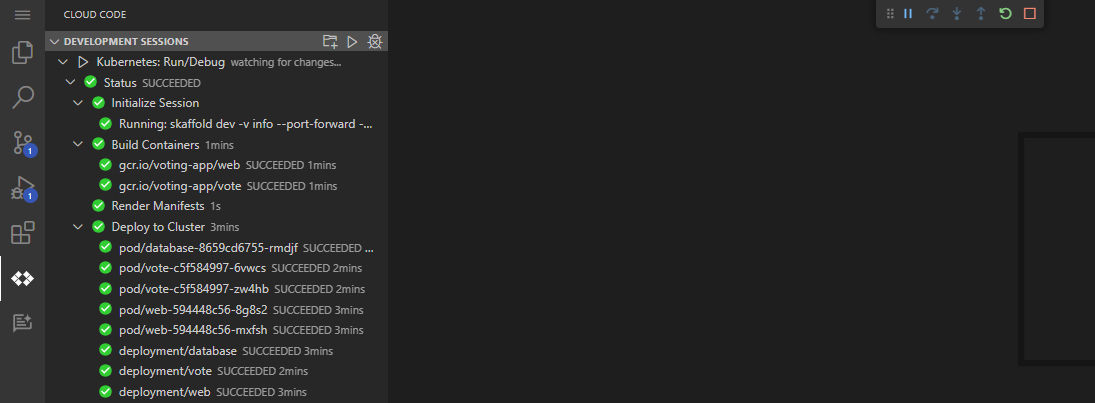
- Click Yes to confirm that resources should be cleaned up on termination.
This way, Cloud Code automatically cleans up your application resources after termination.
Click Check my progress to verify the objective.
Congratulations!
You have just deployed a containerized application to Kubernetes Engine! In this lab you have performed the following tasks:
- Cloned an external public repository
- Update the KubeConfig to point to our GKE Autopilot cluster
- Used Skaffold to create a remote container image without needing to install software
- Deployed a container to the GKE Autopilot cluster
- Tested the application using HTTP
- Cleaned up existing resources
Next steps / Learn more
This lab is part of a series of labs called Qwik Starts. These labs are designed to give you some experience with the many features available on Google Cloud. Search for "Qwik Starts" in the Cloud Skills Boost catalog to find the next lab you'd like to take!
Google Cloud training and certification
...helps you make the most of Google Cloud technologies. Our classes include technical skills and best practices to help you get up to speed quickly and continue your learning journey. We offer fundamental to advanced level training, with on-demand, live, and virtual options to suit your busy schedule. Certifications help you validate and prove your skill and expertise in Google Cloud technologies.
Manual Last Updated February 19, 2024
Lab Last Tested February 19, 2024
Copyright 2024 Google LLC All rights reserved. Google and the Google logo are trademarks of Google LLC. All other company and product names may be trademarks of the respective companies with which they are associated.