Checkpoint
Install Actifio connector
/ 20
Create SLA Templates & Profiles
/ 20
Back up ACTIFIO-MSSQL database server
/ 20
Protect “ACTIFIO-MSSQL” SQL Server
/ 20
Trigger On-Demand Backup
/ 10
Recovering "AdventureWorks2017" Database from a backup image
/ 10
Protect and Recover Microsoft SQL Server with Actifio
- GSP945
- Overview
- Setup
- Task 1. Connecting to Microsoft SQL Server 2017 instance
- Task 2. Installing Actifio connector
- Task 3. Logging into Actifio Global Manager (a.k.a AGM)
- Task 4. Defining SLA templates and profiles (a.k.a backup policies)
- Task 5. Backing up the ACTIFIO-MSSQL database server
- Task 6. Triggering on-demand backup
- Task 7. Recovering a database from a backup image
- Congratulations!
GSP945

Overview
Actifio GO for Google Cloud is a SaaS offering which enables powerful enterprise class backup and disaster recovery for Google Cloud residents and on-premises workloads.
Actifio supports the following workloads:
- Compute Engine Instances, On-premises VMware, and Google Cloud VMware Engine VMs
- SAP HANA, Oracle, Microsoft SQL Server, MySQL, Postgres, Db2, MongoDB, and databases running on physical servers
Key Features:
- Application consistent incremental forever capture of databases and VMs which reduces RPO significantly
- Instant recovery on-premises or in the cloud which reduces RTO to minutes
- SLA driven data management
- Google-like search catalog for file / folder restore directly from Persistent Disk or Nearline/Coldline to the VM of choice
- Data encryption in transit and at rest
What you'll do
Below is a diagram of the lab environment:
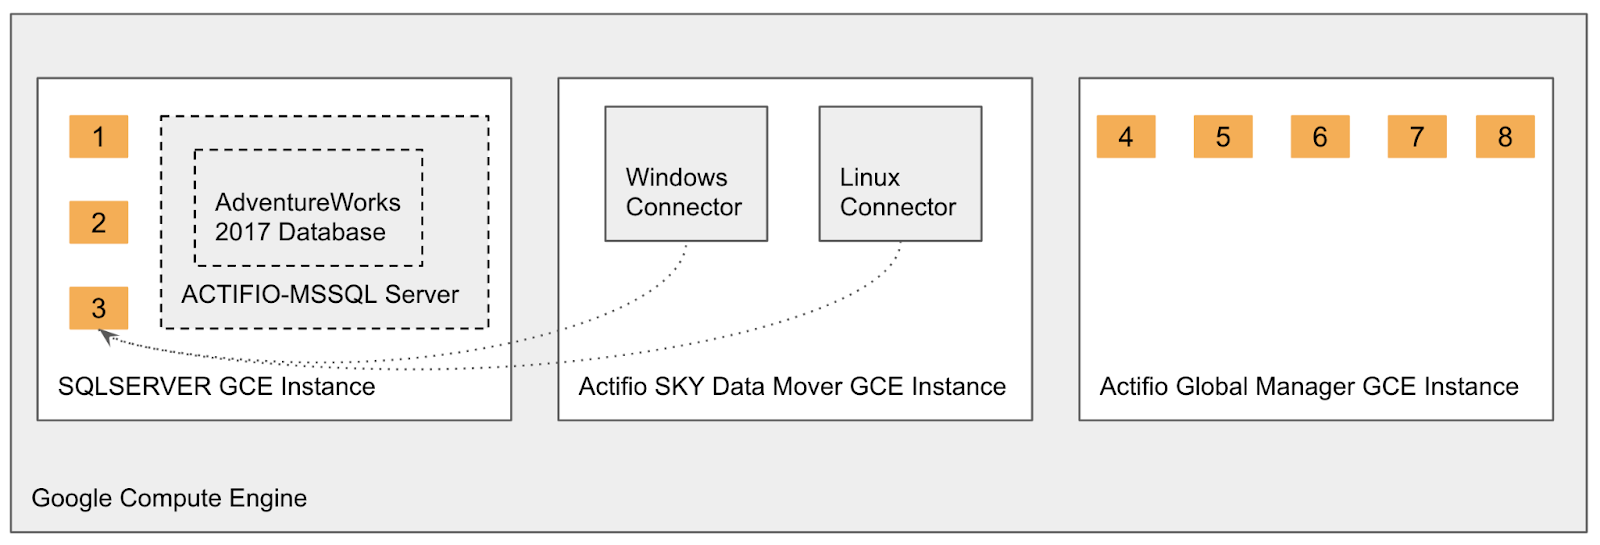
In this lab you will perform the following:
- RDP into an already provisioned
SQLSERVERCompute Engine instance running Microsoft SQL ServerACTIFIO-MSSQL. - Connect to
ACTIFIO-MSSQL2017 server and browse some sample table data. - Download the Actifio connector (agent) from Actifio SKY Data Mover and install it on
SQLSERVERCompute Engine instance. - Define SLA Template & Profile (backup policy).
- Add
SQLSERVERCompute Engine instance as a host on AGM; DiscoverACTIFIO-MSSQLinstance and all the databases on it. - Protect
ACTIFIO-MSSQLserver with backup policy defined in step #4. - Run on-demand backups.
- View backups.
Prerequisites
Some familiarity with Microsoft SQL Server.
Setup
Before you click the Start Lab button
Read these instructions. Labs are timed and you cannot pause them. The timer, which starts when you click Start Lab, shows how long Google Cloud resources will be made available to you.
This hands-on lab lets you do the lab activities yourself in a real cloud environment, not in a simulation or demo environment. It does so by giving you new, temporary credentials that you use to sign in and access Google Cloud for the duration of the lab.
To complete this lab, you need:
- Access to a standard internet browser (Chrome browser recommended).
- Time to complete the lab---remember, once you start, you cannot pause a lab.
How to start your lab and sign in to the Google Cloud console
-
Click the Start Lab button. If you need to pay for the lab, a pop-up opens for you to select your payment method. On the left is the Lab Details panel with the following:
- The Open Google Cloud console button
- Time remaining
- The temporary credentials that you must use for this lab
- Other information, if needed, to step through this lab
-
Click Open Google Cloud console (or right-click and select Open Link in Incognito Window if you are running the Chrome browser).
The lab spins up resources, and then opens another tab that shows the Sign in page.
Tip: Arrange the tabs in separate windows, side-by-side.
Note: If you see the Choose an account dialog, click Use Another Account. -
If necessary, copy the Username below and paste it into the Sign in dialog.
{{{user_0.username | "Username"}}} You can also find the Username in the Lab Details panel.
-
Click Next.
-
Copy the Password below and paste it into the Welcome dialog.
{{{user_0.password | "Password"}}} You can also find the Password in the Lab Details panel.
-
Click Next.
Important: You must use the credentials the lab provides you. Do not use your Google Cloud account credentials. Note: Using your own Google Cloud account for this lab may incur extra charges. -
Click through the subsequent pages:
- Accept the terms and conditions.
- Do not add recovery options or two-factor authentication (because this is a temporary account).
- Do not sign up for free trials.
After a few moments, the Google Cloud console opens in this tab.

Task 1. Connecting to Microsoft SQL Server 2017 instance
When this lab spun up, a Microsoft SQL 2017 server on Windows 2016 Datacenter VM was provisioned for you as part of this lab. You will install the Actifio agent on this VM, discover the SQL server databases, and then protect them.
- In the Cloud Console, expand the Navigation menu (
), and select Compute Engine > VM Instances.
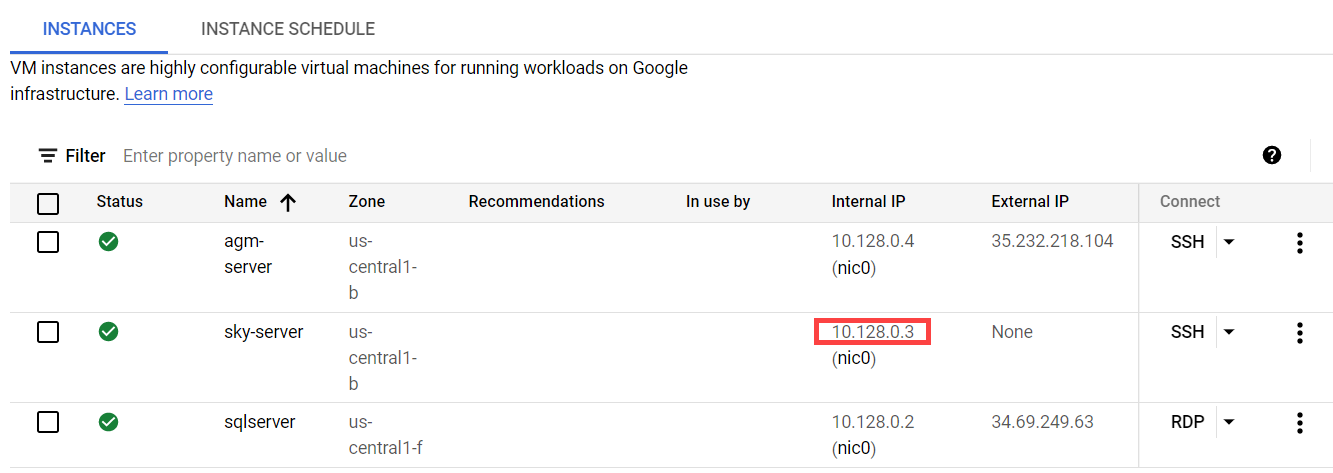
You should see 3 VM instances.
- Click the sqlserver instance RDP.
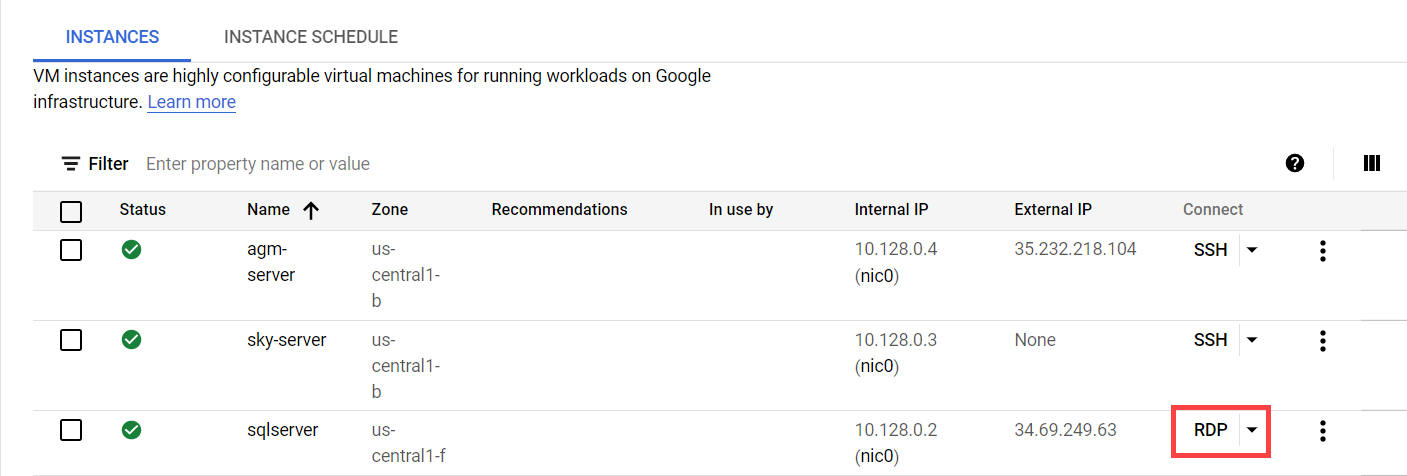
This opens up the Connect using your RDP client pop-up.
- Click the Download the RDP file if you will be using a 3rd-party client link to download the file.
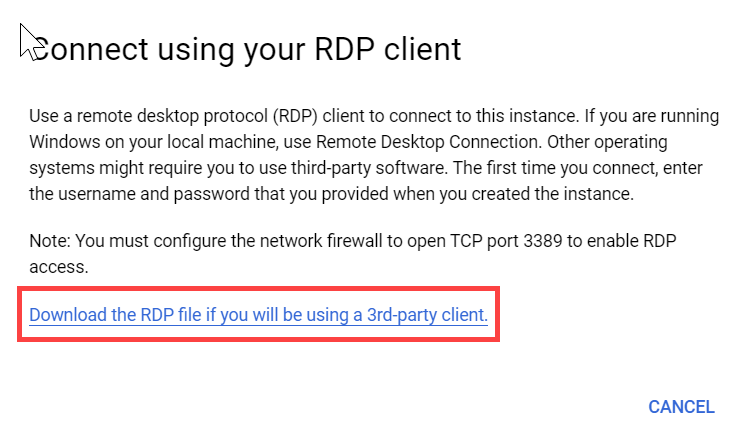
- Once downloaded, click on the downloaded RDP file.
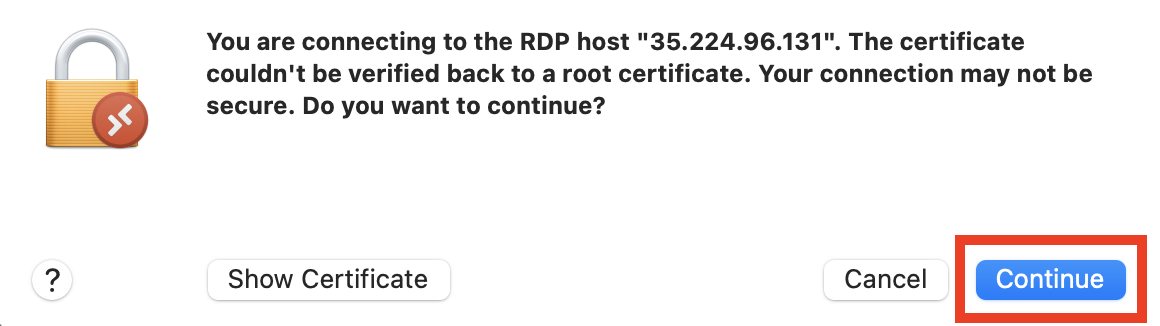
This connects to the
sqlserverinstance using RDP. In case you get any certificate warning, just ignore and click Continue as shown in the below screen.
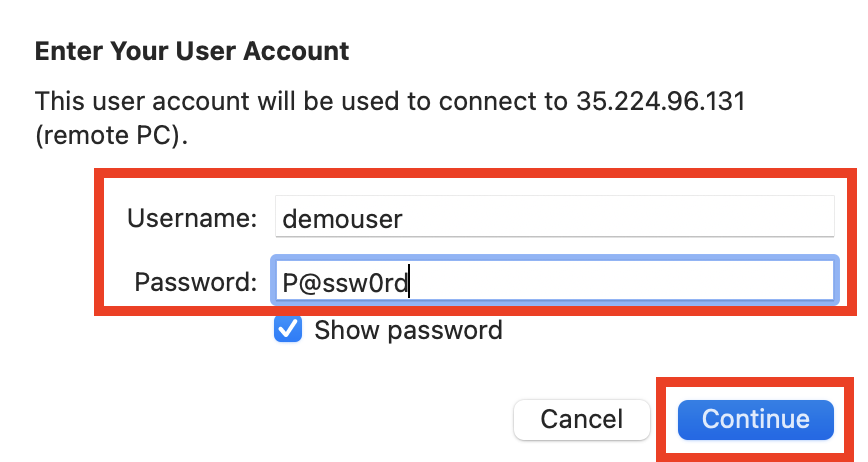
- When prompted for credentials, enter the Username as demouser and password as P@ssw0rd and then click the Continue button.
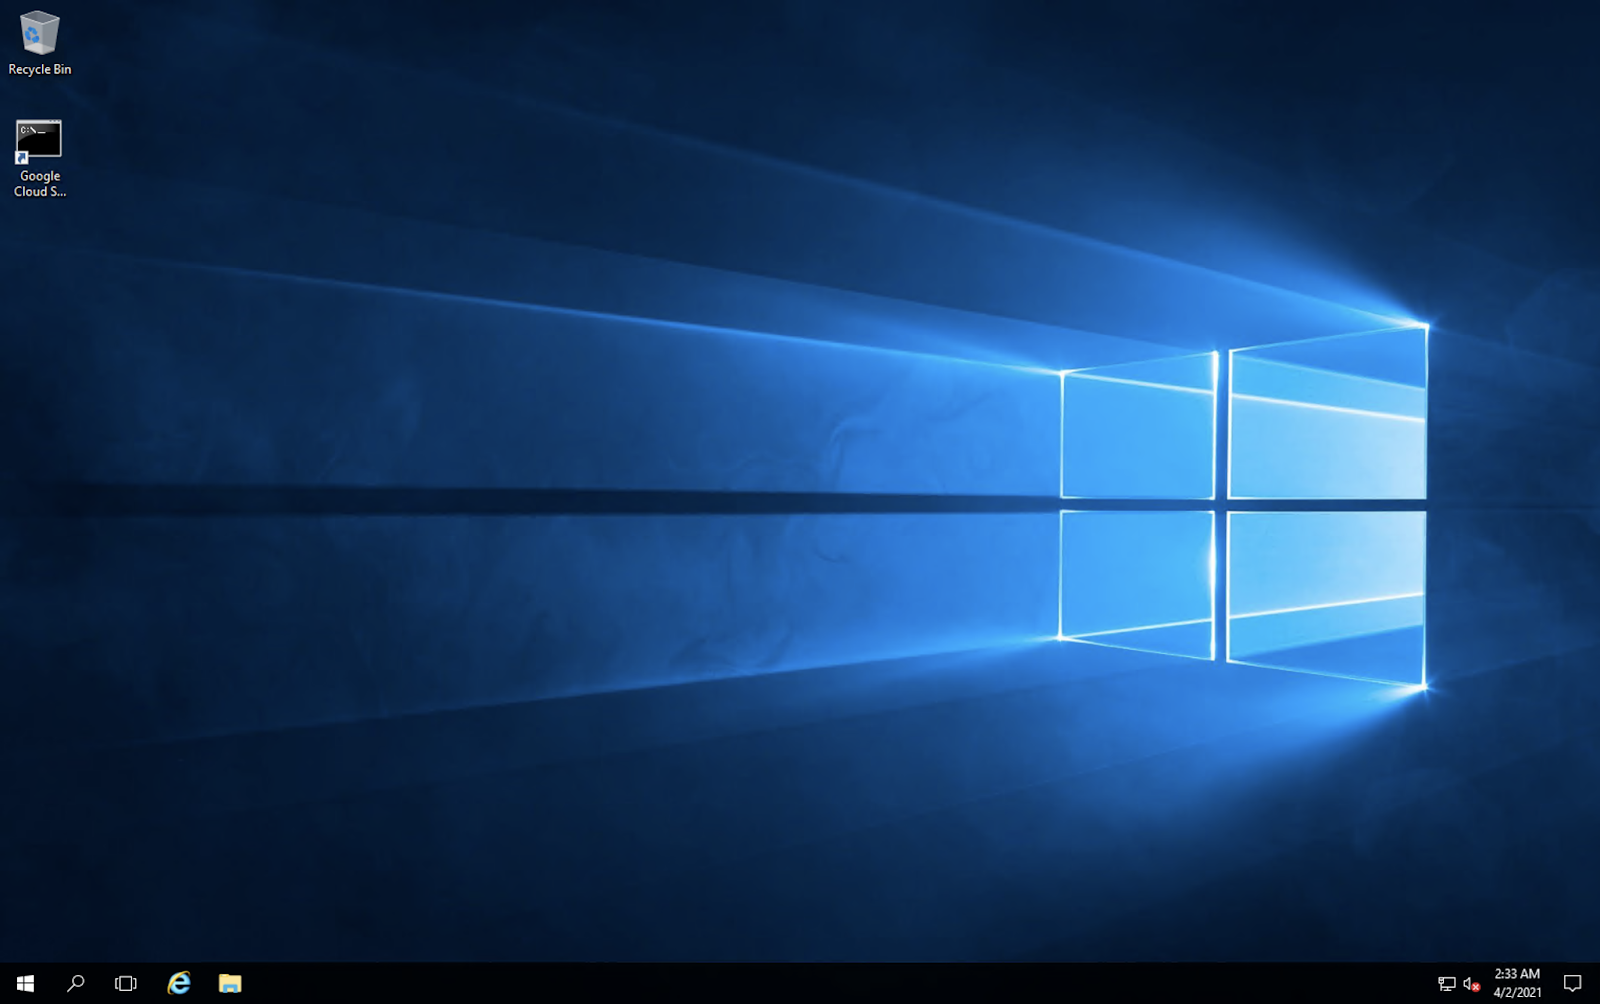
- In a few moments, you are connected to the sqlserver instance using RDP.
Now connect to the SQL server running on this instance and explore some data.
- Click on the Windows icon, select Microsoft SQL Server Tools 18 and then select Microsoft SQL Server Management Studio.
In a few moments, the SQL Server Management Studio login screen opens.
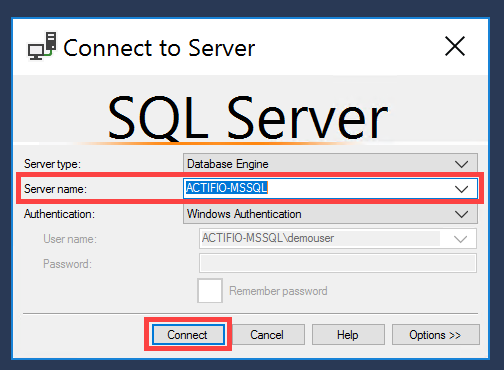
- Select Server Name: ACTIFIO-MSSQL, then click on the Connect button.
- Browse through some databases and tables.
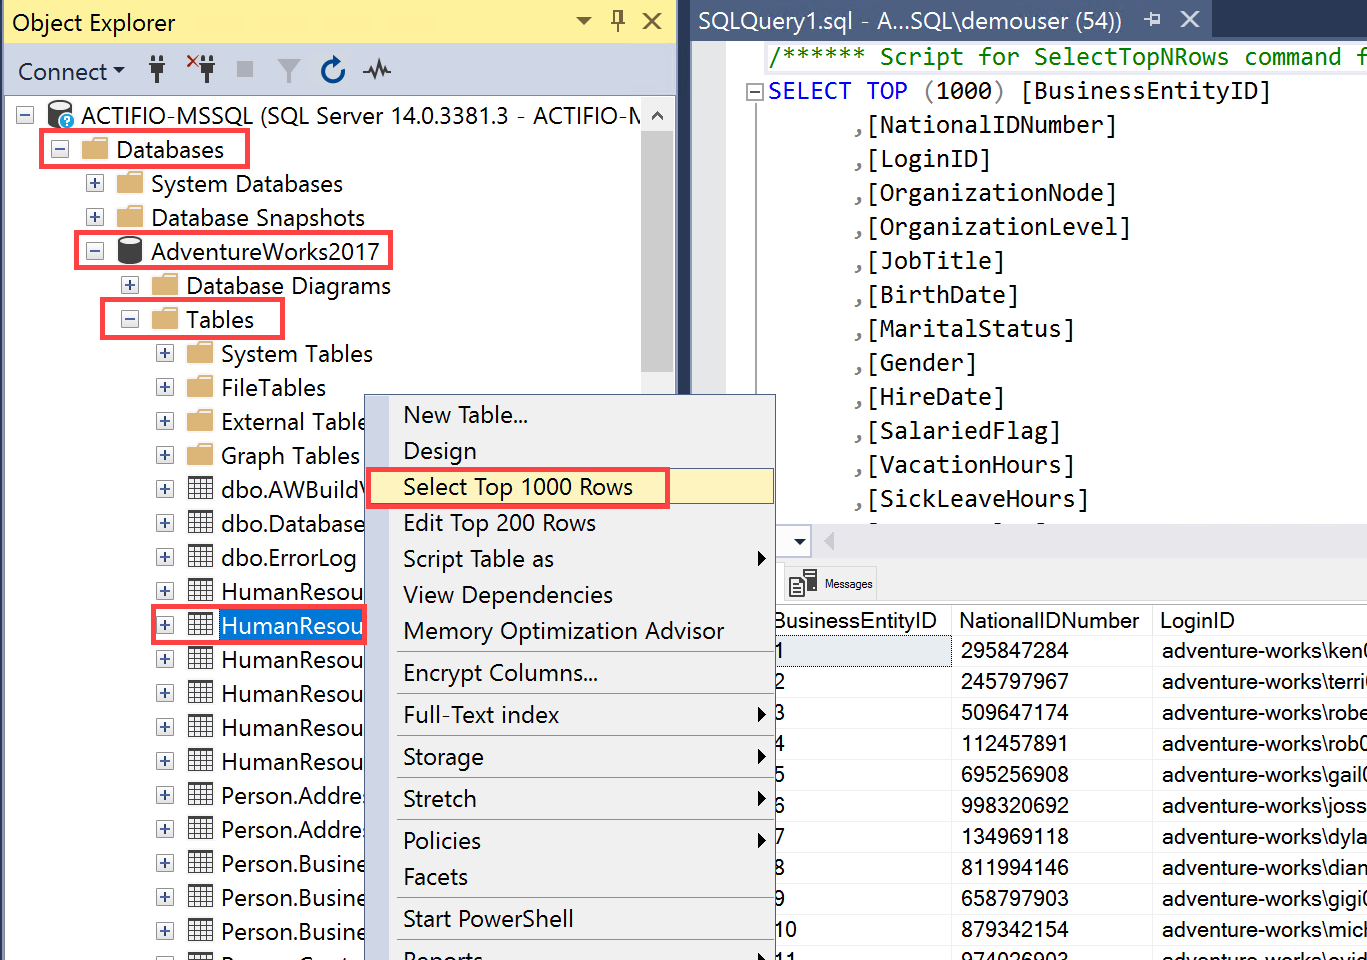
- In the Object Explorer pane, expand Databases and to see the OLTP database named AdventureWorks2017.
- Expand the tables in it and to see it has a bunch of tables.
- Right click the "HumanResources.Employee" table and select "Select top 1000 rows" to see some data.
See the below screen for reference.
Task 2. Installing Actifio connector
To download the needed Actifio connector (agent) and install it on the sqlserver Compute Engine instance, you need the internal IP address of Actifio Sky data mover, because all the Actifio agents are hosted on Actifio Sky data mover appliance.
- To get the internal IP address, go back to the Compute Engine page on the Cloud Console and copy the internal ip address of the sky-server instance.
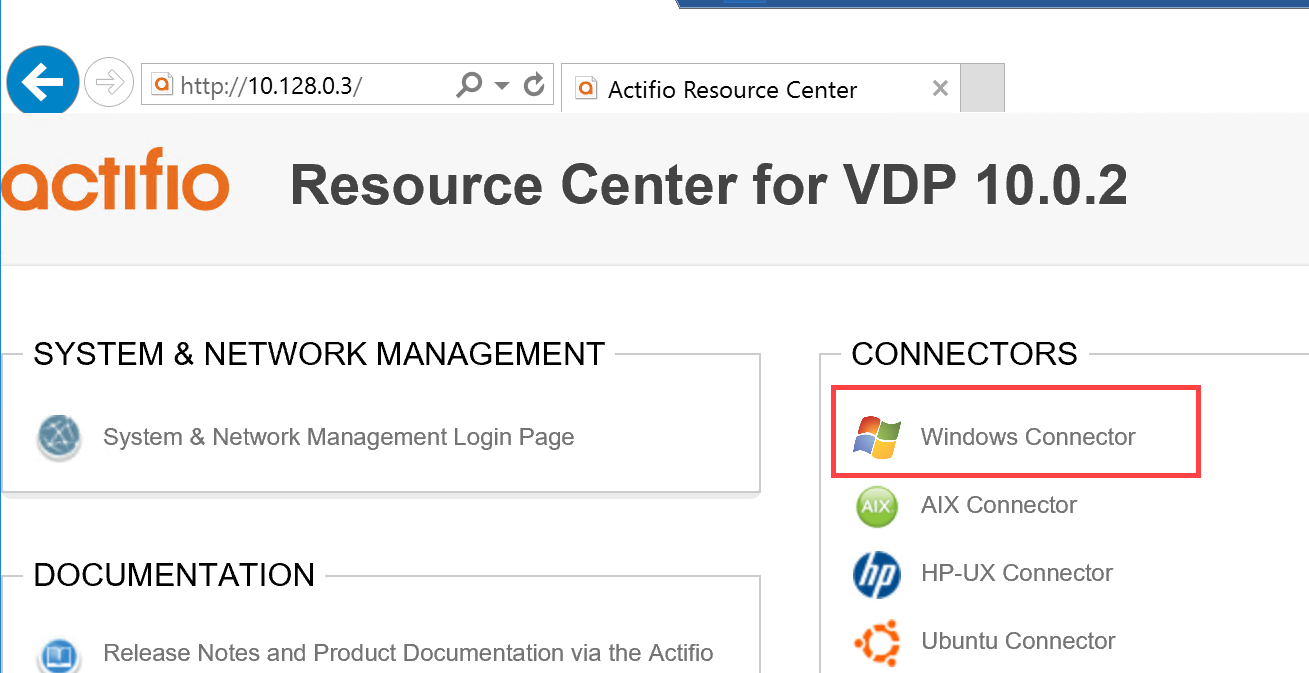
- Now go back to the sqlserver instance that you are already connected to using RDP and open the Internet Explorer to add the internal ip address of the sky-server instance.
This will open up the "Actifio Resource Center" page.
- Click on the Windows Connector link as shown in the below screen.
- When prompted to either run or save the file, click Run.
In a few moments, a User Account Control pop-up window will appear.
- Click on the Yes button to continue with the Actifio connector installation.
This brings up the Actifio connector setup wizard.
- Within the Actifio connector setup wizard:
- Click Next on the welcome screen.
- Click Next to continue with the default installation path.
- On the Select Component dropdown, select Actifio Connector with Change Tracking Driver, click Next.
- On the "Ready to install" screen click Install.
The installation takes a few seconds to complete.
- When complete, click the Finish.
Click Check my progress below to check your lab progress.
Task 3. Logging into Actifio Global Manager (a.k.a AGM)
-
Navigate to the Cloud Console > Compute Engine page and copy the external IP address of
agm-server. -
Open a new browser tab/window and paste the following URL:
Remember to replace the <agm-server> with agm-server's external IP address obtained from step #1 above.
- This takes you to the AGM login screen. Use the below credentials to log in.
- Username: admin
- Password: @ct1f1O!#@
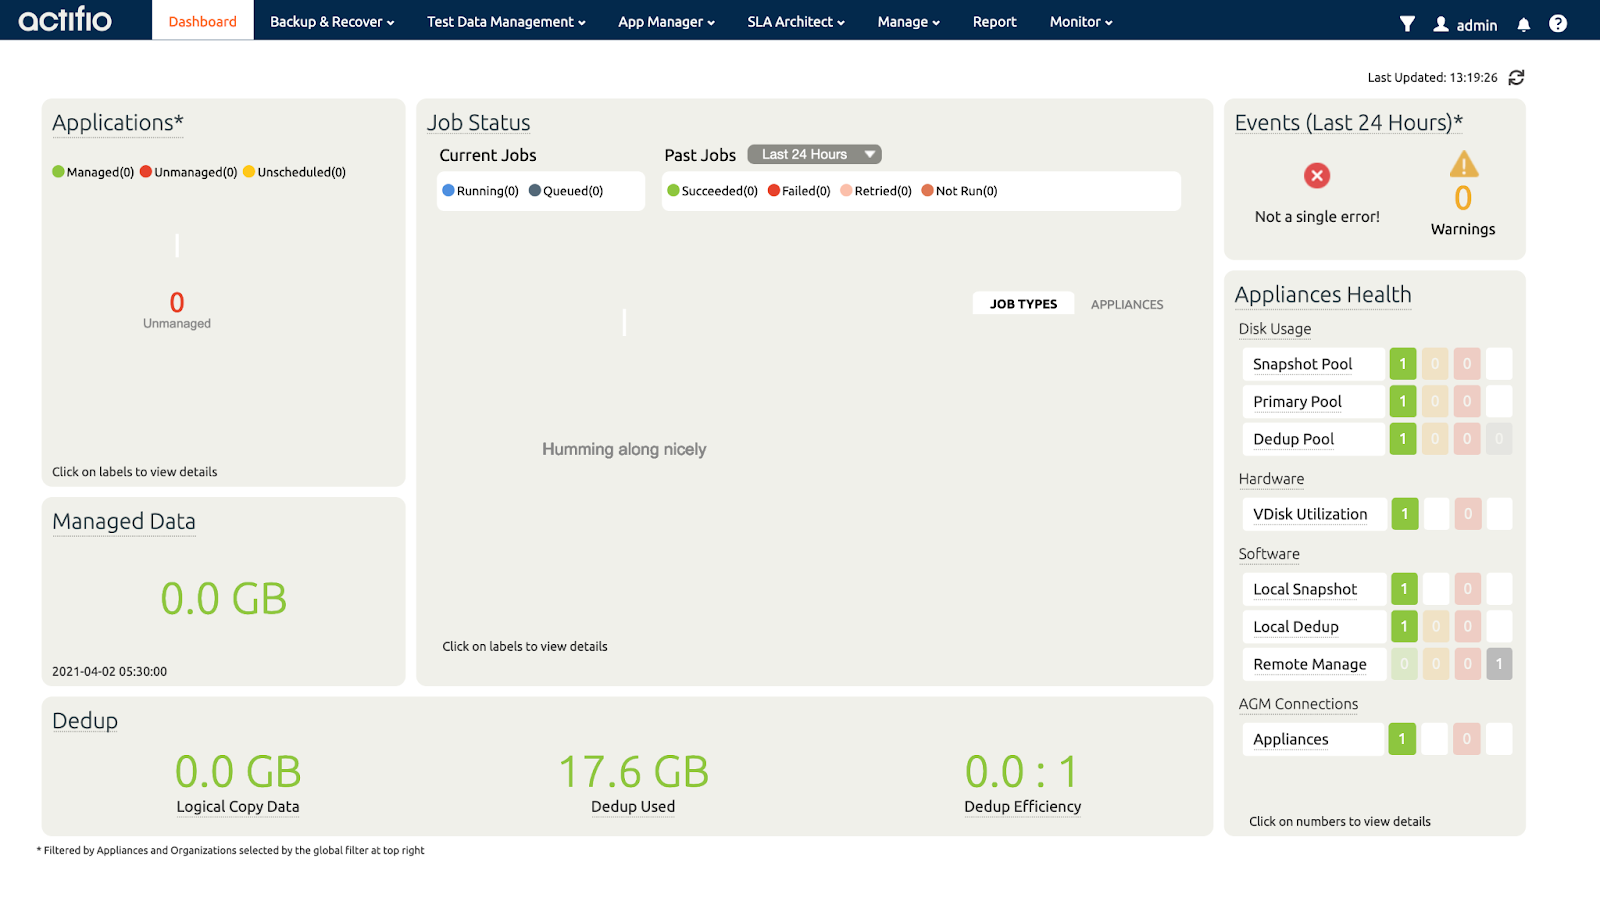
- Once logged in, the dashboard page opens.
Task 4. Defining SLA templates and profiles (a.k.a backup policies)
Before you discover your MSSQL server, you define an SLA template and profile, which together in Actifio make a backup policy. Once you define a backup template and profile, you discover the ACTIFIO-MSSQL server on the sqlserver instance (you previously connected to) and then protect the "ACTIFIO-MSSQL" server.
Learn more about SLA templates and profiles from the YouTube video Considerations for Designing SLA Architecture.
Creating a template
In this section, you create an SLA template, which dictates how to backup, how frequently to backup, and the retention period.
For simplicity, you will define a Template with a simple policy that will backup your ACTIFIO-MSSQL server twice everyday and store backups in a local cache (also known as snapshot pool). You will configure the database logs to be backed up every hour.
- On the AGM, navigate to SLA Architect > Templates, and then click CREATE TEMPLATE on the top right.
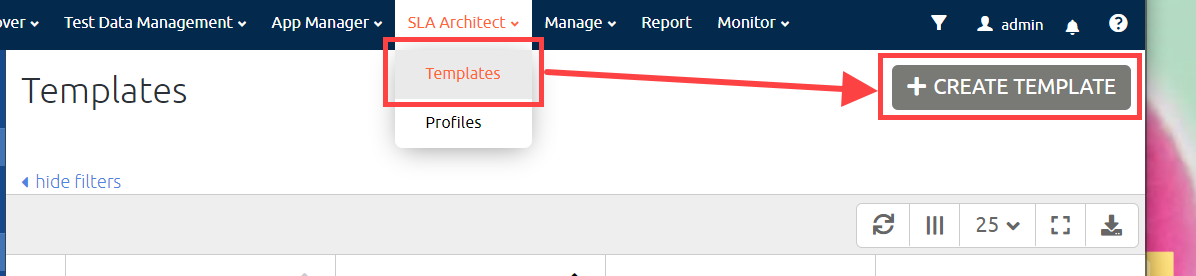
A new template page opens.
-
Enter a meaningful template name and description that describes the template. It's common for customers to use "Gold" templates (backup policies) to protect tier 1 applications with RPO of less than an hour. "Silver" to protect tier 2 applications that have RPO needs between 1 to 12 hours and so on.
-
In this lab, since you're backing up the database twice a day (with hourly log backups), call your template DB-Gold.
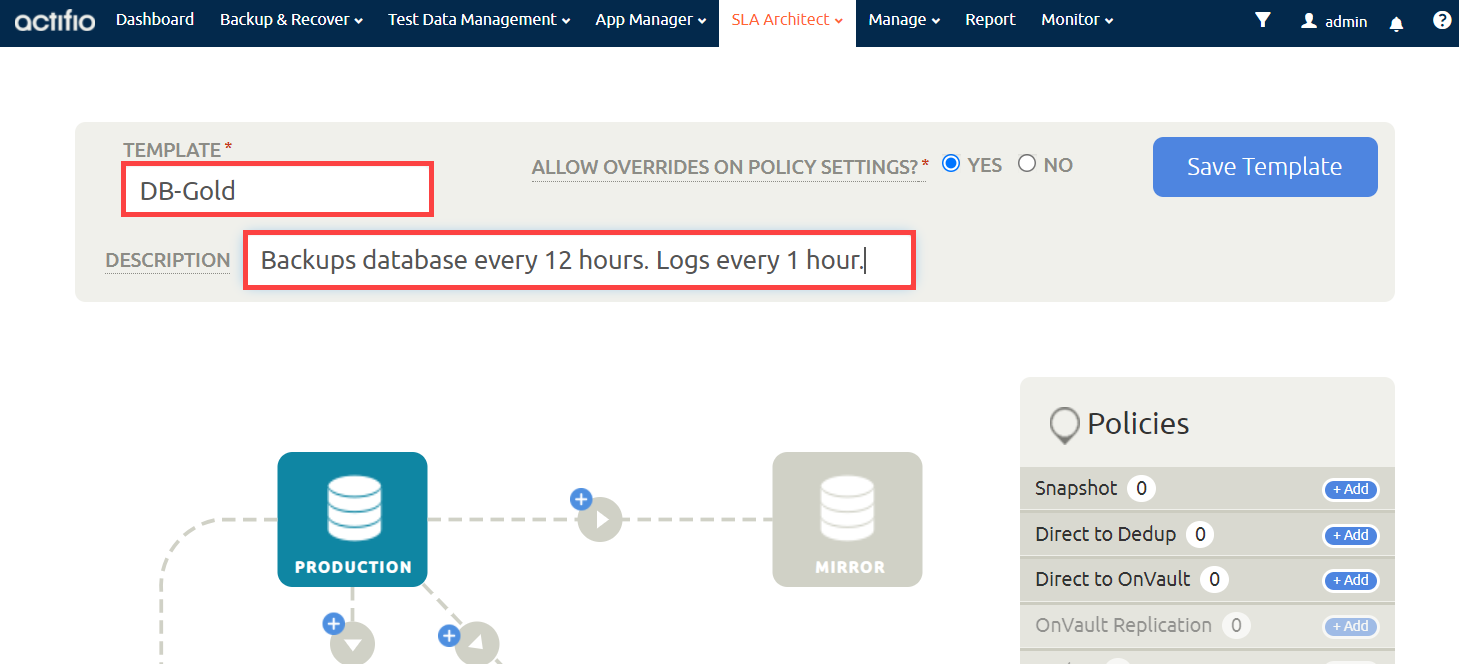
- Next click the + button between the production and snapshot box (or click the + Add button next to Snapshot label under the Policies section.
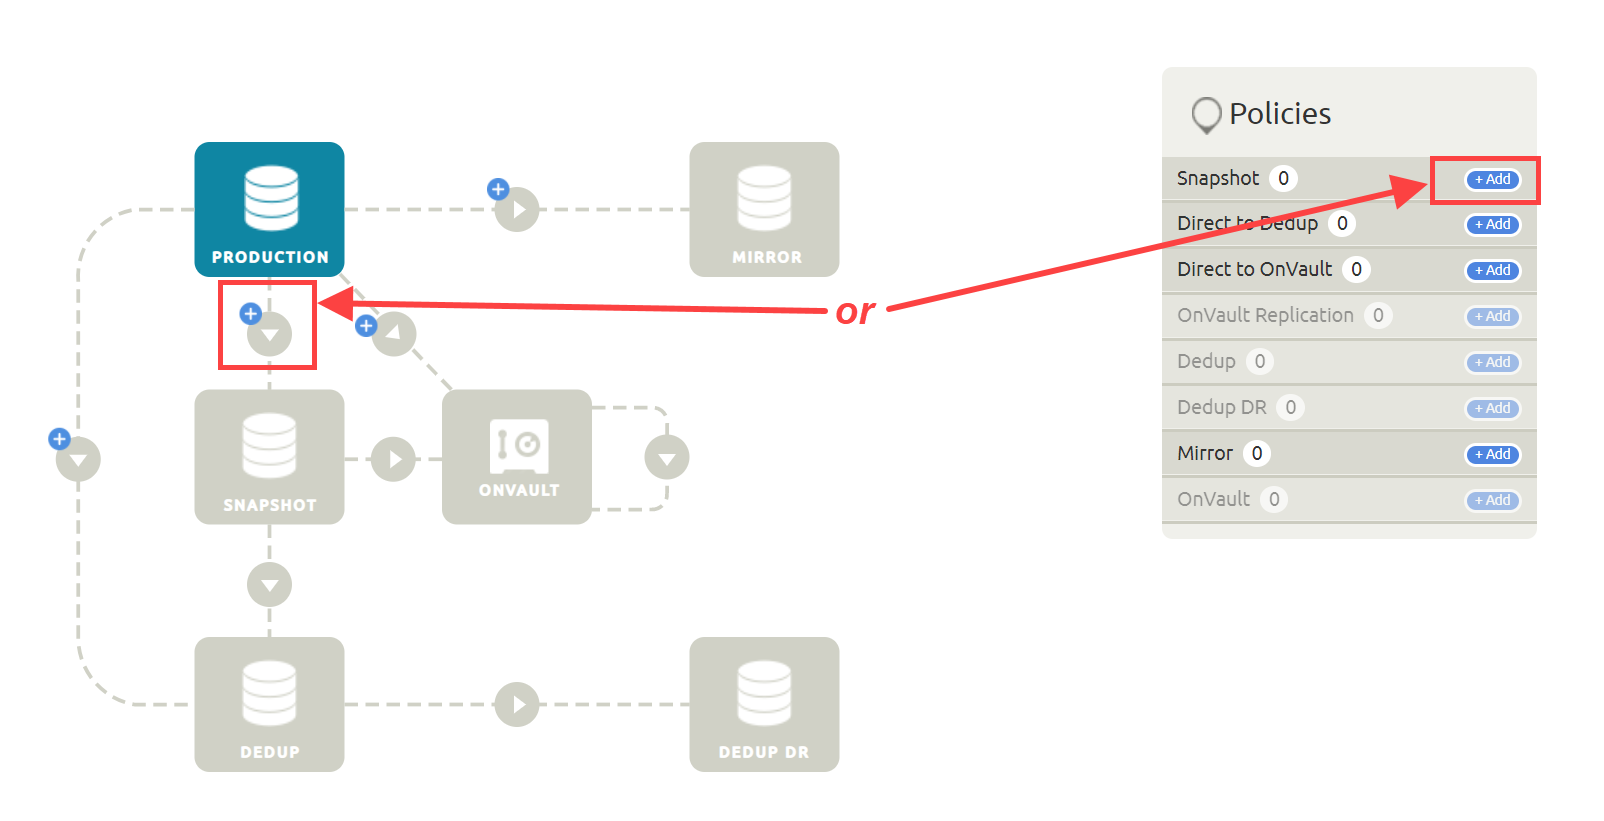
The Production To Snapshot page opens.
-
Give the backup policy a meaningful name. Call it Snap every 12 hours since it will back up every 12 hours.
-
Scheduling - Set to Continuous.
You could also define a windowed policy in case you want backups to run only within a specified window.
-
Every - Specifies how frequently you want to backup the data. Since you want to backup twice a day, set the backup frequency to "Every 12 hours"
-
Starting At - Specifies the start time at which you want the backup policy to trigger. Set the backup to trigger at 6 AM and then every 12 hours from there.
-
Retain For - Specifies how long backups are retained. Set to 7 days. All backup copies in the local storage (snapshot pool) will expire after 7 days.
-
Leave the other defaults as is.
-
Click Advance Policy Settings. This opens the Policy Settings popup.
In the policy settings, set:
- Application Consistent to Take application consistent backup
- Backup SQL Server User Logins to Yes
- Enable Database Log Backup to Yes
- Set RPO (Minutes) to 60
- Log Backup Retention Period to 7
- Replicate Logs (Uses StreamSnap Technology) to No
- Send Logs to OnVault Pool to No. You would set to yes if you wanted to send the log backups to Cloud Storage NearLine/ColdLine.
-
Click Save Changes on the Policy Settings popup.
-
Click Update Policy. This will take you back to the previous Templates page.
-
Click Save Template.
You just created/defined a template with a policy that will backup the database every twelve hours (and log every hour) and retain them for 7 days.
Creating a profile
In the previous section, you defined a backup policy that dictates how frequently to back the data and its retention period. You haven't defined where backups should be stored. You will do that by defining Profiles.
In this section, you create a profile which dictates where backups are stored.
- Navigate to SLA Architect > Profiles menu on the Actifio Global Manager (AGM).
- Once on the Profiles page, click CREATE PROFILE.
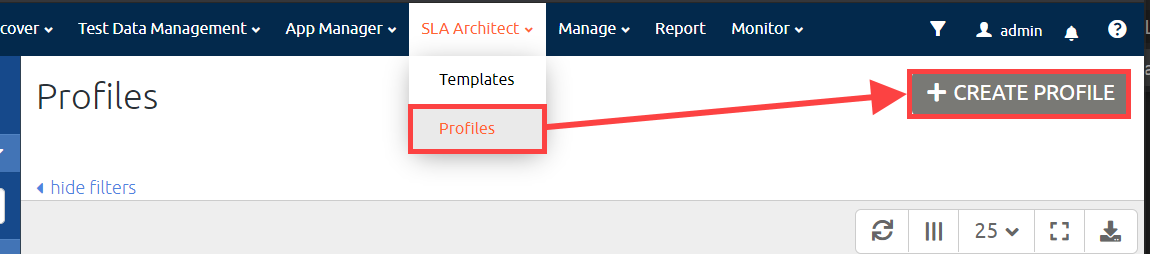
The Create New Profile dialog opens.
-
Give the profile a meaningful name, LocalStorage, with a description of "This will store backups locally in a snapshot pool".
-
For the appliance select the skybasecentos7.... appliance. There is only one.
-
For "Snapshot Pool" - select act_per_pool000.
Leave everything else at their default value.
- Click Save Profile.
- Navigate again to SLA Architect > Profiles and check if you can see the profile "LocalStorage" that was just created.
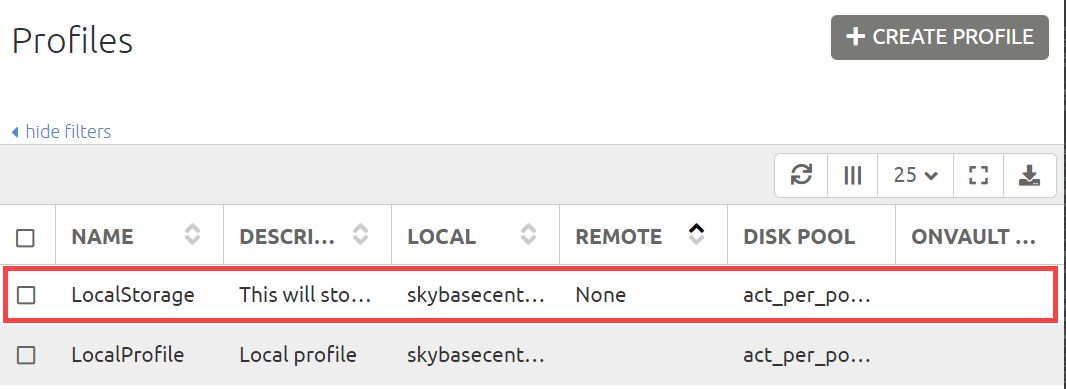
You just created/defined a profile that dictates where backups are stored.
This profile, together with the template created in the previous section, will dictate:
- How to backup data
- How frequently to back your data
- Where backups are stored
- How long should backups are retained
Now you just apply the template and profile you created to any data source to automatically back that data source based on the backup definition.
Click Check my progress below to check your lab progress.
Task 5. Backing up the ACTIFIO-MSSQL database server
To discover and protect the Microsoft SQL Server instance, trigger the SQL Server backup wizard.
- Navigate to the "Backup & Recover > Backup" menu on the AGM.
This will open up the "Select the type of application you wish to add or protect" page with all the Actifio GO supported databases & application types.
- Click on SQL Server icon as shown in the screen below:
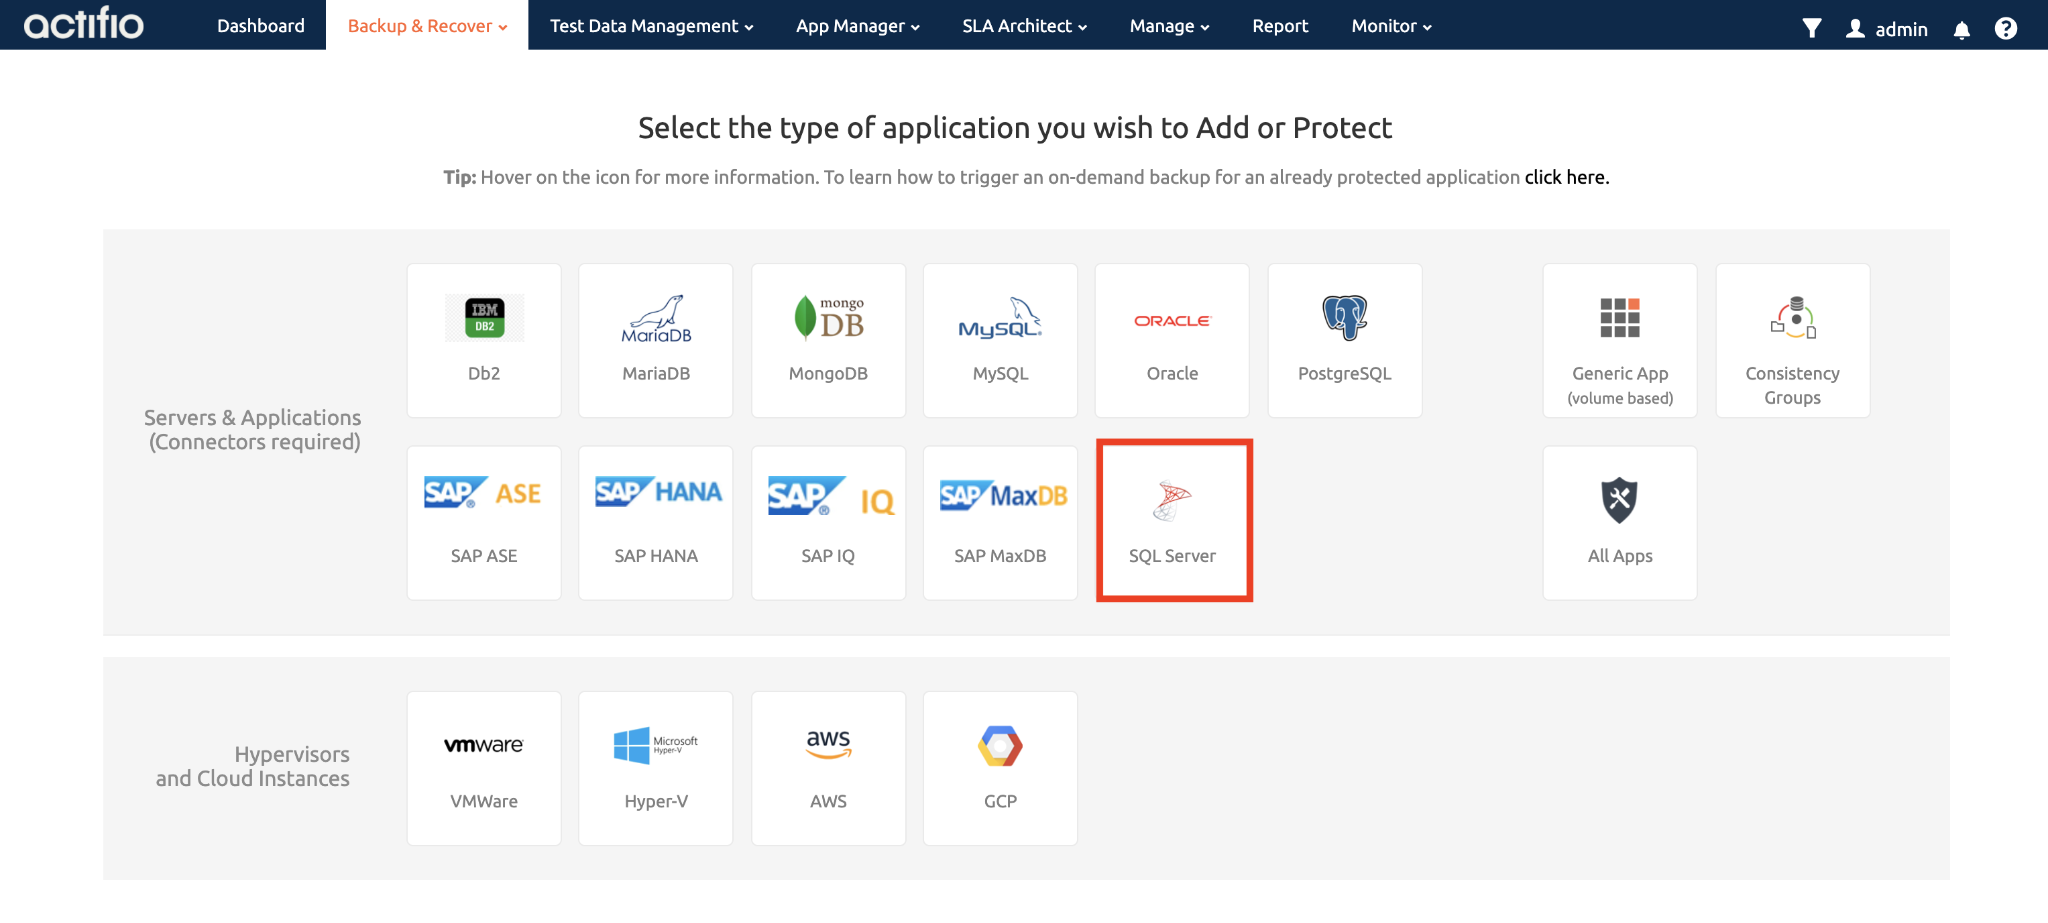
This will open up the Microsoft SQL Server backup wizard as shown below.
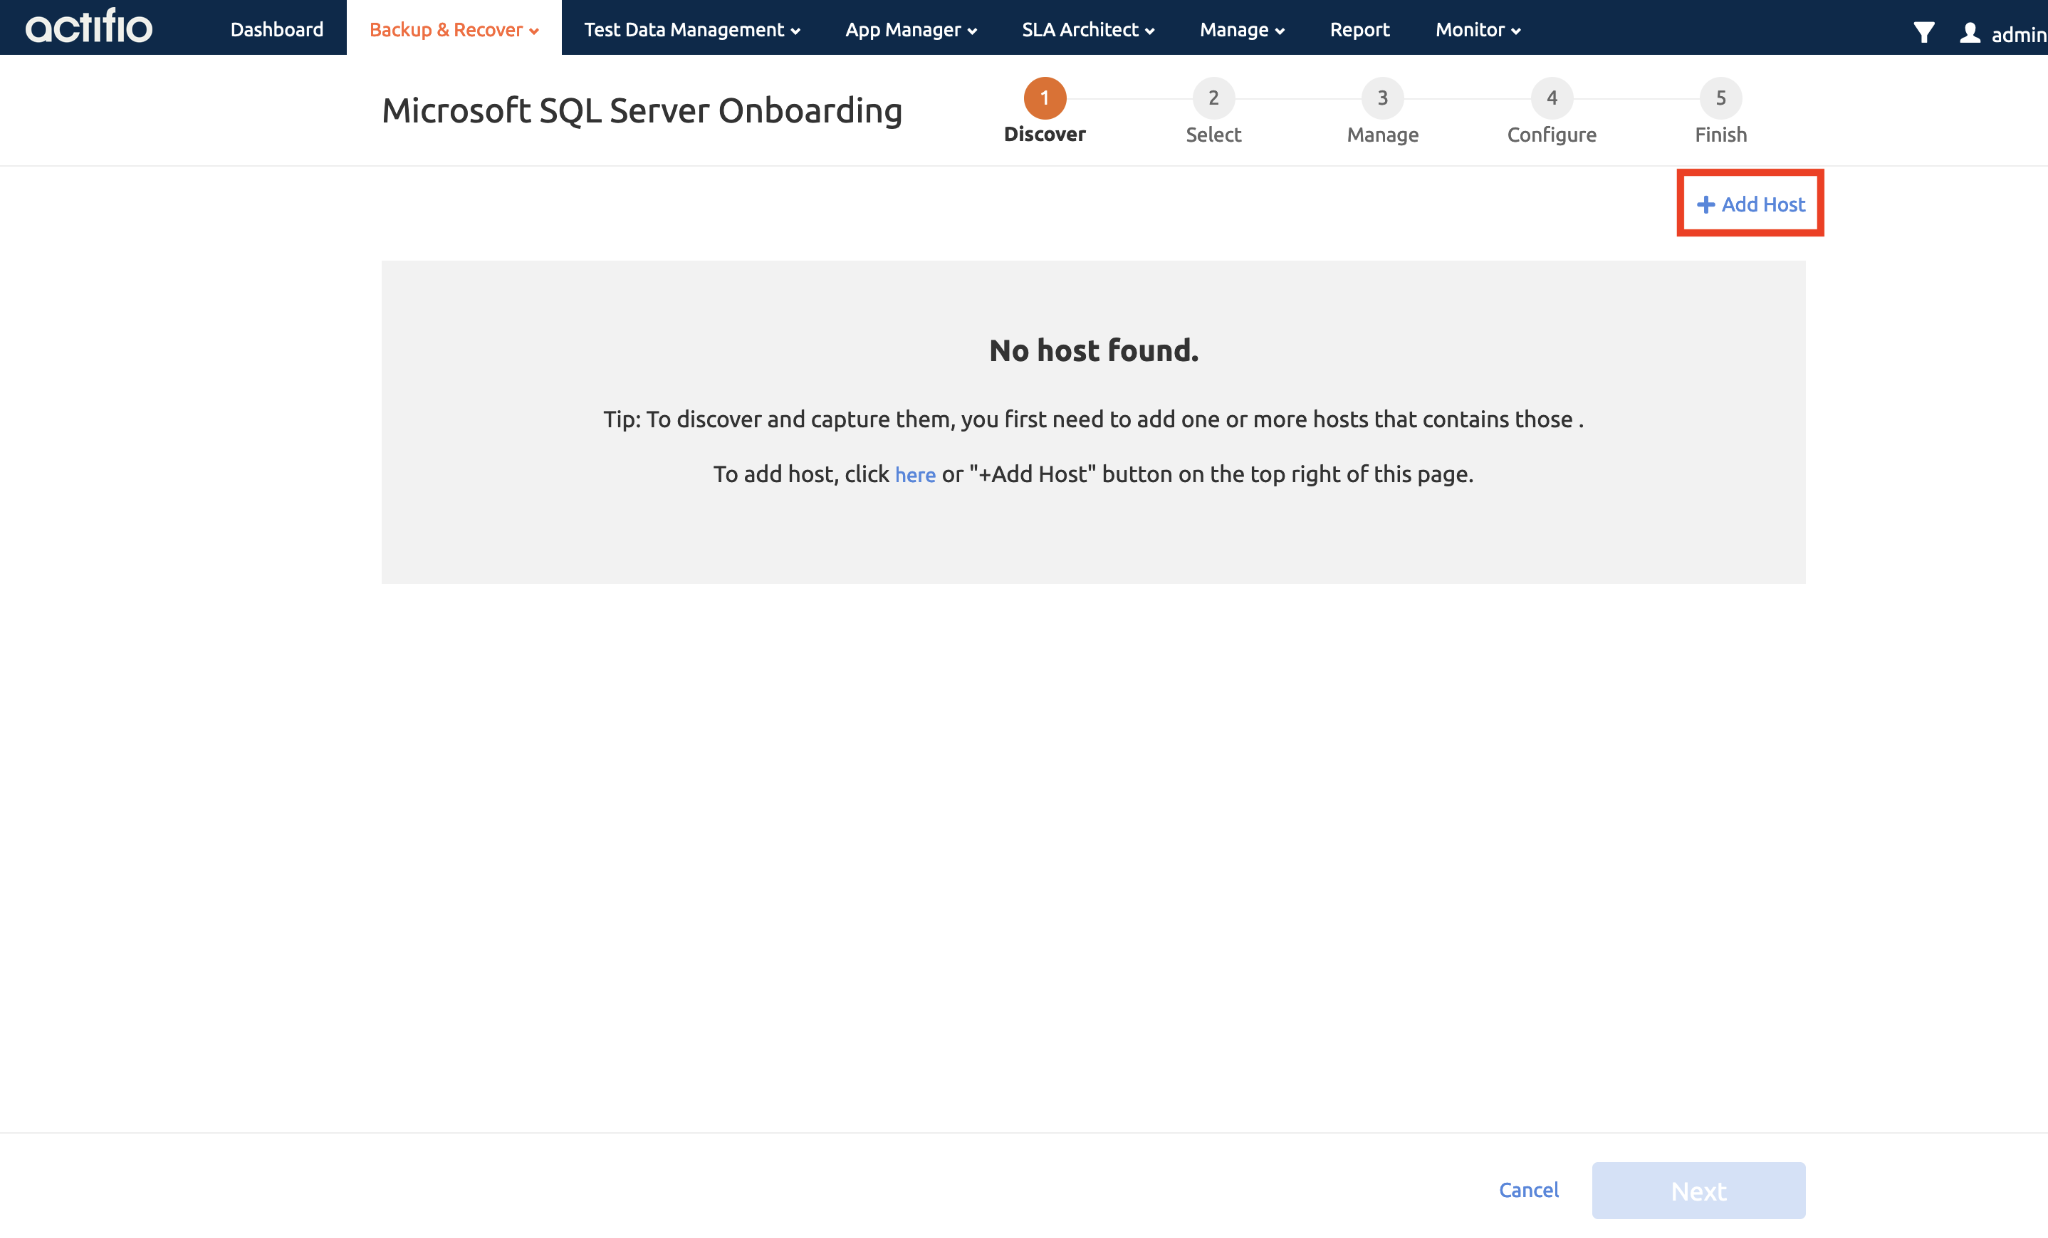
Since AGM doesn't yet know the information about the host running Microsoft SQL Server instance, it shows a "No host found" message.
-
Go ahead and add
sqlserver(which has a SQL server instance running on it) as a host by clicking the + Add Host button. See the screen above. -
In the Add Host popup, enter:
-
Name: Enter "sqlserver" which is the GCE instance name on which SQL Server instance is running. You could enter anything, but for easy identification just use the Compute Engine instance name as is.
-
IP Address: Enter the internal IP address of this VM instance and hit the "+" button. In this case it's "10.128.0.2". Double check the internal IP address of the "sqlserver" instance on the "Compute Engine > Instance" page on Google Cloud Console page.
Note: Click the plus icon after entering the IP address. - Appliances: Select the available sky server.
-
-
Leave other details as is and click the Add button at the bottom of the popup as shown in the screen below.
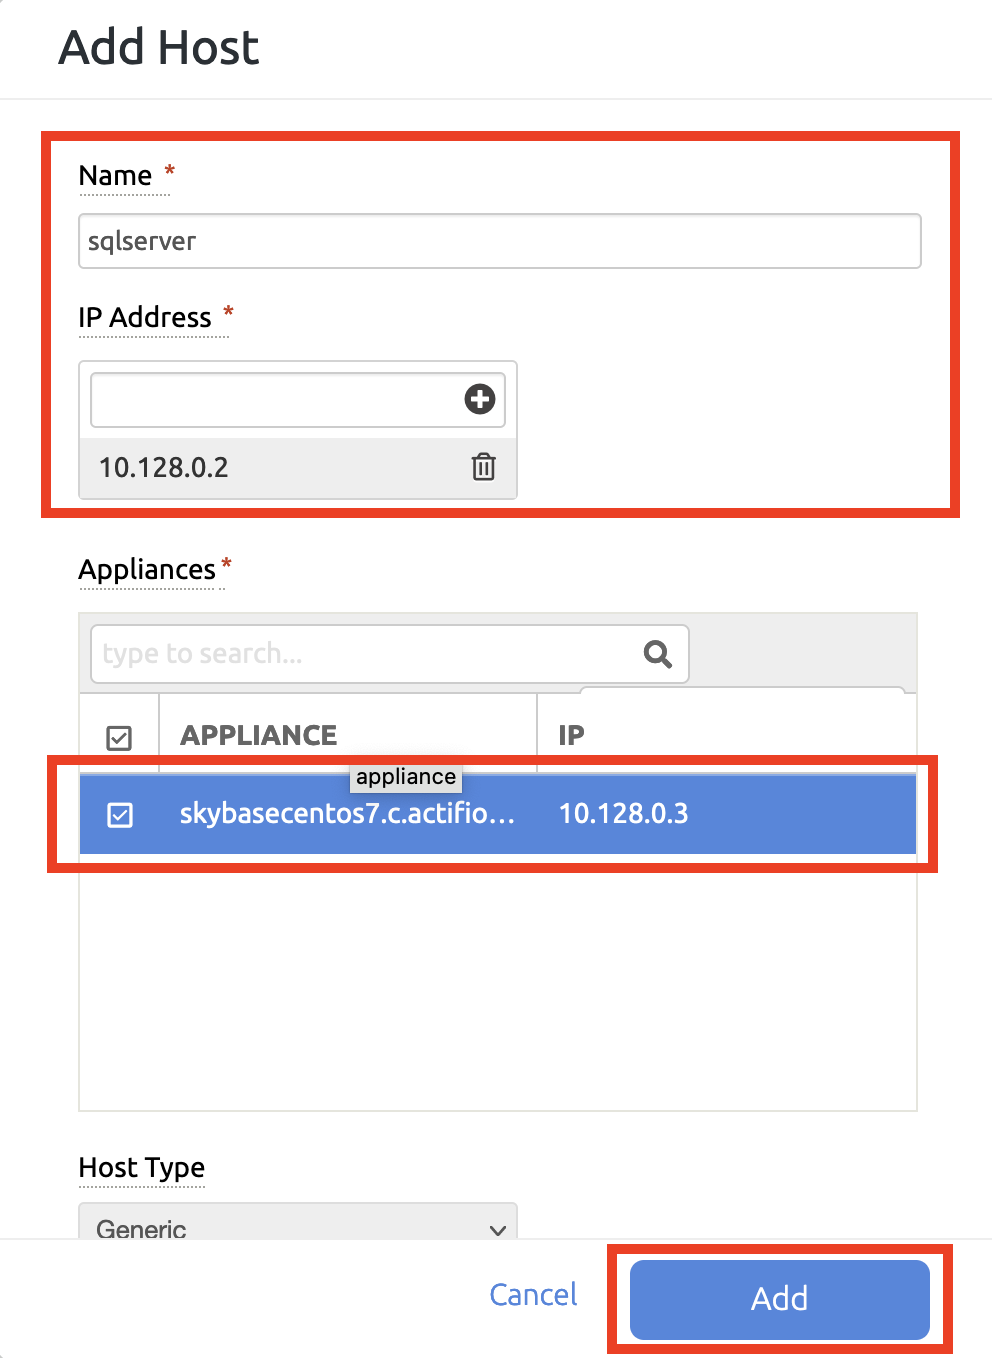
Once the host is added, it will get listed as shown below.

Click Check my progress below to check your lab progress.
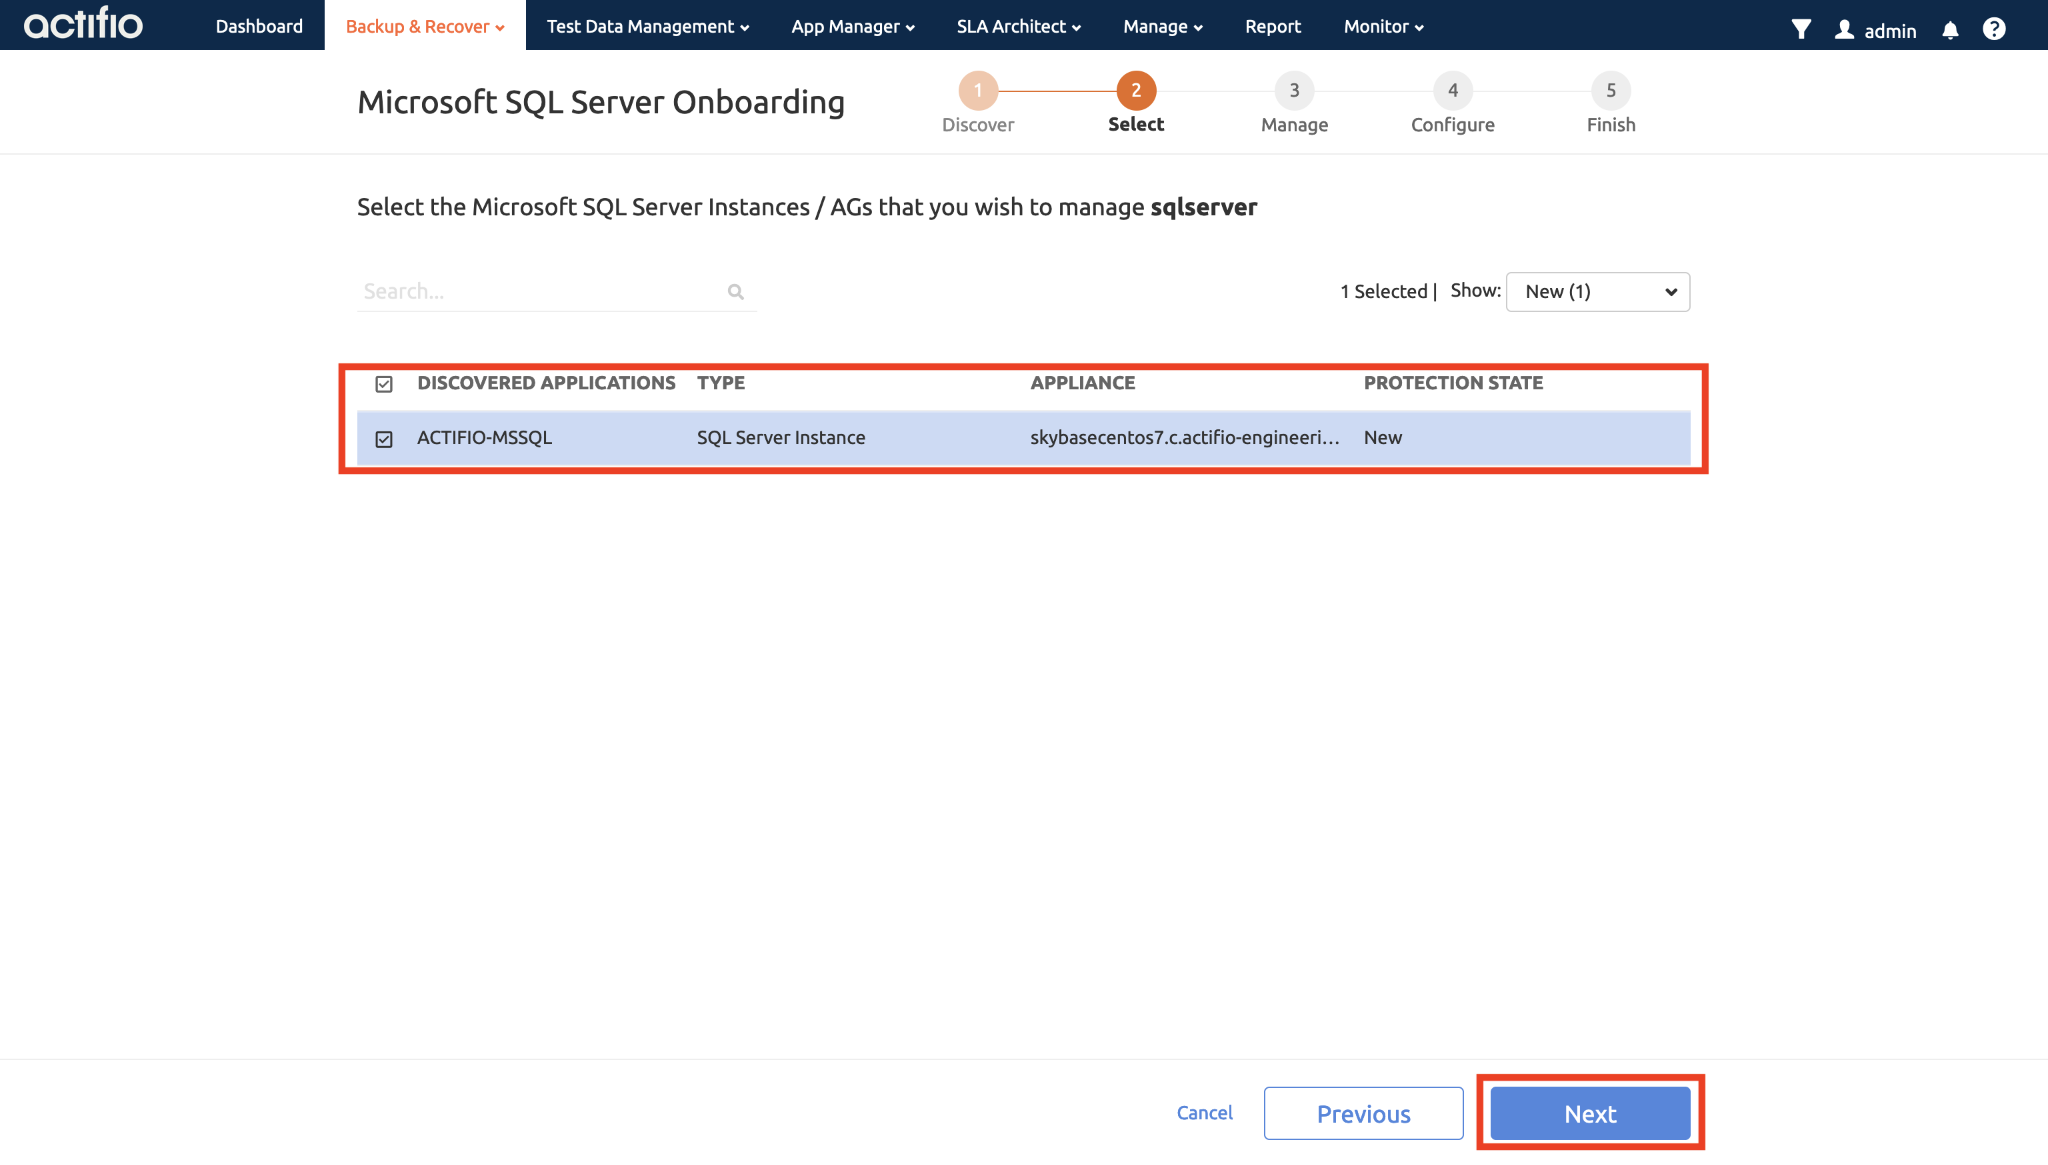
- Now, click on the Next button.
This will trigger discovery of Microsoft SQL Server instance on the host sqlserver. Once the discovery is complete, all the discovered SQL Server instances would be listed.
-
Select the discovered
ACTIFIO-MSSQLSQL Server instance and click on the Next button as shown in the below screenshot. -
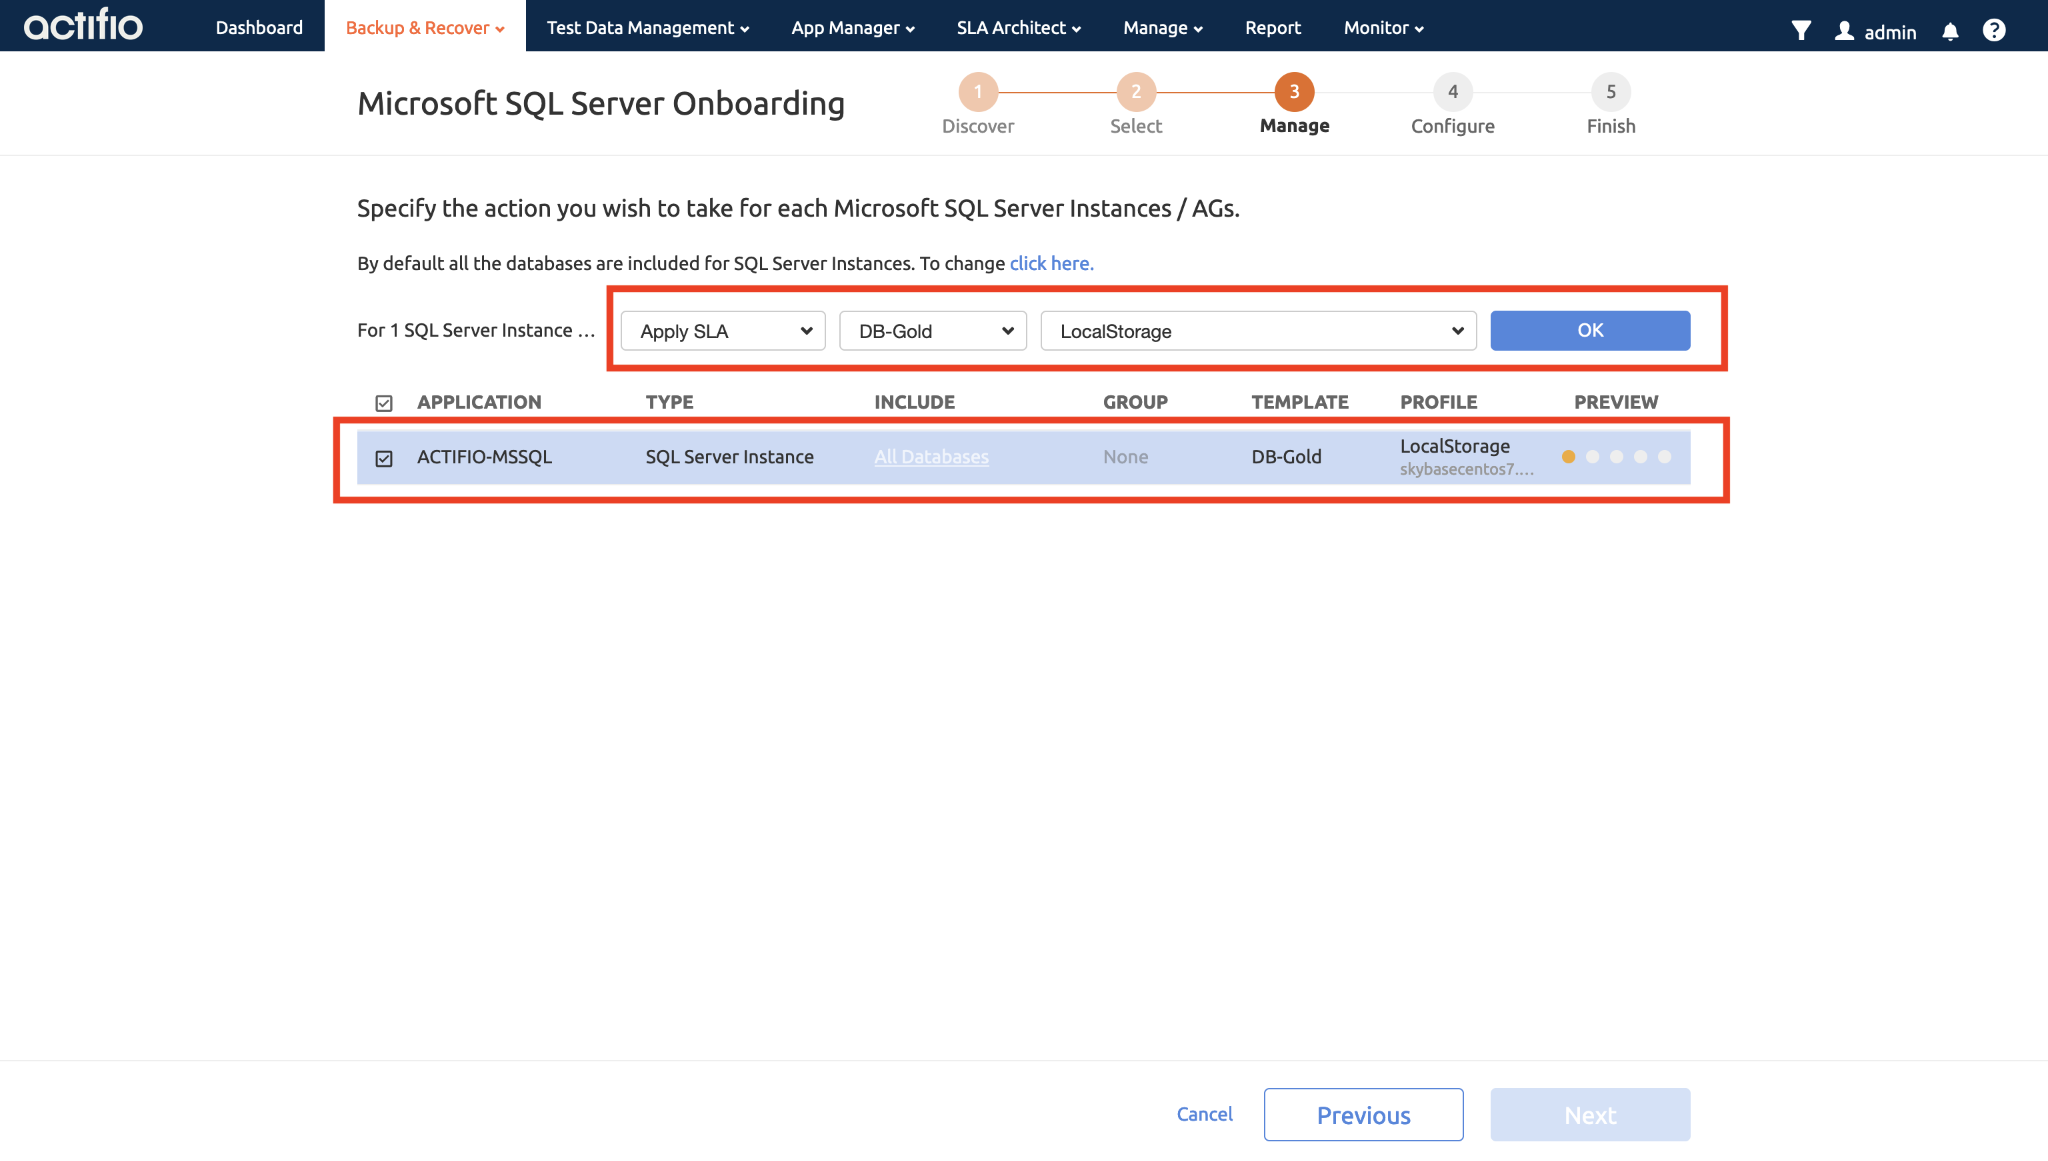
Now, select the
ACTIFIO-MSSQLSQL Server instance and then select Apply SLA. Once you select Apply SLA, a dropdown to choose Template will appear. -
Select "DB-Gold", and for the Profile select "LocalStorage".
-
Click the OK button.
Remember the template and profile that was created in the previous section which together defines a backup policy? You are now assigning the backup policy to this SQL Server instance.
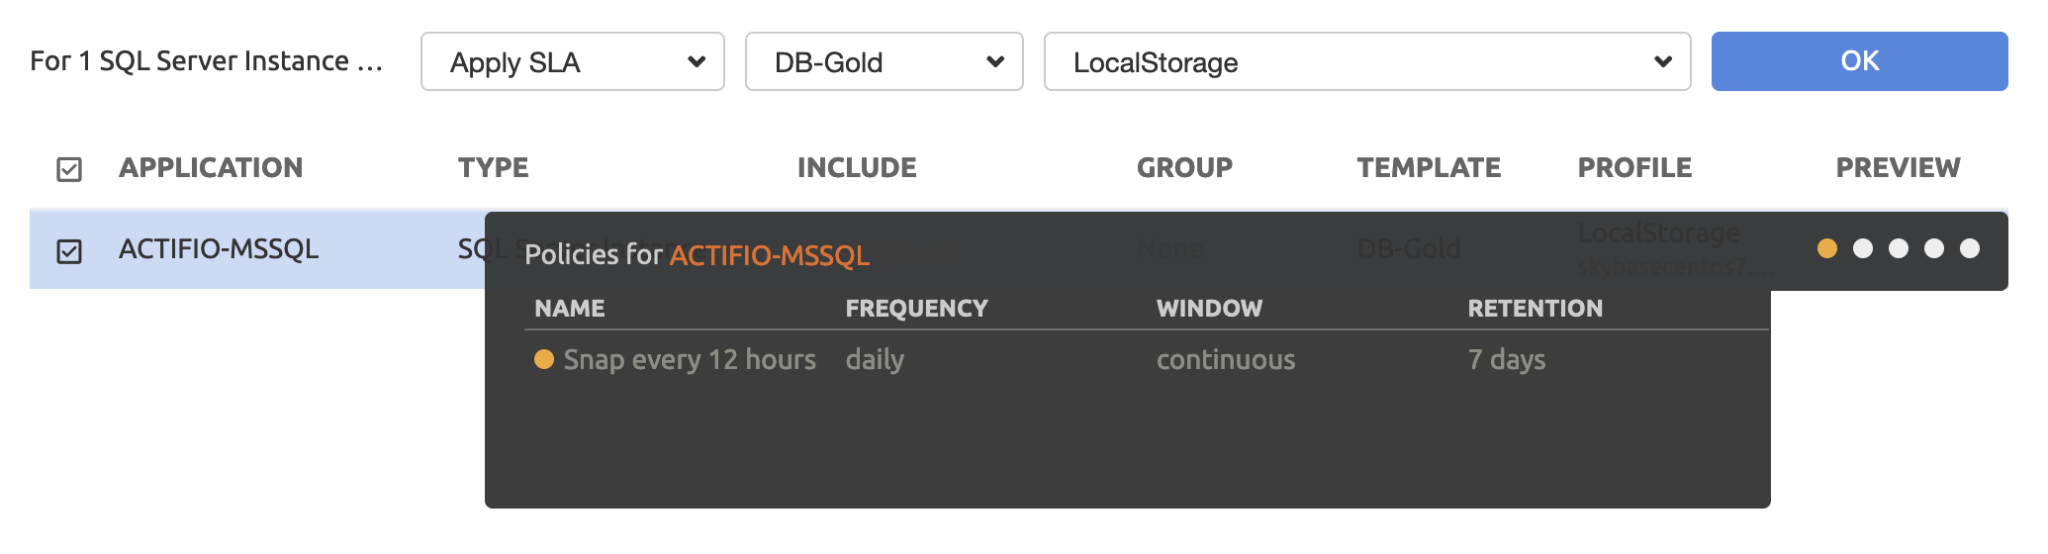
-
You can hover on the preview column to see the preview of the backup schedule and retention period for the applied DB-Gold template. See the below screen.
-
Click on the Next button (at the bottom right) which will advance the wizard to the settings page as shown below.
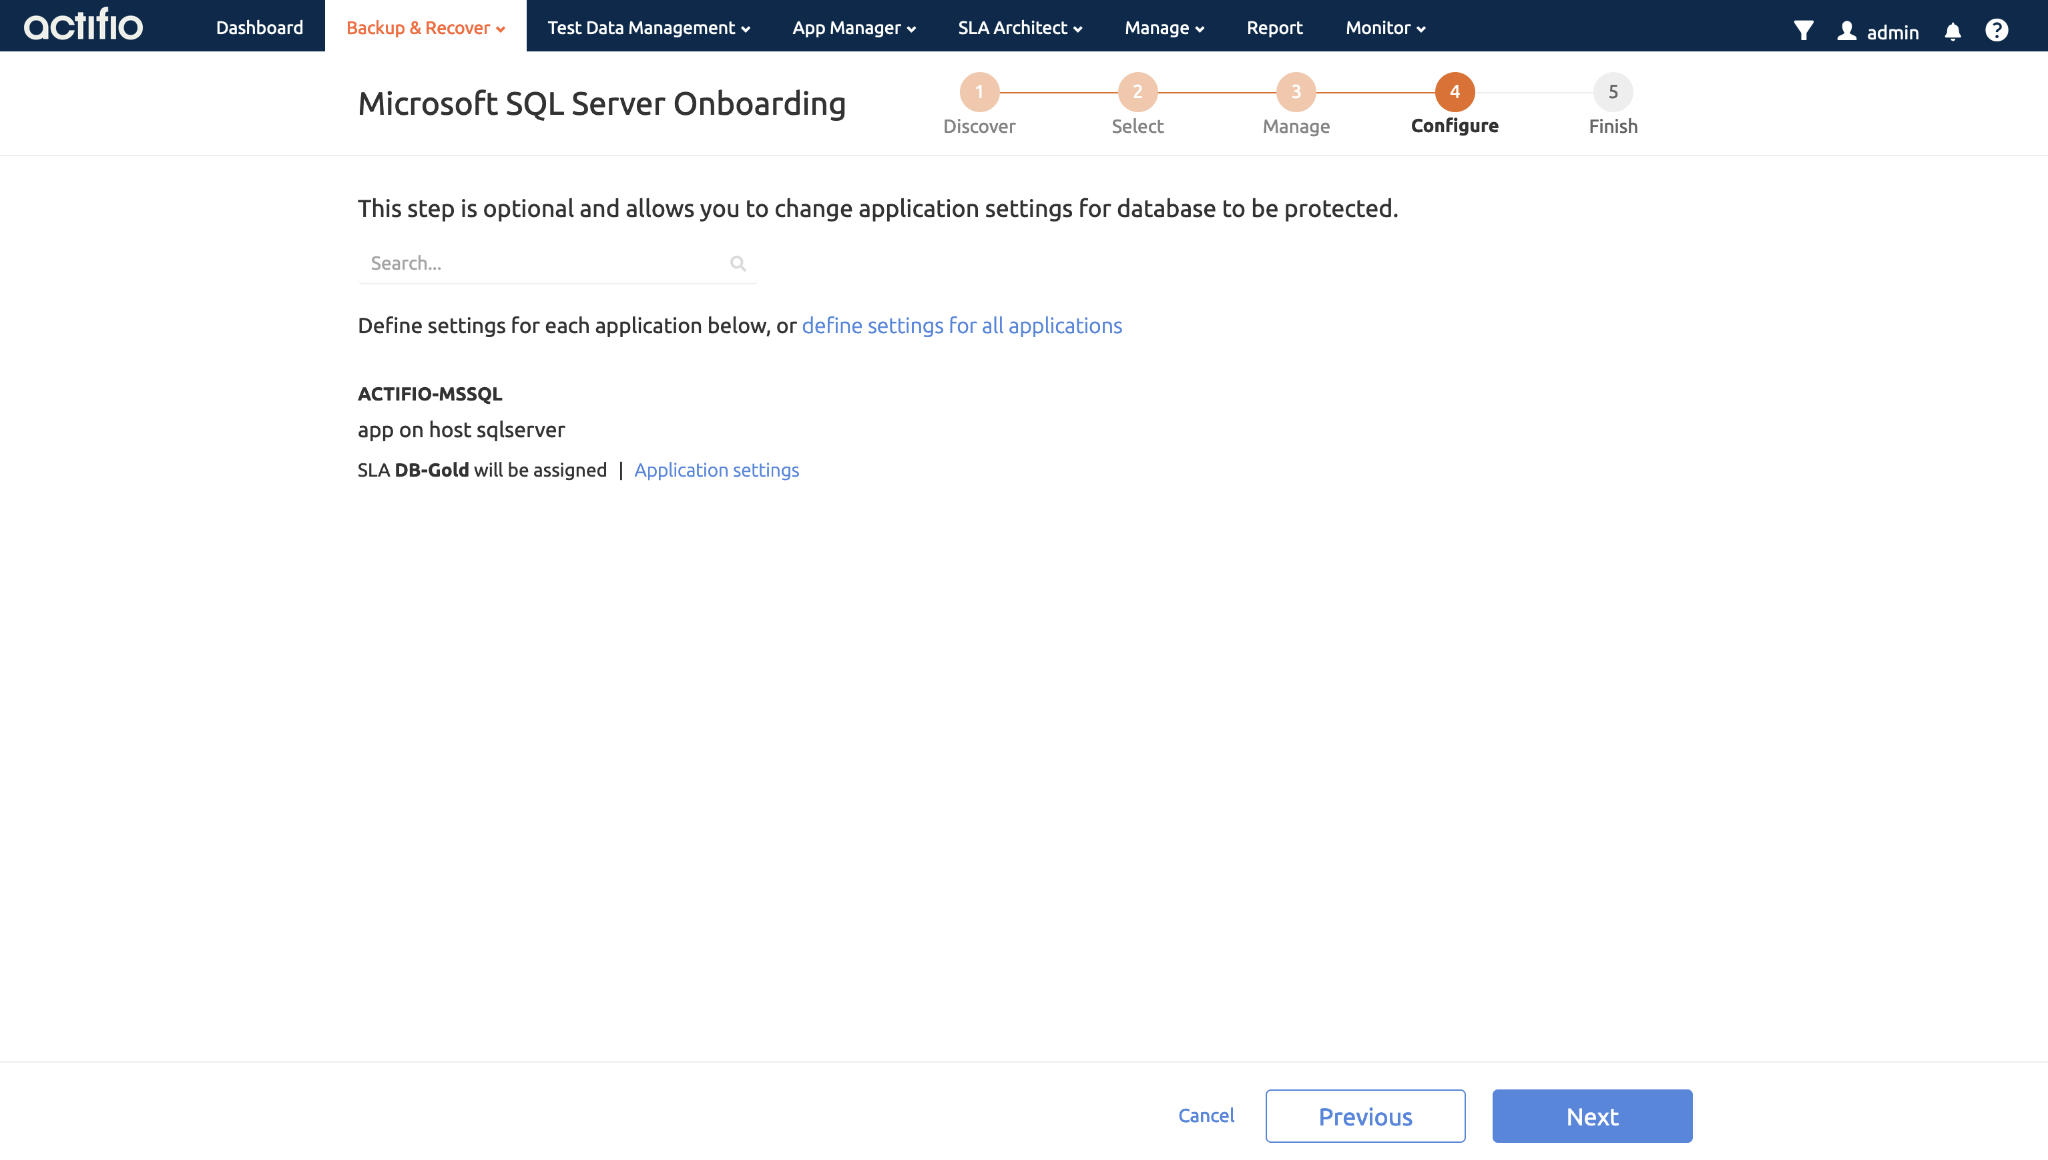
To configure any SQL server backup specific settings, you can make use of the Application Settings link. In this lab, you will use the defaults and not change any settings.
-
So, click the Next button to view the summary page.
-
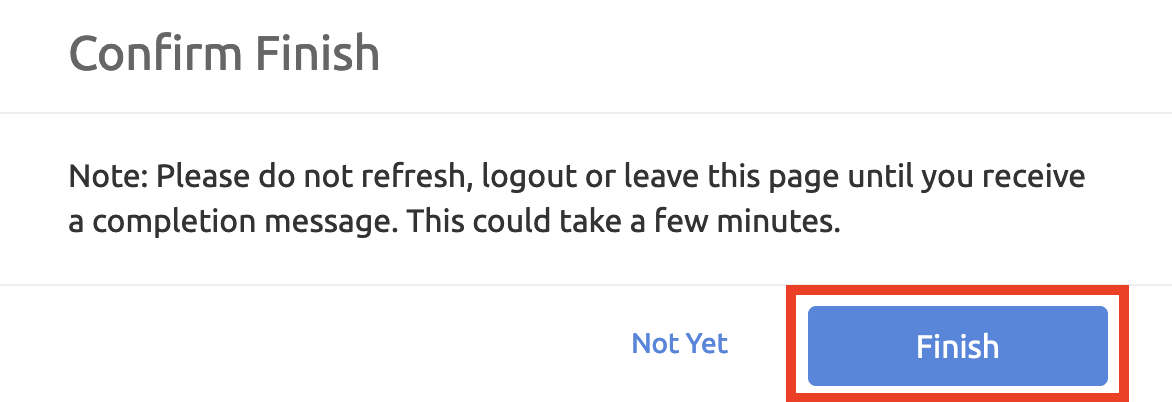
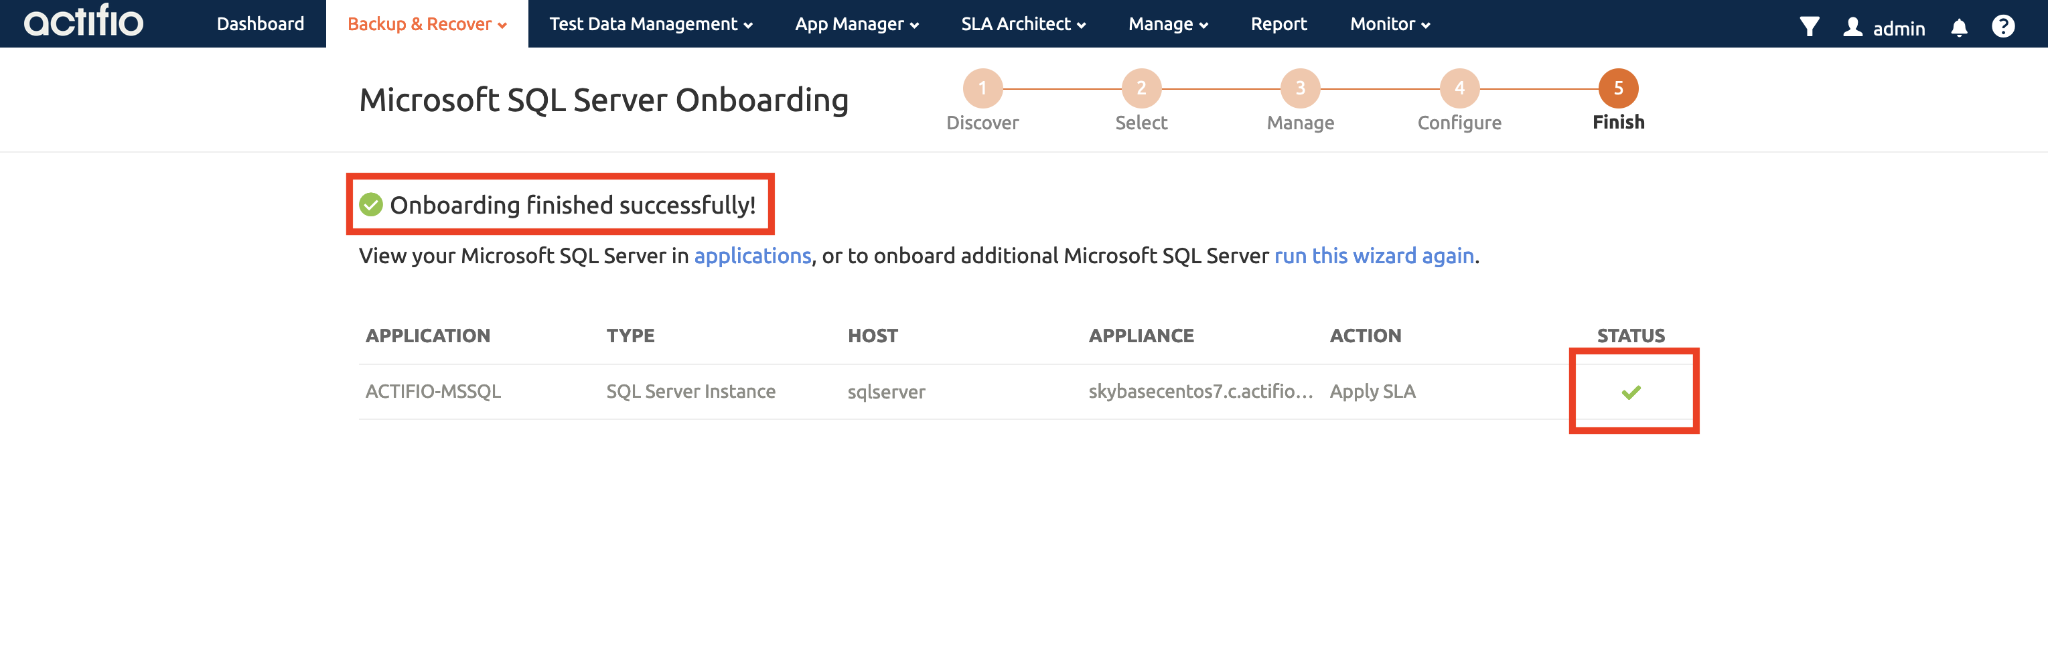
Click the Finish button as shown below.
Note: You would get a popup warning not to navigate to another page unless the operation completes. -
Click the Finish button again as shown below.
Once the operation completes, you would see the status column set to green tick mark (as shown below) indicating that the ACTIFIO-MSSQL instance is now protected with the desired backup policy.
You just discovered and protected your Microsoft SQL Server instance with the
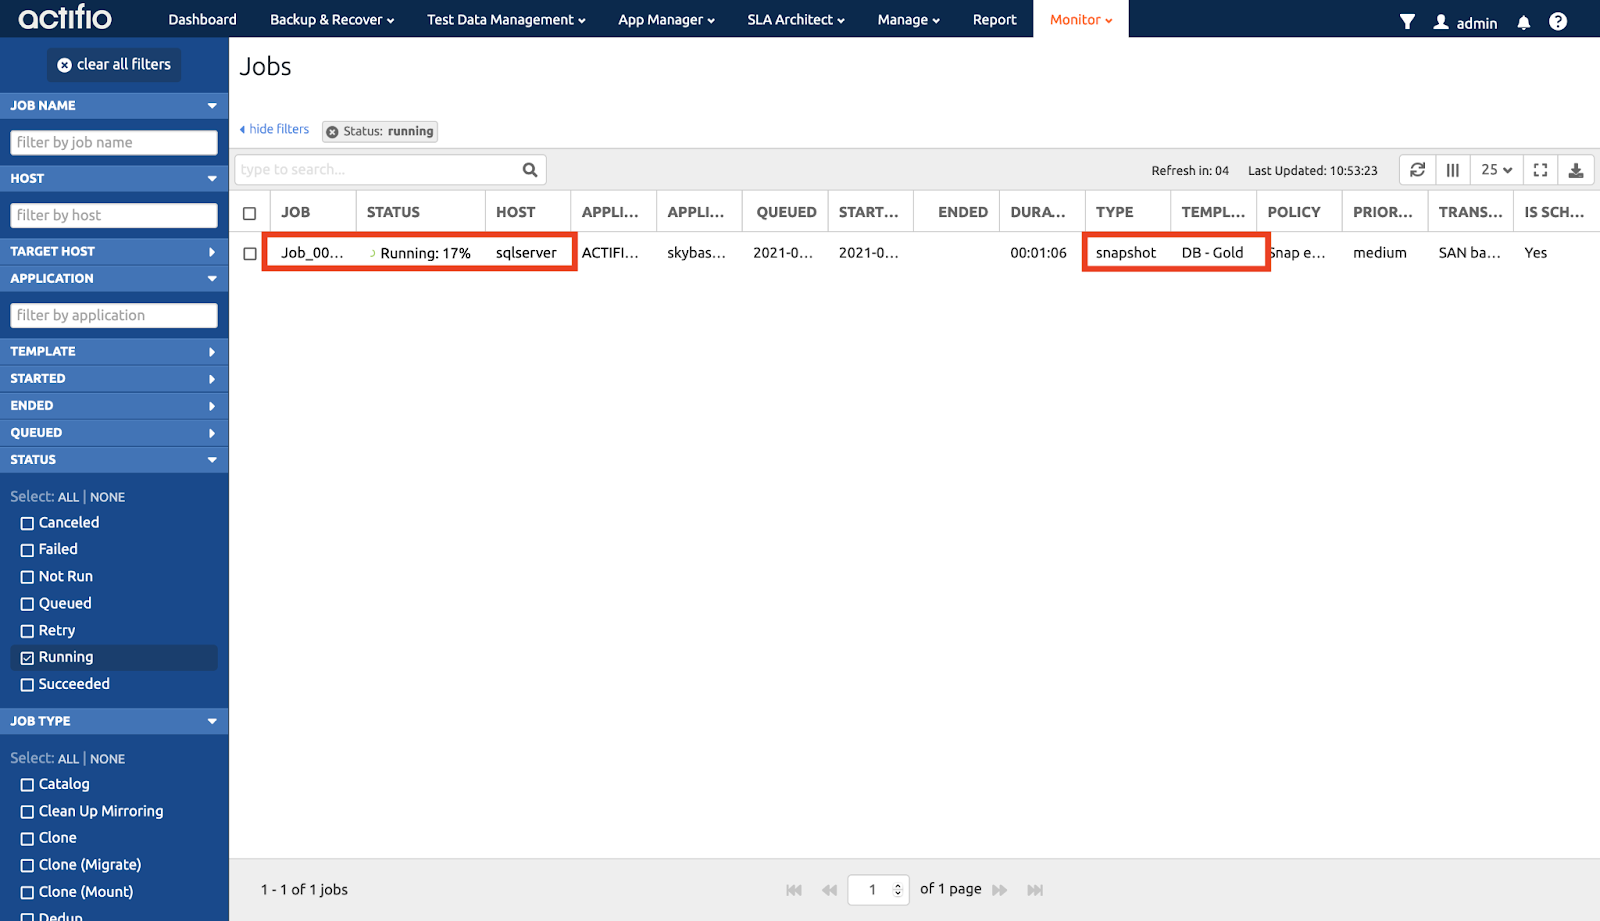
DB-Goldpolicy that you defined in the previous section. Remember the backup policy would backup the database every 12 hours and logs every 1 hour. And those backups will be stored locally for 7 days.Note: Since you defined a continuous policy, the first backup gets triggered automatically after the SLA template and profiles are attached/applied to any application object. -
To verify the same, navigate to the Monitor > Jobs page and you will see that a backup job would be running as shown in the below screen.
-
If you don't see any job in running state, then wait for a few seconds and refresh the page.
-
Wait for the backup job to finish. It would take about a couple of minutes. Once finished, it would disappear. Alternatively, you could make use of the "Status" filter from the left pane and also select "Succeeded" so that you can view jobs in either running or succeeded state.

Click Check my progress below to check your lab progress.
Task 6. Triggering on-demand backup
To trigger an on-demand backup:
-
Navigate to App Manager > Applications page.
-
Select the desired database instance from the list. For this lab, select the ACTIFIO-MSSQL server instance.
-
Right click and select Manage SLA from the action menu or click on the Manage SLA.
-
Under Policies select what you want to trigger the on-demand backup. In this case, choose Snapshot > Snap every 12 hours.
-
Select what you would like to be included in the backup. For this lab, select the DB + LOG to backup both DB and Log.
-
Enter a meaningful label for the Label field and click the Run SLA button. You will get a Backup started successfully message.
-
Click Okay.
You just triggered an on-demand backup for your database application.
- To view/monitor the backup job progress, navigate to the Monitor > Jobs page on the AGM. You will see an on-demand backup job in progress.
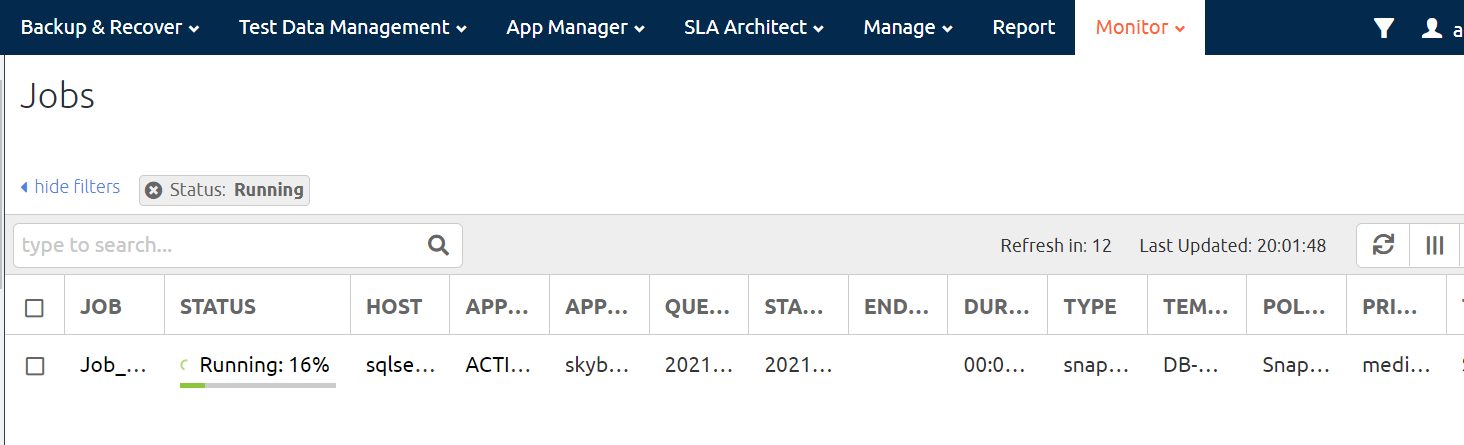
- Click the job ID to see the job details.
Click Check my progress below to check your lab progress.
Viewing backups
To view all backups available for a given application:
- Navigate to App Manager > Applications.
- Select ACTIFIO-MSSQL.
- Right click and select Access from the action menu item. Alternatively, you could also click on the chevron next to the Manage SLA button at the bottom right of the page and select Access.
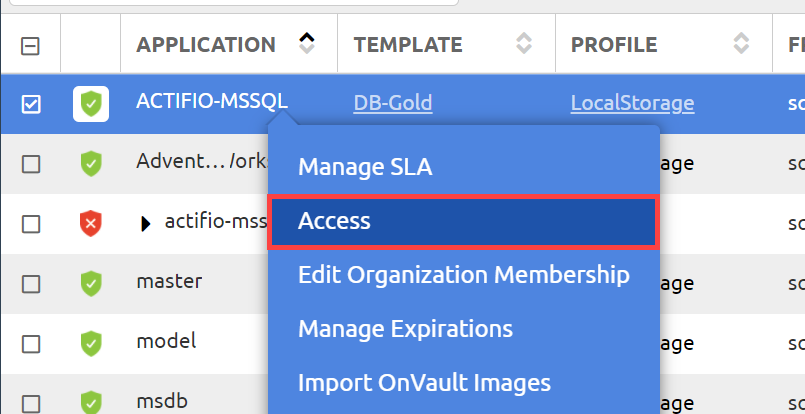
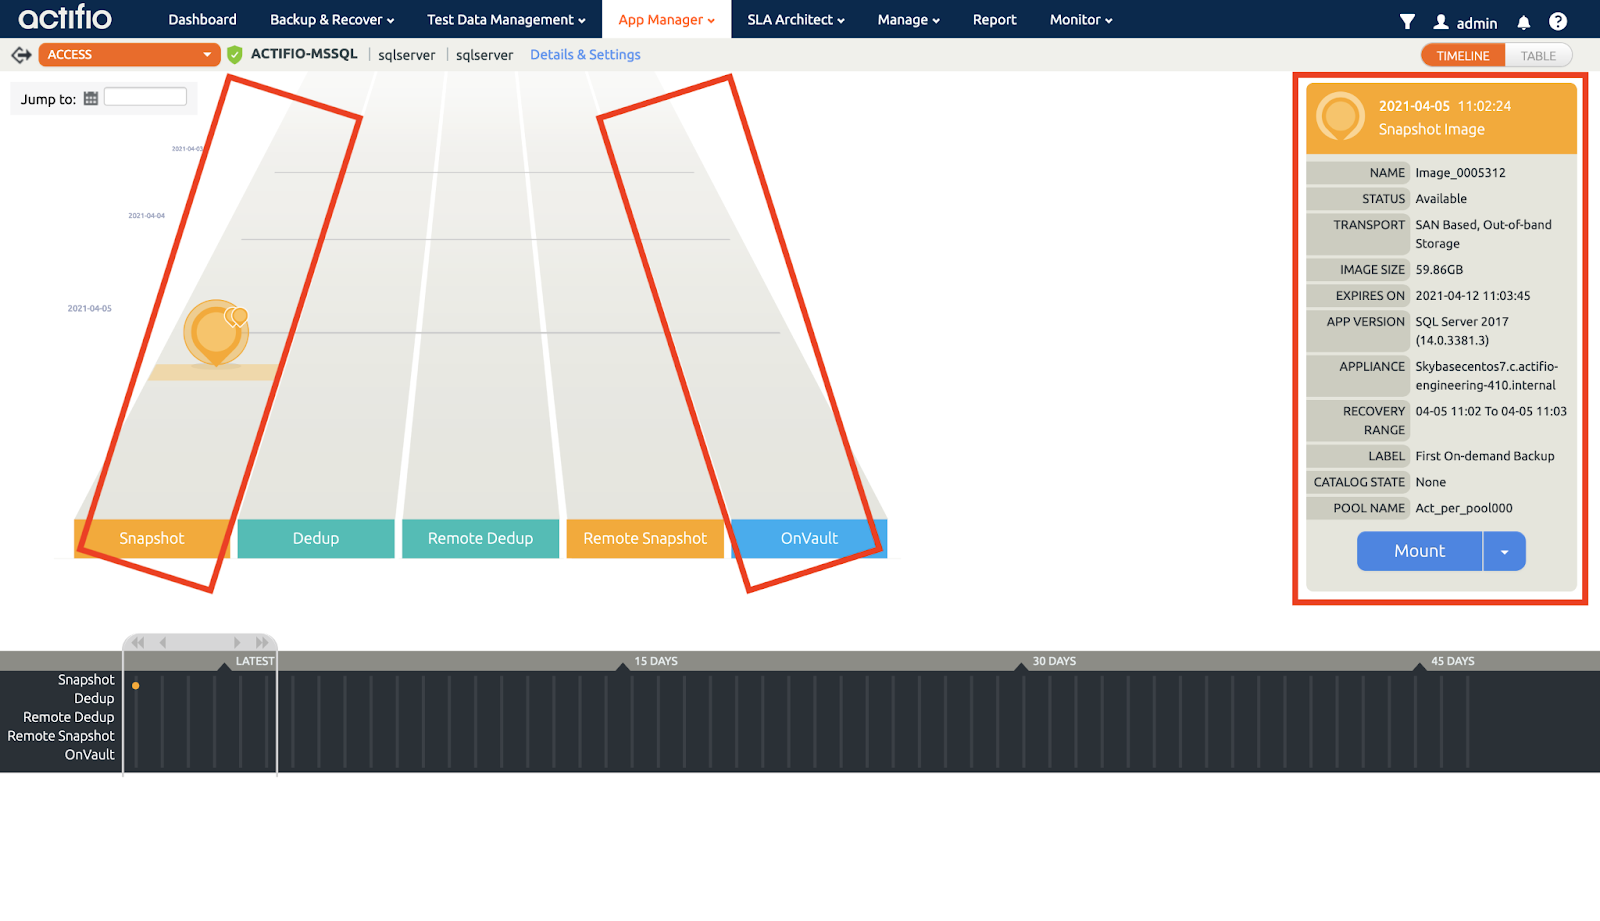
This will present a guitar view (a.k.a swim lanes) as shown below. You can view all the available backups in the local snapshot pool or OnVault (Cloud Storage) for the respective application.
The image details tile on the right presents image details like backup image name, size, its expiry date, recovery range for DB log roll forward and so on.
Task 7. Recovering a database from a backup image
- From the Access page, select the desired point in time backup image for this ACTIFIO-MSSQL server.
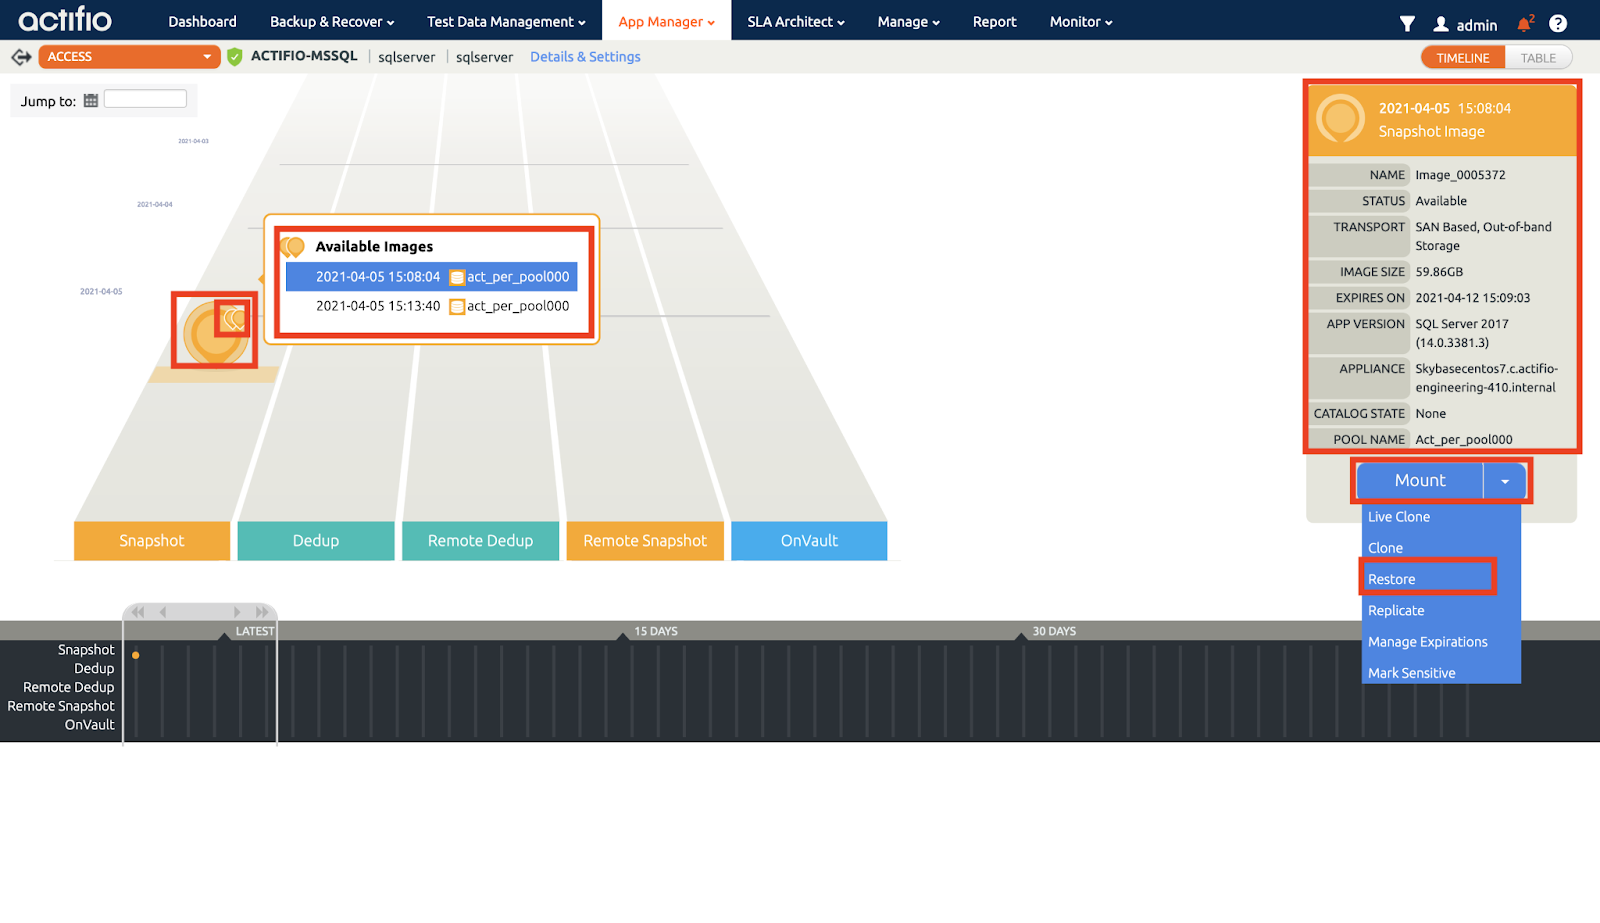
- Once the image is selected, the image tile on the right will display relevant image details.
- Click on Mount.
- Once on the Mount screen, select sqlserver as target. You can mount the backup image on any target server where you want to recover the data. For simplicity, in this lab, you will recover the database back on the source server but as a different database.
- Provide a meaningful label in the label field. In this lab, "qwiklab demo".
- Select the AdventureWorks2017 database. Once you select the database, additional options display.
- The SQL Server Instance Name field is auto populated. This is because you are mounting the backup image on the same source server from which the back was taken - which is already known to AGM. You could mount the backup image to any target server by selecting the appropriate target host and providing the correct SQL Server instance name running on that host.
- For the SQL Server Database Name - set to "Recovered_AdventureWorks2017" for this lab.
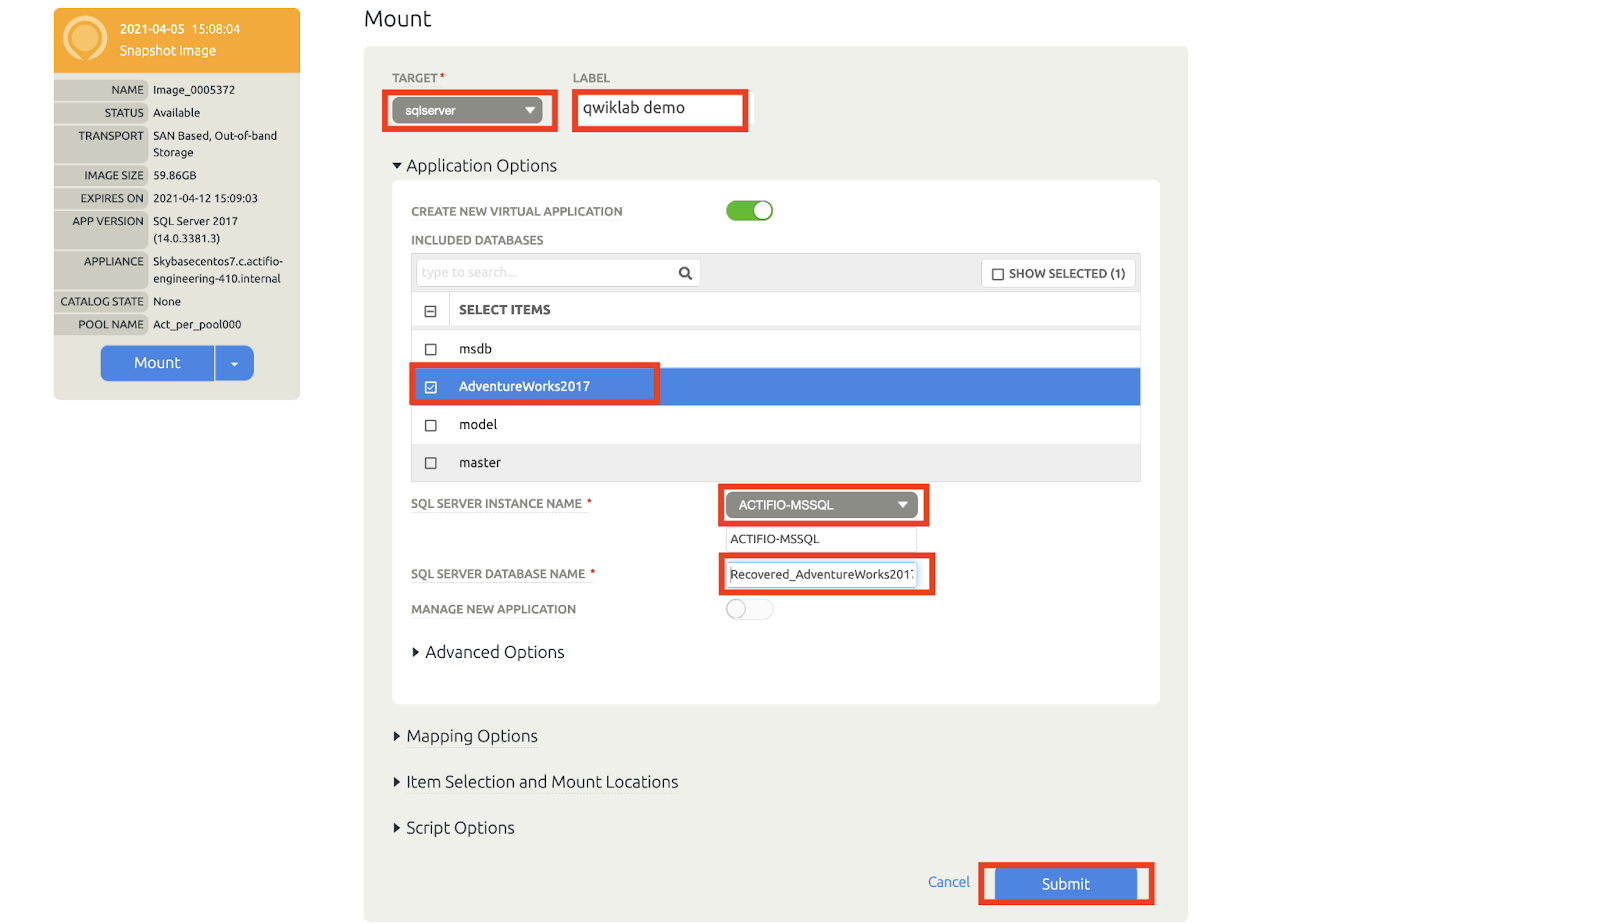
-
Leave other values at their default and click Submit. This triggers a mount job behind the scenes.
-
When successful, click Okay.
-
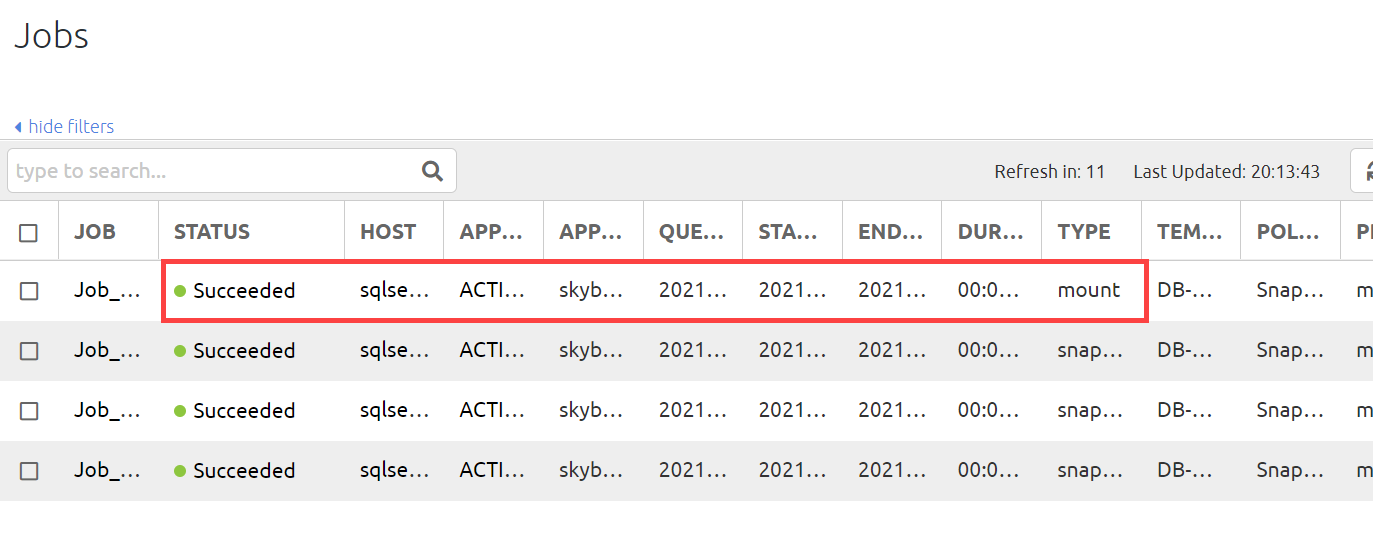
Now, navigate to Monitor > Jobs page. You will see a mount job running. Wait for a few seconds and the mount job will complete.
- Now RDP back into the SQLSERVER Compute Engine instance and refresh the object explorer pane in the SQL Server Management Studio. You will see the new database Recovered_AdventureWorks2017 appear as shown below.
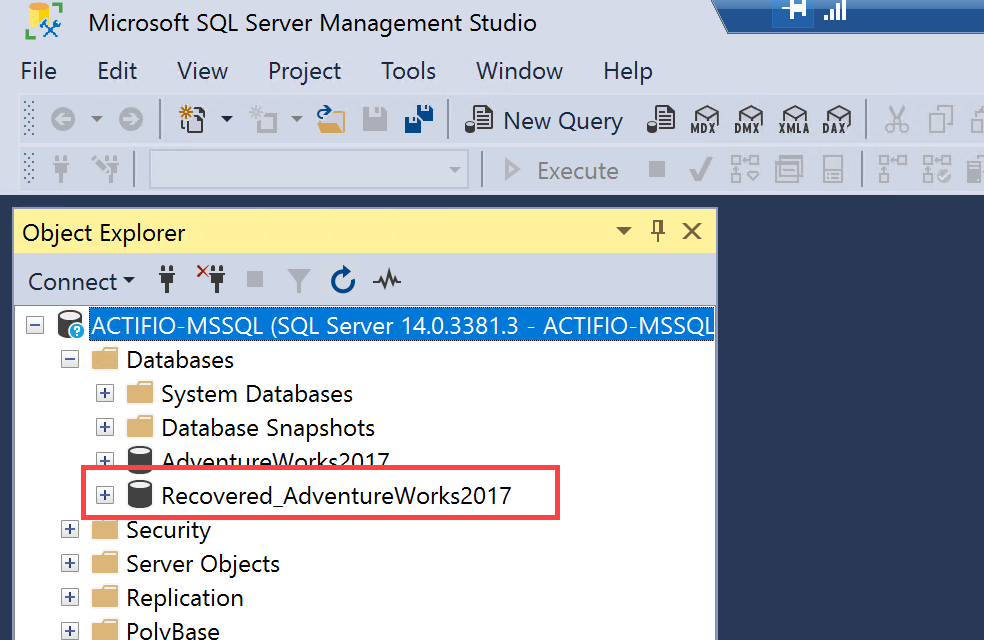
You just recovered your AdventureWorks2017 database in a matter of seconds. You can query the recovered database just like any other database.
Click Check my progress below to check your lab progress.
Congratulations!
You just learned how to backup and recover a Microsoft SQL Server with Actifio.
Manual last updated January 24, 2024
Lab last tested January 24, 2024
Copyright 2024 Google LLC All rights reserved. Google and the Google logo are trademarks of Google LLC. All other company and product names may be trademarks of the respective companies with which they are associated.