Punkty kontrolne
Set up a Cloud SQL for PostgreSQL instance
/ 25
Set up a Cloud Storage bucket
/ 25
Create encrypted credentials file and store key as Secret Manager secret
/ 25
Deploy the app to Cloud Run
/ 25
Using Ruby on Rails with Cloud SQL for PostgreSQL on Cloud Run
GSP943

Overview
In this Qwiklab, you will learn how to deploy a sample Rails application to Cloud Run and how to integrate managed databases, object storage, encrypted secrets, and build pipelines with serverless compute.
Google Cloud SQL for PostgreSQL is a fully-managed database service that makes it easy to set up, maintain, manage, and administer your PostgreSQL relational databases on Google Cloud.
Cloud Run is a managed compute platform that enables you to run containers that are invocable via requests or events. Cloud Run is serverless: it abstracts away all infrastructure management, so you can focus on what matters most — building great applications.
Deploying Rails applications involves integrating multiple services together to form a cohesive project. Here's a visual example of the application you will deploy for this lab:
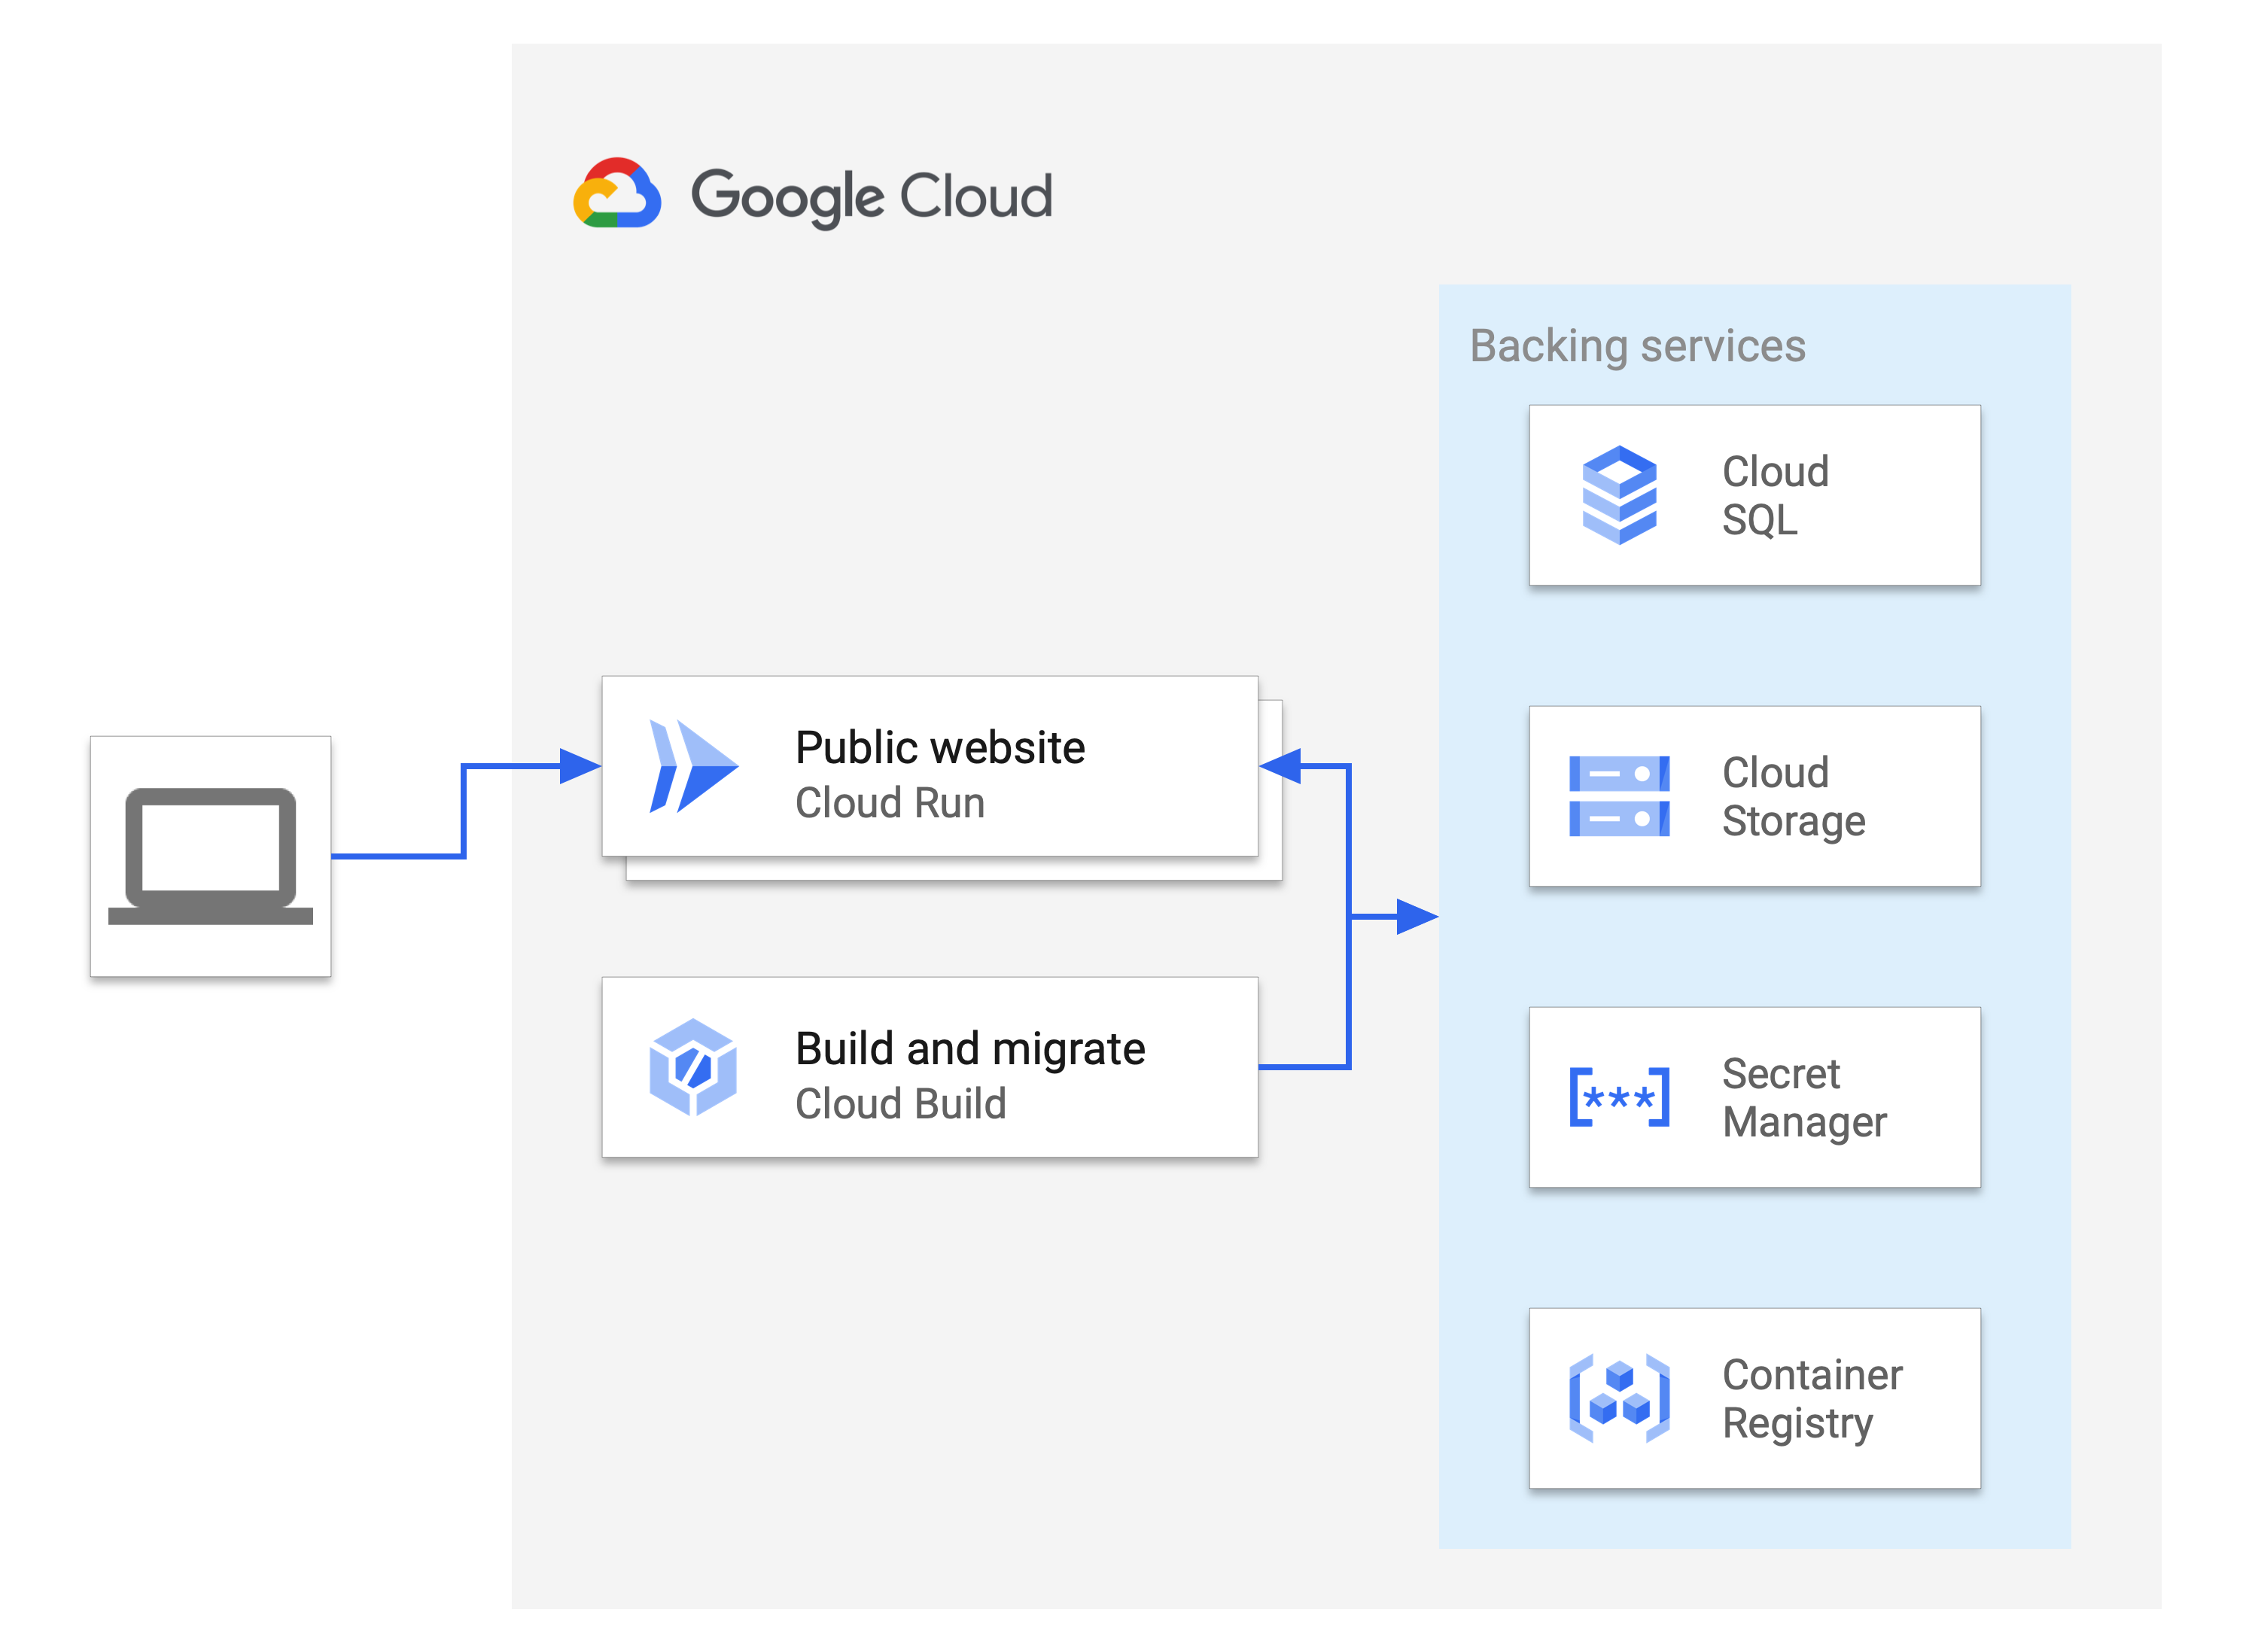
The Rails site is served from Cloud Run, which uses multiple backing services to store different data types (relational database information, media assets, configuration secrets, and container images). The backend services are updated by Cloud Build as part of a build and migrate task.
What you'll learn
- How to create and connect a Cloud SQL database to Active Record
- How to create and use Secret Manager to store and access a Rails master key securely
- How to host user-uploaded media and files on Cloud Storage from Active Storage
- How to set up a Rails app with PostgreSQL
- How to use Cloud Build to automate build and database migrations
- How to deploy a Rails app to Cloud Run
What you'll need
- A browser, such Chrome or Firefox
- Familiarity with standard Linux text editors such as Vim, Emacs or Nano
- Familiarity using Ruby
Setup and requirements
Before you click the Start Lab button
Read these instructions. Labs are timed and you cannot pause them. The timer, which starts when you click Start Lab, shows how long Google Cloud resources will be made available to you.
This hands-on lab lets you do the lab activities yourself in a real cloud environment, not in a simulation or demo environment. It does so by giving you new, temporary credentials that you use to sign in and access Google Cloud for the duration of the lab.
To complete this lab, you need:
- Access to a standard internet browser (Chrome browser recommended).
- Time to complete the lab---remember, once you start, you cannot pause a lab.
How to start your lab and sign in to the Google Cloud console
-
Click the Start Lab button. If you need to pay for the lab, a pop-up opens for you to select your payment method. On the left is the Lab Details panel with the following:
- The Open Google Cloud console button
- Time remaining
- The temporary credentials that you must use for this lab
- Other information, if needed, to step through this lab
-
Click Open Google Cloud console (or right-click and select Open Link in Incognito Window if you are running the Chrome browser).
The lab spins up resources, and then opens another tab that shows the Sign in page.
Tip: Arrange the tabs in separate windows, side-by-side.
Note: If you see the Choose an account dialog, click Use Another Account. -
If necessary, copy the Username below and paste it into the Sign in dialog.
{{{user_0.username | "Username"}}} You can also find the Username in the Lab Details panel.
-
Click Next.
-
Copy the Password below and paste it into the Welcome dialog.
{{{user_0.password | "Password"}}} You can also find the Password in the Lab Details panel.
-
Click Next.
Important: You must use the credentials the lab provides you. Do not use your Google Cloud account credentials. Note: Using your own Google Cloud account for this lab may incur extra charges. -
Click through the subsequent pages:
- Accept the terms and conditions.
- Do not add recovery options or two-factor authentication (because this is a temporary account).
- Do not sign up for free trials.
After a few moments, the Google Cloud console opens in this tab.

Activate Cloud Shell
Cloud Shell is a virtual machine that is loaded with development tools. It offers a persistent 5GB home directory and runs on the Google Cloud. Cloud Shell provides command-line access to your Google Cloud resources.
- Click Activate Cloud Shell
at the top of the Google Cloud console.
When you are connected, you are already authenticated, and the project is set to your Project_ID,
gcloud is the command-line tool for Google Cloud. It comes pre-installed on Cloud Shell and supports tab-completion.
- (Optional) You can list the active account name with this command:
- Click Authorize.
Output:
- (Optional) You can list the project ID with this command:
Output:
gcloud, in Google Cloud, refer to the gcloud CLI overview guide.
Task 1. Preparing your environment
Cloning the Rails app
The code for the Rails sample app is in the GoogleCloudPlatform/ruby-docs-samples repository on GitHub.
- Clone the repository:
- Go to the directory that contains the sample code and run the following commands to ensure the application is properly set up with the required gems and dependencies:
Task 2. Preparing the backing services
This lab uses a number of Google Cloud services to provide the database, media storage, and secret storage that support the deployed Rails project. These services are deployed in a specific region. For efficiency between services, it is best that all services are deployed in the same region.
Set up a Cloud SQL for PostgreSQL instance
Rails supports multiple relational databases, including several offered by Cloud SQL. This lab uses PostgreSQL, an open source database commonly used by Rails apps.
The following sections describe the creation of a PostgreSQL instance, database, and database user for your Rails app.
- Define re-usable environment variables for your instance name, region, and database name:
- Create your PostgreSQL Instance:
- Create the database within the recently created instance:
- Generate a random password for the database user, and write it to a file called
dbpassword:
- Create the user (named
qwiklabs_user) within the recently created instance and set its password to be the content of dbpassword:
Click Check my progress to verify the objective.
Set up a Cloud Storage bucket
You can host Rails static assets and user-uploaded media in highly available object storage using Cloud Storage.
- Assign a Bucket Name and create a Cloud Storage bucket:
- After creating a bucket, to make the uploaded images public, change the permissions of image objects to be readable by everyone:
Click Check my progress to verify the objective.
Task 3. Store secret values in Secret Manager
Now that the backing services are configured, Rails needs secure information, such as passwords, to access these services. Instead of putting these values directly into the Rails source code, this lab uses Rails Credentials and Secret Manager to store this information securely.
Create encrypted credentials file and store key as Secret Manager secret
Rails stores secrets in an encrypted file called config/credentials.yml.enc. The file can be decrypted with the local config/master.key or the environment variable ENV[“RAILS_MASTER_KEY”]. In the credentials file, you can store the Cloud SQL Instance database password and other access keys for external APIs.
You can store this key securely in Secret Manager. Then, you can grant Cloud Run and Cloud Build access to the key by granting access to their respective service accounts. Service accounts are identified by an email address that contains the project number.
- Generate the
config/credentials.yml.encfile with the following command:
The command will create a config/master.key if no master key is defined, and create a config/credentials.yml.enc file if the file does not exist. This will open a temporary file in the assigned $EDITOR with the decrypted contents for the secrets to be added.
- Copy and paste the necessary fields for your database at the end of the credentials file:
Do not close the editor yet. You will get the db_password value next.
-
Open a new tab in your Cloud Shell by pressing the + button.
-
Run this command to review the password saved in your
dbpasswordfile:
-
Copy your output from the previous command.
-
Return to your first Cloud Shell tab with your credentials file open in an editor.
-
Replace the REPLACE_WITH_DB_PASSWORD value with the password you copied.
Your credentials file should look similar to this:
EDITOR="nano" bin/rails credentials:edit to edit your credentials file again. This command should be run in the ~/ruby-docs-samples/run/rails directory.
Secrets can be accessed with Rails.application.credentials. For example, Rails.application.credentials.secret_key_base should return the application's secret key base and Rails.application.credentials.gcp[:db_passsword] should return your database password.
- Press
control+xand thenyto save and exit your credentials.
The config/credentials/yml.enc is stored encrypted, but config/master.key can be stored in Secret Manager.
- Create a new secret with the value of the
config/master.key:
If prompted to enable API service, enter Y
- To confirm the creation of the secret, check it:
- Get the value of the project number:
- Grant access to the secret to the Cloud Run service account:
- Grant access to the secret to the Cloud Build service account:
Connect Rails app to production database and storage
This lab uses a PostgreSQL instance as the production database and Cloud Storage as the storage backend. For Rails to connect to the newly created database and storage bucket, you need to specify all the information needed to access them in the .env file.
Our .env file contains the configuration for the application environment variables. The application will read this file using the dotenv gem. Since the secrets are stored in credentials.yml.enc and Secret Manger, the .env doesn’t have to be encrypted because it doesn’t hold any sensitive credentials.
- Take a look at your
.envfile:
You'll notice there are key value pairs which you can define to set up your connection.
- To configure the Rails app to connect with the database and storage bucket, run this command:
You filled out your .env file with the variables you used to store the values for your database, project, region, instance, and bucket earlier in the lab.
Grant Cloud Build access to Cloud SQL
- In order for Cloud Build to apply the database migrations, you need to grant permissions for Cloud Build to access Cloud SQL:
Click Check my progress to verify the objective.
Task 4. Deploying the app to Cloud Run
With the backing services set up, you can now deploy the app as a Cloud Run service.
- Change the Ruby base image in the Dockerfile to use the same version of Ruby Cloud Shell uses:
These commands store a variable with the major and minor versions of your Ruby version and then reconstruct the line that specifies which image to pull using your Ruby version instead.
- Using the supplied
cloudbuild.yaml, use Cloud Build to build the image, run the database migrations, and populate the static assets:
This first build takes a few minutes to complete. If the build timed out, increase the timeout duration by inserting --timeout=2000s into the build command above.
- When the build is completed and successful, deploy the Cloud Run service for the first time, setting the service region, base image, and connected Cloud SQL instance:
You should see output that shows the deployment succeeded, with a service URL:
- To see the deployed service, go to the service URL.
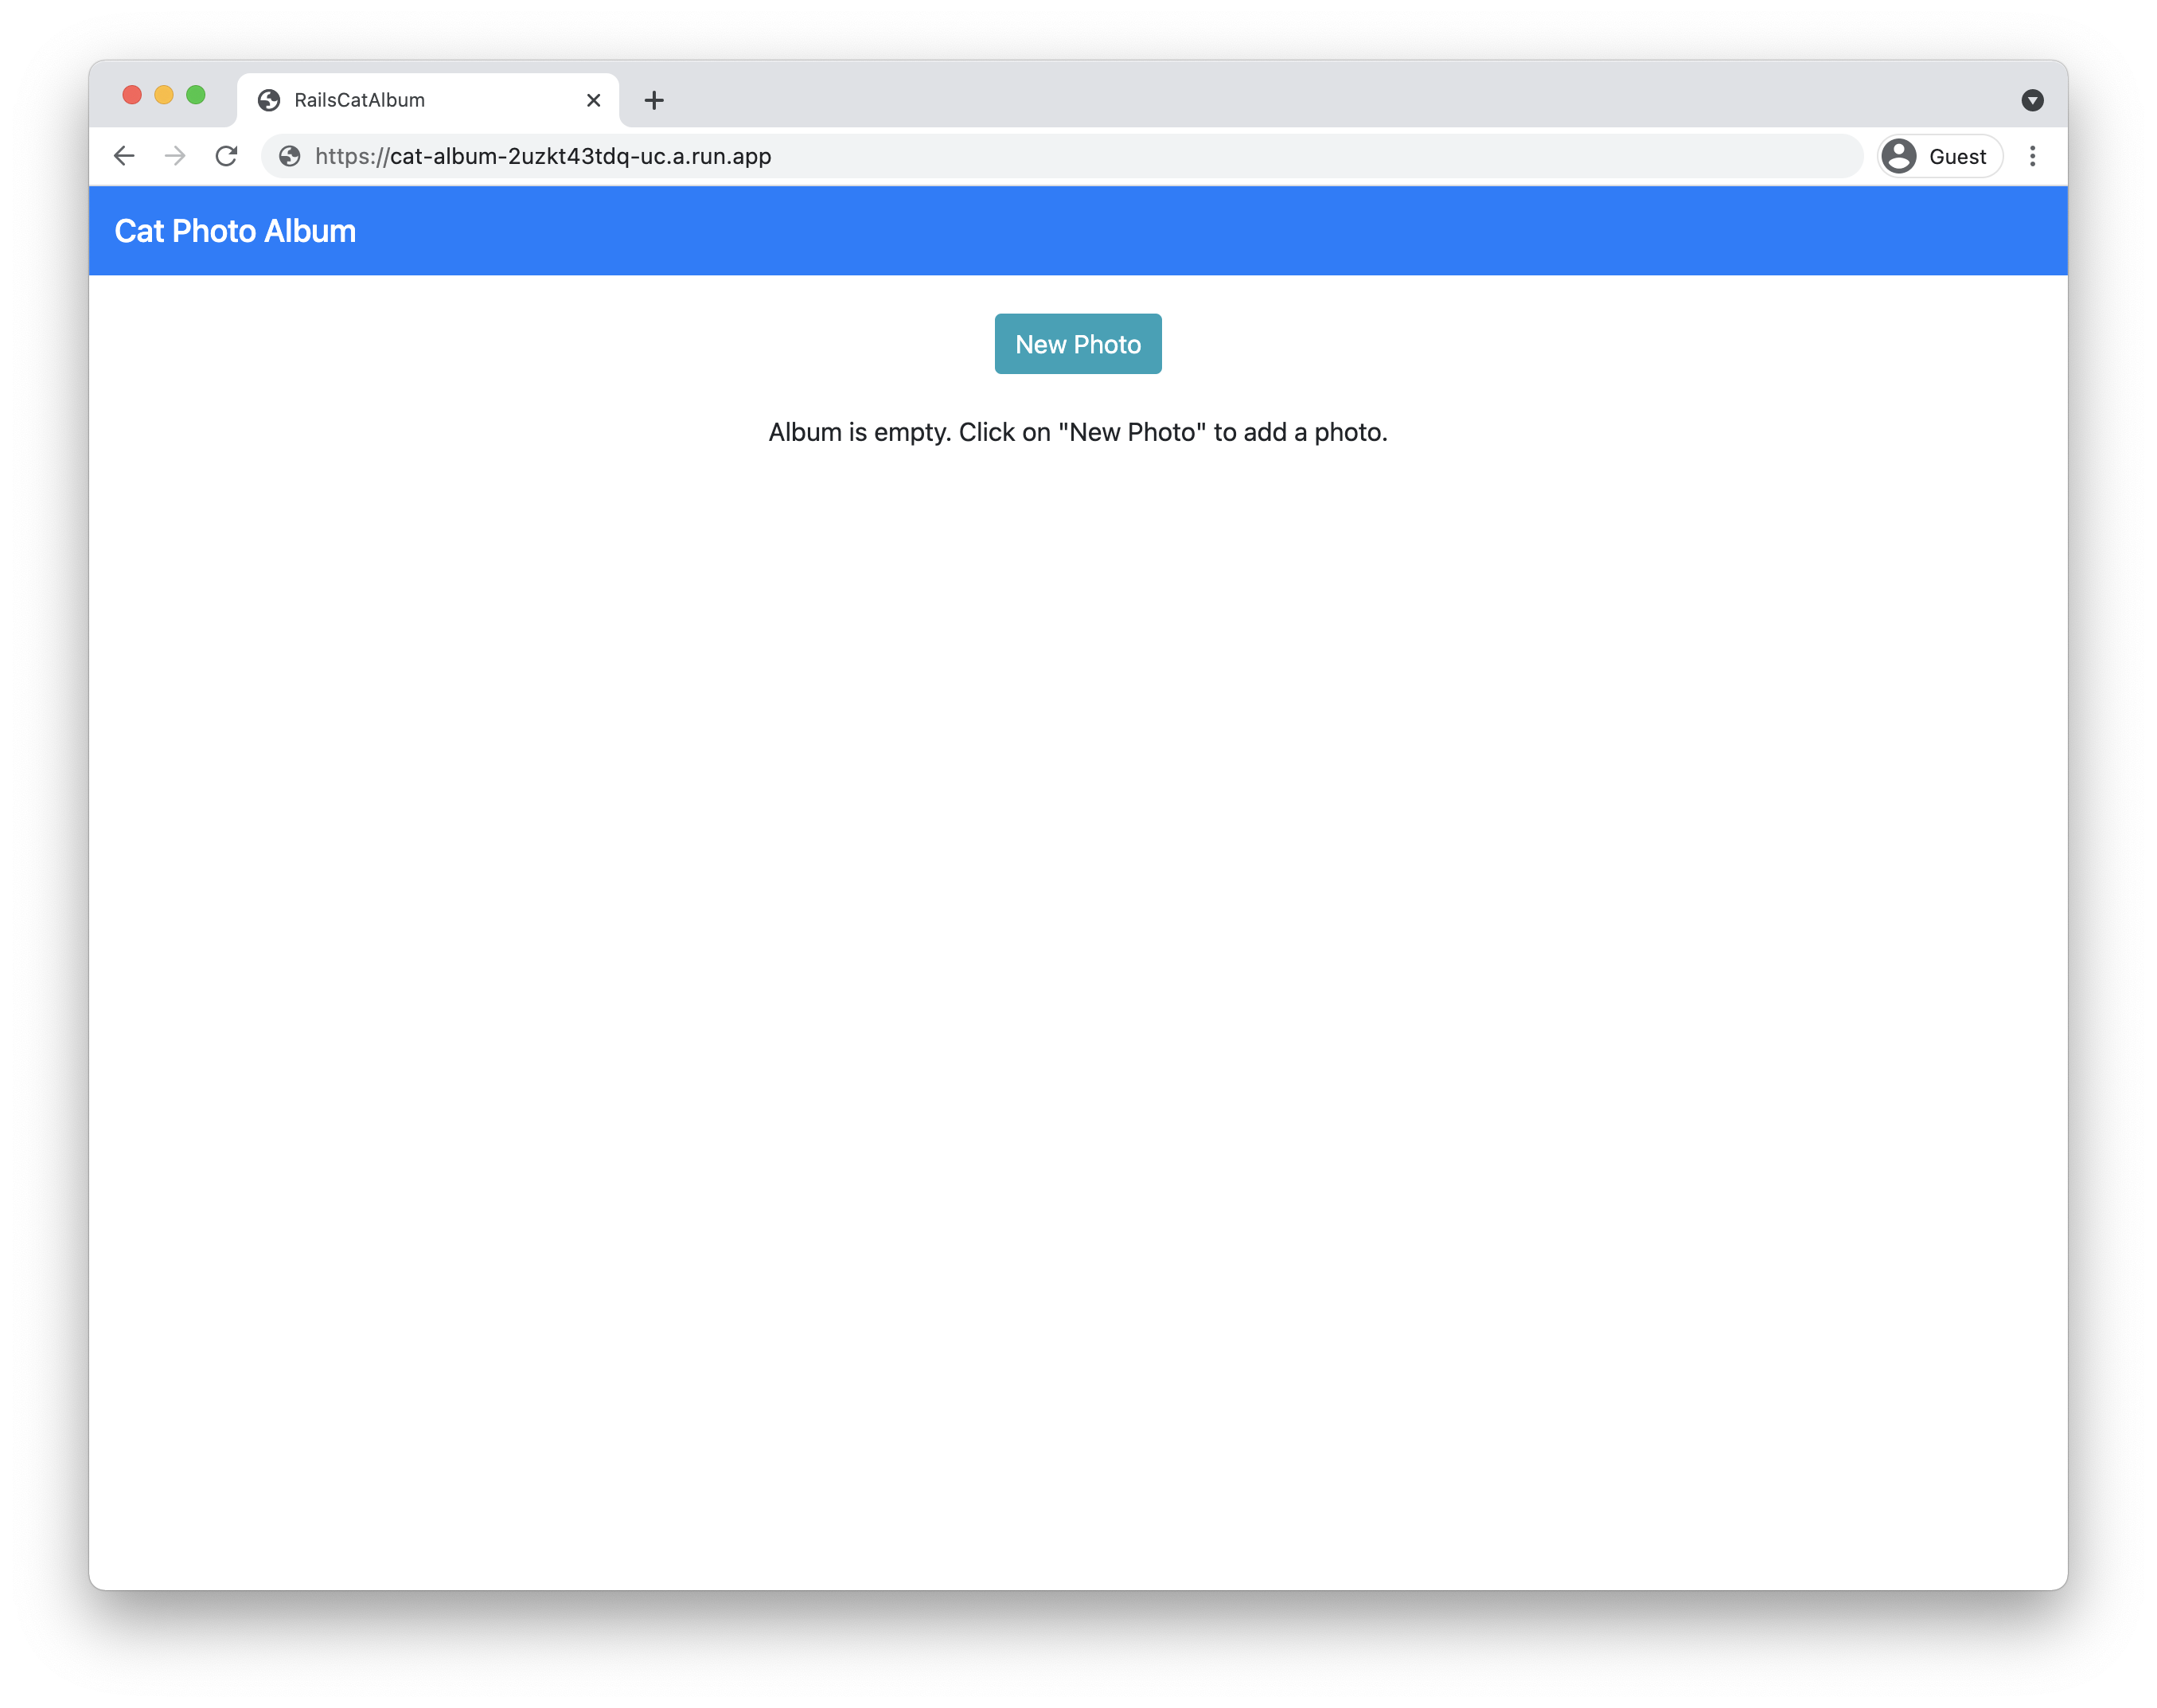
If the service URL shows Cat Photo Album, you're on the homepage of the app.
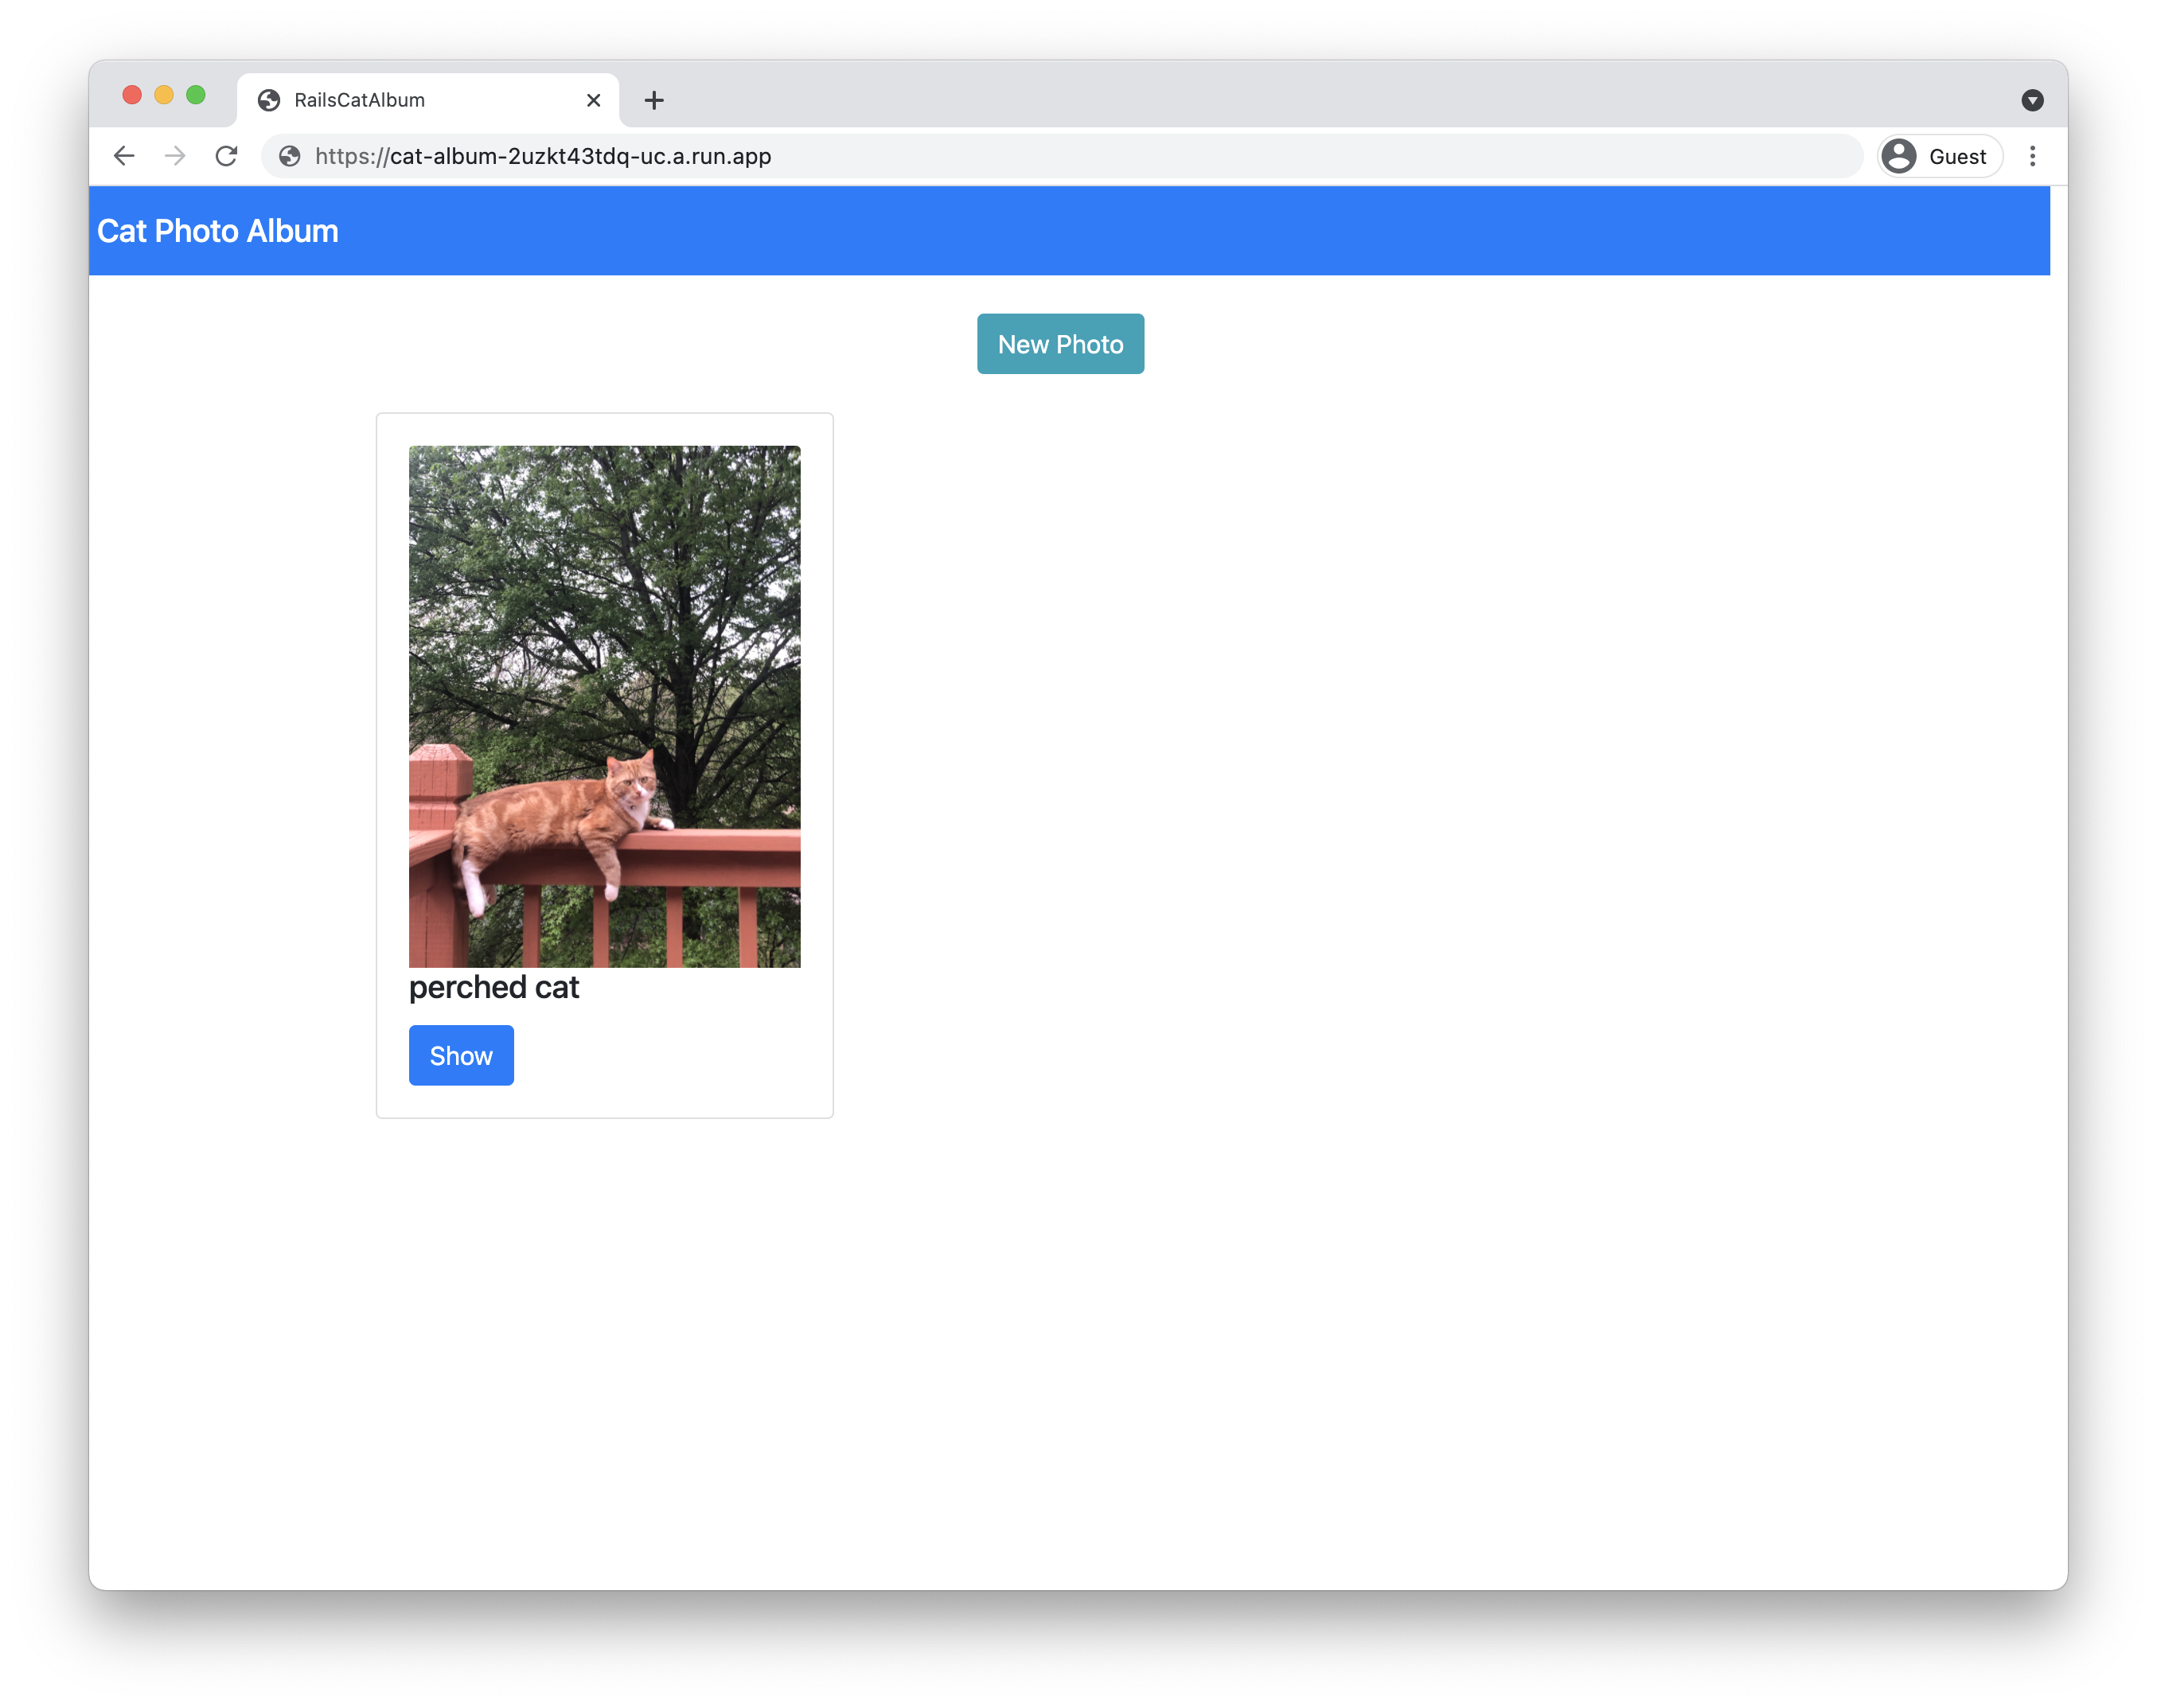
- Try to upload a new photo.
If the photo successfully uploads, the Rails application has been successfully deployed.
Click Check my progress to verify the objective.
Task 5. Understanding the code
The Rails sample app was created using standard Rails commands. The following commands create the cat_album app and use the scaffold command to generate a model, controller, and views for the Photo resource:
Database connection
The config/database.yml file contains the configuration needed to access your databases in different environments (development, test, production).
For example, the production database is configured to run in Cloud SQL for PostgreSQL. The database name and username are set through environment variables in the .env file, while the database password is stored inside the config/credentials.yml.enc file, which requires the RAILS_MASTER_KEY to decrypt.
When the app runs on Cloud Run (fully managed), it connects to the PostgreSQL instance via a socket provided by the Cloud Run environment. When the app runs on your local machine, it connects to the PostgreSQL instance via Cloud SQL Auth proxy.
run/rails/config/database.yml:
Cloud-stored user uploaded media
Rails uses Active Storage to upload files to cloud storage providers.The config/storage.yml and config/environments/production.rb files specify Google Cloud Storage as the service provider in the production environment.
run/rails/config/storage.yml:
run/rails/config/environments/production.rb:
Automation with Cloud Build
The cloudbuild.yaml file performs not only the typical image build steps (creating the container image and pushing that to the container registry), but also the Rails database migrations. These require access to the database, which is performed by using the app-engine-exec-wrapper, a helper for Cloud SQL Auth proxy.
run/rails/cloudbuild.yaml:
Substitution variables are used in this configuration. Changing the values in the file directly means the --substitutions flag can be dropped at migration time.
In this configuration, only existing migrations in the db/migrate directory are applied. To create migration files, see Active Record Migrations.
To build the image and apply migrations, the Cloud Build configuration needs access to the RAILS_MASTER_KEY secret from Secret Manager. The availableSecrets field sets the secret version and environment variables to use for the secret. The master key secret is passed in as an argument in the build image step and then gets set to be the RAILS_MASTER_KEY in the Dockerfile when building the image.
run/rails/Dockerfile:
To extend the Cloud Build configuration to include the deployment in the one configuration without having to run two commands, see Continuous deployment from git using Cloud Build. This requires IAM changes, as described.
Congratulations!
You learned how to use Cloud SQL for PostgreSQL using Ruby on Rails and then deploy it on the Cloud Run environment.
Finish your quest
A quest is a series of related labs that form a learning path. This self-paced lab is part of the Cloud SQL quest. A quest is a series of related labs that form a learning path. Completing a quest earns you a badge to recognize your achievement. You can make your badge or badges public and link to them in your online resume or social media account.
Enroll in Cloud SQL and get immediate completion credit. Refer to the Google Cloud Skills Boost catalog for all available quests.
Next steps / Learn more
Continue your learning with the given docs:
Google Cloud training and certification
...helps you make the most of Google Cloud technologies. Our classes include technical skills and best practices to help you get up to speed quickly and continue your learning journey. We offer fundamental to advanced level training, with on-demand, live, and virtual options to suit your busy schedule. Certifications help you validate and prove your skill and expertise in Google Cloud technologies.
Manual Last Updated October 31, 2023
Lab Last Tested October 31, 2023
Copyright 2024 Google LLC All rights reserved. Google and the Google logo are trademarks of Google LLC. All other company and product names may be trademarks of the respective companies with which they are associated.