In this lab, you will explore TFX pipeline metadata including pipeline and run artifacts. An AI Platform Pipelines instance includes the ML Metadata service. In AI Platform Pipelines, ML Metadata uses MySQL as a database backend and can be accessed using a GRPC server.
Objectives
Use a GRPC server to access and analyze pipeline artifacts stored in the ML Metadata service of your AI Platform Pipelines instance.
Setup
For each lab, you get a new Google Cloud project and set of resources for a fixed time at no cost.
Sign in to Qwiklabs using an incognito window.
Note the lab's access time (for example, 1:15:00), and make sure you can finish within that time.
There is no pause feature. You can restart if needed, but you have to start at the beginning.
When ready, click Start lab.
Note your lab credentials (Username and Password). You will use them to sign in to the Google Cloud Console.
Click Open Google Console.
Click Use another account and copy/paste credentials for this lab into the prompts.
If you use other credentials, you'll receive errors or incur charges.
Accept the terms and skip the recovery resource page.
Activate Cloud Shell
Cloud Shell is a virtual machine that contains development tools. It offers a persistent 5-GB home directory and runs on Google Cloud. Cloud Shell provides command-line access to your Google Cloud resources. gcloud is the command-line tool for Google Cloud. It comes pre-installed on Cloud Shell and supports tab completion.
Click the Activate Cloud Shell button () at the top right of the console.
Click Continue.
It takes a few moments to provision and connect to the environment. When you are connected, you are also authenticated, and the project is set to your PROJECT_ID.
[core]
project = qwiklabs-gcp-44776a13dea667a6
Note: Full documentation of gcloud is available in the gcloud CLI overview guide.
Task 1. Create an instance of AI Platform Pipelines
In this task, you deploy Kubeflow Pipelines as a Kuberenetes App, which are solutions with simple click to deploy to Google Kubernetes Engine and that have the flexibility to deploy to Kubernetes clusters on-premises or in third-party clouds. You will see Kubeflow Pipelines integrated into your Google Cloud environment as AI Platform Pipelines. If interested, learn more about Kubeflow Pipelines in the Introduction to Kubeflow documentation during installation steps.
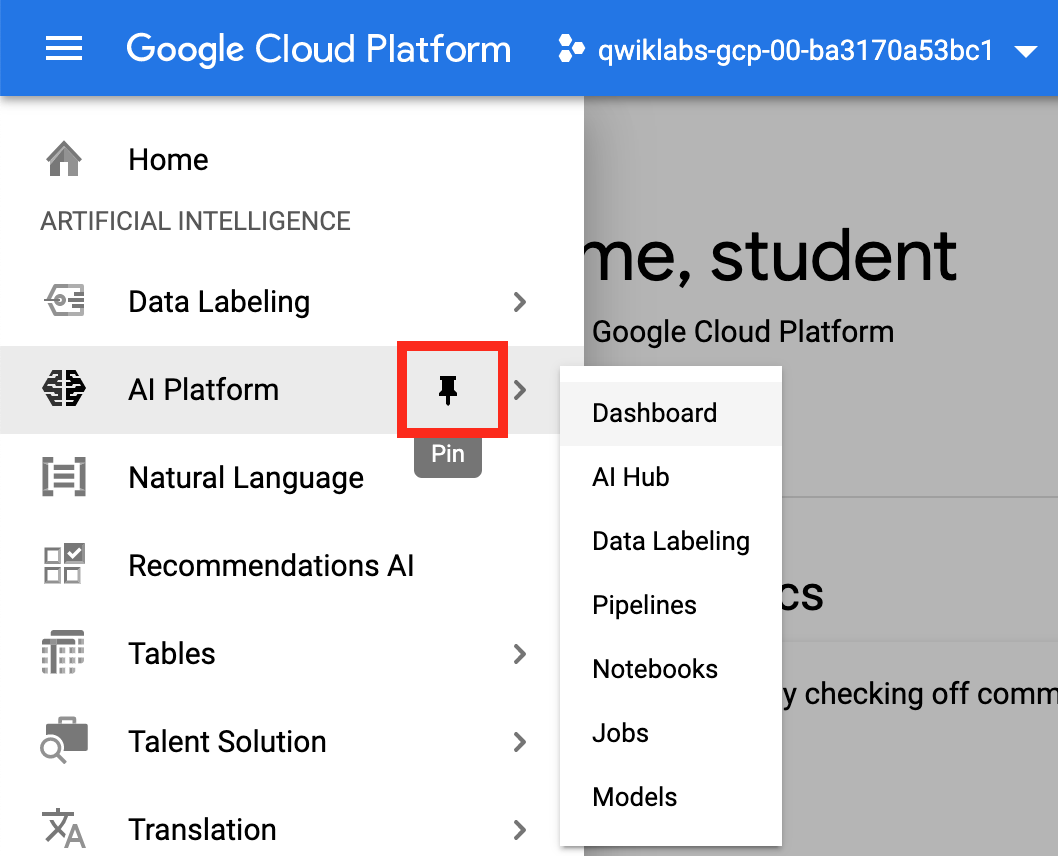
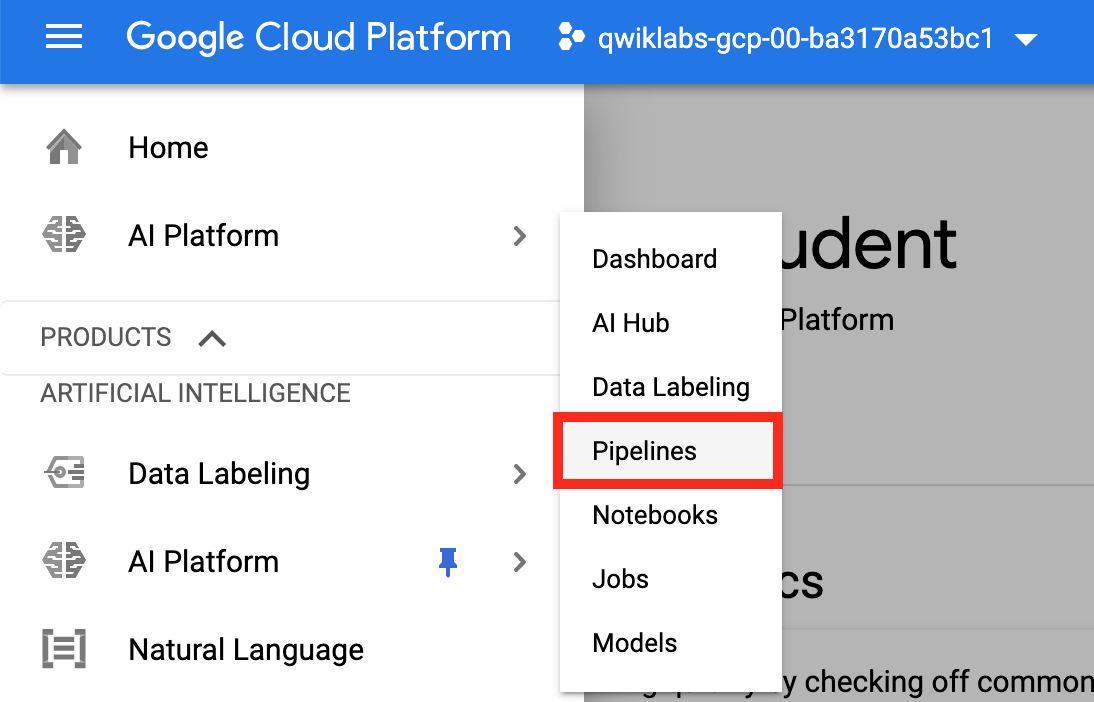
In the Google Cloud Console, on the Navigation menu, scroll down to AI Platform and pin the section for easier access later in the lab.
Navigate to AI Platform > Pipelines.
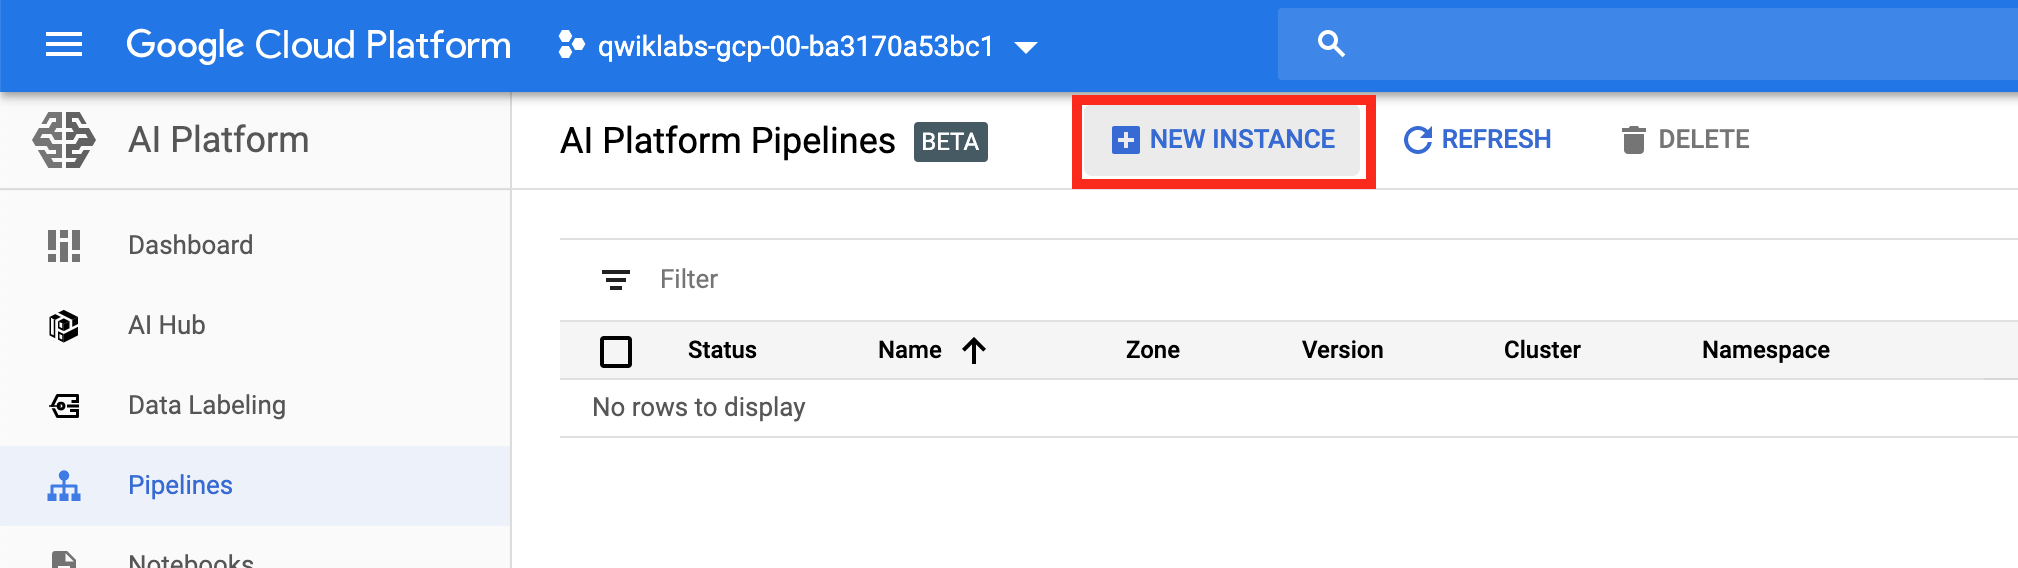
Then click New Instance.
Click Configure.
To create cluster select Zone as then check Allow access to the following Cloud APIs, leave the name as is, and then click Create New Cluster.
Note:
The cluster creation will take 3 - 5 minutes. You need to wait until this step completes before you proceed to the next step.
Note:
If the cluster creation fails because of insuffcient resources in a certain region/zone, try again with a different zone.
Scroll to the bottom of the page, accept the marketplace terms, and click Deploy. You will see the individual services of KFP deployed to your GKE cluster. Wait for the deployment to finish before proceeding to the next task.
In Cloud Shell, run the following to configure kubectl command line access
In Cloud Shell, run the following to get the ENDPOINT of your KFP deployment
kubectl describe configmap inverse-proxy-config | grep googleusercontent.com
Important: In a later task, you will need to set the endpoint for your KFP in one of the cells in your notebook. Remember to use the above output as your ENDPOINT.
Click Check my progress to verify the objective.
Creating an instance of AI Platform Pipelines
Task 2. Access Vertex AI Workbench
To launch AI Platform Workbench:
Click on the Navigation Menu and navigate to Vertex AI, then to Workbench.
Click on USER-MANAGED NOTEBOOKS.
You should see tfx-on-googlecloud notebook preprovisioned for you. If not, wait a few minutes and refresh the page.
Click Open JupyterLab. A JupyterLab window will open in a new tab.
Task 3. Clone the example repo within your AI Platform Notebooks instance
To clone the mlops-on-gcp notebook in your JupyterLab instance:
In JupyterLab, click the Terminal icon to open a new terminal.
At the command-line prompt, type in the following command and press Enter:
git clone https://github.com/GoogleCloudPlatform/mlops-on-gcp
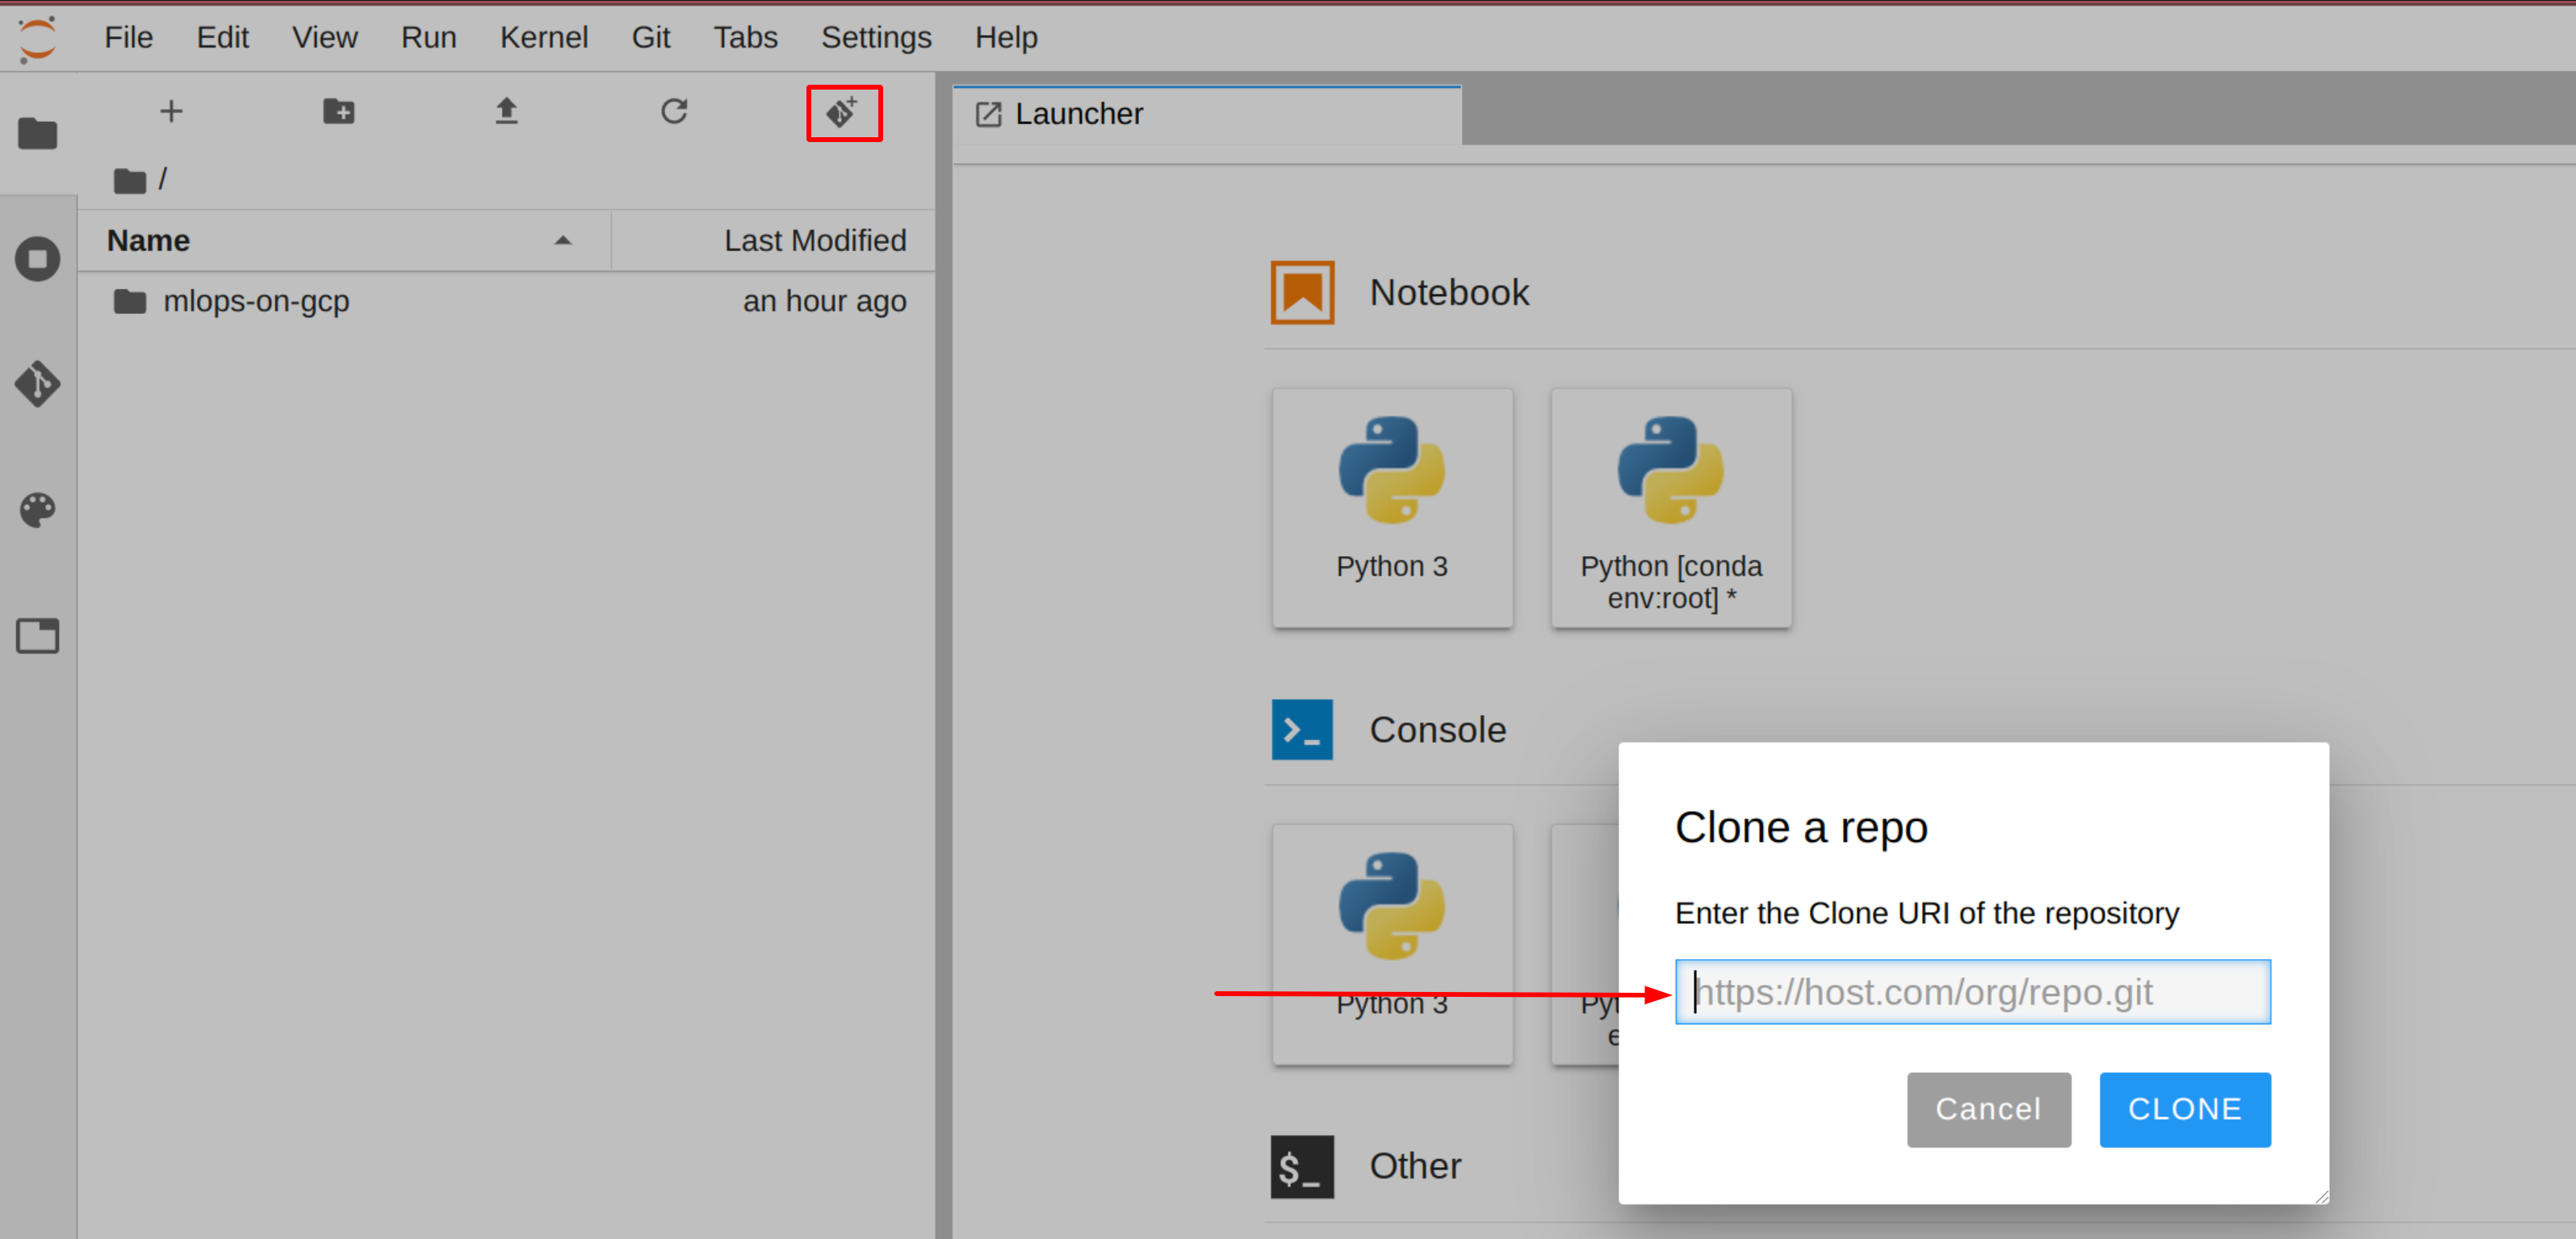
Note: If the cloned repo does not appear in the JupyterLab UI, you can use the top line menu and under Git > Clone a repository, clone the repo (https://github.com/GoogleCloudPlatform/mlops-on-gcp) using the UI.
Confirm that you have cloned the repository by double clicking on the mlops-on-gcp directory and ensuring that you can see its contents. The files for all the Jupyter notebook-based labs throughout this course are available in this directory.
Navigate to the lab notebook
From the mlops-labs/workshops/tfx-caip-tf23 folder execute the install.sh script to install TFX and KFP SDKs:
cd mlops-on-gcp/workshops/tfx-caip-tf23
./install.sh
Now, in AI Platform Notebook, navigate to mlops-labs/workshops/tfx-caip-tf23/lab-04-tfx-metadata/labs and open lab-04.ipynb.
Clear all the cells in the notebook (look for the Clear button on the notebook toolbar) and then Run the cells one by one.
When prompted, come back to these instructions to check your progress.
If you need more help, you may take a look at the complete solution by navigating to mlops-on-gcp/workshops/tfx-caip-tf23/lab-04-tfx-metadata/solutions and open lab-04.ipynb.
Task 4. Run your training job in the cloud
Test completed tasks - Compile the kubeflow pipeline
Click Check my progress to verify the objective.
Compile the kubeflow pipeline
Test completed tasks - Deploy the pipeline package to AI Platform Pipelines
Click Check my progress to verify the objective.
Deploy the pipeline package to AI Platform Pipelines
Congratulations!
In this lab, you explored ML metadata and ML artifacts created by TFX pipeline runs using TFX pipeline ResolverNodes.
End your lab
When you have completed your lab, click End Lab. Qwiklabs removes the resources you’ve used and cleans the account for you.
You will be given an opportunity to rate the lab experience. Select the applicable number of stars, type a comment, and then click Submit.
The number of stars indicates the following:
1 star = Very dissatisfied
2 stars = Dissatisfied
3 stars = Neutral
4 stars = Satisfied
5 stars = Very satisfied
You can close the dialog box if you don't want to provide feedback.
For feedback, suggestions, or corrections, please use the Support tab.
Copyright 2022 Google LLC All rights reserved. Google and the Google logo are trademarks of Google LLC. All other company and product names may be trademarks of the respective companies with which they are associated.
Lab membuat project dan resource Google Cloud untuk jangka waktu tertentu
Lab memiliki batas waktu dan tidak memiliki fitur jeda. Jika lab diakhiri, Anda harus memulainya lagi dari awal.
Di kiri atas layar, klik Start lab untuk memulai
Gunakan penjelajahan rahasia
Salin Nama Pengguna dan Sandi yang diberikan untuk lab tersebut
Klik Open console dalam mode pribadi
Login ke Konsol
Login menggunakan kredensial lab Anda. Menggunakan kredensial lain mungkin menyebabkan error atau dikenai biaya.
Setujui persyaratan, dan lewati halaman resource pemulihan
Jangan klik End lab kecuali jika Anda sudah menyelesaikan lab atau ingin mengulanginya, karena tindakan ini akan menghapus pekerjaan Anda dan menghapus project
Konten ini tidak tersedia untuk saat ini
Kami akan memberi tahu Anda melalui email saat konten tersedia
Bagus!
Kami akan menghubungi Anda melalui email saat konten tersedia
Satu lab dalam satu waktu
Konfirmasi untuk mengakhiri semua lab yang ada dan memulai lab ini
Gunakan penjelajahan rahasia untuk menjalankan lab
Gunakan jendela Samaran atau browser pribadi untuk menjalankan lab ini. Langkah ini akan mencegah konflik antara akun pribadi Anda dan akun Siswa yang dapat menyebabkan tagihan ekstra pada akun pribadi Anda.
In this lab, you will explore ML metadata and ML artifacts created by TFX pipeline runs.
 ) at the top right of the console.