Overview
In this lab, you:
- Write unit tests for
DoFns and PTransforms using testing tools in Apache Beam.
- Perform a pipeline integration test.
- Use the
TestStream class to test windowing behavior for a streaming pipeline.
Testing your pipeline is a particularly important step in developing an effective data-processing solution. The indirect nature of the Beam model can make debugging failed runs a non-trivial task.
In this lab, we will explore how to perform unit tests locally with tools in the testing package of the Beam SDK, using the DirectRunner.
Setup and requirements
Before you click the Start Lab button
Note: Read these instructions.
Labs are timed and you cannot pause them. The timer, which starts when you click Start Lab, shows how long Google Cloud resources will be made available to you.
This Qwiklabs hands-on lab lets you do the lab activities yourself in a real cloud environment, not in a simulation or demo environment. It does so by giving you new, temporary credentials that you use to sign in and access Google Cloud for the duration of the lab.
What you need
To complete this lab, you need:
- Access to a standard internet browser (Chrome browser recommended).
- Time to complete the lab.
Note: If you already have your own personal Google Cloud account or project, do not use it for this lab.
Note: If you are using a Pixelbook, open an Incognito window to run this lab.
How to start your lab and sign in to the Console
-
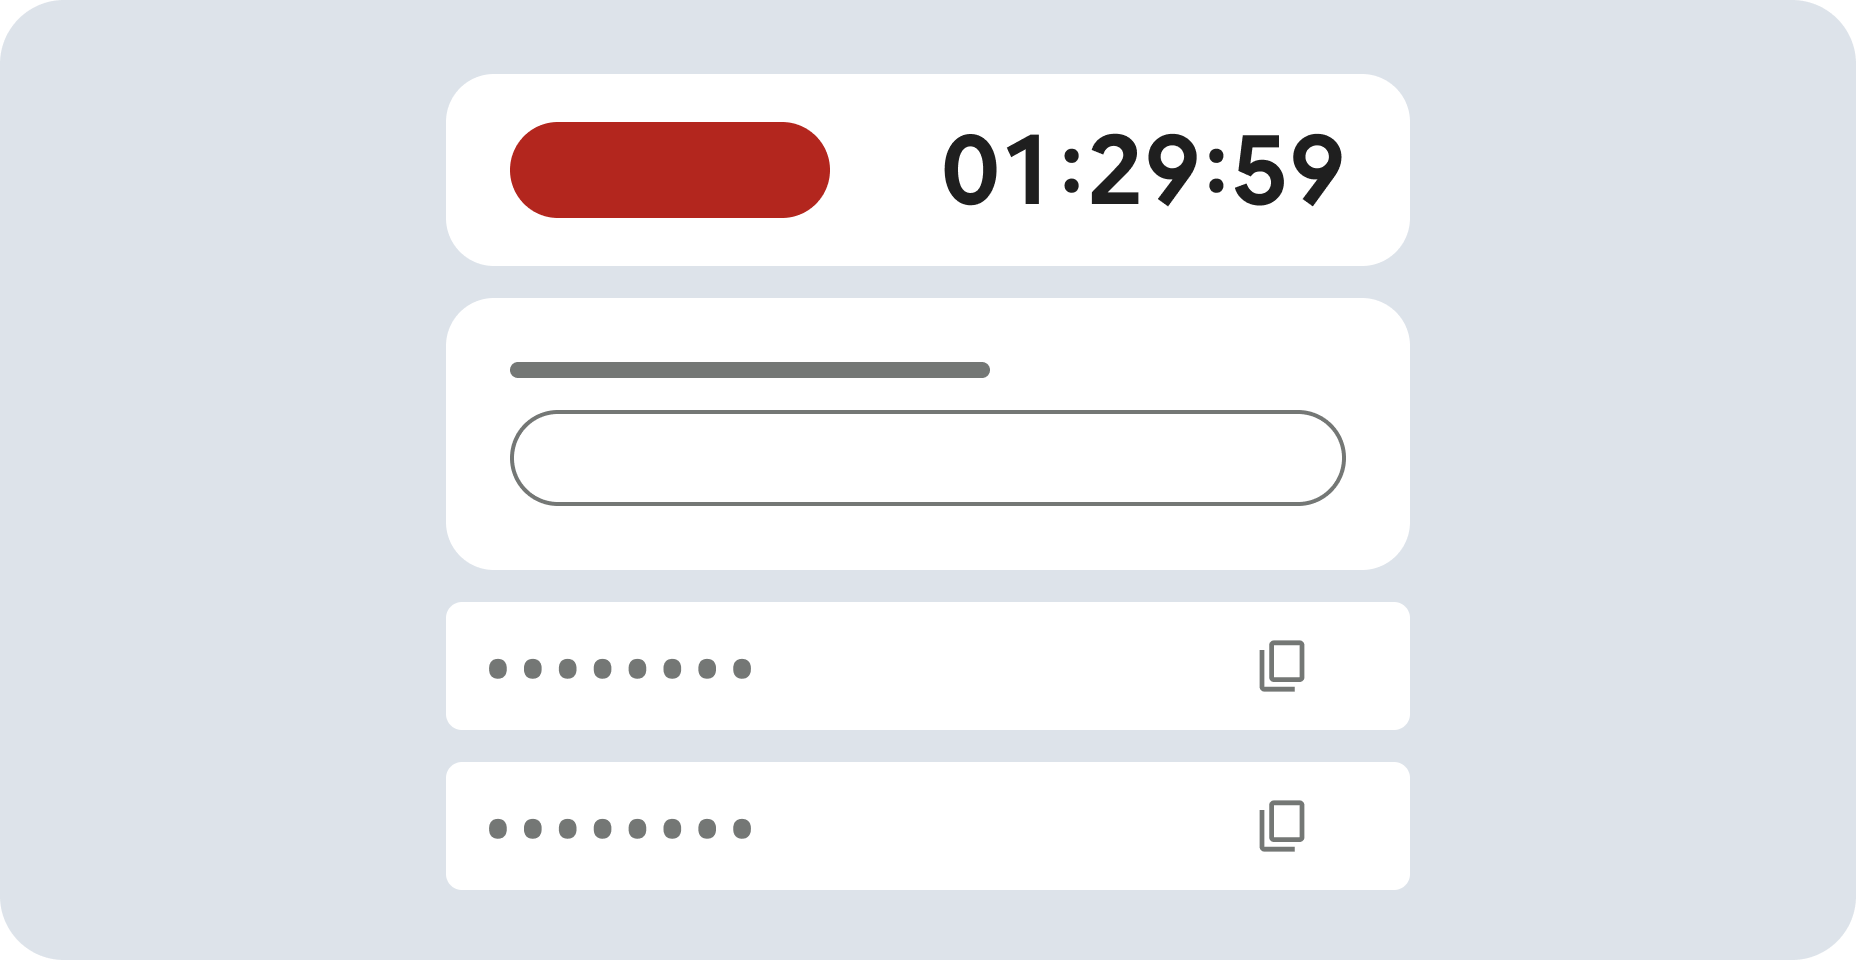
Click the Start Lab button. If you need to pay for the lab, a pop-up opens for you to select your payment method.
On the left is a panel populated with the temporary credentials that you must use for this lab.

-
Copy the username, and then click Open Google Console.
The lab spins up resources, and then opens another tab that shows the Choose an account page.
Note: Open the tabs in separate windows, side-by-side.
-
On the Choose an account page, click Use Another Account. The Sign in page opens.

-
Paste the username that you copied from the Connection Details panel. Then copy and paste the password.
Note: You must use the credentials from the Connection Details panel. Do not use your Google Cloud Skills Boost credentials. If you have your own Google Cloud account, do not use it for this lab (avoids incurring charges).
- Click through the subsequent pages:
- Accept the terms and conditions.
- Do not add recovery options or two-factor authentication (because this is a temporary account).
- Do not sign up for free trials.
After a few moments, the Cloud console opens in this tab.
Note: You can view the menu with a list of Google Cloud Products and Services by clicking the Navigation menu at the top-left.

For this lab, you will be running all commands in a terminal from your Instance notebook.
-
In the Google Cloud console, from the Navigation menu ( ), select Vertex AI > Dashboard.
-
Click Enable All Recommended APIs.
-
In the Navigation menu, click Workbench.
At the top of the Workbench page, ensure you are in the Instances view.
-
Click  Create New.
-
Configure the Instance:
-
Name: lab-workbench
-
Region: Set the region to
-
Zone: Set the zone to
-
Advanced Options (Optional): If needed, click "Advanced Options" for further customization (e.g., machine type, disk size).
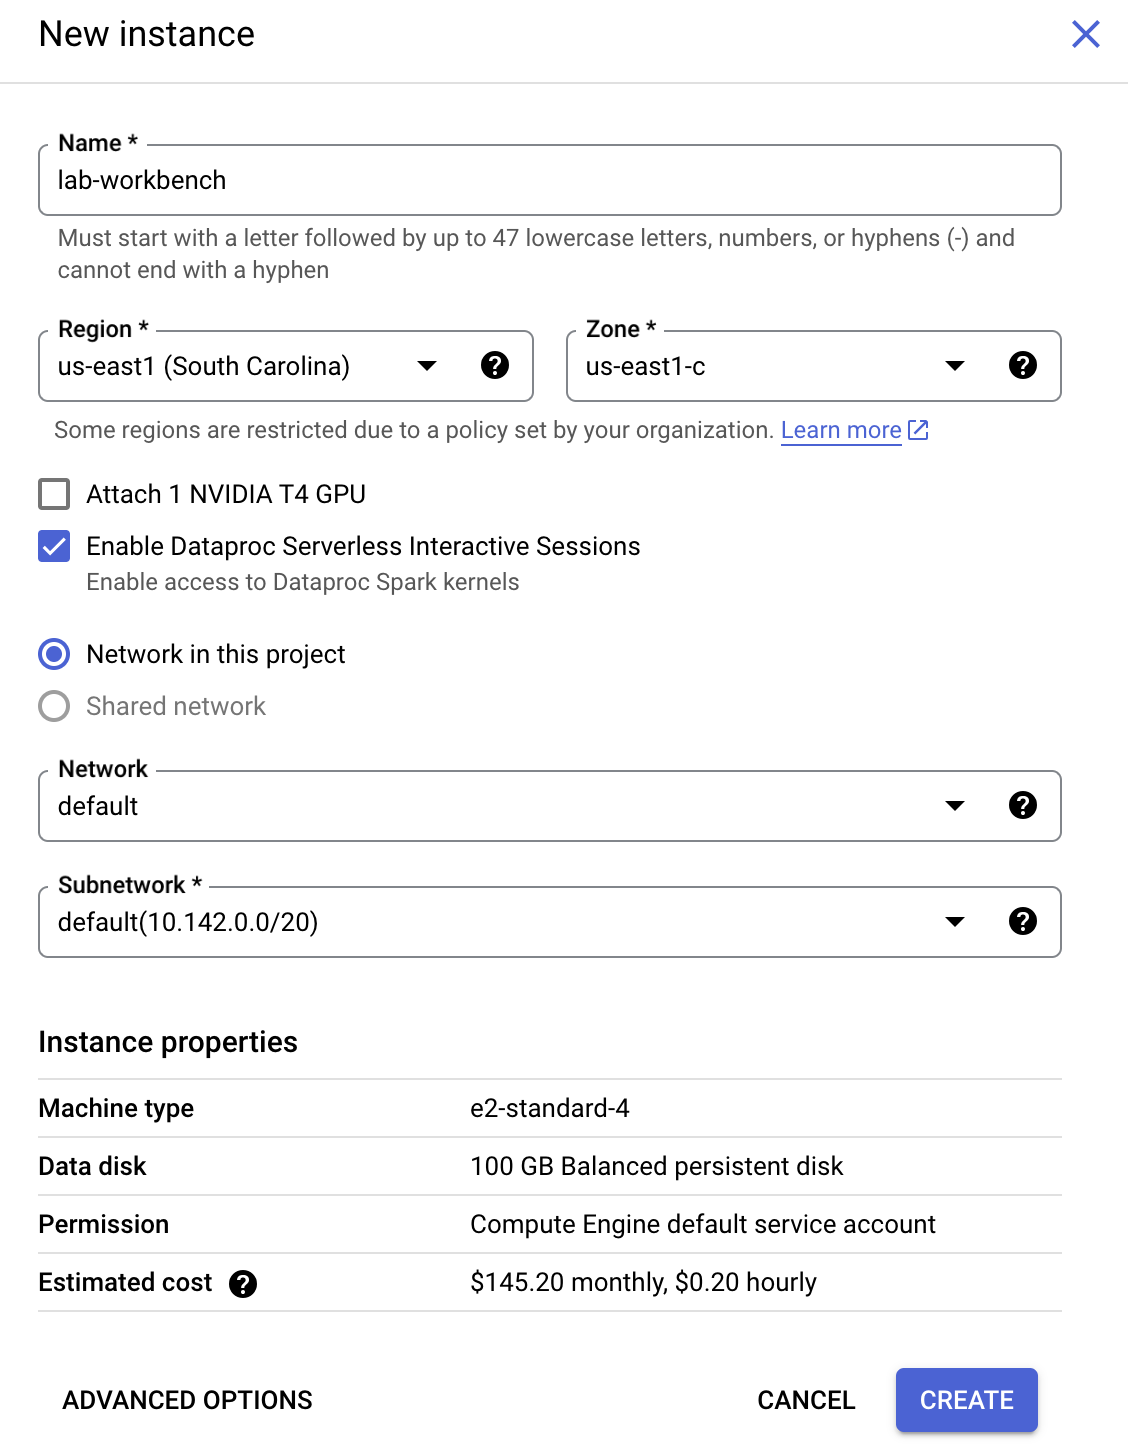
- Click Create.
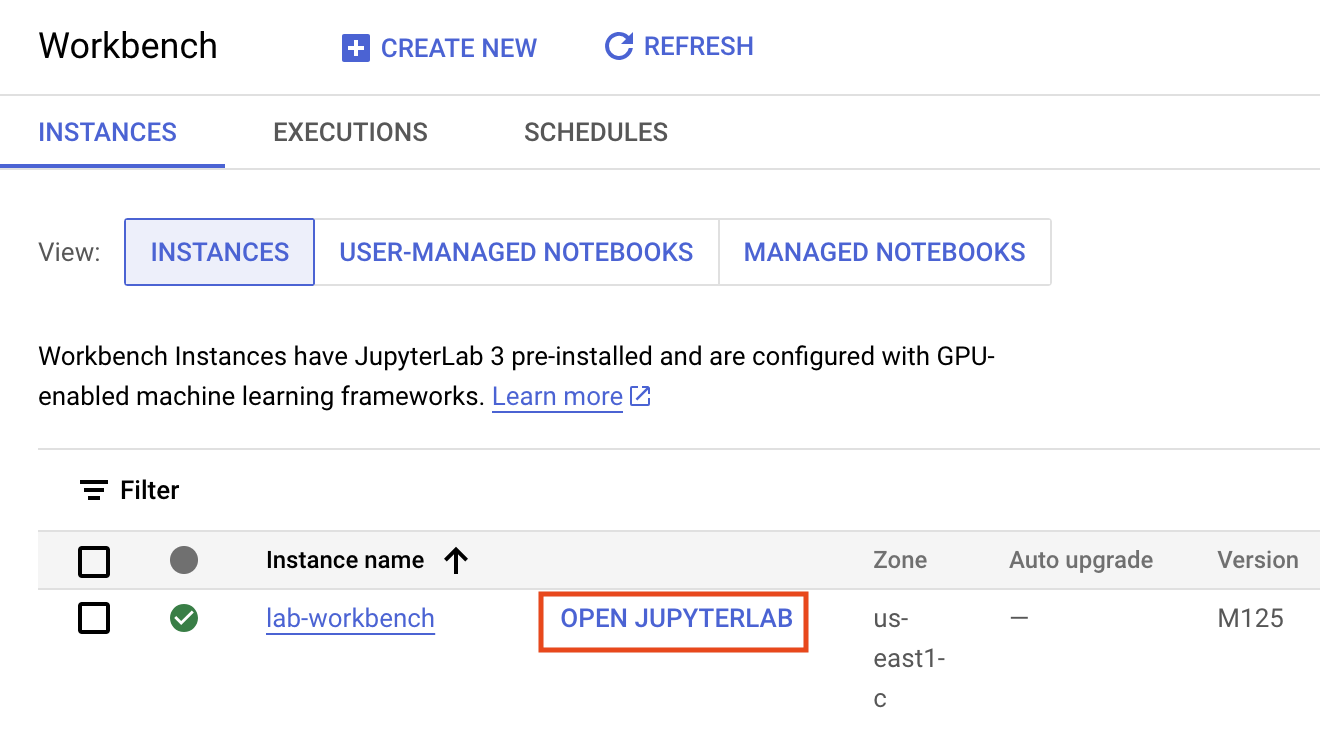
This will take a few minutes to create the instance. A green checkmark will appear next to its name when it's ready.
- Click Open Jupyterlab next to the instance name to launch the JupyterLab interface. This will open a new tab in your browser.
- Next, click Terminal. This will open up a terminal where you can run all the commands in this lab.
Download Code Repository
Next you will download a code repository for use in this lab.
- In the terminal you just opened, enter the following:
git clone https://github.com/GoogleCloudPlatform/training-data-analyst
cd /home/jupyter/training-data-analyst/quests/dataflow_python/
-
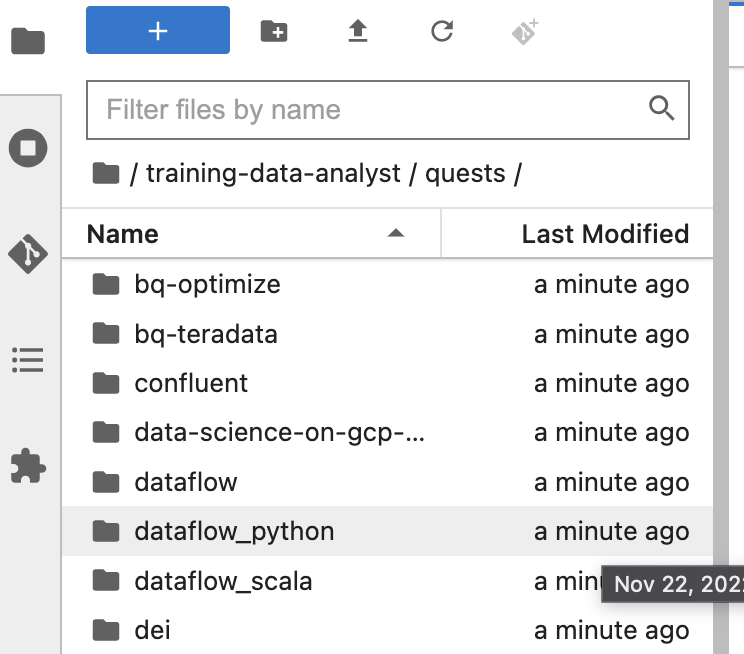
On the left panel of your notebook environment, in the file browser, you will notice the training-data-analyst repo added.
-
Navigate into the cloned repo /training-data-analyst/quests/dataflow_python/. You will see a folder for each lab, which is further divided into a lab sub-folder with code to be completed by you, and a solution sub-folder with a fully workable example to reference if you get stuck.
Note: To open a file for editing purposes, simply navigate to the file and click on it. This will open the file, where you can add or modify code.
The lab code is split between two folders: 8a_Batch_Testing_Pipeline/lab and 8b_Stream_Testing_Pipeline/lab. If you get stuck at any point, the solution can be found in the corresponding solution folders.
Click Check my progress to verify the objective.
Create notebook instance and clone course repo
Lab part 1: Performing unit tests for DoFns and PTransforms
Task 1. Prepare environment
In this part of the lab, we will perform unit testing on DoFns and PTransforms for a batch pipeline computing statistics from weather sensors. To test transforms that you have created, you can use the following pattern and transforms provided by Beam:
- Create a
TestPipeline.
- Create some test input data and use the
Create transform to create a PCollection of your input data.
- Apply your transform to the input
PCollection and save the resulting PCollection.
- Use the
assert_that method from the testing.util module and its other methods to verify that the output PCollection contains the elements that you expect.
TestPipeline is a special class included in the Beam SDK specifically for testing your transforms and pipeline logic. When testing, use TestPipeline instead of Pipeline when you create the pipeline object. The Create transfrom takes an in-memory collection of objects (a Java iterable) and creates a PCollection from this collection. The goal is to have a small set of test input data, for which we know the expected output PCollection, from our PTransforms.
with TestPipeline() as p:
INPUTS = [fake_input_1, fake_input_2]
test_output = p | beam.Create(INPUTS) | # Transforms to be tested
Finally, we want to check that the output PCollection matches the expected output. We use the assert_that method to verify this. For example, we can use the equal_to method to verify that the output PCollection has the correct elements:
assert_that(test_output, equal_to(EXPECTED_OUTPUTS))
As in the prior labs, the first step is to generate data for the pipeline to process. You will open the lab environment and generate the data as before:
Open the appropriate lab
- In the terminal in your IDE, run the following commands to change to the directory you will use for this lab:
# Change directory into the lab
cd 8a_Batch_Testing_Pipeline/lab
export BASE_DIR=$(pwd)
Setting up virtual environment and dependencies
Before you can begin editing the actual pipeline code, you need to ensure you have installed the necessary dependencies.
- Execute the following to create a virtual environment for your work in this lab:
sudo apt-get install -y python3-venv
# Create and activate virtual environment
python3 -m venv df-env
source df-env/bin/activate
- Next, install the packages you will need to execute your pipeline:
python3 -m pip install -q --upgrade pip setuptools wheel
python3 -m pip install apache-beam[gcp]
- Ensure that the Dataflow API is enabled:
gcloud services enable dataflow.googleapis.com
- Finally, create a storage bucket:
export PROJECT_ID=$(gcloud config get-value project)
gcloud storage buckets create gs://$PROJECT_ID --location=US
Click Check my progress to verify the objective.
Prepare environment
Task 2. Explore the main pipeline code
-
In the file explorer, navigate to 8a_Batch_Testing_Pipeline/lab. This directory contains two files: weather_statistics_pipeline.py containing our main pipeline code, and weather_statistics_pipeline_test.py containing our testing code.
-
First, open 8a_Batch_Testing_Pipeline/lab/weather_statistics_pipeline.py.
We will explore our pipeline code briefly before working on our unit tests. First we see the WeatherRecord class (starting at line 6). This is a subclass of typing.NamedTuple, so we can use schema-aware transforms to work with objects of this class. We will also be defining in-memory collections of objects of this class for our tests later.
class WeatherRecord(typing.NamedTuple):
loc_id: str
lat: float
lng: float
date: str
low_temp: float
high_temp: float
precip: float
- Now scroll down to where we start defining our
DoFns and PTransforms (line 17).
The concepts in this pipeline have mostly been covered in previous labs, but be sure to explore the following pieces more carefully:
- The
DoFns ConvertCsvToWeatherRecord (starting on line 17) and ConvertTempUnits (starting on line 27). We will be performing unit testing on these DoFns later.
- The
PTransform ComputeStatistics (starting on line 41). This is an example of a composite transform that we will be able to test in the same manner as a DoFn.
- The
PTransform WeatherStatsTransform (starting on line 55). This PTransform contains the processing logic for our entire pipeline (minus the source and sink transforms) so that we can perform a small pipeline integration test on synthetic data created by a Create transform.
Note: If you notice a logical error in the processing code, do not fix it yet! Later we will see how to narrow down the error via testing.
Task 3. Add dependencies for testing
- Now open the 8a_Batch_Testing_Pipeline/lab/weather_statistics_pipeline_test.py in your file explorer.
We need to add a few dependecies for testing. We will be taking advantage of testing utilities included in Apache Beam and the unittest package in Python.
- To complete this task, add the following import statements where prompted at the top of weather_statistics_pipeline_test.py:
from apache_beam.testing.test_pipeline import TestPipeline
from apache_beam.testing.util import BeamAssertException
from apache_beam.testing.util import assert_that, equal_to
If you get stuck, you can refer to the solutions.
Task 4. Write first DoFn unit test in Apache Beam
Notice that the 8a_Batch_Testing_Pipeline/lab/weather_statistics_pipeline_test.py file contains the code for our DoFn and PTransform unit tests. The code is mostly commented out now, but we will be uncommenting the code as we go along.
Before exploring our Beam code, note that we have defined a custom main method to manage running our tests and writing the test output to a text file. This way we have a record of the tests to refer to after the current terminal session has ended. This could also be managed using the logging module, for example.
def main(out = sys.stderr, verbosity = 2):
loader = unittest.TestLoader()
suite = loader.loadTestsFromModule(sys.modules[__name__])
unittest.TextTestRunner(out, verbosity = verbosity).run(suite)
# Testing code omitted
if __name__ == '__main__':
with open('testing.out', 'w') as f:
main(f)
- We will start by exploring a
DoFn unit test for our ConvertCsvToWeatherRecord DoFn (starting on line 43). First we create a class for testing our pipeline and create a TestPipeline object:
class ConvertToWeatherRecordTest(unittest.TestCase):
def test_convert_to_csv(self):
with TestPipeline() as p:
...
- Now look at the (incomplete) code for our first test:
LINES = ['x,0.0,0.0,2/2/2021,1.0,2.0,0.1']
EXPECTED_OUTPUT = [WeatherRecord('x', 0.0, 0.0, '2/2/2021', 1.0, 2.0, 0.1)]
input_lines = p | # TASK 4: Create PCollection from LINES
output = input_lines | beam.ParDo(ConvertCsvToWeatherRecord())
# TASK 4: Write assert_that statement
We create a single test input (LINES) representing a line of a CSV file (the expected input format for our pipeline) and put it into a list. We also define the expected output (EXPECTED_OUTPUT) as a list of WeatherRecords.
There are a couple of pieces missing in the rest of the code for the test.
-
To complete this task, first add the Create transform to convert LINES into a PCollection.
-
Second, include an assert_that statement using the equal_to method to compare output with EXPECTED_OUTPUT.
If you get stuck, you can refer to later commented tests or the solutions.
Task 5. Run first DoFn unit test
- Return to your terminal and run the following command:
python3 weather_statistics_pipeline_test.py
cat testing.out
The output from the tests will be written to the testing.out file. We can view the contents of this file by executing cat testing.out in our terminal. If the previous task was completed correctly, the contents of the testing.out file should be the following (the time elapsed may differ):
test_convert_to_csv (__main__.ConvertToWeatherRecordTest) ... ok
----------------------------------------------------------------------
Ran 1 test in 0.918s
OK
Note: The test above could have been run using the command "python3 -m unittest test_script.py" instead. We ran the python script directly to access the main method, but the approach mentioned here tends to be more common in practice.
Task 6. Run second DoFn unit test and debug pipeline
- Go back to 8a_Batch_Testing_Pipeline/lab/weather_statistics_pipeline_test.py and uncomment the code for the second unit test (around lines 33-50). You can do this by highlighting the code and pressing Ctrl + / (or Cmd + / on MacOS). The code is shown below for reference:
class ConvertTempUnitsTest(unittest.TestCase):
def test_convert_temp_units(self):
with TestPipeline() as p:
RECORDS = [WeatherRecord('x', 0.0, 0.0, '2/2/2021', 1.0, 2.0, 0.1),
WeatherRecord('y', 0.0, 0.0, '2/2/2021', -3.0, -1.0, 0.3)]
EXPECTED_RECORDS = [WeatherRecord('x', 0.0, 0.0, '2/2/2021', 33.8, 35.6, 0.1),
WeatherRecord('y', 0.0, 0.0, '2/2/2021', 26.6, 30.2, 0.3)]
input_records = p | beam.Create(RECORDS)
output = input_records | beam.ParDo(ConvertTempUnits())
assert_that(output, equal_to(EXPECTED_RECORDS))
This test ensures that the ConvertTempUnits() DoFn is working as intended. Save weather_statistics_pipeline_test.py and return to your terminal.
- Execute the follow commands to run the tests and view the output:
rm testing.out
python3 weather_statistics_pipeline_test.py
cat testing.out
The test fails this time! If we scroll through the output, we can find the following information about the test failure:
test_compute_statistics (__main__.ComputeStatsTest) ... ok
test_convert_temp_units (__main__.ConvertTempUnitsTest) ... ERROR
...
apache_beam.testing.util.BeamAssertException: Failed assert: [WeatherRecord(loc_id='x', lat=0.0, lng=0.0, date='2/2/2021', low_temp=33.8, high_temp=35.6, precip=0.1), WeatherRecord(loc_id='y', lat=0.0, lng=0.0, date='2/2/2021', low_temp=26.6, high_temp=30.2, precip=0.3)] == [WeatherRecord(loc_id='x', lat=0.0, lng=0.0, date='2/2/2021', low_temp=32.8, high_temp=34.6, precip=0.1), WeatherRecord(loc_id='y', lat=0.0, lng=0.0, date='2/2/2021', low_temp=25.6, high_temp=29.2, precip=0.3)], unexpected elements [WeatherRecord(loc_id='x', lat=0.0, lng=0.0, date='2/2/2021', low_temp=32.8, high_temp=34.6, precip=0.1), WeatherRecord(loc_id='y', lat=0.0, lng=0.0, date='2/2/2021', low_temp=25.6, high_temp=29.2, precip=0.3)], missing elements [WeatherRecord(loc_id='x', lat=0.0, lng=0.0, date='2/2/2021', low_temp=33.8, high_temp=35.6, precip=0.1), WeatherRecord(loc_id='y', lat=0.0, lng=0.0, date='2/2/2021', low_temp=26.6, high_temp=30.2, precip=0.3)] [while running 'assert_that/Match']
Looking a little more closely at the BeamAssertException, we can see that the values for low_temp and high_temp are incorrect. Something is wrong in the processing logic of the ConvertTempUnits DoFn!
- Return to 8a_Batch_Testing_Pipeline/lab/weather_statistics_pipeline.py and scroll down to the definition of
ConvertTempUnits (around line 32). To complete this task, find the error in the DoFn processing logic and rerun the following commands to confirm that the test now succeeds:
rm testing.out
python3 weather_statistics_pipeline_test.py
cat testing.out
As a reminder, the formula for converting degrees Celsius to degrees Farenheit is given below:
temp_f = temp_c * 1.8 + 32.0
If you get stuck, you can refer to the solutions.
Task 7. Run PTransform unit test and test end-to-end pipeline
- Return to 8a_Batch_Testing_Pipeline/lab/weather_statistics_pipeline_test.py and uncomment the code for the final two tests (starting around line 53).
The first test we just uncommented is testing the composite PTransform ComputeStatistics. A truncated form of the code is presented below for reference:
def test_compute_statistics(self):
with TestPipeline() as p:
INPUT_RECORDS = # Test input omitted here
EXPECTED_STATS = # Expected output omitted here
inputs = p | beam.Create(INPUT_RECORDS)
output = inputs | ComputeStatistics()
assert_that(output, equal_to(EXPECTED_STATS))
Notice that this looks very similar to our earlier DoFn unit tests! The only real difference (other than different test inputs and outputs) is that we are applying the PTransform rather than beam.ParDo(DoFn()).
The final test is for the end-to-end pipeline. In the pipeline code (weather_statistics_pipeline.py) the entire end-to-end pipeline minus the source and sink has been included in a single PTransform WeatherStatsTransform. To test the end-to-end pipeline, we can repeat something similar to what we did above, but using that PTransform instead.
- Now return to your terminal and execute the follow command to run the tests one more time:
rm testing.out
python3 weather_statistics_pipeline_test.py
cat testing.out
If you have completed the previous tasks successfully, you should see the following in the terminal after the tests complete:
test_compute_statistics (__main__.ComputeStatsTest) ... ok
test_convert_temp_units (__main__.ConvertTempUnitsTest) ... ok
test_convert_to_csv (__main__.ConvertToWeatherRecordTest) ... ok
test_weather_stats_transform (__main__.WeatherStatsTransformTest) ... ok
----------------------------------------------------------------------
Ran 4 tests in 2.295s
OK
- Now, copy the
testing.out file to the storage bucket:
export PROJECT_ID=$(gcloud config get-value project)
gcloud storage cp testing.out gs://$PROJECT_ID/8a_Batch_Testing_Pipeline/
Click Check my progress to verify the objective.
Performing unit tests for DoFns and PTransforms
Lab part 2: Testing stream processing logic with TestStream
In this part of the lab, we will perform unit testing for a streaming pipeline computing windowed counts of taxi rides. To test transforms that you have created, you can use the following pattern and transforms provided by Beam:
- Create a
TestPipeline.
- Use the
TestStream class to generate streaming data. This includes generating a series of events, advancing the watermark, and advancing the processing time.
- Use the
assert_that method from the testing.util module and its other methods to verify that the output PCollection contains the elements that you expect.
When executing a pipeline that reads from a TestStream, the read waits for all of the consequences of each event to complete before moving on to the next event, including when processing time advances and the appropriate triggers fire. TestStream allows for the effect of triggering and allowed lateness to be observed and tested on a pipeline. This includes logic around late triggers and dropped data due to lateness.
Task 1. Explore the main pipeline code
- In file explorer, navigate to 8b_Stream_Testing_Pipeline/lab.
This directory contains two files: taxi_streaming_pipeline.py containing our main pipeline code, and taxi_streaming_pipeline_test.py containing our testing code.
- First, open 8b_Stream_Testing_Pipeline/lab/taxi_streaming_pipeline.py.
We will explore our pipeline code briefly before working on our unit tests. First we see the TaxiRide class (starting at line 6). This is a subclass of typing.NamedTuple, so we can use schema-aware transforms to work with objects of this class. We will also be defining in-memory collections of objects of this class for our tests later.
class TaxiRide(typing.NamedTuple):
ride_id: str
point_idx: int
latitude: float
longitude: float
timestamp: str
meter_reading: float
meter_increment: float
ride_status: str
passenger_count: int
Next is the main code for our pipeline. The concepts in this pipeline have mostly been covered in previous labs, but be sure to explore the following pieces more carefully:
- The
DoFn JsonToTaxiRide (starting on line 22) used to convert the incoming Pub/Sub messages into objects of the TaxiRide class.
- The
PTransform TaxiCountTransform (starting on line 36). This PTransform contains the main counting and windowing logic of the pipeline. Our tests will focus on this PTransform.
The output of the TaxiCountTransform should be a count of all of the recorded taxi rides per window. However, we will have multiple events per ride (pickup, dropoff, etc.). We will filter on the ride_status property to ensure that we only count each ride once. We will do this by only keeping elements with ride_status equal to "pickup":
... | "FilterForPickups" >> beam.Filter(lambda x : x.ride_status == 'pickup')
Zooming in a bit more, the windowing logic being used in our pipeline is included below:
... | "WindowByMinute" >> beam.WindowInto(beam.window.FixedWindows(60),
trigger=AfterWatermark(late=AfterCount(1)),
allowed_lateness=60,
accumulation_mode=AccumulationMode.ACCUMULATING)
We will window into fixed windows of 60 seconds' length. We do not have an early trigger, but will emit results after the watermark passes the end of the window. We include late firings with every new element that comes in, but will only do so with an allowed lateness of 60 seconds. Finally, we will accumulate state in windows until the allowed lateness has passed.
Task 2. Explore TestStream usage and run first test
- Now open 8b_Stream_Testing_Pipeline/lab/taxi_streaming_pipeline_test.py.
The first goal will be to understand the usage of TestStream in our testing code. Recall that the TestStream class allows us to simulate a real-time stream of message while having control over the progression of processing time and the watermark. The code from the first test (starting on line 66) is included below:
test_stream = TestStream().advance_watermark_to(0).add_elements([
TimestampedValue(base_json_pickup, 0),
TimestampedValue(base_json_pickup, 0),
TimestampedValue(base_json_enroute, 0),
TimestampedValue(base_json_pickup, 60)
]).advance_watermark_to(60).advance_processing_time(60).add_elements([
TimestampedValue(base_json_pickup, 120)
]).advance_watermark_to_infinity()
- We create a new
TestStream object, and then we will pass in the JSON message as a string (named base_json_pickup or base_json_enroute, depending on the ride status). What is the above TestStream doing?
The TestStream is performing the following tasks:
- Set the initial watermark to time
0 (all timestamps are in seconds).
- Add three elements to the stream via the
add_elements method with an event timestamp of 0. Two of these events will be counted (ride_status = "pickup") and the other will not.
- Add another "pickup" event, but with an event timestamp
60.
- Advance the watermark and processing time to
60, triggering the first window.
- Add another "pickup" event, but with an event timestamp
120.
- Advance the watermark to "infinity". This means that all windows will now be closed and any new data will be beyond any allowed lateness.
- The rest of the code for the first test is similar to the previous batch example, but we now use the
TestStream instead of the Create transform:
taxi_counts = (p | test_stream
| TaxiCountTransform()
)
EXPECTED_WINDOW_COUNTS = {IntervalWindow(0,60): [3],
IntervalWindow(60,120): [1],
IntervalWindow(120,180): [1]}
assert_that(taxi_counts, equal_to_per_window(EXPECTED_WINDOW_COUNTS),
reify_windows=True)
In the above code, we define our output PCollection (taxi_counts) by creating the TestStream and applying the TaxiCountTransform PTransform. We use the InvervalWindow class to define the windows we wish to check, and then use assert_that with the equal_to_per_window method to verify results per window.
- Save the file, return to your terminal and run the following commands to relocate to the correct directory:
# Change directory into the lab
cd $BASE_DIR/../../8b_Stream_Testing_Pipeline/lab
export BASE_DIR=$(pwd)
- Now run the test above and view the output by executing the following commands:
python3 taxi_streaming_pipeline_test.py
cat testing.out
You should see the following output after the test (though the elapsed time may differ):
test_windowing_behavior (__main__.TaxiWindowingTest) ... ok
----------------------------------------------------------------------
Ran 1 test in 1.113s
OK
Task 3. Create TestStream to test late data handling
In this task you will write code for a TestStream to test logic around handling late data.
- Return to 8b_Stream_Testing_Pipeline/lab/taxi_streaming_pipeline_test.py and scroll down to where the
test_late_data_behavior method is commented out (around line 60). Uncomment the code for this test, as we will be completing the code for this task.
class TaxiLateDataTest(unittest.TestCase):
def test_late_data_behavior(self):
options = PipelineOptions()
options.view_as(StandardOptions).streaming = True
with TestPipeline(options=options) as p:
base_json_pickup = "{\"ride_id\":\"x\",\"point_idx\":1,\"latitude\":0.0,\"longitude\":0.0," \
"\"timestamp\":\"00:00:00\",\"meter_reading\":1.0,\"meter_increment\":0.1," \
"\"ride_status\":\"pickup\",\"passenger_count\":1}"
test_stream = # TASK 3: Create TestStream Object
EXPECTED_RESULTS = {IntervalWindow(0,60): [2,3]} #On Time and Late Result
taxi_counts = (p | test_stream
| TaxiCountTransform()
)
assert_that(taxi_counts, equal_to(EXPECTED_RESULTS))
Note that EXPECTED_RESULTS contains two results for IntervalWindow(0,60). These represent the results from on-time and late triggers for this window.
The code for the test is complete outside of the creating of the TestStream.
-
To complete this task, create a TestStream object that performs the following tasks:
- Advances the watermark to
0 (all timestamps are in seconds).
- Adds two
TimestampedValues with value base_json_pickup and timestamp 0.
- Advances the watermark and processing time to
60.
- Adds another
TimestampedValue with value base_json_pickup and timestamp 0.
- Advances the watermark and processing time to
300.
- Adds another
TimestampedValue with value base_json_pickup and timestamp 0.
- Advances the watermark to infinity.
This will create a TestStream with four elements belonging to our first window. The first two elements are on-time, the second element is late (but within the allowed lateness), and the final element is late and beyond the allowed lateness. Since we are accumulating fired panes, the first trigger should count two events and the final trigger should count three events. The fourth event should not be included.
If you get stuck, you can refer to the solutions.
Task 4. Run test for late data handling
- Now return to your terminal and execute the following command to run the tests one more time:
rm testing.out
python3 taxi_streaming_pipeline_test.py
cat testing.out
If you have completed the previous tasks successfully, you should see the following in the terminal after the tests complete:
test_late_data_behavior (__main__.TaxiLateDataTest) ... ok
test_windowing_behavior (__main__.TaxiWindowingTest) ... ok
----------------------------------------------------------------------
Ran 2 tests in 2.225s
OK
- Now, copy the
testing.out file to the storage bucket:
export PROJECT_ID=$(gcloud config get-value project)
gcloud storage cp testing.out gs://$PROJECT_ID/8b_Stream_Testing_Pipeline/
Click Check my progress to verify the objective.
Testing stream processing logic with TestStream
End your lab
When you have completed your lab, click End Lab. Google Cloud Skills Boost removes the resources you’ve used and cleans the account for you.
You will be given an opportunity to rate the lab experience. Select the applicable number of stars, type a comment, and then click Submit.
The number of stars indicates the following:
- 1 star = Very dissatisfied
- 2 stars = Dissatisfied
- 3 stars = Neutral
- 4 stars = Satisfied
- 5 stars = Very satisfied
You can close the dialog box if you don't want to provide feedback.
For feedback, suggestions, or corrections, please use the Support tab.
Copyright 2025 Google LLC All rights reserved. Google and the Google logo are trademarks of Google LLC. All other company and product names may be trademarks of the respective companies with which they are associated.