In this lab, you will see how to build a simple deep neural network model using the Keras Sequential API and Feature Columns.
Once you have trained your model, you will deploy it using Vertex AI and see how to call the model for online prediction.
What you learn
In this lab, you will:
Create a Workbench Instance Notebook.
Build a DNN model using the Keras Sequential API.
Learn how to use feature columns in a Keras model.
Learn how to train a model with Keras.
Learn how to save/load, and deploy a Keras model on GCP.
Learn how to deploy and make predictions with the Keras model.
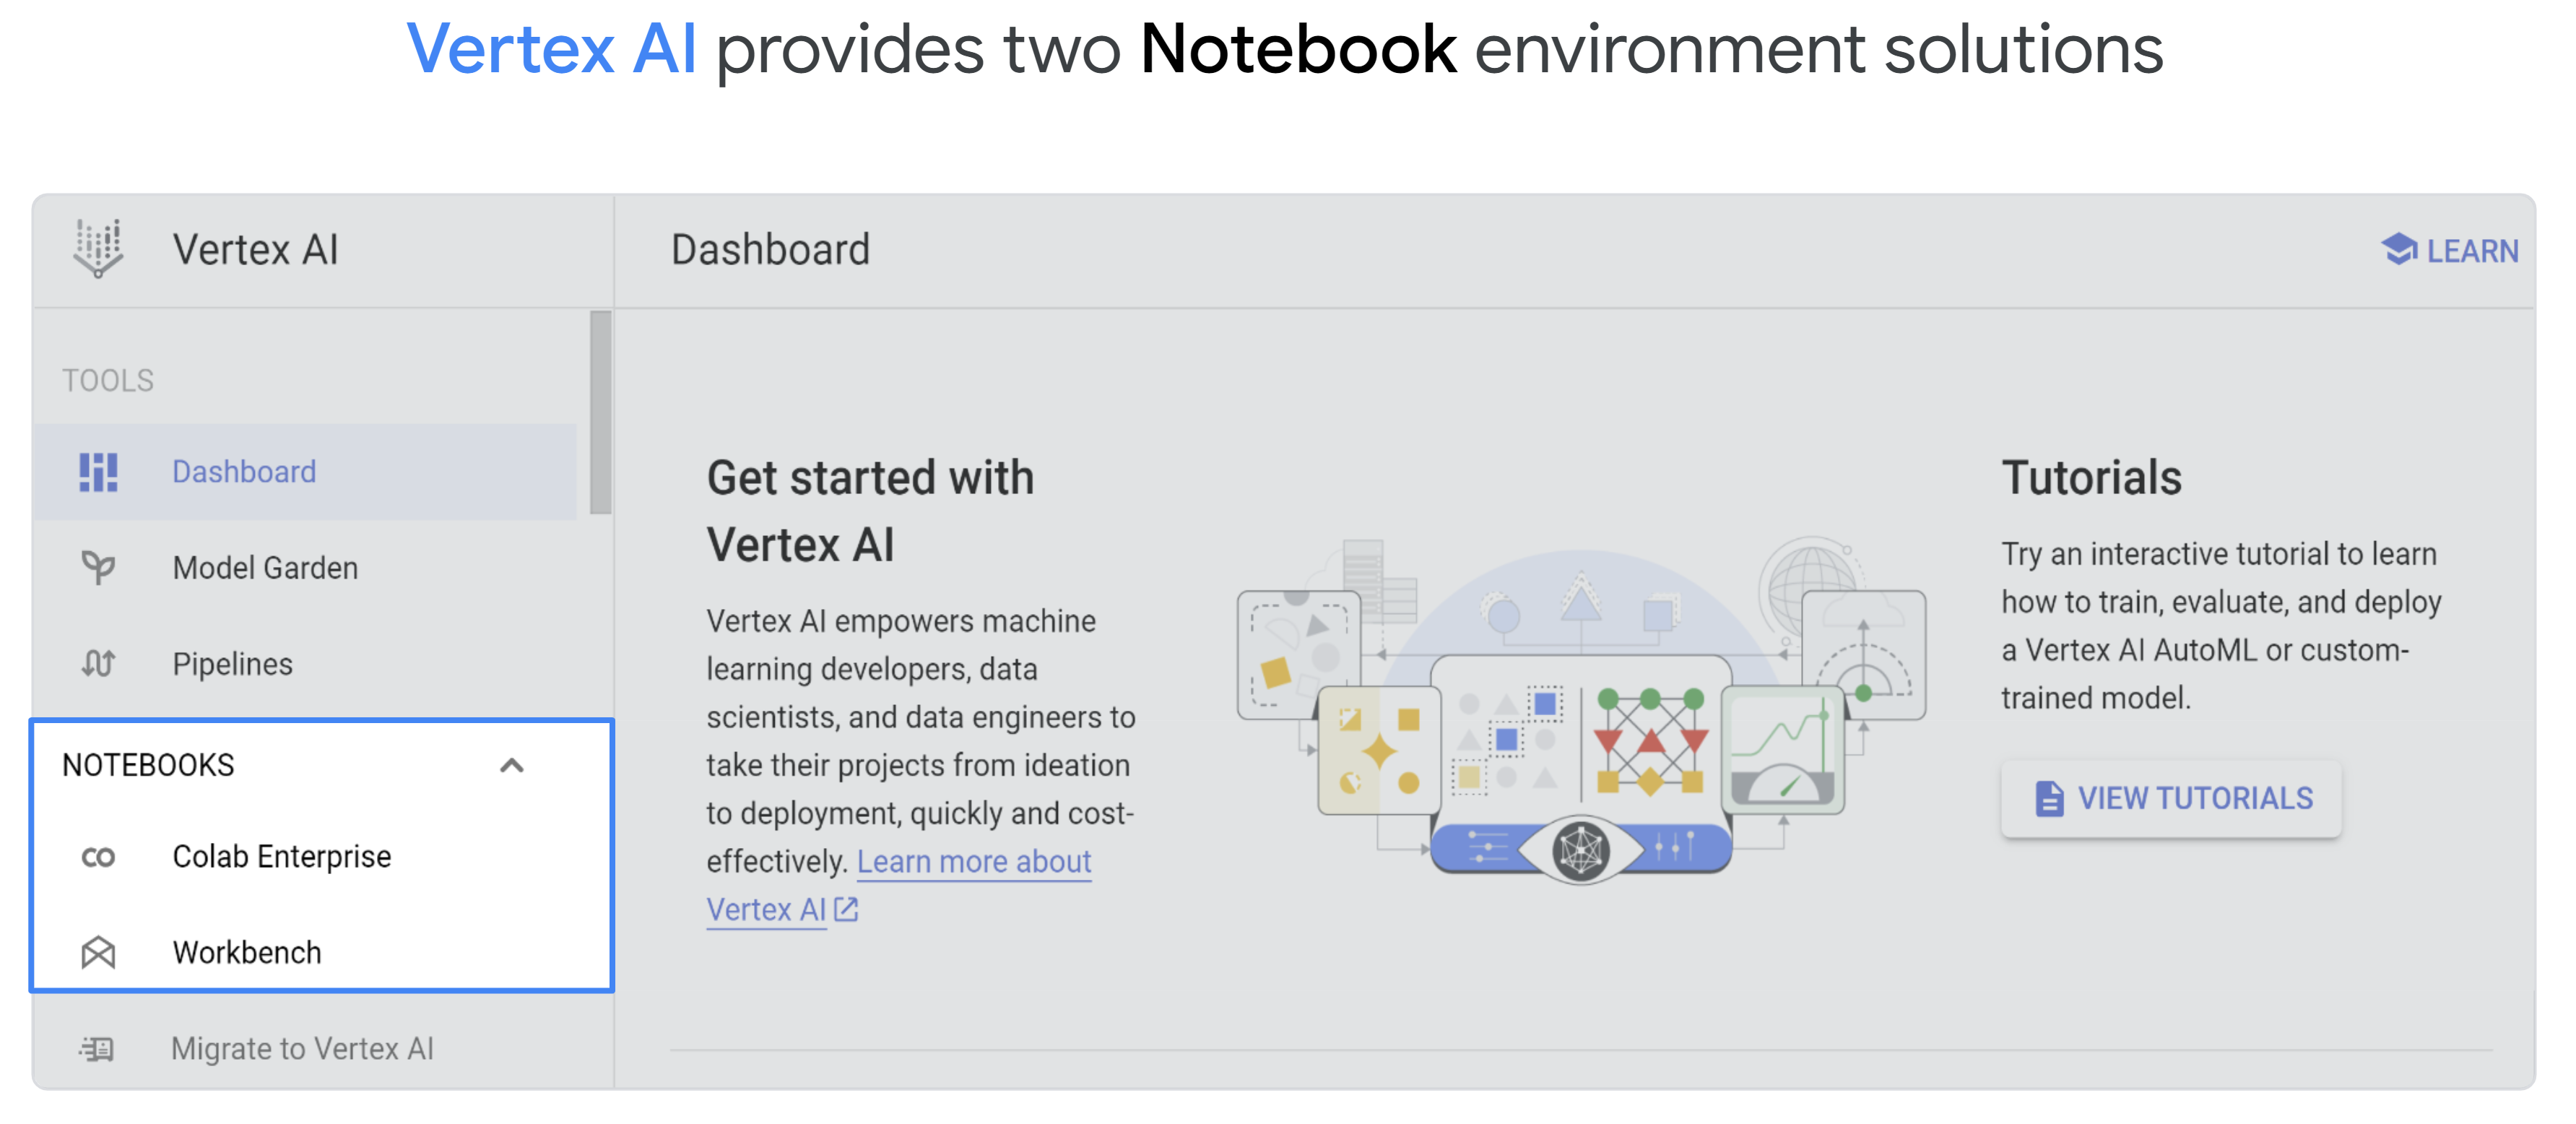
Vertex AI offers two Notebook Solutions, Workbench and Colab Enterprise.
Workbench
Vertex AI Workbench is a good option for projects that prioritize control and customizability. It’s great for complex projects spanning multiple files, with complex dependencies. It’s also a good choice for a data scientist who is transitioning to the cloud from a workstation or laptop.
Vertex AI Workbench Instances comes with a preinstalled suite of deep learning packages, including support for the TensorFlow and PyTorch frameworks.
Setup and requirements
For each lab, you get a new Google Cloud project and set of resources for a fixed time at no cost.
Sign in to Qwiklabs using an incognito window.
Note the lab's access time (for example, 1:15:00), and make sure you can finish within that time.
There is no pause feature. You can restart if needed, but you have to start at the beginning.
When ready, click Start lab.
Note your lab credentials (Username and Password). You will use them to sign in to the Google Cloud Console.
Click Open Google Console.
Click Use another account and copy/paste credentials for this lab into the prompts.
If you use other credentials, you'll receive errors or incur charges.
Accept the terms and skip the recovery resource page.
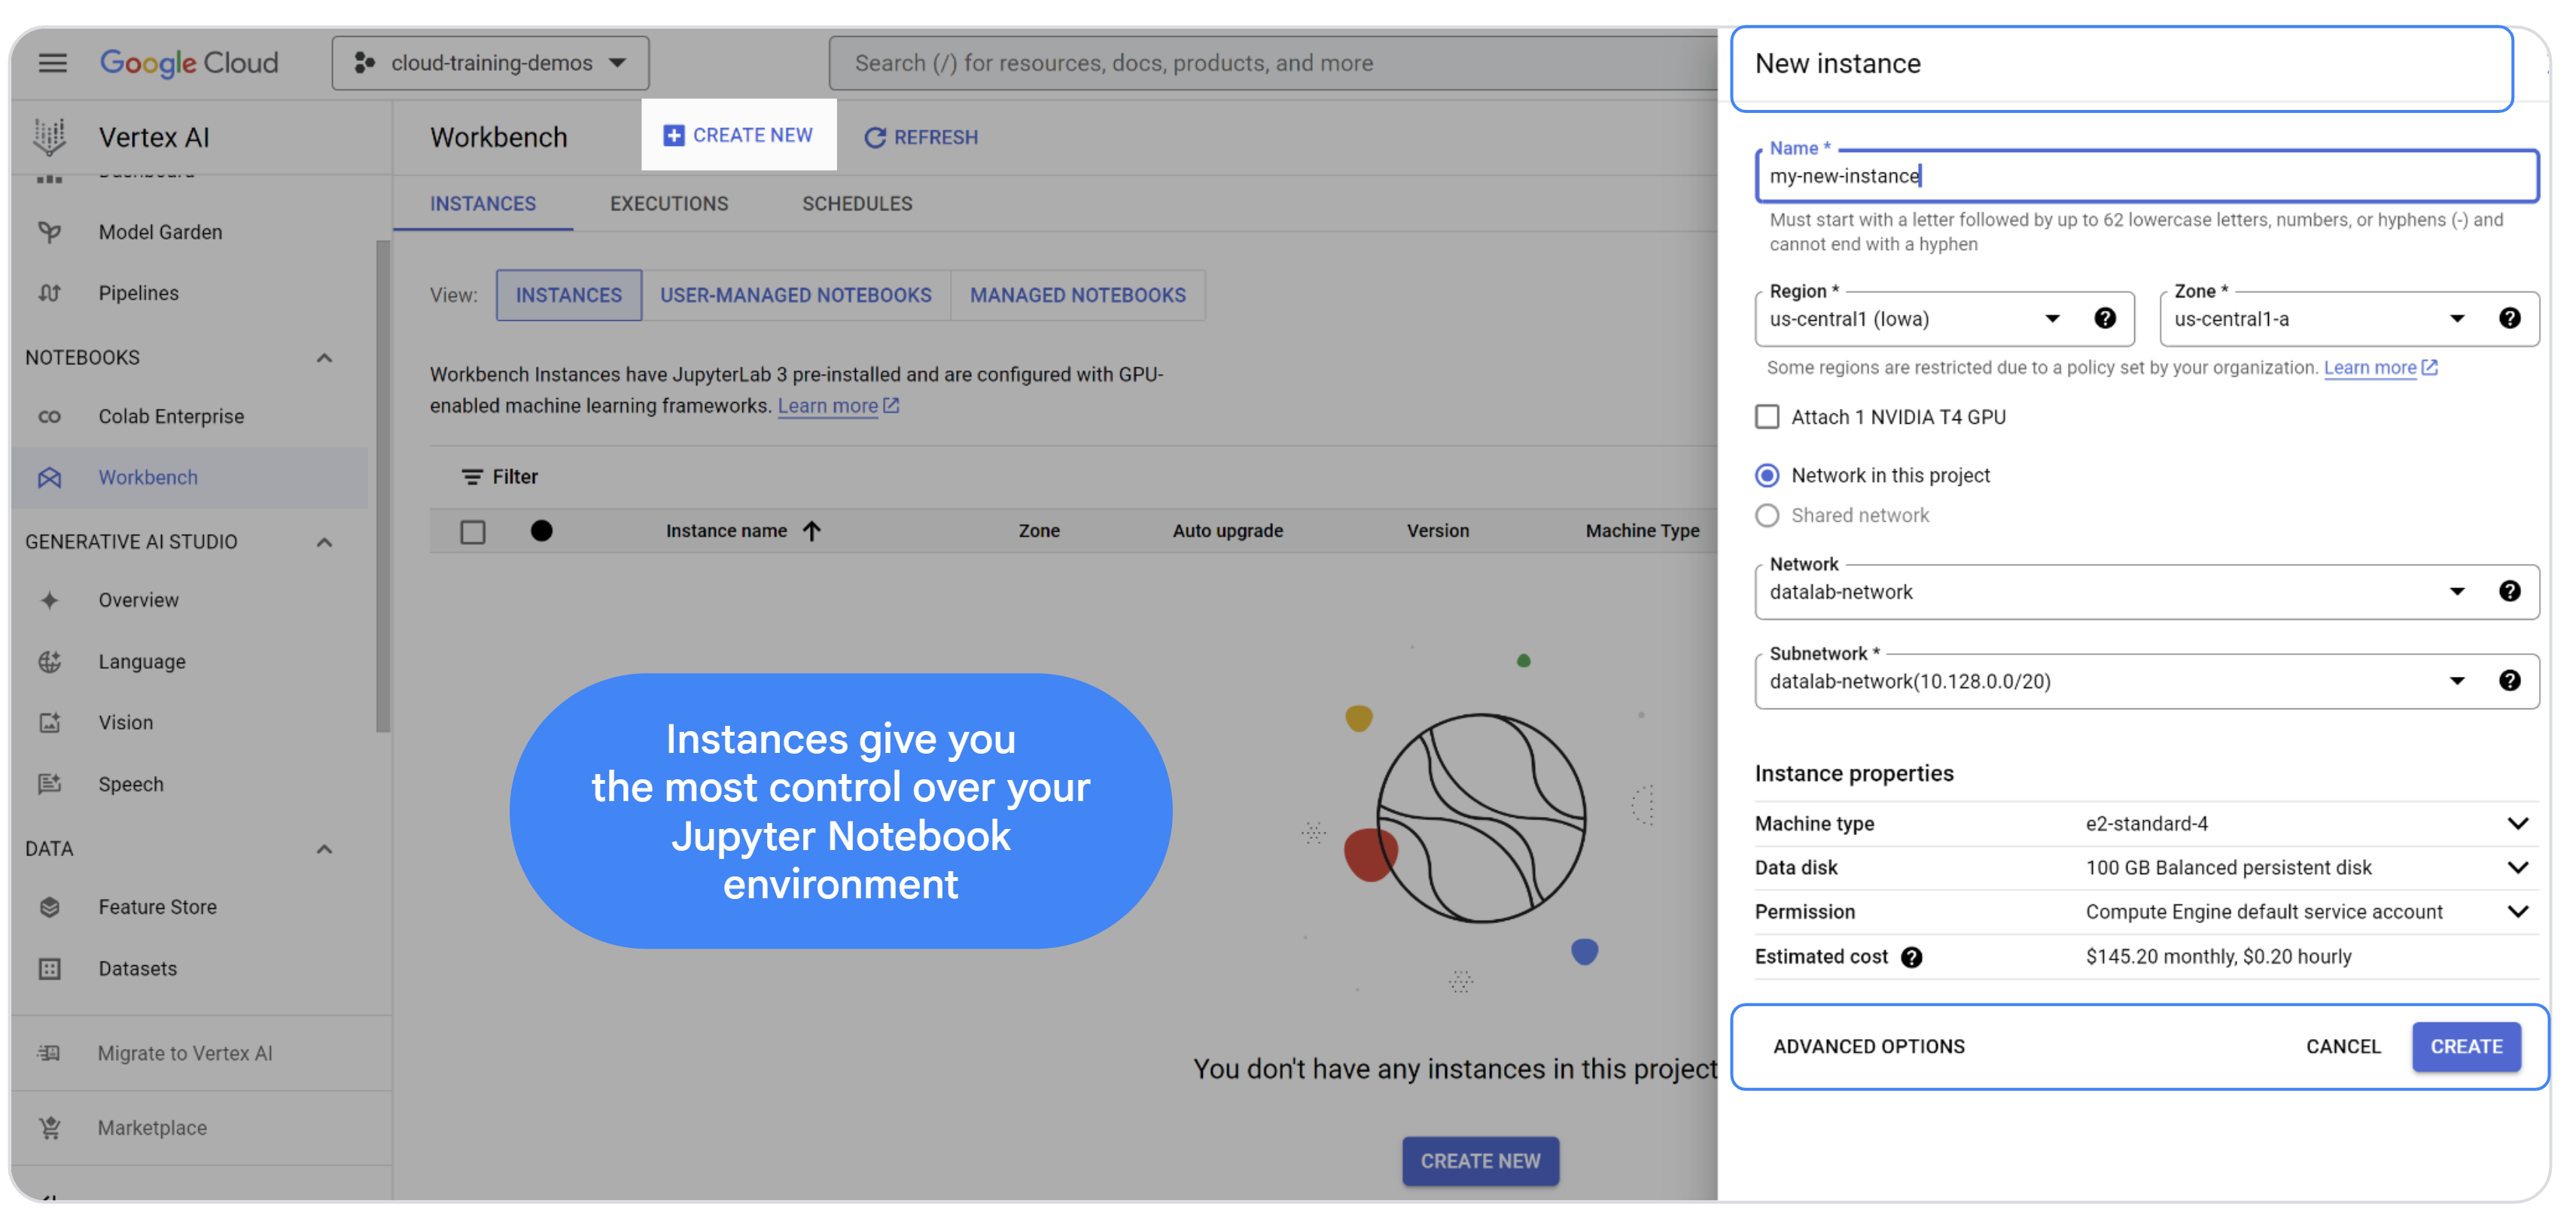
Task 1. Launch Vertex AI Workbench instance
In the Google Cloud console, from the Navigation menu (), select Vertex AI > Dashboard.
Click Enable All Recommended APIs.
In the Navigation menu, click Workbench.
At the top of the Workbench page, ensure you are in the Instances view.
Click Create New.
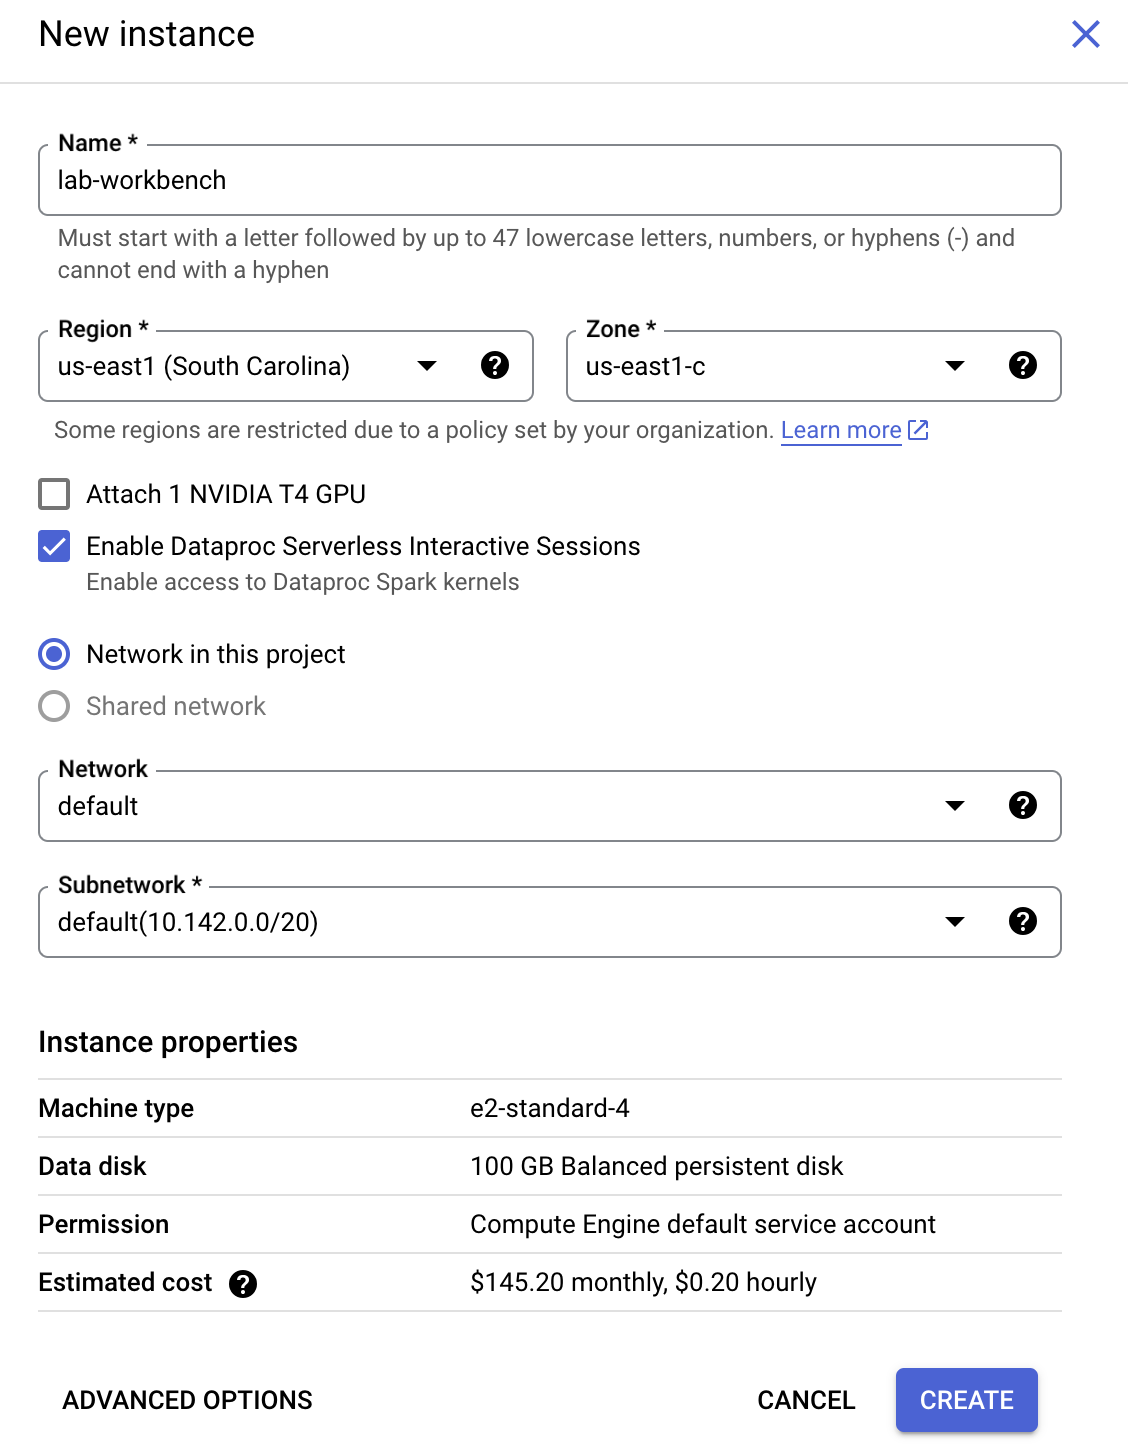
Configure the Instance:
Name: lab-workbench
Region: Set the region to
Zone: Set the zone to
Advanced Options (Optional): If needed, click "Advanced Options" for further customization (e.g., machine type, disk size).
Click Create.
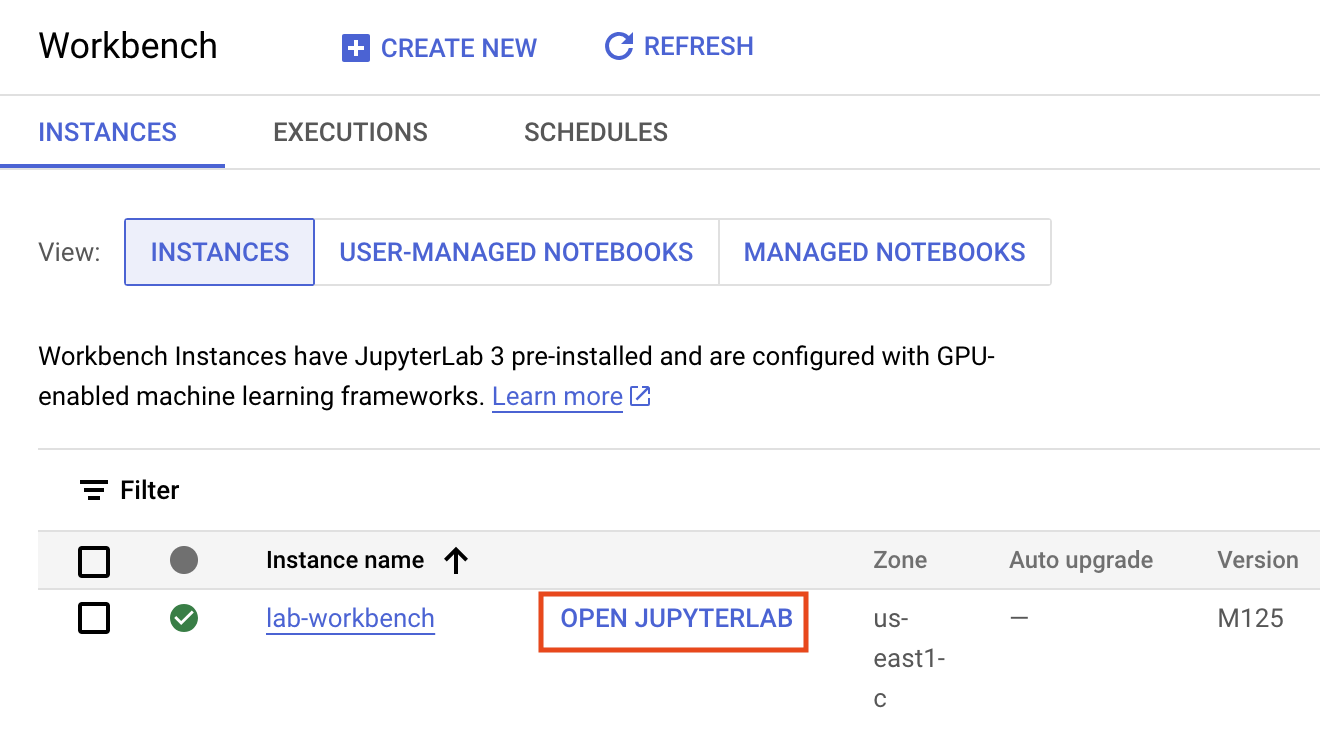
This will take a few minutes to create the instance. A green checkmark will appear next to its name when it's ready.
Click Open Jupyterlab next to the instance name to launch the JupyterLab interface. This will open a new tab in your browser.
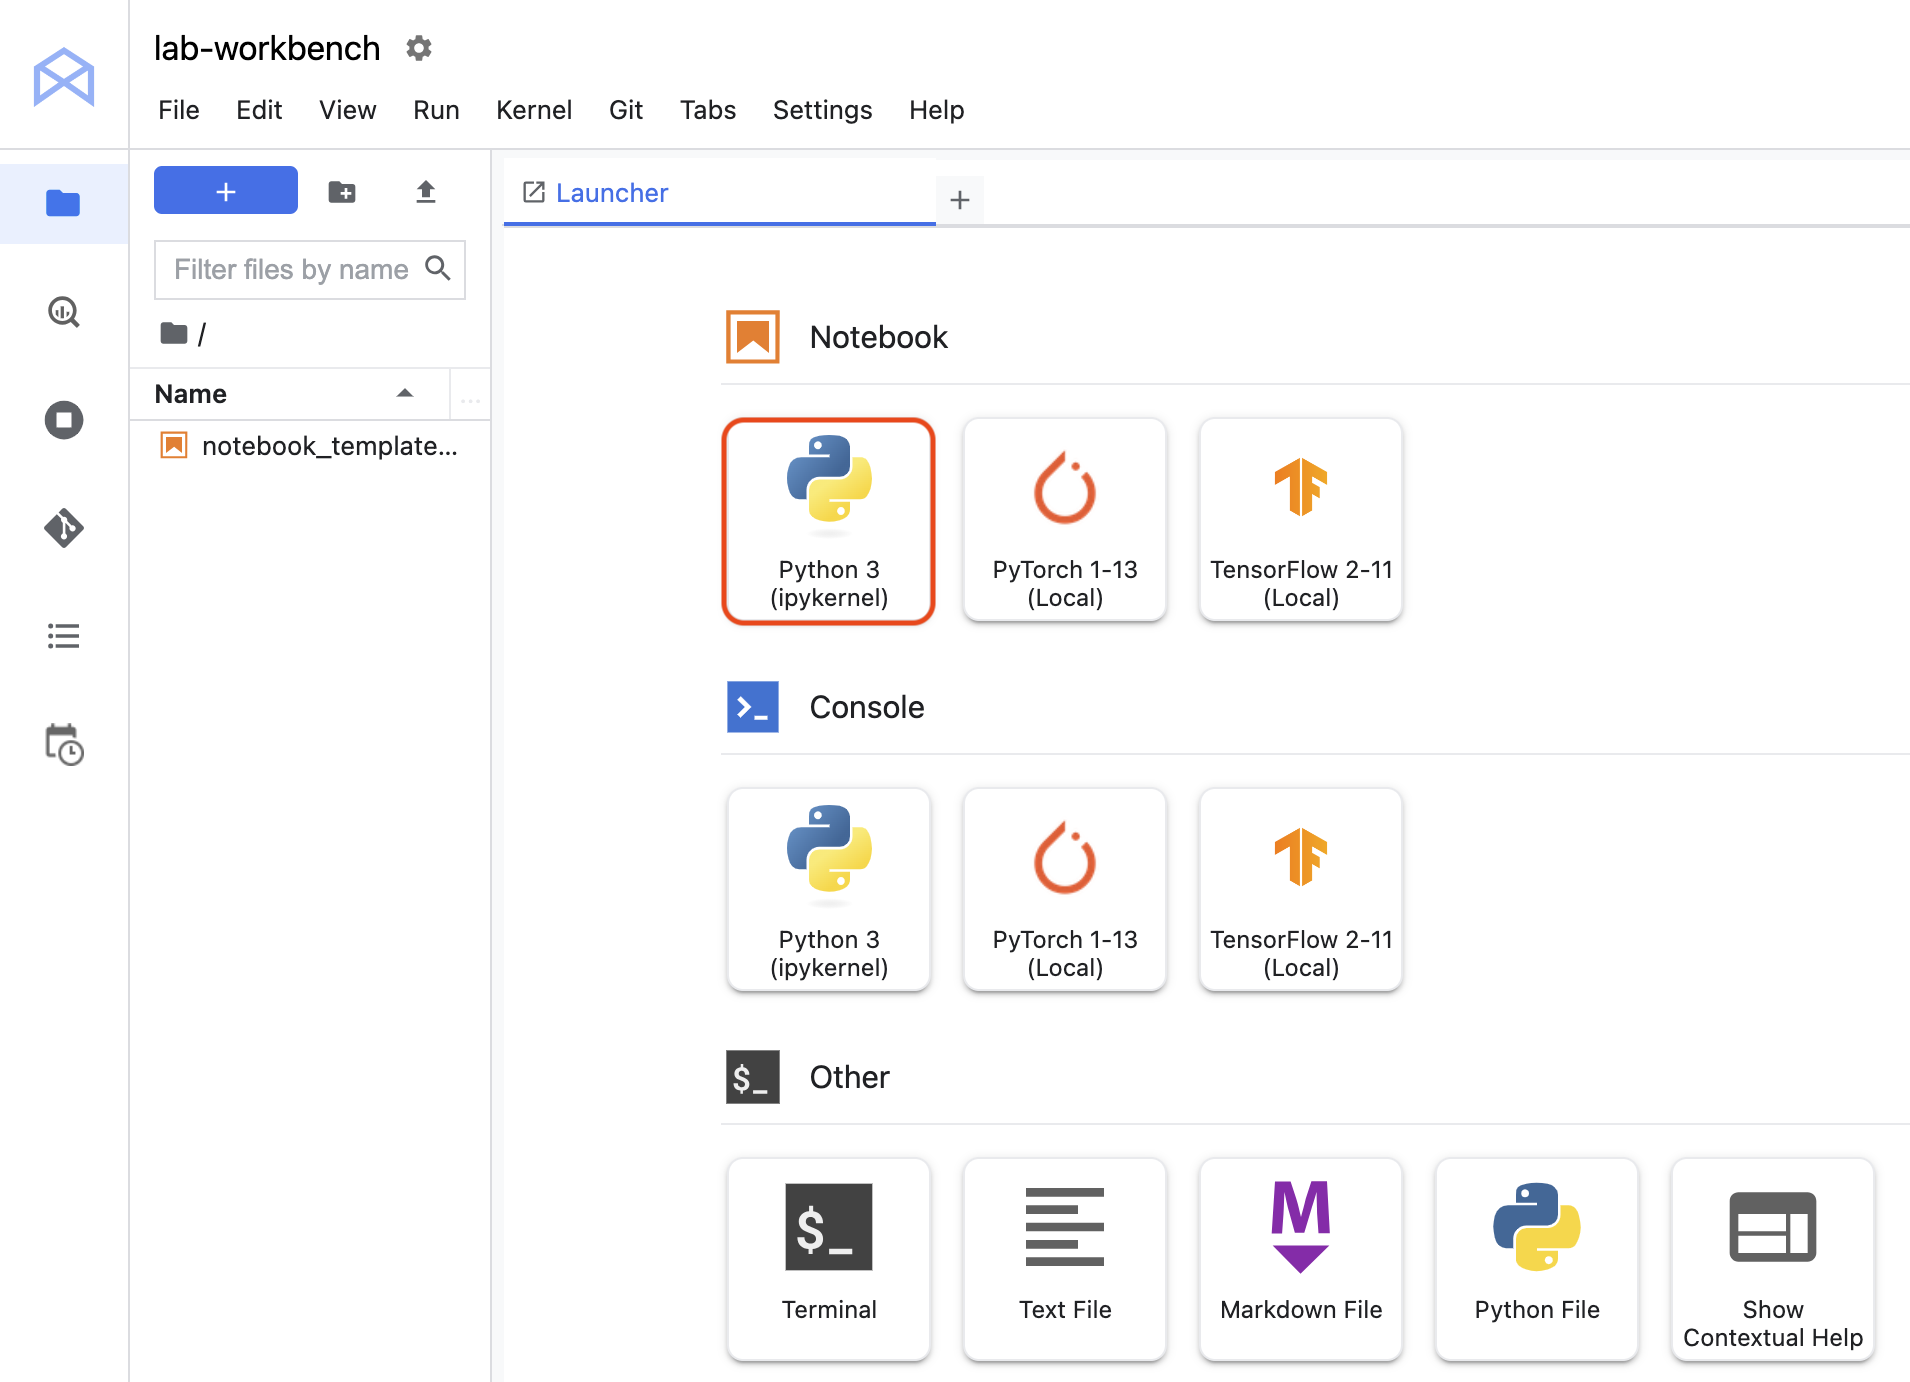
Click the Python 3 icon to launch a new Python notebook.
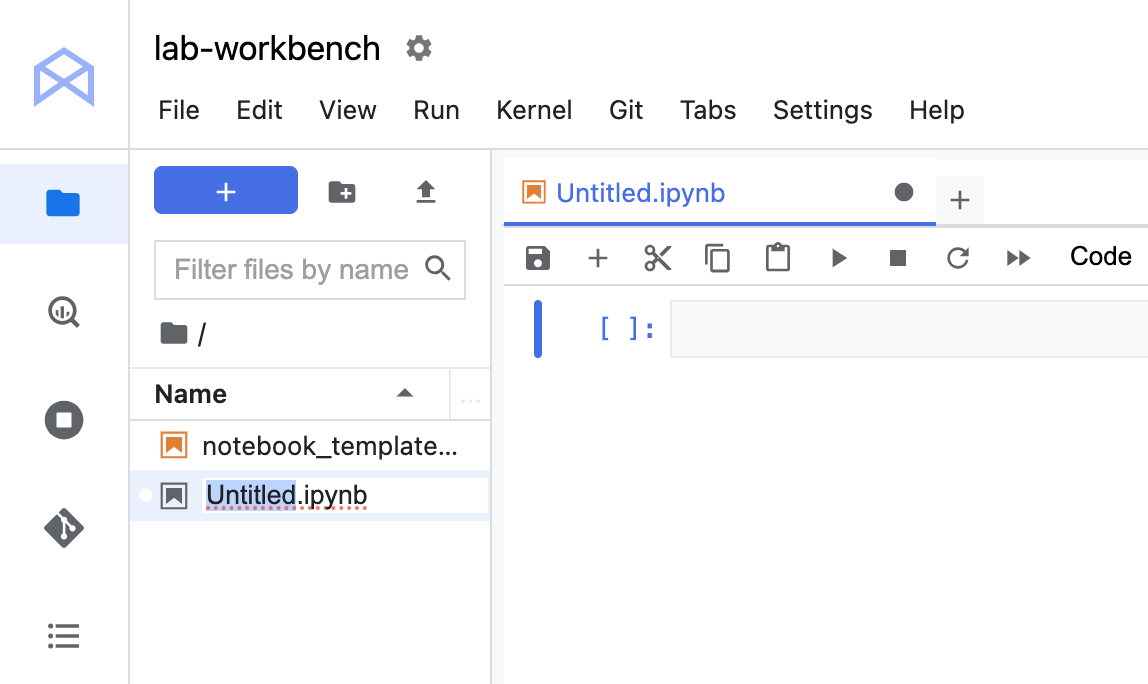
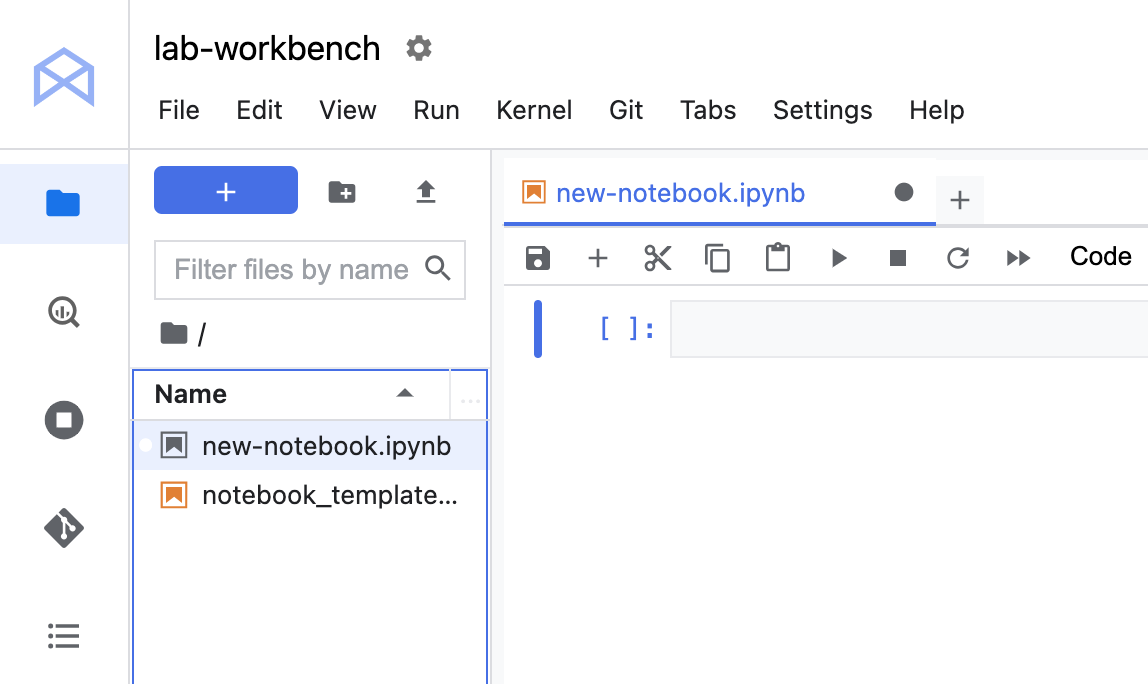
Right-click on the Untitled.ipynb file in the menu bar and select Rename Notebook to give it a meaningful name.
Your environment is set up. You are now ready to start working with your Vertex AI Workbench notebook.
Click Check my progress to verify the objective.
Launch Vertex AI Workbench instance
Task 2. Clone a course repo within your JupyterLab interface
The GitHub repo contains both the lab file and solutions files for the course.
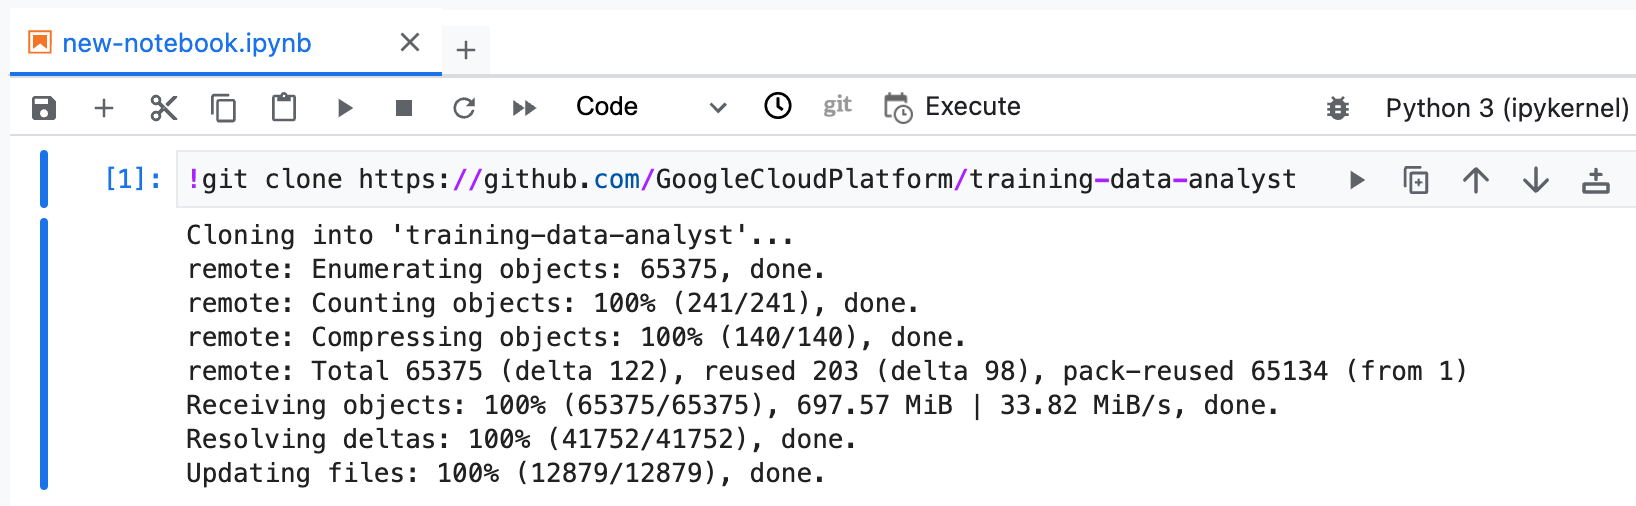
Copy and run the following code in the first cell of your notebook to clone the training-data-analyst repository.
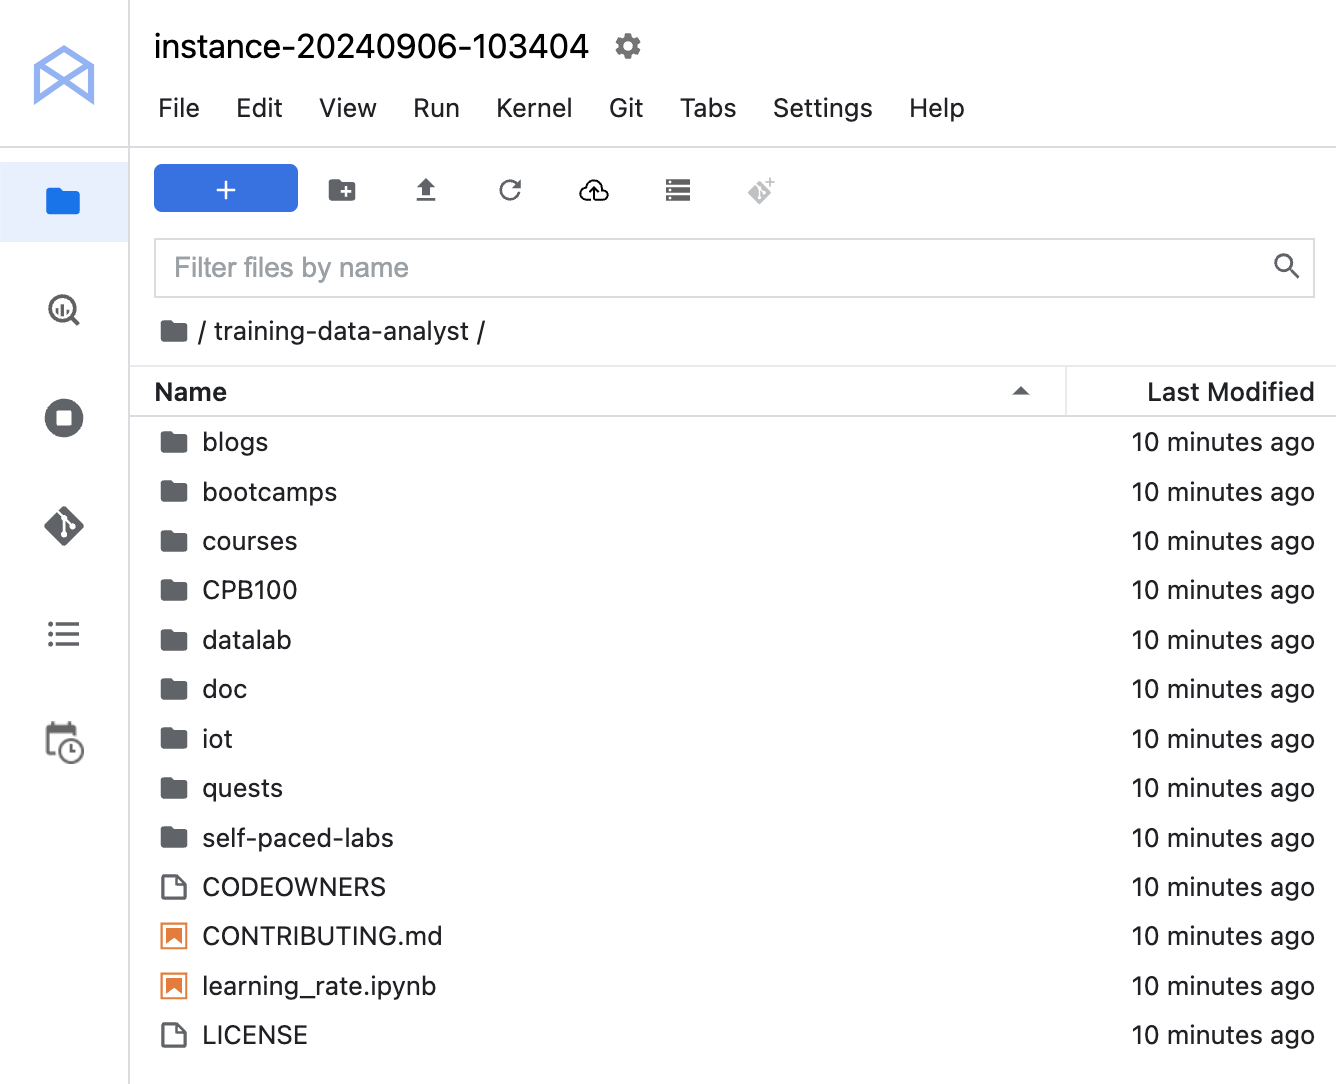
Confirm that you have cloned the repository. Double-click on the training-data-analyst directory and ensure that you can see its contents.
Click Check my progress to verify the objective.
Clone a course repo within your JupyterLab interface
Task 3. Keras Sequential API
Duration is 45 min
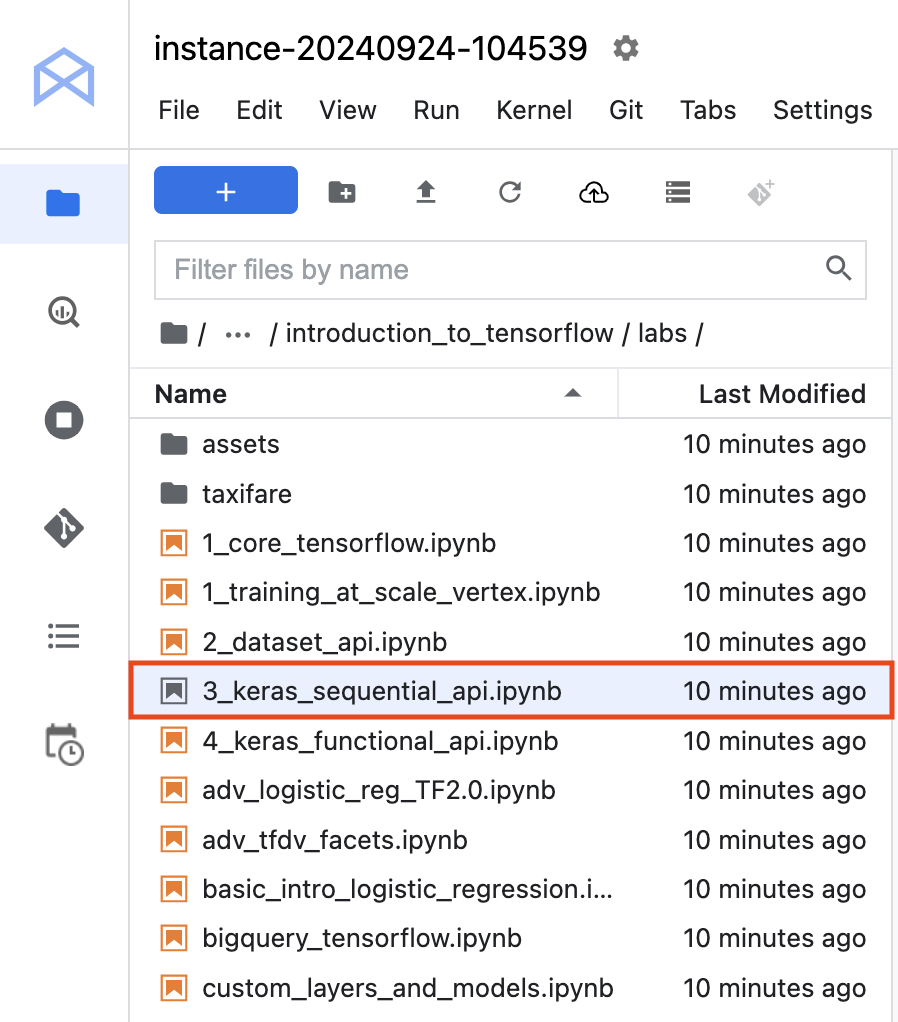
In the notebook interface, navigate to training-data-analyst > courses > machine_learning > deepdive2 > introduction_to_tensorflow > labs and open 3_keras_sequential_api.ipynb.
A pop-up will appear for you to select a kernel. Choose the TensorFlow 2.11 (Local) kernel from the options.
In the notebook interface, click on Edit > Clear All Outputs (click on Edit, then in the drop-down menu, select Clear All Outputs).
Carefully read through the notebook instructions and fill in lines marked with #TODO where you need to complete the code as needed.
Click Check my progress to verify the objective.
Keras Sequential API
End your lab
When you have completed your lab, click End Lab. Qwiklabs removes the resources you’ve used and cleans the account for you.
You will be given an opportunity to rate the lab experience. Select the applicable number of stars, type a comment, and then click Submit.
The number of stars indicates the following:
1 star = Very dissatisfied
2 stars = Dissatisfied
3 stars = Neutral
4 stars = Satisfied
5 stars = Very satisfied
You can close the dialog box if you don't want to provide feedback.
For feedback, suggestions, or corrections, please use the Support tab.
Copyright 2022 Google LLC All rights reserved. Google and the Google logo are trademarks of Google LLC. All other company and product names may be trademarks of the respective companies with which they are associated.
Moduły tworzą projekt Google Cloud i zasoby na określony czas.
Moduły mają ograniczenie czasowe i nie mają funkcji wstrzymywania. Jeśli zakończysz moduł, musisz go zacząć od początku.
Aby rozpocząć, w lewym górnym rogu ekranu kliknij Rozpocznij moduł.
Użyj przeglądania prywatnego
Skopiuj podaną nazwę użytkownika i hasło do modułu.
Kliknij Otwórz konsolę w trybie prywatnym.
Zaloguj się w konsoli
Zaloguj się z użyciem danych logowania do modułu. Użycie innych danych logowania może spowodować błędy lub naliczanie opłat.
Zaakceptuj warunki i pomiń stronę zasobów przywracania.
Nie klikaj Zakończ moduł, chyba że właśnie został przez Ciebie zakończony lub chcesz go uruchomić ponownie, ponieważ spowoduje to usunięcie wyników i projektu.
Ta treść jest obecnie niedostępna
Kiedy dostępność się zmieni, wyślemy Ci e-maila z powiadomieniem
Świetnie
Kiedy dostępność się zmieni, skontaktujemy się z Tobą e-mailem
Jeden moduł, a potem drugi
Potwierdź, aby zakończyć wszystkie istniejące moduły i rozpocząć ten
Aby uruchomić moduł, użyj przeglądania prywatnego
Uruchom ten moduł w oknie incognito lub przeglądania prywatnego. Dzięki temu unikniesz konfliktu między swoim kontem osobistym a kontem do nauki, co mogłoby spowodować naliczanie dodatkowych opłat na koncie osobistym.
In this lab, you will see how to build a simple deep neural network model using the Keras Sequential API and Feature Columns. Once you have trained your model, you will deploy it using AI Platform and see how to call the model for online prediciton.
Czas trwania:
Konfiguracja: 0 min
·
Dostęp na 60 min
·
Ukończono w 45 min
 ), select Vertex AI > Dashboard.
 Create New.