


准备工作
- 实验会创建一个 Google Cloud 项目和一些资源,供您使用限定的一段时间
- 实验有时间限制,并且没有暂停功能。如果您中途结束实验,则必须重新开始。
- 在屏幕左上角,点击开始实验即可开始
Create and Deploy the front-end to App Engine flexible environment
/ 50
Update an App Engine Flexible Environment Application
/ 50
An App Engine app is a single application resource with one or more services. Each service can be configured to use different runtimes and to operate with different performance settings. Within each service, you can deploy versions of that service, and each then runs within one or more instances, depending on how much traffic you configured it to handle. For more information, see the An Overview of App Engine article.
App Engine uses either a Standard or Flexible environment. A standard environment runs instances in a sandbox, limiting available CPU options and disc access.
In contrast, a flexible environment runs your application in Docker containers on Google Compute Engine virtual machines (VMs), which have fewer restrictions. For example, you can use the programming language or library of your choice, write to disk, and even run multiple processes. You also have the choice of Compute Engine machine types for your instances. For more information about App Engine environments, see The App Engine Standard Environment and App Engine Flexible Environment.
In this lab, you deploy the Quiz application into an App Engine flexible environment, leveraging App Engine features, including versions and traffic splitting.
In this lab, you learn how to perform the following tasks:
Create an app.yaml file to describe the App Engine flexible environment requirements for an application.
Deploy the quiz application into an App Engine flexible environment.
Employ versions and traffic splitting to perform A/B testing of an application feature.
For each lab, you get a new Google Cloud project and set of resources for a fixed time at no cost.
Sign in to Qwiklabs using an incognito window.
Note the lab's access time (for example, 1:15:00), and make sure you can finish within that time.
There is no pause feature. You can restart if needed, but you have to start at the beginning.
When ready, click Start lab.
Note your lab credentials (Username and Password). You will use them to sign in to the Google Cloud Console.
Click Open Google Console.
Click Use another account and copy/paste credentials for this lab into the prompts.
If you use other credentials, you'll receive errors or incur charges.
Accept the terms and skip the recovery resource page.
Google Cloud Shell is a virtual machine that is loaded with development tools. It offers a persistent 5GB home directory and runs on the Google Cloud.
Google Cloud Shell provides command-line access to your Google Cloud resources.
In Cloud console, on the top right toolbar, click the Open Cloud Shell button.
Click Continue.
It takes a few moments to provision and connect to the environment. When you are connected, you are already authenticated, and the project is set to your PROJECT_ID. For example:
gcloud is the command-line tool for Google Cloud. It comes pre-installed on Cloud Shell and supports tab-completion.
Output:
Example output:
Output:
Example output:
In this section, you access Cloud Shell, clone the git repository containing the Quiz application, configure environment variables, and run the application.
Clone the repository for the class:
Create a soft link as a shortcut to your working directory:
Change to the directory that contains the sample files for this lab:
Run the executable file by by running the following command:
This script file:
Creates an App Engine application.
Creates a Cloud Storage bucket.
Exports environment variables GCLOUD_PROJECT and GCLOUD_BUCKET.
Creates a virtualenv isolated Python environment for Python 3 and activates it.
Updates pip and runs pip install -r requirements.txt.
Creates entities in Datastore.
Creates IAM role and service accounts.
Creates a Pub/Sub topic.
Creates a Spanner Instance, Database, and Table.
Creates a Cloud Function.
Prints out the Project ID.
In this lab you'll view and edit files. You can use the shell editors that are installed on Cloud Shell, such as nano or vim, or use gcloud, the integrated code editor.
In this section, you use the Cloud Shell text editor to review the Quiz application code.
The integrated code editor launches in a separate tab of your browser, along with Cloud Shell.
/appengine/start.The folder structure for the Quiz application reflects how the application will be deployed in App Engine. For example, the web application is in the frontend folder, so you'll see the configuration files for App Engine; app.yaml file is present in the frontend folder.
In this section, you modify the configuration files for deployment of the Quiz application frontend into an App Engine flexible environment.
In the Cloud Shell code editor, open frontend/app.yaml.
Add two key: value pairs, and set scaling to manual:
The first setting, runtime, indicates that you want to use the python runtime.
The second setting, env, indicates that you want to use the flexible environment.
The number of instances is set to 1. A production service should typically be allowed to scale to more instances.
Add a third configuration entry, entrypoint to the app.yaml file:
This value is the command-line that executes the Flask application, using the gunicorn HTTP server.
Add runtime_config:
Add a final configuration entry, env_variables to the app.yaml file. Include a key GCLOUD_BUCKET and the value from the -media bucket in your project. Be sure to replace [GCLOUD_PROJECT] with the GCP Project ID found in the left panel of the lab:
app.yaml
In Cloud Shell, setting the request timeout for the cloud build:
Deploy the quiz application to App Engine flexible environment:
Enter Y to confirm.
App Engine automatically packages, containerizes, and deploys the code.
It will take up to 20 minutes to complete the deployment.
In the Cloud Platform Console, click Navigation menu > App Engine.
Click the link to your application in the top-right corner of the App Engine Dashboard.
The link will be in the form https://<PROJECT_ID>.appspot.com.
You should see your application.
Click Check my progress to verify the objective.
In this section you modify the application code and then redeploy the application.
In the Cloud Shell code editor, open frontend/quiz/webapp/templates/home.html.
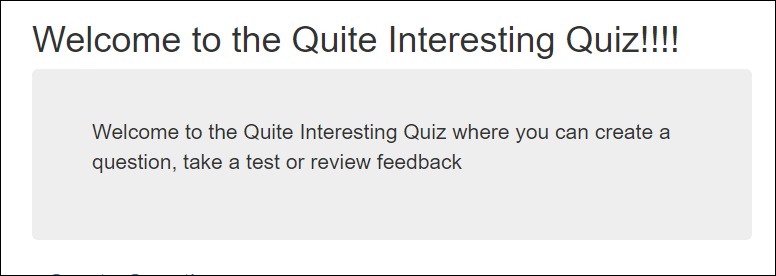
Add several exclamation points to the top-level heading:
This small change stands in for all the changes you might make when updating an application.
Save the file.
In Cloud Shell, redeploy the App Engine application:
Enter Y to confirm.
Notice the two additional flags in the command, which mean that the previous version will continue to receive traffic.
It may take up to 20 minutes to complete the updates to the deployment.
Click Check my progress to verify the objective.
In the Console, click Navigation menu > App Engine > Dashboard.
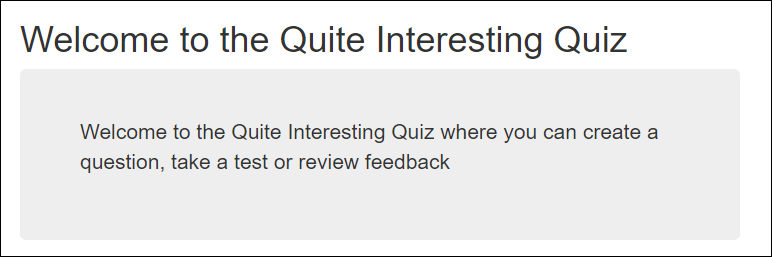
Click on the application URL in the top-right corner of the window. You should see that your application still displays the old title.
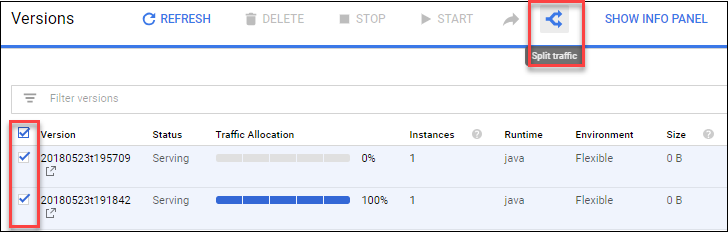
In the App Engine window, click Versions. You may need to refresh the page until you see two versions of the applications.
yyyymmddthhmmss, so it's easy to see which is the new and which is the old version.
Click on both version links to see the new and old version of the quiz application.
New version (notice those exclamation points!):
Old version:
Enable the checkbox for both versions of the application, and click Split traffic.
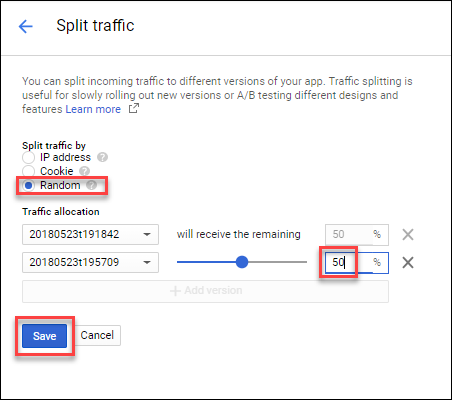
Select the radio button to deliver versions randomly.
Configure the traffic split to deliver 50% of traffic to the old version, and 50% to the new version.
Click Save.
Return to the Dashboard, set Version to All versions and click the application link.
You should see one version of the application.
Refresh the homepage a few times.
You should see that the homepage displays the old version approximately half the time, and the new version half the time.
When you have completed your lab, click End Lab. Google Cloud Skills Boost removes the resources you’ve used and cleans the account for you.
You will be given an opportunity to rate the lab experience. Select the applicable number of stars, type a comment, and then click Submit.
The number of stars indicates the following:
You can close the dialog box if you don't want to provide feedback.
For feedback, suggestions, or corrections, please use the Support tab.
Copyright 2022 Google LLC All rights reserved. Google and the Google logo are trademarks of Google LLC. All other company and product names may be trademarks of the respective companies with which they are associated.


此内容目前不可用
一旦可用,我们会通过电子邮件告知您

太好了!
一旦可用,我们会通过电子邮件告知您

一次一个实验
确认结束所有现有实验并开始此实验