Cloud Storage allows world-wide storage and retrieval of any amount of data at any time. You can use Cloud Storage for a range of scenarios including serving website content, storing data for archival and disaster recovery, or distributing large data objects to users via direct download.
In this lab, you configure an application to use Cloud Storage to store and retrieve application data. The application is an online Quiz, the data is the form data, including an image you upload from your local machine.
Objectives
In this lab, you learn how to perform the following tasks:
Set up Cloud Shell as your development environment
Update the application code to integrate Cloud Storage
Use the Quiz application to upload an image file into Cloud Storage and view the image in the Quiz
Setup and requirements
For each lab, you get a new Google Cloud project and set of resources for a fixed time at no cost.
Sign in to Qwiklabs using an incognito window.
Note the lab's access time (for example, 1:15:00), and make sure you can finish within that time.
There is no pause feature. You can restart if needed, but you have to start at the beginning.
When ready, click Start lab.
Note your lab credentials (Username and Password). You will use them to sign in to the Google Cloud Console.
Click Open Google Console.
Click Use another account and copy/paste credentials for this lab into the prompts.
If you use other credentials, you'll receive errors or incur charges.
Accept the terms and skip the recovery resource page.
Activate Google Cloud Shell
Google Cloud Shell is a virtual machine that is loaded with development tools. It offers a persistent 5GB home directory and runs on the Google Cloud.
Google Cloud Shell provides command-line access to your Google Cloud resources.
In Cloud console, on the top right toolbar, click the Open Cloud Shell button.
Click Continue.
It takes a few moments to provision and connect to the environment. When you are connected, you are already authenticated, and the project is set to your PROJECT_ID. For example:
gcloud is the command-line tool for Google Cloud. It comes pre-installed on Cloud Shell and supports tab-completion.
You can list the active account name with this command:
To run the application, execute the following command:
mvn spring-boot:run
Review the Quiz application
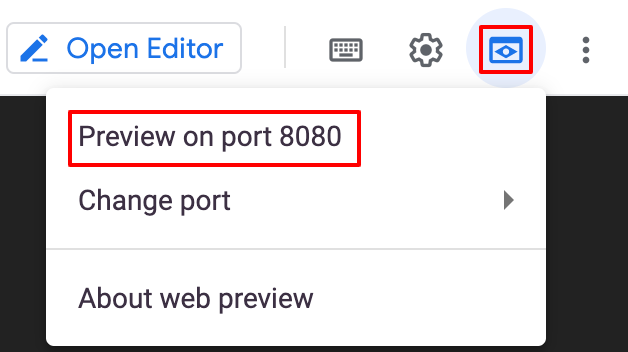
To view the application, click Web preview > Preview on port 8080.
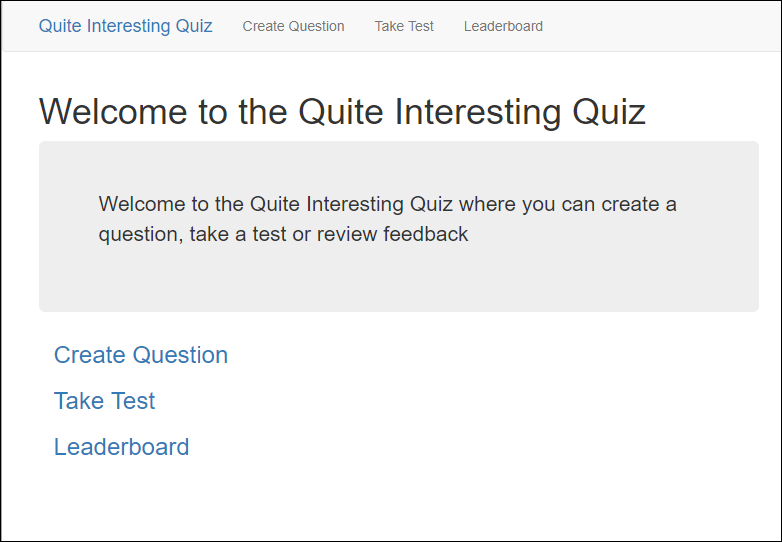
The Quite Interesting Quiz opens.
Click Create Question in the toolbar.
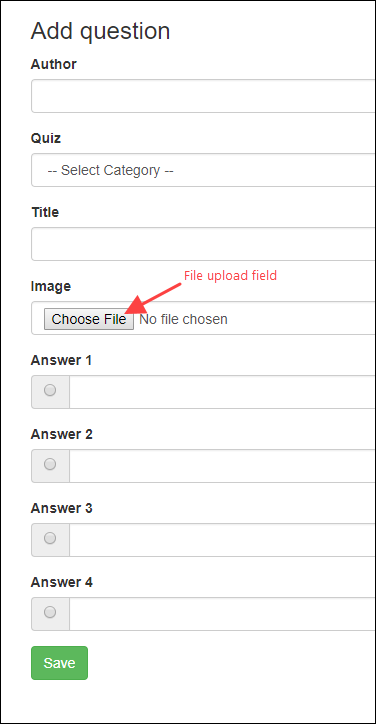
You should see a simple form that contains textboxes for the question and answers and radio buttons to select the correct answer.
The form has a new file upload field that is used to upload an image or video file. In this lab you upload an image file. You would use the same process to upload a video file.
Task 2. Examining the Quiz application code
In this section, you use the Cloud Shell text editor to review the Quiz application code.
Launch the Cloud Shell text editor
From Cloud Shell, click Open Editor icon to launch the code editor.
Navigate to /cloudstorage/start folder using the file browser panel on the left side of the editor.
Review the Spring Boot Web application
Select new_question.html file in the .../src/main/resources/templates folder.
This file contains the Thyme template for the Create Question form.
Notice how the form uses multipart/form-data as the enctype, and the two form controls for images and videos:
A file upload control called image
A hidden field called imageUrl
Select the .../src/main/java/com/google/training/appdev folder.
Java file paths are relative to this folder.
Select .../web/QuestionsController.java.
In this file the POST handler invokes a method on an image service.
Select the .../services/gcp/cloudstorage/ImageService.java file.
This is the file where you write code to save image file data into Cloud Storage.
Task 3. Creating a Cloud Storage bucket
In this section, you create a Cloud Storage bucket and export an environment variable that references it.
Create a Cloud Storage bucket
Return to Cloud Shell and stop the application by pressing Ctrl+C.
To create a Cloud Storage bucket named <Project ID>-media, execute the following command:
gcloud storage buckets create gs://$DEVSHELL_PROJECT_ID-media
Note: You can create a bucket using the gcloud storage buckets create command, passing through the name of the bucket as gs://BUCKET_NAME
You can use $DEVSHELL_PROJECT_ID as the bucket name prefix followed by -media.
Click Check my progress to verify the objective.
Create a storage bucket
To export the Cloud Storage bucket name as an environment variable named GCLOUD_BUCKET, execute the following command:
export GCLOUD_BUCKET=$DEVSHELL_PROJECT_ID-media
Recall that the application makes use of environment variables for configuration. This allows the development team to deploy the application into development, test, staging, and production just by changing these variables.
Task 4. Adding objects to Cloud Storage
In this section, you write code to save uploaded files into Cloud Storage.
Note: Update code in the sections between // TODO and // END TODO.
To maximize your learning, review the code, inline comments, and related APIs & reference documentation.
Import and use the Java Cloud Storage Package
In the code editor, move to the top of the .../services/gcp/cloudstorage/ImageService.java file.
Write a star import for the com.google.cloud.storage.* package:
// TODO: Write a start import for Cloud Storage
import com.google.cloud.storage.*;
// END TODO
Construct a Cloud Storage client named storage using the StorageOptions class:
// TODO: Create the storage client
// The StorageOptions class has a getDefaultInstance()
// static method.
// Use the getService() method to get the storage client
private static Storage storage = StorageOptions
.getDefaultInstance()
.getService();
// END TODO
Declare a String named bucketName, and annotate it with a Spring value annotation to retrieve the value from a property named google.storage.bucket:
// TODO: Get the name of the Cloud Storage bucket
// Use a Spring @Value annotation to get the value
// Get the value using ${google.storage.bucket}
// This references the GCLOUD_BUCKET environment variable
@Value("${google.storage.bucket}")
private String bucketName;
// END TODO
ImageService.java
package com.google.training.appdev.services.gcp.cloudstorage;
// TODO: Write a start import for Cloud Storage
import com.google.cloud.storage.*;
// END TODO
import org.springframework.beans.factory.annotation.Value;
import org.springframework.stereotype.Service;
import org.springframework.web.multipart.MultipartFile;
import java.io.IOException;
import java.util.ArrayList;
import java.util.Arrays;
@Service
public class ImageService {
// TODO: Create the storage client
// The StorageOptions class has a getDefaultInstance()
// static method.
// Use the getService() method to get the storage client
private static Storage storage = StorageOptions
.getDefaultInstance()
.getService();
// END TODO
// TODO: Get the name of the Cloud Storage bucket
// Use a Spring @Value annotation to get the value
// Get the value using ${google.storage.bucket}
// This references the GCLOUD_BUCKET environment variable
@Value("${google.storage.bucket}")
private String bucketName;
// END TODO
Write code to send a file to Cloud Storage
Still updating ImageService.java, move to the saveImage(MultipartFile file) handler and then use the Cloud Storage client to upload a file to your Cloud Storage bucket and make it publicly available.
Declare a BlobInfo object and initialize it using the storage client object. Customize the BlobInfo object using its Builder. Use the option to set the Content Type and to set the ACL to allow unauthenticated Read access:
// TODO: Create a new Cloud Storage object
// Use the BlobInfo class to represent this object
// Use the BlobInfo.Builder to customize the Blob
// Set the content type from the file
// Set the object ACL to Public Read
BlobInfo blobInfo = storage.create(
BlobInfo.newBuilder(bucketName, fileName)
.setContentType(file.getContentType())
.setAcl(new ArrayList<>(
Arrays.asList(Acl.of(Acl.User.ofAllUsers(),
Acl.Role.READER))))
.build(),
file.getInputStream());
// END TODO
Return the public URL for the new Cloud Storage object as a string:
// TODO: Cloud Storage public URLs are in the form:
// https://storage.googleapis.com/[BUCKET]/[OBJECT]
// Use String concatentation to create return the URL
return "https://storage-download.googleapis.com/" + bucketName+ "/" +fileName;
// END TODO
ImageService.java
public String saveImage(MultipartFile file)
throws IOException {
// The existing code in the method creates a unique name
// based on the file's original name. It has a
// prefix generated using the current date and time.
// This should ensure that a new file upload won't
// overwrite an existing object in the bucket
String fileName = System.nanoTime() +
file.getOriginalFilename();
// TODO: Create a new Cloud Storage object
// Use the BlobInfo class to represent this object
// Use the BlobInfo.Builder to customize the Blob
// Set the content type from the file
// Set the object ACL to Public Read
BlobInfo blobInfo = storage.create(
BlobInfo.newBuilder(bucketName, fileName)
.setContentType(file.getContentType())
.setAcl(new ArrayList<>(
Arrays.asList(Acl.of(Acl.User.ofAllUsers(),
Acl.Role.READER))))
.build(),
file.getInputStream());
// END TODO
// TODO: Cloud Storage public URLs are in the form:
// https://storage.googleapis.com/[BUCKET]/[OBJECT]
// Use String concatenation to return the URL
return "https://storage-download.googleapis.com/" +
bucketName + "/" + fileName;
// END TODO
}
Run the application and create a Cloud Storage object
Save .../services/gcp/cloudstorage/ImageService.java and then return to the Cloud Shell.
Start the application by typing:
mvn spring-boot:run
Download an image file to your local machine from here.
In Cloud Shell, click Web preview > Preview on port 8080 to preview the Quiz application.
Click the Create Question link.
Complete the form with the following values, and then click Save:
Field
Value
Author
Your name
Quiz
Google Cloud Platform
Title
Which product does this logo relate to?
Image
Upload the Google_Cloud_Storage_logo.png file you previously downloaded
Answer 1
App Engine
Answer 2
Cloud Storage (and select the Answer 2 radio button to indicate this as the correct answer)
Answer 3
Compute Engine
Answer 4
Container Engine
Click Check my progress to verify the objective.
Add Objects to Cloud Storage
Return to the Cloud Console and navigate to Navigation menu > Cloud Storage.
On the Cloud Storage > Buckets page, click the correct bucket (named <Project ID>-media).
You should see your new object named #UniqueNumber#Google_Cloud_Storage_logo.png.
Click Check my progress to verify the objective.
Create a Datastore entity
Run the client application and test the Cloud Storage public URL
Add /api/quizzes/gcp to the end of the Quiz application's URL.
You should see that the application returns JSON data to the client corresponding to the Question you added in the web application:
{"questions":[{"quiz":"gcp","author":"Mary Smith","title":"Which product does this logo relate to?","correctAnswer":2,"imageUrl":"https://storage-download.googleapis.com/qwiklabs-gcp-33f2cf3e36ee1794-media/2293278773582Websites_and_Web_Apps_GCP.png","image":null,"id":5629499534213120,"answer1":"App Engine","answer2":"Cloud Storage","answer3":"Compute Engine","answer4":"Container Engine"}]}
The imageUrl property should have a value corresponding to the new object you created in Cloud Storage.
Return to the application home page and click the Take Test link.
Click GCP, and answer each question.
When you get to the question you just added, you should see the image has been formatted inside the client-side web application!
End your lab
When you have completed your lab, click End Lab. Google Cloud Skills Boost removes the resources you’ve used and cleans the account for you.
You will be given an opportunity to rate the lab experience. Select the applicable number of stars, type a comment, and then click Submit.
The number of stars indicates the following:
1 star = Very dissatisfied
2 stars = Dissatisfied
3 stars = Neutral
4 stars = Satisfied
5 stars = Very satisfied
You can close the dialog box if you don't want to provide feedback.
For feedback, suggestions, or corrections, please use the Support tab.
Copyright 2022 Google LLC All rights reserved. Google and the Google logo are trademarks of Google LLC. All other company and product names may be trademarks of the respective companies with which they are associated.
Les ateliers créent un projet Google Cloud et des ressources pour une durée déterminée.
Les ateliers doivent être effectués dans le délai imparti et ne peuvent pas être mis en pause. Si vous quittez l'atelier, vous devrez le recommencer depuis le début.
En haut à gauche de l'écran, cliquez sur Démarrer l'atelier pour commencer.
Utilisez la navigation privée
Copiez le nom d'utilisateur et le mot de passe fournis pour l'atelier
Cliquez sur Ouvrir la console en navigation privée
Connectez-vous à la console
Connectez-vous à l'aide des identifiants qui vous ont été attribués pour l'atelier. L'utilisation d'autres identifiants peut entraîner des erreurs ou des frais.
Acceptez les conditions d'utilisation et ignorez la page concernant les ressources de récupération des données.
Ne cliquez pas sur Terminer l'atelier, à moins que vous n'ayez terminé l'atelier ou que vous ne vouliez le recommencer, car cela effacera votre travail et supprimera le projet.
Ce contenu n'est pas disponible pour le moment
Nous vous préviendrons par e-mail lorsqu'il sera disponible
Parfait !
Nous vous contacterons par e-mail s'il devient disponible
Un atelier à la fois
Confirmez pour mettre fin à tous les ateliers existants et démarrer celui-ci
Utilisez la navigation privée pour effectuer l'atelier
Ouvrez une fenêtre de navigateur en mode navigation privée pour effectuer cet atelier. Vous éviterez ainsi les conflits entre votre compte personnel et le compte temporaire de participant, qui pourraient entraîner des frais supplémentaires facturés sur votre compte personnel.
In this lab, you will enhance the online Quiz application to work with images. You will store files as objects in a Cloud Storage bucket.
Durée :
0 min de configuration
·
Accessible pendant 120 min
·
Terminé après 120 min