


Before you begin
- Labs create a Google Cloud project and resources for a fixed time
- Labs have a time limit and no pause feature. If you end the lab, you'll have to restart from the beginning.
- On the top left of your screen, click Start lab to begin
Google Cloud Datastore is a NoSQL document database built for automatic scaling, high performance, and ease of application development. In this lab, you use Datastore to store application data for an online Quiz application. You also configure the application to retrieve from Datastore and display the data in the quiz.
The Quiz application skeleton has already been written. You clone the repository that contains the skeleton using Google Cloud Shell, review the code using the Cloud Shell editor, and view it using the Cloud Shell web preview feature. You then modify the code that stores data to use Cloud Datastore.
In this lab, you learn how to perform the following tasks:
For each lab, you get a new Google Cloud project and set of resources for a fixed time at no cost.
Sign in to Qwiklabs using an incognito window.
Note the lab's access time (for example, 1:15:00), and make sure you can finish within that time.
There is no pause feature. You can restart if needed, but you have to start at the beginning.
When ready, click Start lab.
Note your lab credentials (Username and Password). You will use them to sign in to the Google Cloud Console.
Click Open Google Console.
Click Use another account and copy/paste credentials for this lab into the prompts.
If you use other credentials, you'll receive errors or incur charges.
Accept the terms and skip the recovery resource page.
Google Cloud Shell is a virtual machine that is loaded with development tools. It offers a persistent 5GB home directory and runs on the Google Cloud.
Google Cloud Shell provides command-line access to your Google Cloud resources.
In Cloud console, on the top right toolbar, click the Open Cloud Shell button.
Click Continue.
It takes a few moments to provision and connect to the environment. When you are connected, you are already authenticated, and the project is set to your PROJECT_ID. For example:
gcloud is the command-line tool for Google Cloud. It comes pre-installed on Cloud Shell and supports tab-completion.
Output:
Example output:
Output:
Example output:
virtualenv is used to create user space virtual environments that allow you to install different sets of Python packages for different projects.
Using virtualenv also means you don't have to install Python packages globally which can cause system tools or other Python projects to break.
In this lab virtualenv is also used to make sure that Python3 is used for all Python commands.
Configure a virtualenv environment for Python 3:
Activate the virtual environment:
The repository that contains the Quiz application is located on GitHub.com.
In this section, you use Cloud Shell to enter commands that clone repository and run the application.
Change the directory that contains the files for this lab:
Export an environment variable, GCLOUD_PROJECT that references the GCP Project ID:
$DEVSHELL_PROJECT_ID environment variable.
Install the application dependencies:
Run the application:
The application is running when you see a message similar to the following:
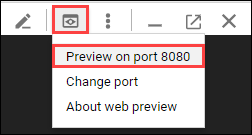
In Cloud Shell, click Web preview > Preview on port 8080 to preview the quiz application.
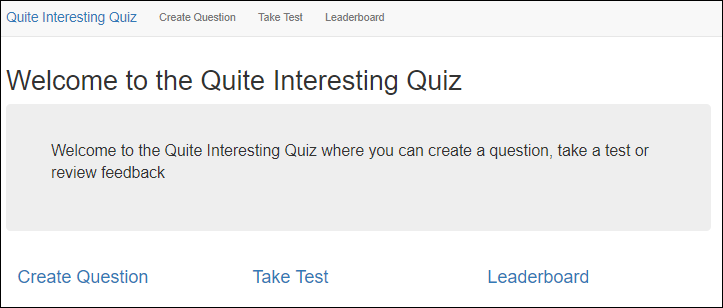
You should see the user interface for the web application. The three main parts to the application are:
In the navigation bar, click Create Question.
You should see a simple form that contains textboxes for the question and answers with radio buttons to select the correct answer.
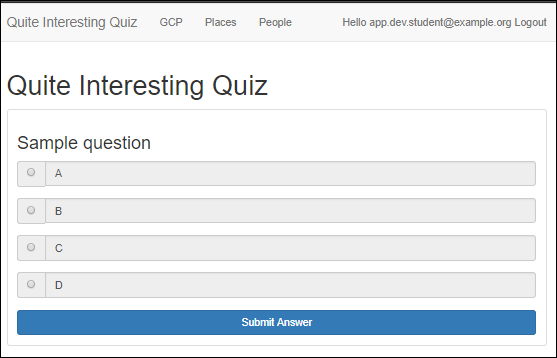
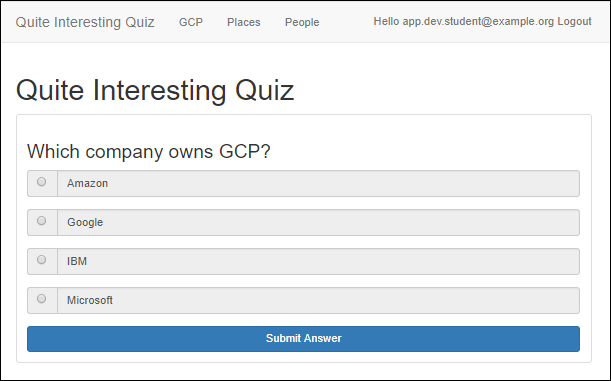
In the navigation bar, click Take Test, and then GCP to access the GCP questions.
You should see a sample question.
Quiz takers answer questions in this part of the application.
To return to the server-side application, click on the Quite Interesting Quiz link in the navigation bar.
In this lab you'll view and edit files. You can use the shell editors that are installed on Cloud Shell, such as nano or vim or the Cloud Shell code editor.
This lab uses the Cloud Shell code editor to review the Quiz application code.
/datastore/start folder using the file browser panel on the left side of the editor.Select the ...run-server.py file.
This file contains the entrypoint for the application, and runs it on port 8080.
Select the ...quiz/__init__.py file.
This file imports routes for the web application and REST API.
Select the ...quiz/webapp/questions.py and ...quiz/webapp/routes.py file.
These files contain the routes that map URIs to handlers that display the form and collect form data posted by quiz authors in the web application.
Select the ...quiz/webapp/templates folder.
This folder contains templates for the web application user interface using Jinja2 templates.
View the ...quiz/webapp/templates/add.html file.
This file contains the Jinja2 template for the Create Question form.
Notice how there is a select list to pick a quiz, textboxes where an author can enter the question and answers, and radio buttons to select the correct answer.
Select the ...quiz/api/api.py file.
This file contains the handler that sends JSON data to students taking a test.
Select the ...quiz/gcp/datastore.py file.
This is the file where you write Datastore code to save and load quiz questions to and from Cloud Datastore.
This module will be imported into the web application and API.
In this section, you write code to save form data in Cloud Datastore.
// TODO
// END TODO
To maximize your learning, review the code, inline comments, and related API documentation.
Return to Cloud Shell and stop the application by pressing Ctrl+C.
To create an App Engine application in your project, use the following command:
You'll see this message when the App Engine has been created:
Open the ...quiz/gcp/datastore.py file in the Cloud Shell editor and add the following code to perform the following:
os module.GCLOUD_PROJECT environment variable.datastore module from the google.cloud package.datastore.Client client object named datastore_client.Updated datastore.py
Still in ...quiz/gcp/datastore.py, move to the save_question() function and remove the existing pass placeholder statement.
Perform the following by adding the code:
'Question'.datastore.py - save_question() function
datastore.py....quiz/gcp/datastore.py file and then return to the Cloud Shell command prompt.|
Form Field |
Value |
|
Author |
|
|
Quiz |
|
|
Title |
|
|
Answer 1 |
|
|
Answer 2 |
|
|
Answer 3 |
|
|
Answer 4 |
|
You should returned to the application home page.
You should see your new question!
In this section, you write code to retrieve entity data from Cloud Datastore to view your question in the application.
In the code editor, in the ...quiz/gcp/datastore.py file, remove the code for the list_entities(quiz, redact) function and replace it with a query that:
Replace this code:
With this code:
datastore.py.Now to test if your question is retrieved from Datastore and loaded into your Quiz application.
Preview the quiz. If the browser running the quiz is still open, reload the browser. Otherwise, click Web preview > Preview on port 8080.
Click Take Test > GCP.
You should see the questions you created.
When you have completed your lab, click End Lab. Google Cloud Skills Boost removes the resources you’ve used and cleans the account for you.
You will be given an opportunity to rate the lab experience. Select the applicable number of stars, type a comment, and then click Submit.
The number of stars indicates the following:
You can close the dialog box if you don't want to provide feedback.
For feedback, suggestions, or corrections, please use the Support tab.
Copyright 2022 Google LLC All rights reserved. Google and the Google logo are trademarks of Google LLC. All other company and product names may be trademarks of the respective companies with which they are associated.


This content is not currently available
We will notify you via email when it becomes available

Great!
We will contact you via email if it becomes available

One lab at a time
Confirm to end all existing labs and start this one