In this lab, you will upgrade a GKE cluster using the Google Cloud Console.
Objectives
In this lab, you learn how to perform the following task:
Use the Google Cloud Console to upgrade your GKE cluster.
Setup and requirements
For each lab, you get a new Google Cloud project and set of resources for a fixed time at no cost.
Sign in to Qwiklabs using an incognito window.
Note the lab's access time (for example, 1:15:00), and make sure you can finish within that time.
There is no pause feature. You can restart if needed, but you have to start at the beginning.
When ready, click Start lab.
Note your lab credentials (Username and Password). You will use them to sign in to the Google Cloud Console.
Click Open Google Console.
Click Use another account and copy/paste credentials for this lab into the prompts.
If you use other credentials, you'll receive errors or incur charges.
Accept the terms and skip the recovery resource page.
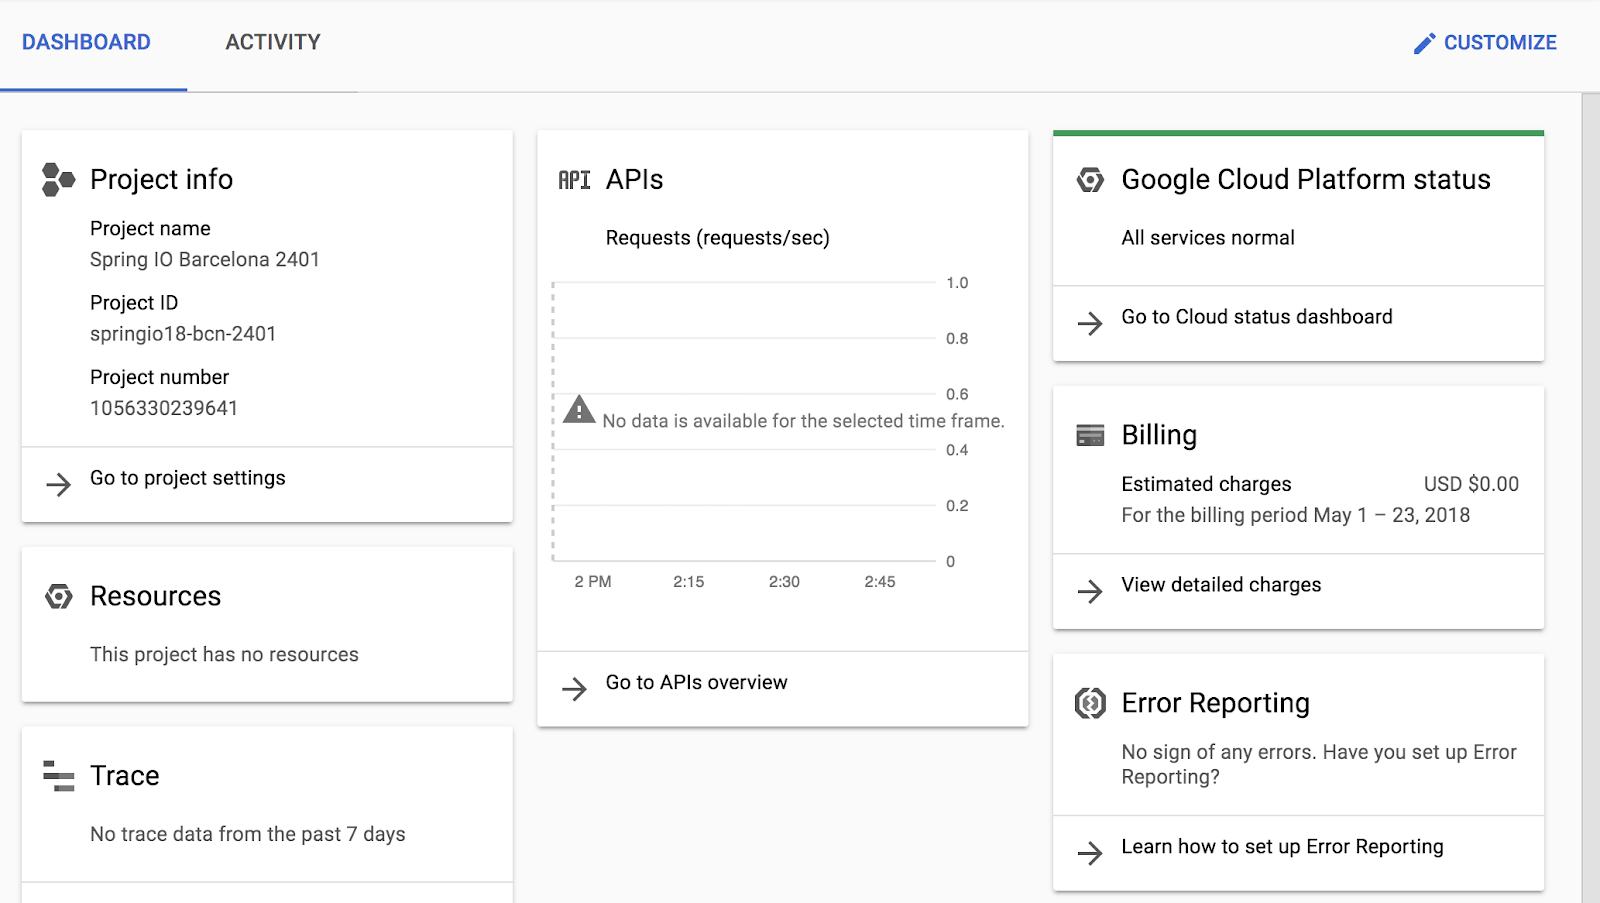
After you complete the initial sign-in steps, the project dashboard appears.
Task 1. Deploy a GKE cluster
In this task, you use Google Cloud Console to deploy a GKE cluster running a Kubernetes version that is not the most recent release. You will upgrade this cluster to a more recent release in a later task.
In the Google Cloud Console, on the Navigation menu (), click Kubernetes Engine > Clusters.
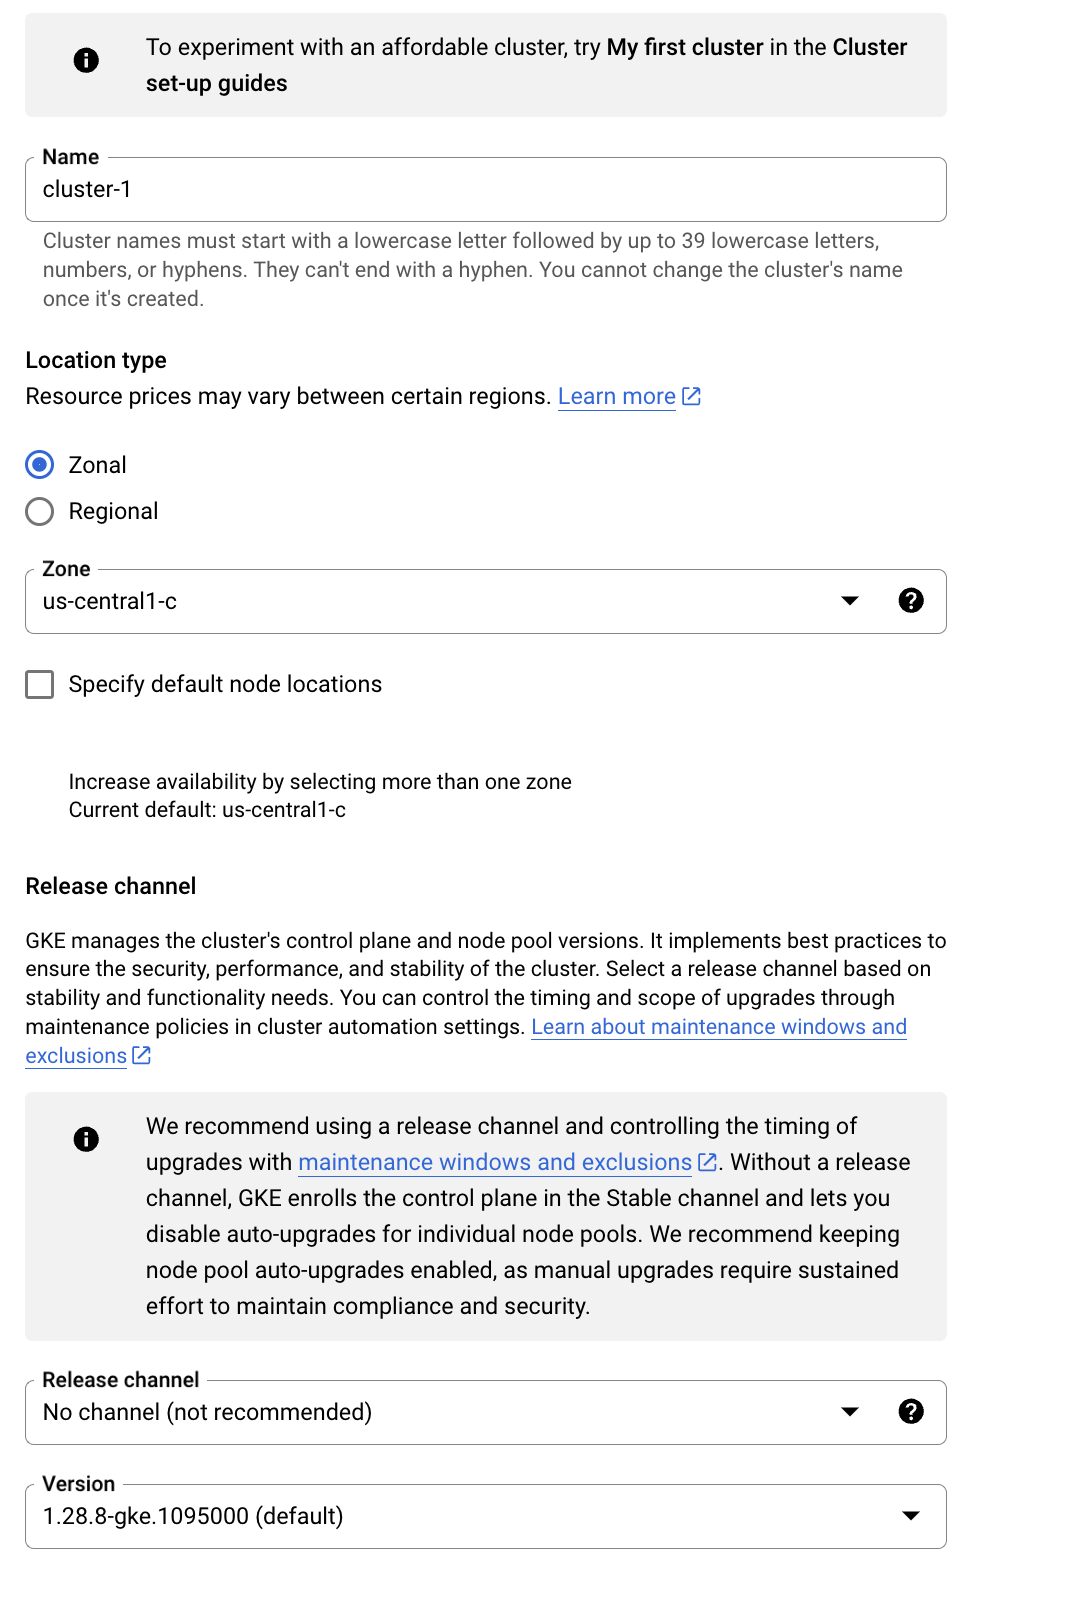
Click Create to begin creating a GKE cluster.
Click Switch to Standard Cluster in the top right of the screen to switch operation modes.
Click Switch to Standard Cluster to confirm choice
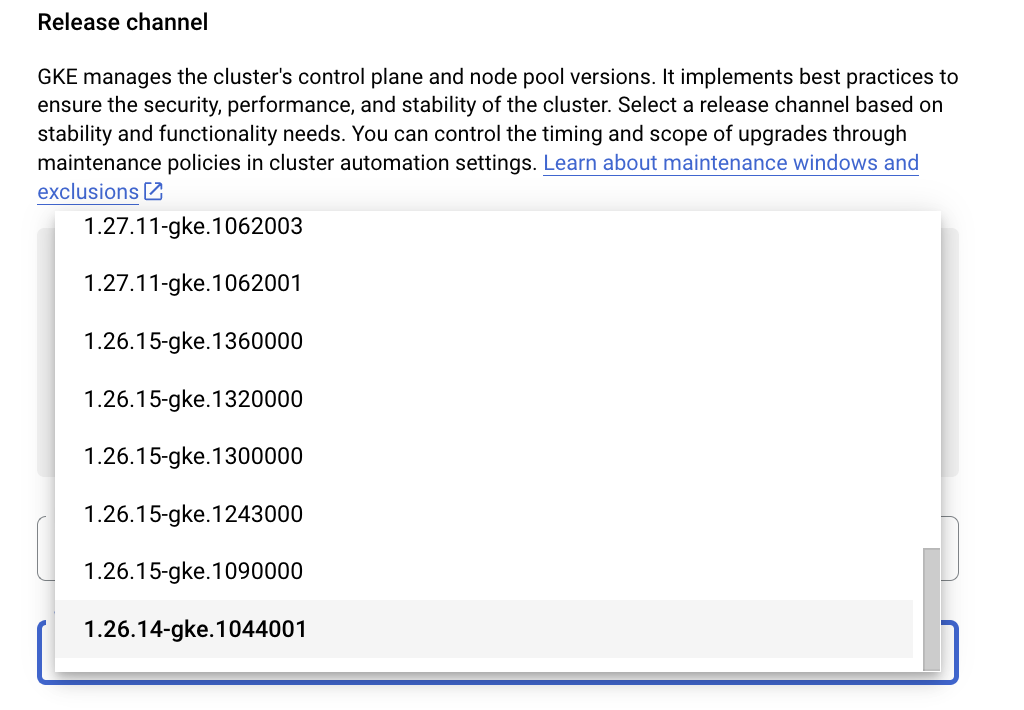
In the Release Channel section, choose No channel (not recommended) as the release channel, and then click on the version dropdown to expand the list of available Kubernetes versions.
Select the lowest version number in the list.
Leave all of the other settings at the defaults and click Create to begin creating a GKE cluster.
Note: You need to wait a few minutes for the cluster deployment to complete.
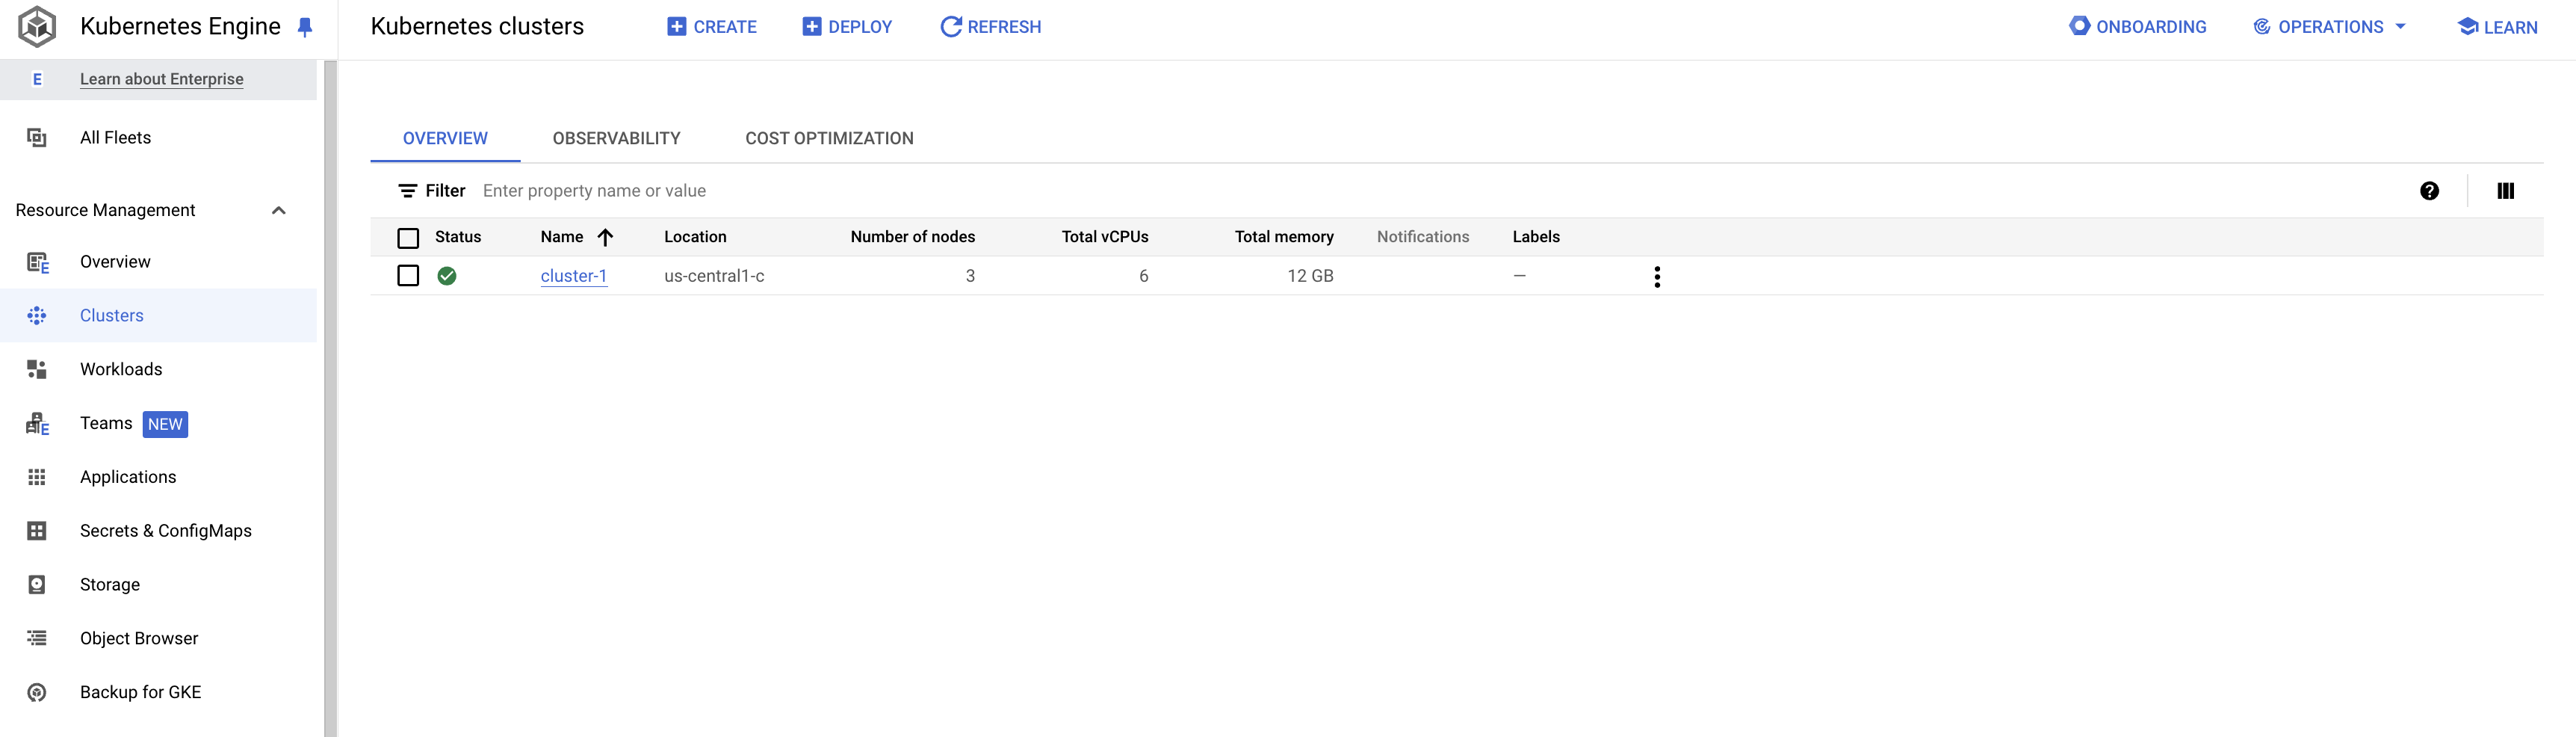
When provisioning is complete, the Kubernetes Engine > Clusters page looks like the screenshot:
Click Check my progress to verify the objective.
Deploy GKE cluster
Task 2. Upgrade your GKE cluster
In this task, you upgrade your GKE cluster and all of the nodes.
Upgrade your GKE cluster
In the Google Cloud Console, on the Navigation menu (), in the Kubernetes Engine section, click Clusters.
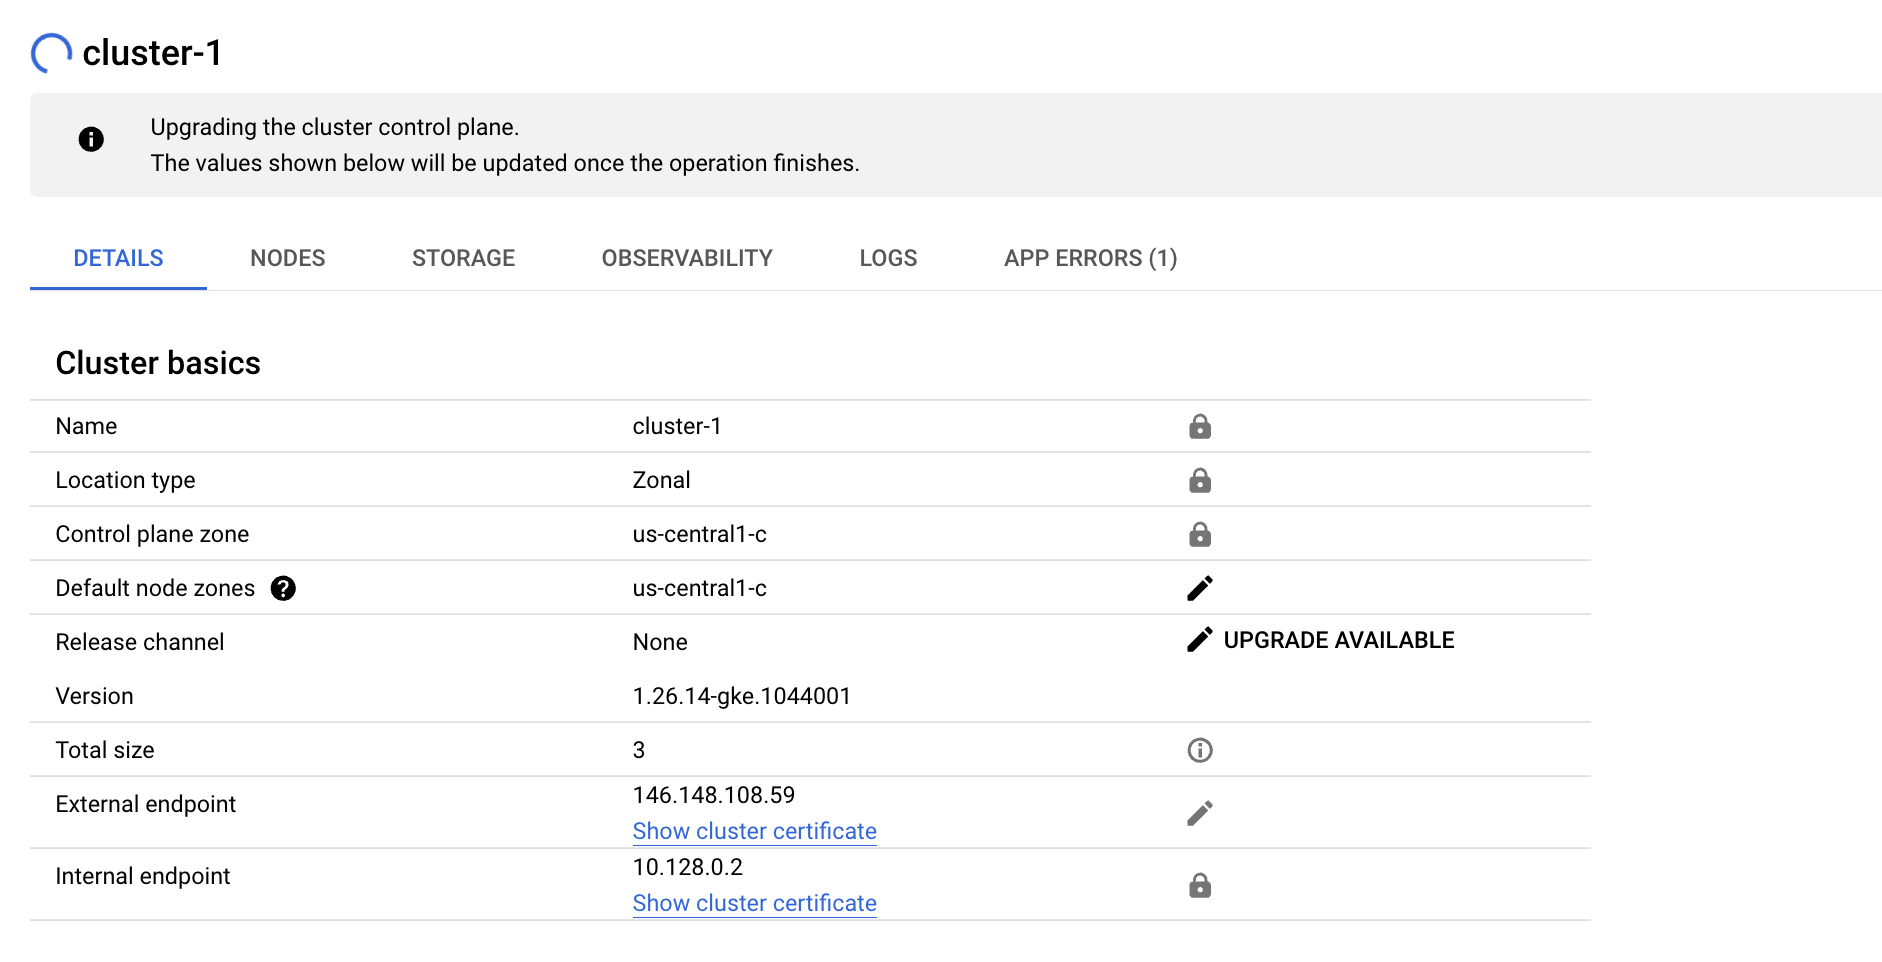
Click the name of your cluster to open its properties.
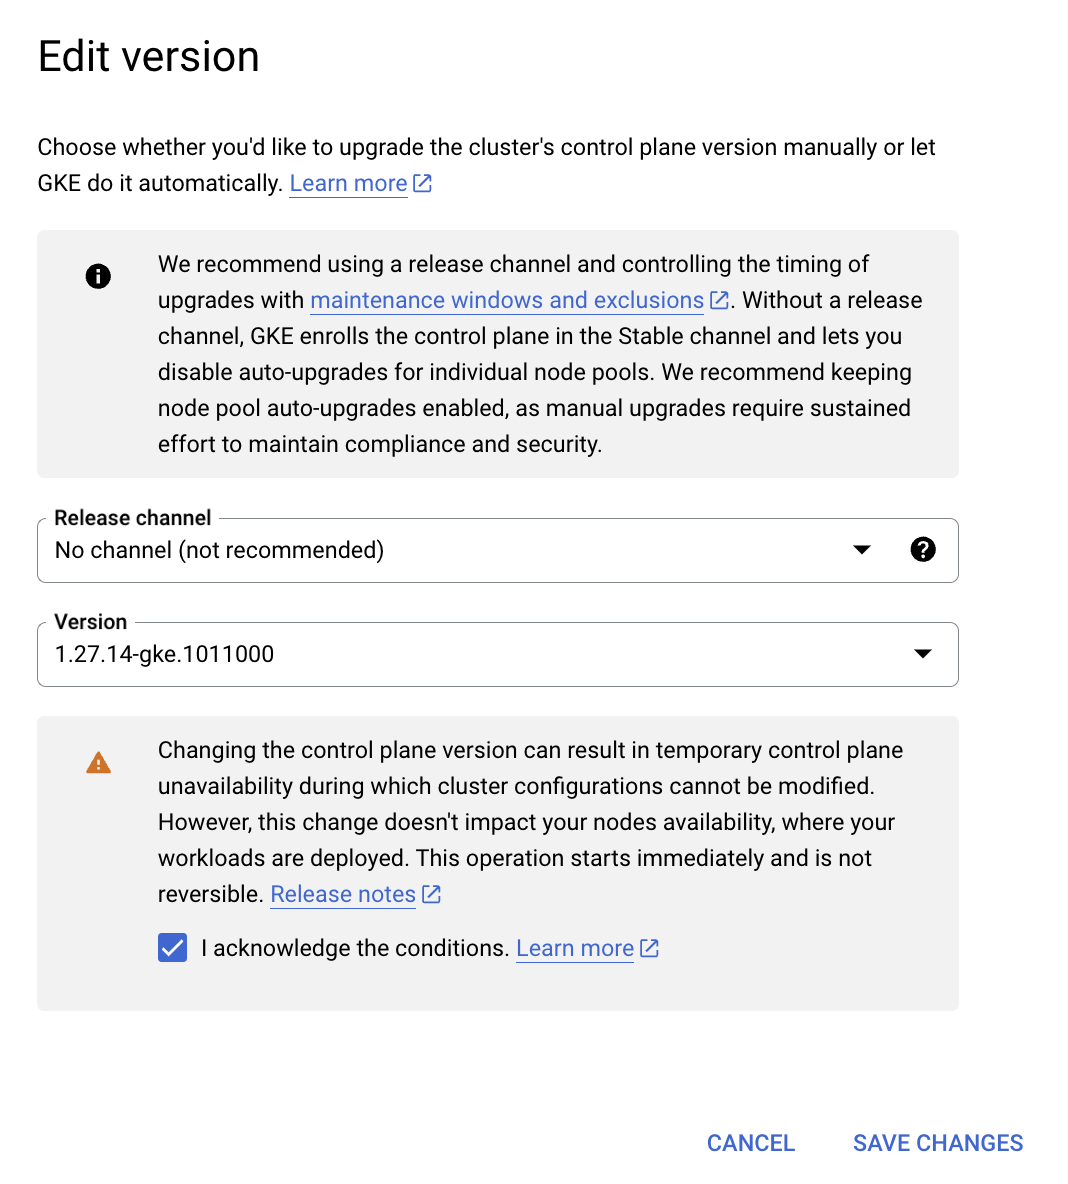
To the right of the Release channel version, click the Upgrade available link to start the upgrade wizard.
Select the most recent (highest) build available.
Click the checkbox for Acknowledgement and then click Save Change.
Note: Version numbers are presented in the following format major.minor.patch.For Example in the version 1.14.10, 1.14.10 is the major version, 1.14.10 is the minor version, and 1.14.10 is the patch version.
If the version you are upgrading to is more than 1 minor version away from the current version. You may have to do this step in stages.
For Example: I will upgrade from 1.14.10 to 1.15.11 first, then I will upgrade from 1.15.11 to my most recent version (1.16.9).
Note: You need to wait 2 or 3 minutes for the Control Plane upgrade to complete.
You can refresh the page to check the status of the upgrade.
When the control plane upgrade has completed, the control plane version number changes to the version that you selected in the upgrade wizard.
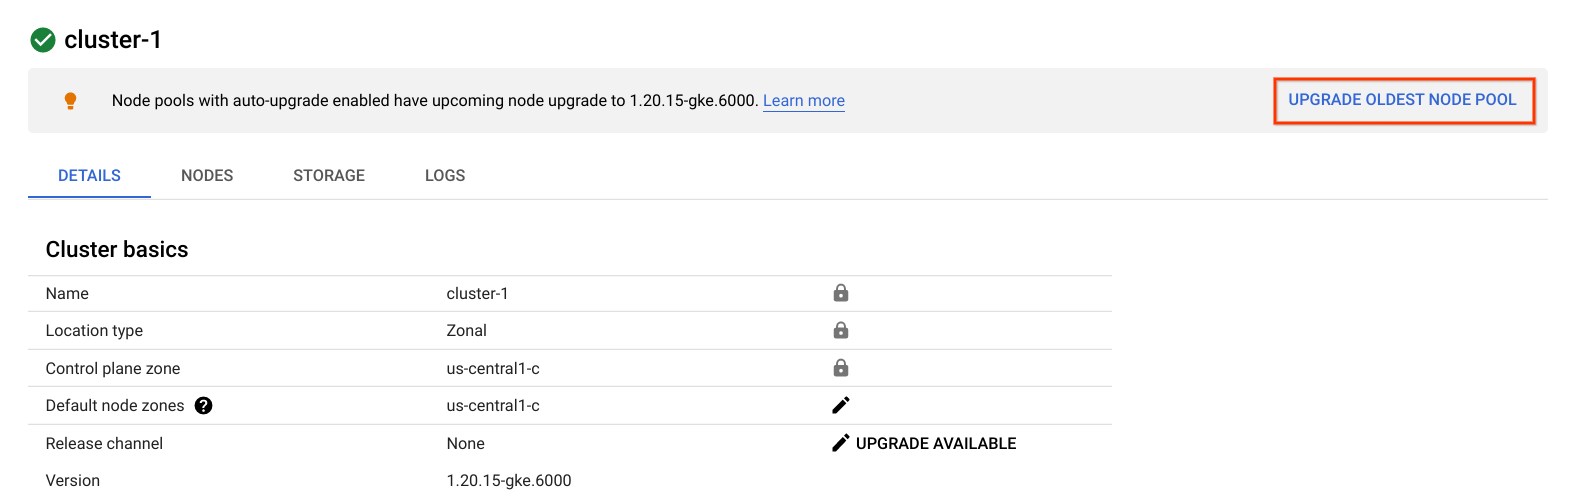
Upgrade the node pool in your cluster
You must now upgrade the nodes of your cluster to the same version as the control plane.
Refresh your web browser to display the prompt, and then click Upgrade oldest node pool.
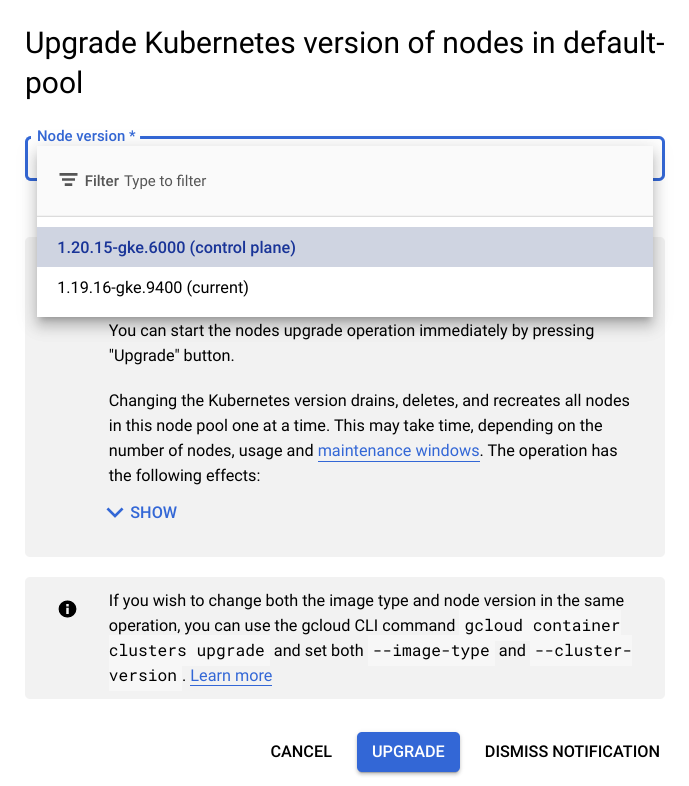
In the upgrade wizard window, choose the most recent version (at the top of the list), and then click Upgrade to continue with the upgrade.
Because this process must upgrade all nodes in your cluster, it might take several minutes to complete.
You can check the status by refreshing the web browser. A progress bar appears.
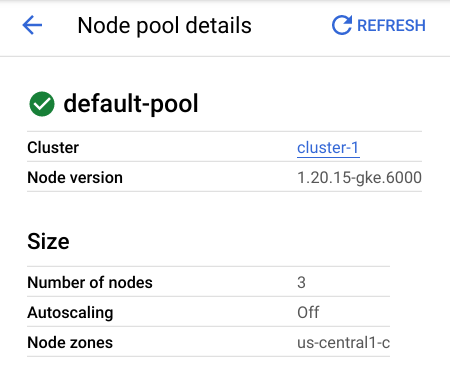
When the node pool upgrade process finishes, your cluster upgrade is complete.
When all of the nodes have been upgraded the new version is reflected in the node pool details pane.
Click Check my progress to verify the objective.
Upgrade GKE cluster
End your lab
When you have completed your lab, click End Lab. Google Cloud Skills Boost removes the resources you’ve used and cleans the account for you.
You will be given an opportunity to rate the lab experience. Select the applicable number of stars, type a comment, and then click Submit.
The number of stars indicates the following:
1 star = Very dissatisfied
2 stars = Dissatisfied
3 stars = Neutral
4 stars = Satisfied
5 stars = Very satisfied
You can close the dialog box if you don't want to provide feedback.
For feedback, suggestions, or corrections, please use the Support tab.
Copyright 2022 Google LLC All rights reserved. Google and the Google logo are trademarks of Google LLC. All other company and product names may be trademarks of the respective companies with which they are associated.
Moduły tworzą projekt Google Cloud i zasoby na określony czas.
Moduły mają ograniczenie czasowe i nie mają funkcji wstrzymywania. Jeśli zakończysz moduł, musisz go zacząć od początku.
Aby rozpocząć, w lewym górnym rogu ekranu kliknij Rozpocznij moduł.
Użyj przeglądania prywatnego
Skopiuj podaną nazwę użytkownika i hasło do modułu.
Kliknij Otwórz konsolę w trybie prywatnym.
Zaloguj się w konsoli
Zaloguj się z użyciem danych logowania do modułu. Użycie innych danych logowania może spowodować błędy lub naliczanie opłat.
Zaakceptuj warunki i pomiń stronę zasobów przywracania.
Nie klikaj Zakończ moduł, chyba że właśnie został przez Ciebie zakończony lub chcesz go uruchomić ponownie, ponieważ spowoduje to usunięcie wyników i projektu.
Ta treść jest obecnie niedostępna
Kiedy dostępność się zmieni, wyślemy Ci e-maila z powiadomieniem
Świetnie
Kiedy dostępność się zmieni, skontaktujemy się z Tobą e-mailem
Jeden moduł, a potem drugi
Potwierdź, aby zakończyć wszystkie istniejące moduły i rozpocząć ten
Aby uruchomić moduł, użyj przeglądania prywatnego
Uruchom ten moduł w oknie incognito lub przeglądania prywatnego. Dzięki temu unikniesz konfliktu między swoim kontem osobistym a kontem do nauki, co mogłoby spowodować naliczanie dodatkowych opłat na koncie osobistym.
Architecting with Google Kubernetes Engine: Upgrading Kubernetes Engine Clusters
Czas trwania:
Konfiguracja: 0 min
·
Dostęp na 60 min
·
Ukończono w 60 min
 ), click Kubernetes Engine > Clusters.