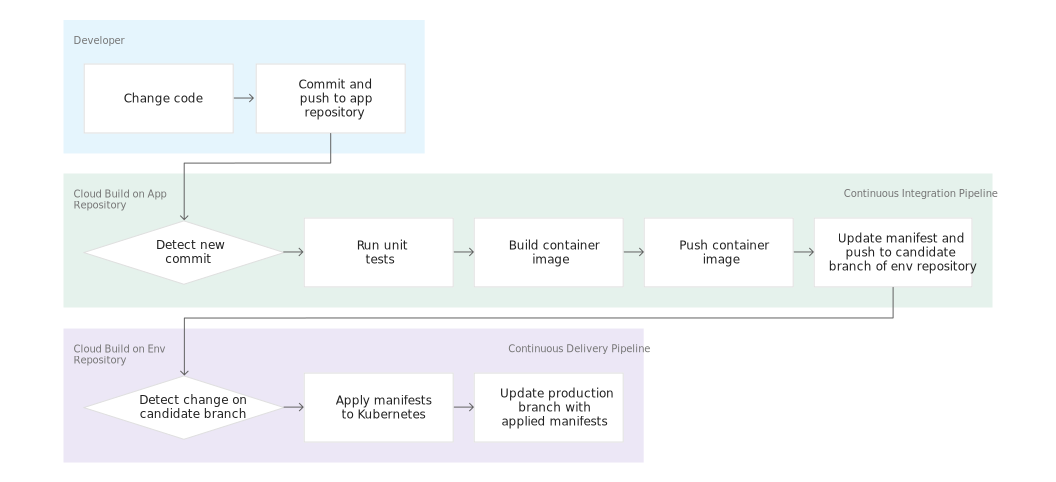
In this lab, you create a CI/CD pipeline that automatically builds a container image from committed code, stores the image in Container Registry, updates a Kubernetes manifest in a Git repository, and deploys the application to Google Kubernetes Engine using that manifest.
For this lab you will create 2 Git repositories:
App repository: contains the source code of the application itself
Env repository: contains the manifests for the Kubernetes Deployment
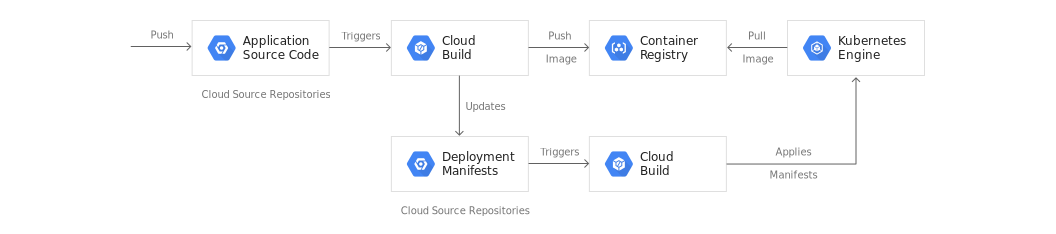
When you push a change to the app repository, the Cloud Build pipeline runs tests, builds a container image, and pushes it to Artifact Registry. After pushing the image, Cloud Build updates the Deployment manifest and pushes it to the env repository. This triggers another Cloud Build pipeline that applies the manifest to the GKE cluster and, if successful, stores the manifest in another branch of the env repository.
We keep the app and env repositories separate because they have different lifecycles and uses. The main users of the app repository are actual humans and this repository is dedicated to a specific application. The main users of the env repository are automated systems (such as Cloud Build), and this repository might be shared by several applications. The env repository can have several branches that each map to a specific environment (you only use production in this lab) and reference a specific container image, whereas the app repository does not.
When you finish this lab, you have a system where you can easily:
Distinguish between failed and successful deployments by looking at the Cloud Build history,
Access the manifest currently used by looking at the production branch of the env repository,
Rollback to any previous version by re-executing the corresponding Cloud Build build.
Note:
This lab uses Cloud Build to execute the pipelines, but there are other popular build automation tools that could serve as alternatives, such as Spinnaker and Jenkins. At this time, some of these other tools have superior support for blue/green deployments, canary analysis, and similar features that may be required in more advanced CI/CD implementations.
Objectives
In this lab, you learn how to perform the following tasks:
Create Kubernetes Engine clusters
Create Cloud Source Repositories
Trigger Cloud Build from Cloud Source Repositories
Automate tests and publish a deployable container image via Cloud Build
Manage resources deployed in a Kubernetes Engine cluster via Cloud Build
Setup and requirements
Access Qwiklabs
For each lab, you get a new Google Cloud project and set of resources for a fixed time at no cost.
Sign in to Qwiklabs using an incognito window.
Note the lab's access time (for example, 1:15:00), and make sure you can finish within that time.
There is no pause feature. You can restart if needed, but you have to start at the beginning.
When ready, click Start lab.
Note your lab credentials (Username and Password). You will use them to sign in to the Google Cloud Console.
Click Open Google Console.
Click Use another account and copy/paste credentials for this lab into the prompts.
If you use other credentials, you'll receive errors or incur charges.
Accept the terms and skip the recovery resource page.
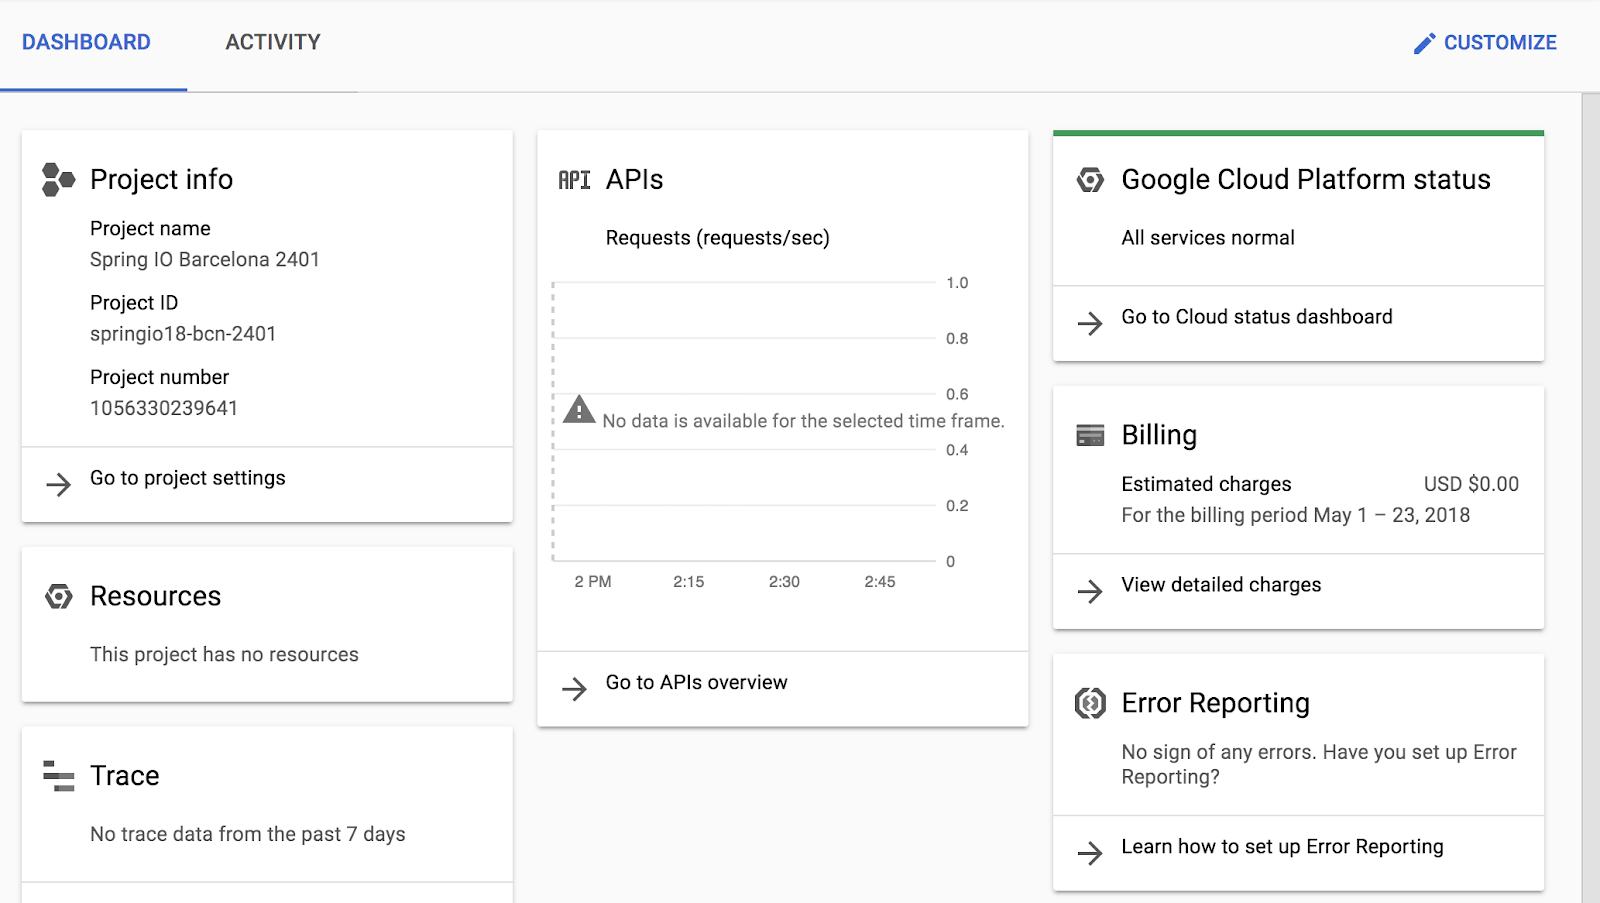
After you complete the initial sign-in steps, the project dashboard appears.
Activate Google Cloud Shell
Google Cloud Shell is a virtual machine that is loaded with development tools. It offers a persistent 5GB home directory and runs on the Google Cloud.
Google Cloud Shell provides command-line access to your Google Cloud resources.
In Cloud console, on the top right toolbar, click the Open Cloud Shell button.
Click Continue.
It takes a few moments to provision and connect to the environment. When you are connected, you are already authenticated, and the project is set to your PROJECT_ID. For example:
gcloud is the command-line tool for Google Cloud. It comes pre-installed on Cloud Shell and supports tab-completion.
You can list the active account name with this command:
[core]
project = qwiklabs-gcp-44776a13dea667a6
Note:
Full documentation of gcloud is available in the
gcloud CLI overview guide
.
Task 1. Initialize your lab
In this task you will prepare your Google Cloud Project for use by enabling the required APIs, initializing the git configuration in Cloud Shell, and downloading the sample code used later in the lab.
In Cloud Shell, run the following command to enable the APIs for GKE, Cloud Build, Cloud Source Repositories and Container Analysis:
Git will use these to identify you as the author of the commits you will create in Cloud Shell.
Click Check my progress to verify the objective.
Initialize Your Lab
Task 2. Create the Git repositories in Cloud Source repositories
In this task, you create the two Git repositories (hello-cloudbuild-app and hello-cloudbuild-env) used in this lab, and initialize hello-cloudbuild-app with some sample code.
Cloud Build streams the logs generated by the creation of the container image to your terminal when you execute this command.
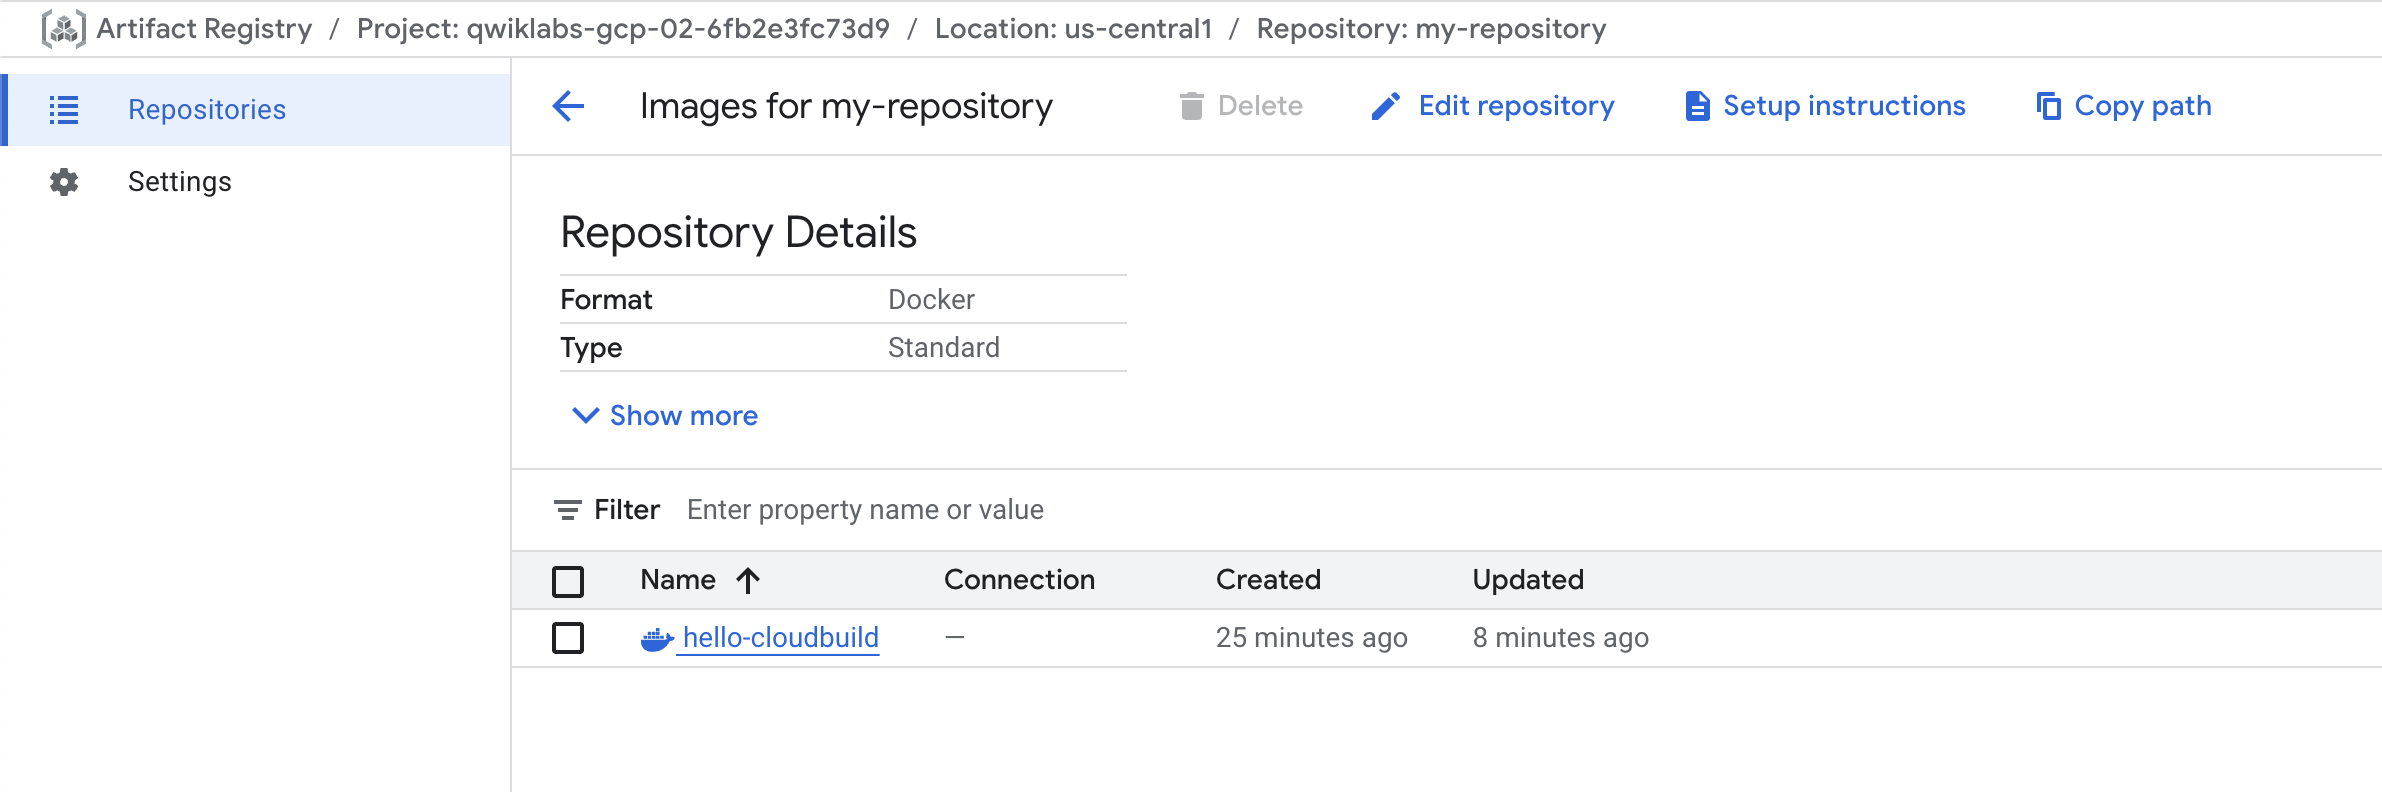
After the build finishes, in the Google Cloud Console Artifact Registry > Repositories verify that your new container image is indeed available by in Artifact Registry.
Click my repository.
Click Check my progress to verify the objective.
Create a container image with Cloud Build
Task 4. Create the Continuous Integration (CI) pipeline
In this task, you will configure Cloud Build to automatically run a small unit test, build the container image, and then push it to Container Registry. Pushing a new commit to Cloud Source Repositories triggers automatically this pipeline. The cloudbuild.yaml file already included in the code is the pipeline's configuration.
In the Google Cloud Console, Cloud Build > Triggers.
Click Create Trigger.
In the Name field, type hello-cloudbuild.
Under Event, select Push to a branch.
Under Source, select hello-cloudbuild-app as your Repository and type ^master$ for your Branch.
Under Build configuration, select Cloud Build configuration file.
In the Cloud Build configuration file location field, type cloudbuild.yaml after the /.
For Service account select the service account starting with your project-id that look similar to (@.iam.gserviceaccount.com).
Click Create.
When the trigger is created, return to the Cloud Shell. You now need to push the application code to Cloud Source Repositories to trigger the CI pipeline in Cloud Build.
To start this trigger, run the following command:
cd ~/hello-cloudbuild-app
git push google master
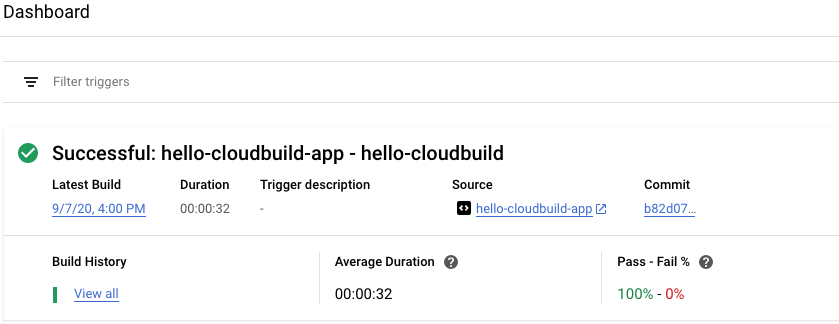
In the Google Cloud Console, go to Cloud Build > Dashboard.
You should see a build running or having recently finished.
You can click on the build to follow its execution and examine its logs.
Click Check my progress to verify the objective.
Create the Continuous Integration (CI) Pipeline
Task 5. Create the test environment and CD pipeline
Cloud Build is also used for the continuous delivery pipeline. The pipeline runs each time a commit is pushed to the candidate branch of the __hello-cloudbuild-env__repository. The pipeline applies the new version of the manifest to the Kubernetes cluster and, if successful, copies the manifest over to the production branch. This process has the following properties:
The candidate branch is a history of the deployment attempts.
The production branch is a history of the successful deployments.
You have a view of successful and failed deployments in Cloud Build.
You can rollback to any previous deployment by re-executing the corresponding build in Cloud Build. A rollback also updates the production branch to truthfully reflect the history of deployments.
You will modify the continuous integration pipeline to update the candidate branch of the hello-cloudbuild-env repository, triggering the continuous delivery pipeline.
Grant Cloud Build access to GKE
To deploy the application in your Kubernetes cluster, Cloud Build needs the Kubernetes Engine Developer Identity and Access Management Role.
You need to initialize the hello-cloudbuild-env repository with two branches (production and candidate) and a Cloud Build configuration file describing the deployment process.
The first step is to clone the hello-cloudbuild-env repository and create the production branch. It is still empty.
In Cloud Shell execute the following command:
cd ~
gcloud source repos clone hello-cloudbuild-env
cd ~/hello-cloudbuild-env
git checkout -b production
Next you need to copy the cloudbuild-delivery.yaml file available in the hello-cloudbuild-app repository and commit the change:
cd ~/hello-cloudbuild-env
cp ~/hello-cloudbuild-app/cloudbuild-delivery.yaml ~/hello-cloudbuild-env/cloudbuild.yaml
git add .
git commit -m "Create cloudbuild.yaml for deployment"
Note: The cloudbuild-delivery.yaml file describes the deployment process to be run in Cloud Build.
It has two steps:
Cloud Build applies the manifest on the GKE cluster.
If successful, Cloud Build copies the manifest on the production branch.
Create a candidate branch and push both branches for them to be available in Cloud Source Repositories:
Click Check my progress to verify the objective.
Grant Kubernetes Engine Developer and Source Repository Writer IAM role to cloud build
Create the trigger for the continuous delivery pipeline
In the Google Cloud Console, Cloud Build > Triggers.
Click Create Trigger.
In the Name field, type hello-cloudbuild-deploy.
Under Event, select Push to a branch.
Under Source, select hello-cloudbuild-env as your Repository and ^candidate$ as your Branch.
Under Build configuration, select Cloud Build configuration file.
In the Cloud Build configuration file location field, type cloudbuild.yaml after the /.
For Service account select the service account starting with your project-id that look similar to (@.iam.gserviceaccount.com).
Click Create
Modify the continuous integration pipeline to trigger the continuous delivery pipeline
In this section, you add some steps to the continuous integration pipeline that will generate a new version of the Kubernetes manifest and push it to the __hello-cloudbuild-env__repository to trigger the continuous delivery pipeline.
Copy the extended version of the cloudbuild.yaml file for the app repository:
cd ~/hello-cloudbuild-app
cp cloudbuild-trigger-cd.yaml cloudbuild.yaml
The cloudbuild-trigger-cd.yaml is an extended version of the cloudbuild.yaml file. It adds the steps below: they generate the new Kubernetes manifest and trigger the continuous delivery pipeline.
Note: This pipeline uses a simple sed to render the manifest template. In reality, you will benefit from using a dedicated tool such as kustomize or skaffold. They allow for more control over the rendering of the manifest templates.
Commit the modifications and push them to Cloud Source Repositories:
cd ~/hello-cloudbuild-app
git add cloudbuild.yaml
git commit -m "Trigger CD pipeline"
git push google master
This triggers the continuous integration pipeline in Cloud Build.
Click Check my progress to verify the objective.
Create the trigger for the continuous delivery pipeline
Task 6. Review Cloud Build pipeline
In the Google Cloud Console, Cloud Build > Dashboard.
Click into hello-cloudbuild-app trigger to see to follow its execution and examine its logs.
The last step of this pipeline pushes the new manifest to the hello-cloudbuild-env repository, which triggers the continuous delivery pipeline.
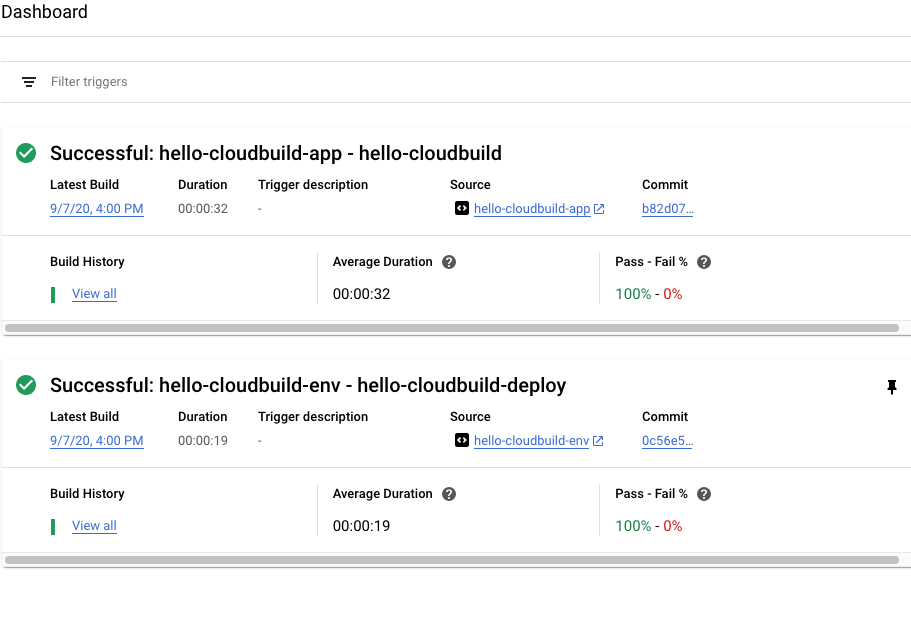
Return to the main Dashboard.
You should see a build running or having recently finished for the hello-cloudbuild-env repository. You can click on the build to follow its execution and examine its logs.
Task 7. Test the complete pipeline
The complete CI/CD pipeline is now configured. In this section, you test it from end to end.
In the Google Cloud Console, Kubernetes Engine > Gateways, Services & Ingress.
Select Services on the top menu
There should be a single service called hello-cloudbuild in the list. It has been created by the continuous delivery build that just ran.
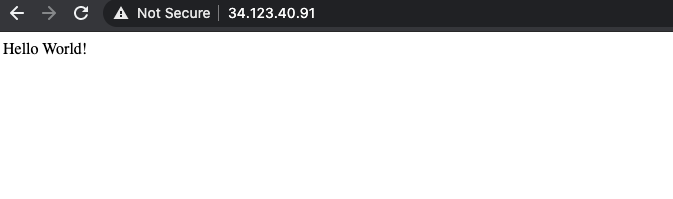
Click on the endpoint for the hello-cloudbuild service.
You should see "Hello World!". If there is no endpoint, or if you see a load balancer error, you may have to wait a few minutes for the load balancer to be completely initialized. Click Refresh to update the page if needed.
In Cloud Shell, replace "Hello World" by "Hello Cloud Build", both in the application and in the unit test:
cd ~/hello-cloudbuild-app
sed -i 's/Hello World/Hello Cloud Build/g' app.py
sed -i 's/Hello World/Hello Cloud Build/g' test_app.py
Commit and push the change to Cloud Source Repositories:
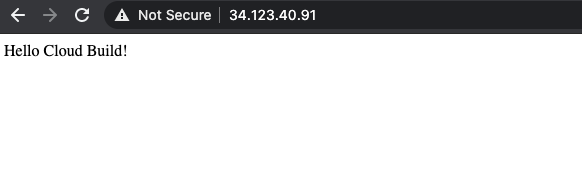
After a few minutes, reload the application in your browser. You should now see "Hello Cloud Build!".
Click Check my progress to verify the objective.
Test the complete pipeline
Task 8. Test the rollback
In this task, you rollback to the version of the application that said "Hello World!".
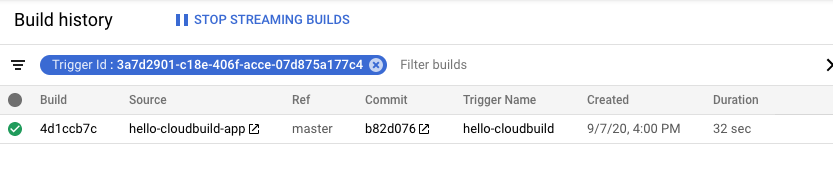
In the Google Cloud Console, Cloud Build > Dashboard.
Click on View all link under Build History for the hello-cloudbuild-env repository.
Click on the second most recent build available.
Click Retry build.
When the build is finished, reload the application in your browser.
You should now see "Hello World!" again.
Click Check my progress to verify the objective.
Test the rollback
End your lab
When you have completed your lab, click End Lab. Google Cloud Skills Boost removes the resources you’ve used and cleans the account for you.
You will be given an opportunity to rate the lab experience. Select the applicable number of stars, type a comment, and then click Submit.
The number of stars indicates the following:
1 star = Very dissatisfied
2 stars = Dissatisfied
3 stars = Neutral
4 stars = Satisfied
5 stars = Very satisfied
You can close the dialog box if you don't want to provide feedback.
For feedback, suggestions, or corrections, please use the Support tab.
Copyright 2025 Google LLC All rights reserved. Google and the Google logo are trademarks of Google LLC. All other company and product names may be trademarks of the respective companies with which they are associated.
Labs create a Google Cloud project and resources for a fixed time
Labs have a time limit and no pause feature. If you end the lab, you'll have to restart from the beginning.
On the top left of your screen, click Start lab to begin
Use private browsing
Copy the provided Username and Password for the lab
Click Open console in private mode
Sign in to the Console
Sign in using your lab credentials. Using other credentials might cause errors or incur charges.
Accept the terms, and skip the recovery resource page
Don't click End lab unless you've finished the lab or want to restart it, as it will clear your work and remove the project
This content is not currently available
We will notify you via email when it becomes available
Great!
We will contact you via email if it becomes available
One lab at a time
Confirm to end all existing labs and start this one
Use private browsing to run the lab
Use an Incognito or private browser window to run this lab. This
prevents any conflicts between your personal account and the Student
account, which may cause extra charges incurred to your personal account.
In this lab, you will explore the concept of GitOps in the context of Continuous Integration/Continuous Deployment (CI/CD) pipelines implemented with Cloud Build for applications running on Google Kubernetes Engine.