Checkpoints
Assign roles to service account
/ 25
Set up Service Accounts
/ 25
Set up a new ONTAP storage environment
/ 25
Create Windows VM
/ 25
Managing SMB Workloads and Optimizing Storage Usage with NetApp BlueXP & Cloud Volumes ONTAP
This lab was developed with our partner, NetApp. Your personal information may be shared with NetApp, the lab sponsor, if you have opted-in to receive product updates, announcements, and offers in your Account Profile.
GSP901

Overview
In this lab, you will learn how to leverage NetApp Cloud Volumes ONTAP for SMB workloads. You will get practical experience in configuring and accessing NetApp volumes using the SMB protocol with integration to Active Directory. In addition, you will learn how to recover data from NetApp Snapshots using Windows's native way and how to optimize storage consumption of any workload (SMB included) using Thin Provisioning and Data Tiering along with BlueXP's automatic capacity management mode. This lab is derived from the BlueXP documentation published by NetApp.
Objectives
You will learn how to perform the following tasks:
- Integrate Cloud Volumes ONTAP with Active Directory
- Create and access a NetApp volume using SMB
- Restore SMB data from NetApp Snapshots
- Use NetApp storage efficiency features to optimize storage consumption
Prerequisites
This is a fundamental lab and no prior knowledge is required. It is recommended to be familiar with using NetApp BlueXP and knowing how to perform foundational tasks in Google Cloud. The lab, Getting Started with NetApp BlueXP & Cloud Volumes ONTAP for Google Cloud, is a good introduction.
RDP requirements
You will need to use RDP to log into a Windows VM. You can either use the Chrome RDP for Google Cloud extension or Microsoft Remote Desktop. If you are on a Windows machine, it is highly recommended to use Microsoft Remote Desktop as it will be a much better user experience.
Setup and requirements
Before you click the Start Lab button
Read these instructions. Labs are timed and you cannot pause them. The timer, which starts when you click Start Lab, shows how long Google Cloud resources will be made available to you.
This hands-on lab lets you do the lab activities yourself in a real cloud environment, not in a simulation or demo environment. It does so by giving you new, temporary credentials that you use to sign in and access Google Cloud for the duration of the lab.
To complete this lab, you need:
- Access to a standard internet browser (Chrome browser recommended).
- Time to complete the lab---remember, once you start, you cannot pause a lab.
How to start your lab and sign in to the Google Cloud console
-
Click the Start Lab button. If you need to pay for the lab, a pop-up opens for you to select your payment method. On the left is the Lab Details panel with the following:
- The Open Google Cloud console button
- Time remaining
- The temporary credentials that you must use for this lab
- Other information, if needed, to step through this lab
-
Click Open Google Cloud console (or right-click and select Open Link in Incognito Window if you are running the Chrome browser).
The lab spins up resources, and then opens another tab that shows the Sign in page.
Tip: Arrange the tabs in separate windows, side-by-side.
Note: If you see the Choose an account dialog, click Use Another Account. -
If necessary, copy the Username below and paste it into the Sign in dialog.
{{{user_0.username | "Username"}}} You can also find the Username in the Lab Details panel.
-
Click Next.
-
Copy the Password below and paste it into the Welcome dialog.
{{{user_0.password | "Password"}}} You can also find the Password in the Lab Details panel.
-
Click Next.
Important: You must use the credentials the lab provides you. Do not use your Google Cloud account credentials. Note: Using your own Google Cloud account for this lab may incur extra charges. -
Click through the subsequent pages:
- Accept the terms and conditions.
- Do not add recovery options or two-factor authentication (because this is a temporary account).
- Do not sign up for free trials.
After a few moments, the Google Cloud console opens in this tab.

Activate Cloud Shell
Cloud Shell is a virtual machine that is loaded with development tools. It offers a persistent 5GB home directory and runs on the Google Cloud. Cloud Shell provides command-line access to your Google Cloud resources.
- Click Activate Cloud Shell
at the top of the Google Cloud console.
When you are connected, you are already authenticated, and the project is set to your Project_ID,
gcloud is the command-line tool for Google Cloud. It comes pre-installed on Cloud Shell and supports tab-completion.
- (Optional) You can list the active account name with this command:
- Click Authorize.
Output:
- (Optional) You can list the project ID with this command:
Output:
gcloud, in Google Cloud, refer to the gcloud CLI overview guide.
Task 1. Set up service accounts
- To start, in your Cloud Shell window, run the following commands to set some environment variables:
- Next, run the following commands to assign roles to the pre-created
netapp-cloud-managerservice account:
Click Check my progress to verify the objective.
- Lastly, create the
netapp-cvoservice account and assign it the relevant roles:
Click Check my progress to verify the objective.
Task 2. Set up a new ONTAP storage environment
In this section you will log in to NetApp BlueXP, NetApp’s data lifecycle management platform, and create a new Cloud Volumes ONTAP storage environment on Google Cloud infrastructure.
- From the Navigation Menu, go to Compute Engine > VM instances. You should see the
cloudmanagerVM already deployed for you.
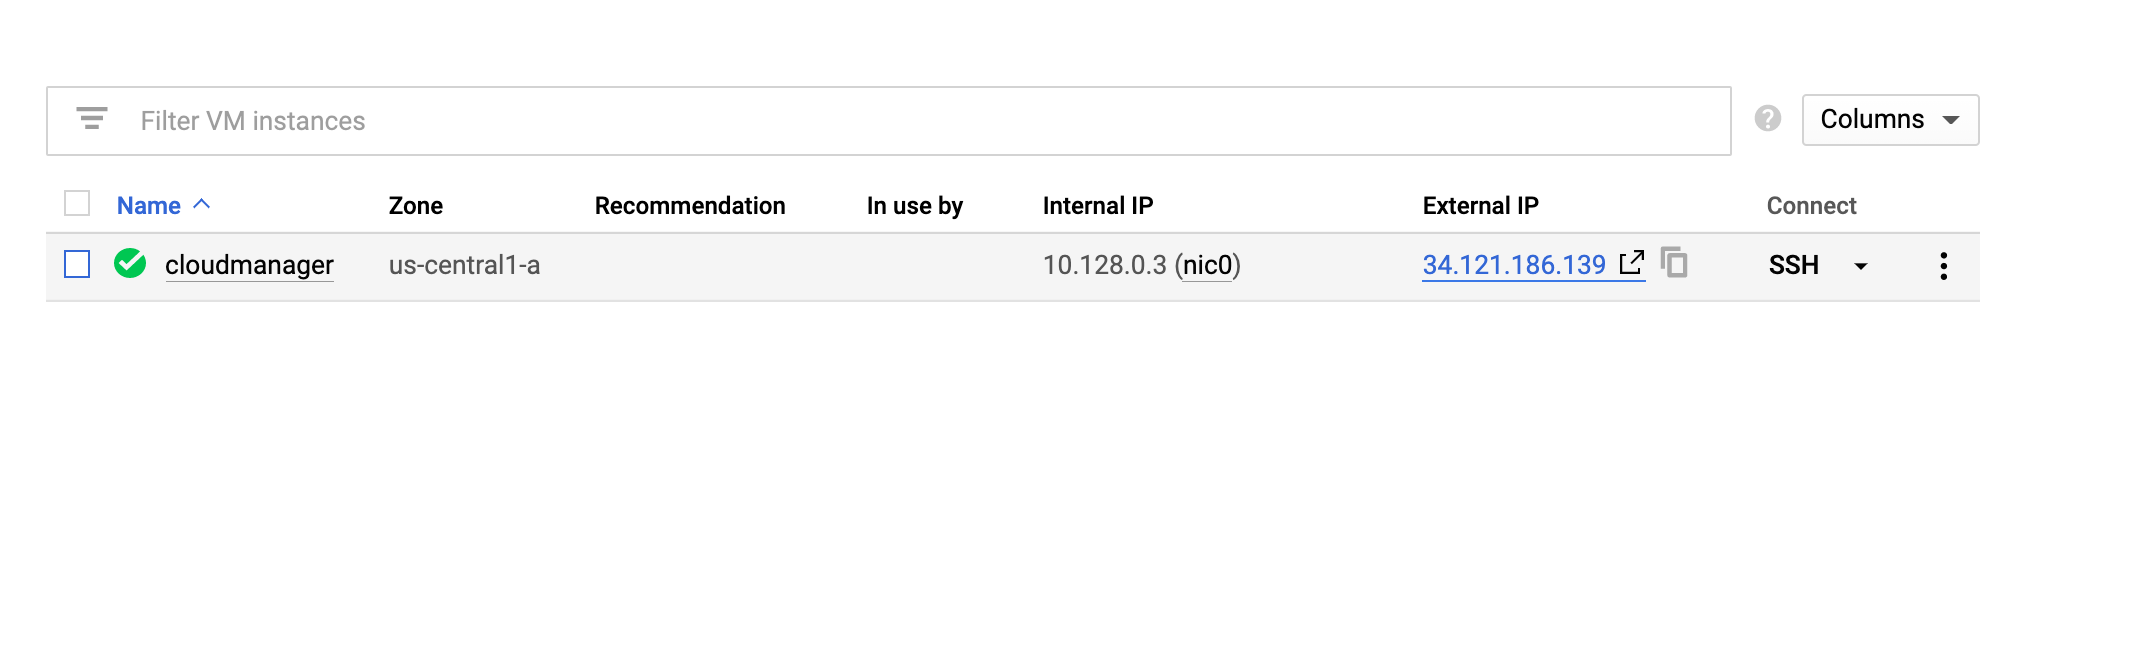
- Click the External IP to connect to the VM in a new window. Use
http://<IP Address>/.
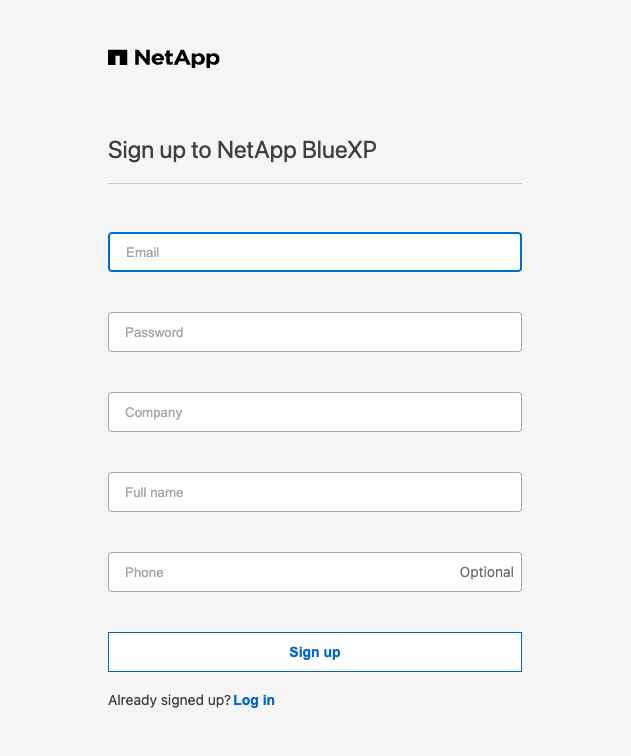
- Once you are on the BlueXP SaaS setup page, you can set up your NetApp Account:
- First click Sign Up, then enter in your email address and a password.
- Fill out the rest of the fields to authenticate yourself with NetApp’s Cloud Central and click Sign Up to accept the Terms and Conditions and log in to BlueXP.
-
Next, you will be prompted to create a Connector name and an Account Name. For these, you can just use
user. Click Let's Start and then click Lets go to BlueXP SaaS. You should now be redirected to the BlueXP SaaS page. If you are presented with a Welcome page, just click Continue. -
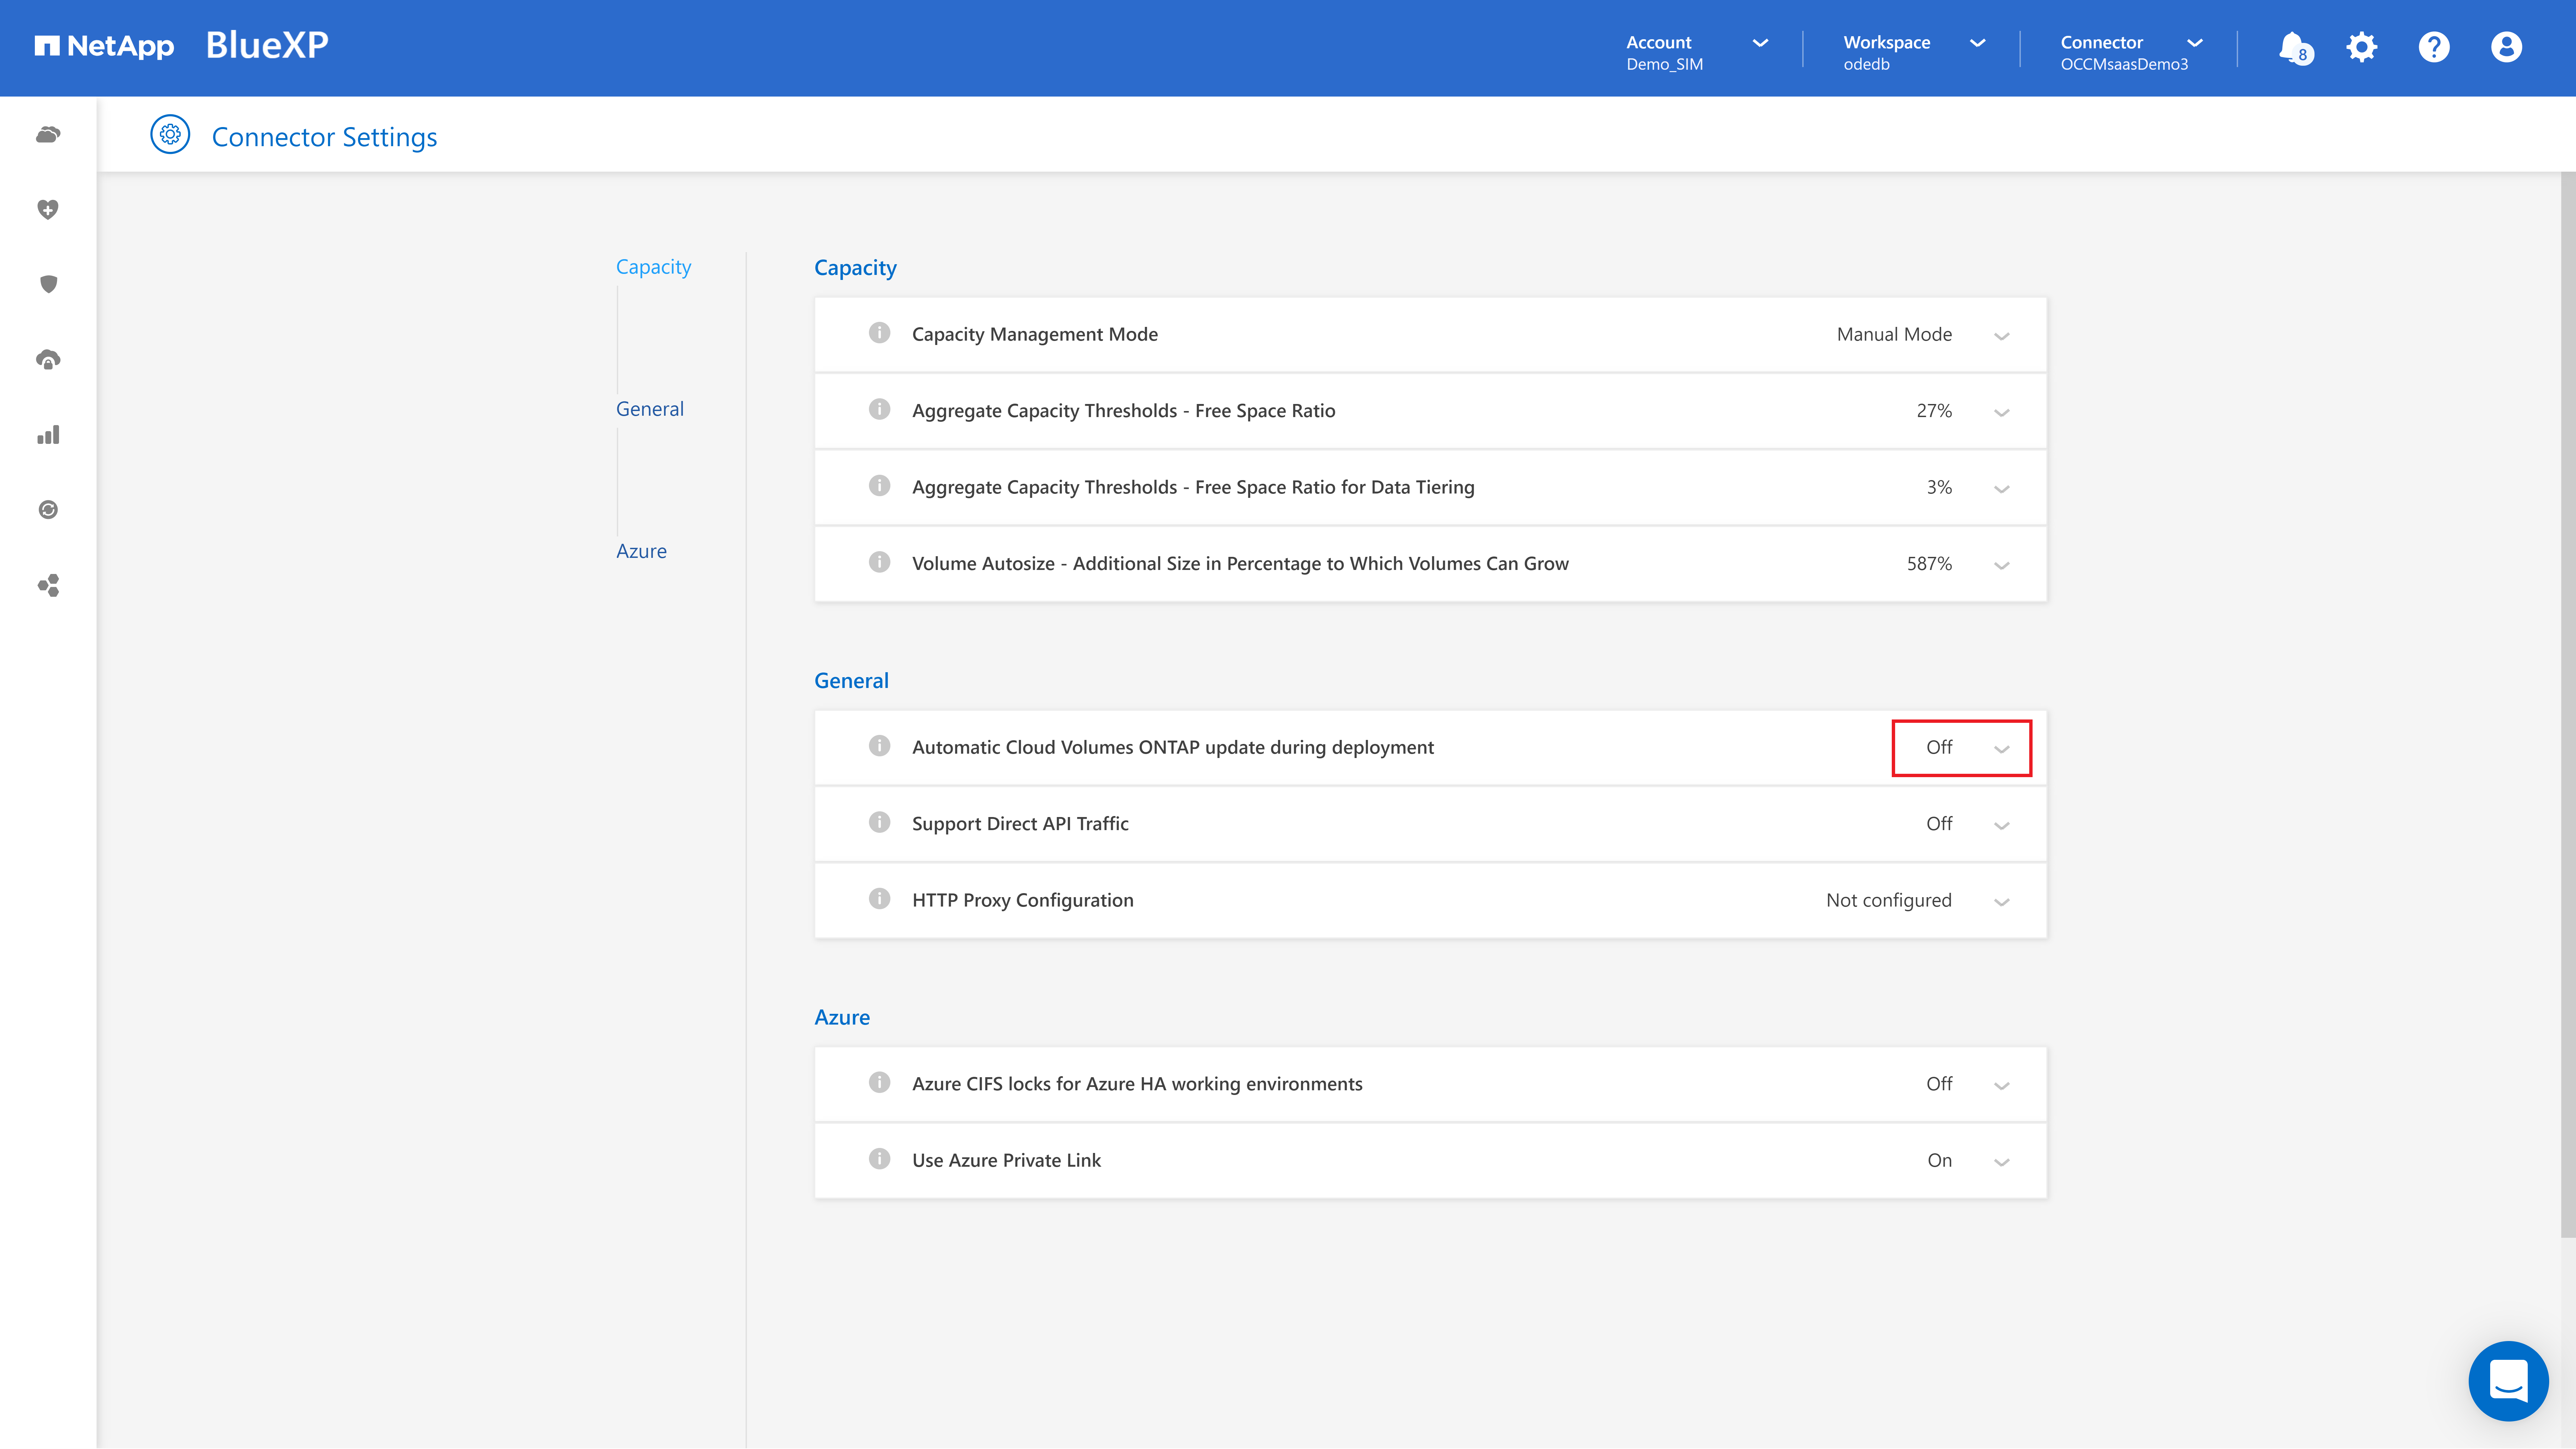
Before you add a working environment, navigate to the gear icon on the top-right of the page then click Connector Settings > General.
- For Automatic Cloud Volumes ONTAP update during deployment, click the box and then uncheck the Automatically update Cloud Volumes ONTAP box to turn the updates off. Click Save. Your configuration settings should resemble the following:
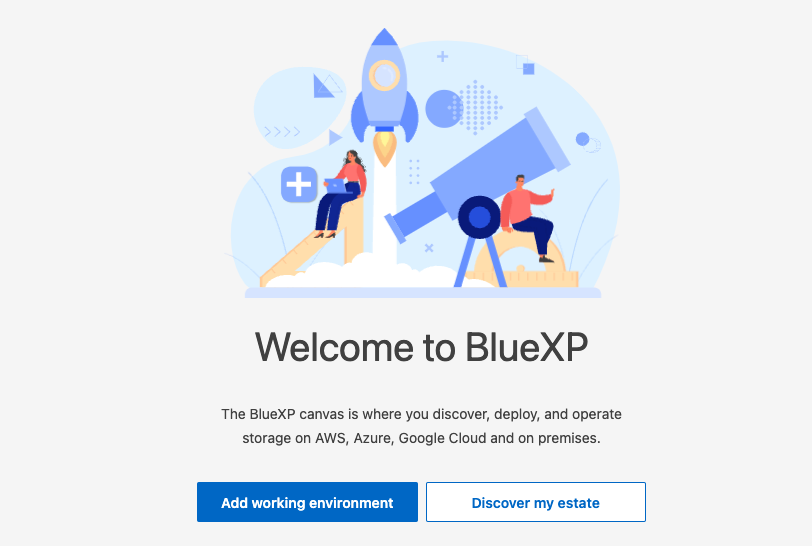
- Click BlueXP on the top left to navigate to the home page. Click Add Working Environment.
-
Add New Working Environment: select Google Cloud Platform.
-
Choose Type: Cloud Volumes ONTAP and click on Add New.
-
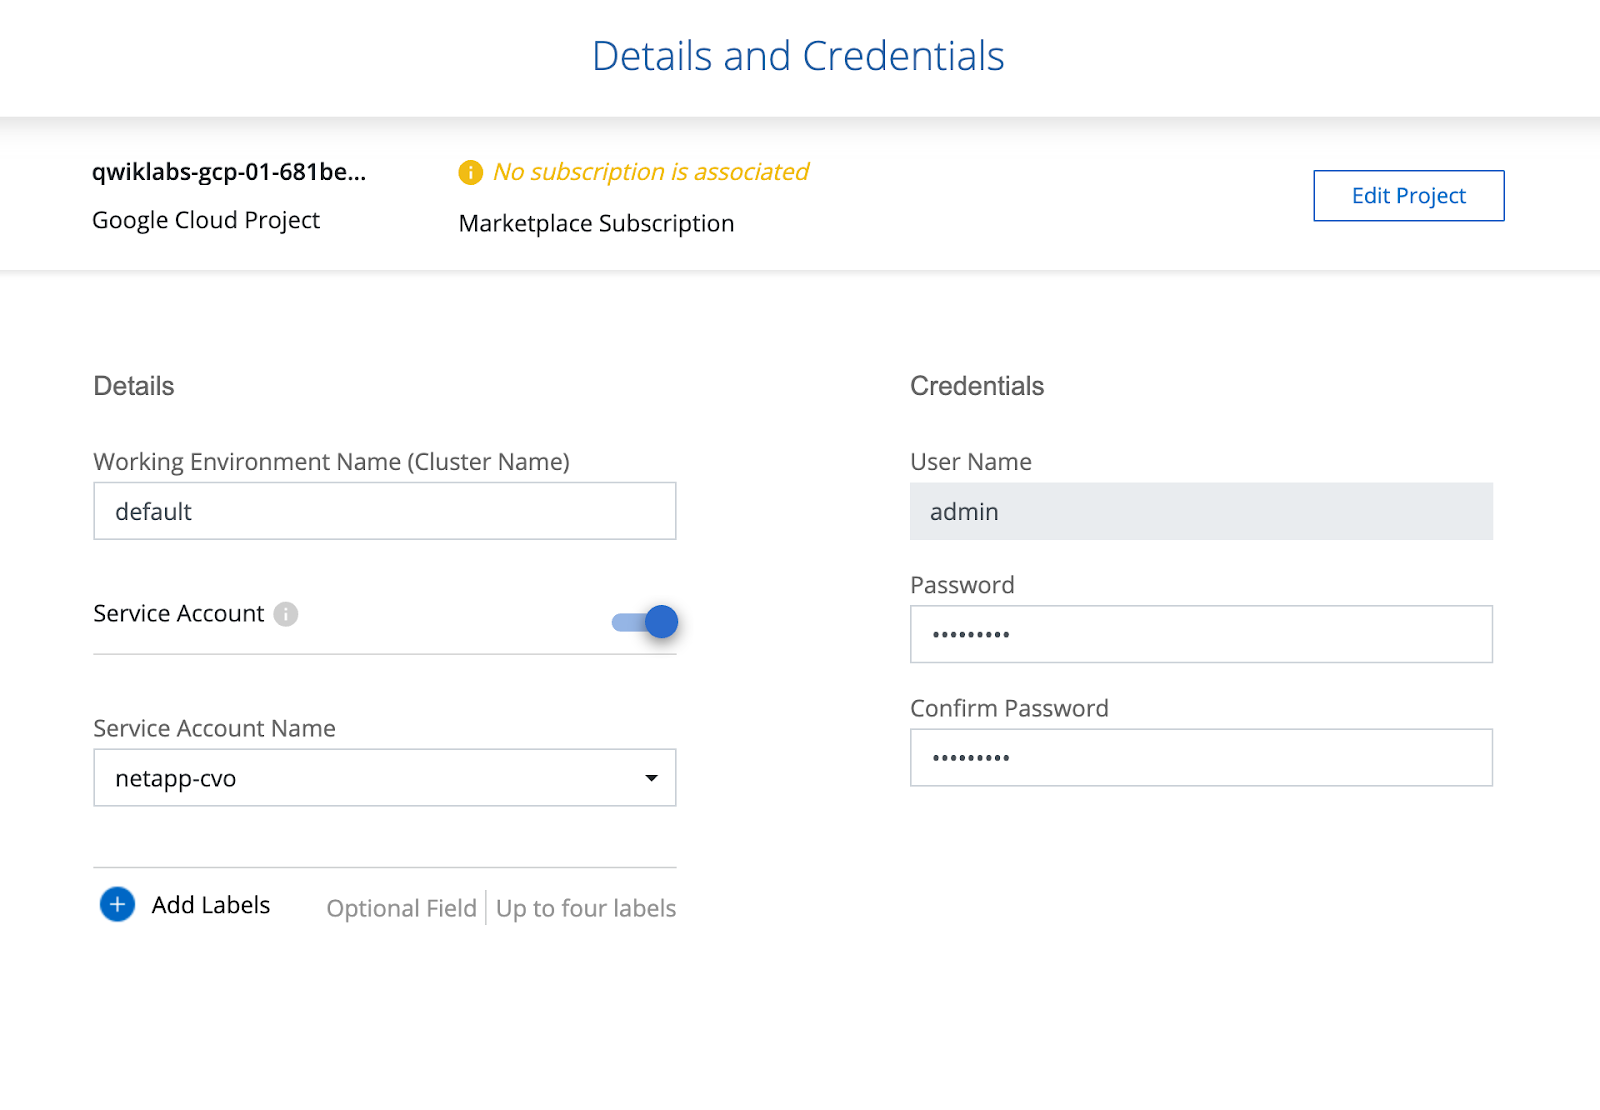
Specify a cluster name, optionally add labels, and then specify a password for the default admin account. Click Continue.
netapp-cvo has been pre-created for you with the Storage Admin role.
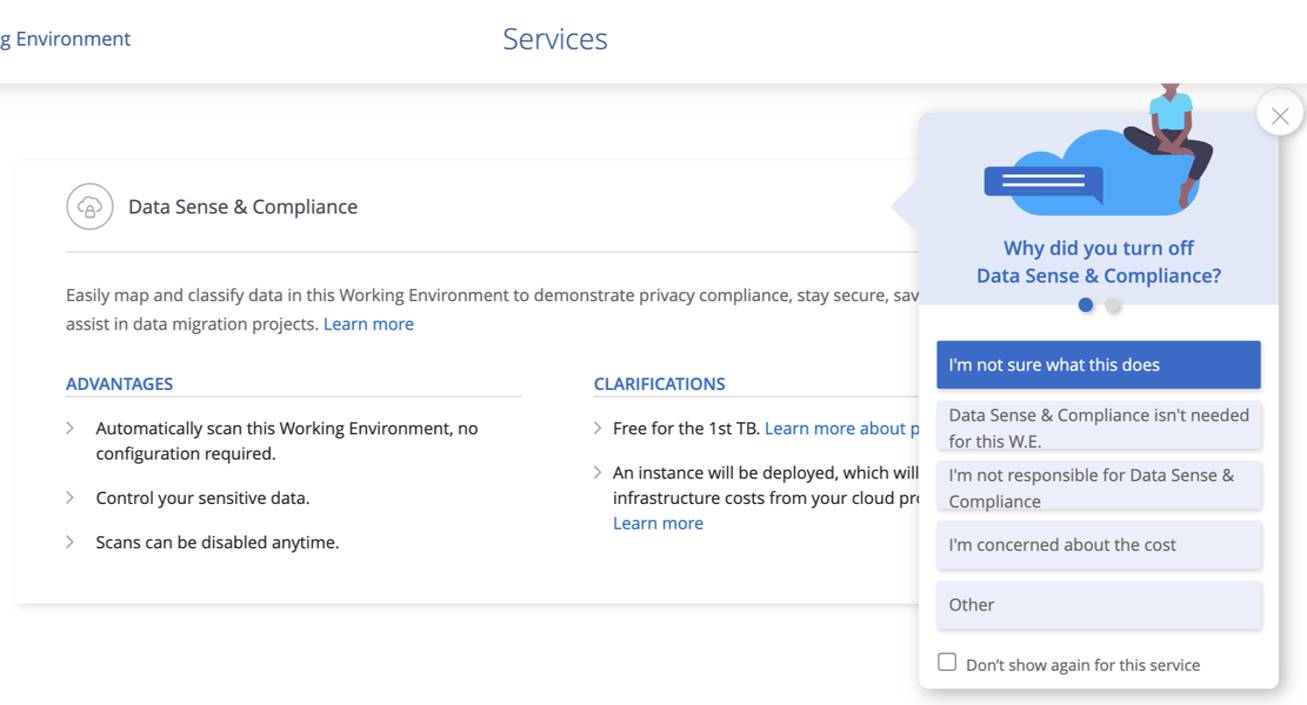
- On the Services page, toggle off Data Sense & Compliance and click Continue.
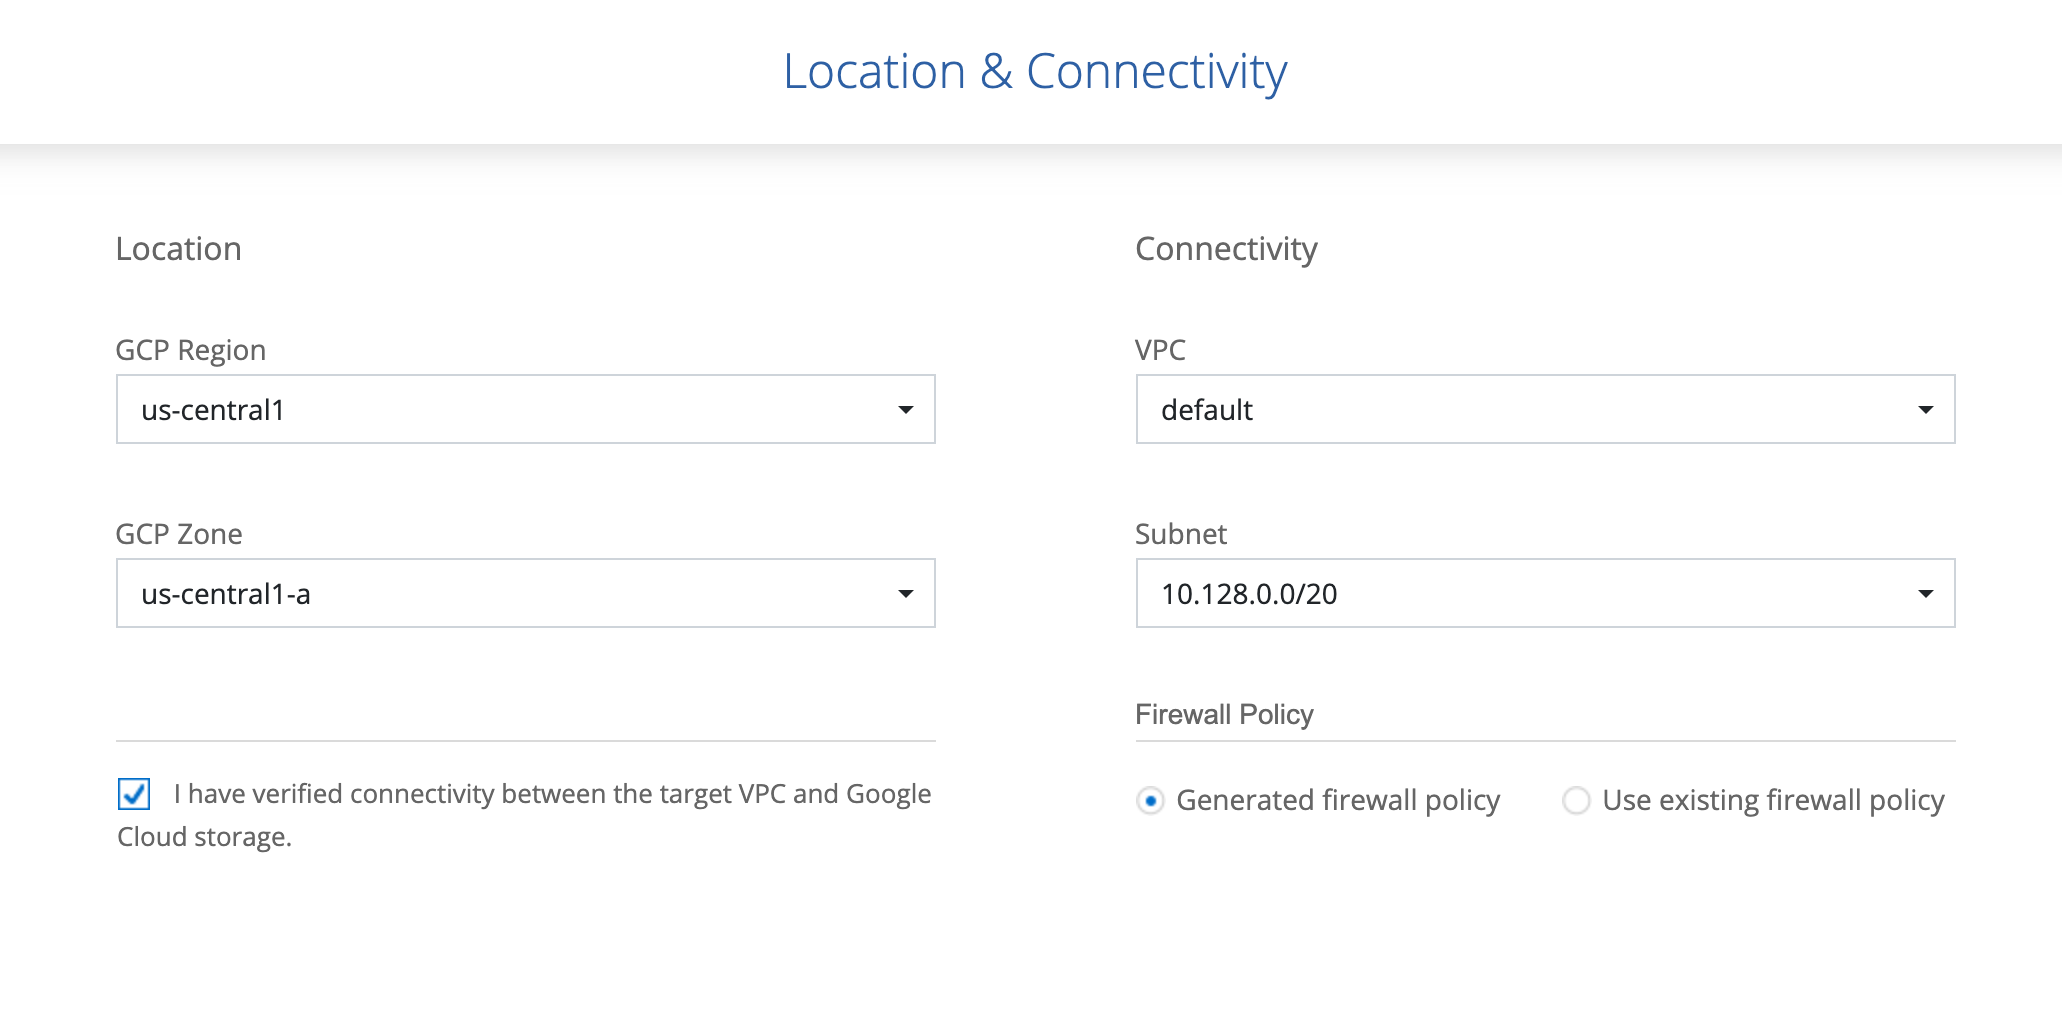
12.Location & Connectivity: For the Google Cloud Region and Google Cloud Zone, use
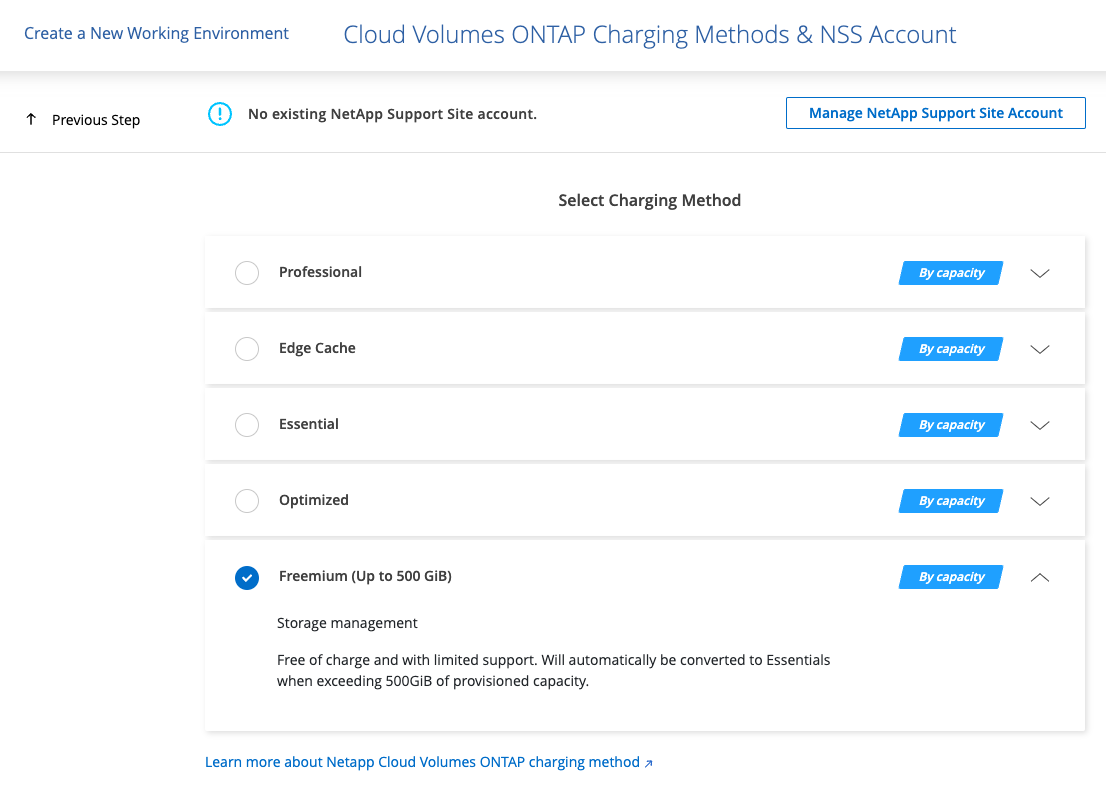
- Cloud Volumes ONTAP Charging Methods & NSS Account: Select Freemium (Up to 500 GiB) and click on Continue.
-
Preconfigured Packages: click Change Configuration.
-
On the Licensing section, verify that version is selected
ONTAP-9.14.0. In the Machine Type dropdown list, selectn1-highmem-4. Click Continue. -
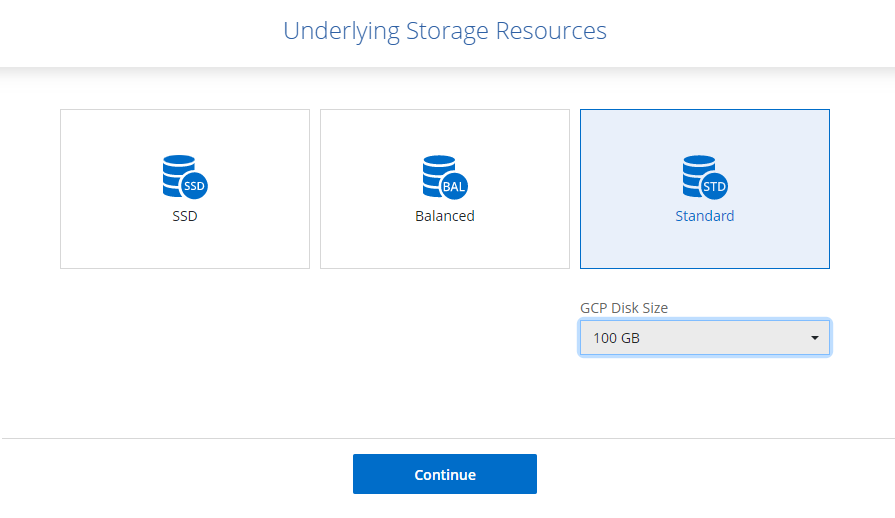
Underlying Storage Resources: Choose
Standardand for the Google Cloud Disk Size select100 GB. Click Continue.
-
WORM (write once, read many): keep the settings as default and click Continue.
-
Create Volume: Skip this as you will create volumes and access them in the next sections.
-
Review & Approve: Review and confirm your selections:
- Review details about the configuration.
- Click More information to review details about support and the Google Cloud resources that BlueXP will purchase.
- Select both checkboxes.
- Click Go.
Great! You're done with your working environment setup.
Sit back and relax while BlueXP deploys your Cloud Volumes ONTAP system (this should take around ten minutes to complete) and your Active Directory (deployed for you upon lab startup) is being created. In the meantime, you can check out the NetApp documentation for Cloud Volumes ONTAP for Google Cloud.
If you're interested in following the process, click on the Notifications (bell) icon on the top right of the screen, and then on the Timeline link that appears on the bottom.
Click Check my progress to verify the objective.
Task 3. Set up a Windows Virtual Machine
With its low cost, ease of deployment & administration, and rich integration with Windows Server and Active Directory, SMB is the default file-sharing protocol for Windows and Macs. Since the release of SMB 3, it has increasingly become associated with application data and continuously available scale-out file server (SOFS) solutions.
In this section you will create a Windows virtual machine and manually join it to an Active Directory domain. Later you will use this VM to map a Cloud Volumes ONTAP volume as a network drive and access it using SMB.
Create Windows VM & install required Active Directory tools
First, set up a Windows VM and join it to the newly created active directory domain.
- Go back to the Cloud Console. Run the following commands in Cloud Shell to reset your
PROJECT_IDenvironment variable and create a new windows-vm instance:
- On the Cloud Console, navigate to Compute Engine > VM Instances and locate your
windows-vm.
Click Check my progress to verify the objective.
- Set Windows password from the Connect/RDP menu, Copy and Save the password.
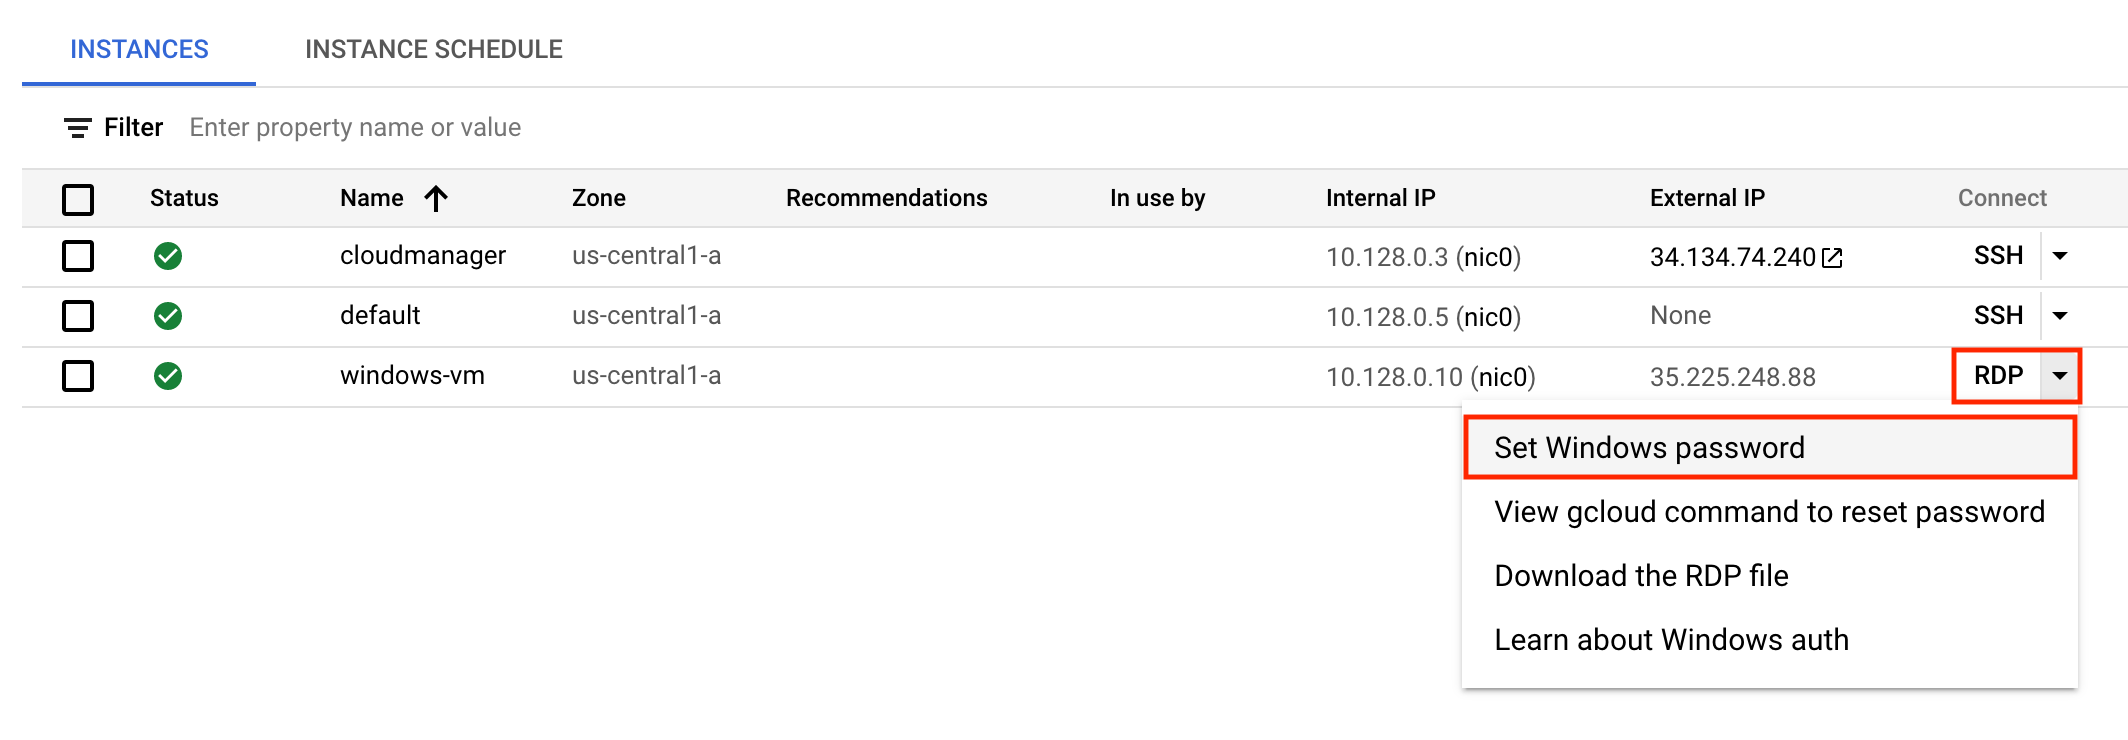
-
Download the RDP file from the Connect/RDP menu or copy
windows-vmExternal IP address. -
Next, open a remote desktop connection and log in to the windows virtual machine. To do this, locate the downloaded RDP file and double click it. When prompted for password, enter the password copied on step 3.
-
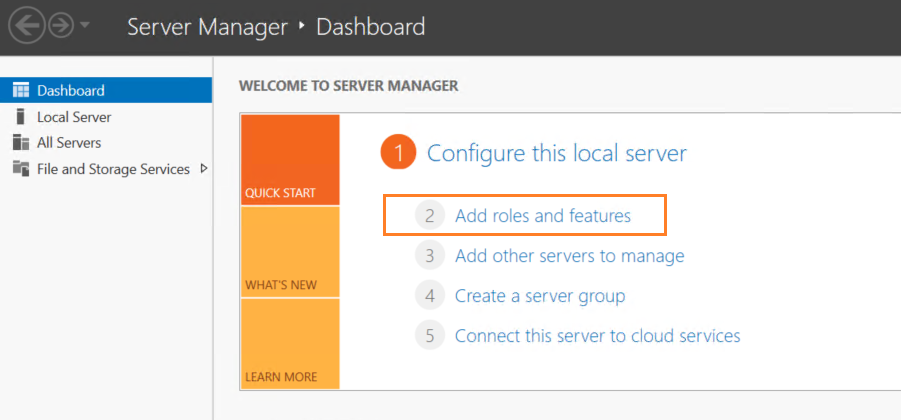
On the Windows VM, on the opened Server Manager click on Add Roles and Features Wizard.
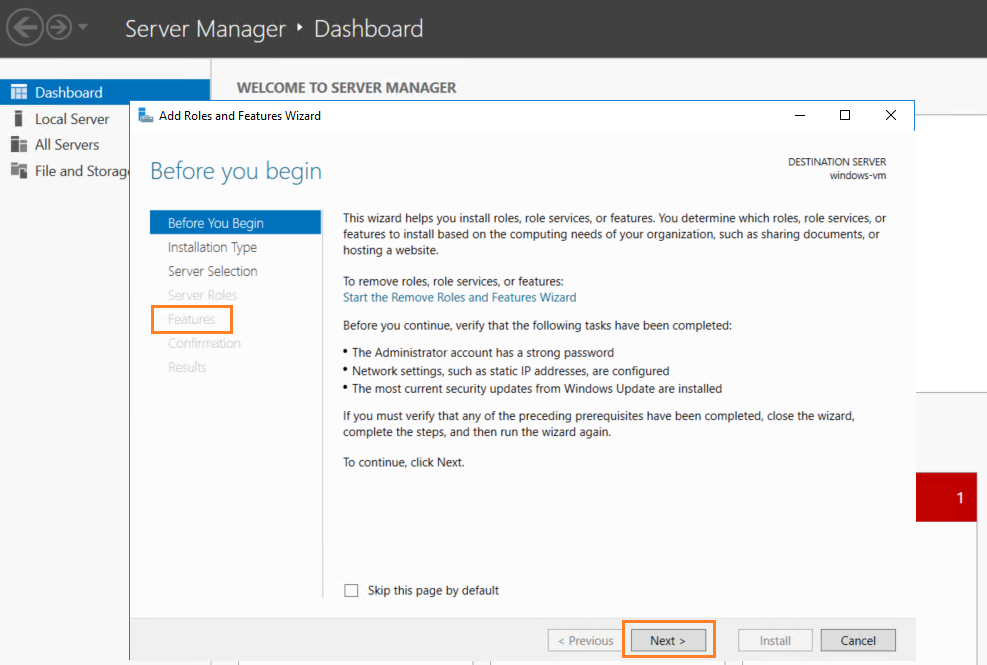
- In the wizard, click next multiple times to advance to the Select features page.
-
On the Select features page, in the Features list, expand Remote Server Administration Tools, and then expand Role Administration Tools.
-
Under Role Administration Tools, select AD DS and AD LDS Tools and click Next. This enables the following features:
- Active Directory module for Windows PowerShell
- AD LDS Snap-Ins and Command-Line Tools
- Active Directory Administrative Center
- AD DS Snap-Ins and Command-Line Tools
- On the Confirm installation selections page, click Install and then Close.
Join Windows VM to Active Directory Domain
-
Go back to the Cloud Console. Under Security, go to Managed Microsoft AD and click on the
qwiklabs.netapp.localactive directory domain that was created for you upon lab startup. -
Scroll down to the Access details section and click SET PASSWORD. Click Confirm. Copy and Save the password.
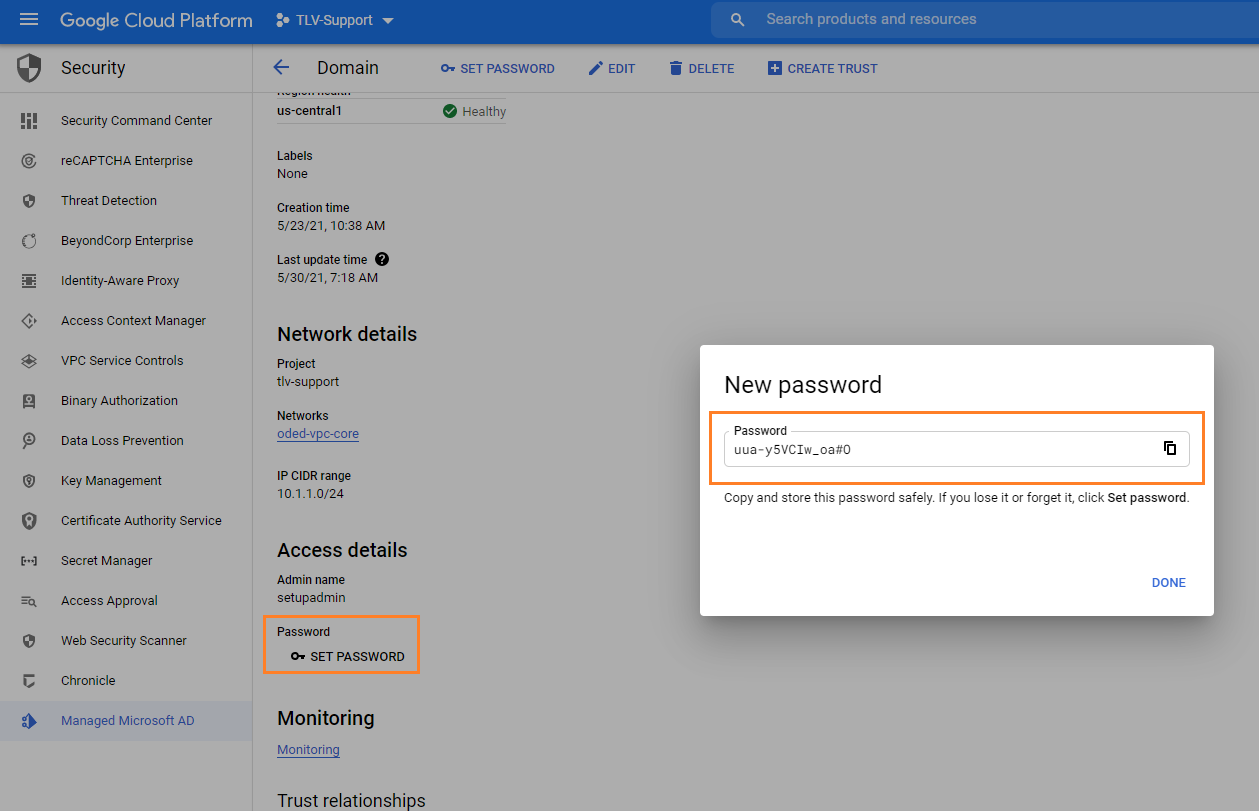
-
Go back to the Windows VM. On the Start screen, click the Control Panel.
-
Navigate to System and Security, and then click System.
-
Under Computer name, domain, and workgroup settings, click Change settings.
-
On the Computer Name tab, click Change.
-
Under Member of, click Domain, and type
qwiklabs.netapp.local, and then click OK. -
When prompted for User name and Password use the following:
- User name: setupadmin
- Password: <password copied on step 2>
After a few seconds a Welcome message to the domain would appear. Once acknowledged, another message will appear specifying the computer must be restarted to apply the changes.
-
Click OK and Close System Properties.
-
Finally, click Restart Now to restart the computer.
-
Once your Windows server is up and running, log in and verify it has joined the domain.
-
From the Windows Start screen > Control Panel > System and Security > System, check the Windows Computer name, domain, and workgroup settings. It should be similar to the image below:
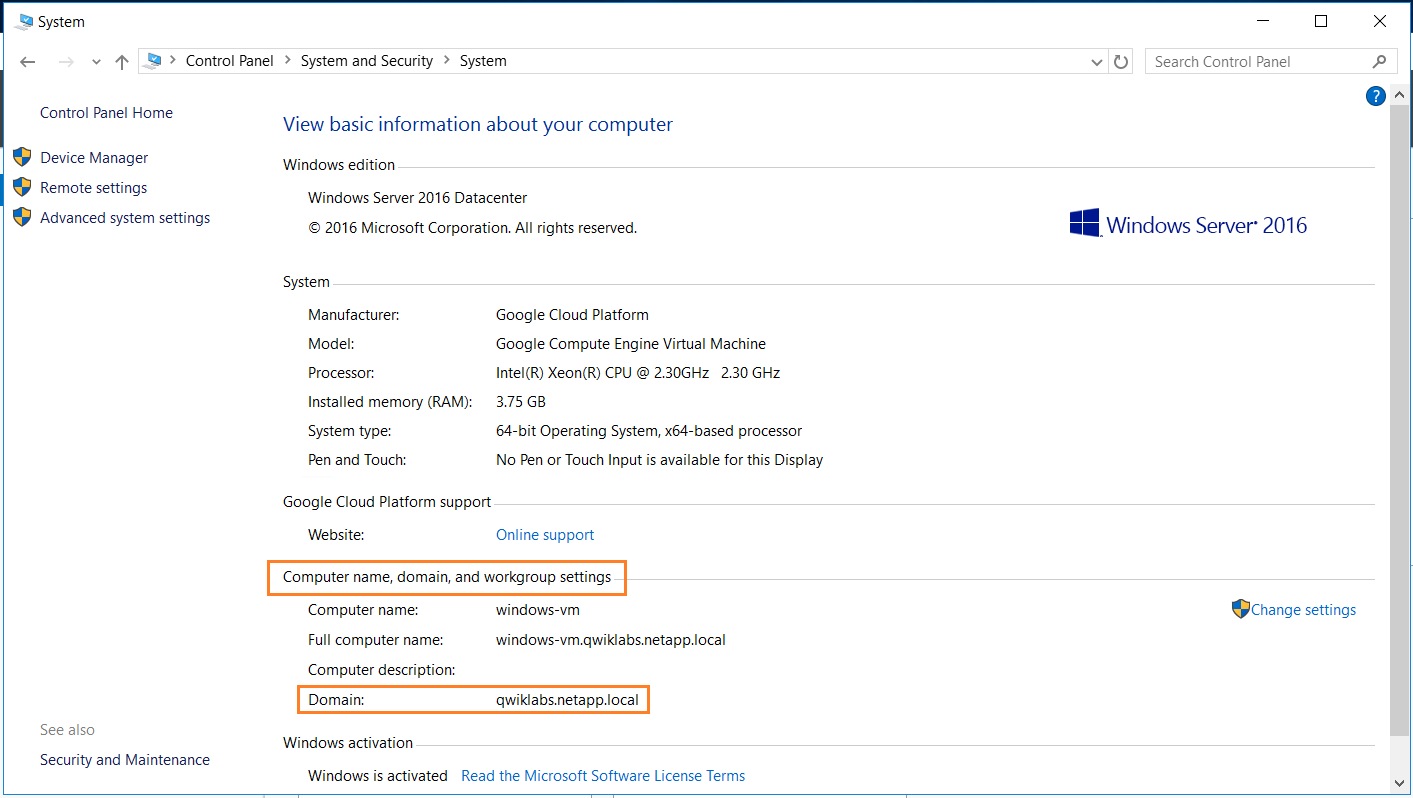
That's that! Your Windows computer was restarted and configured as a member server in the qwiklabs.netapp.local domain. Now it's time to create some SMB storage!
Task 4. Manage a NetApp Volume using SMB
In this section you can use Cloud Volumes ONTAP to support your Windows workload. You will learn how to configure Cloud Volumes ONTAP as a member server in an Active Directory domain, create a NetApp volume and configure it for SMB access. Once that's done, you'll access the volume through your Windows server, after mapping it as a network drive, and learn how to use NetApp Snapshots to recover data in a Windows environment.
Create a NetApp Volume for SMB Access
-
Get the DNS IP address you need to use later on. Back in the Google Cloud Console, under Networking, go to VPC Network > VPC Networks.
-
Under the
defaultVPC, copy and save the Gateway IP for theregion.
-
Next, go to NetApp BlueXP Storage Canvas page and double-click on your Cloud Volumes ONTAP working environment, and click on the Volumes link to access the Volumes page.
-
On the Volumes page, click on the Add Volume button.
-
On the Volume Details, Protection & Tags page use the following details:
- Volume Name:
smb_data1 - Volume Size: 10. Click Next.
- Select the volume's protocol: CIFS Protocol. Click Next.
- Leave the rest of the settings with their default values.
Your screen should look like the image below.
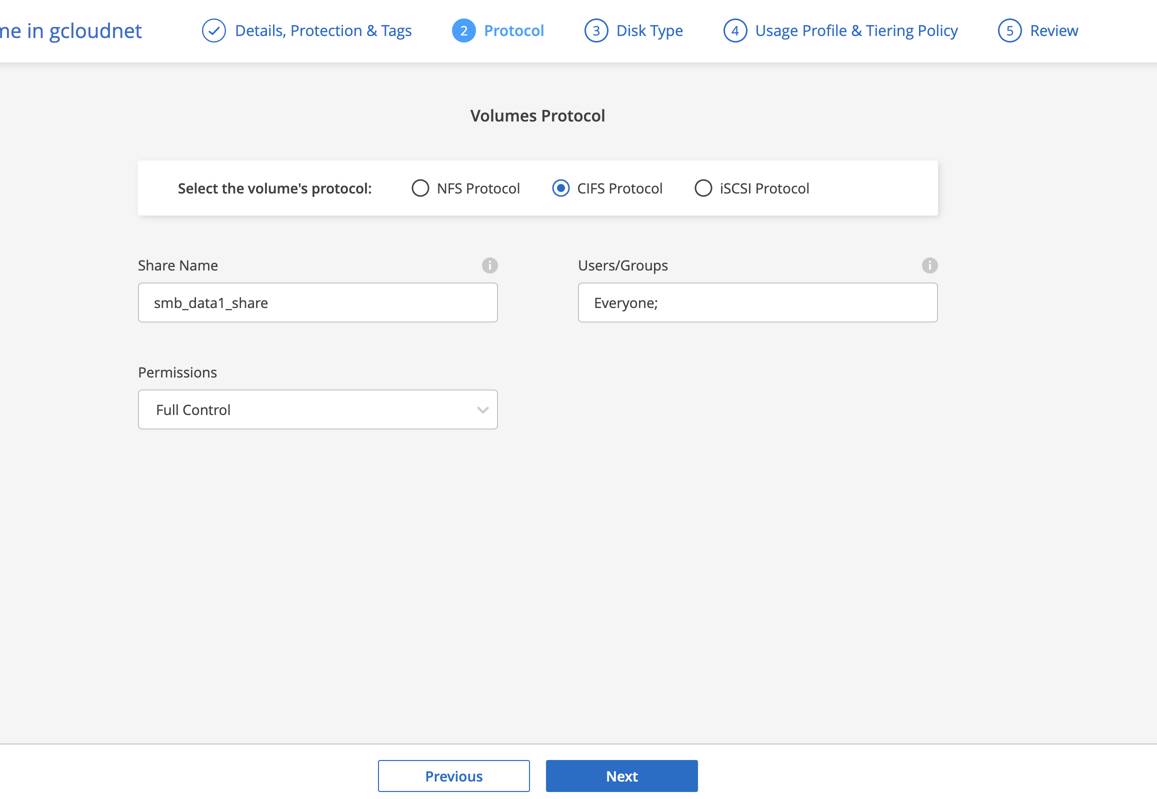
- Click Next when done.
- Next, on the CIFS Connectivity Setup page, since it's the first SMB volume created, you will register Cloud Volumes ONTAP as a member server in your Active Directory domain. Use the following details:
- Active Directory Domain to join:
qwiklabs.netapp.local - Credentials authorized to join the domain:
- User name:
setupadmin - Password: <password copied on step 2 in the previous section>
- User name:
- DNS Primary IP Address: <your network's gateway, copied in step 2>
- DNS Domain:
qwiklabs.netapp.local - Organizational Unit: OU=Cloud
-
Click Save. On the Disk Type page, Select Disk Type
PD-Standard. Click Next. -
On the Usage Profile & Tiering Policy page, use the defaults and click Next. On the Review page, click Add. After a short while your Volumes screen should look like this:
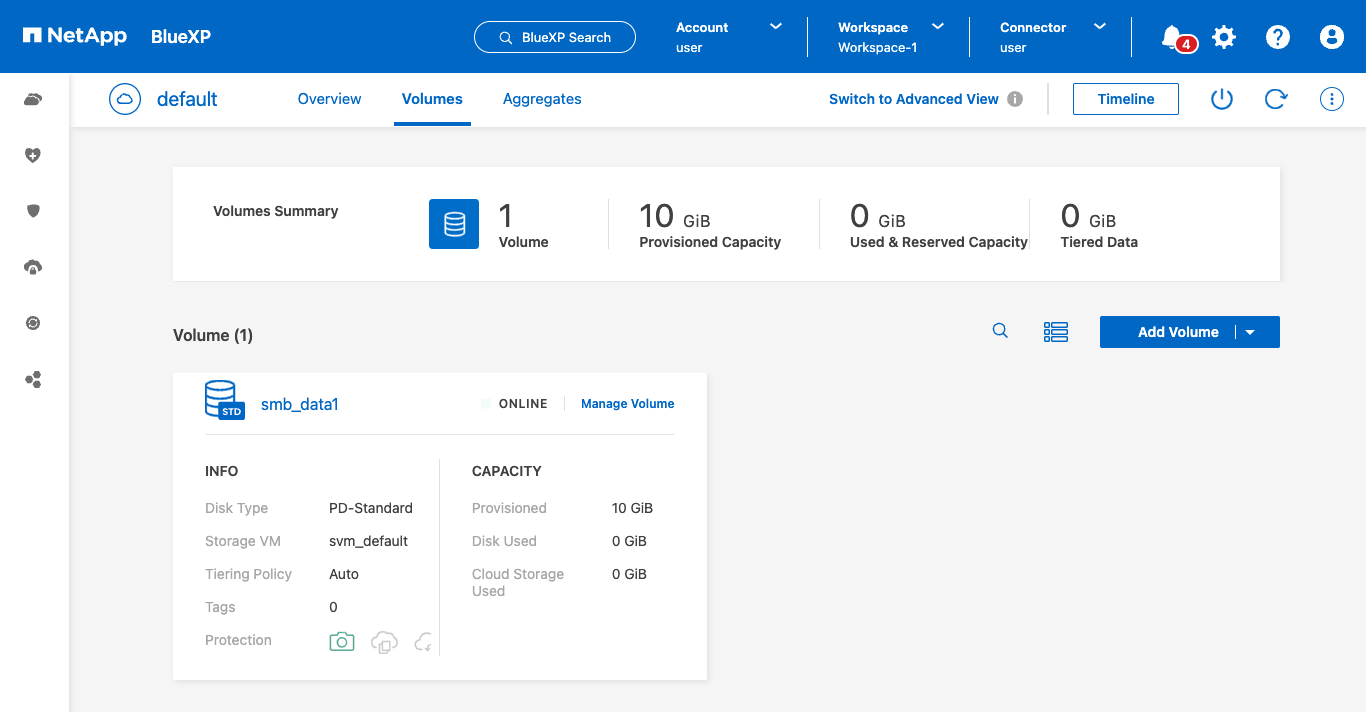
Click the "Refresh" icon (circular arrow) on the top right if the above page doesn't show up immediately.
Map a NetApp volume as a network drive
-
Next, click on the volume's Manage Volume link (on the top right of the card). From the list of operations revealed, expand Volume Actions and click on Mount Command.
-
Then click on Copy to copy the command to your clipboard:
-
Back on your Windows VM, open File Explorer from the taskbar or the Start menu, or press the Windows logo key + E.
-
Select This PC from the left pane. Then, on the Computer tab, select Map network drive.
-
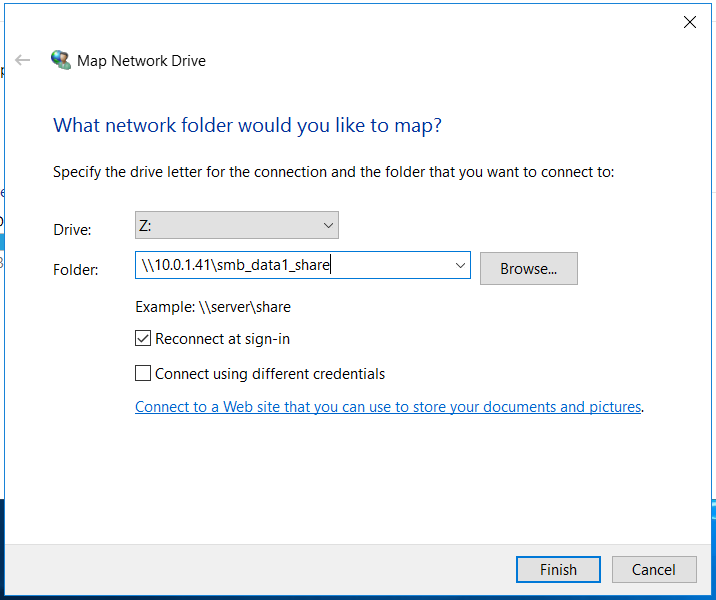
On the Map Network Drive window use the following details:
- Drive: Z: (the first available drive letter)
- Folder box: <mount command copied on step 6>
Your screen should look like this:
-
Click Finish to execute the Map Network Drive operation.
-
When prompted Enter network credentials use the following:
-
User name:
setupadmin -
Password: <password copied on step 2 in the previous section>
- Upon completion of the operation a new window will appear showing the mapped network drive. If you expand This PC you can see it listed as one of the available drives.
Congratulations! You have successfully connected a Cloud Volumes ONTAP volume, configured for SMB access, to your Windows VM.
Recover Windows data from NetApp Snapshots
From your windows-vm, create a text file named cvo_google.txt in the new (Z:) mapped network drive.
-
Right click within the opened (Z:) drive window, select New and then Text Document.
-
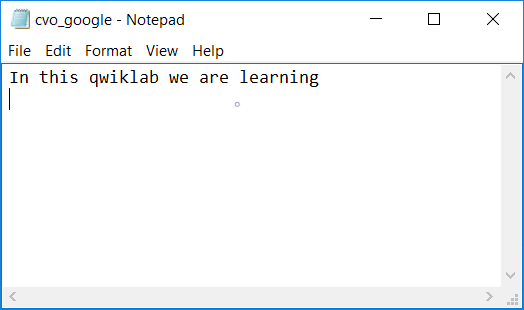
Double-click the file (to open it with the Notepad application), and enter the line:
In this qwiklab we are learning. -
To save, click File and then Save on the Notepad menu.
-
Alternatively, from the Windows Start screen, type cmd to open the Command Prompt window and enter the following command:
Your file should look like this:
-
Go back to the Volumes page on BlueXP, and click on the volume's Manage Volume link.
-
From the list of operations revealed, expand Protection Items and click on Create a snapshot copy.
-
On the Create a Snapshot copy page, use the default Snapshot Copy Name and click Create.
-
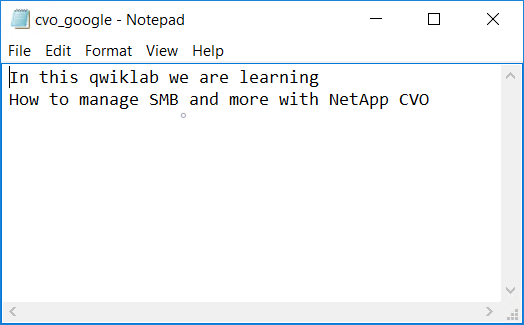
Back on your Windows VM, open the file you created earlier in drive (Z:). Double-click the file (to open it with the Notepad application), and add a second line:
How to manage SMB and more with NetApp CVO. -
To save, click File and then Save on the Notepad menu.
-
Alternatively, from the Windows Start screen, type cmd to open the Command Prompt window and enter the following command:
Your file should look now like this:
Now, use Windows native Restore previous versions, which NetApp's Snapshots are integrated with, to restore the first version of the file to the same (Z:) drive, right next to the current one.
-
Right click the cvo_google.txt file on your (Z:) drive. On the opened menu, select Restore previous versions.
-
On the opened Properties window, click on Open to view the first version of the file, located on the NetApp Snapshot you created on step 3.
-
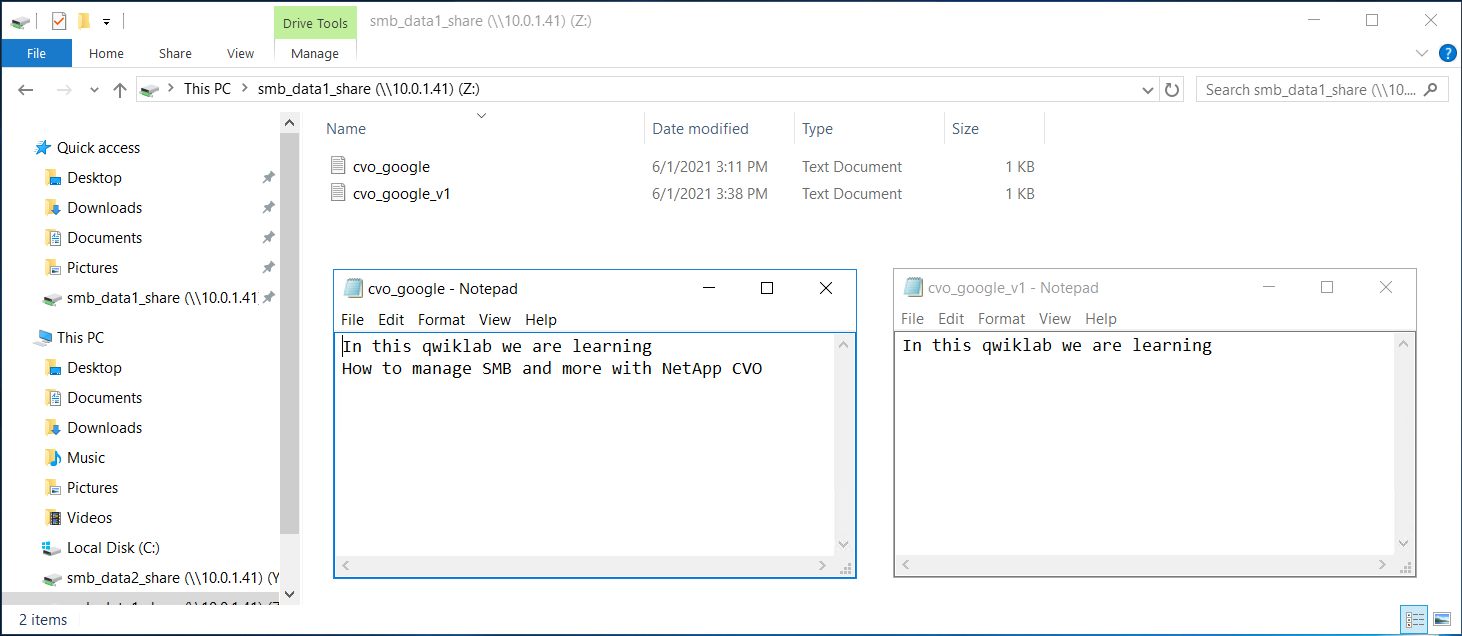
From the Notepad menu, click on the File tab and select Save or Save As. Name the file
cvo_google_v1.txt. -
Go back to Window File Explorer to drive (Z:). You should now see two files present. Open both of them to compare.
You should see the following:
Amazing! You just used the native Windows way to recover SMB data from a Cloud Volumes ONTAP Snapshot copy.
Task 5. Optimize persistent disks consumption
NetApp ONTAP storage efficiency technologies (Thin Provisioning, Deduplication, Compression, Compaction & FabricPool, AKA Data Tiering) have been used for years to reduce storage consumption on-premises. Those features are available as well with Cloud Volumes ONTAP. Together with BlueXP's automatic capacity management, persistent disks are scaled on-demand and overall storage costs are dramatically reduced. In this section you will learn about NetApp's Thin Provisioning, Data Tiering to Google Cloud Storage, and BlueXP's Capacity Management.
Thin provisioning and automatic capacity management
First, check how many persistent disks are currently allocated and their total size.
- Go back to BlueXP and double-click on the Cloud Volumes ONTAP working environment. Click on the Aggregates menu.
An aggregate is the most basic storage object in ONTAP and is required to allow the provisioning of volumes for connected hosts. Essentially, it's a collection of persistent disks arranged into a single pool of storage.
-
On the opened Aggregates page, note that Aggr1 is composed of a single 100GB Standard PD.
-
Go back to the Volumes page by clicking Volumes located above Aggregates.
-
On the Volumes page, click on the Add Volume button, to the right, and select New volume.
-
On the Volume Details, Protection & Tags page use the following details:
- Volume Name:
smb_data2 - Volume Size: 200. Click Next.
- Protocol: CIFS. Click Next.
- Disk Type: Standard.
- Leave the rest of the settings with their default values.
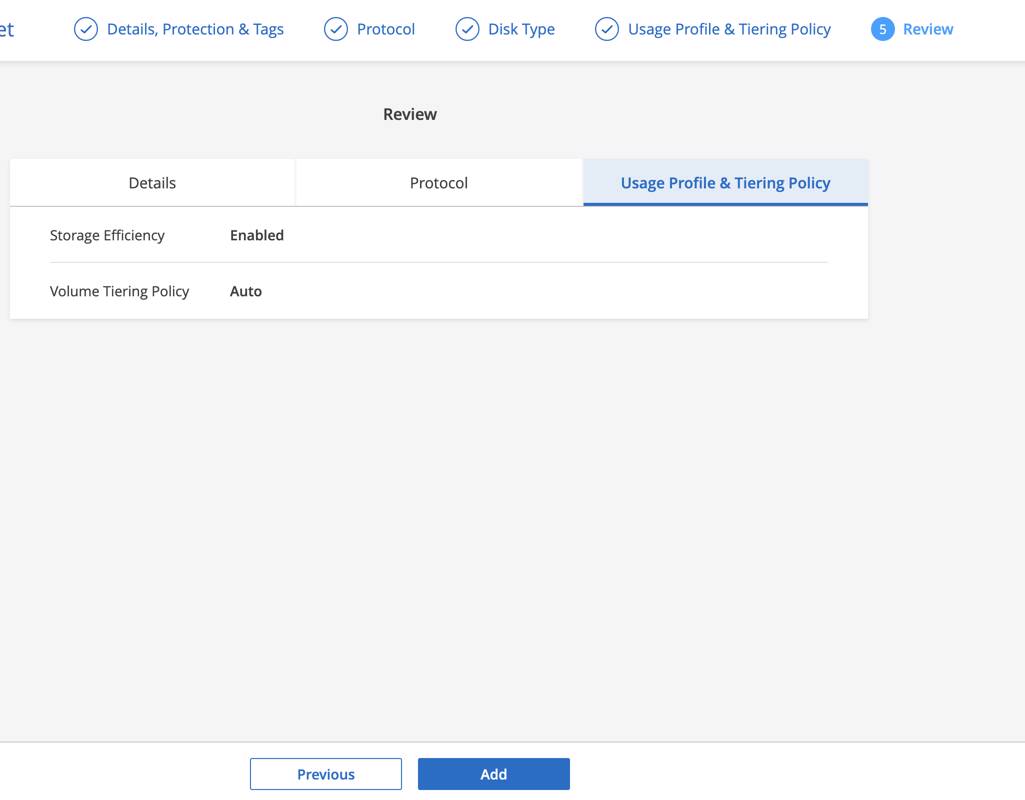
- On the Usage Profile & Tiering Policy page, verify that the Storage Efficiency is Enabled so that the volume is thin provisioned. Click Next and then click ADD to create the volume.
Your screen should look like this:
-
Go back to the Aggregates page and see what has changed.
-
On the opened Aggregates page, note that other than having one more volume in the aggregate, nothing has changed! You have created a 200GB volume and Aggr1 is still composed of a single 100GB Standard PD. That's thin provisioning.
So what happens when data is piling up and the allocated disks are about to run out-of-space? That's where BlueXP's Automatic Capacity Management feature comes into play.
-
Click on the top right gear icon and select Connector Settings.
-
On the opened Connector Settings page, note that Capacity Management Mode is set by default to Automatic Mode. Click on it to expand.
In this mode, BlueXP automatically purchases new disks for Cloud Volumes ONTAP when the Aggregate Capacity Threshold - Free Space Ratio is reached (10% by default). In addition, it deletes unused aggregates, and moves volumes between aggregates when needed.
You scaled it! With thin provisioning and automatic capacity management you can allocate space without the need to allocate the same persistent disks ahead. You simply pay-as-you-grow as the physical capacity increases only when it's really needed. This way you don't need to pay ahead for storage resources that will sit idle.
Cold data tiering to Google Cloud Storage
-
Go back to the NetApp BlueXP Storage Canvas page and double-click on your Cloud Volumes ONTAP working environment. Click the Volumes menu link to access the Volumes page.
-
Next, click on the smb_data2 volume's Manage Volume link, and from the list of operations revealed, click on Advanced Options and then on Change Tiering Policy.
-
To demonstrate the impact of data tiering right away, select the All policy. Then, click on Change.
Note that currently there is no data stored on Google Cloud Storage. Time to add some!
-
Click on the smb_data2 volume's Manage Volume link and from the list of operations revealed, click on Mount Command. Then click on Copy to copy the command to your clipboard.
-
Back on your Windows VM, open File Explorer from the taskbar or the Start menu, or press the Windows logo key + E.
-
Select This PC from the left pane. Then, on the Computer tab, select Map network drive.
-
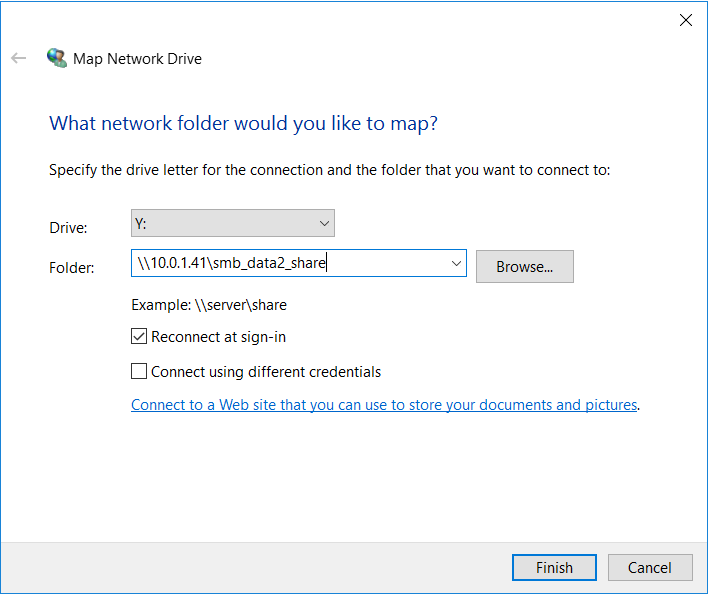
On the Map Network Drive window use the following details:
- Drive: Y: (the next available drive letter)
- Folder box: <mount command copied on step 5>
Your screen should look like this:
- Click Finish to execute the Map Network Drive operation.
Upon completion of the operation a new window will appear showing the new mapped network drive. Note that now there are two mapped network drives:
- (Z:) - mapped to smb_data1 volume
- (Y:) - mapped to smb_data2 volume
-
Bring on some data! On the Windows File Explorer, navigate to C:\Windows and copy the Fonts directory (~380MB)then paste it into smb_data2_share or drive (Y:).
-
Go back to the Volumes page on BlueXP and refresh the page using BlueXP's refresh button.
-
Now, take another look at the smb_data2. You should see that around ~380MB were tiered to Google Cloud Storage.
You did it! You just implemented one the most significant capabilities of Cloud Volumes ONTAP that dramatically reduces your storage costs. With cold data tiering to Google Cloud Storage enabled, based on the tiering policy selected, Cloud Volumes ONTAP ensures that your data is located at the right tier at the right time - hot data on Persistent Disks while cold data on Google Cloud Storage. In addition, with data tiering Cloud Volumes ONTAP can scale to petabytes of capacity.
Congratulations!
In this lab, you honed your Cloud Volumes ONTAP skills by learning how you can leverage Cloud Volume ONTAP to support your Windows workloads. In addition, you learned how Cloud Volumes ONTAP storage efficiency features and data tiering to Google Cloud Storage can optimize your storage consumption and reduce costs, allowing you to get more from Google Cloud and pay less.
Next steps / Learn more
Be sure to check out the following to receive more hands-on practice with NetApp:
- NetApp on the Google Cloud Marketplace!
- Get started with your 30-days Cloud Volumes ONTAP free trial
Google Cloud training and certification
...helps you make the most of Google Cloud technologies. Our classes include technical skills and best practices to help you get up to speed quickly and continue your learning journey. We offer fundamental to advanced level training, with on-demand, live, and virtual options to suit your busy schedule. Certifications help you validate and prove your skill and expertise in Google Cloud technologies.
Manual Last Updated November 21, 2023
Lab Last Tested November 21, 2023
Copyright 2024 Google LLC All rights reserved. Google and the Google logo are trademarks of Google LLC. All other company and product names may be trademarks of the respective companies with which they are associated.