Контрольні точки
Lab Completion
/ 20
Dart Functions Framework
- GSP889
- Overview
- Setup
- Task 1. Create a backend service
- Task 2. Create a proxy service
- Task 3. Open the frontend service
- Task 4. Accepting the Flutter extensions
- Task 5. Clone the code repository
- Task 6. Import the starter app
- Task 7. Exploring the Flutter code
- Task 8. Creating a frontend service
- Task 9. Run the Flutter code
- Congratulations!
GSP889

Overview
Flutter is Google's UI toolkit for building beautiful, natively compiled applications for mobile, web, and desktop from a single codebase. Flutter works with existing code, is used by developers and organizations around the world, and is free and open source.
In this lab, you will create a couple of applications using Flutter and Dart. The two applications demonstrate how to use Dart Functions Framework in a Flutter application.
Dart Functions Framework is used for the backend service running on Cloud Run. The general architecture is shown in the following diagram.
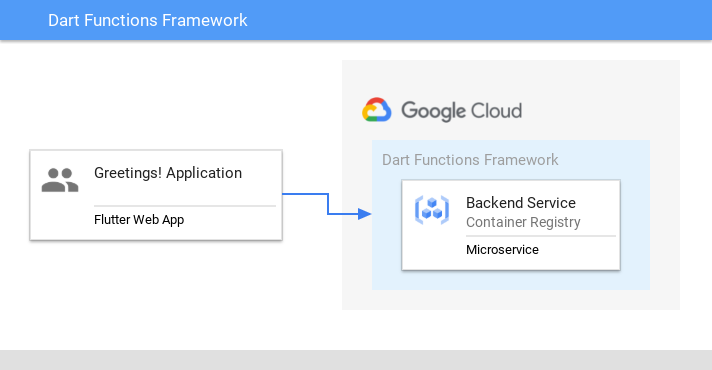
At the frontend a Flutter application is used to send messages using HTTP.
What you'll learn
- How to write a Flutter app that looks natural on iOS, Android, and the web
- Basic structure of a Flutter app
- The basics of Dart Functions Framework
- Using hot reload for a quicker development cycle
Prerequisites
Based on the content, it is recommended to have some familiarity with:
- Flutter
- Dart
Setup
Before you click the Start Lab button
Read these instructions. Labs are timed and you cannot pause them. The timer, which starts when you click Start Lab, shows how long Google Cloud resources will be made available to you.
This hands-on lab lets you do the lab activities yourself in a real cloud environment, not in a simulation or demo environment. It does so by giving you new, temporary credentials that you use to sign in and access Google Cloud for the duration of the lab.
To complete this lab, you need:
- Access to a standard internet browser (Chrome browser recommended).
- Time to complete the lab---remember, once you start, you cannot pause a lab.
Task 1. Create a backend service
The backend service can be run either locally or remotely (e.g. Cloud Run). In this example, the service will be deployed to Cloud Run.
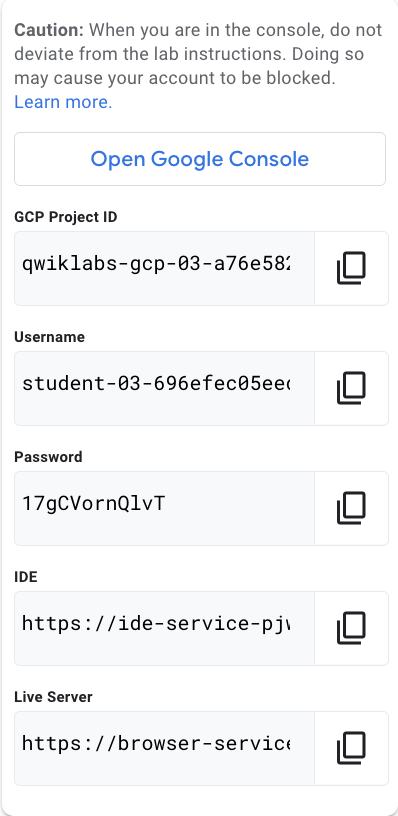
- Open Google Console using Incognito Browser
- Username/Password combination are credentials for the Google Cloud account
- GCP Project ID is unique to the sandbox environment
- Open the Google Console in an incognito browser.
-
When prompted enter the lab credentials (i.e. Username + Password).
-
In Google Cloud Console, Open a Cloud Shell (i.e.
). If prompted click continue.
-
Enable the Cloud Run Service. If prompted, click Authorize.
- Set the Cloud Run region:
- Git clone the function framework repository:
- Create a configuration named
cloudbuild.yaml:
- Paste this into your
cloudbuild.yamlfile:
-
Exit and save the file by pressing
control + x,y, and thenenterin that sequence. -
Build the image:
- Deploy Cloud Run service using the new image
backend:
- Get the backend endpoint of the deployed service:
- Test the backend service:
The service should response in a similar manner to the information shown below:
We now have a backend service to interact with Google Cloud. However as we are using multiple hosts, we need a proxy to add the correct cors headers.
- Expectation that scripts are sourced from the same ORIGIN
- Notice in the above response message, the x-frame-options: SAMEORIGIN
In the next section, learn how to create a proxy to test across origins.
Task 2. Create a proxy service
The proxy service can be run either locally or remotely (e.g. Cloud Run).
The revised architecture is shown in the following diagram.
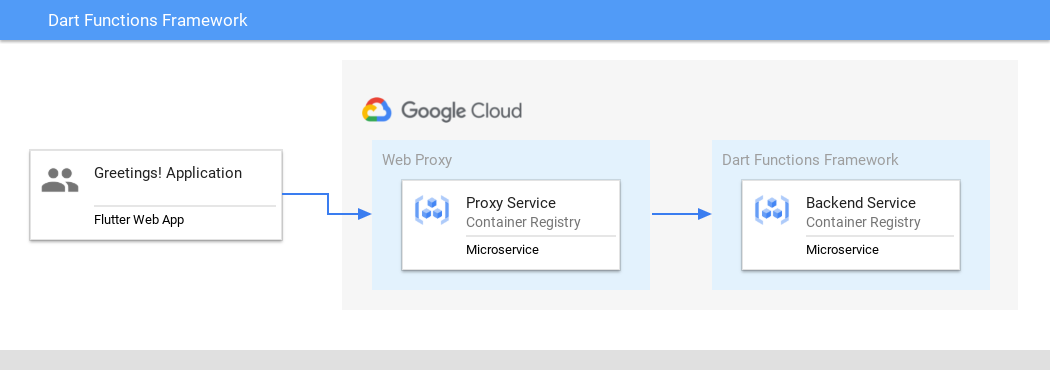
In this example, introduce a new Cloud Run service. The proxy service will be used to update the header associated with HTTP response.
- Deploy a
backend-Proxyas a Cloud Run service and set the ENDPOINT as thebackend-service:
- Get the backend endpoint of the deployed service:
- Test the backend service:
The service should response in a similar manner to the information shown below:
The proxy communicates directly with the backend service and is used to add a wildcard header to the origin. With this action, we can consume the payload from any location.
In the next section, create a Flutter frontend application to consume the output from this backend service.
Task 3. Open the frontend service
In this lab, we use a custom editor that includes the Flutter and Dart extensions. The lab environment is preprovisioned.
- Based on VSCode extensions
- Supports Extensions
- Copy the
IDEaddress from the Qwiklabs panel and paste it into an Incognito Browser.
- The browser might warn you that the cert authority is invalid
- Click the Advanced button to reveal and proceed to the IP address
If The Flutter Editor will request a password.
- Enter Flutter Password as "Password01".
Access to the editor has now been granted. Proceed to the next section to accept the extensions used in this lab.
Task 4. Accepting the Flutter extensions
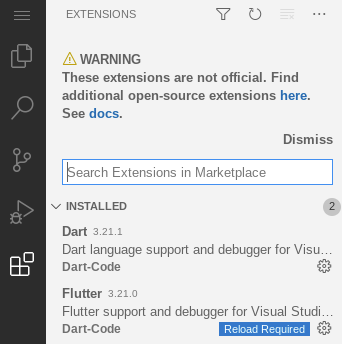
Code Server has been pre-provisioned with the Flutter and Dart extensions. The left hand side of the editor contains the main options used in this lab.
- Flutter extension provides support for developing with the Flutter Framework
- Dart language extension will automatically be installed as part of the Flutter extension
- Click the extensions icon (highlighted in white)
- If prompted click on Reload Required to update the loaded extensions. The editor will reload and enable the extensions.
The editor has now been updated to handle both Flutter and Dart. In the next section clone a repository into the editor.
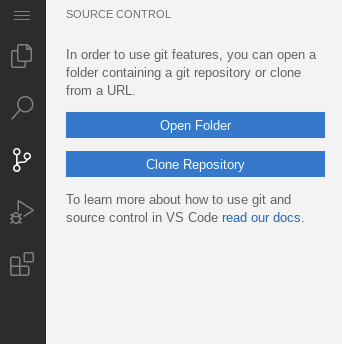
Task 5. Clone the code repository
The lab has pre-existing code located on GitHub. In this section clone the repository and prepare the environment to use the code.
- Select the Source Control button (highlighted in white).
-
Click the Clone Repository button.
-
Enter the repository:
-
Click the Clone from URL link.
-
Set the destination folder
/home/ide-dev/flutter/and press the OK button. -
Click the X to close the notification popup for the cloned repository.
- Where a repository contains multiple Flutter/Dart applications
- Opening a specific folder can be easier to manage the codebase.
- To see the full folder contents of the cloned repository, select and open the cloned repository.
The code has now been cloned into the editor. In the next section access the source code and explore the Flutter application.
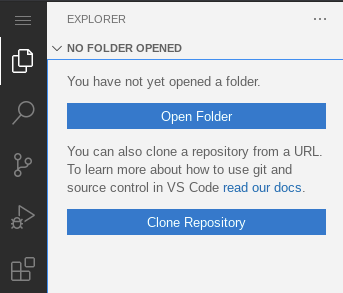
Task 6. Import the starter app
In this section access the Dart Functions Framework Flutter application.
- Select the Explorer button (highlighted in white).
-
Select the Open Folder menu option.
-
Use the following folder location:
- Confirm the on screen notification(s) to update packages and editor settings.
The editor has now updated the code directory for the cloned repository. In the next section explore the Flutter code.
Task 7. Exploring the Flutter code
The application code is organized over multiple directories. This split of functionality is designed to make it easier to work on, by grouping code by functionality.
|
File |
Description |
|
lib/main.dart |
This file contains the main entry point and the application widget. |
|
lib/config.dart |
This file contains the environment settings. |
|
services/api.dart |
This file performs the http post request. |
|
pubspec.yaml |
This file contains the package configuration for the application. |
- Take a moment to explore the rest of the code.
In the next section, initiate the frontend service used to consume the backend salutation service.
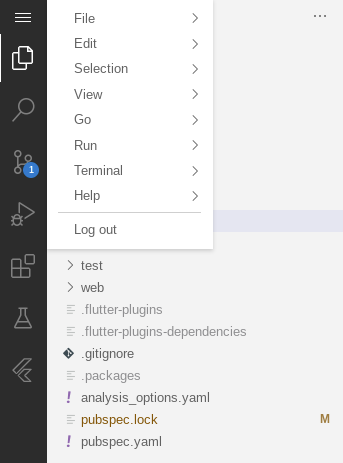
Task 8. Creating a frontend service
The frontend service will be developed as a Flutter application. The role of this service will be to consume data from the backend service.
- Click the Navigation Menu.
-
Select Terminal > New Terminal.
-
Copy the file
frontend/assets/config/dev.json. If prompted click Allow.
- Copy the backend-proxy URL from the Cloud Run console.

-
Navigate to the
/assets/config/prod.jsonfile in your editor and click on it. -
Replace the value of the
greetingURLwith the value of your backend-proxy URL.
The prod.json should now look similar to below:
The prod.json update enables the frontend application to communicate with the backend service.
The backend service does not require authentication, so consumers can call the URL directly.
In the next section run the Flutter application to interact with the backend.
Task 9. Run the Flutter code
In this section run the Flutter Web application from the command line.
- In the editor, open a Terminal, if not already available.
- Ensure the directory is set to
functions-framework-dart/examples/fullstack/frontend.
- Building a Web application
- Flutter application will be run in the browser
- Tell Flutter to use the browser on a specific port
- Provide the environment setting as a variable
- Run the Flutter web server:
- The running web server should look similar to below:

- Copy the
Live ServerURL and paste into a new Incognito Browser tab.
The Flutter device will display a Greetings! title as well as a Name input field and a Submit button.
Feel free to interact with the running application.
- Enter a name and see the greeting response appended to the supplied name.
Click Check my progress to verify the objective.
Congratulations!
You have successfully completed the lab and demonstrated your knowledge of Flutter. Over the course of this lab, you have performed the following tasks:
- Installed the Flutter + Dart extensions
- Developed a backend service using Cloud Run
- Learned to use hot reload feature
- Tested code updates in the web device
Finish your quest
This self-paced lab is part of the Flutter Development quest. A quest is a series of related labs that form a learning path. Completing this quest earns you a badge to recognize your achievement. You can make your badge or badges public and link to them in your online resume or social media account. Enroll in this quest and get immediate completion credit. Refer to the Google Cloud Skills Boost catalog for all available quests.
Take your next lab
Google Cloud training and certification
...helps you make the most of Google Cloud technologies. Our classes include technical skills and best practices to help you get up to speed quickly and continue your learning journey. We offer fundamental to advanced level training, with on-demand, live, and virtual options to suit your busy schedule. Certifications help you validate and prove your skill and expertise in Google Cloud technologies.
Manual Last Updated November 17, 2023
Lab Last Tested November 17, 2023
Copyright 2024 Google LLC All rights reserved. Google and the Google logo are trademarks of Google LLC. All other company and product names may be trademarks of the respective companies with which they are associated.