

准备工作
- 实验会创建一个 Google Cloud 项目和一些资源,供您使用限定的一段时间
- 实验有时间限制,并且没有暂停功能。如果您中途结束实验,则必须重新开始。
- 在屏幕左上角,点击开始实验即可开始
Creating a dataset to store new tables
/ 10
Ingest a new Dataset from a CSV
/ 10
ingest-a-dataset-from-google-cloud-storage
/ 10
Create tables from other tables with DDL
/ 10
BigQuery is Google's fully managed, NoOps, low cost analytics database. With BigQuery you can query terabytes and terabytes of data without having any infrastructure to manage or needing a database administrator. BigQuery uses SQL and can take advantage of the pay-as-you-go model. BigQuery allows you to focus on analyzing data to find meaningful insights.
In this lab you will ingest subsets of the NYC taxi trips data into tables inside of BigQuery.
Read these instructions. Labs are timed and you cannot pause them. The timer, which starts when you click Start Lab, shows how long Google Cloud resources are made available to you.
This hands-on lab lets you do the lab activities in a real cloud environment, not in a simulation or demo environment. It does so by giving you new, temporary credentials you use to sign in and access Google Cloud for the duration of the lab.
To complete this lab, you need:
Click the Start Lab button. If you need to pay for the lab, a dialog opens for you to select your payment method. On the left is the Lab Details pane with the following:
Click Open Google Cloud console (or right-click and select Open Link in Incognito Window if you are running the Chrome browser).
The lab spins up resources, and then opens another tab that shows the Sign in page.
Tip: Arrange the tabs in separate windows, side-by-side.
If necessary, copy the Username below and paste it into the Sign in dialog.
You can also find the Username in the Lab Details pane.
Click Next.
Copy the Password below and paste it into the Welcome dialog.
You can also find the Password in the Lab Details pane.
Click Next.
Click through the subsequent pages:
After a few moments, the Google Cloud console opens in this tab.

The Welcome to BigQuery in the Cloud Console message box opens. This message box provides a link to the quickstart guide and the release notes.
The BigQuery console opens.
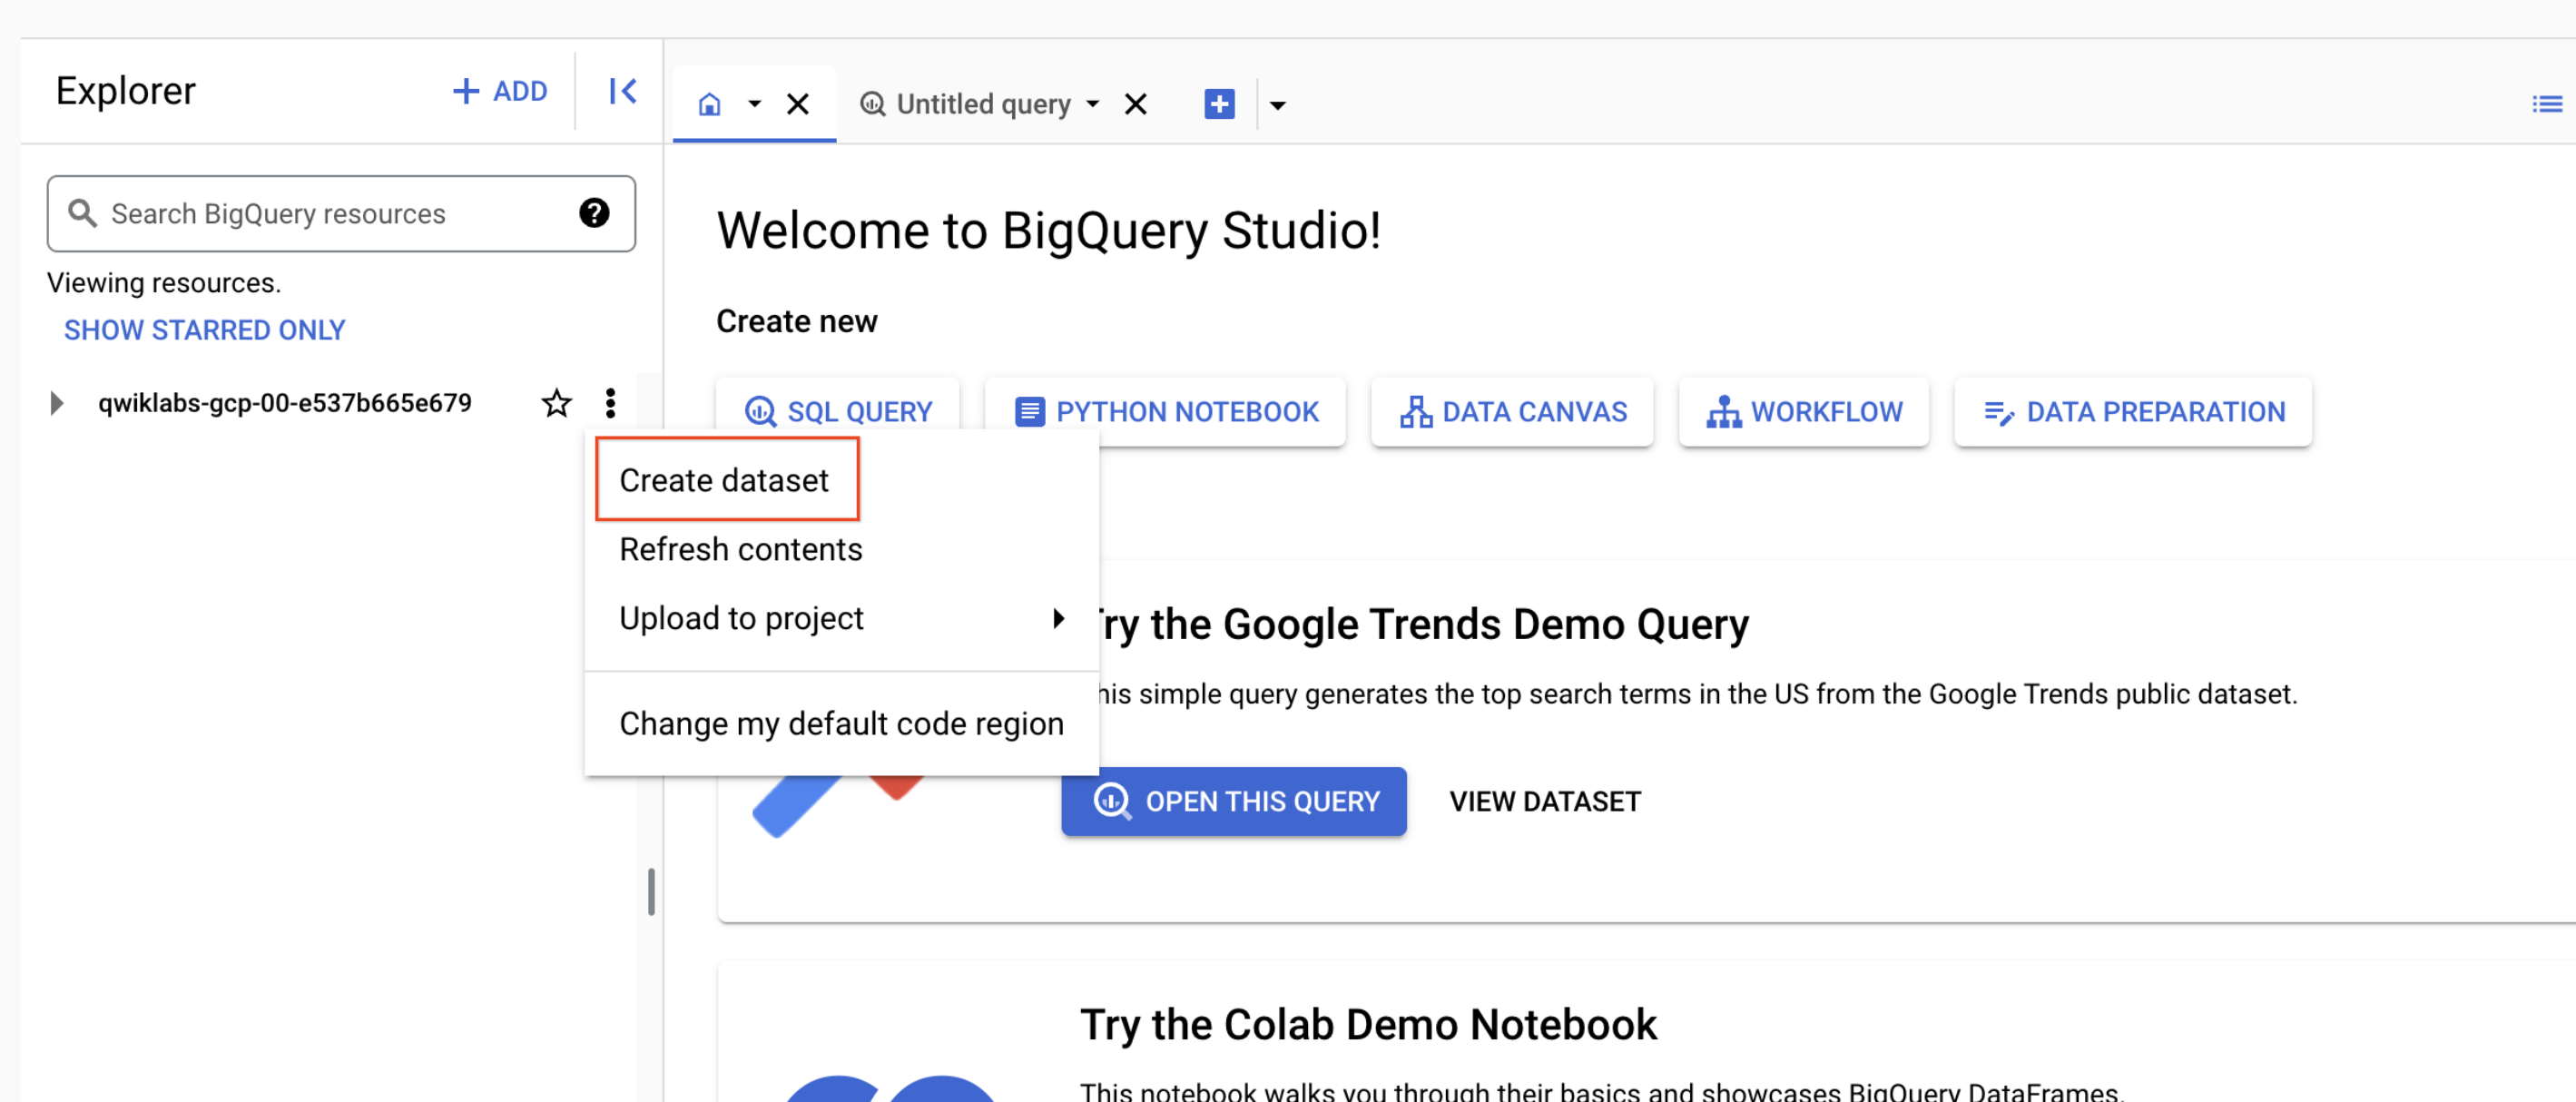
 ) next to your Project ID and click Create dataset.
Set the Dataset ID to nyctaxi. Leave the other fields at their default values.
Click Create dataset.
You'll now see the nyctaxi dataset under your project name.
To check your progress in this lab, click Check my progress below. A checkmark means you're successful.
In this section, you will load a local CSV into a BigQuery table.
Download a subset of the NYC taxi 2018 trips data locally onto your computer from this link.
In the BigQuery Console, click View actions icon next to nyctaxi dataset then click Create table.
Specify the following table options:
Source:
Destination:
Leave all other settings at default.
Schema:
Advanced Options
You should now see the 2018trips table below the nyctaxi dataset.
Select the 2018trips table and view details:
You have successfully loaded CSV file into a new BigQuery table.
Next, practice with a basic query on the 2018trips table.
To check your progress in this lab, click Check my progress below. A checkmark means you're successful.
Now, try to load another subset of the same 2018 trip data that is available on Cloud Storage. And this time, let's use the CLI tool to do it.
When the load job is complete, you will get a confirmation on the screen.
Back on your BigQuery console, select the 2018trips table and view details. Confirm that the row count has now almost doubled.
You may want to run the earlier query to see if the top 5 most expensive trips have changed.
To check your progress in this lab, click Check my progress below. A checkmark means you're successful.
The 2018trips table now has trips from throughout the year. What if you were only interested in January trips? For the purpose of this lab, we will keep it simple and focus only on pickup date and time. Let's use DDL to extract this data and store it in another table
CREATE TABLE command :To check your progress in this lab, click Check my progress below. A checkmark means you're successful.
You've successfully created a new dataset and ingested data into BigQuery from CSV, Google Cloud Storage, and other BigQuery tables.
...helps you make the most of Google Cloud technologies. Our classes include technical skills and best practices to help you get up to speed quickly and continue your learning journey. We offer fundamental to advanced level training, with on-demand, live, and virtual options to suit your busy schedule. Certifications help you validate and prove your skill and expertise in Google Cloud technologies.
Manual Last Updated: August 21, 2025
Lab Last Tested: November 05, 2024
Copyright 2025 Google LLC. All rights reserved. Google and the Google logo are trademarks of Google LLC. All other company and product names may be trademarks of the respective companies with which they are associated.


此内容目前不可用
一旦可用,我们会通过电子邮件告知您

太好了!
一旦可用,我们会通过电子邮件告知您

一次一个实验
确认结束所有现有实验并开始此实验