


Before you begin
- Labs create a Google Cloud project and resources for a fixed time
- Labs have a time limit and no pause feature. If you end the lab, you'll have to restart from the beginning.
- On the top left of your screen, click Start lab to begin
Create the lab resources
/ 20
Create the Cloud Build Triggers
/ 20
Deploy the first versions of the application
/ 20
Deploy the second versions of the application
/ 20
Roll back the production deployment
/ 20
In a challenge lab you’re given a scenario and a set of tasks. Instead of following step-by-step instructions, you will use the skills learned from the labs in the course to figure out how to complete the tasks on your own! An automated scoring system (shown on this page) will provide feedback on whether you have completed your tasks correctly.
When you take a challenge lab, you will not be taught new Google Cloud concepts. You are expected to extend your learned skills, like changing default values and reading and researching error messages to fix your own mistakes.
To score 100% you must successfully complete all tasks within the time period!
This lab is recommended for students enrolled in the Implement DevOps Workflows in Google Cloud course. Are you ready for the challenge?
Read these instructions. Labs are timed and you cannot pause them. The timer, which starts when you click Start Lab, shows how long Google Cloud resources are made available to you.
This hands-on lab lets you do the lab activities in a real cloud environment, not in a simulation or demo environment. It does so by giving you new, temporary credentials you use to sign in and access Google Cloud for the duration of the lab.
To complete this lab, you need:
A GitHub account is required for this Lab. If you already have one, you can use it. If not, you will need to create a GitHub account
As a recent hire as a DevOps Engineer for Cymbal Superstore a few months ago, you have learned the ins and outs of how the company operates its e-commerce website. Specifically, the DevOps team is working on a large scale CI/CD pipeline that they would like your assistance with building. This allows the company to help developers automate tasks, collaborate more effectively with other teams, and release software more frequently and reliably. Your experience with GitHub, Artifact Registry, Docker, and Cloud Build is going to be a large help since Cymbal Superstore would like to use all native Google Cloud Services for their pipeline.
Before you start this project, the DevOps team would like you to demonstrate your new skills. As part of this demonstration, they have a list of tasks they would like to see you do in an allotted period of time in a sandbox environment.
Your tasks include the following:
Overall, you are creating a simple CI/CD pipeline using GitHub Repositories, Artifact Registry, and Cloud Build.
In this section, you initialize your Google Cloud project for the demo environment. You enable the required APIs, configure Git in Cloud Shell, create an Artifact Registry Docker repository, and create a GKE cluster to run your production and development applications on.
In Cloud Shell, run the following commands to configure Git and GitHub:
When you have successfully logged in, your GitHub username appears in the output in Cloud Shell.
Create an Artifact Registry Docker repository named my-repository in the
Create a GKE Standard cluster named hello-cluster with the following configuration:
| Setting | Value |
|---|---|
| Zone | |
| Release channel | Regular |
| Cluster version |
1.29 or newer
|
| Cluster autoscaler | Enabled |
| Number of nodes | 3 |
| Minimum nodes | 2 |
| Maximum nodes | 6 |
prod and dev namespaces on your cluster.Click Check my progress to verify the objective.
In this task, you create a repository sample-app in GitHub Repositories and initialize it with some sample code. This repository holds your Go application code, and be the primary source for triggering builds.
Create an empty repository named sample-app in GitHub Repositories.
Clone the sample-app GitHub Repository in Cloud Shell.
Use the following command to copy the sample code into your sample-app directory:
<your-region> and <your-zone> placeholders in the cloudbuild-dev.yaml and cloudbuild.yaml files with the assigned region and zone of your project:Create a GitHub repository with name sample-app
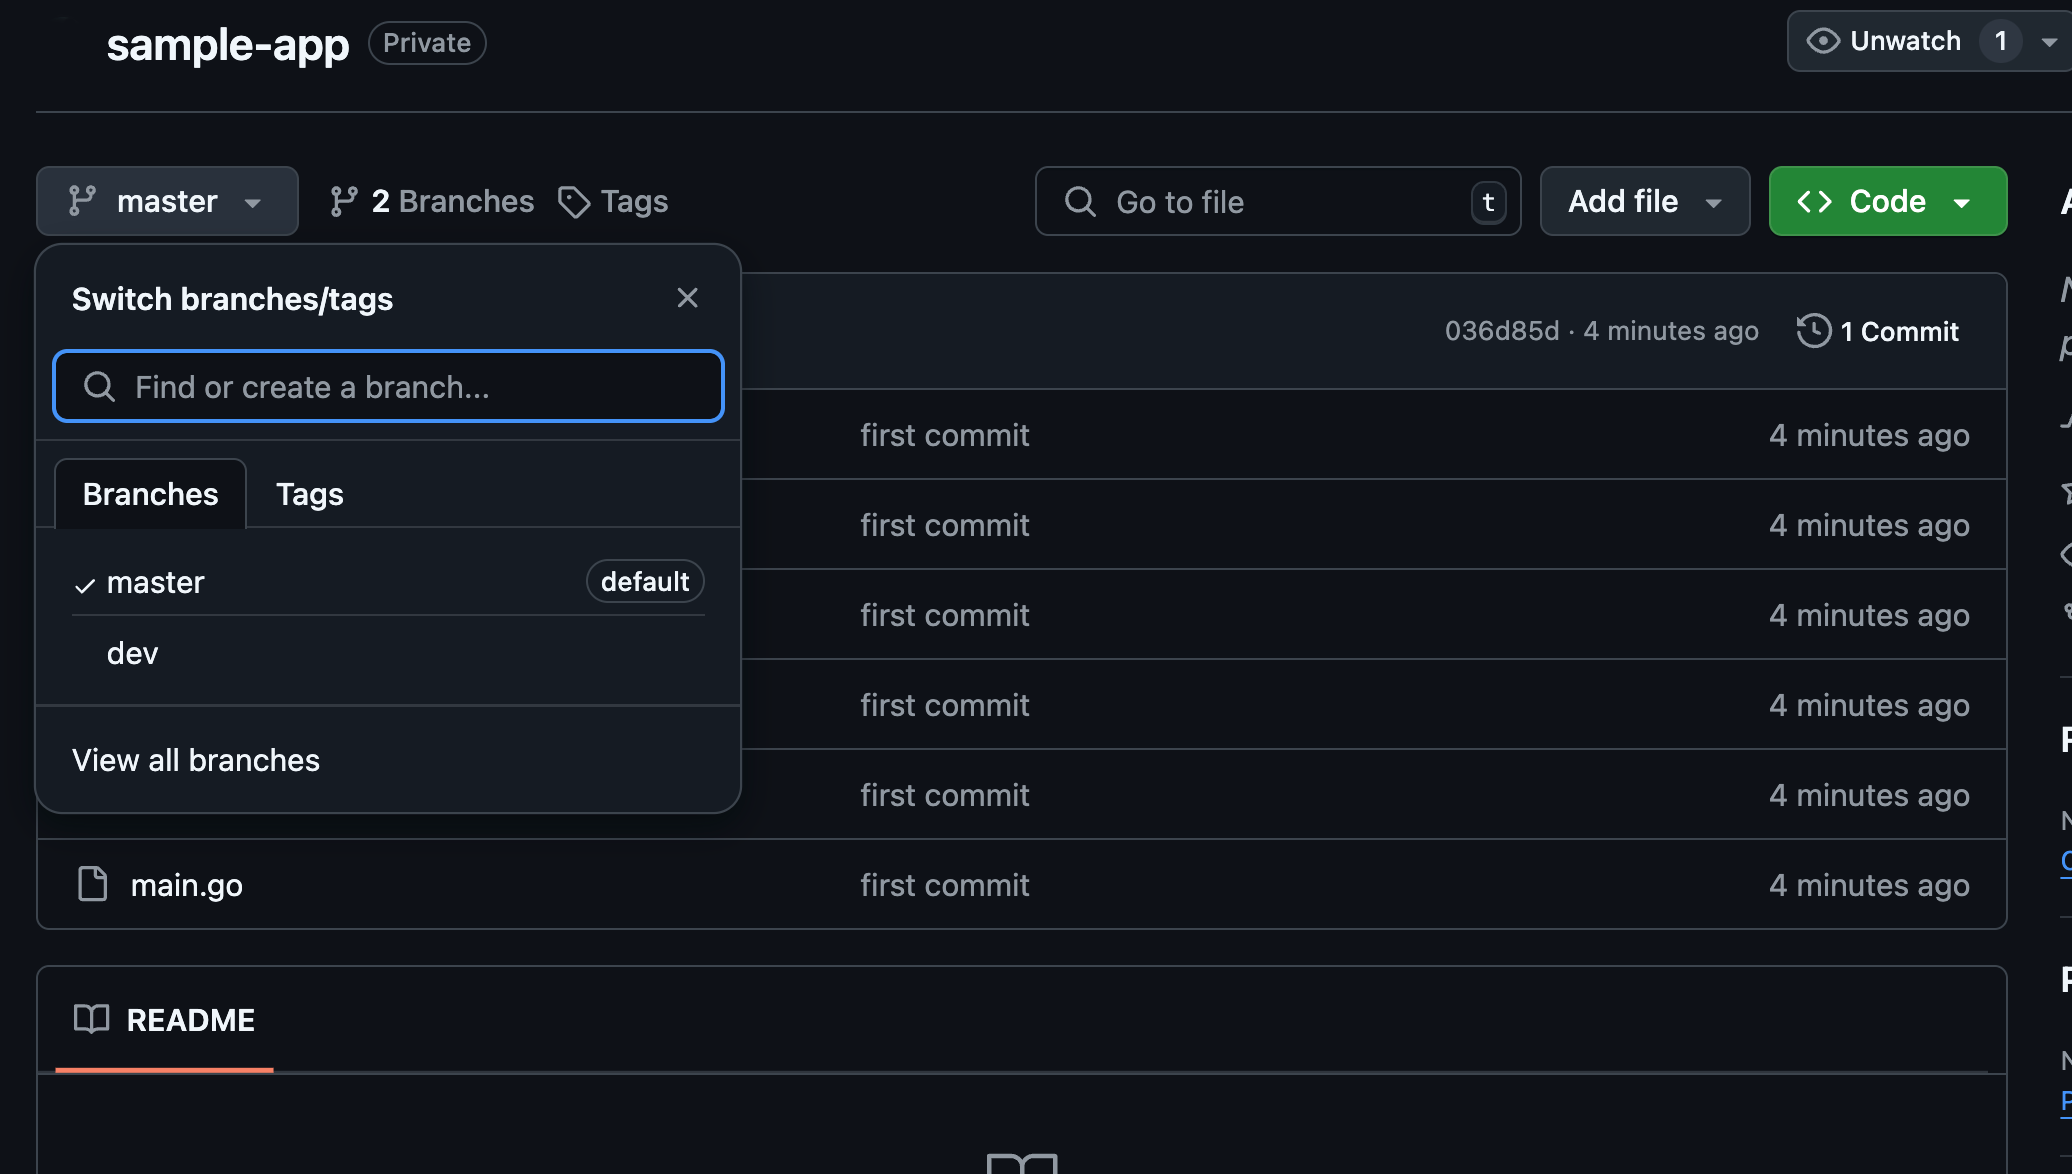
After creating repository make your first commit with the sample code added to your sample-app directory, and push the changes to the master branch.
Create a branch named dev. Make a commit with the sample code added to your sample-app directory and push the changes to the dev branch.
Verify you have the sample code and branches stored in the GitHub Repository.
The code you just cloned contains a simple Go application that has two entry points: Red and Blue. Each displays a simple colored square on the web page depending on the entry point you go to.
In this section, you create two Cloud Build Triggers.
The first trigger listens for changes on the master branch and builds a Docker image of your application, pushes it to Google Artifact Registry, and deploys the latest version of the image to the prod namespace in your GKE cluster.
The second trigger listens for changes on the dev branch and build a Docker image of your application and push it to Google Artifact Registry, and deploy the latest version of the image to the dev namespace in your GKE cluster.
Create a Cloud Build Trigger named sample-app-prod-deploy that with the following configurations:
GitHub (Cloud Build GitHub App)
sample-app
^master$
cloudbuild.yaml
Create a Cloud Build Trigger named sample-app-dev-deploy that with the following configurations:
sample-app
^dev$
cloudbuild-dev.yaml
After setting up the triggers, any changes to the branches trigger the corresponding Cloud Build pipeline, which builds and deploy the application as specified in the cloudbuild.yaml files.
Click Check my progress to verify the objective.
In this section, you build the first version of the production application and the development application.
In Cloud Shell, inspect the cloudbuild-dev.yaml file located in the sample-app directory to see the steps in the build process. In cloudbuild-dev.yaml file, replace the <version> on lines 9 and 13 with v1.0.
Navigate to the dev/deployment.yaml file and Update the <todo> on line 17 with the correct container image name. Also, replace the PROJECT_ID variable with actual project ID in the container image name.
Make a commit with your changes on the dev branch and push changes to trigger the sample-app-dev-deploy build job.
Verify your build executed successfully in Cloud build History page, and verify the development-deployment application was deployed onto the dev namespace of the cluster.
Expose the development-deployment deployment to a LoadBalancer service named dev-deployment-service on port 8080, and set the target port of the container to the one specified in the Dockerfile.
Navigate to the Load Balancer IP of the service and add the /blue entry point at the end of the URL to verify the application is up and running. It should resemble something like the following: http://34.135.97.199:8080/blue.
Switch to the master branch. Inspect the cloudbuild.yaml file located in the sample-app directory to see the steps in the build process. In cloudbuild.yaml file, replace the <version> on lines 11 and 16 with v1.0.
Navigate to the prod/deployment.yaml file and update the <todo> on line 17 with the correct container image name. Also, replace the PROJECT_ID variable with actual project ID in the container image name.
Make a commit with your changes on the master branch and push changes to trigger the sample-app-prod-deploy build job.
Verify your build executed successfully in Cloud build History page, and verify the production-deployment application was deployed onto the prod namespace of the cluster.
Expose the production-deployment deployment on the prod namespace to a LoadBalancer service named prod-deployment-service on port 8080, and set the target port of the container to the one specified in the Dockerfile.
Navigate to the Load Balancer IP of the service and add the /blue entry point at the end of the URL to verify the application is up and running. It should resemble something like the following: http://34.135.245.19:8080/blue.
Click Check my progress to verify the objective.
In this section, you build the second version of the production application and the development application.
dev branch.main.go file, update the main() function to the following:main.go file:Inspect the cloudbuild-dev.yaml file to see the steps in the build process. Update the version of the Docker image to v2.0.
Navigate to the dev/deployment.yaml file and update the container image name to the new version (v2.0).
Make a commit with your changes on the dev branch and push changes to trigger the sample-app-dev-deploy build job.
Verify your build executed successfully in Cloud build History page, and verify the development-deployment application was deployed onto the dev namespace of the cluster and is using the v2.0 image.
Navigate to the Load Balancer IP of the service and add the /red entry point at the end of the URL to verify the application is up and running. It should resemble something like the following: http://34.135.97.199:8080/red.
master branch.main.go file, update the main() function to the following:main.go file:Inspect the cloudbuild.yaml file to see the steps in the build process. Update the version of the Docker image to v2.0.
Navigate to the prod/deployment.yaml file and update the container image name to the new version (v2.0).
Make a commit with your changes on the master branch and push changes to trigger the sample-app-prod-deploy build job.
Verify your build executed successfully in Cloud build History page, and verify the production-deployment application was deployed onto the prod namespace of the cluster and is using the v2.0 image.
Navigate to the Load Balancer IP of the service and add the /red entry point at the end of the URL to verify the application is up and running. It should resemble something like the following: http://34.135.245.19:8080/red.
Great! You have successfully created fully functioning production and development CI/CD pipelines.
Click Check my progress to verify the objective.
In this section, you roll back the production deployment to a previous version.
v1.0 version of the application./red entry point at the end of the URL of the production deployment and response on the page should be 404.Click Check my progress to verify the objective.
Congratulations! In this lab you verified your skills on implementing DevOps workflows in Google Cloud. You first created a GKE cluster to run your application and a git repository to host your code base. You then created Cloud Build Triggers, modified the code and the templates, and pushed updates to the repo that created your first development and production application builds. You then pushed updates to the application to create new builds, and rolled back the production application to a previous version. You are now ready to start DevOps work in your own environment!
This self-paced lab is part of the Implement DevOps Workflows in Google Cloud course. Completing this skill badge course earns you the badge above, to recognize your achievement. Share your badge on your resume and social platforms, and announce your accomplishment using #GoogleCloudBadge.
This skill badge is part of Google Cloud’s Cloud Devops Engineer learning path. Continue your learning journey by enrolling in the Monitor and Log with Google Cloud Observability course.
...helps you make the most of Google Cloud technologies. Our classes include technical skills and best practices to help you get up to speed quickly and continue your learning journey. We offer fundamental to advanced level training, with on-demand, live, and virtual options to suit your busy schedule. Certifications help you validate and prove your skill and expertise in Google Cloud technologies.
Manual Last Updated June 26, 2024
Lab Last Tested June 26, 2024
Copyright 2025 Google LLC. All rights reserved. Google and the Google logo are trademarks of Google LLC. All other company and product names may be trademarks of the respective companies with which they are associated.


This content is not currently available
We will notify you via email when it becomes available

Great!
We will contact you via email if it becomes available

One lab at a time
Confirm to end all existing labs and start this one