
始める前に
- ラボでは、Google Cloud プロジェクトとリソースを一定の時間利用します
- ラボには時間制限があり、一時停止機能はありません。ラボを終了した場合は、最初からやり直す必要があります。
- 画面左上の [ラボを開始] をクリックして開始します
Create a lake, zone, and asset in Dataplex Universal Catalog
/ 50
Dataplex Universal Catalog setup
/ 50
Dataplex Universal Catalog Enables centralized discover, management, monitoring, and governing data and AI artifacts across your data platform, providing access to trusted data and powering analytics and AI at scale.
Dataplex Universal Catalog (previously named Dataplex, Dataplex Catalog, and BigQuery Universal Catalog) is a fully managed, scalable metadata management service that you can use to tag data assets using aspects and search for assets to which you have access. Aspects are a template to allow you to attach metadata fields to specific data assets for easy identification and retrieval (such as marking certain assets as containing protected or sensitive data); in addition to predefined aspects, you can also create custom aspects to assign to different data assets.
In this lab, you learn how to use Dataplex Universal Catalog to attach aspects to a data asset and then search for assets.
Read these instructions. Labs are timed and you cannot pause them. The timer, which starts when you click Start Lab, shows how long Google Cloud resources will be made available to you.
This hands-on lab lets you do the lab activities yourself in a real cloud environment, not in a simulation or demo environment. It does so by giving you new, temporary credentials that you use to sign in and access Google Cloud for the duration of the lab.
To complete this lab, you need:
Since this is a temporary account, which will last only as long as this lab:
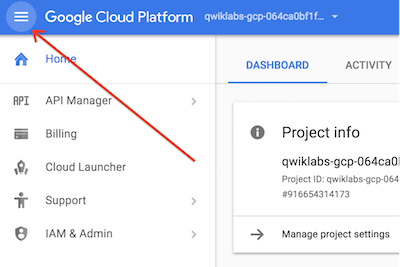
 ) at the top-left.
In the Google Cloud Console, enter Cloud Dataplex API in the top search bar.
Click on the result for Cloud Dataplex API under Marketplace.
If the API is not already enabled, click Enable to enable the API.
Repeat steps 1-3 for BigQuery API.
From the navigation menu select IAM & Admin and from the flyout submenu select IAM.
Find your entry which will look like student-xx-xxxxxxxxxxxx@qwiklabs.net
Verify you have the role Dataplex Administrator and Dataplex Catalog Admin
In this task, you create a new Dataplex Universal Catalog lake to store customer order information, add a curated zone to the lake, and then attach a pre-created BigQuery dataset as a new asset in the zone.
), navigate to View All Products > Analytics > Dataplex Universal Catalog.If prompted Welcome to the new Dataplex experience, click Close.
Under Manage lakes, click Manage.
Click Create.
Enter the required information to create a new lake:
| Property | Value |
|---|---|
| Display Name | Orders Lake |
| ID | Leave the default value. |
| Region |
Leave the other default values including Metastore service as None.
It can take up to 3 minutes for the lake to be created.
On the Manage tab, click on the name of your lake.
Click Add zone.
Enter the required information to create a new zone:
| Property | Value |
|---|---|
| Display Name | Customer Curated Zone |
| ID | Leave the default value. |
| Type | Curated zone |
| Data locations | Regional |
Leave the other default values.
For example, the option for Enable metadata discovery under Discovery settings is enabled by default and allows authorized users to discover the data in the zone.
It can take up to 2 minutes for the zone to be created.
On the Zones tab, click on the name of your zone.
On the Assets tab, click Add assets.
Click Add an asset.
Enter the required information to attach a new asset:
| Property | Value |
|---|---|
| Type | BigQuery dataset |
| Display Name | Customer Details Dataset |
| ID | Leave the default value. |
| Dataset |
|
Leave the other default values.
Click Done.
Click Continue.
For Discovery settings, select Inherit to inherit the Discovery settings from the zone level, and then click Continue.
Click Submit.
Click Check my progress to verify your performed task.
We will now work with Dataplex Universal Catalog and enrich the BigQuery asset you just configured.
On the left menu click Search.
The search platform will automatically be Dataplex Universal Catalog. Ignore any messages about the prior product Data Catalog.
In the Filters section go to the Systems section and select BigQuery.
Once the BigQuery assets load on the right, search for Customers, then star it and click Customers which has the Type alias of DATASET. Changing Sort by to Last modified (Recent first) will make it easier to find.
Click the LIST link in header.
Click customer_details.
In the Tags & aspects section under Required aspects click the down facing show more arrow on the right side of the Storage entry. Notice the metadata under Resource Name showing the complete path to the BigQuery table.
In the header click on SCHEMA and notice the field names and other metadata for the fields.
In the header click on Data Profile, next click on QUICK DATA PROFILE. Click CONFIRM in the message box.
In the header click on Data Quality, next click on CREATE DATA QUALITY SCAN. Enter the required information:
| Property | Value |
|---|---|
| Display Name | Customer Detail |
| Sampling size * | 20% |
Verify Publish results to BigQuery and Dataplex Catalog UI is checked. Leave the rest of the fields as their defaults. Click CONTINUE.
Click ADD RULES.
Select Profile based recommendationions in the drop down menu.
In the field Choose columns * click BROWSE. In the pop-up check the box to the left of Name to select all the fields then click the SELECT button at the bottom. If no data fields appear you will need to wait a couple of minutes for the data profile scan you just created to run then start again at step 12
Check the box to the left of Column name to select all rows.
Scroll to the bottom and click SELECT.
In the next screen scroll to the bottom and click CONTINUE.
In the box Select BigQuery dataset click BROWSE.
Select the radio button for Customers and click SELECT.
In the box BigQuery table enter customer_details_quality_scan.
Click RUN SCAN.
We will now add a new aspect. Under the Manage Metadata menu on the left Click Catalog.
Click CREATE ASPECT TYPE.
Click the box labeled Data Sensitivity.
Click USE EXAMPLE.
Set the Location field
Click SAVE.
We will now add the new Aspect and connect it to fields in the table. Click Search in the left menu bar. Choose search platform by clicking Dataplex Universal Catalog on the right of the header bar.
Select the box for BigQuery in the Systems section under Filters.
Select customer_details.
While you can connect an aspect at the table level on the DETAILS tab by using + ADD next to Optional tags & aspects at the bottom of the page, we are going to connect it to specific fields instead.
To add or edit aspects to individual columns of our table. Click the Schema tab.
Select the zip field.
Click + ADD TAG OR ASPECT and select Data_Sensitivity on the pop-up menu.
On the fly-out set Is Encrypted False
Has PII True. PII Type Other then click SAVE.
Repeat step 33-34 for each of the following fields using the same value for Is Encrypted and Has PII as above:
| Name | PII Type |
|---|---|
| age | Other |
EMAIL |
|
| latitude | Other |
| city | Address |
| longitude | Other |
Click Check my progress to verify your performed task.
On the left menu click Search.
In the Filters section scroll down to Aspects and select Data Sensitivity.
Once the BigQuery assets load on the right, click customer_details which has the Type alias of TABLE.
Click on the SCHEMA tab. Notice the fields marked Data Sensitivity.
Click on one of the Data Sensitivity tags and notice the setting in the pop-out. Click CLOSE on the pop-out.
You now know how to locate data by the aspect associated to it.
You configured and used Dataplex Universal Catalog to enrich the metadata for specific fields in a table. You then used that metadata to locate the data fields.


このコンテンツは現在ご利用いただけません
利用可能になりましたら、メールでお知らせいたします

ありがとうございます。
利用可能になりましたら、メールでご連絡いたします

1 回に 1 つのラボ
既存のラボをすべて終了して、このラボを開始することを確認してください