GSP1330

Overview
Gemini is an AI-powered collaborator helping development teams build, deploy, and operate applications faster and more efficiently.
In this lab, you will learn how Gemini for developers can assist in debugging your code and generate unit tests such as when testing for boundary conditions within your code.
The labs in this course cover a typical software development life cycle (SDLC) from the application developers point of view. Other aspects of the SDLC (requirements, security, monitoring, etc.) will be covered in other courses.
Objectives
This lab focuses on to utilize Gemini for Developers in the following ways:
- Identify and resolve runtime errors with the assistance of Gemini for Developers.
- To generate unit tests for functions.
What you'll learn
Cymbal Superstore is a thriving online shopping platform seeking continuous improvements to stay competitive in the market. As part of the ongoing development efforts, a new feature named 'New Products' is designed, allowing users to easily discover the latest additions to the store's inventory.
The new endpoint, newproducts has been deployed to staging, but isn't quite what the business owner wants. You need to make some modifications and debug the new code. To keep the lab focused on how Gemini for Developers can assist you, the new code will be added to the original code base. You will also be asked to develop some unit tests of the backend services.
Setup and requirements
Before you click the Start Lab button
Read these instructions. Labs are timed and you cannot pause them. The timer, which starts when you click Start Lab, shows how long Google Cloud resources are made available to you.
This hands-on lab lets you do the lab activities in a real cloud environment, not in a simulation or demo environment. It does so by giving you new, temporary credentials you use to sign in and access Google Cloud for the duration of the lab.
To complete this lab, you need:
- Access to a standard internet browser (Chrome browser recommended).
Note: Use an Incognito (recommended) or private browser window to run this lab. This prevents conflicts between your personal account and the student account, which may cause extra charges incurred to your personal account.
- Time to complete the lab—remember, once you start, you cannot pause a lab.
Note: Use only the student account for this lab. If you use a different Google Cloud account, you may incur charges to that account.
How to start your lab and sign in to the Google Cloud console
-
Click the Start Lab button. If you need to pay for the lab, a dialog opens for you to select your payment method.
On the left is the Lab Details pane with the following:
- The Open Google Cloud console button
- Time remaining
- The temporary credentials that you must use for this lab
- Other information, if needed, to step through this lab
-
Click Open Google Cloud console (or right-click and select Open Link in Incognito Window if you are running the Chrome browser).
The lab spins up resources, and then opens another tab that shows the Sign in page.
Tip: Arrange the tabs in separate windows, side-by-side.
Note: If you see the Choose an account dialog, click Use Another Account.
-
If necessary, copy the Username below and paste it into the Sign in dialog.
{{{user_0.username | "Username"}}}
You can also find the Username in the Lab Details pane.
-
Click Next.
-
Copy the Password below and paste it into the Welcome dialog.
{{{user_0.password | "Password"}}}
You can also find the Password in the Lab Details pane.
-
Click Next.
Important: You must use the credentials the lab provides you. Do not use your Google Cloud account credentials.
Note: Using your own Google Cloud account for this lab may incur extra charges.
-
Click through the subsequent pages:
- Accept the terms and conditions.
- Do not add recovery options or two-factor authentication (because this is a temporary account).
- Do not sign up for free trials.
After a few moments, the Google Cloud console opens in this tab.
Note: To access Google Cloud products and services, click the Navigation menu or type the service or product name in the Search field.

Activate Cloud Shell
Cloud Shell is a virtual machine that is loaded with development tools. It offers a persistent 5GB home directory and runs on the Google Cloud. Cloud Shell provides command-line access to your Google Cloud resources.
-
Click Activate Cloud Shell  at the top of the Google Cloud console.
-
Click through the following windows:
- Continue through the Cloud Shell information window.
- Authorize Cloud Shell to use your credentials to make Google Cloud API calls.
When you are connected, you are already authenticated, and the project is set to your Project_ID, . The output contains a line that declares the Project_ID for this session:
Your Cloud Platform project in this session is set to {{{project_0.project_id | "PROJECT_ID"}}}
gcloud is the command-line tool for Google Cloud. It comes pre-installed on Cloud Shell and supports tab-completion.
- (Optional) You can list the active account name with this command:
gcloud auth list
- Click Authorize.
Output:
ACTIVE: *
ACCOUNT: {{{user_0.username | "ACCOUNT"}}}
To set the active account, run:
$ gcloud config set account `ACCOUNT`
- (Optional) You can list the project ID with this command:
gcloud config list project
Output:
[core]
project = {{{project_0.project_id | "PROJECT_ID"}}}
Note: For full documentation of gcloud, in Google Cloud, refer to the gcloud CLI overview guide.
Task 1. Investigate, generate and test the code
Set environment variables
- In Cloud Shell, run the following command to set the necessary environment variables.
export PROJECT_ID=$(gcloud config get-value project)
export REGION={{{project_0.default_region|Lab Region}}}
export ZONE={{{project_0.startup_script.lab_zone|Lab Zone}}}
- Copy necessary files to Cloud Shell from Cloud Storage bucket.
gsutil -m cp -r gs://duet-appdev/cymbal-superstore .
Investigate the code
Along with Gemini’s ability to explain code segments you are not familiar with, it can also create comments for you to add to your code to increase understanding during future maintenance cycles.
- Open the editor by clicking the Open Editor option visible at the top right of the Cloud Shell window.

This will open the Visual Studio Code editor. You can view the editor in a new window using the option present on the menu bar of the Cloud Shell.
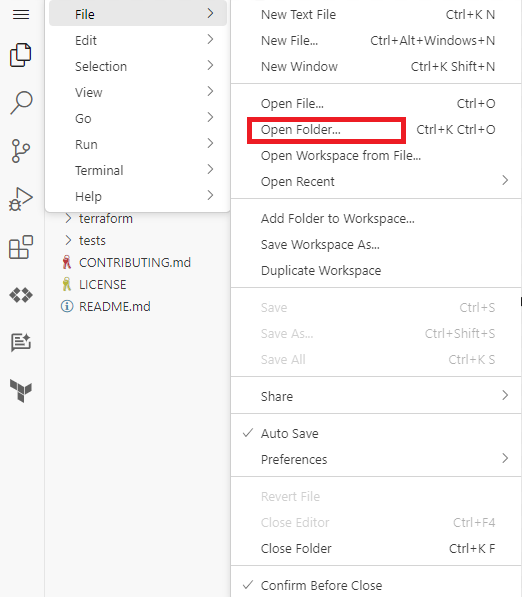
- Navigate to File > Open Folder....
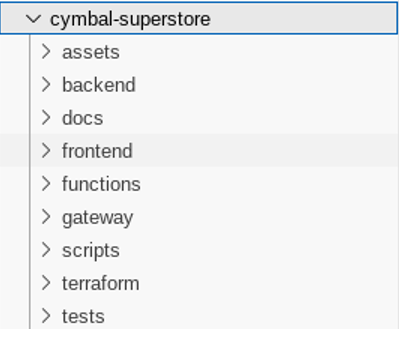
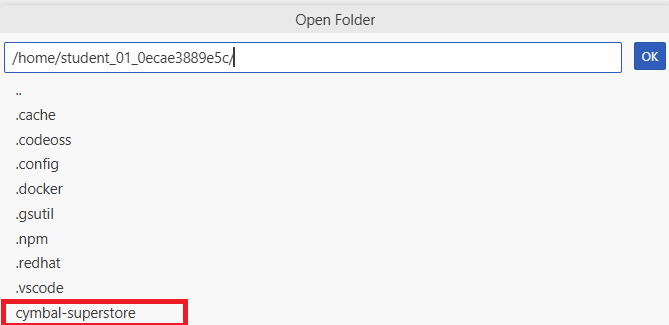
- Select the cymbal-superstore directory, and click OK.

The selected folder should now be visible in the Explorer section of the Visual Studio Code editor.

-
Open index.ts file under the backend folder.
-
At the top right of the file, click the arrow next to Gemini 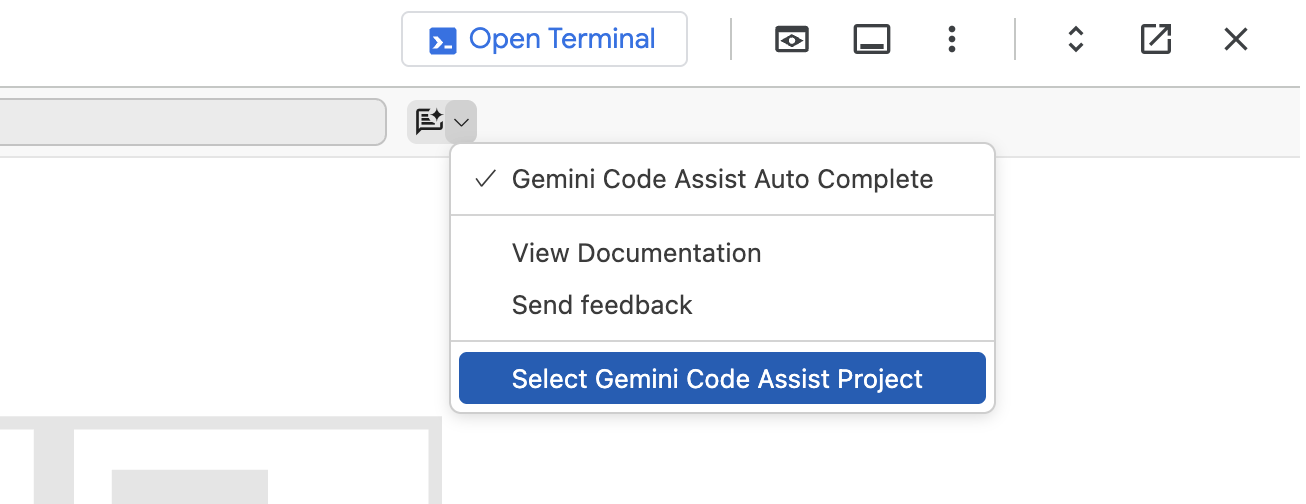 .
.
-
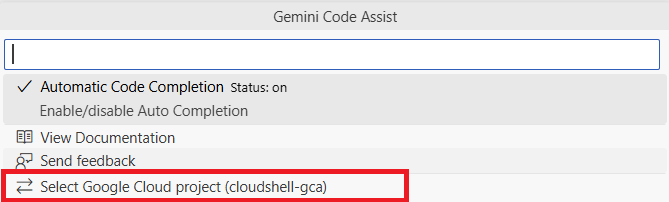
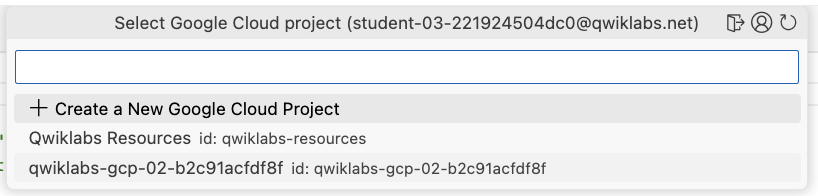
Click on Select Gemini Code Assist Project, to select the project to use for Gemini. From the list, select Project ID.
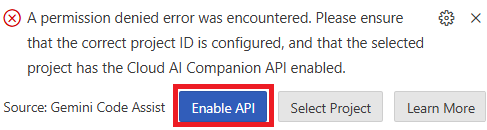
- If any prompt appears at the bottom of the editor that Gemini Code Assist is not enabled for the selected project, then click Enable API button in the prompt to enable the API.
Generate the code
- In the index.ts file, scroll to the line
102 where you see the following text: /newproducts endpoint code goes here.
Replace this line with the comment shown below.
{{{project_0.startup_script.prompt_1 | "Comment 1"}}}
{{{project_0.startup_script.prompt_2 | "Comment 2"}}}
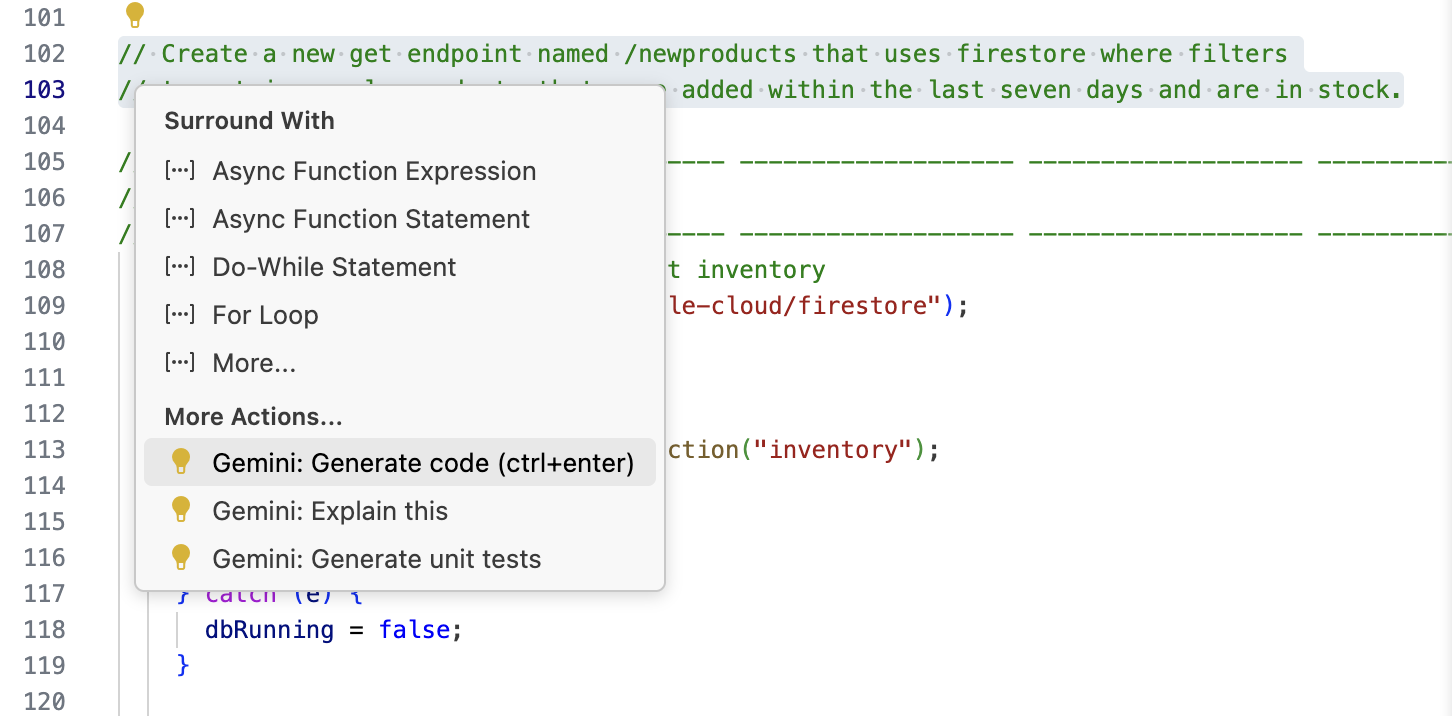
- Select the newly added comment, and click on the yellow light bulb icon that appears. From the list, click on the following option:
Gemini: Generate code.
- Gemini displays some suggested code. Look at the suggested code and accept it by clicking Accept or pressing Tab key. The code should be something like this
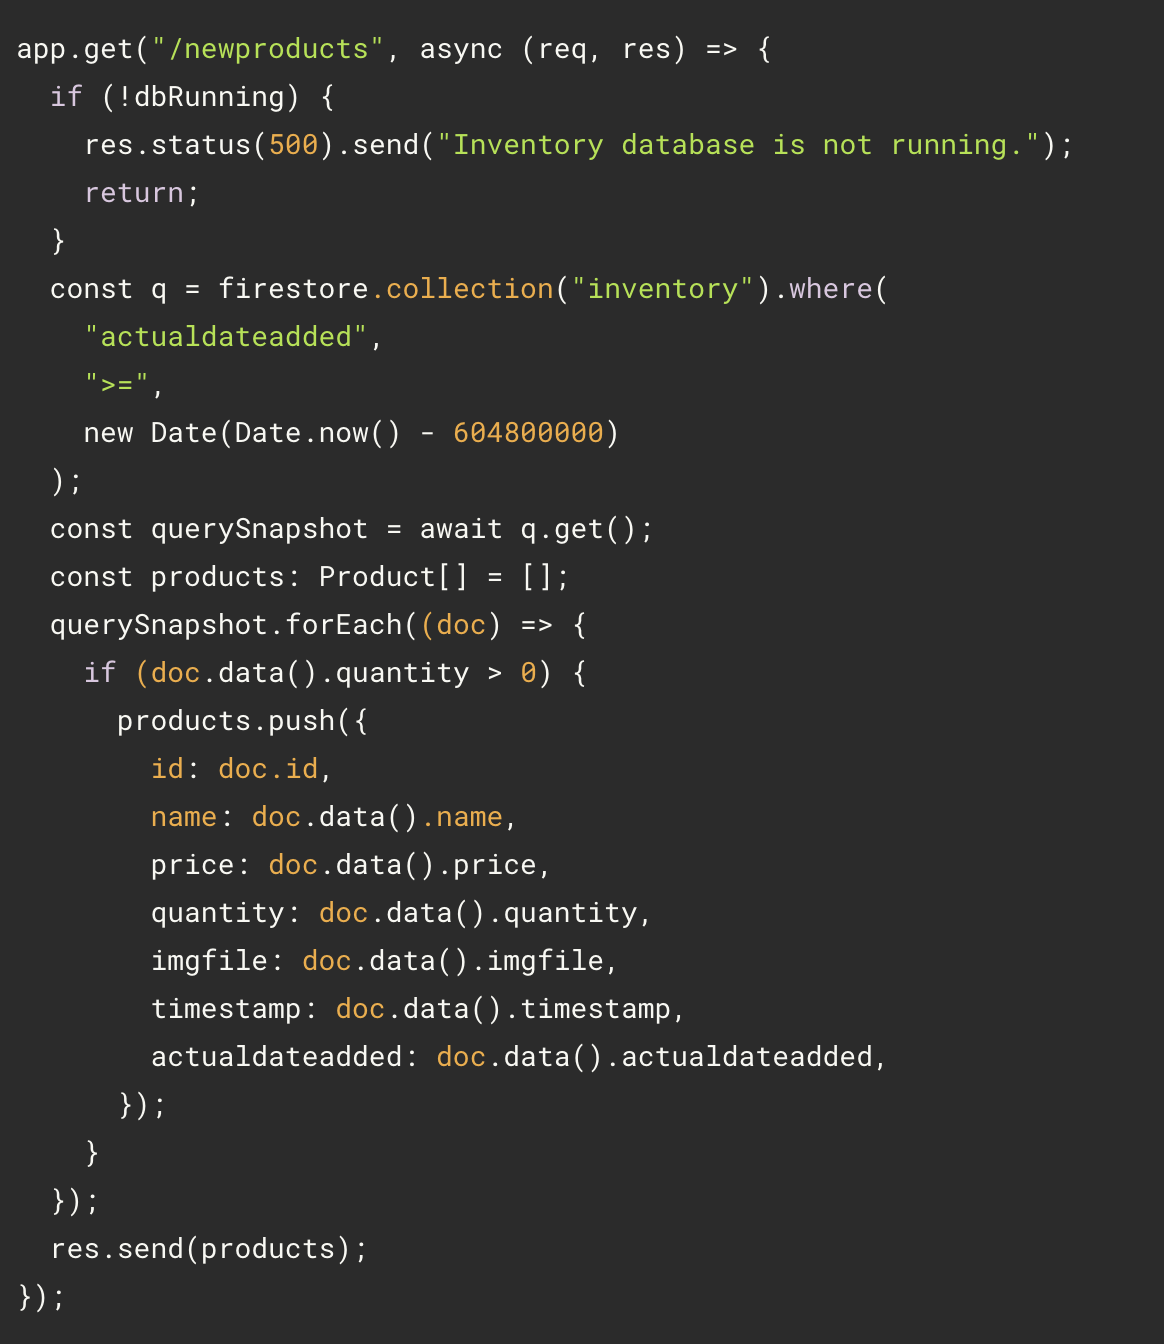
Note:
- Gemini knew the meaning of ‘are in stock’. That is a fairly understood phrase with a common meaning, so Gemini used that here. If your requirement was less common, an example might be needed.
- The use of a data property named quantity allowed Gemini to associate that with the concept of ‘in stock’. If you name your variable, properties, and methods with shorthand, abbreviations, or other non-standard wording, not only will your code be less maintainable by others, but Gemini will be less specific with its suggestions.
- Even though not stated, Gemini suggested code with the database running check to be consistent with other endpoints in the file.
Test the code
- Switch back to the Cloud Shell terminal using the Open Terminal button present on the tool bar of the Cloud Shell window. In the Cloud Shell terminal, run the following command.
cd ~/cymbal-superstore/backend
npm run start
Your output will look similar to this:
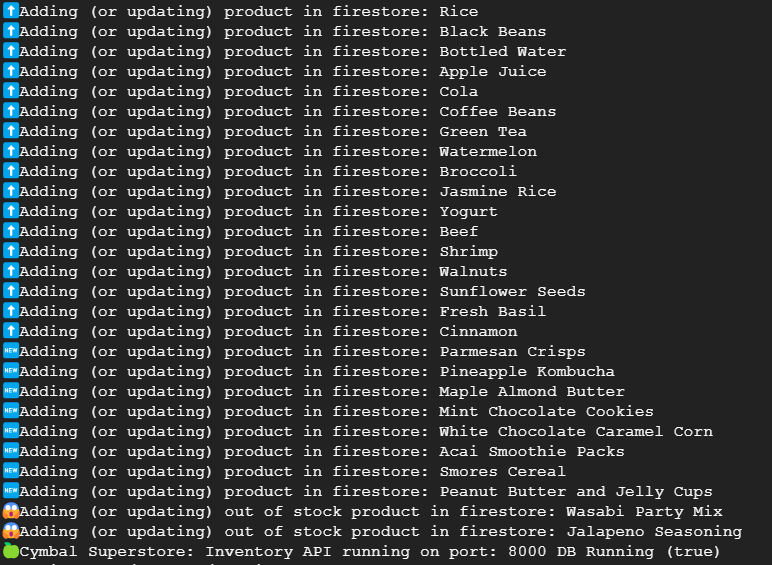
- Open another terminal in Cloud Shell by clicking on the + option on the tool bar of the Cloud Shell window, and call the endpoint on localhost.
curl localhost:8000/newproducts
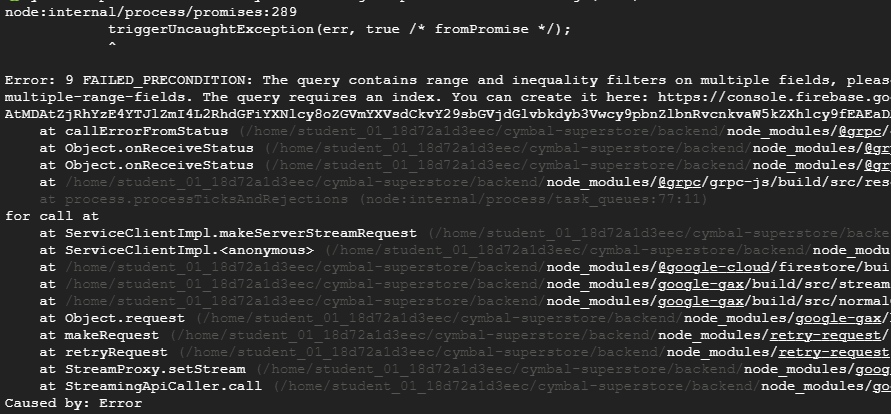
and see the output in the 1st terminal, that is cancelled and there was an error.
Your output will look similar to this:
Click Check my progress to verify the objective.
Generate and test the code.
Task 2. Investigate with the Gemini Chat
-
Open the index.ts file in the editor.
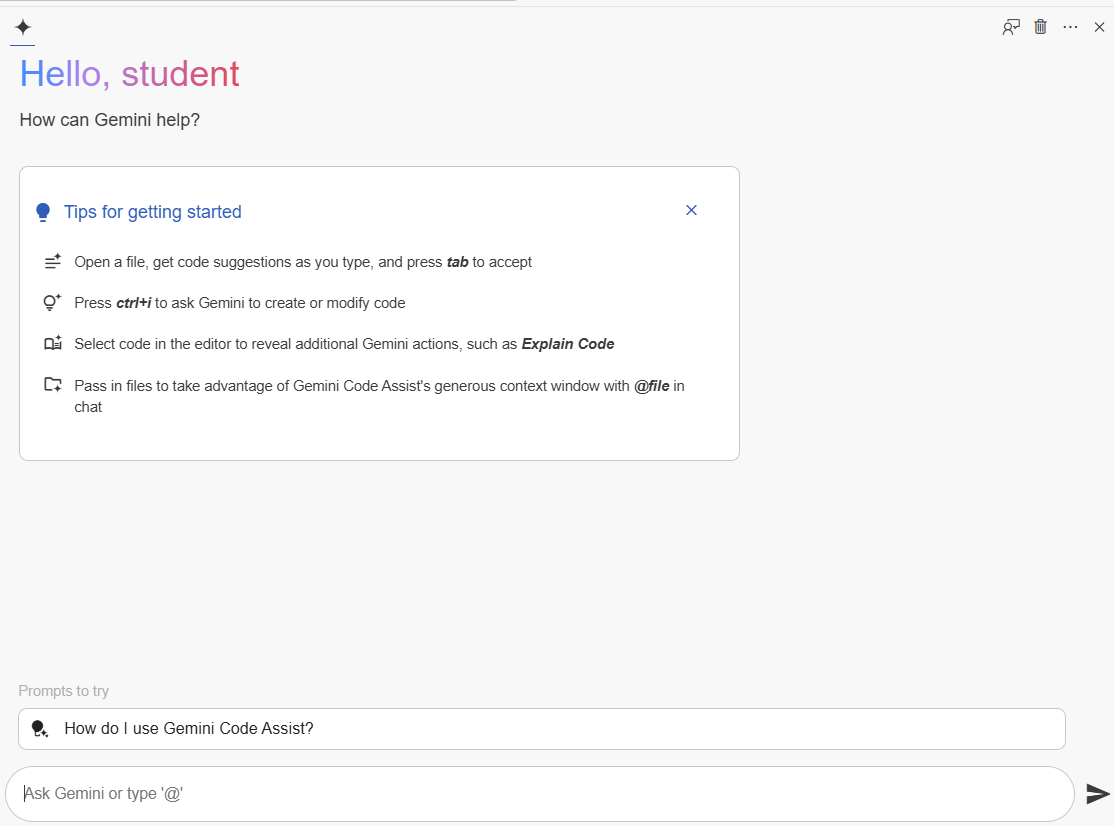
-
Open Gemini Chat as shown in the screenshot and enter the given error message in the prompt.
{{{project_0.startup_script.prompt_2_1 | "Error message to be entered in the prompt"}}}
Your output will look similar to this:
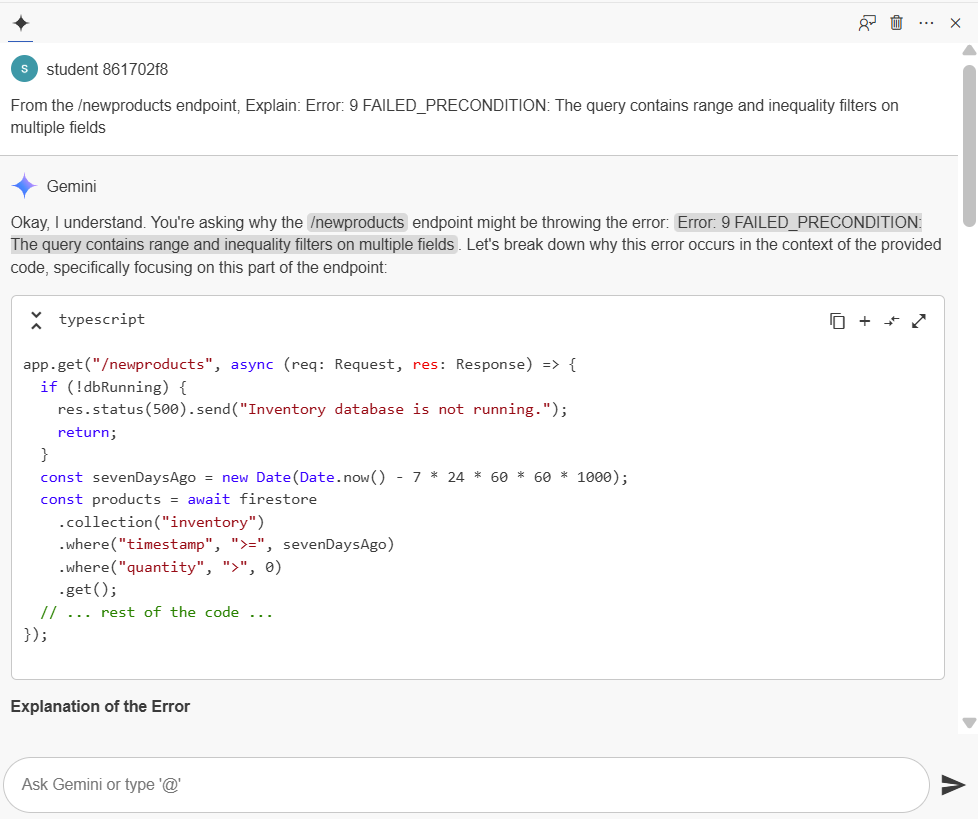
Note: Every time Gemini runs, it produces a different result, therefore the results you see could not match your response.
- Examine the code to resolve the existing issue. The below command is what you determine to be the error's origin:
const query = firestore
const products = await firestore
.collection("inventory")
.where("timestamp", ">", new Date(Date.now() - 604800000))
.where("quantity", ">", 0);
.where("timestamp", ">=", sevenDaysAgo)
.where("quantity", ">", 0)
.get();
Gemini's response gives you the option to either modify the filters to become equality filters or to delete one of the inequality filters.
First, let's remove the quantity filter from the Firestore call to resolve the error.
- To remove the quantity inequality filter, remove the following code fragment from the index.ts file.
.where("quantity", ">", 0);
This code can be removed to make the function operate error-free. Products with a quantity of 0 won't be able to be filter out of the API response, which means they won't meet the business requirement and will fail. We must take care to avoid inserting out-of-stock items. There are several appropriate approaches to this. Some might work better than others. Therefore, we would request help from Gemini.
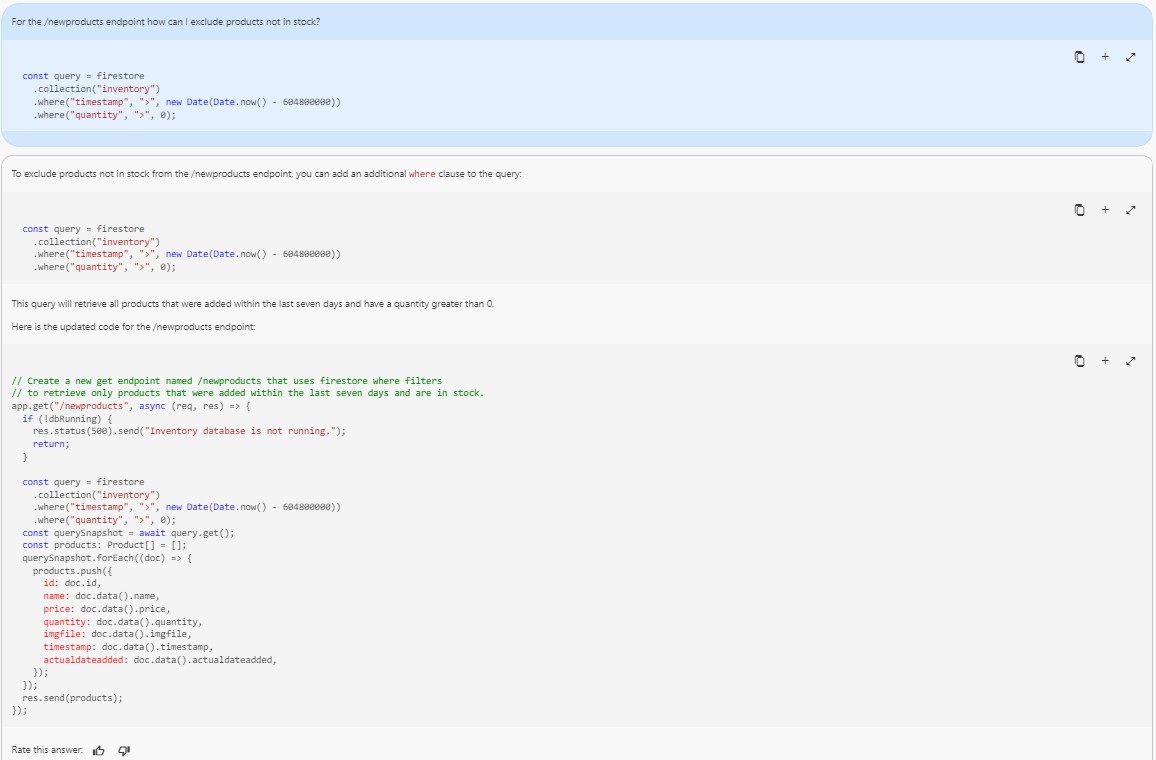
- Ask the question below in the Gemini Chat, and make sure the index.ts file is open.
{{{project_0.startup_script.prompt_2_2 | "Question to the Gemini Chat"}}}
Your output will look similar to this:
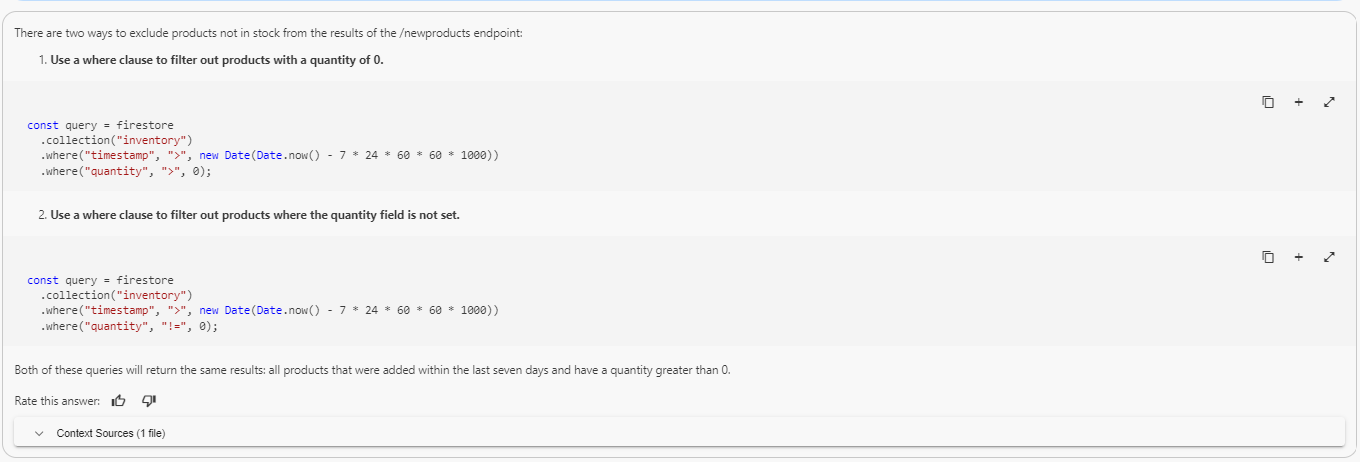
Even after resetting the chat, if Gemini repeatedly suggests you to add two where clauses, here is a technique to get a different answer.
{{{project_0.startup_script.prompt_2_3 | "Different question approach to the Gemini Chat"}}}
Often Gemini will offer an alternative that you can try. You might have to reset the chat and modify your prompt a few times to get a non-firestore option.
Note: Gemini sometimes gets stubborn and offers only random (and illegal) firestore options. In this case, the learner will just have to move on with the suggestion offered.
Your output will look similar to this:
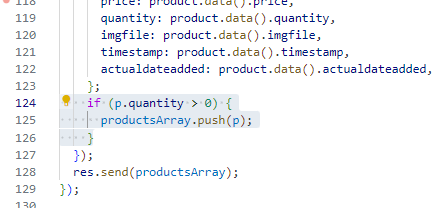
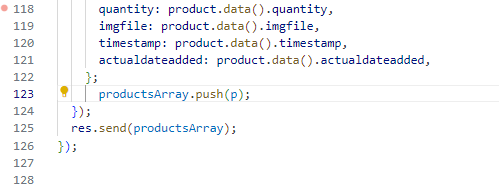
- Modify the existing code by adding the code snippet in the index.ts file.
if (p.quantity > 0) {
productsArray.push(p);
}
After modifying, the code should look like this.
Testing the code, with the above changes.
- Open the Cloud Shell terminal and paste the command below.
cd ~/cymbal-superstore/backend
npm run start
- Open a second terminal tab and call the endpoint
localhost.
curl localhost:8000/newproducts
Your output will look similar to this:

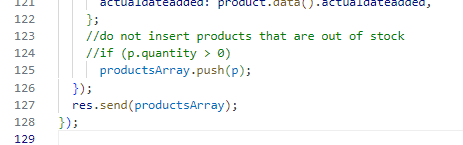
- Let's try another way with an inline comment and remove the condition added above. The final code would be similar to this.
- Before the productsArray.push(p) line, add the given comment below. Press Ctrl+Enter, to generate a code. Accept the code, if it returns
if (p.quantity > 0).
{{{project_0.startup_script.prompt_2_4 | "Comment message"}}}
Comment out the filter and it should look like this:
Click Check my progress to verify the objective.
Investigate with Gemini Chat.
Note: Overall, since there are numerous ways to code this fix, Gemini may offer many suggestions. When this happens you must evaluate the options. This may also result in some syntax patching as shown above.
Task 3. Running the Tests
- Go to the Cloud Shell terminal and execute the command below.
cd cymbal-superstore/backend
npm run test
Your output will look similar to this:

- Open the file index.test.ts under the backend folder. This file contains a few simple tests that are developed with a tool called
supertest, using the Jest testing framework. Review the existing tests and ask Gemini to explain anything that is unclear.
Task 4. Develop tests with the help of Gemini
In this task, you will write a test for the new products API in the backend with help from Gemini.
Develop the test
- Open the file index.test.ts under the backend folder. At the bottom of file add the below comments.
{{{project_0.startup_script.prompt_3_1 | "Comment message 1 in index.test.ts"}}}
{{{project_0.startup_script.prompt_3_2 | "Comment message 2 in index.test.ts"}}}
- Select the newly added comment, and click on the yellow light bulb icon that appears. From the list, click on the following option:
Gemini: Generate code. Hit tab to accept the suggestion.
This is an example of the generated code. You can also paste the code given below.
describe('GET /newproducts', () => {
it('should return a 200 status code', async () => {
const response = await request(app)
.get('/newproducts');
{{{project_0.startup_script.prompt_3_3 | "Generated code line from Gemini"}}};
});
it('should return a list of new products with length 8', async () => {
const response = await request(app)
.get('/newproducts');
expect(response.body.length).toBe(8);
});
});
Run the test
- Execute the below commands in Cloud Shell terminal.
cd ~/cymbal-superstore/backend
npm run test
Your output will look similar to this:
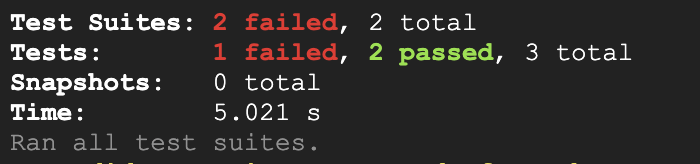
- Investigate which test failed by scrolling the results in the terminal output.
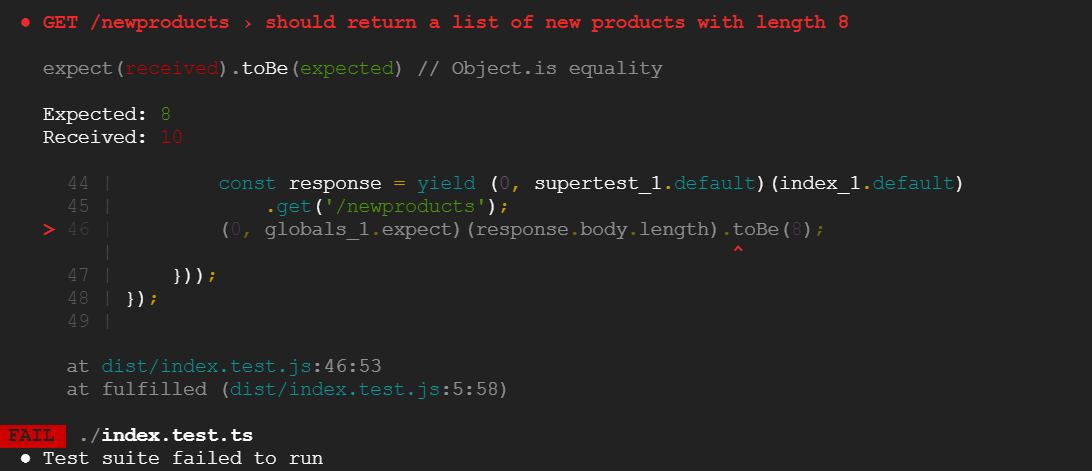
Note: You should see this response indicating the test failed. The value 10 was the newproducts count including products with quantity 0. The new business requirements stated that items not in stock should be filtered, but the test reveals that something is wrong.
Click Check my progress to verify the objective.
Write tests for new products API.
Fix the bug
- Open the index.ts under the backend folder and remove the comment for the filter that was added in the last task. The updated code should like this.
//do not insert products that are out of stock
if (p.quantity > 0)
productsArray.push(p);
- Re-run the test from the Cloud Shell terminal.
cd ~/cymbal-superstore/backend
npm run test
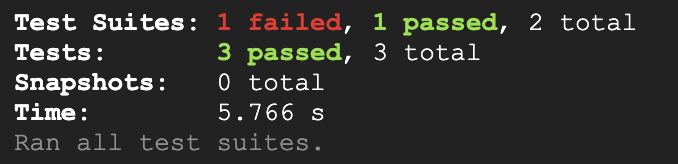
Your output will look similar to this:
Task 5. Boundary condition test
Boundary condition tests can be difficult. This difficulty stems from the need to consider unexpected situations, like empty lists or negative balances, that shouldn't occur but might arise during execution. In this context, let's see if Gemini can be of assistance.
- To provide the most generic response, close all open files. Reset the Gemini Chat by clicking on the New Chat icon (+) above the chat, and enter the following prompt:
{{{project_0.startup_script.prompt_4_1 | "Prompt for boundary conditions"}}}
Your output will look similar to this:
Yes, I can definitely help you create tests for boundary conditions!
Boundary value analysis is a crucial part of software testing.
It involves testing at the "edges" or "boundaries" of input domains.
These are often the places where errors lurk.
To help you best, I'd need a little more information. For example:
- What programming language are you using?
- Could you provide the code (or a snippet of it) that you'd like to test?
- What are the inputs and their expected valid ranges?
- Open the index.ts file under the
backend folder to provide some background for Gemini. Ask Gemini about boundary tests for the /newproducts endpoint. Open the Gemini’s Chat and enter:
{{{project_0.startup_script.prompt_4_2 | "Prompt for boundary tests for the /newproducts endpoint"}}}
Your output will look similar to this:
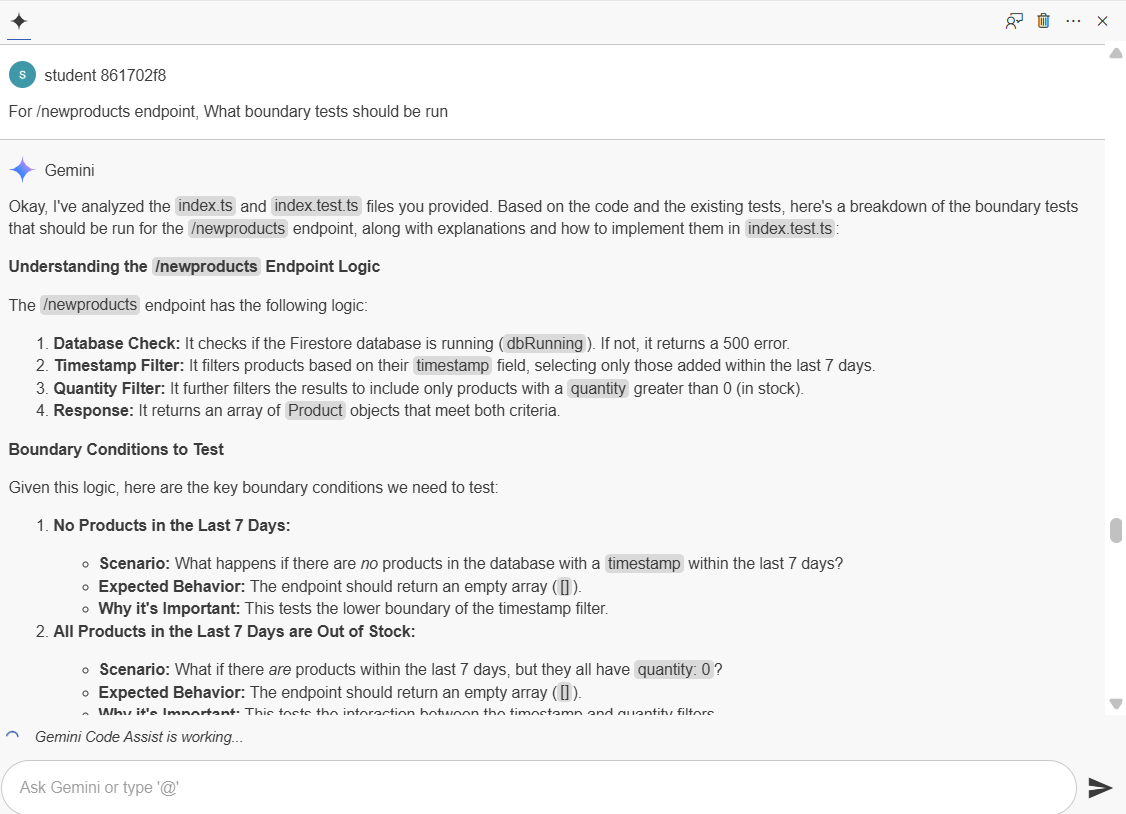
Note: Clearly some of these were generated based on the code itself (added in the last 7 days and are in stock) and more general boundary conditions that Gemini has found are typical for this type of code. This is very useful to get a start on creating a solid set of boundary conditions.
- For turning into actual tests, open the index.test.ts file. Copy the below comment and add it at the end of the file.
{{{project_0.startup_script.prompt_4_3 | "Comment message in index.test.ts file"}}}
Your output will look similar to this:
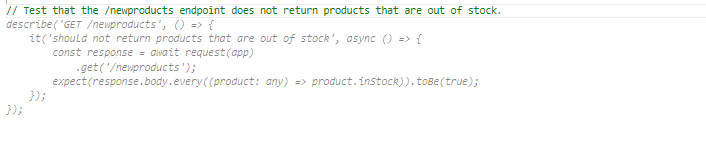
- Add the code below after the above comment in index.test.ts file.
describe('GET /newproducts', () => {
it('should not return products that are out of stock', async () => {
const response = await request(app)
.get('/newproducts');
response.body.forEach((product: any) => {
expect(product.quantity).toBeGreaterThan(0);
});
});
});
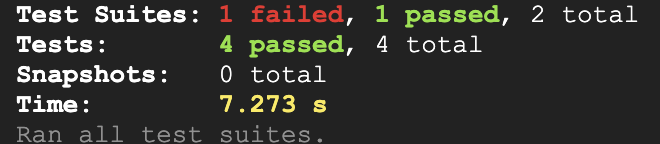
- Re-run the test in the Cloud Shell terminal. You should see the output as below.
Your output will look similar to this:
Click Check my progress to verify the objective.
Boundary condition test.
Congratulations!
At the end of this lab, you have gained proficiency in utilizing Gemini for Developers to enhance code debugging capabilities and streamline the generation of unit tests, particularly when assessing boundary conditions within the code.
Manual Last Updated June 24, 2025
Lab Last Tested June 24, 2025
Copyright 2025 Google LLC. All rights reserved. Google and the Google logo are trademarks of Google LLC. All other company and product names may be trademarks of the respective companies with which they are associated.


