


Before you begin
- Labs create a Google Cloud project and resources for a fixed time
- Labs have a time limit and no pause feature. If you end the lab, you'll have to restart from the beginning.
- On the top left of your screen, click Start lab to begin
Load the data
/ 25
Add Cloud Data Fusion API Service Agent role to service account
/ 25
Deploy and execute batch pipeline
/ 25
View the results
/ 25
ETL stands for Extract Transform and Load. There are various other mutations of this concept including EL, ELT, and ELTL.
This lab will teach you how to use the Pipeline Studio in Cloud Data Fusion to build an ETL pipeline. Pipeline Studio exposes the building blocks and built-in plugins for you to build your batch pipeline, one node at a time. You will also use the Wrangler plugin to build and apply transformations to your data that goes through the pipeline.
The most common source of data for ETL applications is typically data stored in comma separated value (CSV) format text files, as many database systems export and import data in this fashion. For the purposes of this lab you’ll be using a CSV file, but the same techniques can be applied to DB sources as well as any other data source that you have available.
The output will be written to a BigQuery table and you’ll use standard SQL to perform data analytics against this target data set.
In this lab, you will learn how to:
For each lab, you get a new Google Cloud project and set of resources for a fixed time at no cost.
Sign in to Google Cloud Skills Boost using an incognito window.
Note the lab's access time (for example, 02:00:00), and make sure you can finish within that time.
There is no pause feature. You can restart if needed, but you have to start at the beginning.
When ready, click Start lab.
Note your lab credentials (Username and Password). You will use them to sign in to the Google Cloud console.
Click Open Google console.
Click Use another account and copy/paste credentials for this lab into the prompts.
If you use other credentials, you'll receive errors or incur charges.
Accept the terms and skip the recovery resource page.
Since this is a temporary account, which will last only as long as this lab:
 ) at the top-left.
Cloud Shell is a virtual machine that contains development tools. It offers a persistent 5-GB home directory and runs on Google Cloud. Cloud Shell provides command-line access to your Google Cloud resources. gcloud is the command-line tool for Google Cloud. It comes pre-installed on Cloud Shell and supports tab completion.
Click the Activate Cloud Shell button (
Click Continue.
It takes a few moments to provision and connect to the environment. When you are connected, you are also authenticated, and the project is set to your PROJECT_ID.
(Output)
(Example output)
(Output)
(Example output)
Before you begin working on Google Cloud, you must ensure that your project has the correct permissions within Identity and Access Management (IAM).
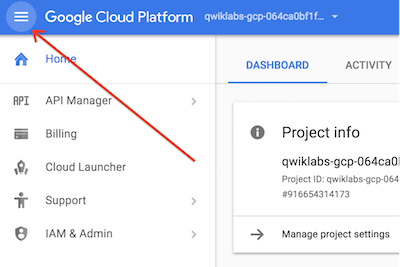
In the Google Cloud console, on the Navigation menu (
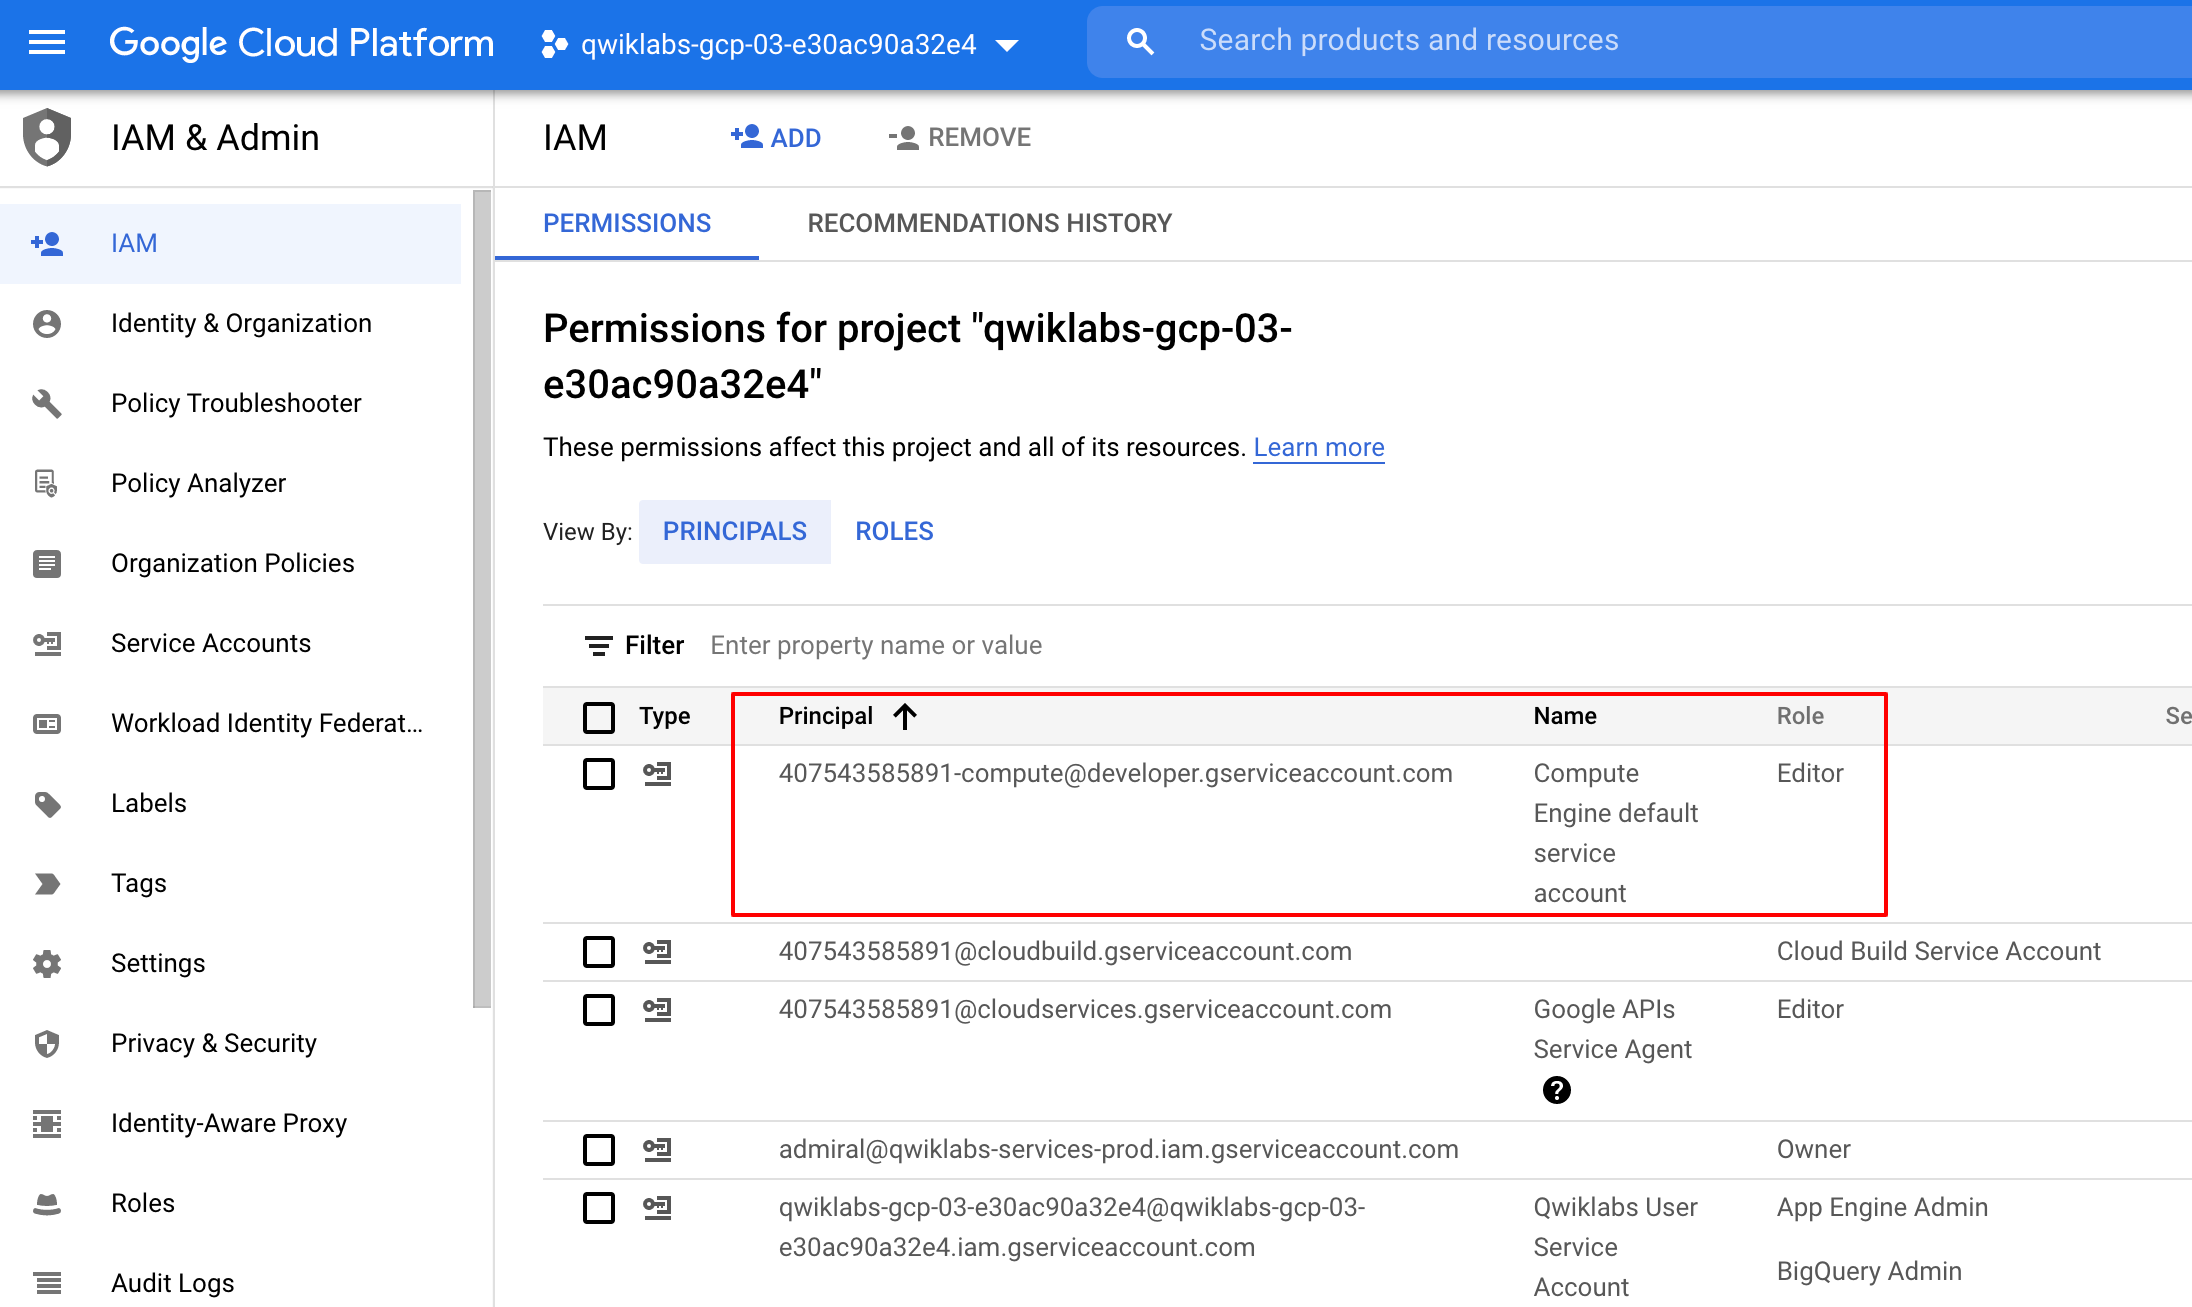
Confirm that the default compute Service Account {project-number}-compute@developer.gserviceaccount.com is present and has the editor role assigned. The account prefix is the project number, which you can find on Navigation menu > Cloud overview.
If the account is not present in IAM or does not have the editor role, follow the steps below to assign the required role.
In the Google Cloud console, on the Navigation menu, click Cloud overview.
From the Project info card, copy the Project number.
On the Navigation menu, click IAM & Admin > IAM.
At the top of the IAM page, click Add.
For New principals, type:
Replace {project-number} with your project number.
For Select a role, select Basic (or Project) > Editor.
Click Save.
Next, you will create a GCS bucket in your project and stage the CSF file. Cloud Data Fusion will later read data out of this storage bucket.
The created bucket name is your Project ID.
Click Check my progress to verify the objective.
Next, you will grant permissions to the service account associated with the instance, using the following steps.
From the Google Cloud console, navigate to the IAM & Admin > IAM.
Confirm that the Compute Engine Default Service Account {project-number}-compute@developer.gserviceaccount.com is present, copy the Service Account to your clipboard.
On the IAM Permissions page, click +Grant Access.
In the New principals field paste the service account.
Click into the Select a role field and start typing Cloud Data Fusion API Service Agent, then select it.
Click ADD ANOTHER ROLE.
Add the Dataproc Administrator role.
Click Save.
Click Check my progress to verify the objective.
In the console, on the Navigation menu, click IAM & admin > IAM.
Select the Include Google-provided role grants checkbox.
Scroll down the list to find the Google-managed Cloud Data Fusion service account that looks like service-{project-number}@gcp-sa-datafusion.iam.gserviceaccount.com and then copy the service account name to your clipboard.
Next, navigate to the IAM & admin > Service Accounts.
Click on the default compute engine account that looks like {project-number}-compute@developer.gserviceaccount.com, and select the Principals with access tab on the top navigation.
Click on the Grant Access button.
In the New Principals field, paste the service account you copied earlier.
In the Role dropdown menu, select Service Account User.
Click Save.
When working with data it’s always handy to be able to see what the raw data looks like so that we can use it as a starting point for our transformation. For this purpose you’ll be using Data Fusion’s Wrangler component for preparing and cleaning data. This data-first approach will allow us to quickly visualize our transformations and the real-time feedback ensures us that you’re on the right track.
The Cloud Data Fusion web UI comes with its own navigation panel (on the left) to navigate to the page you need. In the Cloud Data UI, click on the Navigation menu on the top left to expose the navigation panel, then choose Wrangler.
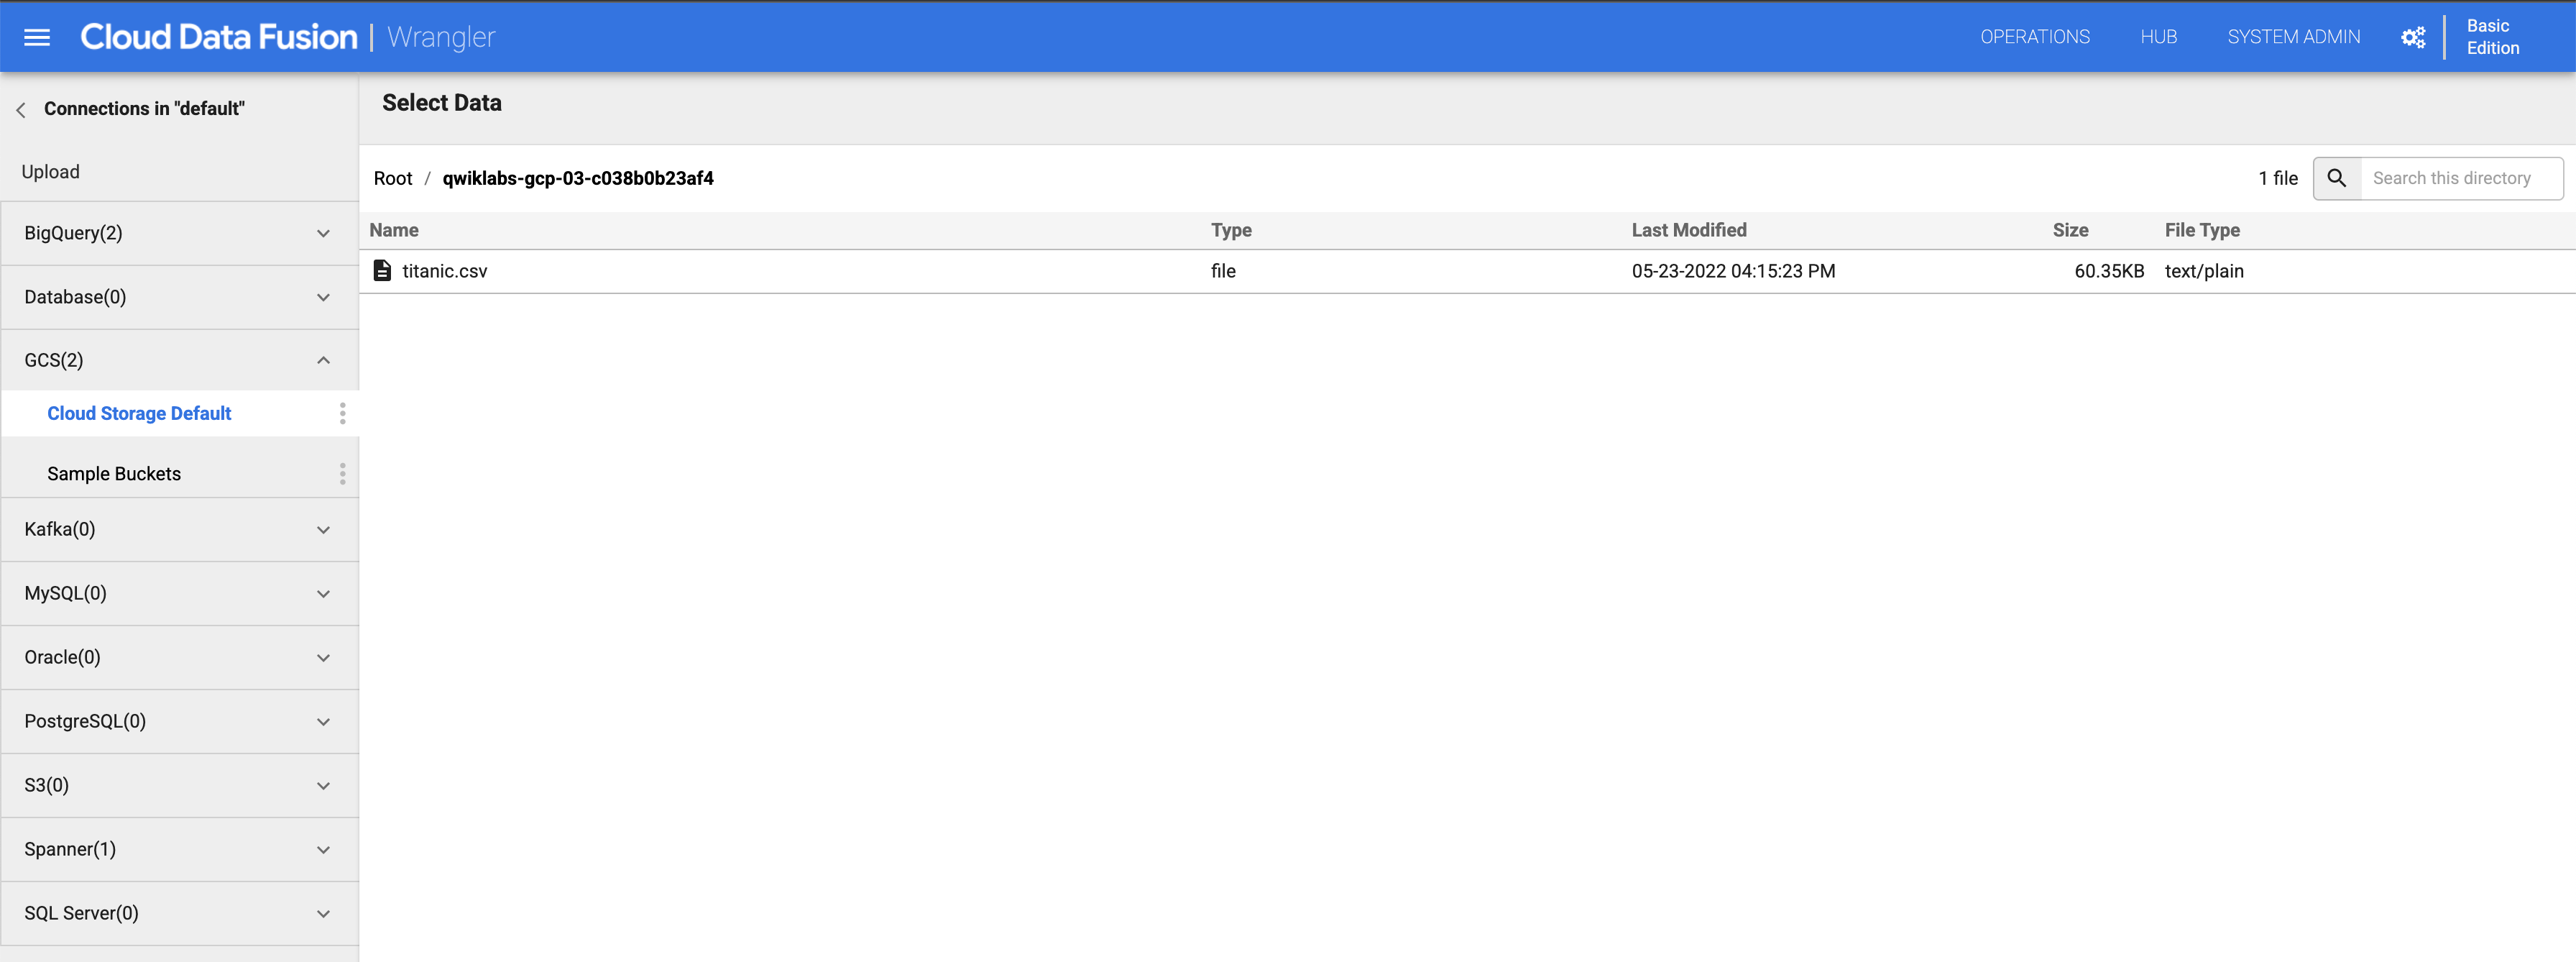
On the left side is a panel with the pre-configured connections to your data, including the Cloud Storage connection.Under (GCS) Google Cloud Storage, select Cloud Storage Default.
Click on the bucket corresponding to your project name.
Click on titanic.csv.
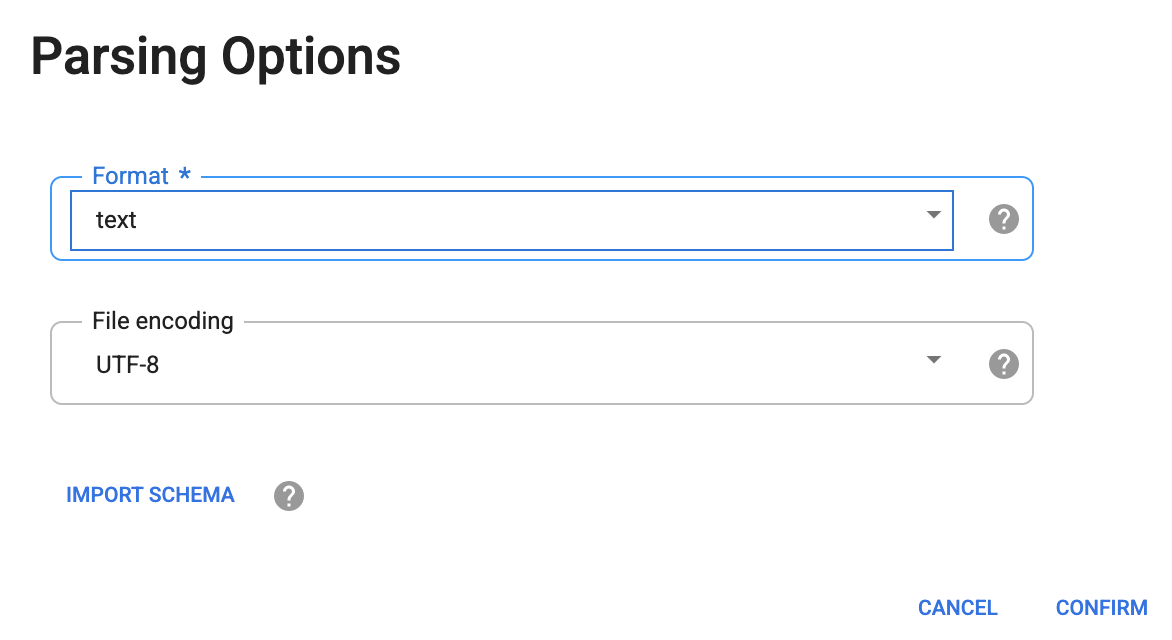
In the Parsing Options dialog box that comes up, select text under the Format drop-down list.
Then click CONFIRM.
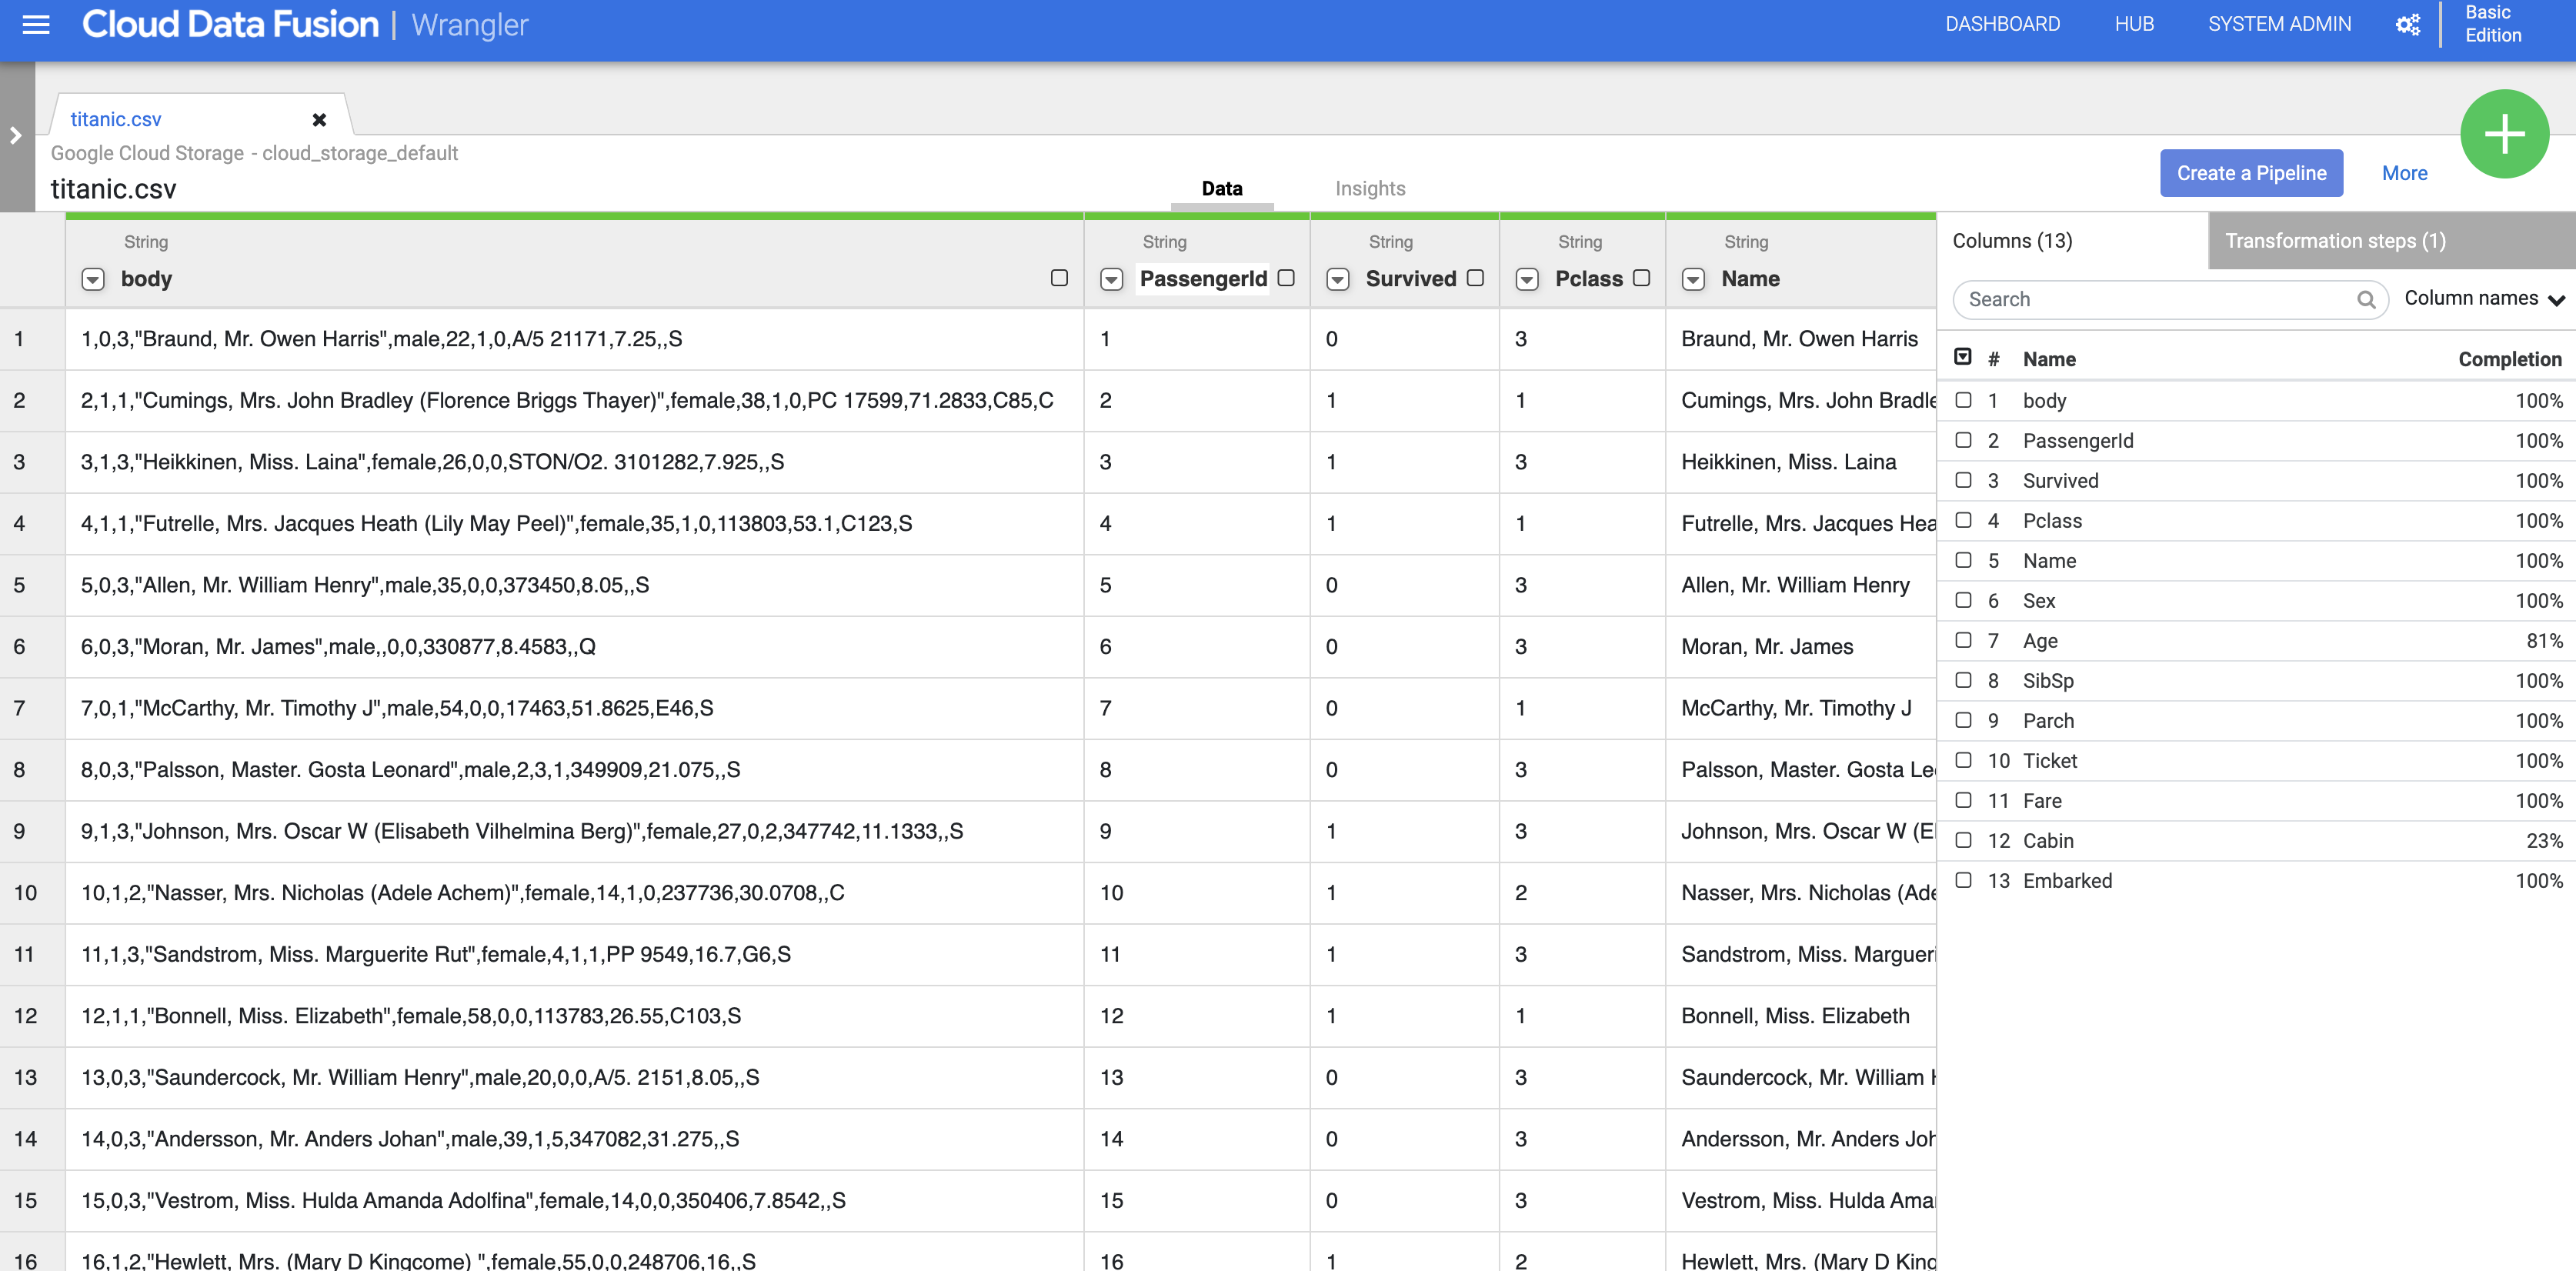
The data is loaded into the Wrangler screen. You can now start applying the data transformations iteratively.
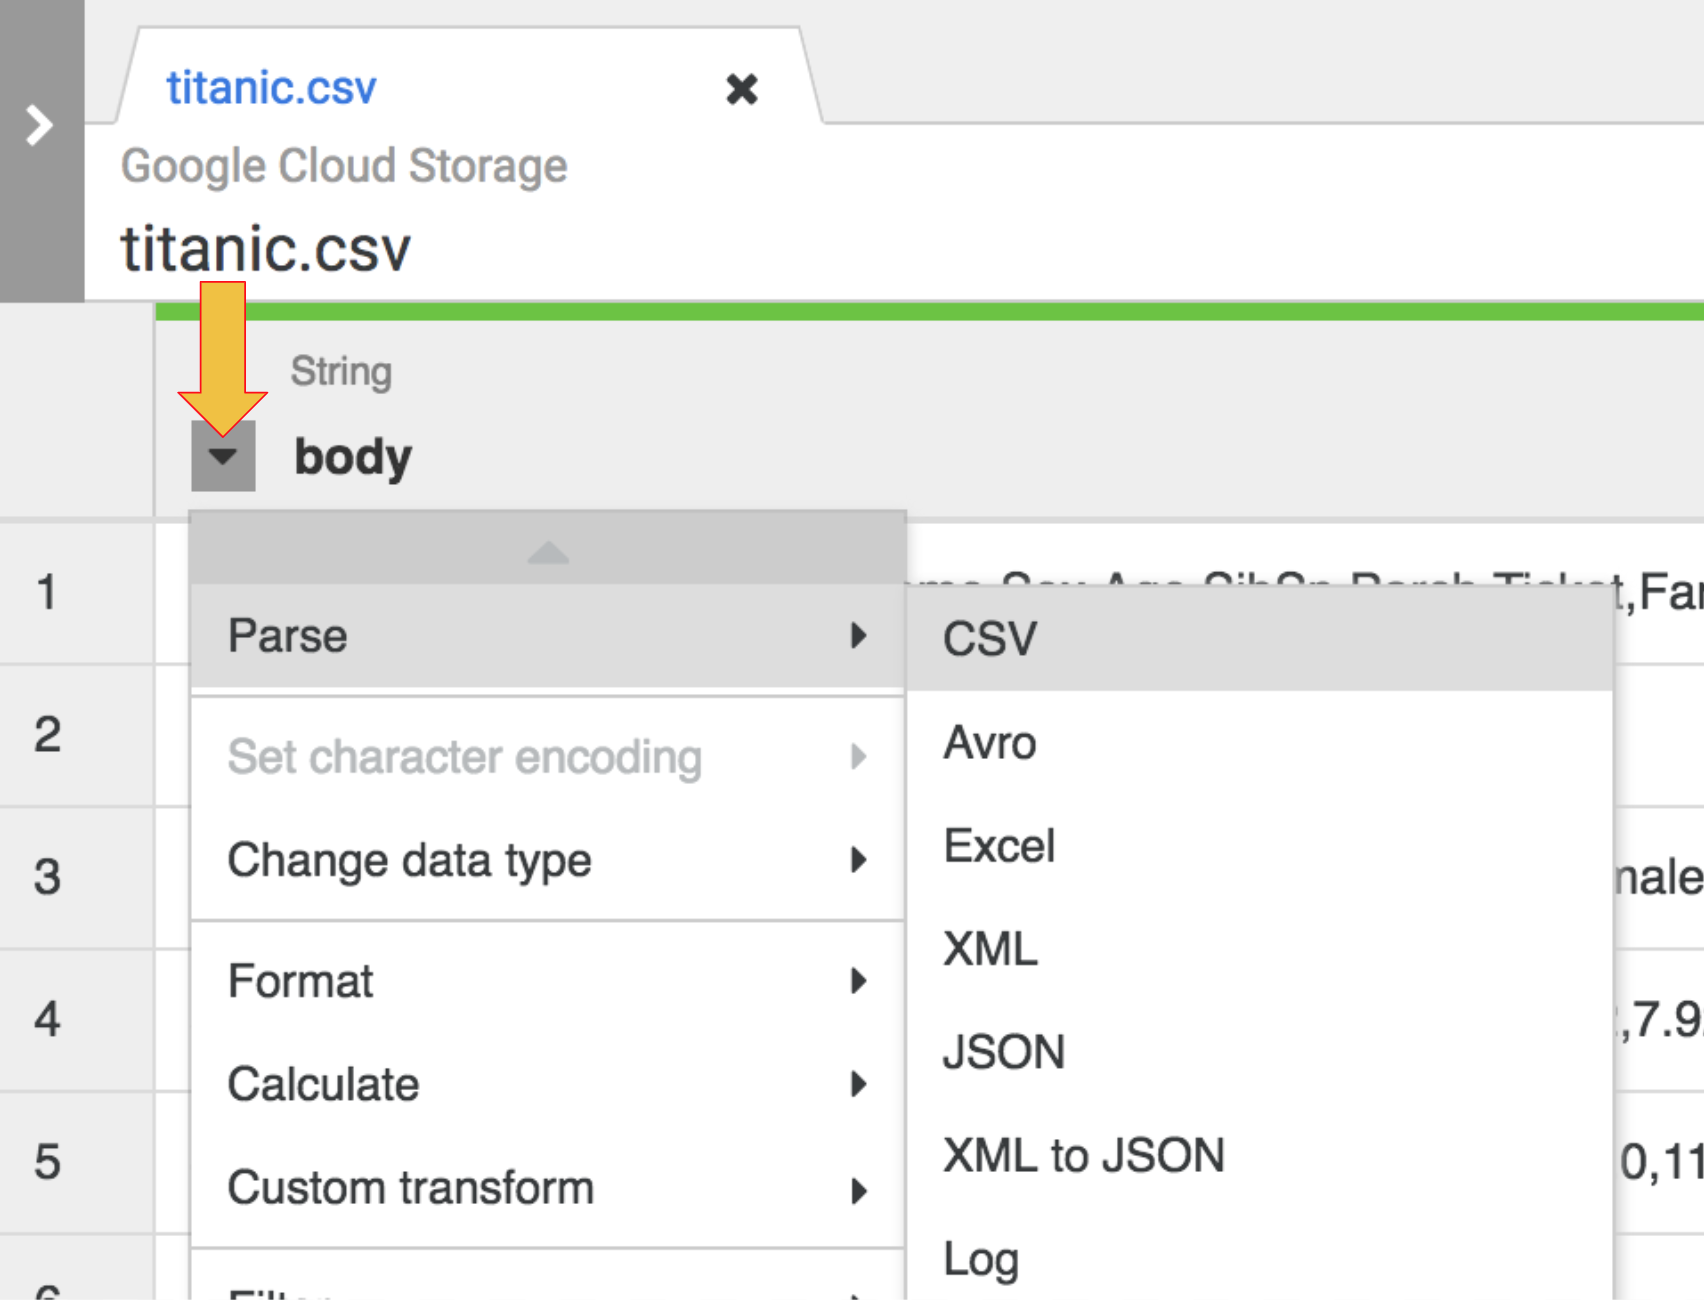
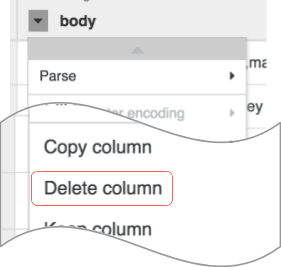
The first operation is to parse the raw CSV data into a tabular representation that is split into rows and columns. To do this, select the dropdown icon from the first column heading (body), and select the Parse menu item, and CSV from the submenu.
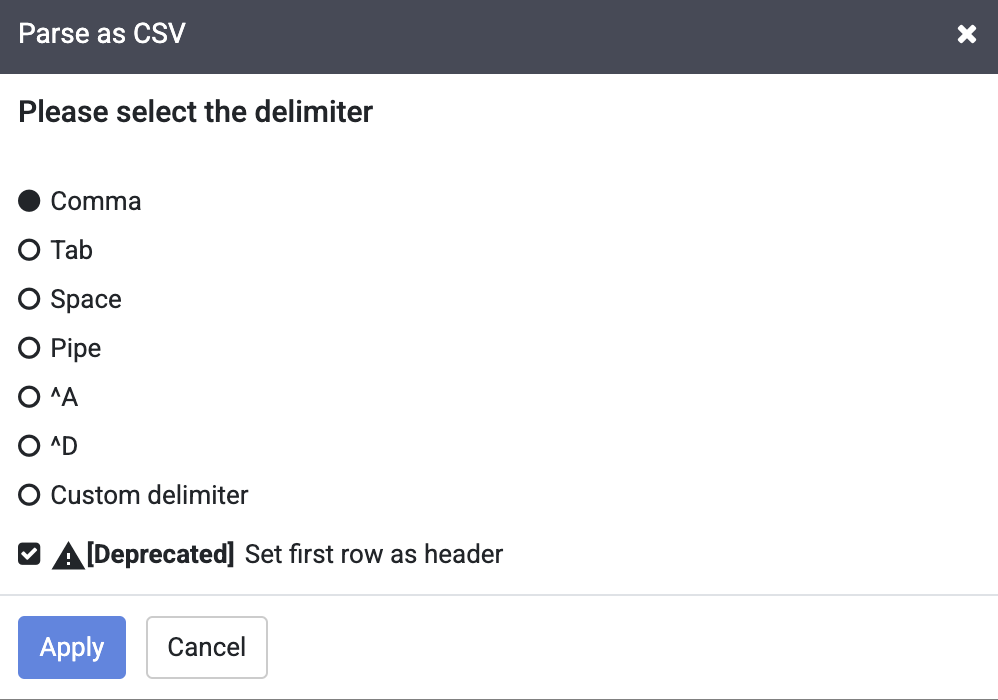
In the raw data, you can see that the first row consists of column headings, so you’ll select the option to Set first row as header in the dialog box for Parse as CSV that is presented to us.
Next, click Apply.
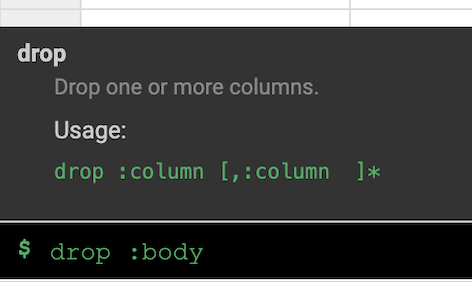
drop :body.
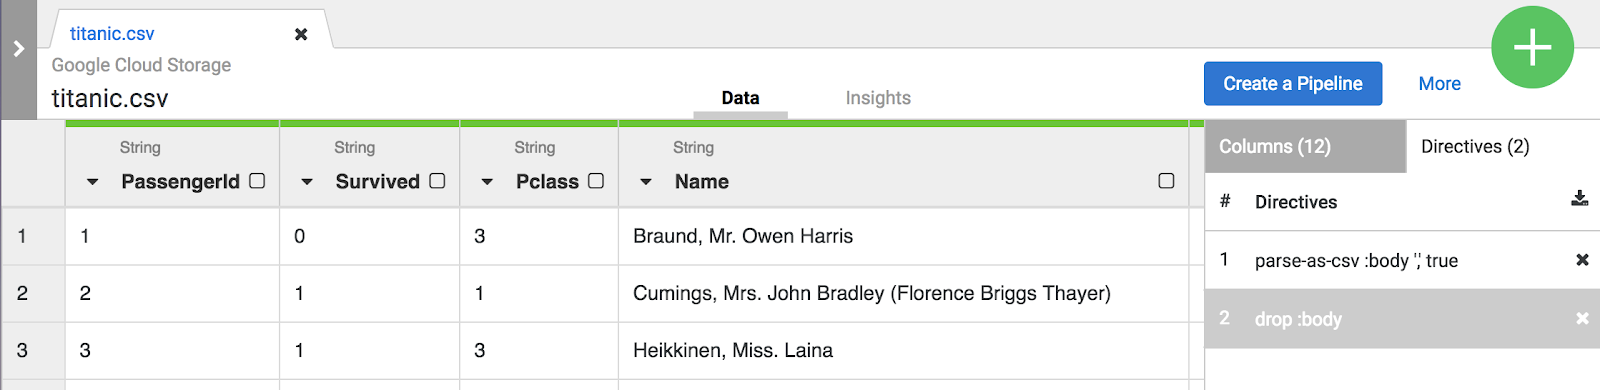
For the purpose of this lab, the two transformations, or recipe, are sufficient to create the ETL pipeline. The next step is to bring this recipe into a pipeline building step where the recipe represents the T in ETL.
Click on the Create a Pipeline button to jump into the next section to create a pipeline, where you’ll see how the ETL pipeline comes together.
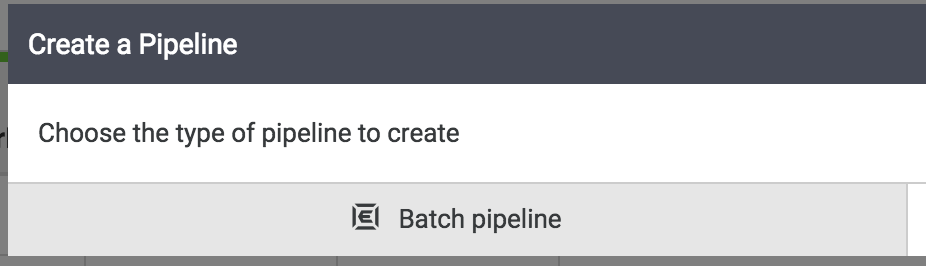
When presented with the next dialog, select Batch pipeline to continue.
The rest of the pipeline building tasks will take in the pipeline studio, the UI that lets you compose data pipelines visually. You should now see the primary building blocks of your ETL pipeline in the studio.
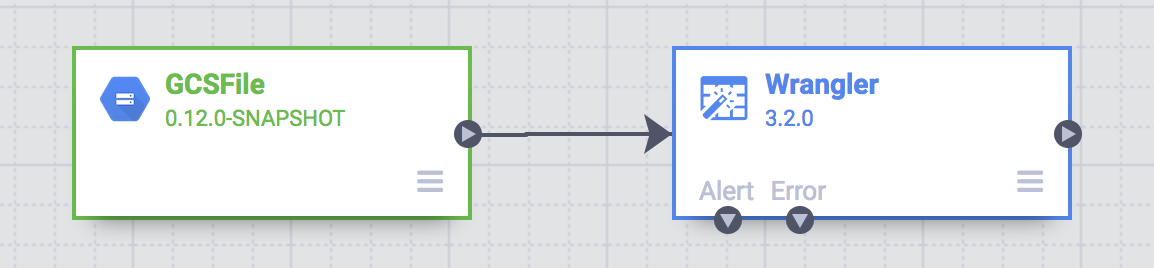
At this point, you will see two nodes in your pipeline: the GCS File plugin that will read the CSV file from Google Cloud Storage and the Wrangler plugin that contains the recipe with the transformations.
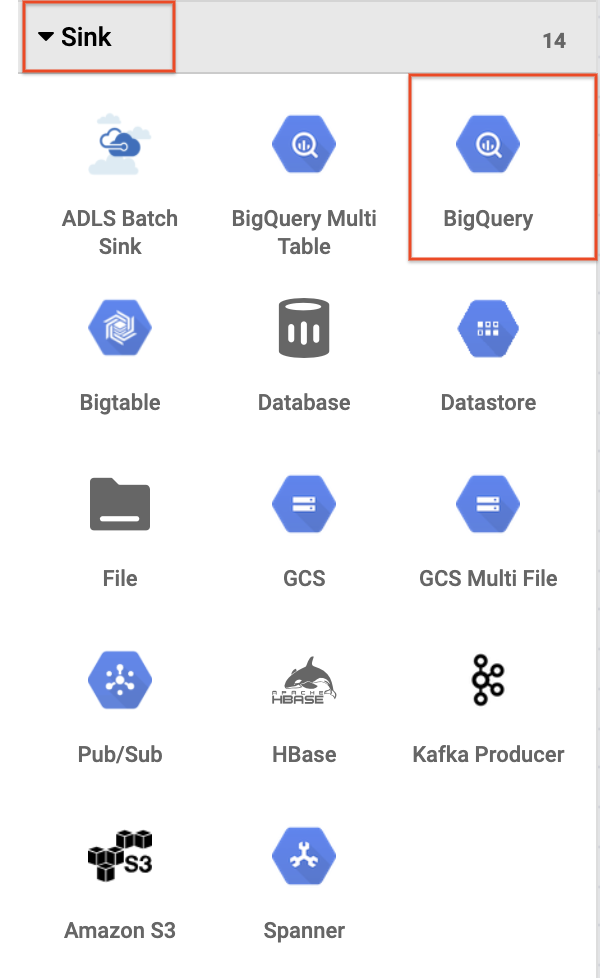
These two plugins (nodes) represent the E and the T in your ETL pipeline. To complete this pipeline add the BigQuery sink, the L portion of our ETL.
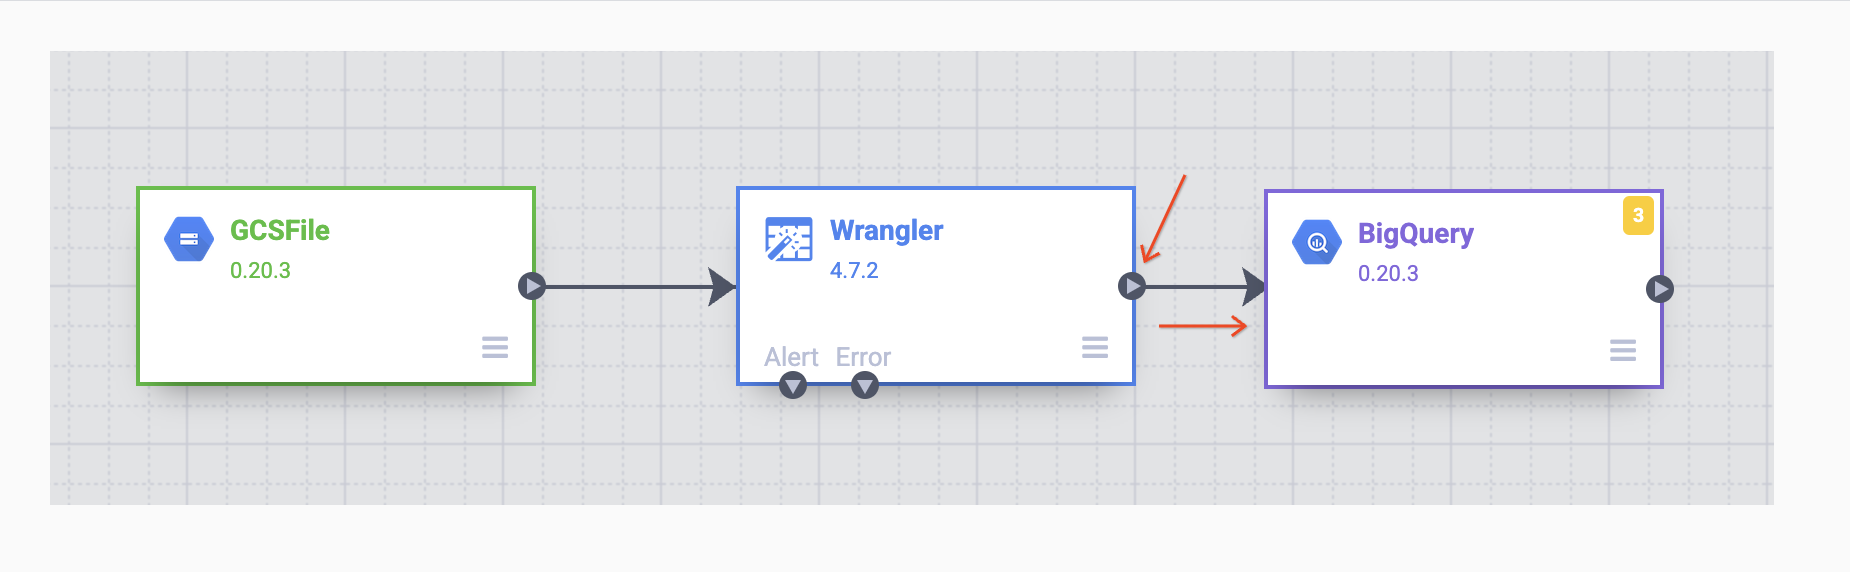
Once the BigQuery sink has been placed on the canvas, connect the Wrangler node with the BigQuery node. Do this by dragging the arrow from the Wrangler node to connect to the BigQuery node as illustrated below. All that’s left to do now is to specify some configuration options so that you can write the data to the dataset you want.
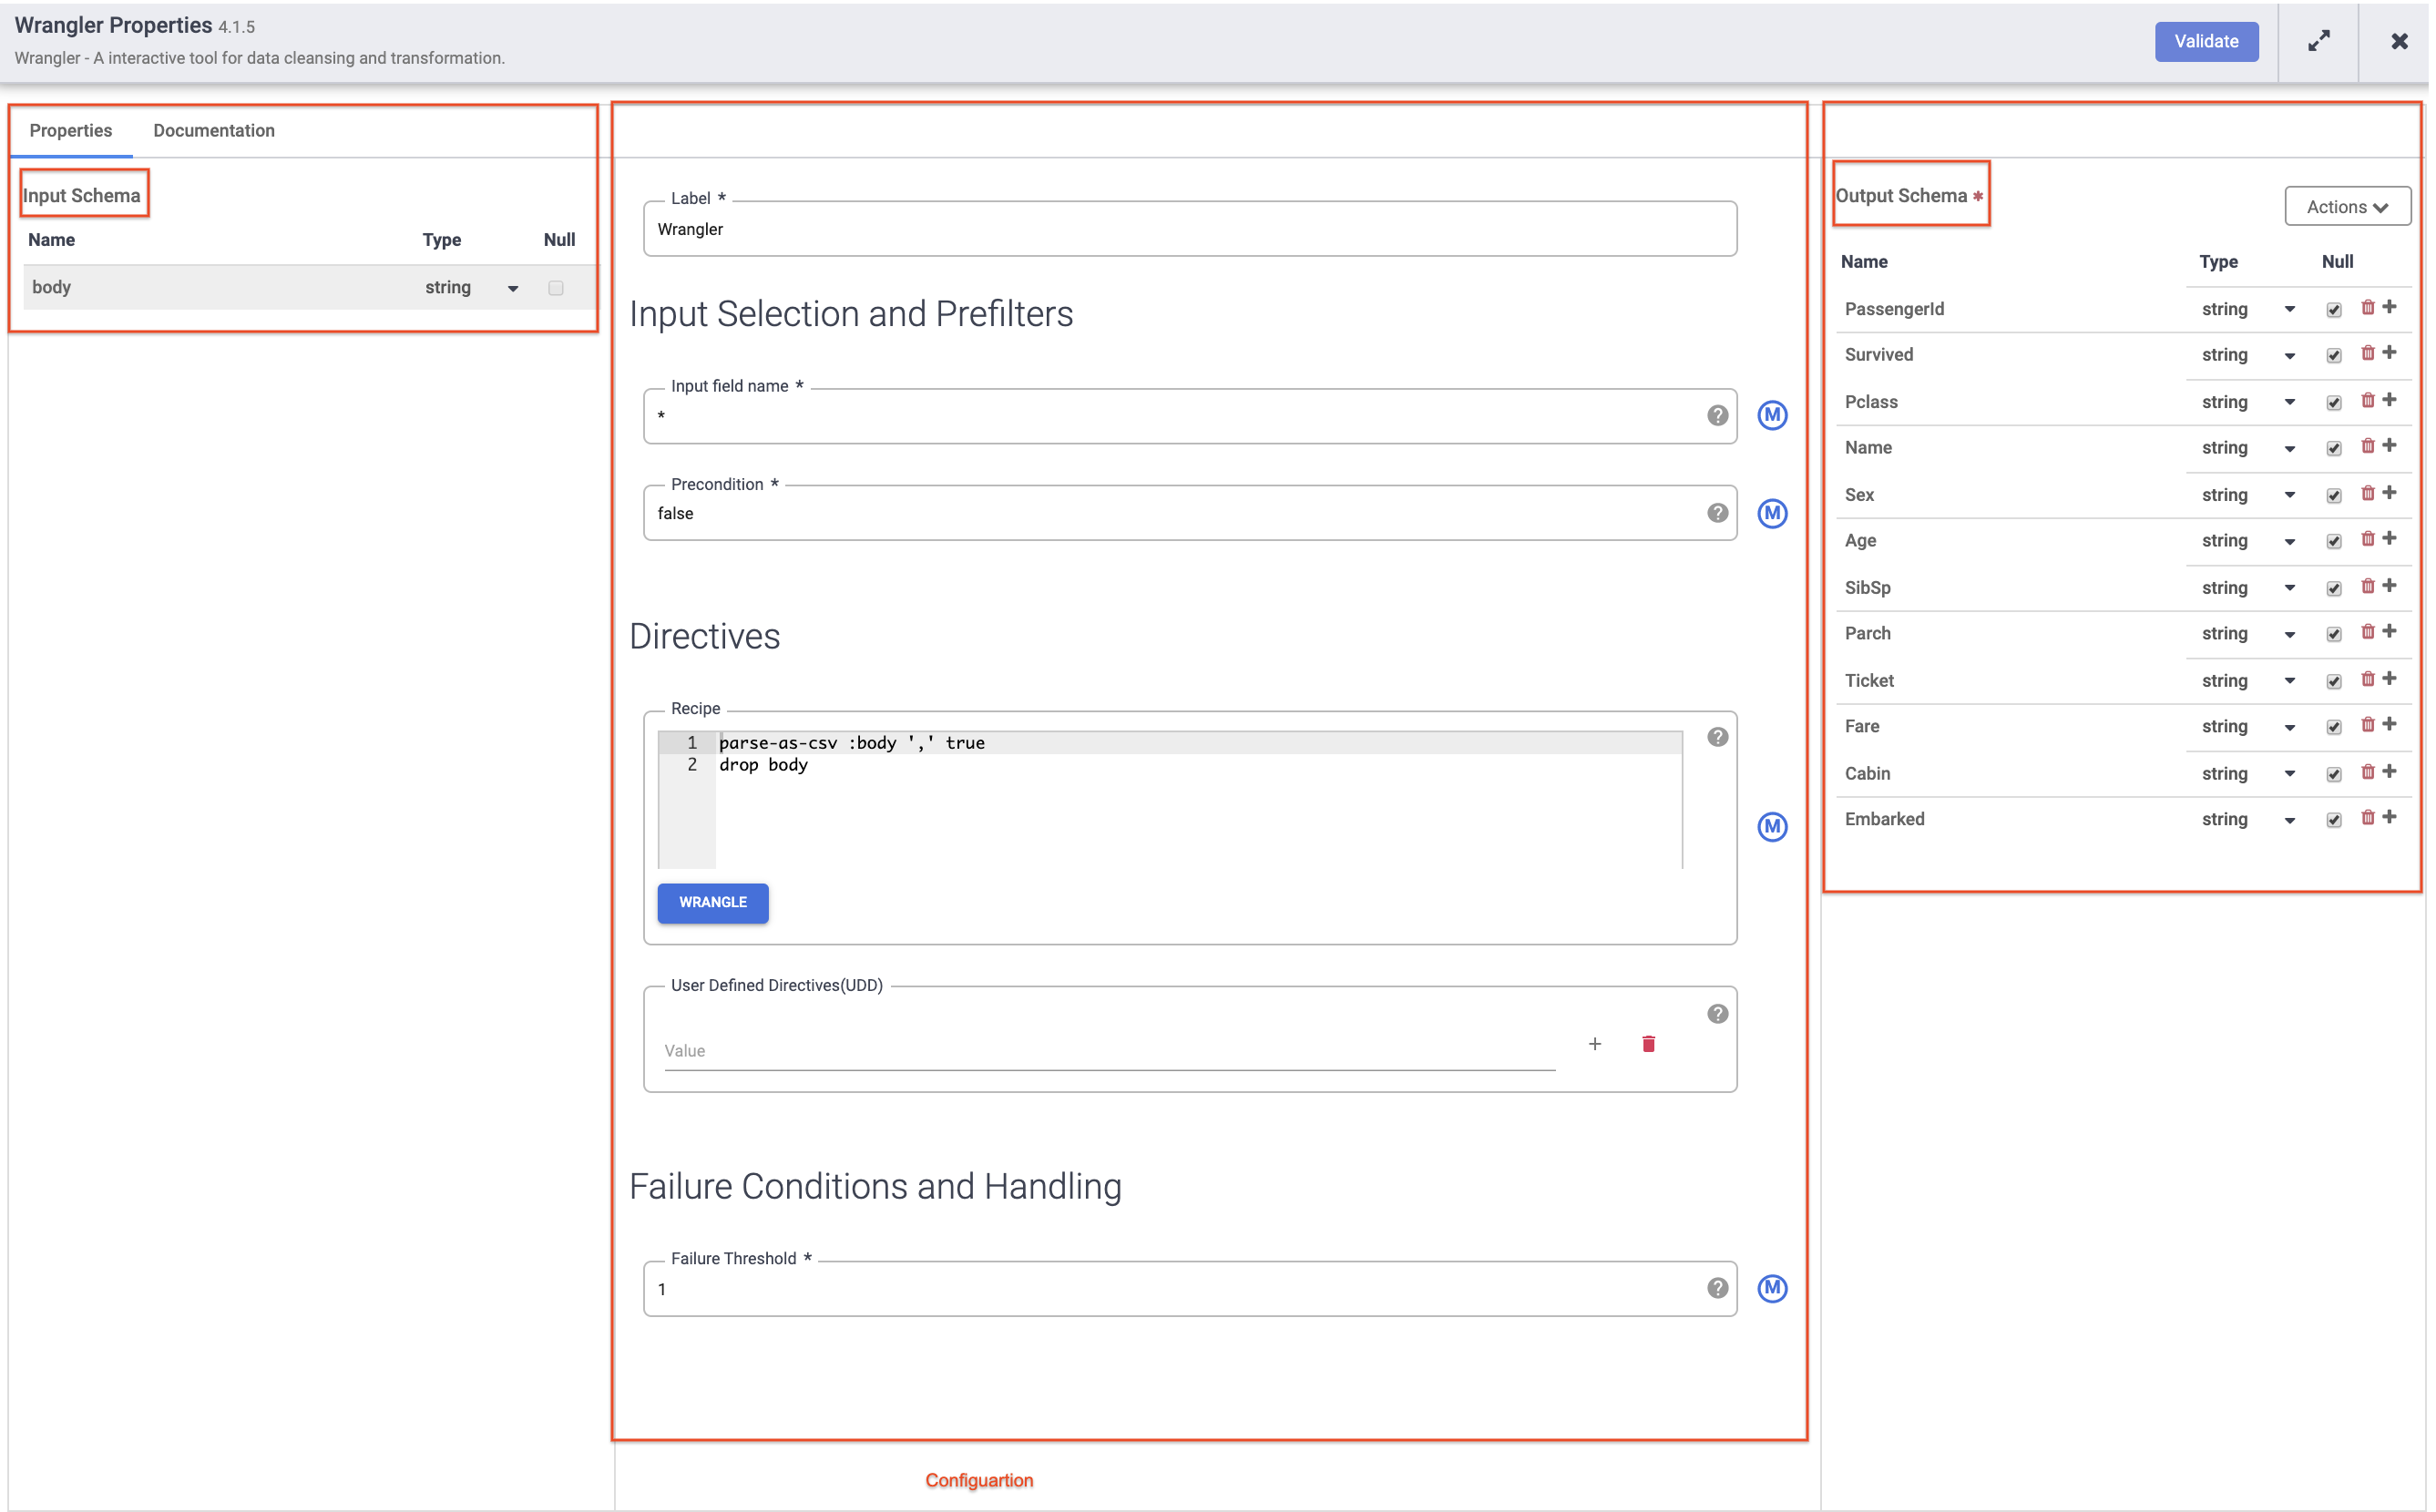
Now it’s time to configure the pipeline. You can do this by opening each of the nodes' properties to verify its settings and/or make any additional changes.
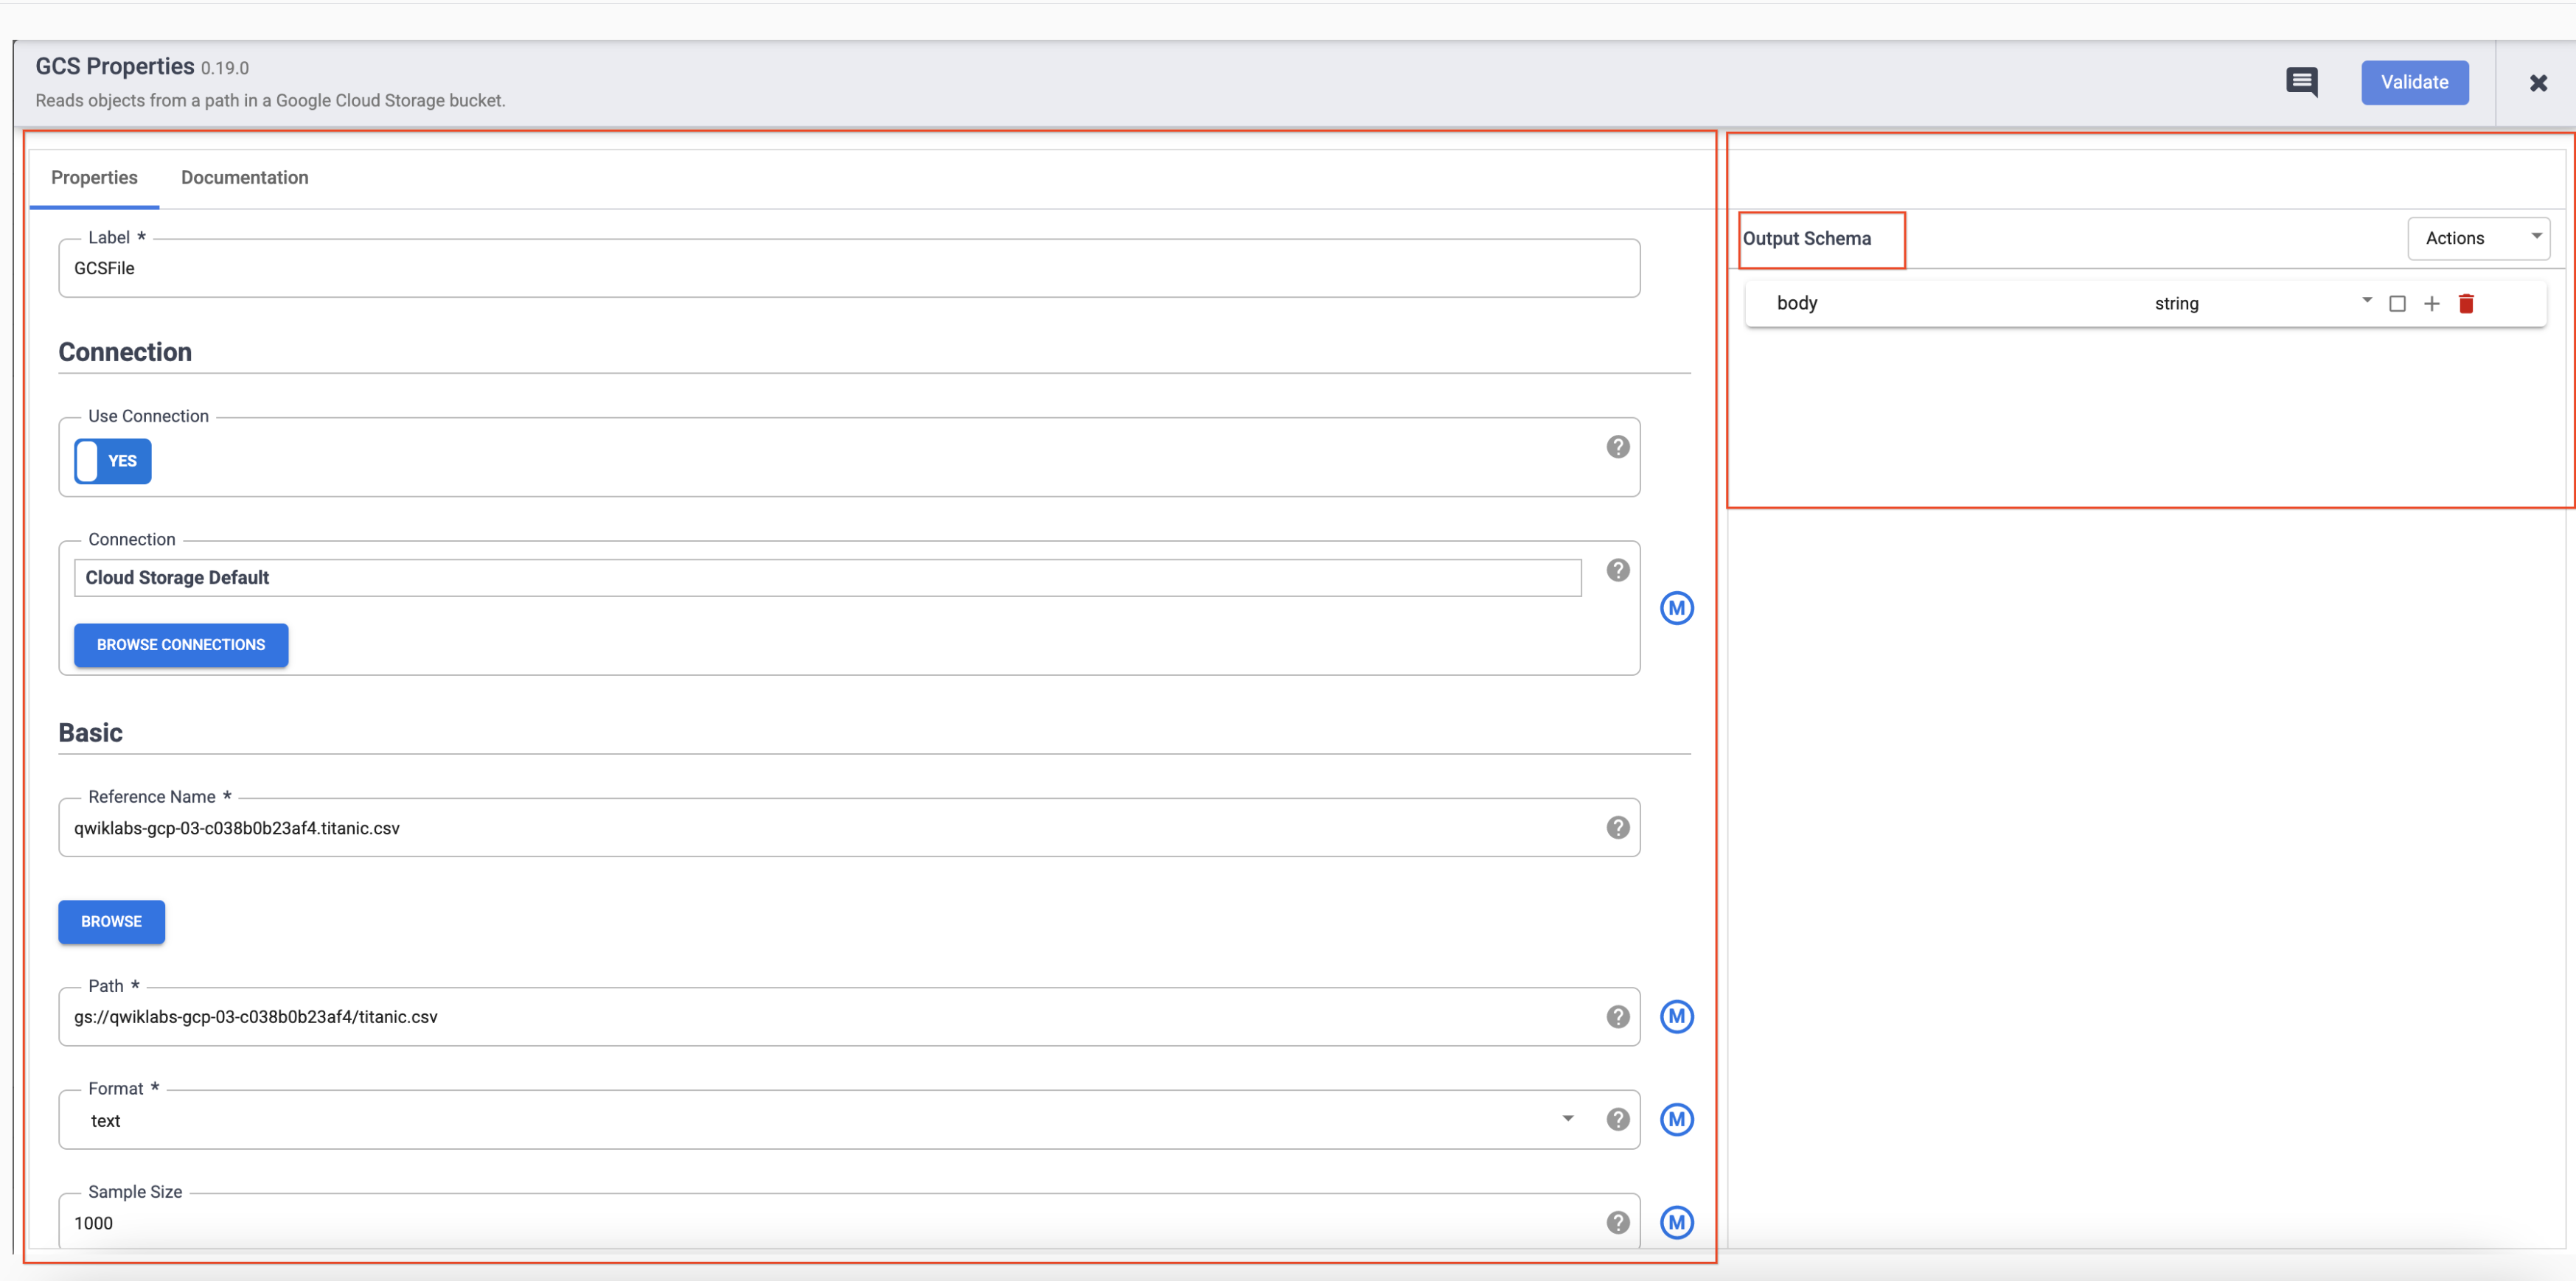
Each plugin has a few mandatory fields that must be present and they are marked with an asterisk ( * ). Depending on the plugin you are using, you may see an Input Schema, on the left, a Configuration section in the middle, and an Output Schema on the right.
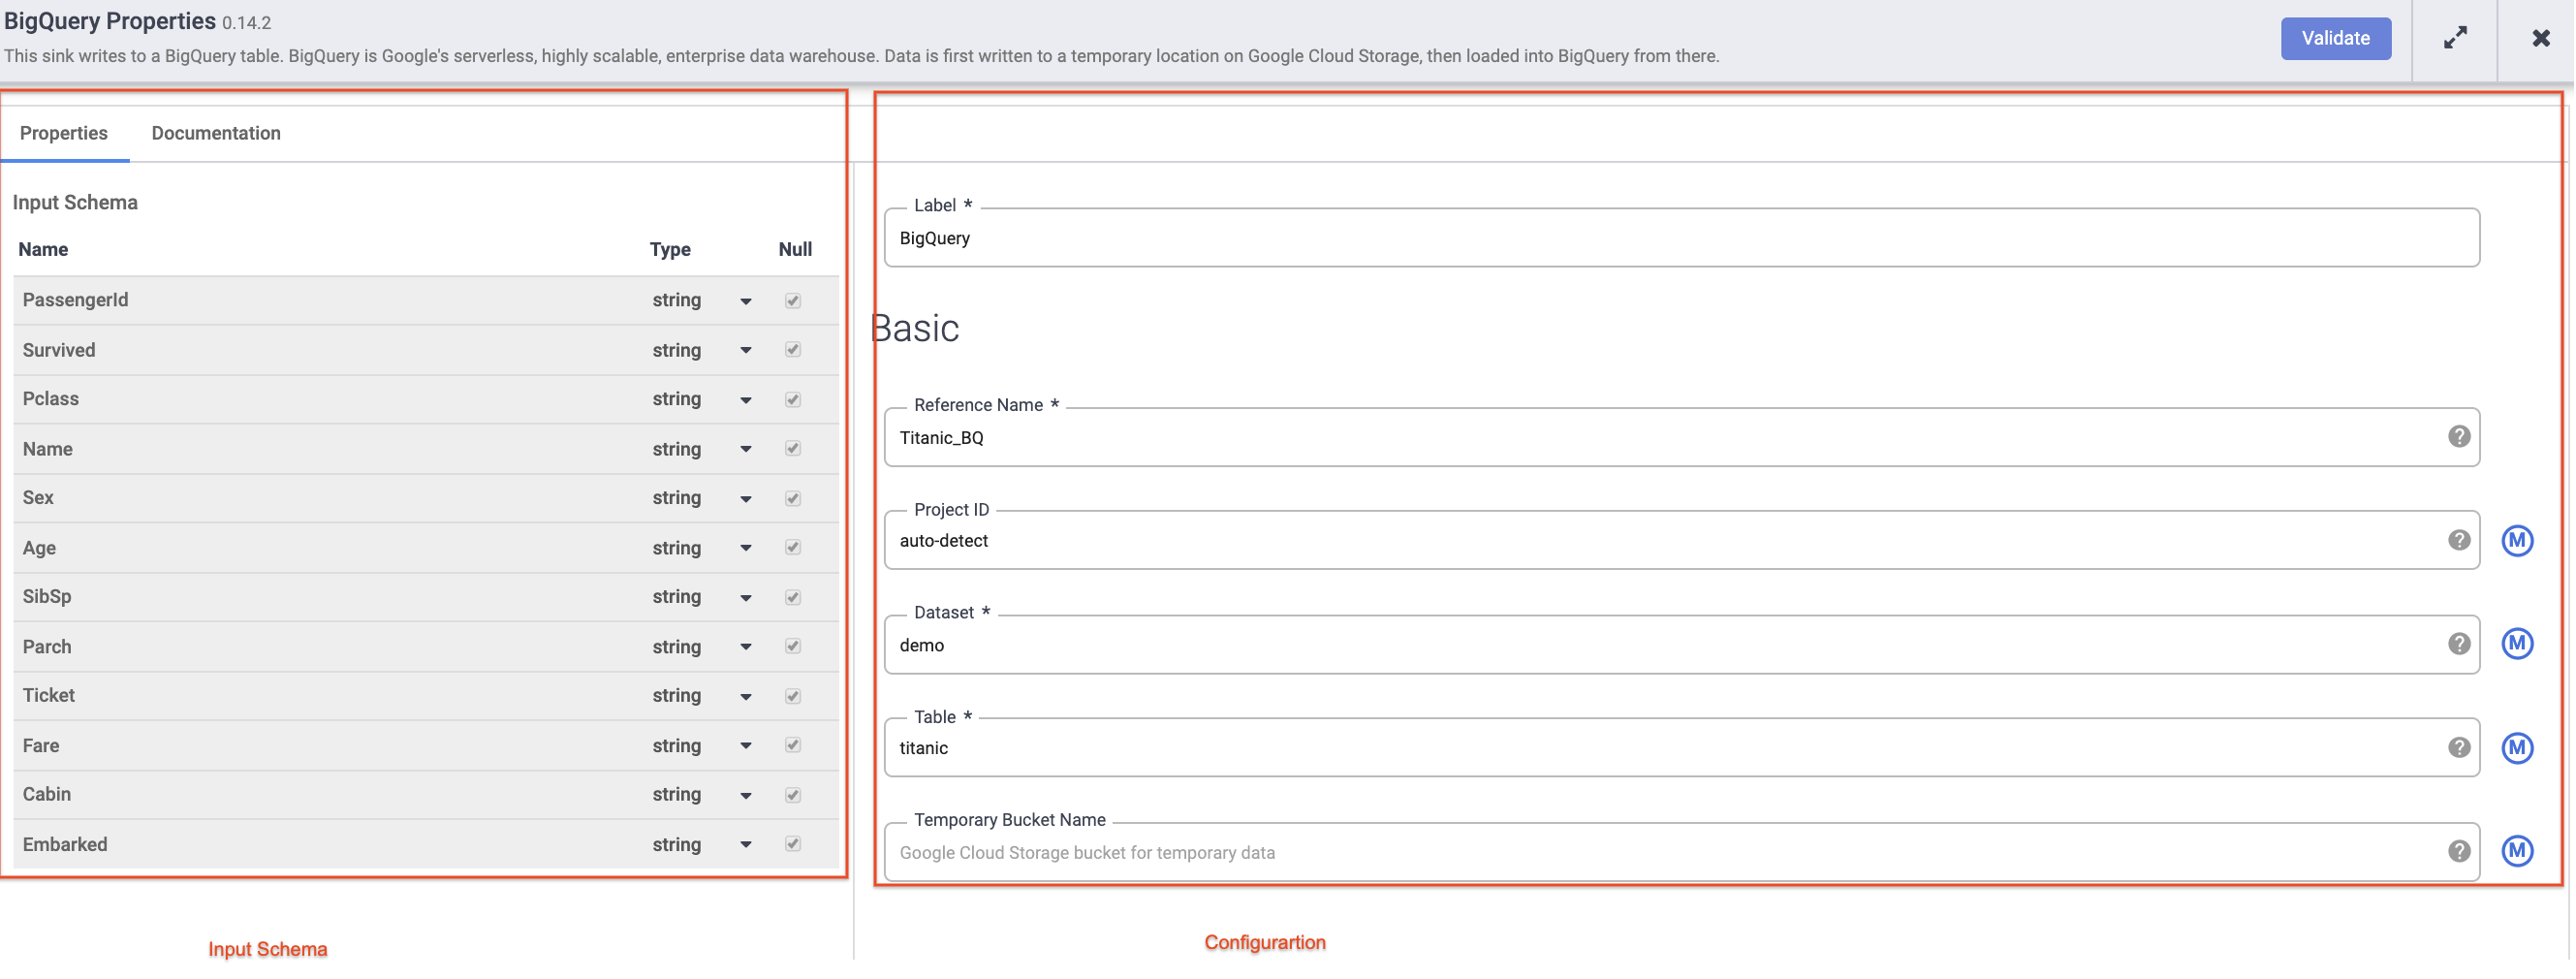
You will notice that Sink plugins don’t have an output schema and Source plugins don’t have an input schema. Both Sink and Source plugins will have a mandatory Reference Name field as well to identify the data source/sink for lineage.
Each plugin will have a Label field. This is the label of the node you see on the canvas where your pipeline is displayed.
Click the X on the top right of the Properties box to close it.
Next, hover over your Wrangler node and click on Properties.
Click on X on the top right of the Properties box to close it.
Hover your mouse over your BigQuery node, click on Properties and enter the following configuration settings:
For Reference Name, enter Titanic_BQ.
For Dataset, enter demo.
For Table, enter titanic.
Click on X on the top right of the Properties box to close it.
All that’s left to do now is to test your pipeline to see that it works as expected, but before you do that make sure to name and save your draft so you won’t lose any of your work.
Now click Save from the upper-right corner menu. You will be prompted to give a Name and add a description to the pipeline.
ETL-batch-pipeline as the name of your pipeline.ETL pipeline to parse CSV, transform and write output to BigQuery for the description.Click on Save.
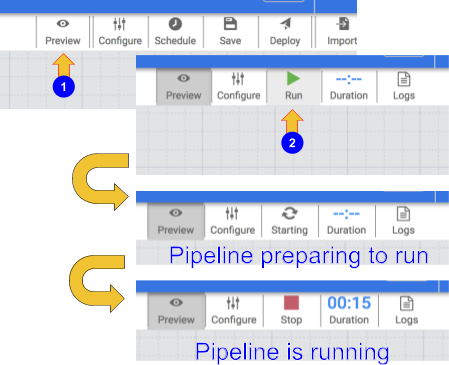
To test your pipeline, click on the Preview icon. The button bar will now show a run icon that you can click to run the pipeline in preview mode.
Click on the Run icon. While the pipeline is running in preview mode, no data is actually written to the BigQuery table, but you will be able to confirm that data is being read properly and that it will be written as expected once the pipeline is deployed. The preview button is a toggle so be sure to click it again to get out of preview mode when done.
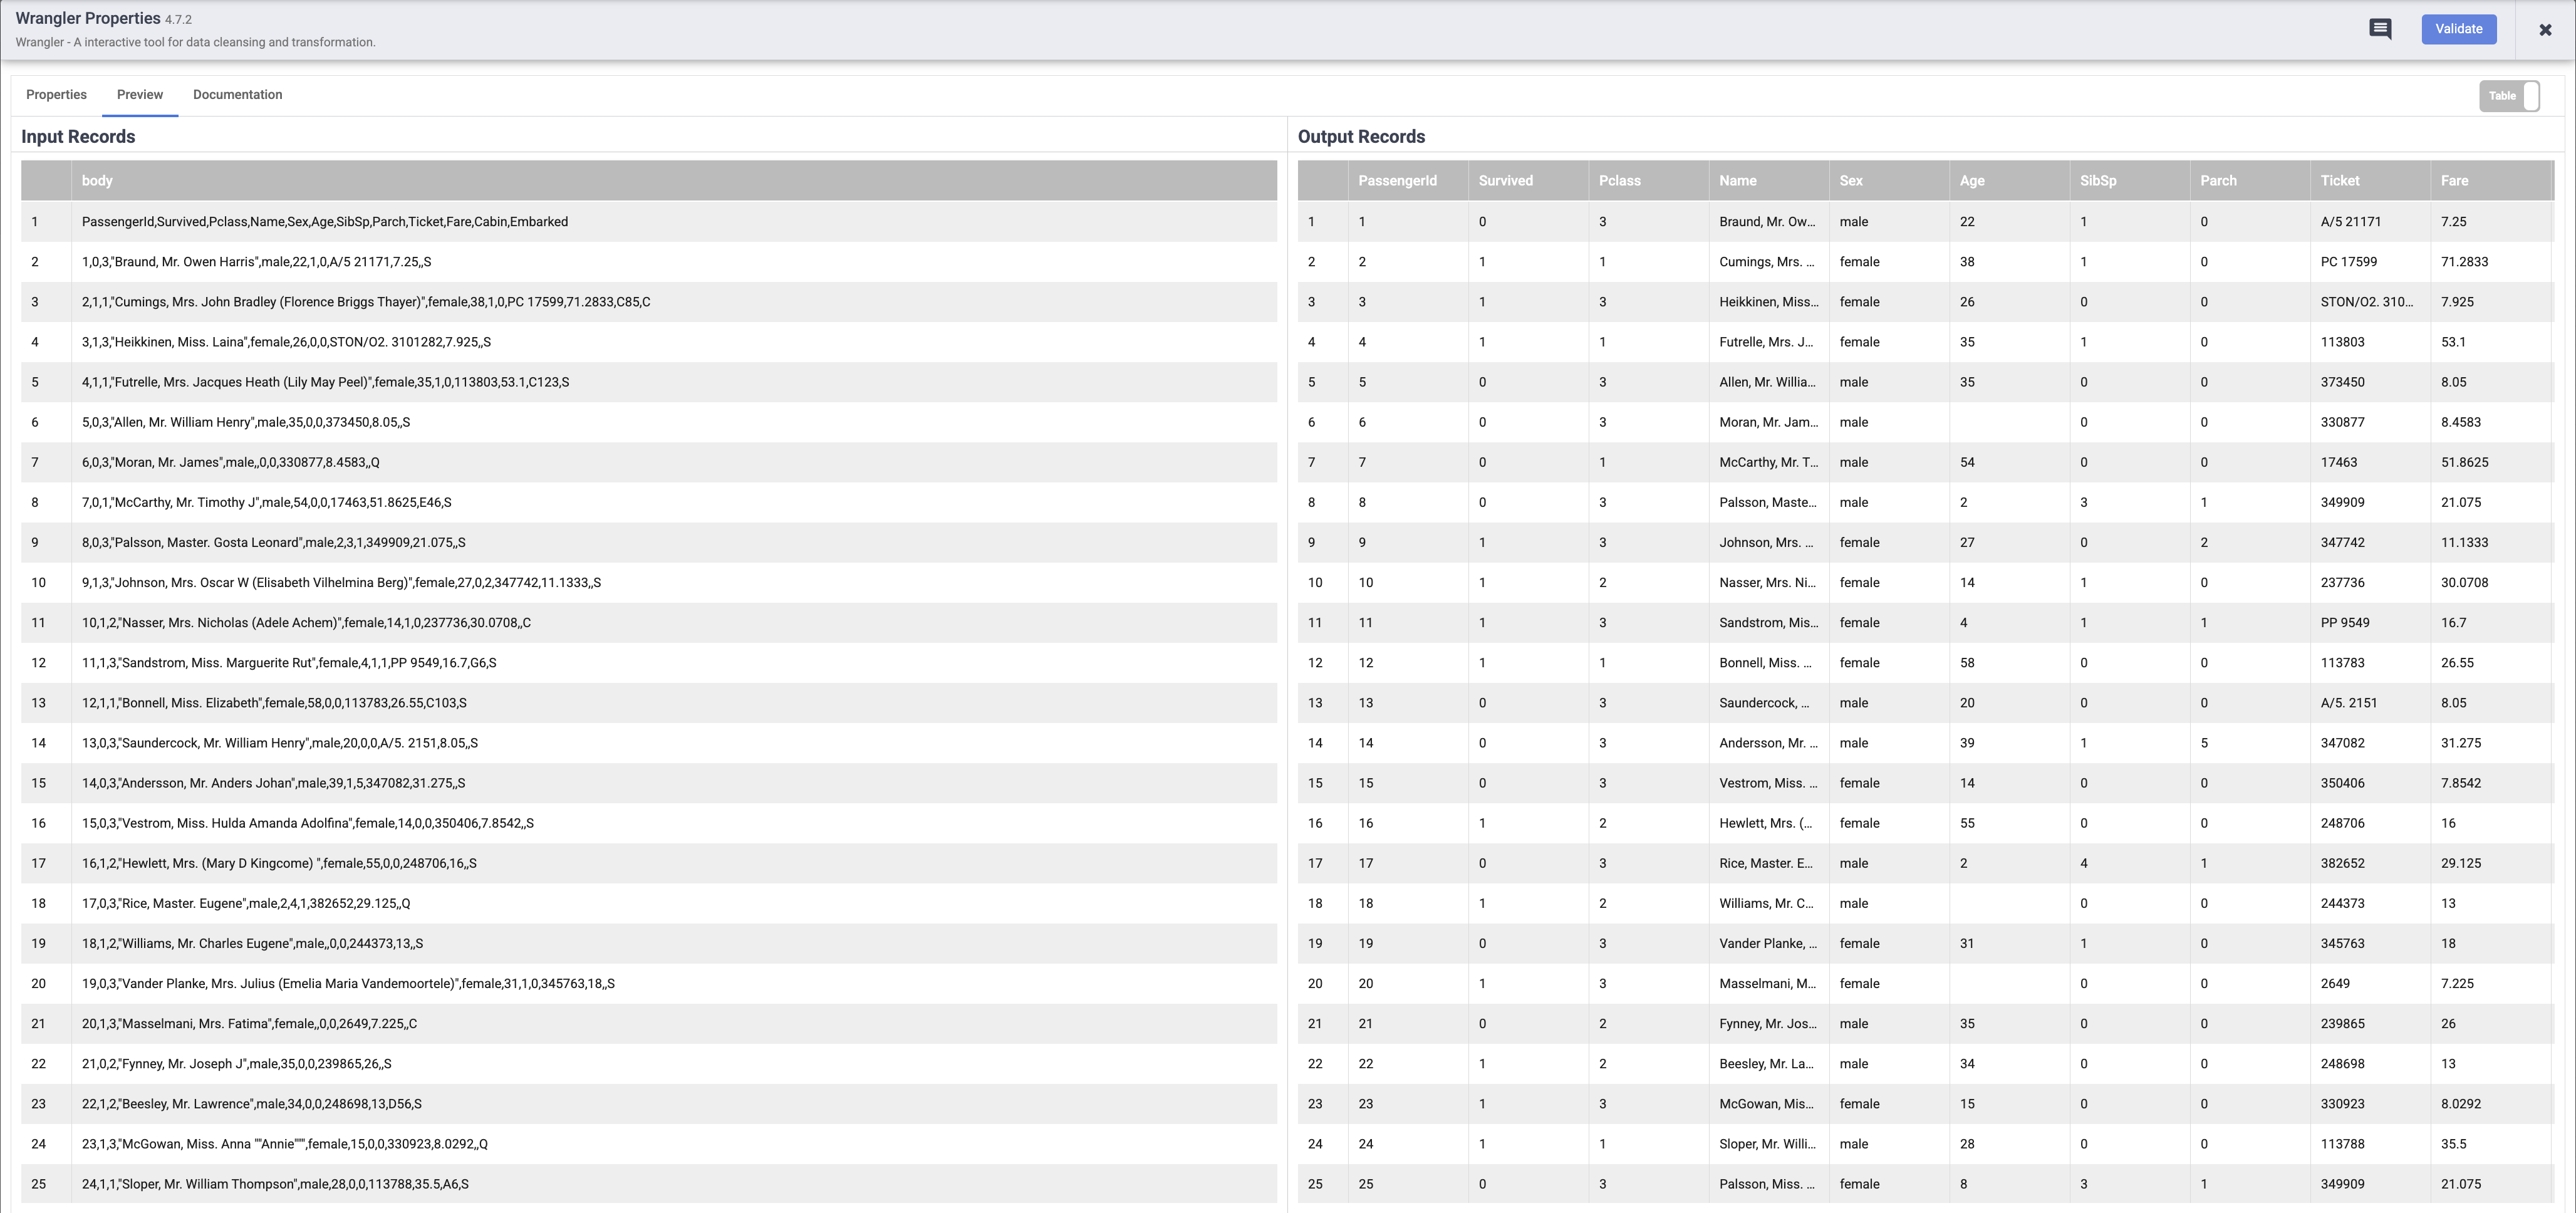
When your pipeline completes running, hover your mouse over your Wrangler node and click on Properties.Then click on Preview tab. If all went well you should see the raw data that came in from the input, the node to the left, and the parsed records that will be emitted as output, to the node on the right.Click on X on the top right of the Properties box to close it.
Click on the Preview icon again, this time to toggle out of Preview mode.
If everything looks good so far, you can proceed to deploy the pipeline. Click on the Deploy icon on the top right 
You will see a confirmation dialog that your pipeline is being deployed:
Once your pipeline has successfully deployed, you’re now ready to run your ETL pipeline and load some data into BigQuery.
Click on the Run icon to execute the ETL job.
When done, you should see pipeline status changes to Succeeded indicating that the pipeline ran successfully.
As data is processed by the pipeline, you will see metrics being emitted by each node in the pipeline indicating how many records have been processed. In the parse operation it displays 892 records whereas in the source there were 893 records, so what happened? The parse operation took the first row and consumed it to set the column headings, so the remaining 892 records are what was left to process.
Click Check my progress to verify the objective
The pipeline writes output into a BigQuery table. You can verify that using the following steps.
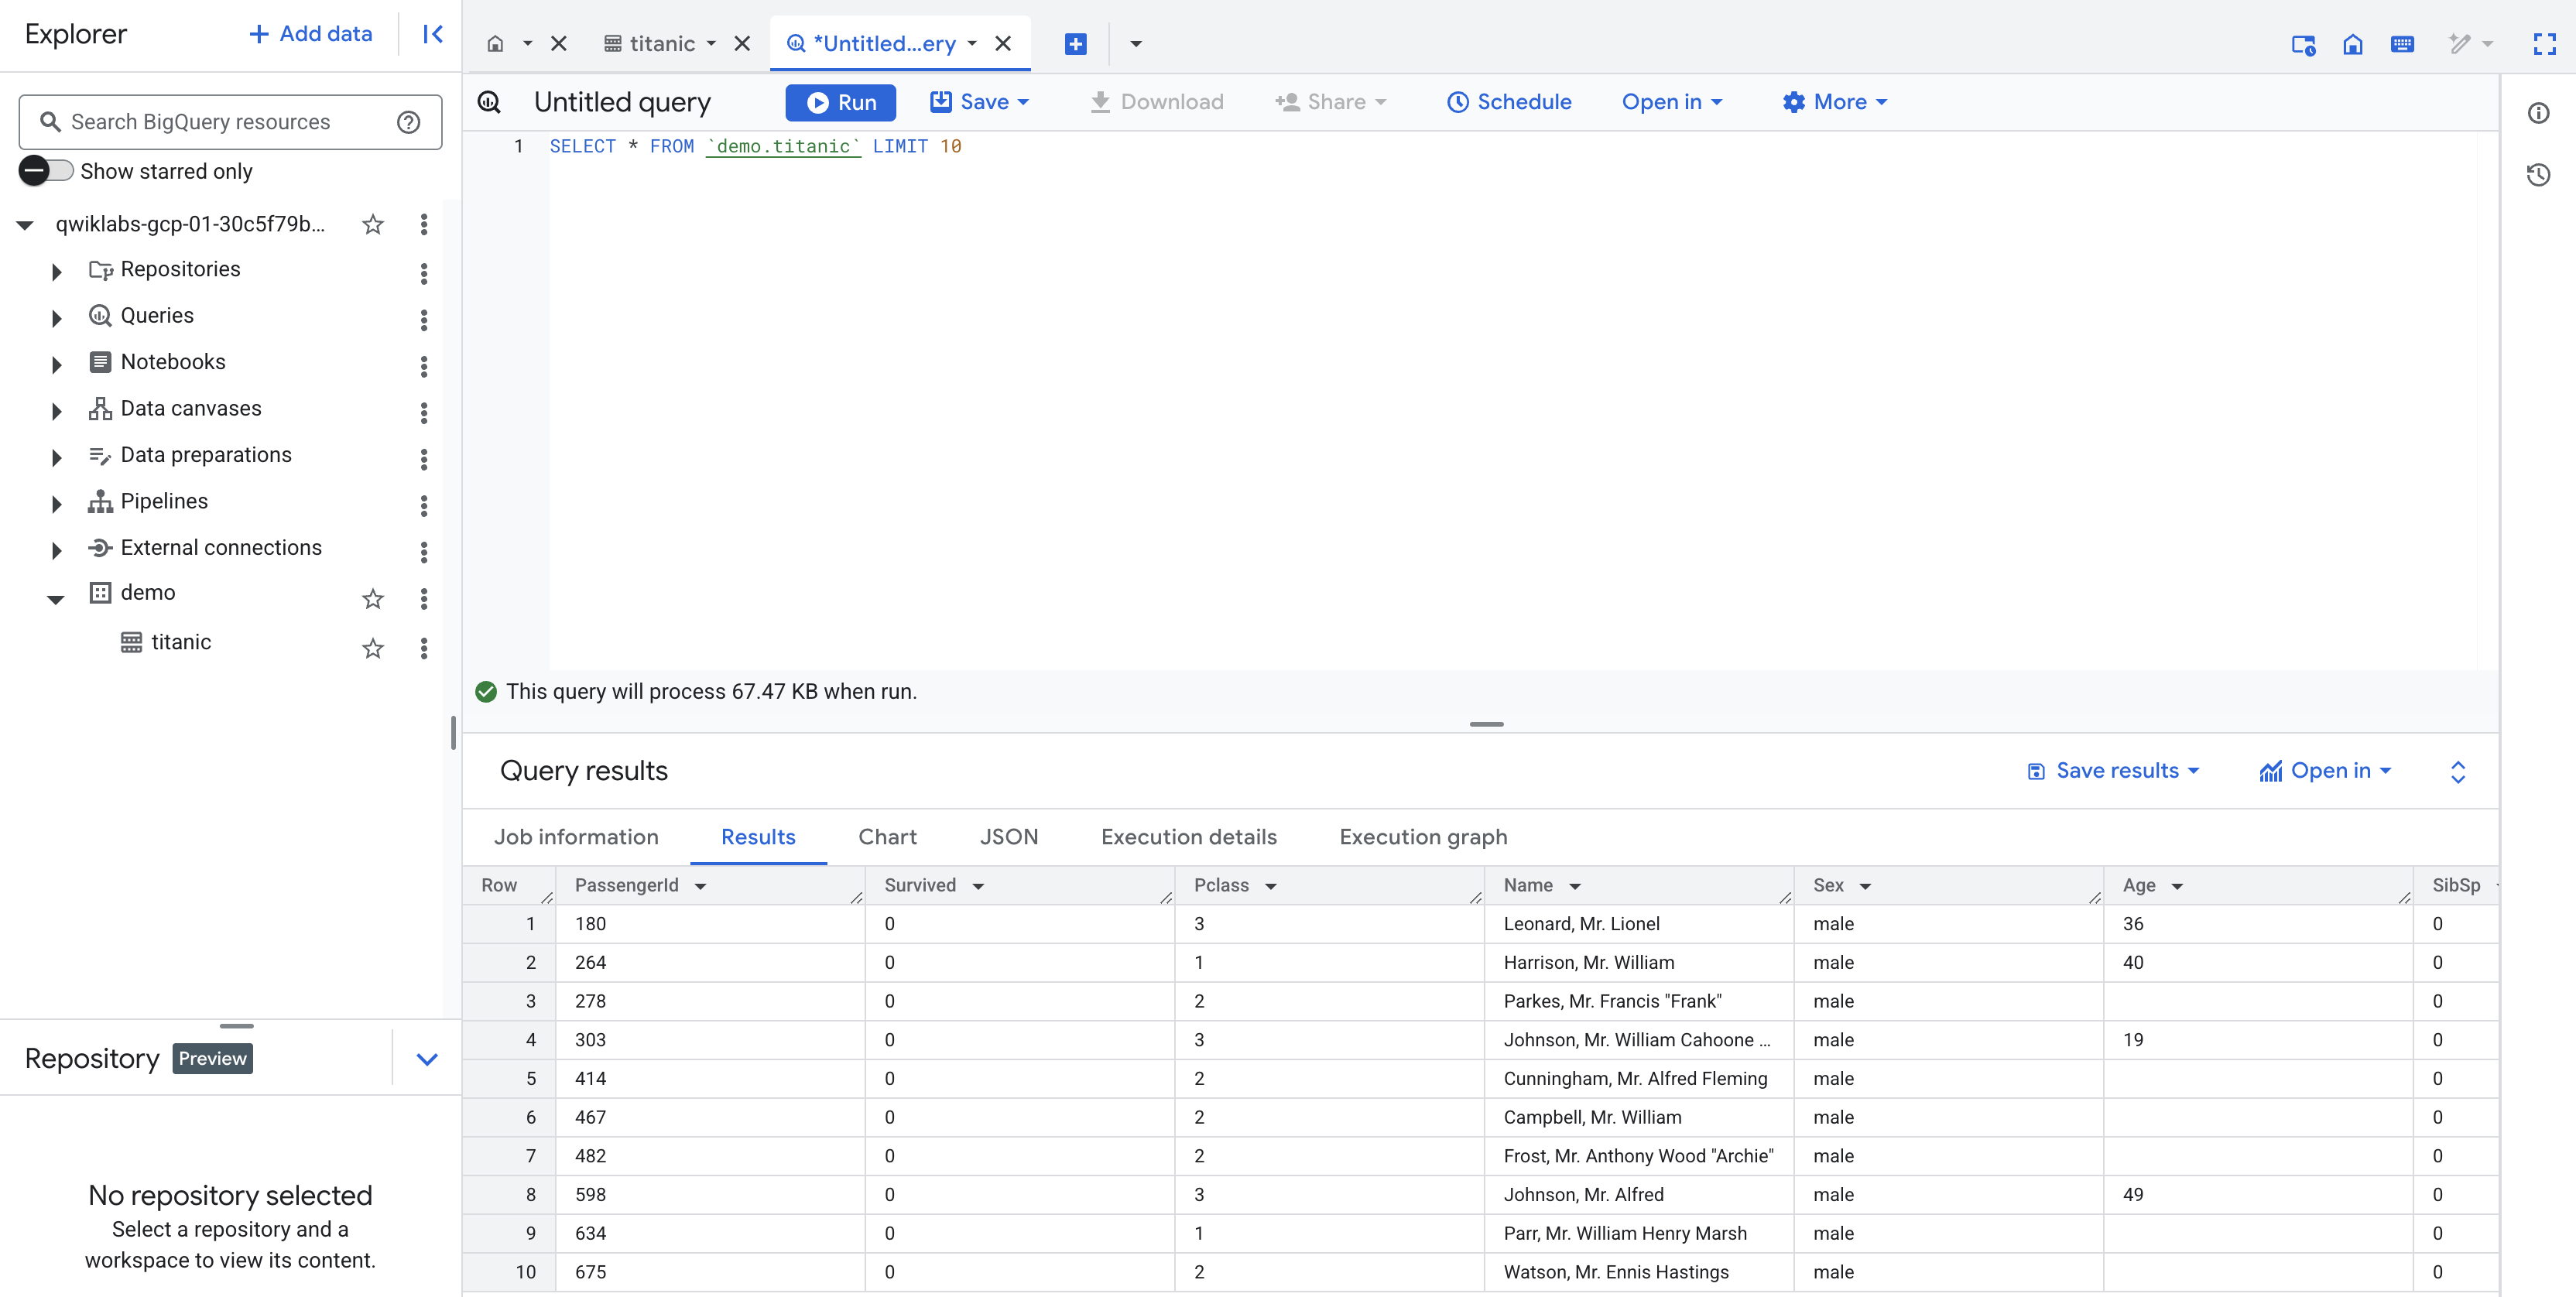
In a new tab, open the BigQuery UI in the Cloud Console or right-click on the Console tab and select Duplicate, then use the Navigation menu to select BigQuery. When prompted, click Done.
In the left pane, in the Explorer section, click your Project ID (it will start with qwiklabs).
Under the demo dataset in your project, click the titanic table and click "+" (SQL query), then run a simple query, such as:
Click Check my progress to verify the objective
You have now learned to use the building blocks available in Cloud Data Fusion's Pipeline Studio to build a batch pipeline. You also learned to use Wrangler to create transformation steps for your data.
Continue with Building Transformations and Preparing Data with Wrangler in Cloud Data Fusion.
Manual Last Updated May 6, 2025
Lab Last Tested May 6, 2025
Copyright 2022 Google LLC All rights reserved. Google and the Google logo are trademarks of Google LLC. All other company and product names may be trademarks of the respective companies with which they are associated.


This content is not currently available
We will notify you via email when it becomes available

Great!
We will contact you via email if it becomes available

One lab at a time
Confirm to end all existing labs and start this one